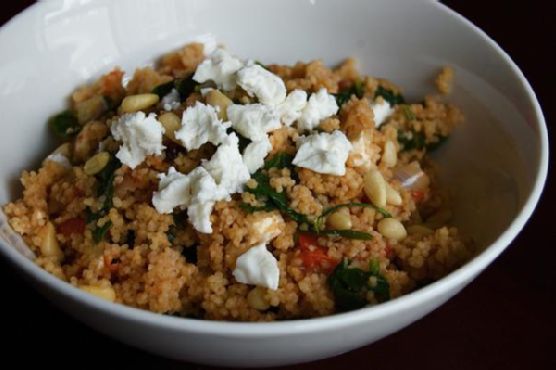
Spinach, Tomato & Onion Couscous | Made by Meaghan Moineau
Title: A Taste of Home: Spinach, Tomato & Onion CouscousDescription: Discover the warmth and nostalgia of our Spinach, Tomato & Onion Couscous recipe. This delightful dish, enriched with feta and pine nuts, is more than just a meal; it's a journey back to cherished family gatherings. Join us as we explore this wholesome main dish, easy enough for a weeknight dinner yet special enough to evoke fond memories. Difficulty: 3/10.
---
As the days grow shorter and the air turns crisp, I find myself yearning for the comforting flavors of my childhood. One dish that always brings back fond memories is the Spinach, Tomato & Onion Couscous. This simple yet flavorful meal is more than a recipe; it's a reminder of cozy family dinners and the laughter that filled our home.
I remember the first time my mother made this dish. It was a chilly autumn evening, and the kitchen was filled with the aromatic blend of sautéed onions and tomatoes. My siblings and I would gather around the table, eagerly waiting for the vibrant colors and enticing smells of the meal to fill our plates.
Ingredients You'll Need:
- Whole-wheat couscous
- Fresh spinach
- Tomatoes
- Red onion
- Olive oil
- Pine nuts
- Feta cheese
- Salt
- Water
Instructions:
1. Begin by bringing water and half the salt to a boil in a small pan. Once bubbling, add the couscous, give it a quick stir, and cover with a lid. Remove from heat, allowing it to sit and absorb the flavors while you prepare the vegetables.
2. In a large pan over medium-high heat, warm the olive oil. Once hot, add the onions, sautéing until they begin to brown. The sizzling sound and sweet aroma always remind me of watching my mother expertly move around the kitchen, a comforting sight that never grows old.
3. Add the tomatoes and remaining salt, sautéing until they start to wilt—this takes merely seconds. Then, add the spinach, cooking just until it wilts but retains its bright, inviting green color. Stir in the pine nuts, and remove the pan from the heat. Season with salt and pepper to taste.
4. Pour the couscous into a large bowl, add the sautéed vegetables, and sprinkle in the crumbled feta. Toss everything together until well combined, and top with extra feta for that rich, tangy finish.
A Nostalgic Journey:
This dish was always a family favorite, especially during fall gatherings. I vividly remember the warmth of the kitchen, the laughter echoing through the house, and the way this meal brought us all together. My grandmother would often share stories from her youth as we savored each bite, her tales as rich and satisfying as the meal itself.
As you prepare this Spinach, Tomato & Onion Couscous, I hope it brings you the same sense of comfort and connection it has always brought to my family. It's an easy-to-make main dish, with a difficulty level of just 3 out of 10, yet its simplicity is what makes it so special.
Whether you're creating new memories or reminiscing about old ones, may this dish warm your heart and home as it has mine for many years. Enjoy this culinary journey, and let it be a staple in your family traditions for generations to come.