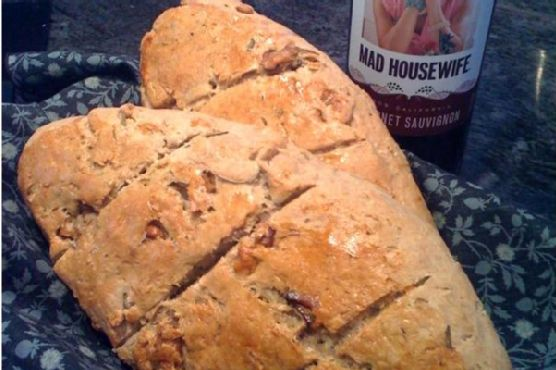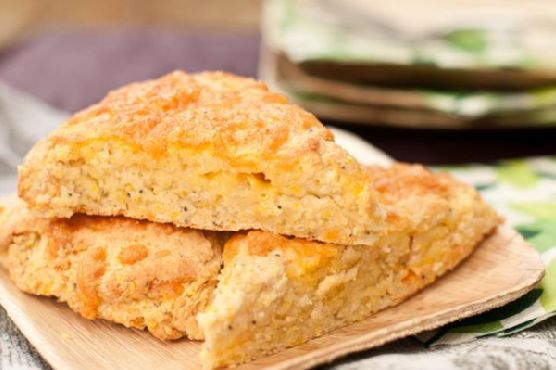
Cheesy Potato Corn Scones
Intro
There’s something magical about the aroma of freshly baked scones wafting through the house. It takes me back to my grandmother’s cozy kitchen on chilly autumn afternoons. She would let me help as she prepared her famous scones, and the anticipation of biting into those warm, cheesy delights made my heart flutter. Today, I’m sharing a recipe that adds a modern twist to those nostalgic scones: Cheesy Potato Corn Scones. This delightful creation combines the comforting flavors of potatoes and cheese with the rustic texture of cornmeal, making it a perfect treat for any occasion.
Why You’ll Love It
These Cheesy Potato Corn Scones are a delightful blend of flavors and textures that will surely win your heart. Here’s why you’ll love them:
- Comforting and Delicious: The combination of buttery potato flakes and rich cheddar cheese creates a comforting taste that is hard to resist.
- Perfectly Textured: The addition of cornmeal gives these scones a slightly crunchy exterior while keeping the inside soft and tender.
- Easy to Make: With simple ingredients and straightforward steps, this recipe is accessible for both novice and experienced bakers alike.
- Versatile: These scones can be enjoyed for breakfast, as a snack, or even as a side dish with soups and salads.
Ingredients
- 1 cup water
- 1/2 cup potato flakes
- 1/4 cup diced unsalted butter
- 1 1/2 cups flour
- 1/2 cup yellow cornmeal
- 1 cup shredded cheddar cheese, divided
- 1 tablespoon baking powder
- 1/2 teaspoon salt
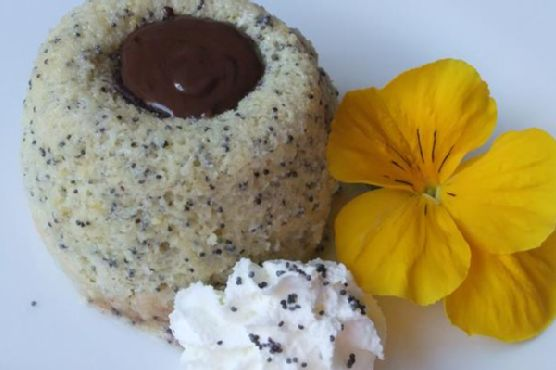
- 1 tablespoon poppy seeds
- 1/2 cup milk
Instructions
- Preheat your oven to 400°F (200°C). Lightly grease a baking sheet and set it aside.
- In a small saucepan, bring the water just to a simmer, then remove from heat.
- Stir in the potato flakes until moistened, then incorporate the butter until it’s fully melted and combined with the potato mixture.
- In a large bowl, combine the flour, cornmeal, 3/4 cup of the shredded cheddar cheese, baking powder, salt, and poppy seeds.
- Add the potato mixture and milk to the dry ingredients, stirring until a dough forms.
- With floured hands, gently knead and fold the dough for five to six strokes, or until it comes together in one mass.
- Pat the dough lightly to flatten it into a 9-inch circle on the prepared baking sheet.
- Using a pizza cutter or floured knife, cut the dough into eight wedges without separating them.
- Sprinkle the edges with the remaining cheddar cheese.
- Bake in the preheated oven for about 25 minutes or until the scones are lightly browned.
- Gently pull or cut the scones to separate them and serve warm.
Tips
- Use cold butter to ensure a flaky texture. You can even pop it in the freezer for a few minutes before dicing.
- For a richer flavor, try using sharp cheddar cheese.
- To avoid overworking the dough, handle it as little as possible once it comes together.
Variations & Substitutions
If you’re looking to customize these scones, here are some variations and substitutions:
- Cheese Variations: Swap the cheddar for gouda, feta, or pepper jack for a different flavor profile.
- Herbs: Add a tablespoon of fresh herbs like rosemary or chives for an aromatic twist.
- Gluten-Free: Substitute the flour with a gluten-free blend and ensure your cornmeal is also certified gluten-free.
Storage
To store these scones, allow them to cool completely before placing them in an airtight container. They can be kept at room temperature for up to 2 days. For longer storage, freeze the scones in a resealable bag for up to a month. To reheat, warm them in a preheated oven at 350°F (175°C) for about 10 minutes or until heated through.
FAQ
Can I make these scones ahead of time?
Yes, you can prepare the dough the night before and store it in the refrigerator. When you’re ready to bake, simply shape and cut the dough into wedges and bake as directed.
What can I serve with Cheesy Potato Corn Scones?
These scones pair wonderfully with a hot bowl of soup, a fresh salad, or simply with a pat of butter and a touch of honey or jam.
Can I use instant mashed potatoes instead of potato flakes?
Yes, instant mashed potatoes can be used as a substitute. Just ensure they are prepared to a similar consistency as the potato flakes would be when mixed with water and butter.
Nutrition
While exact nutritional values may vary based on ingredient brands and measurements, each scone approximately contains:
- Calories: 220
- Protein: 6g
- Carbohydrates: 24g
- Fat: 11g
- Cholesterol: 30mg
- Sodium: 320mg
Conclusion
Cheesy Potato Corn Scones are a delightful treat that bring a sense of warmth and nostalgia with every bite. Whether you’re reminiscing over fond memories or creating new ones, these scones are sure to become a family favorite. Enjoy them fresh from the oven, and don’t forget to share the love (and the recipe) with others!
Related update: Cheesy Potato Corn Scones
Related update: Brandy-Apple Mini Pies With Cornmeal Crust
Related update: Chive and dill muffins