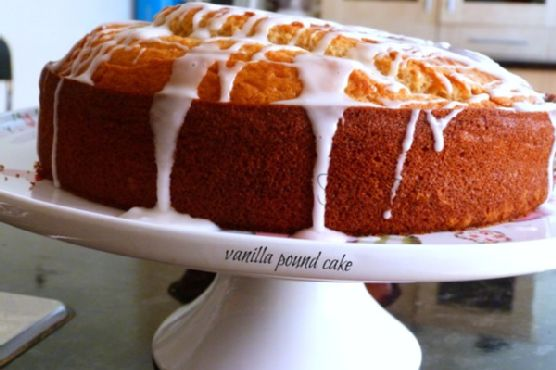
Vanilla Pound Cake | Made by Meaghan Moineau

Vanilla Pound Cake

Intro

There’s something magical about the aroma of a freshly baked cake wafting through the house. It takes me back to Sunday afternoons spent in my grandmother’s cozy kitchen. I remember standing on a stool, eagerly watching as she mixed ingredients with love and care. Her vanilla pound cake was always my favorite—a simple yet indulgent treat that brought smiles to our faces. Today, I’m sharing her cherished recipe with you, so you can create sweet memories of your own.

Why You’ll Love It

This vanilla pound cake is the epitome of comfort and simplicity. With its buttery texture and rich vanilla flavor, it’s perfect for any occasion. Whether you’re enjoying it with a hot cup of tea or serving it as a dessert at a family gathering, this cake is sure to impress. You’ll love how easy it is to prepare, and your loved ones will adore every bite.

Ingredients

  • 1 cup plain flour
  • 1 teaspoon baking powder
  • 1/4 teaspoon salt
  • 1/4 teaspoon nutmeg
  • 1/2 cup butter, softened
  • 1 cup canned granulated sugar
  • 2 large eggs
  • 1 teaspoon vanilla extract
  • 1/2 cup fat free natural yogurt
  • 1/4 cup milk

Instructions

  1. With the aid of a sifter, sift the dry ingredients (flour, baking powder, salt, nutmeg) into a bowl and set aside.
  2. Grease the cake pan and dust with flour. Preheat your oven to 180 degrees Celsius.
  3. In a large mixing bowl, cream the butter and sugar together until light and fluffy.
  4. Add the eggs, one at a time, beating well after each addition. Stir in the vanilla extract.
  5. Mix in the yogurt until well combined.
  6. Gradually add the dry ingredients to the wet mixture, alternating with the milk. Mix until just combined.
  7. Pour the batter into the prepared cake pan and smooth the top with a spatula.
  8. Bake in the preheated oven for 45-50 minutes, or until a toothpick inserted into the center comes out clean.
  9. Allow the cake to cool in the pan for 10 minutes before transferring it to a wire rack to cool completely.

Tips

For the best results, ensure all your ingredients are at room temperature before you begin. This helps with even mixing and a smoother batter. Additionally, avoid over-mixing, as this can lead to a dense cake. A light hand yields the fluffiest results!

Variations & Substitutions

If you’re feeling adventurous, consider adding a tablespoon of lemon or orange zest for a citrus twist. You can also substitute half of the plain flour with almond flour for a nutty flavor. For a dairy-free version, replace the butter with coconut oil and the yogurt with a plant-based alternative.

Storage

This vanilla pound cake keeps well at room temperature for up to three days when stored in an airtight container. For longer storage, wrap individual slices in plastic wrap and freeze for up to two months. Thaw at room temperature before serving.

FAQ

Can I use salted butter instead of unsalted?

Yes, you can use salted butter if that’s what you have on hand. Just omit the added salt in the recipe to balance the flavors.

How can I tell if my cake is done?

The best way to check doneness is by inserting a toothpick into the center of the cake. If it comes out clean or with a few crumbs clinging to it, your cake is ready. It should also have a golden-brown top and start to pull away from the sides of the pan.

Nutrition

Each slice of this sumptuous vanilla pound cake is approximately 250 calories, providing a delightful balance of carbohydrates, fats, and proteins that are perfect for a treat. Keep in mind that nutritional values may vary slightly based on specific ingredient brands and measurements.

Conclusion

Baking a vanilla pound cake is more than just combining ingredients; it’s an opportunity to create warmth and joy in your home. Whether you’re baking for yourself, your family, or friends, this classic recipe is sure to become a staple in your baking repertoire. I hope it brings as much happiness to your table as it has to mine over the years. Happy baking!

Related update: Vanilla Pound Cake

Related update: 5-Minute Rocky Road Fudge

Blackberry Pie With Lemon Verbena Whip Cream | Made by Meaghan Moineau

Blackberry Pie With Lemon Verbena Whip Cream

Intro

There’s something magical about the scent of a freshly baked pie wafting through the house. It brings back memories of summer afternoons spent at my grandmother’s kitchen, where the air was always filled with the sweet aroma of baked fruits and spices. Her blackberry pie was a family favorite, and over the years, I’ve added my own twist to it: a delightfully refreshing lemon verbena whip cream. This combination creates a delicious harmony of flavors, celebrating the tartness of blackberries with the gentle citrus notes of lemon verbena.

Why You’ll Love It

This blackberry pie with lemon verbena whip cream is a perfect dessert for any occasion, whether it’s a family gathering or a cozy weekend treat. Here’s why you’ll love it:

  • Flavorful Harmony: The tartness of blackberries complements the sweet and fragrant lemon verbena whip cream, creating a perfect balance of flavors.
  • Easy to Make: With simple, straightforward steps, this pie is accessible to both novice and experienced bakers.
  • Versatile: This pie is perfect for any occasion, from summer picnics to holiday dinners.
  • Nostalgic: It evokes the warmth and comfort of homemade desserts, bringing back cherished memories of family and tradition.

Ingredients

  • Fresh defrosted blackberries
  • Butter
  • Cinnamon
  • Pastry
  • Flour
  • Lemon verbena leaves
  • Nutmeg
  • Sugar
  • Fresh whipping cream

Instructions

  1. Preheat your oven to 450°F (232°C). Chill a mixing bowl in the freezer to prepare for the whip cream.
  2. Line a 9-inch pie pan with half of the pastry. Cover it and place it in the refrigerator to chill while you prepare the filling.
  3. In another mixing bowl, combine the blackberries, flour, cinnamon, nutmeg, and sugar. Stir gently until the blackberries are evenly coated.
  4. Spoon the blackberry mixture into the chilled pie shell. Cover it with the remaining pastry, crimping the edges to seal.
  5. Cut steam vents in the top crust to allow steam to escape during baking.
  6. Bake the pie in the preheated oven for 15 minutes, then reduce the oven temperature to 350°F (177°C) and continue baking for an additional 34 to 40 minutes, or until the crust is golden brown.
  7. While the pie is baking, prepare the lemon verbena whip cream. In a small saucepan, combine the cream and three lemon verbena leaves. Heat over medium-high heat until the cream is just simmering, then remove from heat and let steep for 5 minutes.
  8. Pour the cream and verbena leaves into a glass container and chill in the refrigerator for 20 minutes. Remove the verbena leaves from the cream.
  9. Pour the chilled cream into the mixing bowl you prepared earlier. Whip using an electric mixer until soft peaks form, adding sugar to taste.
  10. Once the pie has cooled slightly, serve slices with a generous dollop of lemon verbena-infused whip cream on the side.

Tips

  • Ensure your blackberries are fully defrosted and drained to prevent excess moisture in the pie.
  • Chill your pastry before baking to help maintain its shape and avoid a soggy crust.
  • Taste your whipped cream as you add sugar to achieve your preferred level of sweetness.

Variations & Substitutions

If you want to experiment with this recipe, here are some variations and substitutions you can try:

  • Fruits: Swap blackberries with raspberries or a mix of berries for a different flavor profile.
  • Herbs: If lemon verbena is unavailable, try using lemon zest or mint for a refreshing twist.
  • Crust: Use a graham cracker crust for a different texture and flavor.

Storage

Store any leftover pie in an airtight container in the refrigerator for up to three days. The lemon verbena whip cream should be stored separately in the refrigerator and is best used within two days. For longer storage, you can freeze the pie (without the whip cream) for up to two months. Thaw it in the refrigerator before serving.

FAQ

Can I use frozen blackberries?

Yes, you can use frozen blackberries if fresh ones are not available. Just make sure to defrost and drain them thoroughly to avoid excess moisture in your pie.

What can I use instead of lemon verbena?

If lemon verbena is hard to find, you can substitute it with lemon zest or a few mint leaves to infuse a similar refreshing flavor into your whipped cream.

How do I know when the pie is done?

The pie is done when the crust is golden brown and the filling is bubbling. If you’re unsure, insert a skewer to test if the filling has thickened.

Nutrition

This recipe is a delightful treat, but remember to enjoy it in moderation. The nutritional value will vary based on the size of the slices and the amount of whipped cream used. A typical serving with a dollop of whip cream contains approximately:

  • Calories: 350
  • Fat: 18g
  • Carbohydrates: 45g
  • Protein: 4g

Conclusion

This blackberry pie with lemon verbena whip cream is not just a dessert; it’s a celebration of flavors and memories. Whether you’re reliving the nostalgia of family gatherings or creating new traditions, this pie is sure to bring joy and warmth to your table. The balance of tart berries and fragrant whipped cream is a delightful treat for any palate. So gather your loved ones, serve up a slice, and enjoy the sweet taste of cherished memories and new beginnings.

Related update: Blackberry Pie With Lemon Verbena Whip Cream

Related update: Vanilla Pound Cake

Gluten Free Yellow Cake And Cupcakes | Made by Meaghan Moineau

Gluten Free Yellow Cake And Cupcakes

Intro

There’s something magical about the aroma of freshly baked cake wafting through the kitchen, a scent that has the power to transport us back to cherished childhood memories. I remember helping my grandmother in her kitchen, eagerly awaiting the moment when I could lick the spoon and taste the sweetness of her yellow cake batter. Her secret ingredient was always love, and today, I’m excited to share a gluten-free version of this classic treat. Whether you’re making a cake for a special occasion or whipping up cupcakes for a casual get-together, this recipe is sure to bring a smile to your face and warmth to your heart.

Why You’ll Love It

This gluten-free yellow cake and cupcake recipe is a delightful twist on a traditional favorite. Whether you’re gluten intolerant or simply looking to try something new, you’ll appreciate the moist, fluffy texture of this cake. The use of coconut and tapioca flours creates a delicate crumb, while the dairy-free ingredients ensure that everyone can enjoy a slice. Best of all, this recipe is versatile enough to adapt to any occasion, from birthday parties to afternoon tea.

Ingredients

  • 1/2 cup coconut flour
  • 1/2 cup tapioca flour (plus extra for dusting)
  • 1/4 teaspoon salt
  • 1/2 teaspoon baking soda
  • 1 teaspoon baking powder
  • 1/2 teaspoon xanthan gum
  • 4 whole eggs
  • 1 cup sugar
  • 1/2 cup veganaise
  • 3/4 cup milk alternative (just under)
  • 2 teaspoons vanilla extract
  • 1/2 cup Earth Balance butter (softened)
  • 1 cup dairy-free chocolate chips (optional)
  • Pinch of salt
  • 1 cup powdered sugar (for icing)

Instructions

  1. Preheat oven to 350 degrees Fahrenheit.
  2. Grease two 8 or 9-inch round cake pans and sprinkle with tapioca flour if making a layer cake, or line a muffin tin with baking cups for cupcakes.
  3. In a large bowl, mix together the coconut flour, tapioca flour, salt, xanthan gum, baking soda, and baking powder. Set aside.
  4. In another bowl, beat the eggs, sugar, and veganaise until the mixture is fluffy and well combined.
  5. Slowly add the vanilla extract, flour mixture, and milk alternative to the egg mixture, alternating between the dry ingredients and milk to ensure a smooth, fluffy batter.
  6. Pour the batter into the prepared cake pans or fill the baking cups 3/4 full. This recipe makes 24 cupcakes.
  7. Bake for 20-25 minutes for cakes or 12-15 minutes for cupcakes. The cakes are done when they are nicely browned and spring back when lightly touched, or when a toothpick inserted in the center comes out clean.
  8. Let the cakes or cupcakes cool completely before icing.

Tips

For best results, make sure all your ingredients are at room temperature before you begin. This will help the batter mix more evenly and ensure a uniform texture. Also, if you’re using the cake pans, be sure to tap them gently on the counter to release any air bubbles before baking. And remember, patience is key! Allowing the cakes to cool completely before icing will prevent the icing from melting and sliding off.

Variations & Substitutions

Feel free to get creative with this recipe! If you’d like to add a pop of flavor, consider incorporating lemon or almond extract in place of the vanilla. For a chocolatey twist, fold in dairy-free chocolate chips before pouring the batter into the pans. Additionally, if you’re not a fan of veganaise, you can substitute it with applesauce or mashed bananas for a fruity undertone.

Storage

Store your gluten-free yellow cake or cupcakes in an airtight container at room temperature for up to three days. If you’ve made a layered cake, it’s best to store it in the refrigerator to keep the icing fresh. Simply bring the cake to room temperature before serving for optimal flavor and texture.

FAQ

Can I freeze this cake?

Absolutely! You can freeze the unfrosted cake layers for up to two months. Wrap them tightly in plastic wrap and aluminum foil before placing them in the freezer. When you’re ready to enjoy, simply thaw the layers at room temperature and frost as desired.

What is a good milk alternative to use?

There are several milk alternatives that work well in this recipe. Almond milk, coconut milk, and oat milk are all excellent choices. Just make sure to use unsweetened varieties to maintain the right balance of flavors.

Nutrition

This recipe is gluten-free and dairy-free, making it suitable for those with specific dietary restrictions. However, it’s important to note that the cake is still a treat and should be enjoyed in moderation. Each serving of this cake is approximately 200 calories, depending on the size and any additional toppings or fillings.

Conclusion

Baking is a love language that connects us to each other and to our past. This gluten-free yellow cake and cupcake recipe is a testament to that connection, offering a delicious and inclusive option for everyone to enjoy. Whether you’re a seasoned baker or just starting out, I hope this recipe brings joy and sweetness to your table, just as it has to mine. Happy baking!

Related update: Gluten Free Yellow Cake And Cupcakes

Lemon Squares | Made by Meaghan Moineau

Lemon Squares: A Zesty Delight

Intro

There’s something magical about the taste of lemon squares that takes me back to my grandmother’s kitchen. I remember spending lazy Sunday afternoons with her, the air filled with the scent of fresh lemons and the warmth of her love. She would always let me sift the flour and powdered sugar, an important task for a small child, and together we would create a batch of these delightful treats. Those moments are etched in my memory, and today, I’m excited to share this beloved lemon squares recipe with you.

Why You’ll Love It

Lemon squares are the perfect blend of tart and sweet, making them a favorite for any occasion. Their bright, citrusy flavor and soft, buttery crust are irresistible. Whether you’re looking for a dessert to impress your guests or a comforting treat for yourself, these lemon squares deliver every time. Plus, they’re surprisingly easy to make with simple ingredients you probably already have in your kitchen.

Ingredients

  • 1 cup all-purpose flour
  • 1/2 cup powdered sugar, plus extra for sprinkling
  • 1/2 cup unsalted butter, chilled
  • 2 large eggs
  • 1 cup sugar
  • 1/2 teaspoon baking powder
  • 1/4 teaspoon salt
  • 1/3 cup fresh lemon juice
  • 2 teaspoons lemon peel, finely grated

Instructions

  1. Sift the flour and 1/2 cup of powdered sugar together in a medium bowl to remove any lumps.
  2. Cut in the chilled butter using a pastry cutter or your fingers until the mixture resembles coarse crumbs.
  3. Press the mixture evenly over the bottom of a 9 by 13 by 2-inch baking pan, forming the crust.
  4. Bake the crust at 300°F (150°C) for about 25 minutes, or until it is lightly browned.
  5. In a separate bowl, whisk together the eggs, sugar, baking powder, salt, lemon juice, and lemon peel until well combined.
  6. Pour the lemon mixture over the baked crust, spreading it evenly.
  7. Bake at 350°F (175°C) for 25 to 30 minutes, or until the filling is set.
  8. Allow the lemon squares to cool completely in the pan before sprinkling with additional powdered sugar.
  9. Cut into squares and serve.

Tips

For the best lemon squares, make sure to use fresh lemon juice and zest. It really makes a difference in the flavor. Also, when cutting the butter into the flour mixture, try to work quickly to keep the butter cold, which results in a flakier crust. Allowing the lemon squares to cool completely before cutting ensures clean cuts and helps the flavors meld together beautifully.

Variations & Substitutions

If you’re looking to switch things up, consider adding a layer of fresh berries on top of the lemon mixture before baking for a fruity twist. You can also substitute lime juice and zest for a different citrus flavor. For a gluten-free option, replace the all-purpose flour with a 1:1 gluten-free baking blend.

Storage

Store your lemon squares in an airtight container at room temperature for up to three days. If you prefer, they can also be refrigerated for up to a week. For longer storage, freeze the squares in a single layer, then transfer to a freezer-safe container for up to three months. Thaw at room temperature before serving.

FAQ

Can I make lemon squares ahead of time?

Yes, lemon squares are a great make-ahead dessert. You can prepare them a day or two in advance and store them in the refrigerator until you’re ready to serve. Just wait to sprinkle with powdered sugar until right before serving to keep them looking fresh.

What if I don’t have a pastry cutter?

No worries! If you don’t have a pastry cutter, you can use two knives or even your fingertips to cut the butter into the flour mixture. Just be sure to work quickly to keep the butter from melting.

Why is my filling runny?

If your filling is runny, it might not have baked long enough. Make sure the filling is set before removing from the oven. If needed, bake for a few additional minutes, checking frequently to avoid over-baking.

Nutrition

While these lemon squares are a delightful treat, they do come with a bit of indulgence. Each square (assuming you cut the batch into 16 pieces) contains approximately 150 calories, 7 grams of fat, 20 grams of carbohydrates, and 15 grams of sugar. Enjoy them in moderation as part of a balanced diet.

Conclusion

These lemon squares are a nostalgic treat that offer a perfect balance of tartness and sweetness. Easy to make and incredibly delicious, they’re a wonderful addition to any dessert table. Whether you’re enjoying them as a simple afternoon snack or serving them at a special gathering, they’re sure to bring a smile to anyone’s face. I hope this recipe brings you as much joy as it does to me, and perhaps even creates new cherished memories in your kitchen.

Related update: Lemon Squares

Related update: Fresh Peach With Goat Cheese Side Salad

Related update: Gluten Free Yellow Cake And Cupcakes

Brown Sugar Sponge Cookie with Chocolate Covered Caramels | Made by Meaghan Moineau

Brown Sugar Sponge Cookie with Chocolate Covered Caramels

Intro

There’s something magical about the aroma of freshly baked cookies wafting through the house, evoking cherished memories of childhood. I remember my grandmother’s kitchen, a place filled with love, laughter, and the sweet scent of her famous cookies. One of my fondest memories is helping her bake her signature brown sugar sponge cookies, each topped with a chocolate-covered caramel that melted just perfectly in the oven. Today, I’m thrilled to share this beloved recipe with you all, hoping it brings as much joy to your home as it did to mine.

Why You’ll Love It

This recipe combines the light, airy texture of a sponge cookie with the irresistible decadence of chocolate-covered caramels. The result is a delightful treat that’s both sophisticated and comforting. These cookies are perfect for a cozy afternoon with a cup of tea or as a sweet surprise in a lunchbox. Not only are they delicious, but they’re also simple to make, requiring just a handful of ingredients that you likely already have in your pantry.

Ingredients

  • 1 cup all-purpose flour
  • 1 teaspoon baking powder
  • 1 cup dark brown sugar
  • 4 large eggs, separated
  • 1 teaspoon lemon zest
  • 1/4 teaspoon salt
  • 1 teaspoon vanilla extract
  • 25 Rolos, unwrapped

Instructions

  1. Preheat the oven to 375°F (190°C). Line baking sheets with parchment paper and spray with nonstick cooking spray.
  2. In the bowl of a stand mixer on medium speed, beat the egg whites until foamy. Add the baking powder, salt, and sugar, and continue beating on medium speed until stiff peaks form.
  3. In another bowl, combine egg yolks, vanilla, and lemon zest. Beat with a fork until thoroughly mixed.
  4. Fold the yolks into the egg white mixture just until combined. Be careful not to deflate the egg whites.
  5. Sift the flour over the egg mixture and fold in until the batter is smooth and light.
  6. Drop about 2 teaspoons of batter for each cookie about 2 inches apart onto the prepared baking sheets.
  7. Top each cookie with a Rolo in the center and press down lightly.
  8. Bake for 12 minutes or until golden. Cool on the sheets for 5 minutes, then move to racks to cool completely.

Tips

To ensure your cookies have the perfect texture, make sure to sift the flour before adding it to the egg mixture. This helps keep the batter light and airy. Also, be gentle when folding the ingredients together to avoid deflating the egg whites, which are key to the cookie’s sponge-like texture.

Variations & Substitutions

If you’re looking to switch things up, consider using different flavored caramels or chocolates as toppings. You could also try adding a pinch of cinnamon or nutmeg to the batter for a warm, spiced flavor. For a nutty twist, sprinkle chopped nuts over the cookies before baking.

Storage

These cookies are best enjoyed fresh but can be stored in an airtight container at room temperature for up to three days. If you want to keep them longer, freezing is an option. Place the cookies in a single layer in a freezer-safe container, separating layers with parchment paper to prevent sticking. Thaw at room temperature before serving.

FAQ

Can I make these cookies without a stand mixer?

Yes, you can use a hand mixer or even whisk the egg whites by hand, although it will take more time and effort to achieve stiff peaks. Just be patient and make sure the egg whites are properly beaten before proceeding with the recipe.

What can I do if I don’t have lemon zest?

If you don’t have lemon zest, you can substitute with a small amount of lemon extract or even a bit of orange zest for a different citrus note. Alternatively, you can leave it out altogether; the cookies will still be delicious.

How do I know when the cookies are done?

The cookies are done when they are golden brown on the edges and feel set to the touch. They should easily lift off the parchment paper without sticking. Be careful not to overbake them, as this can make them dry.

Nutrition

While these cookies are a delightful treat, they should be enjoyed in moderation. Each cookie contains approximately 100 calories, 5g of fat, 13g of carbohydrates, and 1g of protein. Keep these in mind if you’re monitoring your daily intake.

Conclusion

These brown sugar sponge cookies with chocolate-covered caramels are more than just a sweet treat—they’re a little piece of nostalgia wrapped up in a delicious package. Perfect for sharing with loved ones or enjoying as a personal indulgence, they bring warmth and joy with every bite. I hope this recipe becomes a cherished tradition in your home, just as it has in mine. Happy baking!

Related update: Brown Sugar Sponge Cookie with Chocolate Covered Caramels

Related update: Lemon Squares

Classic Pumpkin Pie | Made by Meaghan Moineau

Classic Pumpkin Pie

Intro

There’s something magical about the aroma of a freshly baked pumpkin pie wafting through the house on a crisp autumn day. As a child, the anticipation of dessert was just as thrilling as the feast itself. I remember eagerly watching my grandmother whip up her famous pumpkin pie, her hands working with the kind of practiced ease that comes from years of tradition. She would always let me have the first slice, topped generously with a dollop of whipped cream. This classic pumpkin pie recipe is a tribute to those cherished memories and a way to bring a touch of that nostalgia to your own table.

Why You’ll Love It

This classic pumpkin pie is the epitome of comfort and tradition. Here’s why it deserves a spot at your next gathering:

  • Simplicity: With a handful of ingredients and straightforward instructions, this pie is as easy to make as it is delicious.
  • Flavor: The perfect blend of spices – cinnamon, ginger, and nutmeg – evokes the essence of fall and enhances the natural sweetness of the pumpkin.
  • Texture: The smooth, creamy filling contrasts beautifully with the flaky pie crust, making each bite a delight.
  • Nostalgia: Its traditional taste brings back fond memories and creates new ones with every slice shared.

Ingredients

  • 1 can (15 oz) canned pumpkin
  • 2 large eggs
  • 1 tsp ground cinnamon
  • 1/2 tsp ground ginger
  • 1/4 tsp ground nutmeg
  • 1/2 tsp salt
  • 1 can (14 oz) sweetened condensed milk
  • 1 unbaked pie crust (9-inch)
  • Whipped cream for garnish

Instructions

  1. Preheat your oven to 425 degrees F (220 degrees C).
  2. In a medium bowl, whisk together the canned pumpkin, sweetened condensed milk, eggs, ground cinnamon, ground ginger, ground nutmeg, and salt until the mixture is smooth and well combined.
  3. Pour the pumpkin mixture into the unbaked pie crust, spreading it evenly.
  4. Place the pie on the center rack of the oven and bake for 15 minutes.
  5. Reduce the oven temperature to 350 degrees F (175 degrees C) and continue baking for an additional 35 to 40 minutes, or until a knife inserted 1 inch from the crust comes out clean.
  6. Remove the pie from the oven and let it cool on a wire rack. This will help the pie set properly.
  7. Once cooled, garnish with a generous dollop of whipped cream before serving. Enjoy!

Tips

For the best results, make sure your ingredients are at room temperature before you begin. This helps the pie bake evenly. If you find the edges of your crust browning too quickly, cover them with strips of aluminum foil partway through baking. To ensure a smooth filling, don’t rush the whisking process – a good mix ensures that all the flavors meld together perfectly.

Variations & Substitutions

If you’re looking to switch things up or accommodate dietary restrictions, consider these variations:

  • Crust: Try a graham cracker crust for a different texture and flavor profile.
  • Spices: Add a pinch of ground cloves or a dash of vanilla extract for an extra layer of flavor.
  • Dairy-Free: Substitute the sweetened condensed milk with a coconut milk or almond milk version for a dairy-free alternative.
  • Sweetener: If you prefer less sugar, use unsweetened condensed milk and add sweetener to taste.

Storage

To store your classic pumpkin pie, cover it loosely with plastic wrap or aluminum foil and refrigerate. It will keep well in the fridge for up to four days. If you plan to freeze it, wrap the pie securely in plastic wrap and then in aluminum foil for extra protection. It can be frozen for up to a month. When ready to enjoy, thaw it in the refrigerator overnight.

FAQ

Can I make the pie filling ahead of time?

Yes, you can prepare the filling up to two days in advance. Store it in an airtight container in the refrigerator until you’re ready to bake.

What should I do if my pie cracks during cooling?

If your pie develops cracks, don’t worry! This can happen as the pie cools and contracts. Simply cover any cracks with whipped cream or a sprinkle of cinnamon sugar for a beautiful presentation.

How can I tell if my pumpkin pie is done?

The pie is done when the filling is set around the edges but still has a slight jiggle in the center. The knife test (inserting a knife 1 inch from the crust) is a reliable method; if it comes out clean, your pie is ready.

Nutrition

This classic pumpkin pie is not only a treat for the taste buds but also a modestly nutritious option for dessert. Pumpkin is a great source of fiber and vitamin A. However, due to the sweetened condensed milk and pie crust, it is also relatively high in sugar and calories. Enjoy it in moderation as part of a balanced diet.

Conclusion

This classic pumpkin pie recipe is more than just a dessert; it’s a slice of tradition, a taste of nostalgia, and a wonderful way to celebrate the season. Whether you’re serving it at a festive holiday gathering or enjoying a quiet slice with a cup of coffee, this pie is sure to bring warmth and joy to your table. I hope it becomes a cherished addition to your recipe collection, just as it has been in mine.

Related update: Classic Pumpkin Pie

Related update: Brown Sugar Sponge Cookie with Chocolate Covered Caramels

Related update: Blackberry Pie With Lemon Verbena Whip Cream

Dump Cake | Made by Meaghan Moineau

Dump Cake: A Simple Treat for Every Occasion

Intro

There’s something magical about recipes that stand the test of time, bringing comfort and joy with their simplicity. One such recipe that has graced countless family gatherings and potlucks is the humble Dump Cake. This delightful dessert holds a special place in my heart, as it was a staple at our family reunions. I remember my grandmother pulling it out of the oven, its sweet aroma filling the air, as we gathered around eagerly waiting for a slice. The best part? It’s so easy to make that even the littlest hands in the kitchen can help!

Why You’ll Love It

Dump Cake is a dessert that combines ease with flavor, making it an absolute favorite for those who love baking without the fuss. If you’re short on time or just not in the mood for a complicated recipe, this is for you. It’s versatile, requiring only a few ingredients that you probably already have in your pantry. The beauty of Dump Cake lies in its ability to be the star of any occasion, from casual get-togethers to festive celebrations.

Ingredients

  • 1 can (20 oz) of canned pineapple, undrained
  • 1 can (21 oz) of canned pie filling (cherry or your favorite choice)
  • 1 box (15.25 oz) of yellow or white cake mix
  • 1/2 cup (1 stick) of butter

Instructions

  1. Preheat your oven to 350°F (175°C).
  2. Spread the canned pineapple, with its juice, evenly in the bottom of a 9×13-inch baking pan.
  3. Cover the pineapple with the canned pie filling, spreading it to ensure even distribution.
  4. Sprinkle the dry cake mix evenly over the fruit layers. It’s important not to stir the layers.
  5. Cut the butter into small pieces and place them evenly over the top of the cake mix. This will create a delightful crust as it bakes.
  6. Bake in the preheated oven for 1 hour, or until the top is golden brown and bubbly.
  7. Allow it to cool slightly before serving. Enjoy it old school with a dollop of Cool Whip or freshly whipped cream.

Tips

For the best results, make sure the butter is distributed evenly to ensure the cake mix bakes up nice and crispy. You can also use a pastry cutter or two knives to cut the butter into smaller, more uniform pieces.

Variations & Substitutions

Dump Cake offers endless possibilities for customization:

  • Fruits: Swap out the pie filling for any flavor you prefer. Blueberry, apple, or peach pie filling all work beautifully.
  • Nuts: Sprinkle chopped nuts, such as pecans or walnuts, over the top before baking for added crunch.
  • Spices: Add a sprinkle of cinnamon or nutmeg to the cake mix for a warm, spiced flavor.
  • Butter: For a richer flavor, consider using browned butter.

Storage

If you have leftovers (which is rare!), store them in an airtight container in the refrigerator for up to 5 days. You can also freeze portions for up to 3 months. To reheat, simply warm it in the oven until heated through.

FAQ

Can I use fresh fruit instead of canned?

Yes, you can use fresh fruit, but you may need to add a bit of sugar or syrup to mimic the sweetness and moisture of canned fruit. Adjust the baking time as needed.

Is it necessary to use a specific type of cake mix?

No, you can use either yellow or white cake mix based on your preference. Even flavored cake mixes like lemon or spice can add a unique twist.

Nutrition

This recipe is a delightful treat meant to be enjoyed in moderation. On average, a serving of Dump Cake can contain around 300-350 calories, depending on the type of ingredients used. It’s a dessert that focuses more on comfort and flavor rather than being a low-calorie option.

Conclusion

Dump Cake is more than just a dessert; it’s a testament to the beauty of simple, heartfelt cooking. Whether you’re a seasoned baker or just starting out, this recipe is a wonderful addition to your repertoire. Its nostalgic charm and delightful taste make it a cherished favorite that can be passed down through generations. So gather your ingredients, invite some friends or family over, and enjoy the sweet simplicity that is Dump Cake. Happy baking!

Related update: Dump Cake

Related update: Classic Pumpkin Pie

Green Monster Ice Pops | Made by Meaghan Moineau

Green Monster Ice Pops: A Refreshing Summer Treat

Intro

There’s something magical about the first taste of an ice pop on a sweltering summer day. Growing up, my siblings and I would race to the ice cream truck, clutching our allowance tightly. Yet, there was a special kind of joy in making our own frozen treats at home. We’d gather in the kitchen, blending various fruits and juices, eager to see what delicious concoction we’d create. Today, I bring you a healthier twist on those childhood favorites with my Green Monster Ice Pops. Packed with nutritious ingredients, they’re as delightful as they are refreshing.

Why You’ll Love It

These Green Monster Ice Pops are not only a delicious way to cool down but also a sneaky way to pack in some greens. With the creaminess of avocado and the natural sweetness of mango and banana, these ice pops are a hit with both kids and adults alike. Whether you’re looking for a post-workout snack or a guilt-free dessert, these ice pops are sure to satisfy. Plus, they’re a fantastic way to use up any ripe fruit you have on hand!

Ingredients

  • Unsweetened almond milk
  • 1 ripe avocado, peeled and pitted
  • 1 cup baby spinach
  • 1 banana
  • 1 tablespoon honey
  • 1 cup fresh mango, diced

Instructions

  1. Place all ingredients into a blender and mix well until smooth and creamy.
  2. Taste the smoothie. If you find that it is not sweet enough, add 1 to 2 tablespoons of maple syrup or honey and blend again.
  3. Pour the smoothie mixture into the ice pop molds.
  4. Insert a wooden popsicle stick into each mold, leaving about a quarter of the stick above the mold.
  5. Place the molds into the freezer for 2-3 hours to let them freeze completely before serving.

Tips

For the creamiest texture, make sure your avocado is perfectly ripe. You can also soak your wooden sticks in water for about 10 minutes before inserting them into the molds to prevent them from floating up. If you’re in a hurry, refrigerate the smoothie mix for an hour before pouring it into the molds to reduce the freezing time.

Variations & Substitutions

Feel free to customize these ice pops to suit your taste! You can substitute the almond milk with coconut milk for a tropical twist. If avocados aren’t your thing, a half cup of Greek yogurt can provide similar creaminess. For an extra nutrient boost, toss in a tablespoon of chia seeds or flaxseeds.

Storage

Once frozen, you can remove the ice pops from the molds and store them in a resealable plastic bag or airtight container in the freezer. They’ll last for up to two weeks, though they’re so delicious they might not last that long!

FAQ

Can I use frozen spinach instead of fresh?

Yes, you can use frozen spinach. Just be sure to thaw and drain it thoroughly before blending to avoid excess water in your mixture.

What if I don’t have ice pop molds?

No worries! You can use small paper cups as an alternative. Simply cover them with foil and insert the popsicle stick through the foil. Once frozen, peel away the paper cup to enjoy your ice pop.

Nutrition

These ice pops are not only refreshing but also packed with nutrients. The avocado provides healthy fats, while spinach adds a dose of iron and fiber. Each pop contains approximately 120 calories, 5g of fat, 20g of carbohydrates, and 2g of protein, making them a balanced treat.

Conclusion

Green Monster Ice Pops are more than just a summer treat; they’re a delightful way to indulge in nostalgia while still honoring a healthy lifestyle. Whether you’re enjoying them by the poolside or serving them at a backyard barbecue, these pops are sure to be a hit. Gather your ingredients, blend away, and relish the vibrant flavors of summer with every bite!

Related update: Green Monster Ice Pops

Related update: Dump Cake

Carrot Cake Muffin Cookies | Made by Meaghan Moineau

Carrot Cake Muffin Cookies

Intro

There’s something truly comforting about the aroma of freshly baked goods wafting through the house. It takes me back to long Sunday afternoons spent in my grandmother’s kitchen, her laughter mingling with the sound of the mixer as she prepared her famous carrot cake. Inspired by those cherished memories, I’ve transformed that classic recipe into delightful Carrot Cake Muffin Cookies. These cookies capture the essence of a carrot cake but come in a convenient, delightful cookie form. Perfect for a cozy afternoon snack or a quick treat on the go, they’re sure to become a favorite in your household too.

Why You’ll Love It

Carrot Cake Muffin Cookies are the epitome of comfort food. They offer the wholesome goodness of a muffin with the convenience of a cookie. Here’s why you’ll adore them:

  • Flavorful: The perfect balance of sweet and spice, these cookies are brimming with the warm flavors of cinnamon and ginger.
  • Nutritious: Made with whole wheat pastry flour and packed with carrots, these cookies are a healthier treat option.
  • Versatile: Perfect for breakfast, a snack, or dessert. They’re a delicious way to satisfy your sweet tooth any time of the day.
  • Easy to Make: With simple ingredients and straightforward instructions, these cookies are a breeze to prepare.

Ingredients

  • 1/2 cup butter, softened
  • 1 cup packed brown sugar
  • 1/4 cup maple syrup
  • 1 teaspoon baking soda
  • 1 teaspoon ground cinnamon
  • 1/2 teaspoon ground ginger
  • 1/4 teaspoon salt
  • 1 large egg
  • 1/2 cup unsweetened applesauce
  • 1 teaspoon vanilla extract
  • 1 cup whole wheat pastry flour
  • 1 cup white whole wheat flour
  • 1 cup shredded carrots
  • 1/2 cup raisins
  • 1/2 cup chopped walnuts
  • Turbinado sugar for sprinkling

Instructions

  1. Preheat your oven to 350°F (175°C).
  2. In a large bowl, beat the softened butter with an electric mixer on medium speed for 30 seconds.
  3. Add the brown sugar, maple syrup, baking soda, cinnamon, ginger, and salt. Beat until combined.
  4. Beat in the egg, applesauce, and vanilla extract until well incorporated.
  5. Gradually beat in as much of the flour as you can with the mixer. Stir in any remaining flour using a spatula or wooden spoon.
  6. Fold in the shredded carrots, raisins, and walnuts just until combined.
  7. Drop dough by slightly rounded teaspoons 2 inches apart onto an ungreased cookie sheet.
  8. Sprinkle the tops with Turbinado sugar for extra crunch and sweetness.
  9. Bake for 8 to 10 minutes or until the edges are firm.
  10. Transfer the cookies to a wire rack and let them cool completely.

Tips

To ensure your Carrot Cake Muffin Cookies turn out perfectly each time, consider these helpful tips:

  • Grate the Carrots Finely: For the best texture, make sure to grate your carrots finely. This helps them blend seamlessly into the cookie dough.
  • Use Fresh Ingredients: Fresh spices and a good quality vanilla extract can make a significant difference in the flavor profile of your cookies.
  • Room Temperature Ingredients: Make sure your butter and egg are at room temperature to ensure even mixing.

Variations & Substitutions

One of the joys of baking is making a recipe your own. Here are some variations and substitutions you can try:

  • Gluten-Free Option: Substitute the whole wheat flours with a gluten-free flour blend to make these cookies gluten-free.
  • Nut-Free Version: Omit the walnuts if you have a nut allergy, or replace them with sunflower seeds for a similar crunch.
  • Extra Add-Ins: Add shredded coconut or a handful of dark chocolate chips for a different twist.

Storage

To keep your Carrot Cake Muffin Cookies fresh and delicious, store them in an airtight container at room temperature for up to one week. For longer storage, freeze the cookies in a single layer on a baking sheet, then transfer them to a freezer-safe bag or container. They can be frozen for up to three months. Thaw at room temperature before serving.

FAQ

Can I use regular flour instead of whole wheat flour?

Yes, you can substitute all-purpose flour for the whole wheat pastry flour and white whole wheat flour if you prefer. Keep in mind that using all-purpose flour may slightly alter the texture and nutritional profile of the cookies.

Can I omit the raisins or walnuts?

Absolutely! If you’re not a fan of raisins or walnuts, you can leave them out or replace them with another ingredient, such as dried cranberries or pecans, for a different flavor twist.

How do I know when the cookies are done?

The cookies are done when the edges are firm, and the tops have a light golden hue. They may appear slightly soft in the center, but they will firm up as they cool on the wire rack.

Nutrition

While these cookies are a treat, they’re also packed with wholesome ingredients that offer nutritional benefits. Carrots provide vitamin A, raisins add natural sweetness and fiber, and walnuts contribute healthy fats. Each cookie is a delightful way to indulge without guilt.

Conclusion

Carrot Cake Muffin Cookies are a delightful fusion of tradition and convenience, bringing the beloved flavors of carrot cake into a compact, portable form. Whether you’re enjoying them with your morning coffee or sharing them with friends and family, these cookies are sure to bring warmth and joy to any occasion. Just like my grandmother’s kitchen, let these cookies fill your home with sweet memories and the comforting aroma of love. Happy baking!

Related update: Carrot Cake Muffin Cookies

Related update: Green Monster Ice Pops

Related update: Pumpkin French Toast

Lemon Drop Jello Shots | Made by Meaghan Moineau

Lemon Drop Jello Shots: A Fun Twist on a Classic Drink

Intro

There’s something about the bright, zesty taste of lemons that instantly transports me back to my childhood summers. I remember the lemonade stands my friends and I used to set up at the end of our street, the sun blazing down as we eagerly served cool, refreshing drinks to our neighbors. Those carefree days inspired this grown-up version of a lemon treat: Lemon Drop Jello Shots. These little bursts of citrusy delight are perfect for gatherings or a fun night in, bringing a playful twist to a classic cocktail. Let me guide you through creating these delightful little shots that promise to be the star of your next party!

Why You’ll Love It

  • Refreshing and Fun: The tangy flavor of lemon paired with the smoothness of jello creates a delightful treat that’s as refreshing as it is fun.
  • Perfect for Parties: These jello shots are not only tasty but also visually appealing, making them a hit at any gathering.
  • Customizable: With simple substitutions and variations, you can easily tailor these shots to your taste preferences or dietary needs.

Ingredients

  • Lemons
  • Lemon jello
  • Sugar
  • Water
  • Fresh lemon juice
  • Lemon vodka

Instructions

  1. Prepare the Lemons: Begin by cutting the lemons in half and hollowing them out to create vessels. Juice the lemons first to make it easier to remove the pulp. Reserve the fresh lemon juice for later.
  2. Hollow Out the Lemons: Turn the lemon halves inside out and carefully remove the pith and membrane. This will ensure that the lemon shells can hold the jello mixture without leaking.
  3. Make the Jello: Follow the instructions on the lemon jello package. Typically, this involves dissolving the jello in boiling water. Substitute some of the water with the reserved fresh lemon juice for an extra citrusy kick.
  4. Add the Vodka: Once the jello is fully dissolved, stir in the lemon vodka. This is what gives the jello shots their signature punch.
  5. Prepare for Chilling: Place the hollowed-out lemon cups into the cups of a muffin pan. This will help them stay upright as the jello sets.
  6. Pour in the Jello Mixture: Carefully fill each lemon shell with the jello mixture. Allow them to chill in the refrigerator overnight to set completely.
  7. Serve and Enjoy: Use a sharp, straight-edge knife to cut the jello-filled lemon halves into wedges. Serve these delightful shots at your next gathering and enjoy!

Tips

  • Use a Muffin Pan: Placing the lemon cups in a muffin pan helps keep them stable while the jello sets.
  • Chill Overnight: For the best results, allow the jello shots to chill overnight in the refrigerator.
  • Sharp Knife for Cutting: Use a very sharp knife to cut the jello-filled lemon halves into wedges. This will help maintain clean edges and a neat presentation.

Variations & Substitutions

  • Non-Alcoholic Version: Simply omit the vodka and replace it with an equal amount of water or lemon-flavored soda for a kid-friendly version.
  • Flavor Twists: Try using lime or orange jello and corresponding citrus fruits for a different flavor profile.
  • Sugar-Free Option: Use sugar-free jello and sweeteners to create a lower-calorie version of these shots.

Storage

Store any leftover Lemon Drop Jello Shots in an airtight container in the refrigerator. They will keep for up to three days, maintaining their flavor and texture. Be sure to keep them chilled until you’re ready to serve them again.

FAQ

Can I prepare these jello shots in advance?

Absolutely! These jello shots can be made up to two days in advance. Just be sure to store them in an airtight container in the refrigerator to keep them fresh.

What type of vodka should I use?

Lemon vodka is recommended for this recipe to enhance the citrus flavor. However, regular vodka will also work if lemon vodka is not available.

How do I make the lemon shells without tearing them?

To prevent tearing, gently turn the lemon halves inside out after juicing them. Use a small spoon to carefully remove the pith and membrane, ensuring the outer peel remains intact.

Conclusion

Lemon Drop Jello Shots are a delightful addition to any party or casual gathering, offering a playful twist on a beloved cocktail. With their vibrant flavor and charming presentation, these shots are sure to impress your guests and bring a smile to their faces. Whether you’re reminiscing about childhood summers or simply looking for a fun treat, these jello shots are a must-try. Enjoy the burst of citrusy goodness and the joy they bring to any occasion!

Related update: Lemon Drop Jello Shots

Related update: Carrot Cake Muffin Cookies

Mixed Berry Yogurt with Almonds | Made by Meaghan Moineau

Mixed Berry Yogurt with Almonds

Intro

There’s something undeniably comforting about a morning routine, and for me, it often involves a peaceful moment by the window, a favorite book in hand, and a bowl of my beloved Mixed Berry Yogurt with Almonds. This recipe takes me back to my childhood summers spent at my grandmother’s house, where the mornings were filled with the sweet aroma of berries picked fresh from her garden. Today, I’ve found a way to capture that nostalgia in a simple, yet satisfying, dish that is perfect for breakfast or a healthy snack.

Why You’ll Love It

This Mixed Berry Yogurt with Almonds is more than just a treat for the taste buds; it’s a symphony of textures and flavors that delight the senses. You’ll love the way the creamy yogurt pairs with the juicy berries, while the crunch of whole almonds and whole oats adds a satisfying bite. It’s a nutrient-rich meal, packed with antioxidants, protein, and healthy fats, to keep you fueled and satisfied.

Ingredients

  • 1 cup frozen mixed berries
  • 1/2 cup whole oats
  • 1 cup plain Greek yogurt
  • 1/4 cup whole almonds

Instructions

  1. Begin by toasting the whole almonds in a skillet over medium heat until they are golden brown and aromatic, about 5 minutes. Set aside to cool.
  2. In a large glass cup or bowl, start layering the ingredients. First, place a layer of Greek yogurt at the bottom.
  3. Add a layer of whole oats over the yogurt for that hearty texture.
  4. Scatter a portion of the frozen mixed berries over the oats. The berries will slightly thaw and release their juices, making the dish deliciously sweet and colorful.
  5. Repeat the layers until all ingredients are used, finishing with a generous layer of Greek yogurt on top.
  6. Top with the toasted almonds just before serving to maintain their crunch.

Tips

To enhance the flavor of this dish, consider adding a pinch of cinnamon or a drizzle of honey between the layers. For the best texture, use thick Greek yogurt, which will hold up nicely against the juicy berries. If you prefer a softer crunch, you can soak the oats in a bit of milk or yogurt overnight.

Variations & Substitutions

This breakfast lends itself to endless variations. If you’re in the mood for something more decadent, especially if serving this as a dessert, use a creamier vanilla yogurt. You can also drizzle a bit of maple syrup on top of the yogurt for added sweetness. Any kind of nut will do, and toasting them will bring out their maximum crunch and flavor. If you don’t have berries on hand, this works well with just about any fruit. Try sliced bananas, peaches, or even a tropical mix with mango and pineapple for a summery twist.

Storage

This dish is best enjoyed fresh, but you can prepare it in advance. Store the yogurt, oats, and berries layered in an airtight container in the refrigerator for up to 3 days. Add the toasted almonds just before serving to maintain their crunch and prevent them from becoming soggy.

FAQ

Can I use fresh berries instead of frozen?

Absolutely! Fresh berries are a wonderful substitute and can add a lovely burst of flavor and freshness to your dish. Just be sure to rinse them thoroughly before use.

What can I use instead of Greek yogurt?

If Greek yogurt isn’t your preference, you can use regular yogurt, dairy-free yogurt, or even cottage cheese for a different texture. Just keep in mind that the consistency and taste will vary slightly depending on your choice.

Nutrition

This dish is not only delicious but also packed with health benefits. The mixed berries provide a rich source of antioxidants, the Greek yogurt offers a high protein content, and the almonds and oats add healthy fats and fiber, making it a well-rounded meal to start your day.

Conclusion

Mixed Berry Yogurt with Almonds is a delightful way to savor the simple pleasures of a well-balanced meal. Whether you enjoy it as a quick breakfast, a refreshing snack, or a light dessert, it’s a versatile recipe you’ll return to time and again. As you dig into your bowl, I hope you’re reminded of your own cherished memories, just as I am of those sunlit mornings at my grandmother’s table. Enjoy every spoonful!

Related update: Mixed Berry Yogurt with Almonds

Fat Free Gingerbread Cookies | Made by Meaghan Moineau

Fat Free Gingerbread Cookies

Intro

There’s something magical about the aroma of gingerbread cookies wafting through the house during the holiday season, instantly transporting me back to my grandmother’s cozy kitchen. As a child, I would watch in awe as she skillfully rolled out the dough, her hands moving with practiced precision. She’d always let me sprinkle the cinnamon sugar on top, a task I took on with pride. Now, I carry on the tradition with my own twist—a fat-free version of her classic recipe that captures all the warm, spicy flavors without the added guilt. These Fat Free Gingerbread Cookies are a delightful treat that everyone can enjoy, and I’m thrilled to share them with you.

Why You’ll Love It

These cookies are a perfect blend of nostalgia and health-conscious baking. With their rich, spicy flavors and chewy texture, you won’t miss the fat at all. They’re perfect for holiday gatherings, or any time you’re craving a sweet treat. Whether you’re sharing them with family or enjoying them solo with a warm cup of tea, these cookies are sure to bring a smile to your face. Plus, they’re simple to make, requiring only a few pantry staples and some festive spices.

Ingredients

  • 1 cup all-purpose flour
  • 1 cup whole wheat flour
  • 1 teaspoon baking soda
  • 1/2 teaspoon salt
  • 1 teaspoon ground ginger
  • 1 teaspoon cinnamon
  • 1/2 teaspoon ground cloves
  • 1/4 teaspoon black pepper
  • 1/4 teaspoon fresh ground nutmeg
  • 1/4 teaspoon ground allspice
  • 1 cup dark brown sugar, packed
  • 1/2 cup blackstrap molasses
  • 1/4 cup unsweetened apple sauce
  • 1 teaspoon vanilla extract
  • 1/2 teaspoon maple extract
  • 1/4 cup chai concentrate
  • 2 egg whites
  • 1/4 cup chopped candied ginger
  • 1/4 cup granulated sugar
  • 1 teaspoon cinnamon

Instructions

  1. Sift together the all-purpose flour, whole wheat flour, baking soda, salt, ground ginger, cinnamon, ground cloves, black pepper, fresh ground nutmeg, and ground allspice. Set the mixture aside.
  2. In a large bowl, combine the dark brown sugar, blackstrap molasses, apple sauce, vanilla extract, maple extract, and chai concentrate. Beat with an electric mixer for about four minutes, until smooth.
  3. Add the egg whites and beat for another minute until well combined.
  4. Slowly whisk in the dry ingredients and beat until completely incorporated. Stir in the chopped candied ginger.
  5. Chill the dough for at least one hour. (For best results, chill overnight.)
  6. Preheat the oven to 350°F (175°C). Line a cookie sheet with parchment paper, or grease with cooking spray.
  7. In a shallow bowl, combine the granulated sugar with cinnamon.
  8. Scoop one tablespoon of cookie dough and place it in the shallow bowl. Using your hands, coat the dough with the cinnamon sugar and shape into balls.
  9. Place the cookie dough on the prepared cookie sheet, leaving about 3 inches between each cookie.
  10. Bake for 10-12 minutes. Remove from the oven and transfer to a rack to cool.

Tips

For the best flavor, make sure your spices are fresh. Spices lose their potency over time, so replacing them every six months to a year can make a big difference in your baking. When measuring flour, spoon it into the measuring cup and level it off with a knife to avoid packing it down, which can lead to dense cookies. Chilling the dough is key for these cookies, as it helps the flavors meld and prevents spreading during baking.

Variations & Substitutions

To make these cookies gluten-free, substitute the all-purpose flour and whole wheat flour with a gluten-free flour blend. If you’re not a fan of candied ginger, you can substitute it with finely chopped nuts or raisins for a different texture. For a touch of citrus, add a teaspoon of lemon or orange zest to the dough. If you prefer a sweeter cookie, consider drizzling melted dark chocolate over the cooled cookies.

Storage

Store the cookies in an airtight container at room temperature for up to a week. For longer storage, you can freeze the cookies for up to three months. Place them in a single layer in a freezer-safe container, using parchment paper between layers to prevent sticking.

FAQ

Can I use regular molasses instead of blackstrap molasses?

Yes, you can use regular molasses if you prefer a milder flavor. Blackstrap molasses provides a richer, more robust taste and a hint of bitterness that complements the spices beautifully.

Can I make the dough ahead of time?

Absolutely! You can prepare the dough up to two days in advance and store it in the refrigerator. Just be sure to wrap it tightly in plastic wrap to prevent it from drying out.

What should I do if my dough is too sticky?

If your dough is too sticky to handle, add a little more flour, one tablespoon at a time, until it reaches a manageable consistency. Be careful not to add too much, as this can make the cookies dry.

Nutrition

While these cookies are low in fat, they are still a treat best enjoyed in moderation. Each cookie contains approximately 80 calories, 18 grams of carbohydrates, and 1 gram of protein. They are a delightful indulgence that fits well into a balanced diet.

Conclusion

Baking these Fat Free Gingerbread Cookies is a heartwarming experience, reminiscent of cherished family traditions and the joy of sharing delicious food with loved ones. With their fragrant spices and soft, chewy texture, they’re sure to become a favorite in your household, just as they have in mine. Whether you’re serving them at a holiday party or enjoying them with a cup of chai on a quiet afternoon, these cookies are a testament to the magic of baking. I hope they bring you as much joy and satisfaction as they have brought to my family. Happy baking!

Related update: Fat Free Gingerbread Cookies

Cacao-Pecan Shortbread Cookies | Made by Meaghan Moineau

Cacao-Pecan Shortbread Cookies: A Delectable Treat for Every Occasion

Intro

There’s something magical about the aroma of freshly baked cookies wafting through the house. It instantly transports me back to my grandmother’s kitchen, where we spent countless afternoons baking and laughing. She had a knack for turning simple ingredients into the most delightful treats, and her shortbread cookies were always my favorite. Inspired by her love for baking and my passion for unique flavors, I’ve crafted these Cacao-Pecan Shortbread Cookies. They combine the rich, nutty aroma of toasted pecans with the sophisticated bitterness of cacao nibs, creating a cookie that’s both nostalgic and modern.

Why You’ll Love It

These cookies are a wonderful blend of textures and flavors. The shortbread’s buttery, melt-in-your-mouth consistency is perfectly complemented by the crunchy pecans and the subtle chocolatey notes of the cacao nibs. Whether you’re enjoying them with a cup of coffee in the morning or as a sweet treat after dinner, these cookies are sure to impress. Plus, they’re incredibly easy to make, making them a perfect recipe for both novice and seasoned bakers alike.

Ingredients

  • 1 cup unsalted butter, softened
  • 1/2 cup cacao nibs
  • 1 cup confectioners’ sugar
  • 1 large egg
  • 2 cups all-purpose flour
  • 1/2 teaspoon kosher salt
  • 1 cup pecans, chopped
  • Seeds from 1 split vanilla bean
  • 1 teaspoon vanilla extract
  • 1/4 cup vanilla sugar
  • 1 tablespoon water

Instructions

  1. Preheat the oven to 350°F (175°C). Set the butter out to soften.
  2. Spread the chopped pecans on a rimmed baking sheet and toast for about 4-6 minutes, until lightly browned and fragrant. Let cool.
  3. In a large bowl, beat the softened butter, confectioners’ sugar, vanilla bean seeds, vanilla extract, and salt at medium speed until fluffy.
  4. Add the flour, mixing in half at a time. Beat at low speed until just incorporated. Stir in the pecans and cacao nibs and mix well.
  5. Transfer the dough to a work surface and roll into a 1 1/2-inch-thick log. Wrap the log in plastic or parchment paper and refrigerate for 1 hour, until chilled.
  6. Line two large baking sheets with parchment paper. Spread the vanilla sugar on a platter.
  7. Mix the egg and water together to create an egg wash. Brush the log with the egg wash and roll in the sugar. Slice the log into 1/2-inch-thick rounds and place them on the prepared baking sheets, about 1 inch apart.
  8. Bake the cookies for about 15 minutes, until the edges are golden. Rotate the baking sheets from top to bottom and front to back halfway through baking. Transfer the cookies to a wire rack and let stand until completely cooled.

Tips

For the best results, make sure your butter is at room temperature before you start baking. This will help the dough come together more easily. Additionally, chilling the dough is key to achieving the perfect shortbread texture, so don’t skip this step! Finally, if you don’t have vanilla sugar, you can make your own by mixing granulated sugar with vanilla bean seeds, or simply use regular sugar in its place.

Variations & Substitutions

If you’re feeling adventurous, try adding some orange zest to the dough for a citrusy twist. You can also substitute walnuts or almonds for the pecans if you prefer a different nut flavor. If cacao nibs are hard to come by, mini chocolate chips make a great alternative, adding a sweeter chocolate note to the cookies.

Storage

These cookies can be stored in an airtight container at room temperature for up to one week. For longer storage, consider freezing the unbaked dough log. When you’re ready to bake, simply slice and bake from frozen, adding a couple of extra minutes to the baking time.

FAQ

Can I make the dough ahead of time?

Yes, you can prepare the dough up to three days in advance. Just keep it wrapped in plastic or parchment paper in the refrigerator until you’re ready to bake.

Are these cookies gluten-free?

As written, this recipe is not gluten-free due to the all-purpose flour. However, you can try substituting a 1:1 gluten-free baking flour for a gluten-free version.

What can I use if I don’t have a vanilla bean?

If you don’t have a vanilla bean, you can increase the vanilla extract to 1 1/2 teaspoons for a similar flavor profile.

Nutrition

While these cookies are an indulgent treat, it’s worth noting that they contain heart-healthy fats from pecans and antioxidants from cacao nibs. Moderation is key, so enjoy a cookie or two with your favorite beverage!

Conclusion

Baking these Cacao-Pecan Shortbread Cookies is not just about creating a delicious treat; it’s about crafting moments and memories that last a lifetime. Whether you’re sharing them with family or enjoying them on your own, these cookies are sure to bring warmth and joy to your day. I hope you find as much comfort and delight in baking and savoring these cookies as I do. Happy baking!

Related update: Cacao-Pecan Shortbread Cookies

Related update: Fat Free Gingerbread Cookies

Easy Thanksgiving Entertaining | Made by Meaghan Moineau

Easy Thanksgiving Entertaining

Intro

Thanksgiving has always been a time for family, friends, and unforgettable meals. As a child, I remember the warmth of the kitchen, the smell of spices, and the sound of laughter that filled our home. My grandmother would always have a special treat ready for us kids—a homemade pumpkin spice ice cream that was both comforting and delicious. Now that I host Thanksgiving, I’ve adapted her recipe to make it even easier, so I can spend more time with my loved ones and less time in the kitchen. This Easy Thanksgiving Entertaining recipe brings together the flavors of the season with minimal fuss, making it the perfect addition to your holiday table.

Why You’ll Love It

This ice cream recipe is a delightful twist on traditional Thanksgiving desserts. Here are a few reasons why you’ll fall in love with it:

  • Simple Ingredients: With just a handful of ingredients, you can create a dessert that’s both luxurious and comforting.
  • Quick Preparation: Spend less time cooking and more time enjoying with family and friends.
  • Seasonal Flavors: The combination of pumpkin spice and creamy goodness captures the essence of fall.
  • Kid-Friendly: This treat is a hit with kids and adults alike, making it perfect for gatherings.

Ingredients

  • 2 cups heavy cream
  • 1 cup whole milk
  • 1/2 cup sugar
  • 1 teaspoon vanilla extract
  • Pinch of salt
  • 1 cup crushed pumpkin spice cookies

Instructions

  1. In a large mixing bowl, whisk together the heavy cream, whole milk, sugar, vanilla extract, and salt until the sugar has completely dissolved.
  2. Gently fold in the crushed pumpkin spice cookies, ensuring they are evenly distributed throughout the mixture.
  3. Pour the mixture into an ice cream machine and freeze according to the manufacturer’s instructions.
  4. Once the ice cream reaches a soft-serve consistency, transfer it to an airtight container and freeze until firm, about 2-4 hours.
  5. When ready to serve, scoop into bowls and garnish with an additional pumpkin spice cookie for an extra touch of festivity and crunch.

Tips

For the best results, make sure your ice cream mixture is well chilled before adding it to the ice cream machine. This will help it freeze faster and achieve a creamier texture. If you don’t have an ice cream machine, you can pour the mixture into a shallow dish, freeze it, and stir every 30 minutes until it reaches the desired consistency.

Variations & Substitutions

If you’re looking to switch things up, consider these delicious variations:

  • Spiced Apple Cider: Replace the pumpkin spice cookies with crushed gingersnap cookies and add a teaspoon of cinnamon.
  • Chocolate Pumpkin: Stir in 1/2 cup of mini chocolate chips for a chocolatey twist.
  • Dairy-Free Option: Substitute coconut milk for heavy cream and almond milk for whole milk to make it dairy-free.

Storage

Store any leftover ice cream in an airtight container in the freezer for up to two weeks. To prevent ice crystals from forming, press a piece of plastic wrap directly onto the surface of the ice cream before sealing the container.

FAQ

Can I make this ice cream without an ice cream machine?

Yes, you can! Simply pour the mixture into a shallow dish and freeze, stirring every 30 minutes to break up ice crystals until it reaches the desired consistency.

How can I make this recipe more festive?

Consider adding a tablespoon of your favorite liqueur, such as bourbon or rum, for an adult version. You can also top the ice cream with caramel sauce or whipped cream for an extra indulgent treat.

Is there a way to make this ice cream less sweet?

Feel free to reduce the sugar to 1/4 cup if you prefer a less sweet dessert. The cookies will still provide plenty of flavor and sweetness.

Nutrition

While this ice cream is a treat, it can be enjoyed in moderation as part of a balanced diet. A single serving (1/2 cup) contains approximately:

  • Calories: 250
  • Fat: 18g
  • Carbohydrates: 22g
  • Protein: 3g

Conclusion

This Easy Thanksgiving Entertaining dessert is more than just ice cream—it’s a memory in the making. Perfect for sharing with loved ones, it’s a sweet reminder of the warmth and togetherness that the holiday season brings. Whether you’re serving it to a crowd or enjoying a quiet evening in, this ice cream is sure to become a cherished part of your Thanksgiving tradition. So go ahead, scoop up some joy, and savor the flavors of the season!

Related update: Easy Thanksgiving Entertaining

Related update: Cacao-Pecan Shortbread Cookies

Wild Blueberry Lemon Muffins | Made by Meaghan Moineau

Wild Blueberry Lemon Muffins

Intro

There’s something inexplicably comforting about the aroma of freshly baked muffins wafting through the house. It takes me back to Sunday mornings in my grandmother’s cozy kitchen, where the sun would gently stream through the lace curtains, casting delicate patterns on the worn wooden table. Those mornings were filled with the chatter of family and the irresistible scent of golden-brown muffins cooling on the counter. Today, I’m thrilled to share a recipe that captures that warmth and nostalgia: Wild Blueberry Lemon Muffins. These muffins combine the tartness of lemons with the sweet burst of wild blueberries, creating a delightful treat that’s perfect for breakfast, brunch, or any moment in between.

Why You’ll Love It

These Wild Blueberry Lemon Muffins are the embodiment of simple pleasures. Each bite offers a perfect balance of sweetness and tartness, with the wild blueberries providing juicy pops of flavor. The muffins are moist, tender, and crowned with a tangy lemon glaze that elevates them from ordinary to extraordinary. Whether you’re hosting a brunch or looking for a delightful weekday breakfast, these muffins are sure to impress. Plus, they’re incredibly easy to make, requiring just a few staple ingredients and minimal effort.

Ingredients

  • 2 cups all-purpose flour
  • 2 teaspoons baking powder
  • 1/4 teaspoon salt
  • 1/2 cup unsalted butter, softened
  • 1 cup granulated sugar, plus 1/8 cup for lemon zest
  • 1 large egg
  • 1 cup buttermilk
  • 1 teaspoon vanilla extract
  • 1 tablespoon fresh lemon juice
  • 1 tablespoon lemon zest
  • 1 cup canned wild blueberries, drained
  • 1 cup powdered sugar

Instructions

  1. Preheat your oven to 375°F (190°C). Line 16 muffin cups with paper liners.
  2. Mash 1/8 cup of sugar with the lemon zest in a small bowl until the sugar is moistened and fragrant.
  3. In a medium-sized bowl, whisk together the flour, baking powder, and salt. Set aside.
  4. Using an electric mixer, beat 1 cup of sugar and the softened butter together in a large bowl until light and fluffy.
  5. Add the egg to the butter mixture, beating well after each addition.
  6. Mix in the buttermilk, vanilla extract, and lemon sugar gradually, ensuring each ingredient is fully incorporated.
  7. Slowly add the flour mixture to the wet ingredients, mixing until the batter is smooth and free of lumps.
  8. Fold in the wild blueberries gently with a large spatula, being careful not to crush them.
  9. Divide the batter equally among the prepared muffin tins, filling each about 3/4 full.
  10. Bake for about 35 minutes, or until a cake tester inserted into the center of a muffin comes out clean.
  11. Allow the muffins to cool in the pan for a few minutes before transferring them to a wire rack.
  12. Prepare the lemon glaze by combining the lemon juice, remaining lemon zest, and powdered sugar in a small bowl.
  13. Spoon about 1 tablespoon of glaze over each muffin, letting it drip down the sides.

Tips

For the best muffins, ensure your butter is at room temperature before you start. This allows it to incorporate more air, resulting in fluffier muffins. Also, when folding in the blueberries, do so gently to avoid breaking them and turning your batter purple. Finally, don’t skip the glaze—it’s what ties everything together with a delightful zing!

Variations & Substitutions

If you can’t find canned wild blueberries, fresh or frozen ones will work just as well. Just make sure to pat them dry if using frozen to avoid excess moisture. For a dairy-free version, substitute the buttermilk with almond milk mixed with a splash of lemon juice. You can also try adding a handful of chopped nuts, like almonds or walnuts, for some extra texture.

Storage

These muffins are best enjoyed fresh, but they can be stored in an airtight container at room temperature for up to three days. If you want to keep them longer, they freeze beautifully. Just wrap each muffin individually in plastic wrap and place them in a resealable plastic bag. They can be frozen for up to two months. To enjoy, simply thaw at room temperature or warm them in the oven for a few minutes.

FAQ

Can I use regular blueberries instead of wild blueberries?

Absolutely! Regular blueberries can be used as a substitute if wild blueberries aren’t available. Keep in mind that wild blueberries tend to be smaller and more intensely flavored, so you might notice a slight difference in taste and texture with regular blueberries.

How can I make my muffins rise higher?

To achieve higher rising muffins, make sure your baking powder is fresh. Additionally, starting with a higher oven temperature for the first 5 minutes of baking can create a burst of steam, which helps the muffins rise. Then, reduce the temperature to the specified 375°F for the remainder of the baking time.

Can I make these muffins gluten-free?

Yes, you can make these muffins gluten-free by using a gluten-free all-purpose flour blend. Ensure the blend contains xanthan gum or a similar binding agent, which helps mimic the texture of traditional flour.

Nutrition

Each muffin is approximately 210 calories, with 8g of fat, 32g of carbohydrates, and 2g of protein. The nutritional content can vary slightly based on ingredient brands and portion sizes.

Conclusion

These Wild Blueberry Lemon Muffins are more than just a treat; they’re a little piece of nostalgia wrapped in a paper liner. With their sunny lemon flavor and sweet blueberries, they’re sure to brighten any day. Whether you enjoy them with a cup of tea or as a grab-and-go breakfast, these muffins are a delightful reminder of the simple joys in life. I hope this recipe brings as much joy to your kitchen as it has to mine. Happy baking!

Related update: Wild Blueberry Lemon Muffins

Chocolate Pavlova with Winter Fruit | Made by Meaghan Moineau

Chocolate Pavlova with Winter Fruit

Introduction

There’s something magical about a pavlova, with its crisp exterior and soft, marshmallow-like center. This Chocolate Pavlova with Winter Fruit is a delightful twist on a classic dessert that’s both elegant and rustic. I remember the first time I made it for a family gathering during the holidays. The house was filled with the warmth of laughter and the aroma of cocoa. My grandmother, a stickler for traditional pavlova, was dubious at first, but after her first bite, she nodded approvingly and asked for seconds. That moment, her approval, made this recipe a cherished family favorite.

Why You’ll Love It

This chocolate pavlova is a showstopper! It’s perfect for impressing guests at any gathering or for a cozy night in. The combination of rich chocolate and the tartness of winter fruits creates a harmonious balance of flavors. The meringue is light and airy, yet decadently chocolatey, making it an indulgent treat without being too heavy. Plus, it’s naturally gluten-free, making it suitable for a variety of dietary needs.

Ingredients

  • 6 large egg whites, room temperature
  • 1/4 teaspoon cream of tartar
  • 1 cup granulated sugar
  • 1 tablespoon dutch process cocoa powder
  • 1 teaspoon tapioca starch
  • 1 teaspoon vanilla bean paste
  • 1 teaspoon white vinegar
  • 2 ounces dark 70% chocolate, finely chopped
  • 1 cup heavy cream
  • 2 tablespoons confectioner’s sugar
  • 1 teaspoon vanilla extract
  • Assorted fresh winter fruit (e.g., pomegranate seeds, kiwi, clementines)

Instructions

  1. Preheat the oven to 225°F convection or 250°F conventional. Line a rimmed baking sheet with a Silpat or parchment paper.
  2. In the bowl of a stand mixer fitted with a whisk attachment, whip the egg whites, vanilla bean paste, and cream of tartar until soft peaks begin to form.
  3. Sift together the sugar, cocoa powder, and tapioca starch. With the motor running at low speed, add the sugar mixture 1 tablespoon at a time to the egg whites.
  4. Add the vinegar and dark chocolate. Whip until fully incorporated and the egg whites hold a stiff peak (the whip attachment will have a sturdy egg white tail when removed).
  5. Scoop the mixture onto the prepared baking sheet. Shape into a 9- to 10-inch circle with a slightly higher edge.
  6. Bake for 1 hour and 15 minutes, then turn off the oven and allow the pavlova to cool completely in the oven with the door slightly ajar.
  7. Just before serving, whip the heavy cream with confectioner’s sugar and vanilla extract until soft peaks form.
  8. Spoon the whipped cream onto the pavlova and top with fresh winter fruit.

Tips

For the fluffiest meringue, ensure your mixing bowl and whisk are clean and free from any grease. Use room temperature egg whites for better volume. When adding sugar, do so gradually to avoid deflating the meringue. Baking the pavlova slowly at a low temperature is key to achieving the perfect texture.

Variations & Substitutions

You can play around with different flavors by adding a pinch of cinnamon or nutmeg to the meringue. For a fruit topping, consider using berries, mango, or passion fruit in the summer months. If you don’t have tapioca starch, cornstarch is an adequate substitute. For a dairy-free version, use coconut cream in place of heavy cream.

Storage

The pavlova is best enjoyed the day it is assembled. However, the meringue base can be made a day in advance and stored in an airtight container at room temperature. Once topped with cream and fruit, it should be consumed within a few hours, as the moisture can soften the meringue.

FAQ

Can I make this recipe ahead of time?

Absolutely! You can prepare the meringue base a day in advance and store it in an airtight container. Assemble with cream and fruit just before serving for optimal texture.

What can I do if my pavlova cracks?

Cracks are common and often add to the rustic charm of a pavlova. If you find the cracks too large, you can use whipped cream as a delicious “glue” to hold pieces together. It will still taste wonderful!

Nutrition

This pavlova is relatively low in calories compared to other desserts, thanks to its light meringue base. The fresh fruit topping adds natural sweetness and vital nutrients. However, as with all treats, moderation is key, especially for those watching their sugar intake.

Conclusion

This Chocolate Pavlova with Winter Fruit is a delightful dessert that brings joy and indulgence to any occasion. Its beautiful presentation and delicious flavors make it a memorable addition to your dessert repertoire. Whether you’re making it for a holiday feast or a simple family dinner, it’s sure to impress and bring smiles to the table. Enjoy this recipe and create sweet memories with your loved ones!

Related update: Chocolate Pavlova with Winter Fruit

Home made coffee ice cream | Made by Meaghan Moineau

Homemade Coffee Ice Cream

Intro

There’s something magical about homemade ice cream. For me, it’s not only about the rich, creamy texture or the way it melts on your tongue, but it’s also about the memories it evokes. I remember summer afternoons spent at my grandmother’s house, where the scent of freshly brewed coffee mingled with laughter and the sound of churning ice cream. Those afternoons were a delightful blend of warmth, family, and the anticipation of a sweet treat. This homemade coffee ice cream recipe is a tribute to those cherished moments, a perfect blend of nostalgia and indulgence.

Why You’ll Love It

This coffee ice cream is a treat for coffee lovers and dessert enthusiasts alike. It’s rich, creamy, and perfectly captures the robust flavor of your favorite brew. Whether you’re enjoying it on a hot summer day or alongside a slice of warm pie in the cooler months, this ice cream is sure to delight. Plus, making it at home allows you to control the sweetness and the intensity of the coffee flavor, ensuring it’s just right for you. With its luxurious texture and bold taste, this recipe is bound to become a favorite.

Ingredients

  • 2 cups cream
  • 4 egg yolks
  • 2 tablespoons coffee granules
  • 1 cup milk
  • 3/4 cup sugar
  • 1 teaspoon vanilla extract

Instructions

  1. Combine the cream, milk, sugar, and coffee in a medium, heavy saucepan. Bring to a gentle boil over medium heat; remove from the heat and set aside.
  2. Beat the egg yolks in a medium bowl. Whisk 1 cup of the hot cream into the egg yolks. Add the vanilla extract.
  3. Gradually add the egg mixture in a slow, steady stream, to the hot cream. Cook over low heat, stirring constantly until slightly thickened, about 4-5 minutes.
  4. Remove from the heat and strain through a fine mesh strainer into a clean container.
  5. Cover with plastic wrap, pressing down against the surface to keep a skin from forming. Chill in the refrigerator for at least 2 hours.
  6. Pour the mixture into an ice cream machine and churn until frozen (according to the manufacturer’s instructions).
  7. Transfer to a plastic container and place in the freezer for a few hours before serving.
  8. Serving: take it out of the freezer for 5-10 minutes before serving, or longer, so it comes to the right scooping temperature.
  9. Easy suggestion: ice cream is best served in chilled glass or porcelain bowls. Scoop it with a hot, but dry, ice-cream spoon (soak it in boiling water, then wipe dry).

Tips

Here are some handy tips to ensure your homemade coffee ice cream turns out perfect every time:

  • Use high-quality coffee granules for the best flavor. Instant coffee works well, but freshly ground coffee can elevate the taste even more.
  • For a smoother texture, ensure that the custard mixture is strained well to remove any cooked egg bits.
  • Keep the mixing bowls and utensils chilled to ensure the ice cream base stays as cold as possible before churning.

Variations & Substitutions

If you’d like to experiment with this recipe, consider these variations and substitutions:

  • Decaf Option: Use decaffeinated coffee granules for a caffeine-free version.
  • Dairy-Free: Substitute the milk and cream with coconut milk for a dairy-free version. The coconut flavor pairs beautifully with coffee.
  • Add-Ins: Mix in some chocolate chips, crushed nuts, or a swirl of caramel or chocolate sauce during the last few minutes of churning for added texture and flavor.

Storage

Store your homemade coffee ice cream in an airtight container in the freezer. For the best texture and flavor, enjoy it within two weeks. To prevent ice crystals, press a piece of plastic wrap directly onto the surface of the ice cream before sealing the container.

FAQ

Can I make this ice cream without an ice cream maker?

Yes, you can make this recipe without an ice cream maker. Pour the chilled mixture into a shallow dish and place it in the freezer. Stir it every 30 minutes until it reaches the desired consistency. This method may result in a slightly less creamy texture, but it’s still delicious!

How can I make the coffee flavor more intense?

If you prefer a stronger coffee flavor, increase the amount of coffee granules by an additional tablespoon, or use espresso powder instead of regular coffee granules.

Nutrition

This ice cream is a rich and indulgent treat, so it’s best enjoyed in moderation. Each serving contains approximately:

  • Calories: 300
  • Fat: 20g
  • Sugar: 25g
  • Protein: 4g

Conclusion

Homemade coffee ice cream is a wonderful way to indulge your love for coffee and ice cream in one delightful scoop. Its creamy texture and deep coffee flavor are sure to satisfy any cravings you have. Whether you’re making it for a special occasion or simply to enjoy at home, this recipe is bound to become a favorite. So gather your ingredients, start churning, and prepare to savor every delicious bite. Enjoy the sweet nostalgia of homemade ice cream with this delightful coffee-flavored treat!

Related update: Home made coffee ice cream

Related update: Chocolate Pavlova with Winter Fruit

Zabaglione with Roasted Plums | Made by Meaghan Moineau

Zabaglione with Roasted Plums

Intro

There’s something incredibly comforting about the gentle sizzle of plums roasting in the oven, their sweet fragrance perfuming the entire kitchen. Zabaglione with Roasted Plums is a dessert that transports me back to my childhood, where Sunday afternoons were spent in my grandmother’s cozy kitchen. She would prepare this delightful treat as the sun dipped below the horizon, its warmth mirrored by the glow of her smile. This dessert is not just a dish; it is a cherished memory passed down through generations, capturing the essence of Italian comfort food.

Why You’ll Love It

This Zabaglione with Roasted Plums is a dessert that will captivate your senses with its delightful blend of flavors and textures. The creamy, frothy zabaglione pairs perfectly with the juicy, caramelized plums, creating a harmonious balance of sweetness and tartness. It’s an elegant yet simple dessert that is sure to impress your guests, yet easy enough to make for a special family dinner. The aromatic brandy adds a sophisticated touch, while the hint of salt enhances the natural sweetness of the plums. This dish is a testament to the beauty of Italian culinary tradition, bringing warmth and joy to any occasion.

Ingredients

  • Italian plums
  • Sugar
  • Egg yolks
  • Mixed plum brandy
  • Kosher salt

Instructions

  1. Preheat your oven to 400°F (200°C).
  2. Place the plums on a rimmed cookie sheet lined with parchment paper for easier cleanup.
  3. Sprinkle the plums with 2 tablespoons of sugar.
  4. Roast the plums in the oven until they are browning and tender but not falling apart, about 15 minutes.
  5. Meanwhile, bring about 2 inches of water to a bare simmer in a saucepan over medium-high heat. Reduce the heat to maintain a bare simmer.
  6. In a round-bottomed metal mixing bowl, combine the egg yolks, remaining 4 tablespoons of sugar, mixed plum brandy, and a pinch of kosher salt. Whisk thoroughly.
  7. Set the bowl over the simmering water, ensuring the base of the bowl does not touch the water, and whisk continuously.
  8. The egg yolks will begin to froth, lighten, and grow greatly in volume. If you sense that the yolks are at risk of scrambling, quickly remove the bowl from the heat and whisk to cool slightly, then continue.
  9. When soft peaks form, after 5 to 10 minutes, the zabaglione is done.
  10. Transfer the zabaglione to a clean bowl, cover, and refrigerate.
  11. To serve, place 6 plum halves in the bottom of each of 4 glasses. Give the zabaglione a quick whisk and spoon it on top of the plums.
  12. Serve immediately and enjoy!

Tips

For the perfect zabaglione, it’s crucial to maintain a gentle heat under the bowl to prevent the eggs from scrambling. If you don’t have a round-bottomed mixing bowl, a regular metal bowl can work, but be extra cautious with the heat. Whisking continuously is key to achieving that light, airy texture. Additionally, using a good quality plum brandy will enhance the flavor profile, creating a more refined dessert experience.

Variations & Substitutions

If Italian plums are not in season, you can substitute them with other stone fruits such as peaches or nectarines. For a non-alcoholic version, replace the plum brandy with a splash of vanilla extract and a little extra sugar for sweetness. You can also experiment with different types of sugar, like brown sugar or honey, to add a different depth of flavor to the dessert.

Storage

This dessert is best enjoyed fresh, but if you have leftovers, store the zabaglione and roasted plums separately in airtight containers in the refrigerator. They will keep for up to two days. Before serving, give the zabaglione a gentle whisk to restore its creamy consistency. Avoid freezing the zabaglione, as it can affect the texture.

FAQ

Can I make zabaglione without alcohol?

Yes, you can make a non-alcoholic version of zabaglione by substituting the plum brandy with a splash of vanilla extract and a little extra sugar to maintain the sweetness. This will still give you a deliciously creamy dessert without the alcohol.

What can I serve with zabaglione and roasted plums?

Zabaglione with roasted plums pairs beautifully with a crisp biscotti or a light almond cookie for added texture. You could also serve it alongside a scoop of vanilla ice cream or a dollop of whipped cream for an extra indulgent treat.

Nutrition

This dessert provides a delightful balance of flavors with a moderate calorie count, making it a perfect treat for special occasions. The plums offer a good source of vitamins and antioxidants, while the eggs provide protein. However, due to the sugar and brandy, it’s best enjoyed in moderation.

Conclusion

Zabaglione with Roasted Plums is more than just a dessert; it’s a celebration of flavors and a testament to the joy of cooking with love. Whether you’re rekindling cherished memories or creating new ones, this dish is sure to become a beloved part of your culinary repertoire. With its delicate sweetness and rich flavors, it’s a perfect way to end any meal. Enjoy this little taste of Italy and share it with those you love.

Related update: Zabaglione with Roasted Plums

Related update: Home made coffee ice cream

Fall Fruit Compote | Made by Meaghan Moineau

Fall Fruit Compote

Intro

There’s something magical about fall—the crisp air, the vibrant colors, and the comforting aroma of spices and fruits mingling together. Growing up, fall was always my favorite season. I remember sitting in my grandmother’s cozy kitchen, the windows fogging up as she cooked her famous fruit compote. The sweet and tangy smell would waft through the house, inviting everyone to gather around the table. Her secret? A touch of apple cider vinegar that added just the right amount of zing. Now, I carry on her tradition with my own version of this delightful Fall Fruit Compote, and I can’t wait to share it with you!

Why You’ll Love It

This Fall Fruit Compote is a hug in a bowl. Whether you’re serving it up as a side dish, a topping for potato latkes, or simply enjoying it on its own, this recipe is sure to warm your heart and soul. Here’s why you’ll absolutely love it:

  • Easy to Make: With just a few simple steps, you can have this delicious compote ready in no time.
  • Versatile: Serve it warm or cold, with breakfast or dessert—it complements any meal!
  • Full of Fall Flavors: The combination of apples, pears, and cinnamon captures the essence of autumn in every bite.
  • Customizable: Easily adjust the sweetness or tweak the spices to suit your taste.

Ingredients

  • 1 tablespoon butter
  • 2 cups diced honeycrisp apples
  • 1 cup diced pears
  • 1/2 cup dried cherries
  • 1 tablespoon apple cider vinegar
  • 1 cup apple juice, plus more as needed
  • 1/4 cup brown sugar
  • 1 cinnamon stick

Instructions

  1. Melt the butter in a medium saucepan over high heat.
  2. Add the diced apples, pears, cherries, vinegar, apple juice, brown sugar, and cinnamon stick.
  3. Cook for 5 minutes, stirring occasionally.
  4. Lower the heat to medium and cook for a few minutes more, until the fruit is tender and the liquid has boiled away.
  5. If necessary, add a bit more apple juice to keep the fruit from scorching.
  6. Remove the cinnamon stick and serve warm, ideally with potato latkes or your favorite dish.

Tips

Here are a few tips to ensure your compote turns out perfectly:

  • Choose the Right Apples: Honeycrisp apples are ideal for this recipe as they hold their shape well and add a natural sweetness.
  • Monitor the Liquid: Keep an eye on the liquid level to prevent the fruit from burning. Add more apple juice as needed.
  • Adjust Sweetness: Feel free to add more or less brown sugar based on your preference.

Variations & Substitutions

One of the best things about this compote is its adaptability. Here are some variations and substitutions you might consider:

  • Fruit Variations: Swap out the pears for peaches or add cranberries for a tart twist.
  • Sugar Alternatives: Use maple syrup or honey instead of brown sugar for a different sweetness profile.
  • Spice It Up: Add a pinch of nutmeg or cloves for extra warmth.

Storage

This delicious compote can be stored in an airtight container in the refrigerator for up to a week. Reheat gently on the stove or in the microwave before serving. You can also freeze it for up to three months—just thaw and warm it before enjoying.

FAQ

Can I use fresh cherries instead of dried?

Yes, fresh cherries can be used, though they will add more moisture to the compote. You might need to reduce the amount of apple juice slightly to compensate.

Is there a way to make this recipe vegan?

Absolutely! Simply substitute the butter with a plant-based alternative, such as coconut oil or vegan butter, and you’re good to go.

Can I make this compote in advance?

Definitely! This compote tastes even better the next day, as the flavors have more time to meld together. Just store it in the fridge and reheat when you’re ready to serve.

Nutrition

This Fall Fruit Compote is not only delicious but also packed with nutrients. Apples and pears are high in fiber and vitamin C, while cherries add antioxidants. While it does include sugar, you can easily adjust the amount to fit your dietary needs.

Conclusion

There you have it—a warm, comforting dish that captures the essence of fall in every bite. Whether you’re gathering with family or simply indulging in a cozy night at home, this Fall Fruit Compote is sure to be a hit. I hope it brings as much joy to your table as it does to mine. Happy cooking!

Related update: Fall Fruit Compote

Related update: Zabaglione with Roasted Plums

Caramel ice cream | Made by Meaghan Moineau

Decadent Homemade Caramel Ice Cream

Intro

There’s something truly magical about homemade ice cream, especially when it’s infused with the rich, buttery flavor of caramel. This recipe for caramel ice cream takes me back to summers spent in my grandmother’s kitchen, where the aroma of simmering sugar and cream would fill the air. We’d gather around the table eagerly waiting for the first scoop of freshly churned ice cream, savoring every bite as if it were a treasure. Today, I’m thrilled to share this delightful recipe that promises to evoke the same warm memories and smiles in your home.

Why You’ll Love It

This caramel ice cream is a creamy, indulgent treat that’s surprisingly simple to make. Its rich flavor profile will satisfy any sweet tooth, and the smooth texture is perfect for hot summer days or as a dessert for a cozy night in. Whether you’re an ice cream aficionado or a caramel lover, this recipe is sure to become a family favorite.

Ingredients

  • 2 cups sugar
  • 1 cup water, divided
  • 4 large eggs
  • 1 cup powdered sugar
  • 2 cups heavy cream
  • 1/2 teaspoon salt
  • 1 teaspoon vanilla extract

Instructions

  1. In a large skillet, combine the sugar and 1/2 cup of water over medium-high heat. Stir occasionally, allowing the sugar to dissolve and the mixture to come to a boil.
  2. Continue boiling the sugar mixture for about 5 minutes until it reaches a dark brown color. Be careful not to burn it.
  3. Remove the skillet from the heat and gradually stir in the remaining 1/2 cup of water. Allow the caramel to cool to room temperature and set aside.
  4. In a medium bowl, beat the eggs for 3 minutes until they are thick and light yellow in color.
  5. Gradually beat in the powdered sugar until well combined.
  6. Stir in the heavy cream, salt, and vanilla extract.
  7. Gently stir in the caramel mixture until smooth.
  8. Cover the mixture and chill in the refrigerator for at least 4 hours or overnight.
  9. Pour the chilled mixture into an ice cream machine and churn according to the manufacturer’s instructions until frozen.
  10. Transfer the ice cream to a plastic container and place it in the freezer for at least an hour before serving.
  11. Before serving, let the ice cream sit at room temperature for 5-10 minutes to reach the perfect scooping consistency.

Tips

For best results, serve your caramel ice cream in chilled glass or porcelain bowls. Use a hot, dry ice cream scoop for the perfect scoop every time—simply dip the scoop in boiling water and wipe it dry before using.

Variations & Substitutions

If you’re looking to switch things up, consider adding a pinch of sea salt to the caramel for a salted caramel twist. Alternatively, you could swirl in some chocolate chips or nuts during the churning process for added texture and flavor. For those who prefer a lighter version, substitute half of the heavy cream with milk.

Storage

Store your caramel ice cream in an airtight container in the freezer. It will keep for up to two weeks, although we doubt it will last that long! Just be sure to allow it to soften at room temperature before scooping.

FAQ

Can I make this recipe without an ice cream machine?

Yes! If you don’t have an ice cream machine, simply pour the mixture into a shallow dish and place it in the freezer. Stir every 30 minutes for the first few hours to break up ice crystals, then freeze until firm.

How can I prevent ice crystals from forming?

To prevent ice crystals, ensure that your mixture is thoroughly chilled before churning. Using an ice cream machine also helps achieve a smoother texture by churning air into the mixture as it freezes.

Nutrition

This recipe yields approximately 8 servings. Each serving contains about:

  • Calories: 350
  • Fat: 22g
  • Carbohydrates: 38g
  • Protein: 4g

Conclusion

Making caramel ice cream from scratch is a rewarding experience that brings joy to both the cook and those lucky enough to enjoy the results. With its rich flavor and creamy texture, this recipe is sure to become a staple in your culinary repertoire. Whether you’re serving it at a family gathering or enjoying a quiet night in, this homemade treat is sure to impress. So, gather your ingredients, channel your inner chef, and let the magic of caramel ice cream unfold in your kitchen!

Related update: Caramel ice cream