Cheesy Bacon Burger with Spicy Chipotle Aiolo Sauce | Made by Meaghan Moineau

Cheesy Bacon Burger with Spicy Chipotle Aioli Sauce

Intro

There’s something about the sizzle of a burger on the grill that takes me back to summer evenings spent in my grandmother’s backyard. The air would be filled with the aroma of sizzling meat and the laughter of family members gathering around the picnic table. It was during those cherished gatherings that I learned the art of creating the perfect burger, one that would be etched in our hearts as a family tradition. Today, I am excited to share with you a modern twist on that classic memory – the Cheesy Bacon Burger with Spicy Chipotle Aioli Sauce. This recipe not only brings back those nostalgic moments but also adds a spicy kick that will surely become a new favorite in your home.

Why You’ll Love It

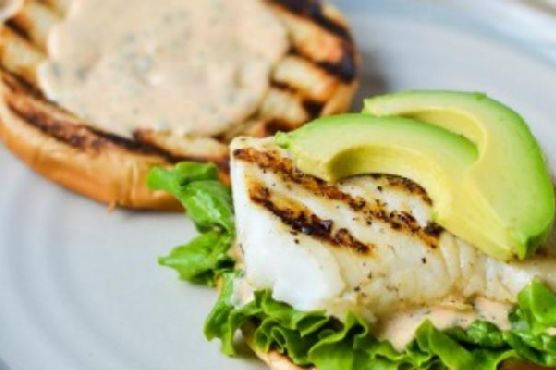
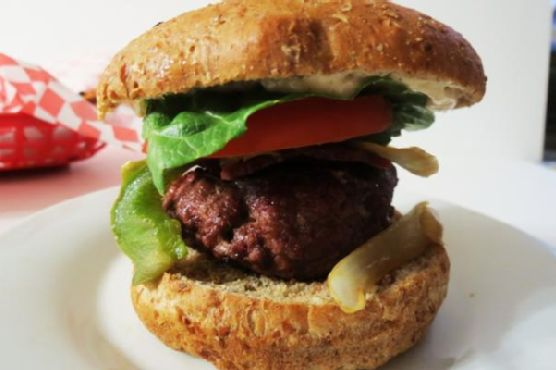
This Cheesy Bacon Burger is a delightful combination of flavors and textures that will make your taste buds dance with joy. The juicy beef patty encasing a creamy Swiss cheese center is topped with crispy turkey bacon, sautéed bell peppers, and onions, all nestled within a soft whole wheat bun. The real star, however, is the Spicy Chipotle Aioli Sauce, which adds a smoky and tangy kick to every bite. Whether you are hosting a backyard barbecue or simply craving a delicious homemade burger, this recipe is sure to impress.

Ingredients

  • Chipotle chiles in adobo
  • Fat-free mayonnaise
  • Garlic
  • Garlic powder
  • Greek yogurt
  • Green bell pepper
  • Ground cumin
  • Black ground pepper
  • Lean ground beef
  • Fresh lime juice
  • Onion
  • Whole wedges of Laughing Cow Swiss cheese
  • Cooked turkey bacon
  • Whole wheat hamburger buns

Instructions

  1. For the burgers: In a pan, cook turkey bacon according to the directions on the package. Once cooked, remove the bacon and set it aside.
  2. In the same pan, add bell pepper and onion and cook until tender, about 10 minutes.
  3. Add ground beef to a small bowl, along with garlic powder and ground pepper, and mix well.
  4. Divide the raw meat into 8 equal pieces (approximately 2oz each). Flatten each piece, place 1/2 a cheese wedge onto each piece of hamburger, and top with another piece of meat. Seal the edges to prevent the cheese from oozing out during cooking.
  5. Place the burgers on the grill and cook until done, about 5 minutes per side.
  6. Place the cooked burgers on buns and top with bacon, peppers & onions, and Spicy Chipotle Aioli Sauce.
  7. For the Spicy Chipotle Aioli Sauce: In a small bowl, whisk together chipotle chiles in adobo, fat-free mayonnaise, garlic, Greek yogurt, ground cumin, and fresh lime juice until combined. This makes 3/4 cup, or 12 tablespoons, of sauce.

Tips

To ensure your burgers are perfectly cooked, use a meat thermometer to check that the internal temperature reaches 160°F (71°C). If you prefer a milder sauce, reduce the amount of chipotle chiles. For an extra layer of flavor, toast your hamburger buns on the grill for a few minutes before assembling your burgers.

Variations & Substitutions

If you prefer a different cheese, cheddar or pepper jack would work wonderfully in this recipe. You can also substitute ground turkey for the beef if you want a leaner option. For a vegetarian twist, try using a plant-based burger patty and coconut bacon.

Storage

Store any leftover cooked burgers in an airtight container in the refrigerator for up to 3 days. The Spicy Chipotle Aioli Sauce can be stored in a separate container in the fridge for up to a week. Reheat the burgers in a pan or microwave before serving.

FAQ

Can I make the Spicy Chipotle Aioli Sauce in advance?

Absolutely! The sauce can be made a day or two in advance and stored in the refrigerator. This will allow the flavors to meld together even more, enhancing its delicious taste.

What is the best way to cook the burgers if I don’t have a grill?

If you don’t have a grill, you can cook the burgers in a skillet on the stovetop. Simply heat a little oil in the pan over medium-high heat and cook the burgers for about 5 minutes on each side, or until they reach the desired doneness.

Can I freeze the burgers?

Yes, you can freeze the uncooked burger patties. Place them on a baking sheet and freeze until solid, then transfer to a freezer-safe bag or container. They can be stored in the freezer for up to 3 months. Thaw in the refrigerator before cooking.

Nutrition

This Cheesy Bacon Burger recipe, when made with lean ground beef and turkey bacon, is a protein-packed meal. The use of Greek yogurt and fat-free mayonnaise in the aioli sauce also helps to keep the calorie count in check. As with any meal, moderation is key to maintaining a balanced diet.

Conclusion

The Cheesy Bacon Burger with Spicy Chipotle Aioli Sauce is more than just a meal; it’s a culinary experience that brings together the comfort of classic flavors with a modern twist. Whether you’re reminiscing about family gatherings or creating new memories, this burger is sure to be a hit with everyone. So fire up the grill, gather your loved ones, and savor the deliciousness of this mouthwatering creation!

Related update: Cheesy Bacon Burger with Spicy Chipotle Aiolo Sauce

Grilled Garlicky-Herbed Shrimp | Made by Meaghan Moineau

Grilled Garlicky-Herbed Shrimp

Intro

Growing up, summers meant endless family gatherings by the beach, where the air was filled with the tantalizing aroma of grilled seafood. My father, always at the helm of the grill, would prepare his signature shrimp dish. The combination of garlic, fresh herbs, and a hint of lemon always drew everyone to the table. Today, I’m excited to share a recipe that captures that nostalgia: Grilled Garlicky-Herbed Shrimp. It’s a dish that’s simple yet bursting with flavor, perfect for bringing a slice of summer to your table anytime.

Why You’ll Love It

This recipe is a celebration of bold flavors and simplicity. The garlicky-herb marinade infuses the shrimp with a delightful zest, while the grilling process adds a smoky finish that enhances each bite. It’s quick to prepare, requires minimal ingredients, and is versatile enough for both casual family dinners and elegant gatherings. Plus, it’s a healthy, protein-rich dish that complements a variety of sides.

Ingredients

  • 1 teaspoon chili pepper flakes
  • 1/4 cup extra virgin olive oil
  • 1/4 cup finely chopped coriander leaves
  • 4 cloves garlic, minced
  • 1 pound large shrimp, peeled and deveined
  • Zest of 1 lemon
  • 1/4 cup finely chopped parsley

Instructions

  1. In a large bowl, combine chili pepper flakes, olive oil, coriander leaves, garlic, lemon zest, and parsley.
  2. Add the shrimp to the bowl and toss to ensure each piece is thoroughly coated in the marinade.
  3. Cover the bowl with plastic wrap and refrigerate for at least 4 hours or overnight for maximum flavor infusion.
  4. Preheat your grill to medium heat. Once hot, place the shrimp on the grill.
  5. Cook the shrimp for about 5 minutes, turning once, until they turn pink and are slightly charred.
  6. Serve immediately, perhaps with a roasted red pepper salad for a Mediterranean twist.

Tips

For the best results, use fresh shrimp as they tend to absorb flavors better than frozen ones. If using wooden skewers, soak them in water for at least 30 minutes before grilling to prevent burning. Always keep an eye on the shrimp while grilling to avoid overcooking, which can make them tough.

Variations & Substitutions

Feel free to customize this recipe to your liking. You can substitute the coriander leaves with basil or cilantro for a different herby flavor. If you prefer a bit more heat, increase the amount of chili pepper flakes or add a dash of cayenne pepper. For a citrusy twist, add a splash of lime juice to the marinade.

Storage

Store any leftover grilled shrimp in an airtight container in the refrigerator for up to 2 days. Reheat them gently in a skillet over low heat to avoid overcooking. While it’s best to consume them fresh, you can freeze the marinated shrimp before grilling for up to 2 months.

FAQ

Can I use a grill pan instead of an outdoor grill?

Absolutely! A grill pan on the stovetop works perfectly fine. Just ensure it’s preheated before adding the shrimp, and cook them as you would on an outdoor grill.

Is it necessary to marinate the shrimp overnight?

While marinating overnight yields the best flavor, a minimum of 4 hours will still allow the shrimp to absorb the delicious garlicky-herb essence. If you’re short on time, even 1 hour can impart good flavor.

Nutrition

Each serving of Grilled Garlicky-Herbed Shrimp (approximately 4-5 shrimp) provides approximately:

  • Calories: 220
  • Protein: 25g
  • Fat: 12g
  • Carbohydrates: 3g
  • Fiber: 1g

This dish is high in protein and healthy fats, making it a nutritious choice for those seeking a balanced meal.

Conclusion

Grilled Garlicky-Herbed Shrimp is a dish that brings together the warmth of family gatherings and the vibrant flavors of the Mediterranean. It’s easy to prepare, incredibly flavorful, and sure to impress anyone who takes a bite. Whether you’re reminiscing about summer barbecues or simply looking to add a new favorite to your recipe repertoire, this shrimp dish is a delightful choice. Enjoy it with loved ones and create new memories around the table.

Related update: Grilled Garlicky-Herbed Shrimp

Related update: Cheesy Bacon Burger with Spicy Chipotle Aiolo Sauce

Grilled Fish Sandwiches | Made by Meaghan Moineau

Grilled Fish Sandwiches | Made by Meaghan Moineau

Title: "Grilled Fish Sandwiches: A Savory Dive Into Nostalgia"
Description:

Embark on a flavorful journey with our Grilled Fish Sandwiches, a dish that not only tantalizes your taste buds but also brings back cherished family memories. This main dish, rated 5 out of 10 in difficulty, combines the freshness of the sea with the comfort of home-cooked meals. Perfect for a family gathering or a casual dinner, these sandwiches promise to deliver a delightful culinary experience.


---


Grilled Fish Sandwiches: A Savory Dive Into Nostalgia

There's something incredibly comforting about the sizzle of fish on a hot grill and the aroma of fresh ingredients coming together to create a meal that’s both simple and satisfying. Our Grilled Fish Sandwiches are a nod to those warm summer evenings spent with family, where laughter and stories were shared over delicious homemade meals.


Ingredients:

- Butter


- White fish (your choice)


- Fresh parsley


- Garlic clove


- Hamburger buns


- Fresh lemon juice


- Mayonnaise


- Toppings: pickles, salt, salt & pepper, smoked paprika


- Vegetable oil


- Yellow mustard


Instructions:
1. Prepare the Aioli: In a small bowl, combine all of the ingredients for the aioli. Season to taste with salt and set aside.
2. Preheat the Grill: Preheat a grill pan (a nonstick skillet can be used as well) over medium-high heat until very hot.
3. Toast the Buns: Brush the cut-sides of the buns with melted butter. Drizzle a bit of oil into the pan and, using a wad of paper towel, carefully wipe out the excess to reinforce your nonstick surface. Toast the buttered sides of the buns, then set aside.
4. Cook the Fish: Pat the fish dry and season with salt & pepper (or seasoning of your choice). Drizzle a little oil over the fish and rub it evenly over the entire surface. Add the fish to the hot pan and cook, turning once, until the fish is cooked through. Cooking time will vary based on thickness, somewhere between 2-4 minutes per side.
5. Assemble the Sandwich: Serve the fish on the toasted buns, slathered with the aioli and your choice of toppings.
A Taste of Memory:

Every time I make these Grilled Fish Sandwiches, I'm transported back to my childhood summers at our family beach house. I remember my grandfather, a man of few words but full of culinary wisdom, standing by the grill with a content smile. As kids, we’d gather around, eagerly waiting for the first bite of his famous fish sandwiches. The crunch of the toasted bun, the tender fish, and the tangy aioli all came together perfectly. It was more than just a meal; it was a moment of connection, a celebration of family and food.


Difficulty Level: 5/10

This dish is simple enough for a weeknight dinner yet special enough for a weekend gathering. With a little preparation and a few quality ingredients, you can recreate this nostalgic family favorite with ease.


Classification: Main Dish

Whether served at a summer barbecue or a cozy family dinner, these Grilled Fish Sandwiches are sure to become a staple in your household, just as they have been in mine. Enjoy the simplicity, savor the flavor, and cherish the memories created around this delightful dish.

Read more about Appetizers

Read more about Main Dishes

Read more about Desserts