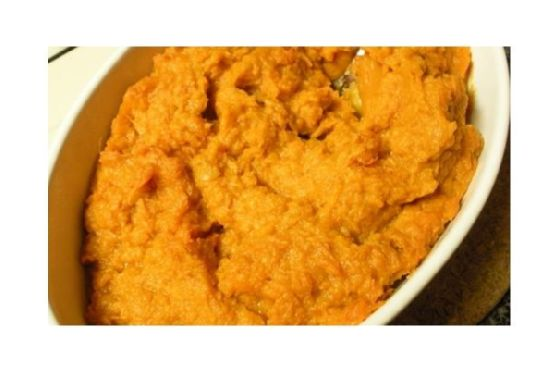
Mashed Potatoes with Garlic, Sage & Goat Cheese
Intro
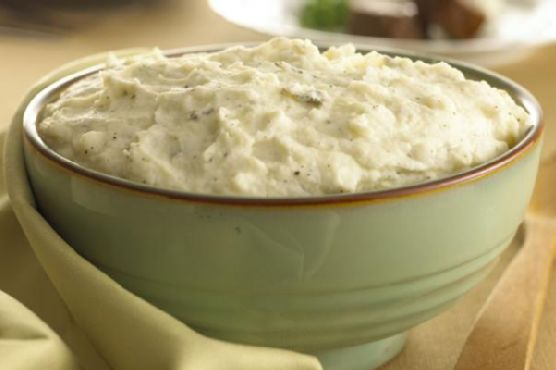
There’s a certain magic in the air when the aroma of garlic and sage wafts through the kitchen, bringing back fond memories of family gatherings and celebrations. I remember my grandmother’s cozy kitchen, where we would gather around the table, eagerly waiting for her famous mashed potatoes to be served. The rich, creamy texture and the subtle tang of goat cheese would melt in our mouths, creating a symphony of flavors that lingered long after the meal was over. Today, I’m excited to share with you a recipe that brings those cherished memories to life: Mashed Potatoes with Garlic, Sage & Goat Cheese. This dish is a perfect combination of comfort and elegance, making it a delightful addition to any meal.
Why You’ll Love It
This recipe for Mashed Potatoes with Garlic, Sage & Goat Cheese is a game-changer for several reasons:
- Rich and Creamy: The addition of goat cheese provides a luxurious creaminess that elevates traditional mashed potatoes.
- Flavorful: Garlic and sage add depth and complexity, transforming a simple side dish into a gourmet experience.
- Easy to Make: With just a handful of ingredients and straightforward instructions, you’ll have this dish ready in no time.
- Versatile: Perfect for holiday feasts, intimate dinners, or as a comforting treat on a chilly evening.
Ingredients
- 4 large baking potatoes, peeled and cubed
- 3 cloves of garlic, minced
- 1 Chavrie goat cheese pyramid (5.3 oz)
- 2 tablespoons olive oil
- 1 tablespoon fresh sage, finely chopped
- Salt and black pepper to taste
Instructions
- In a medium saucepan, cook the potatoes in salted water until tender, about 15 minutes.
- Drain the potatoes and return them to the saucepan.
- While still warm, add the olive oil, garlic, and Chavrie Goat Cheese.
- Whip the potatoes with hand-held mixers until the ingredients are blended and the desired consistency is obtained.
- Season with salt and black pepper to taste.
- Garnish with fresh sage before serving.
Tips
- Use Starchy Potatoes: Russet or Yukon Gold potatoes work best for this recipe, providing a fluffy and creamy texture.
- Don’t Overmix: To avoid gummy mashed potatoes, mix just until the ingredients are combined.
- Infuse the Oil: For an extra flavor boost, gently heat the olive oil with the minced garlic before adding it to the potatoes.
Variations & Substitutions
- Dairy-Free Option: Substitute the goat cheese with a dairy-free cheese alternative for a lactose-free version.
- Herb Variations: Experiment with different herbs like rosemary or thyme for a unique twist.
- Cheese Alternatives: Try using cream cheese or feta for a different flavor profile.
Storage
Store any leftover mashed potatoes in an airtight container in the refrigerator for up to 3 days. To reheat, gently warm them on the stove over low heat, adding a splash of milk or cream to restore their creamy consistency.
FAQ
Can I prepare the mashed potatoes ahead of time?
Yes, you can prepare the mashed potatoes a day in advance. Simply reheat them gently on the stove or in the microwave before serving, adding a little cream or milk to bring back their creamy texture.
What can I serve with these mashed potatoes?
These mashed potatoes are incredibly versatile and pair well with a variety of dishes, including roasted chicken, grilled steak, or even a hearty vegetable stew.
Can I freeze the mashed potatoes?
While it’s possible to freeze mashed potatoes, the texture may change upon thawing. If you choose to freeze them, store in an airtight container and reheat gently, adding cream or milk to improve texture.
Nutrition
Each serving of these mashed potatoes provides approximately:
- Calories: 230
- Protein: 5g
- Carbohydrates: 25g
- Fat: 12g
- Fiber: 3g
- Sugar: 2g
Conclusion
Mashed Potatoes with Garlic, Sage & Goat Cheese are more than just a side dish—they’re a celebration of flavors that bring warmth and joy to any table. Whether you’re hosting a holiday gathering or simply treating yourself to a cozy meal at home, this recipe is sure to impress. With its blend of rich, creamy textures and aromatic herbs, you’ll find yourself returning to this dish time and again. So gather your ingredients, embrace the nostalgia, and savor the comforting taste of these gourmet mashed potatoes. Happy cooking!
Related update: Mashed Potatoes with Garlic, Sage & Goat Cheese