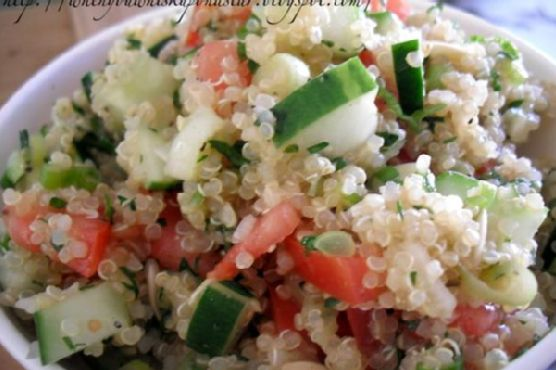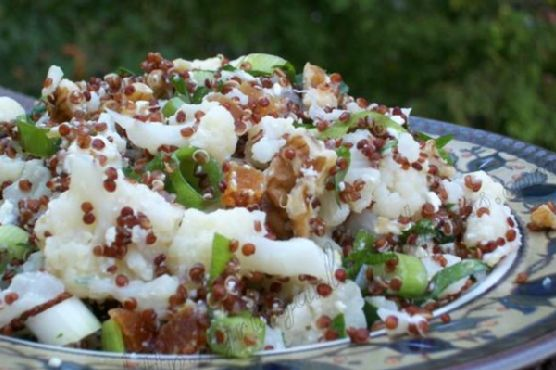
Red Quinoa and Roasted Cauliflower Salad
Intro
There’s something magical about the aroma of roasted cauliflower wafting through the kitchen. It transports me back to my grandmother’s cozy home, where the warmth of her cooking would fill every corner. She had a knack for taking simple ingredients and transforming them into something extraordinary. Inspired by her love for hearty, wholesome meals, I’ve created this Red Quinoa and Roasted Cauliflower Salad. It’s a dish that combines textures and flavors beautifully, making it a family favorite.
Why You’ll Love It
This salad is a delightful medley of nutty quinoa, sweet and chewy dried apricots, crunchy walnuts, and tangy feta cheese. The roasted cauliflower adds a savory depth, while the fresh green onions and parsley bring a burst of freshness. It’s a versatile dish that can be served warm or cold, making it perfect for any season. Whether you’re looking for a nutritious lunch, a side dish for dinner, or a potluck star, this salad fits the bill. Plus, it’s packed with protein, fiber, and healthy fats, ensuring you feel satisfied and nourished.
Ingredients
- 1 head of cauliflower
- 1 cup red quinoa
- 1/2 cup walnuts, chopped
- 1/2 cup dried apricots, chopped
- 1/2 cup feta cheese, crumbled
- 4 green onions, sliced
- 1/4 cup fresh parsley, chopped
- Salt and pepper to taste
- Juice of 1/2 a lemon
- 2 tablespoons olive oil
Instructions
- Cook the quinoa according to package directions. Set aside to cool slightly.
- Preheat the oven to 400°F (200°C).
- Cut the head of cauliflower into florets.
- Toss the cauliflower florets with olive oil, salt, and pepper. Arrange them on a baking sheet in a single layer.
- Roast the cauliflower in the preheated oven for 20 minutes or until tender and golden brown.
- Meanwhile, crumble the feta cheese and prepare the remaining ingredients: chop the walnuts, dried apricots, green onions, and parsley.
- In a large bowl, combine the cooked quinoa, roasted cauliflower, walnuts, apricots, feta cheese, green onions, and parsley.
- Drizzle with extra virgin olive oil and the juice from half a lemon. Toss to combine.
- Season with additional salt and pepper to taste.
- Serve immediately warm or chill in the refrigerator and serve cold.
Tips
For the best results, ensure your cauliflower florets are evenly coated in olive oil and spread out on the baking sheet to roast evenly. You can toast the walnuts for an extra layer of flavor. Simply place them in a dry skillet over medium heat, stirring frequently until fragrant. Be careful not to burn them! Finally, if you’re serving the salad cold, allow the flavors to meld by refrigerating it for at least an hour before serving.
Variations & Substitutions
This salad is highly adaptable to your preferences or dietary needs. You can swap the red quinoa for white or black quinoa, or even use farro or barley for a different grain base. If you’re not a fan of walnuts, try using almonds or pecans instead. For a vegan version, omit the feta cheese or replace it with a plant-based alternative. You can also add more veggies, like roasted cherry tomatoes or bell peppers, for extra color and nutrients.
Storage
This salad stores beautifully, making it an excellent option for meal prep. Place the salad in an airtight container and refrigerate for up to 4 days. If you’ve dressed the salad, the flavors will intensify over time, which many find delicious. However, if you prefer a fresher taste, consider storing the dressing separately and mixing it in just before serving.
FAQ
Can I make this salad ahead of time?
Absolutely! This salad is ideal for making ahead. Prepare all the components and combine them just before serving. This will keep the flavors vibrant and the textures perfect.
Is there a way to add more protein to this salad?
Yes, you can add grilled chicken, chickpeas, or tofu for additional protein. These options complement the existing flavors well and make the salad more filling.
What can I serve with this salad?
This salad is quite versatile and pairs well with grilled meats, such as chicken or fish. It’s also a great side dish for a barbecue or a potluck.
Nutrition
This Red Quinoa and Roasted Cauliflower Salad is not only delicious but also nutritious. It’s rich in plant-based protein from quinoa, healthy fats from walnuts and olive oil, and fiber from the cauliflower and dried apricots. It’s a well-rounded meal that will keep you energized and satisfied.
Conclusion
Whether you’re reminiscing about family meals or creating new memories, this Red Quinoa and Roasted Cauliflower Salad is a dish that brings people together. Its harmonious blend of flavors and textures makes it a standout choice for any occasion. I hope this recipe becomes a staple in your kitchen, just as it is in mine. Enjoy the journey of cooking and savor every bite!
Related update: Red Quinoa and Roasted Cauliflower Salad
Related update: Hush Puppies
Related update: Amaranth and Roast Veggie Salad