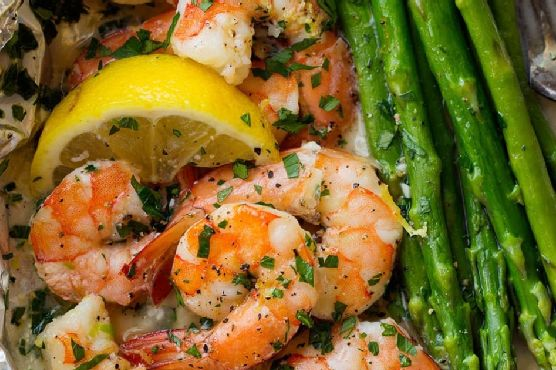
Shrimp and Asparagus Foil Packs with Garlic Lemon Butter Sauce
Intro
There’s something magical about the aroma of garlic and lemon wafting through the air, especially when it brings back memories of summer barbecues with family. I remember the first time I made these shrimp and asparagus foil packs. It was a warm evening, and my parents had come over for dinner. As the foil packs sizzled on the grill, we sat in the backyard, reminiscing about our family vacations to the coast. These foil packets quickly became a family favorite, capturing those cherished moments in every bite.
Why You’ll Love It
If you’re looking for a quick, wholesome meal that doesn’t skimp on flavor, these shrimp and asparagus foil packs are perfect for you. Here’s why:
- Easy to Prepare: Minimal prep work and cleanup make this an ideal dish for busy weeknights.
- Packed with Flavor: The garlic lemon butter sauce infuses the shrimp and asparagus with a burst of freshness and richness.
- Healthy and Nutritious: Loaded with protein and vitamins, this dish is both satisfying and guilt-free.
- Customizable: You can easily adjust the ingredients to suit your personal taste or dietary needs.
Ingredients
- Asparagus
- Diced butter
- Dry white wine
- Fresh parsley
- Garlic
- Fresh lemon juice
- Lemon zest
- Black salt and pepper
- Shrimp
Instructions
- Preheat a grill to medium-high heat (about 400 – 425 degrees).
- Cut 4 sheets of 14 by 12-inch heavy-duty aluminum foil and lay each piece separately on the countertop.
- Divide shrimp among packets near the center, then place asparagus to one side of the shrimp (going the long direction of the foil).
- Pour 1/2 Tbsp white wine over each packet.
- Sprinkle over garlic (1 tsp per packet) and lemon zest, then season with salt and pepper.
- Divide butter pieces evenly among packets, layering them over the shrimp and asparagus.
- Wrap packets and crimp edges together, then wrap ends up (don’t wrap too tight – keep a little extra space inside for heat to circulate).
- Grill, sealed side upward, until shrimp has cooked through, about 9 – 10 minutes.
- Carefully unwrap, then drizzle with lemon juice (or just serve with lemon wedges for spritzing) and sprinkle with parsley.
Tips
For the best results, here are a few tips to keep in mind:
- Choose Fresh Ingredients: Fresh shrimp and asparagus will make a significant difference in flavor.
- Don’t Overcook: Keep an eye on the grill to ensure the shrimp doesn’t overcook and become rubbery.
- Use Heavy-Duty Foil: This will prevent tearing and help the packets hold their shape.
Variations & Substitutions
Feel free to make this recipe your own with some variations:
- Protein Swap: Try using chicken or salmon if you prefer.
- Vegetable Add-Ins: Add bell peppers or cherry tomatoes for more color and variety.
- Herbal Twist: Substitute parsley with dill or basil for a different flavor profile.
Storage
If you have leftovers, store them in an airtight container in the refrigerator for up to 2 days. Reheat gently on the stovetop or in the microwave, adding a splash of water or broth to keep the shrimp moist.
FAQ
Can I prepare these foil packs in the oven?
Absolutely! If you don’t have a grill, you can bake the foil packs in the oven at 425 degrees for about 10-12 minutes until the shrimp is cooked through and the asparagus is tender.
What type of shrimp should I use?
Use large, peeled, and deveined shrimp for the best results. Fresh or frozen (thawed) shrimp both work well.
Is there a non-alcoholic substitute for the white wine?
Yes, you can use chicken broth or a mix of water and a splash of apple cider vinegar as a substitute for white wine.
Nutrition
This dish is not only delicious but also nutritious. It’s a great source of protein from the shrimp and vitamins from the asparagus. The lemon butter sauce adds healthy fats, making it a well-rounded meal. For those counting calories, you can adjust the amount of butter used to suit your dietary needs.
Conclusion
Shrimp and Asparagus Foil Packs with Garlic Lemon Butter Sauce is a recipe that combines simplicity with exceptional flavor. Whether you’re hosting a family barbecue or seeking a quick weeknight dinner, this dish delivers on all fronts. Try it out and create your own memories around the grill. Happy cooking!
Related update: Shrimp and Asparagus Foil Packs with Garlic Lemon Butter Sauce
Related update: My Drunken Fish Fillet