Blackened Cajun Chicken | Made by Meaghan Moineau

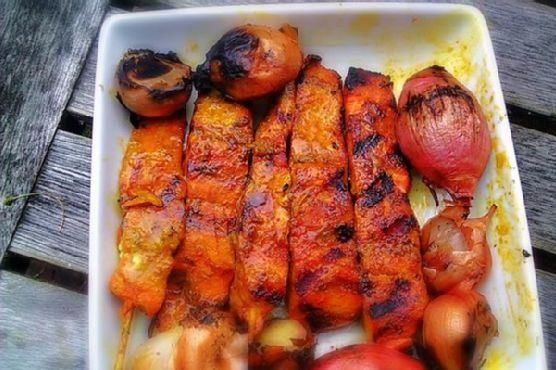
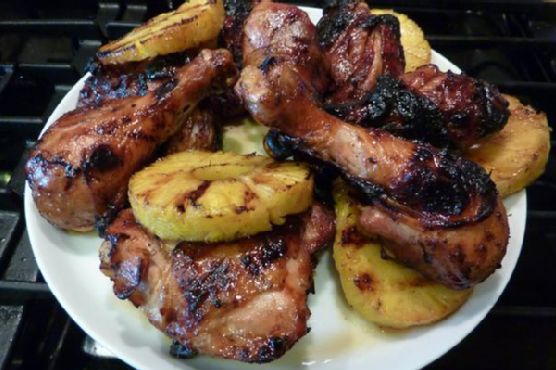
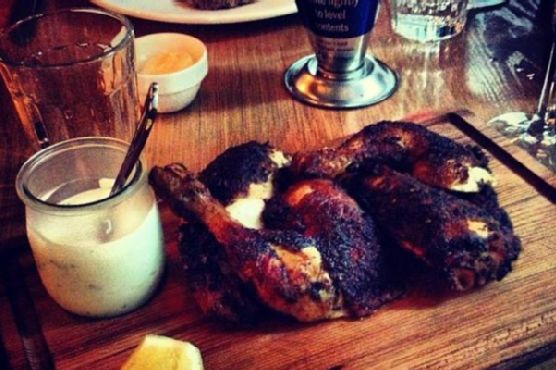
Blackened Cajun Chicken Recipe

Intro

There’s a certain magic in the air when the sun sets and the grill is fired up, filling the backyard with inviting aromas. Growing up, my family would gather around the grill during warm summer evenings, eagerly anticipating the sizzle of my grandmother’s famous Blackened Cajun Chicken. She had a way of turning simple ingredients into a feast for the senses, and her recipe has been a treasured heirloom, passed down through generations. Today, I’m thrilled to share this delightful dish with you, blending rich spices and succulent chicken into a symphony of flavors that will transport you to the heart of Louisiana.

Why You’ll Love It

This Blackened Cajun Chicken is a culinary gem that promises to captivate your taste buds. Here’s why you’ll fall in love with it:

  • Flavor Explosion: A harmonious blend of spices creates a bold, smoky flavor profile that is both spicy and savory.
  • Easy to Prepare: With minimal prep time and straightforward instructions, it’s perfect for both weeknight dinners and special occasions.
  • Healthy Option: Grilling the chicken ensures a lean, protein-rich meal that’s packed with nutrients.
  • Versatile: This dish pairs well with various sides, from salads to roasted vegetables, making it a versatile addition to your meal repertoire.

Ingredients

  • 2 bay leaves
  • 1 tablespoon black pepper
  • 2 tablespoons brown sugar
  • 1 tablespoon cayenne pepper
  • 1 tablespoon dried rosemary
  • 1 tablespoon dried thyme
  • 1 tablespoon dry mustard
  • 1 tablespoon garlic powder
  • 1 tablespoon ground cumin
  • 1 tablespoon onion powder
  • 2 tablespoons paprika
  • 1 tablespoon salt
  • 2 whole chickens

Instructions

  1. In a bowl, combine the bay leaves, black pepper, brown sugar, cayenne pepper, dried rosemary, dried thyme, dry mustard, garlic powder, ground cumin, onion powder, paprika, and salt to create your seasoning mix.
  2. Rub half of the seasoning mixture onto the chickens, ensuring even coverage.
  3. Place the seasoned chickens in a 13- by 9- by 2-inch baking pan. Cover and refrigerate overnight to allow the flavors to meld.
  4. When ready to cook, preheat your grill to medium heat.
  5. Grill the chickens, covered, over medium coals. Turn the chickens once during cooking.
  6. Grill for 30 to 45 minutes or until the juices run clear and the chicken is cooked through.
  7. Let the chicken rest for a few minutes before carving and serving.

Tips

For the best results, allow the chicken to marinate overnight. This will help the spices penetrate the meat, resulting in a more flavorful dish. If you’re short on time, even a few hours of marinating can make a noticeable difference. Additionally, using a meat thermometer can ensure your chicken is perfectly cooked, with an internal temperature of 165°F (75°C).

Variations & Substitutions

This recipe is a great base for experimentation. If you prefer a milder flavor, reduce the amount of cayenne pepper. Alternatively, if you’re a heat seeker, feel free to add extra! For a smoky twist, consider using smoked paprika in place of regular paprika. You can also substitute chicken breasts or thighs if you prefer them over whole chickens; just adjust the grilling time accordingly.

Storage

Leftover Blackened Cajun Chicken can be stored in an airtight container in the refrigerator for up to 3 days. To reheat, place the chicken in a preheated oven at 350°F (175°C) until warmed through. This dish also freezes well; just ensure it’s wrapped tightly before placing it in the freezer. It can be stored frozen for up to 3 months.

FAQ

Can I cook this chicken in the oven instead of on the grill?

Absolutely! If you don’t have access to a grill or prefer to use your oven, you can bake the chicken at 375°F (190°C) for about 50-60 minutes. Be sure to use a meat thermometer to ensure it’s cooked through.

What sides pair well with Blackened Cajun Chicken?

This dish pairs beautifully with a variety of sides. Consider serving it with classic Southern sides like coleslaw, cornbread, or dirty rice. For a lighter option, a fresh garden salad or grilled vegetables would complement the chicken nicely.

Can I make this recipe spicier?

Yes, you can easily adjust the heat level to suit your taste. Increase the amount of cayenne pepper or add a pinch of crushed red pepper flakes for extra spice. Remember, it’s always best to start with a little and add more as desired!

Nutrition

This recipe yields 4 servings, and each serving is a great source of protein. The seasoning blend is low in calories, with the majority of nutritional content coming from the chicken itself. For those monitoring their intake, this dish is high in protein while being relatively low in carbohydrates and fats, making it a balanced meal option.

Conclusion

Blackened Cajun Chicken is more than just a dish; it’s a nostalgic journey to the heart of Southern cuisine, bringing warmth, flavor, and a touch of spice to your table. Whether you’re hosting a backyard barbecue or simply looking for an exciting new recipe to try, this dish is sure to be a hit. I hope this recipe brings as much joy to your home as it has to mine. Happy cooking!

Related update: Blackened Cajun Chicken

Related update: Creamy Vegan Butternut Squash Mac and Cheese

Thai Street Vendor Salmon Skewers | Made by Meaghan Moineau

Thai Street Vendor Salmon Skewers

Intro

One of my fondest memories from a trip to Thailand was wandering through the vibrant night markets. The air was thick with the aroma of sizzling spices, and I was instantly drawn to a small cart where a street vendor was expertly grilling skewers of salmon. The delicate fish, perfectly charred, was complemented by a delightful mix of sweet, tangy, and spicy flavors. Inspired by that unforgettable experience, I have recreated a recipe that brings the essence of Thai street food to your home kitchen. These Thai Street Vendor Salmon Skewers are a delicious tribute to those bustling markets and the culinary adventures that await in every corner of Thailand.

Why You’ll Love It

This recipe is a surefire hit for several reasons. First, it captures the authentic flavors of Thai cuisine with a simple yet effective marinade that enhances the natural taste of salmon. The dish is quick to prepare, making it perfect for both weeknight dinners and entertaining guests. Plus, the skewers are not only flavorful but also fun to eat, reminiscent of an exotic street food experience. Lastly, the dish is healthy, offering omega-3-rich salmon paired with fresh yu choy, ensuring a nutritious meal.

Ingredients

  • 1 bunch yu choy, chilled
  • 2 tablespoons brown sugar
  • 1 tablespoon chili sauce
  • 2 tablespoons fish sauce
  • 1 tablespoon fresh ginger, minced
  • 1 teaspoon dried ground turmeric
  • 1 lime, juiced and zested
  • 1 large salmon fillet, skin removed

Instructions

  1. Remove skin from the salmon fillet and trim away any brown fatty areas.
  2. Place 8 bamboo skewers into the fillet running from the thick side to the thin side, about 1.5 inches apart.
  3. Slice the fillet so that you have individual pieces of salmon on the skewers.
  4. In a bowl, combine brown sugar, chili sauce, fish sauce, minced ginger (using a garlic press), dried ground turmeric, lime juice, and zest to make the marinade.
  5. Adjust the mix of ingredients to match your personal tastes.
  6. Place the salmon skewers in a deep bowl or a Ziploc bag and marinate with about half of the sauce. Reserve the rest for serving.
  7. Refrigerate for 30 minutes to an hour. Avoid marinating for longer as the lime juice can start to “cook” the fish.
  8. Grill the skewers on high heat until the salmon is cooked through and slightly charred.
  9. Serve with chilled raw yu choy, wrapping bits of the fish, and drizzle with the remaining sauce.

Tips

For the best results, use fresh salmon and ensure it is thoroughly cleaned and deboned. Soak the bamboo skewers in water for at least 30 minutes before threading the salmon to prevent them from burning on the grill. Keep a close eye on the grilling process, as the salmon cooks quickly and can easily overcook. If you’re using a charcoal grill, allow the coals to turn white before placing the skewers on the grill for more even cooking.

Variations & Substitutions

Feel free to experiment with this recipe by substituting the salmon with other types of fish such as trout or cod. For a vegetarian version, you can use firm tofu instead of fish, adjusting the grilling time as necessary. If yu choy is not available, baby bok choy or even lettuce leaves make good alternatives for wrapping the fish. To add a bit more heat, you can include finely chopped fresh chili peppers in the marinade.

Storage

Leftovers can be stored in an airtight container in the refrigerator for up to two days. When ready to eat, reheat the skewers in a preheated oven at 350°F (175°C) until warmed through. Keep in mind that the texture of the salmon may change slightly after refrigeration and reheating. The reserved sauce can be stored separately and used as a dipping sauce or salad dressing.

FAQ

Can I prepare the marinade in advance?

Yes, you can prepare the marinade a day in advance and store it in the refrigerator. Just make sure to marinate the salmon for no more than an hour to prevent it from getting too “cooked” by the lime juice.

What can I serve with Thai Street Vendor Salmon Skewers?

These skewers pair wonderfully with steamed jasmine rice or a simple cucumber salad. You can also serve them alongside a spicy Thai green papaya salad for a complete meal full of refreshing flavors.

Nutrition

This dish is rich in omega-3 fatty acids, thanks to the salmon, which supports heart health. Yu choy adds a dose of fiber, vitamins, and minerals, including vitamin C and calcium. The marinade ingredients like lime and ginger offer additional health benefits, such as improved digestion and anti-inflammatory properties.

Conclusion

These Thai Street Vendor Salmon Skewers are more than just a meal; they’re an invitation to explore the rich tapestry of Thai street food culture right from your own kitchen. With simple, fresh ingredients and a burst of flavors, this dish is sure to become a favorite in your home. Whether you’re reminiscing about past travels or dreaming of future adventures, these skewers offer a delightful taste of Thailand that you can enjoy any time. Happy cooking!

Related update: Thai Street Vendor Salmon Skewers

Related update: Drunken Turkey Chili

Shrimp and Asparagus Foil Packs with Garlic Lemon Butter Sauce | Made by Meaghan Moineau

Shrimp and Asparagus Foil Packs with Garlic Lemon Butter Sauce

Intro

There’s something magical about the aroma of garlic and lemon wafting through the air, especially when it brings back memories of summer barbecues with family. I remember the first time I made these shrimp and asparagus foil packs. It was a warm evening, and my parents had come over for dinner. As the foil packs sizzled on the grill, we sat in the backyard, reminiscing about our family vacations to the coast. These foil packets quickly became a family favorite, capturing those cherished moments in every bite.

Why You’ll Love It

If you’re looking for a quick, wholesome meal that doesn’t skimp on flavor, these shrimp and asparagus foil packs are perfect for you. Here’s why:

  • Easy to Prepare: Minimal prep work and cleanup make this an ideal dish for busy weeknights.
  • Packed with Flavor: The garlic lemon butter sauce infuses the shrimp and asparagus with a burst of freshness and richness.
  • Healthy and Nutritious: Loaded with protein and vitamins, this dish is both satisfying and guilt-free.
  • Customizable: You can easily adjust the ingredients to suit your personal taste or dietary needs.

Ingredients

  • Asparagus
  • Diced butter
  • Dry white wine
  • Fresh parsley
  • Garlic
  • Fresh lemon juice
  • Lemon zest
  • Black salt and pepper
  • Shrimp

Instructions

  1. Preheat a grill to medium-high heat (about 400 – 425 degrees).
  2. Cut 4 sheets of 14 by 12-inch heavy-duty aluminum foil and lay each piece separately on the countertop.
  3. Divide shrimp among packets near the center, then place asparagus to one side of the shrimp (going the long direction of the foil).
  4. Pour 1/2 Tbsp white wine over each packet.
  5. Sprinkle over garlic (1 tsp per packet) and lemon zest, then season with salt and pepper.
  6. Divide butter pieces evenly among packets, layering them over the shrimp and asparagus.
  7. Wrap packets and crimp edges together, then wrap ends up (don’t wrap too tight – keep a little extra space inside for heat to circulate).
  8. Grill, sealed side upward, until shrimp has cooked through, about 9 – 10 minutes.
  9. Carefully unwrap, then drizzle with lemon juice (or just serve with lemon wedges for spritzing) and sprinkle with parsley.

Tips

For the best results, here are a few tips to keep in mind:

  • Choose Fresh Ingredients: Fresh shrimp and asparagus will make a significant difference in flavor.
  • Don’t Overcook: Keep an eye on the grill to ensure the shrimp doesn’t overcook and become rubbery.
  • Use Heavy-Duty Foil: This will prevent tearing and help the packets hold their shape.

Variations & Substitutions

Feel free to make this recipe your own with some variations:

  • Protein Swap: Try using chicken or salmon if you prefer.
  • Vegetable Add-Ins: Add bell peppers or cherry tomatoes for more color and variety.
  • Herbal Twist: Substitute parsley with dill or basil for a different flavor profile.

Storage

If you have leftovers, store them in an airtight container in the refrigerator for up to 2 days. Reheat gently on the stovetop or in the microwave, adding a splash of water or broth to keep the shrimp moist.

FAQ

Can I prepare these foil packs in the oven?

Absolutely! If you don’t have a grill, you can bake the foil packs in the oven at 425 degrees for about 10-12 minutes until the shrimp is cooked through and the asparagus is tender.

What type of shrimp should I use?

Use large, peeled, and deveined shrimp for the best results. Fresh or frozen (thawed) shrimp both work well.

Is there a non-alcoholic substitute for the white wine?

Yes, you can use chicken broth or a mix of water and a splash of apple cider vinegar as a substitute for white wine.

Nutrition

This dish is not only delicious but also nutritious. It’s a great source of protein from the shrimp and vitamins from the asparagus. The lemon butter sauce adds healthy fats, making it a well-rounded meal. For those counting calories, you can adjust the amount of butter used to suit your dietary needs.

Conclusion

Shrimp and Asparagus Foil Packs with Garlic Lemon Butter Sauce is a recipe that combines simplicity with exceptional flavor. Whether you’re hosting a family barbecue or seeking a quick weeknight dinner, this dish delivers on all fronts. Try it out and create your own memories around the grill. Happy cooking!

Related update: Shrimp and Asparagus Foil Packs with Garlic Lemon Butter Sauce

Related update: My Drunken Fish Fillet

Steak And Pepper Rounds With Rose Horseradish Garlic Creme Sauce | Made by Meaghan Moineau

Steak And Pepper Rounds With Rose Horseradish Garlic Crème Sauce

Intro

There’s something about the aroma of steak sizzling on the grill that transports me back to summer evenings spent in my grandmother’s garden. She had a knack for turning simple ingredients into a feast, and this recipe is a tribute to those cherished memories. As the sun dipped below the horizon, we’d gather around the table, the air filled with laughter and the rich, savory scent of marinated steak. This dish, inspired by those warm, nostalgic evenings, combines tender beef with the vibrant flavors of roasted peppers and a creamy, horseradish-infused sauce, bringing a touch of elegance to any table.

Why You’ll Love It

This recipe is a delightful blend of flavors and textures that’s sure to impress your guests. Whether you’re hosting a summer barbecue or a cozy winter gathering, these steak and pepper rounds are perfect as both appetizers and hearty main courses. The creamy sauce, with its subtle hint of rose wine, perfectly complements the succulent steak and smoky peppers, making each bite a culinary experience. Plus, it’s a versatile dish that can easily be adapted to suit different tastes and dietary needs.

Ingredients

  • 1 tbsp olive oil, plus extra for sautéing
  • 1 whole garlic bulb
  • 1 boneless beef rib steak
  • 1 tbsp Worcestershire sauce
  • 1 tbsp Jack Daniels mustard
  • 1 tsp crushed red pepper flakes
  • 1/2 cup rose syrah wine
  • 1 onion, sliced into 3-inch strips
  • 1 cup red roasted pepper sections
  • 1/2 cup mascarpone cheese
  • 1 tbsp horseradish
  • 4 cloves roasted garlic
  • 1 tsp fresh dried basil
  • 1 tsp fresh dried oregano
  • 1 tbsp fresh lemon juice
  • Salt and pepper, to taste
  • 1 loaf French bread, sliced into 1-inch rounds

Instructions

  1. Preheat your oven to 400°F. Drizzle 1 tbsp of olive oil over the garlic bulb and wrap it in aluminum foil. Place on a cookie sheet and roast for approximately 40 minutes. Once roasted, let it cool to touch.
  2. While the garlic is roasting, marinate the steak in a ziplock bag with Worcestershire sauce, Jack Daniels mustard, crushed red pepper flakes, and 1/2 cup of rose syrah wine. Toss to coat and let it sit while you slice the vegetables.
  3. Heat olive oil in a skillet over medium heat. Add the sliced onion and sauté until slightly browned and caramelized, about 20 minutes. Add the red roasted pepper sections and cook for another 10 to 15 minutes.
  4. Meanwhile, place the marinated steak on a roasting pan and broil in the oven or grill for approximately 5 to 10 minutes per side. Be careful not to overcook, as the steak will continue to cook after being removed from the heat. Let it rest before cutting.
  5. In a food processor, combine the mascarpone cheese, horseradish, and squeeze out 4 cloves of the roasted garlic. (Store the rest of the garlic bulb in an airtight container in the refrigerator for up to one week.) Pulse a few times to blend.
  6. Add the fresh dried basil, oregano, lemon juice, and a pinch of salt and pepper to the mixture and blend well.
  7. Slice the French bread into 1-inch rounds and lightly toast them in the oven or on a grill.
  8. Cut the steak into 1/8 to 1/4-inch strips.
  9. Spread the rose horseradish garlic crème sauce over each warm piece of bread. Top with a slice of steak and a spoonful of the onion and pepper mixture.

Tips

For the best flavor, allow the steak to marinate for at least an hour, or overnight if possible. Ensure your skillet is properly heated before adding the onions to achieve the perfect caramelization. When slicing the steak, always cut against the grain to ensure tenderness. Finally, if you like a bit more kick, feel free to increase the amount of horseradish in the sauce.

Variations & Substitutions

This recipe is highly adaptable. For a lighter version, use chicken breast or portobello mushrooms instead of steak. You can substitute the Jack Daniels mustard with Dijon mustard for a milder taste. If you’re avoiding alcohol, replace the rose syrah wine with beef broth. For a gluten-free option, use gluten-free bread or serve the toppings over a bed of arugula.

Storage

Store any leftover steak and pepper mixture in an airtight container in the refrigerator for up to three days. The sauce can also be refrigerated for up to a week. When ready to serve again, reheat the steak and pepper mixture gently in a skillet, and toast the bread fresh just before serving.

FAQ

Can I prepare the sauce ahead of time?

Yes, the sauce can be prepared up to three days in advance. Just store it in an airtight container in the refrigerator. Before serving, give it a good stir and adjust the seasoning if necessary.

What wine pairs well with this dish?

A glass of the same rose syrah wine used in the recipe would complement the dish beautifully. Alternatively, a full-bodied red like Cabernet Sauvignon would also work well, enhancing the rich flavors of the steak.

Can I use a different type of cheese?

Absolutely! If mascarpone isn’t available, cream cheese or ricotta can be used as substitutes. Keep in mind that cream cheese will yield a slightly tangier sauce.

Nutrition

Each serving contains approximately 250 calories, 18g of fat, 12g of carbohydrates, and 15g of protein. These values may vary slightly based on specific ingredients used and portion sizes.

Conclusion

Steak and Pepper Rounds with Rose Horseradish Garlic Crème Sauce is a delightful appetizer or main dish that brings together a symphony of flavors reminiscent of time-honored traditions and cherished family gatherings. Whether you’re making this for a special occasion or a cozy night in, it’s sure to become a favorite in your culinary repertoire. Enjoy the process of creating and savoring each bite, and feel free to share your own variations and stories in the comments below. Happy cooking!

Related update: Steak And Pepper Rounds With Rose Horseradish Garlic Creme Sauce

Related update: Ginger Chicken Stir-Fry

Related update: Alouette® Stuffed Mushroom Caps

Tex-Mex Burger | Made by Meaghan Moineau

Tex-Mex Burger

Intro

There’s something truly magical about a sizzling burger hot off the grill, bringing back memories of summer nights spent laughing and sharing stories with family and friends. Growing up, my family had a weekly tradition of gathering around the backyard grill, where my father would prepare his famous Tex-Mex burgers. The aroma of spices mingling with beef was irresistible, and the first bite was always a heavenly blend of flavors that danced on the palate. Now, I’m excited to share this beloved recipe with you, so you can create new memories with your loved ones, just as I have.

Why You’ll Love It

This Tex-Mex Burger is a flavor-packed twist on the classic American burger. It’s perfect for anyone who loves a bit of spice and a lot of flavor. The combination of cumin, chili powder, and paprika gives the beef a smoky, spicy depth, while the creamy avocado and pepper jack cheese add richness and a hint of heat. Topped with fresh cilantro and red onion, each bite is a delightful balance of textures and tastes. Whether you’re hosting a backyard barbecue or looking to switch up your weeknight dinner routine, this burger is sure to become a favorite!

Ingredients

  • 1 pound ground beef
  • 1/4 cup salsa
  • 1 teaspoon chili powder
  • 1 teaspoon cumin
  • 1/2 teaspoon paprika
  • 1/2 teaspoon salt
  • 1/4 teaspoon pepper
  • 4 slices pepper jack cheese
  • 1 avocado, sliced
  • 1/2 small red onion, thinly sliced
  • 1/4 cup fresh cilantro, chopped
  • 4 hamburger buns

Instructions

  1. Preheat your broiler to high. This will ensure your buns are perfectly toasted and ready to hold all the delicious fillings.
  2. In a large frying pan, heat to medium-high heat. This is where the magic happens, as the patties get their perfect sear.
  3. Make the patties: In a large bowl, combine ground beef, salsa, chili powder, cumin, paprika, salt, and pepper. Mix until the ingredients are evenly distributed. Be careful not to overwork the meat to maintain tenderness.
  4. Form the mixture into four equal-sized patties, making a slight indentation in the center of each to ensure even cooking.
  5. Place the patties in the heated frying pan. Cook for about 4-5 minutes on each side, or until they reach your desired level of doneness.
  6. During the last minute of cooking, place a slice of pepper jack cheese on each patty. Cover the pan briefly to allow the cheese to melt.
  7. While the patties are cooking, place the hamburger buns under the broiler for about 1 minute, or until they are lightly toasted.
  8. Assemble the burgers: Place each patty on the bottom half of a toasted bun. Top with avocado slices, red onion, and fresh cilantro. Finish with the top half of the bun.
  9. Serve immediately and enjoy the explosion of Tex-Mex flavors!

Tips

For the juiciest burgers, use ground beef with a higher fat content, like 80/20. If your patties shrink during cooking, it means they’re too compact; gently form them to avoid this. Toasting the buns adds a pleasant crunch and prevents them from getting soggy with the juicy toppings.

Variations & Substitutions

If you’re looking to customize your Tex-Mex Burger, consider these variations:

  • Protein Swap: Substitute the ground beef with ground turkey or chicken for a lighter version. Vegetarians can use black bean patties.
  • Cheese Options: Swap pepper jack for cheddar or Monterey Jack for a different cheesy experience.
  • Spice Level: Add a pinch of cayenne pepper for extra heat, or omit the chili powder for a milder taste.
  • Bun Alternatives: Use whole wheat buns or lettuce wraps for a low-carb option.

Storage

If you have leftovers, let the cooked patties cool to room temperature before storing them in an airtight container in the refrigerator for up to three days. To reheat, warm them in a skillet over medium heat or in the microwave, ensuring they’re thoroughly heated. Unfortunately, these burgers are best enjoyed fresh, so try to make just enough for your meal.

FAQ

Can I make the burger patties ahead of time?

Absolutely! You can prepare the patties and store them in the refrigerator for up to 24 hours before cooking. This can help save time during meal prep and allow the flavors to meld together even more.

What can I serve with Tex-Mex Burgers?

These burgers pair well with a variety of sides, such as crispy sweet potato fries, a fresh green salad, or classic coleslaw. For a true Tex-Mex experience, consider serving with a side of Mexican street corn or spicy black bean salad.

Nutrition

While exact nutritional values will vary based on portion sizes and specific ingredients used, each Tex-Mex Burger (including toppings and bun) is approximately 550 calories. This includes 35g of protein, 30g of fat, and 40g of carbohydrates. For a lighter version, consider using leaner meats and reducing the cheese and avocado portions.

Conclusion

There you have it — a delightful Tex-Mex Burger recipe that brings a touch of southwestern flair to your table. Whether you’re reliving cherished memories or creating new ones, this burger is sure to impress with its bold flavors and satisfying textures. I hope this recipe becomes a staple in your home, just as it has in mine. Enjoy the culinary journey, and happy cooking!

Related update: Tex-Mex Burger

Related update: Pan Seared Lamb Loin With Chimichurri & Roasted Trio Squash Salad With Goat Cheese and Pinenuts

Blue Cheese and Mushroom Turkey Burger | Made by Meaghan Moineau

Blue Cheese and Mushroom Turkey Burger

Intro

There’s something magical about the sizzle of a burger on the grill, the aroma wafting through the air, and the anticipation of that first juicy bite. When I was growing up, summer evenings were often spent in the backyard, my dad at the grill perfecting his burger technique. Those days were filled with laughter, the smell of freshly cut grass, and the comforting sound of cicadas in the distance. Inspired by those cherished memories, I crafted this Blue Cheese and Mushroom Turkey Burger to combine nostalgia with a rich, gourmet twist. Let me walk you through why this burger is going to become your next favorite.

Why You’ll Love It

This Blue Cheese and Mushroom Turkey Burger is a delightful fusion of flavors that will tantalize your taste buds. The earthy mushrooms combined with the savory turkey provide a hearty base, while the blue cheese adds a creamy, tangy finish. Whether you’re a grilling novice or a seasoned pro, this recipe is straightforward and satisfying. Plus, it’s a healthier alternative to traditional beef burgers without sacrificing any of the flavors.

Ingredients

  • 2 garlic cloves, minced
  • 1 pound of ground turkey
  • 1 onion, finely chopped
  • 1 cup portabello mushrooms, diced
  • 1 pinch of sea salt
  • 1 tablespoon soy sauce
  • Blue cheese, crumbled, for topping

Instructions

  1. In a large mixing bowl, combine the minced garlic, ground turkey, chopped onion, diced portabello mushrooms, sea salt, and soy sauce. Mix thoroughly until all ingredients are well incorporated.
  2. Divide the mixture into equal portions and form them into patties, making sure they’re not too thick for even cooking.
  3. Preheat your grill or a large frying pan over medium-high heat. Place the patties on the grill or in the pan.
  4. Cook the burgers for about 5-6 minutes on each side, flipping once, until they are cooked through and reach an internal temperature of 165°F (74°C).
  5. Once the burgers are cooked, add a small amount of crumbled blue cheese on top of each patty.
  6. If you’re using a grill, close the grill top and allow the cheese to melt for 1-2 minutes. If pan-frying, cover the pan with a lid to melt the cheese.
  7. Remove the burgers from the heat and let them rest for a couple of minutes before serving.

Tips

For the best results, make sure your turkey is fresh and not frozen. Fresh herbs like thyme or rosemary can be added to the mixture for an extra burst of flavor. If you’re grilling, lightly oil the grates to prevent sticking. Letting the burgers rest ensures the juices redistribute, keeping them moist and delicious.

Variations & Substitutions

Feel free to experiment with the ingredients. If blue cheese isn’t your favorite, try using goat cheese or feta for a different yet equally delicious taste. For a spicier kick, add a pinch of cayenne pepper or some chopped jalapeños to the turkey mixture. If you’re avoiding soy, try using Worcestershire sauce as an alternative.

Storage

Store any leftover burgers in an airtight container in the refrigerator for up to 3 days. To reheat, place them in a preheated oven at 350°F (175°C) until warmed through, or use a microwave. If freezing, wrap each patty individually in plastic wrap and store in a freezer bag for up to 3 months. Thaw in the refrigerator before reheating.

FAQ

Can I use a different type of cheese?

Absolutely! While blue cheese adds a unique flavor, you can substitute it with any cheese you prefer, such as cheddar, Swiss, or mozzarella. Each will bring its own distinct taste to the burger.

How can I make this recipe gluten-free?

To make this recipe gluten-free, ensure that your soy sauce is labeled gluten-free, or substitute it with tamari, which is naturally gluten-free. Check all other ingredient labels to ensure they are gluten-free as well.

Nutrition

This turkey burger is a healthier alternative to traditional beef burgers. It’s lower in fat and calories, making it a suitable option for those looking to enjoy a delicious meal without the guilt. The addition of mushrooms not only enhances the flavor but also adds fiber and nutrients.

Conclusion

Whether you’re reminiscing about summer barbecues or simply looking for a new recipe to try, this Blue Cheese and Mushroom Turkey Burger is sure to impress. Its rich, savory flavors and creamy cheese topping create a delightful culinary experience that’s both comforting and sophisticated. So, fire up your grill or heat up your pan and indulge in this delightful twist on a classic favorite. Enjoy every bite, and don’t forget to share the love with family and friends!

Related update: Blue Cheese and Mushroom Turkey Burger

Related update: Boeuf Bourgignon

Chicken Suya | Made by Meaghan Moineau

Deliciously Spiced Chicken Suya: A Taste of West Africa

Intro

Chicken Suya is a delightful and spicy grilled chicken recipe originating from West Africa, particularly Nigeria. This dish holds a special place in my heart, as it reminds me of warm summer evenings in Lagos, where the aroma of sizzling suya from roadside vendors filled the air. As a child, my family and I would often take strolls through the bustling city streets, stopping to indulge in this delectable treat. The succulent, spicy flavor of Chicken Suya has been a cherished part of my culinary journey, and I’m thrilled to share this recipe with you.

Why You’ll Love It

There are countless reasons to fall in love with Chicken Suya. Here are just a few:

  • Bold Flavors: The suya spice blend is a powerhouse of taste, combining ground peanuts, ginger, garlic, and chili powder to create a savory and slightly spicy profile that is utterly irresistible.
  • Simple Ingredients: Despite its complex flavor, Chicken Suya requires only a handful of ingredients that you likely already have in your pantry.
  • Versatile Dish: This dish can serve as a main course, appetizer, or even a snack. It’s perfect for gatherings, barbecues, or a cozy night in.
  • Healthy and Satisfying: Grilling the chicken keeps it lean, while the spices provide a burst of nutrition and taste.

Ingredients

  • 2-3 tablespoons suya spice
  • 1 whole chicken, cut into parts
  • 1 teaspoon chili powder
  • 2 tablespoons groundnut oil (or any cooking oil)
  • 2 seasoning cubes
  • 1 onion, sliced
  • 2 tomatoes, sliced
  • Salt to taste

Instructions

  1. Preheat your oven to 500°F (260°C).
  2. Wash the chicken pieces thoroughly and pat them dry with a paper towel.
  3. In a large bowl, combine the suya spice, chili powder, seasoning cubes, and salt. Mix well.
  4. Add the chicken to the bowl, ensuring that each piece is generously coated with the spice mixture.
  5. Drizzle the groundnut oil over the seasoned chicken and give it a good mix to ensure even distribution.
  6. Arrange the chicken pieces on a baking sheet lined with aluminum foil.
  7. Place the baking sheet in the preheated oven and grill for 40 minutes. Be sure to check the chicken occasionally, flipping it to ensure it cooks evenly on both sides.
  8. Once the chicken is cooked through and has a beautiful char, remove it from the oven.
  9. Serve hot, garnished with sliced onions, tomatoes, and an extra sprinkle of suya spice for added flavor.

Tips

  • For an authentic taste, try using a grill instead of an oven. The smoky flavor from the charcoal enhances the suya’s taste.
  • If you prefer a milder heat, adjust the amount of chili powder to suit your taste.
  • Rest the chicken for a few minutes after grilling to allow the juices to redistribute, ensuring a moist and flavorful bite.

Variations & Substitutions

If you’re looking to shake things up, consider these variations:

  • Protein Swap: While chicken is traditional, you can use beef, goat meat, or even tofu for a vegetarian option.
  • Nut-Free: If you have a peanut allergy, substitute the suya spice with a nut-free spice blend.
  • Additional Veggies: Add bell peppers or mushrooms to the grill for an extra layer of flavor and texture.

Storage

Leftover Chicken Suya can be stored in an airtight container in the refrigerator for up to 3 days. To reheat, place the chicken in a preheated oven at 350°F (175°C) for about 10 minutes or until warmed through. You can also freeze the cooked chicken for up to 2 months. Thaw overnight in the refrigerator before reheating.

FAQ

Can I prepare the suya spice blend at home?

Absolutely! To make your own suya spice blend, you can combine roasted peanuts, ground ginger, garlic powder, onion powder, paprika, and chili powder. Blend them together until you reach a fine consistency. Store in an airtight jar for future use.

How can I make my Chicken Suya extra crispy?

For an extra crispy texture, finish the grilled chicken under the broiler for a few minutes. Keep a close eye on it to prevent burning, and you’ll achieve a delightful crunch.

Nutrition

Chicken Suya is a nutritious option rich in protein and flavor. While exact nutritional values depend on portion sizes, a typical serving provides:

  • Calories: Approximately 250-300 per serving
  • Protein: 25-30g
  • Fat: 15-20g
  • Carbohydrates: 5-10g

It’s a great choice for those looking to maintain a balanced diet without sacrificing taste.

Conclusion

Chicken Suya is more than just a meal; it’s a culinary experience that transports you to the vibrant streets of West Africa. With its bold flavors and tantalizing aroma, it’s sure to become a favorite in your household. Whether you’re hosting a gathering or enjoying a quiet dinner at home, this dish promises to deliver satisfaction with every bite. I hope you enjoy making and eating this Chicken Suya as much as I do. Bon appétit!

Related update: Chicken Suya

Related update: Rotisserie Chicken and Bean Tostadas

Chicken Suya | Made by Meaghan Moineau

Chicken Suya: A Flavorful Journey to West Africa

Introduction

Chicken Suya is not just a dish; it’s an experience that takes you on a vibrant culinary journey to the heart of West Africa. I still remember the first time I tasted Suya during a family trip to Lagos, Nigeria. The streets were alive with the aroma of sizzling meats from roadside vendors, each offering their unique twist on this beloved street food. The spicy, nutty fragrance filled the air, and I was hooked from the very first bite. Since then, Chicken Suya has become a cherished recipe in my kitchen, a warm reminder of that sunlit afternoon filled with laughter and new tastes.

Why You’ll Love It

Chicken Suya is a feast for the senses. This dish offers a perfect balance of spicy, savory, and slightly nutty flavors that is sure to tantalize your taste buds. Whether you’re hosting a dinner party or cooking for your family, this recipe is easy to prepare yet impressively delicious. The blend of traditional suya spice with tender, juicy chicken makes it an irresistible choice for anyone looking to explore new culinary horizons. Plus, it’s a great way to bring a taste of West African cuisine right into your home.

Ingredients

  • Suya spice
  • Chicken
  • Chilli powder
  • Cooking spoon groundnut oil
  • Seasoning cubes
  • Onions and tomatoes
  • Salt

Instructions

  1. Preheat your oven to 500°F (260°C).
  2. Wash and season the chicken thoroughly with the suya spice, chilli powder, seasoning cubes, and salt.
  3. Drizzle the groundnut oil over the seasoned chicken to enhance its flavor and ensure it remains moist while cooking.
  4. Place the chicken on a baking tray and put it in the preheated oven.
  5. Grill the chicken for about 40 minutes, checking occasionally and flipping it on both sides to ensure even cooking.
  6. Once done, serve the chicken hot, garnished with sliced onions and tomatoes. Sprinkle a bit more suya spice over the chicken for an extra kick of flavor.

Tips

To get the best results, let the chicken marinate in the spices for at least 30 minutes before cooking. This will allow the flavors to penetrate the meat more deeply. If you have more time, marinate the chicken overnight in the refrigerator. Also, using a meat thermometer can help you ensure the chicken is cooked to perfection—look for an internal temperature of 165°F (74°C).

Variations & Substitutions

Chicken Suya is versatile and can be adapted to suit different tastes and dietary needs. If you’re not a fan of chicken, try using beef or lamb instead. For a vegetarian twist, you can substitute the meat with firm tofu or portobello mushrooms. Adjust the level of chili powder to your liking—reduce it for a milder dish or add more if you love heat. You can also experiment with different oils, such as olive or coconut oil, to see how they influence the flavor of the dish.

Storage

If you have any leftovers, store them in an airtight container in the refrigerator for up to three days. Reheat the chicken in the oven at 350°F (175°C) until warmed through. Avoid microwaving, as it can make the chicken dry. For longer storage, you can freeze the cooked chicken for up to three months. Defrost it in the refrigerator overnight before reheating.

FAQ

What is suya spice made of?

Suya spice is a flavorful blend of ground peanuts, ginger, garlic, onion powder, cayenne pepper, and other spices. It’s commonly used in West African cooking to season grilled meats.

Can I make my own suya spice blend?

Yes, you can easily make your own suya spice at home! Combine ground peanuts, ginger, garlic powder, onion powder, cayenne pepper, paprika, and salt to taste. Adjust the quantities to suit your preference for spice levels.

Is this dish suitable for a barbecue?

Absolutely! Chicken Suya is perfect for barbecuing. Simply prepare the chicken as instructed and grill it over medium heat, turning occasionally until cooked through. The smoky flavor from the barbecue complements the spices beautifully.

Nutrition

Chicken Suya is a protein-rich dish with healthy fats from the groundnut oil. Depending on the portion size and preparation method, it can be a part of a balanced diet. If you are concerned about calorie intake, consider using skinless chicken and reducing the amount of oil used in the recipe.

Conclusion

Chicken Suya is a delightful introduction to West African flavors and a must-try for anyone looking to spice up their meal repertoire. This dish embodies the warmth and richness of Nigerian cuisine, offering a taste that’s as vibrant as it is delicious. Whether you’re reminiscing about a past travel experience or simply exploring new culinary frontiers, Chicken Suya is a recipe that promises to deliver joy with every bite. I hope this family favorite becomes a staple in your home, as it has in mine.

Related update: Chicken Suya

Related update: Oxtail Ragout

Cheesy Bacon Burger with Spicy Chipotle Aiolo Sauce | Made by Meaghan Moineau

Cheesy Bacon Burger with Spicy Chipotle Aioli Sauce

Intro

There’s something magical about the smell of burgers grilling on a warm summer evening. It takes me back to those lazy Sunday afternoons at my grandparents’ house, where the whole family gathered around the backyard grill. My grandfather, with his well-worn apron and his signature chef’s hat, was the burger maestro. He always said the secret to a perfect burger was a little “surprise” inside. Inspired by his culinary wisdom and my love for a little heat, I’ve created a burger that combines the creamy goodness of cheese with the smoky allure of turkey bacon, all wrapped up in a spicy, tantalizing aioli. This Cheesy Bacon Burger with Spicy Chipotle Aioli Sauce is my homage to those cherished memories, with a contemporary twist that will make your taste buds dance with delight.

Why You’ll Love It

This burger isn’t just another patty on a bun; it’s a flavor explosion waiting to happen. The juicy beef patty is stuffed with creamy Swiss cheese that melts to perfection as it grills. The turkey bacon adds a savory crunch, while the spicy chipotle aioli brings just the right amount of heat to keep things exciting. Served on a wholesome whole wheat bun, this burger balances indulgence with nutrition. Whether you’re cooking for a backyard barbecue or a cozy family dinner, this recipe is sure to impress.

Ingredients

  • 1 can of chipotle chiles in adobo sauce
  • 1/2 cup fat free mayonnaise
  • 2 cloves garlic, minced
  • 1 teaspoon garlic powder
  • 1/2 cup Greek yogurt
  • 1 green bell pepper, diced
  • 1 teaspoon ground cumin
  • 1 teaspoon black ground pepper
  • 1 pound lean ground beef
  • 1 tablespoon fresh lime juice
  • 1 onion, diced
  • 4 whole wedges of Laughing Cow Swiss cheese
  • 4 slices cooked turkey bacon
  • 4 whole wheat hamburger buns

Instructions

  1. In a pan, cook the turkey bacon according to the directions on the package. Once cooked, remove the bacon and set it aside.
  2. In the same pan, add the diced bell pepper and onion, cooking until tender, about 10 minutes.
  3. In a small bowl, combine the ground beef with garlic powder and black ground pepper. Mix well.
  4. Divide the beef mixture into eight equal pieces, about 2 ounces each. Flatten each piece into a patty.
  5. Place half a wedge of cheese onto four patties, then top with the remaining patties. Press the edges to seal the cheese inside.
  6. Grill the burgers until cooked through, about 5 minutes per side.
  7. To make the spicy chipotle aioli sauce, combine chipotle chiles, mayonnaise, minced garlic, Greek yogurt, ground cumin, and lime juice in a small bowl. Whisk until smooth.
  8. Assemble the burgers by placing each patty on a whole wheat bun. Top with turkey bacon, sautéed peppers and onions, and a generous dollop of the spicy chipotle aioli sauce.

Tips

For the best results, use a meat thermometer to ensure your burgers reach an internal temperature of 160°F. This ensures they’re cooked safely without being overdone. If you prefer a less spicy aioli, reduce the number of chipotle chiles or substitute with smoked paprika for a milder flavor.

Variations & Substitutions

If you’re looking to switch things up, try using ground turkey or chicken instead of beef for a lighter option. You can also swap out Swiss cheese for cheddar or pepper jack for an extra kick. For a gluten-free version, use gluten-free hamburger buns or serve the burgers wrapped in lettuce leaves for a low-carb alternative.

Storage

Store any leftover burgers in an airtight container in the refrigerator for up to three days. The spicy chipotle aioli can be stored separately in a sealed jar for up to a week. For longer storage, consider freezing the cooked patties without the buns or toppings.

FAQ

Can I make the burgers ahead of time?

Yes, you can prepare the patties in advance and store them in the refrigerator for up to 24 hours before grilling. This can help save time during meal prep.

What can I serve with these burgers?

These burgers pair well with a variety of sides, such as sweet potato fries, a fresh green salad, or grilled corn on the cob. For a truly indulgent meal, consider serving them with a creamy coleslaw or homemade potato chips.

Is there a vegetarian version of this recipe?

Absolutely! You can substitute the beef with a plant-based protein like black bean patties or a store-bought vegetarian burger. Use a plant-based cheese alternative and skip the turkey bacon for a delicious vegetarian option.

Nutrition

While this recipe is a flavorful indulgence, it aims to maintain a balance with healthier ingredients. Opting for lean ground beef and whole wheat buns increases the nutritional value, while Greek yogurt in the aioli sauce provides a protein boost with reduced fat content. Adjust portions to suit your dietary needs.

Conclusion

Our Cheesy Bacon Burger with Spicy Chipotle Aioli Sauce is more than just a meal; it’s an experience. With each bite, you’ll savor the melty cheese, the crisp turkey bacon, and the zesty aioli. Whether you’re creating new memories with friends and family or enjoying a quiet dinner for one, this burger promises to deliver satisfaction and joy. So fire up the grill, gather your ingredients, and get ready to enjoy a delightful taste journey!

Related update: Cheesy Bacon Burger with Spicy Chipotle Aiolo Sauce

Huli-Huli Chicken | Made by Meaghan Moineau

Huli-Huli Chicken Recipe: A Taste of Aloha

Intro

There’s something magical about the aroma of Huli-Huli Chicken wafting through the air. This Hawaiian classic takes me back to sun-drenched days on the island of Maui, where I first savored its sweet and savory flavors. On a family vacation, we stumbled upon a small roadside stand, drawn in by the tantalizing smell. With a warm smile, the vendor served us this succulent chicken, grilled to perfection, alongside juicy pineapple slices. This moment, filled with laughter and delicious food, is etched in my memory and has inspired me to recreate this beloved dish at home. Now, I’d love to share this recipe with you, bringing a bit of that island magic to your kitchen.

Why You’ll Love It

Huli-Huli Chicken is a dish that captures the essence of Hawaiian cuisine: vibrant, flavorful, and perfect for sharing. You will love this recipe because:

  • It’s easy to make and requires simple, fresh ingredients.
  • The marinade infuses the chicken with incredible flavor, making each bite a delightful experience.
  • Grilling adds a smoky char that enhances the sweetness of the sauce and pineapple.
  • It’s a crowd-pleaser, perfect for family dinners or summer cookouts.

Ingredients

  • 4 chicken drumsticks
  • 4 chicken thighs
  • 4 cloves garlic, smashed
  • 1 piece of ginger root, smashed
  • 1 tablespoon kosher salt
  • 1 fresh pineapple, sliced

Instructions

  1. Mix together the brine: water, sugar, salt, garlic, ginger, and thyme.
  2. Place the brine in a large resealable bag and add the chicken.
  3. Refrigerate for at least an hour, but not more than four hours.
  4. Put the sauce ingredients into a saucepan, stir, and simmer until the sauce thickens.
  5. Strain off the sauce and place it in a bowl.
  6. Remove the chicken from the brine and grill until medium brown and cooked through to the bone.
  7. Place the pineapple on the grill and lightly baste the chicken and pineapple with the sauce.
  8. Turn and baste 2-3 times every 2-3 minutes.
  9. Remove from grill and serve.

Tips

  • For the best flavor, don’t rush the marinating process. Allow the chicken to soak up the brine fully.
  • Use a meat thermometer to ensure the chicken is cooked through to a safe internal temperature of 165°F (74°C).
  • Keep the grill lid closed while cooking to maintain a consistent temperature.

Variations & Substitutions

Feel free to adapt this recipe to suit your taste:

  • Swap chicken thighs and drumsticks for boneless chicken breasts if you prefer leaner meat.
  • Add a dash of chili flakes to the sauce for a spicy kick.
  • If fresh pineapple isn’t available, canned pineapple rings can be used as a substitute.

Storage

Leftover Huli-Huli Chicken can be stored in an airtight container in the refrigerator for up to 3 days. To reheat, place the chicken in a preheated oven at 350°F (175°C) until warmed through. The grilled pineapple is best eaten fresh but can also be stored for a short period and reheated.

FAQ

Can I make Huli-Huli Chicken without a grill?

Absolutely! If you don’t have a grill, you can use a grill pan or an oven broiler. Cook the chicken in a preheated oven at 400°F (200°C) for about 25-30 minutes, turning and basting occasionally until cooked through.

What can I serve with Huli-Huli Chicken?

Huli-Huli Chicken pairs wonderfully with steamed rice, a side of coleslaw, or a fresh green salad. For a true Hawaiian experience, try serving it with macaroni salad and a slice of chilled watermelon.

Nutrition

While nutritional values can vary based on specific ingredients used, a serving of Huli-Huli Chicken (including a piece of pineapple) typically contains:

  • Calories: 250
  • Protein: 20g
  • Carbohydrates: 15g
  • Fat: 10g
  • Sodium: 400mg

Conclusion

Whether you’re reminiscing about a Hawaiian vacation or simply seeking a new recipe to delight your taste buds, Huli-Huli Chicken is sure to become a favorite. Its blend of sweet, savory, and smoky flavors captures the spirit of the islands and brings a touch of aloha to your table. I hope you enjoy making and sharing this dish as much as I do. Mahalo!

Related update: Huli-Huli Chicken

Related update: Chicken Stew For The Soul

Related update: Parmesan Mashed Potatoes

Cheesy Bacon Burger with Spicy Chipotle Aiolo Sauce | Made by Meaghan Moineau

Cheesy Bacon Burger with Spicy Chipotle Aioli Sauce

Intro

There’s something about the sizzle of a burger on the grill that takes me back to summer evenings spent in my grandmother’s backyard. The air would be filled with the aroma of sizzling meat and the laughter of family members gathering around the picnic table. It was during those cherished gatherings that I learned the art of creating the perfect burger, one that would be etched in our hearts as a family tradition. Today, I am excited to share with you a modern twist on that classic memory – the Cheesy Bacon Burger with Spicy Chipotle Aioli Sauce. This recipe not only brings back those nostalgic moments but also adds a spicy kick that will surely become a new favorite in your home.

Why You’ll Love It

This Cheesy Bacon Burger is a delightful combination of flavors and textures that will make your taste buds dance with joy. The juicy beef patty encasing a creamy Swiss cheese center is topped with crispy turkey bacon, sautéed bell peppers, and onions, all nestled within a soft whole wheat bun. The real star, however, is the Spicy Chipotle Aioli Sauce, which adds a smoky and tangy kick to every bite. Whether you are hosting a backyard barbecue or simply craving a delicious homemade burger, this recipe is sure to impress.

Ingredients

  • Chipotle chiles in adobo
  • Fat-free mayonnaise
  • Garlic
  • Garlic powder
  • Greek yogurt
  • Green bell pepper
  • Ground cumin
  • Black ground pepper
  • Lean ground beef
  • Fresh lime juice
  • Onion
  • Whole wedges of Laughing Cow Swiss cheese
  • Cooked turkey bacon
  • Whole wheat hamburger buns

Instructions

  1. For the burgers: In a pan, cook turkey bacon according to the directions on the package. Once cooked, remove the bacon and set it aside.
  2. In the same pan, add bell pepper and onion and cook until tender, about 10 minutes.
  3. Add ground beef to a small bowl, along with garlic powder and ground pepper, and mix well.
  4. Divide the raw meat into 8 equal pieces (approximately 2oz each). Flatten each piece, place 1/2 a cheese wedge onto each piece of hamburger, and top with another piece of meat. Seal the edges to prevent the cheese from oozing out during cooking.
  5. Place the burgers on the grill and cook until done, about 5 minutes per side.
  6. Place the cooked burgers on buns and top with bacon, peppers & onions, and Spicy Chipotle Aioli Sauce.
  7. For the Spicy Chipotle Aioli Sauce: In a small bowl, whisk together chipotle chiles in adobo, fat-free mayonnaise, garlic, Greek yogurt, ground cumin, and fresh lime juice until combined. This makes 3/4 cup, or 12 tablespoons, of sauce.

Tips

To ensure your burgers are perfectly cooked, use a meat thermometer to check that the internal temperature reaches 160°F (71°C). If you prefer a milder sauce, reduce the amount of chipotle chiles. For an extra layer of flavor, toast your hamburger buns on the grill for a few minutes before assembling your burgers.

Variations & Substitutions

If you prefer a different cheese, cheddar or pepper jack would work wonderfully in this recipe. You can also substitute ground turkey for the beef if you want a leaner option. For a vegetarian twist, try using a plant-based burger patty and coconut bacon.

Storage

Store any leftover cooked burgers in an airtight container in the refrigerator for up to 3 days. The Spicy Chipotle Aioli Sauce can be stored in a separate container in the fridge for up to a week. Reheat the burgers in a pan or microwave before serving.

FAQ

Can I make the Spicy Chipotle Aioli Sauce in advance?

Absolutely! The sauce can be made a day or two in advance and stored in the refrigerator. This will allow the flavors to meld together even more, enhancing its delicious taste.

What is the best way to cook the burgers if I don’t have a grill?

If you don’t have a grill, you can cook the burgers in a skillet on the stovetop. Simply heat a little oil in the pan over medium-high heat and cook the burgers for about 5 minutes on each side, or until they reach the desired doneness.

Can I freeze the burgers?

Yes, you can freeze the uncooked burger patties. Place them on a baking sheet and freeze until solid, then transfer to a freezer-safe bag or container. They can be stored in the freezer for up to 3 months. Thaw in the refrigerator before cooking.

Nutrition

This Cheesy Bacon Burger recipe, when made with lean ground beef and turkey bacon, is a protein-packed meal. The use of Greek yogurt and fat-free mayonnaise in the aioli sauce also helps to keep the calorie count in check. As with any meal, moderation is key to maintaining a balanced diet.

Conclusion

The Cheesy Bacon Burger with Spicy Chipotle Aioli Sauce is more than just a meal; it’s a culinary experience that brings together the comfort of classic flavors with a modern twist. Whether you’re reminiscing about family gatherings or creating new memories, this burger is sure to be a hit with everyone. So fire up the grill, gather your loved ones, and savor the deliciousness of this mouthwatering creation!

Related update: Cheesy Bacon Burger with Spicy Chipotle Aiolo Sauce

Grilled Portabella and Poblano Tacos | Made by Meaghan Moineau

Grilled Portabella and Poblano Tacos

Intro

There’s something magical about the aroma of fresh ingredients sizzling on a grill. Every time I make these grilled portabella and poblano tacos, I’m transported back to a summer evening at my grandmother’s house. She would fire up the grill, and we’d gather around, eagerly awaiting the feast to come. The smoky scent of chiles and mushrooms would fill the air, mixing with laughter and stories shared as we enjoyed each other’s company. This recipe is a tribute to those cherished memories, and I hope it brings the same joy and warmth to your table as it always has to mine.

Why You’ll Love It

These grilled portabella and poblano tacos are a delightful twist on classic taco fare. They’re perfect for vegetarians and meat-lovers alike, offering a robust and smoky flavor that’s entirely satisfying. The combination of earthy portabellas and spicy poblanos, complemented by the freshness of pico de gallo and creamy guacamole, creates a symphony of tastes and textures. Plus, they’re easy to customize, making them a hit for family dinners or casual gatherings with friends.

Ingredients

  • Canola oil
  • Chipotle powder
  • Cilantro, chopped
  • Cilantro sprigs for garnish
  • Corn tortillas
  • 2 cloves garlic, minced
  • Guacamole
  • 2 tablespoons lime juice
  • Lime wedges for serving
  • Olive oil
  • 1 whole poblano chile
  • 2 whole portabella mushrooms
  • 1 red onion, roughly chopped
  • 2 diced roma tomatoes
  • Salt
  • Salt and pepper
  • Shredded cheddar cheese

Instructions

  1. Preheat a lightly oiled grill on medium-high heat.
  2. While the grill is heating up, prepare the pico de gallo. In a small mixing bowl, combine tomatoes, onion, cilantro, garlic, salt, and lime juice. Set aside.
  3. Next, prepare the grilled portabella filling. Remove the stems from the portabellas, and discard. Using a spoon, scrape out the dark gills from the underside of the mushroom caps.
  4. Lightly brush the portabellas and the onions on both sides with canola oil, and sprinkle generously with salt and pepper.
  5. Arrange the mushrooms, onion, and poblano on the hot grill, and cook for 5-6 minutes per side or until the mushrooms are softened and the onion is lightly charred. Remove from heat and transfer to a cutting board.
  6. Remove the stem and seeds from the poblano, and discard. Cut the poblano and the portabellas into thin strips, and roughly chop the onion. Transfer to a mixing bowl and toss with lime juice and chipotle powder until well coated.
  7. To assemble, arrange 2 tortillas per plate, and divide the mushroom filling evenly between them.
  8. Serve with pico de gallo and bowls of the different toppings so that everyone can garnish their tacos as they please.

Tips

  • Make sure your grill is preheated to ensure a good sear on the vegetables.
  • For a spicier kick, leave a few seeds in the poblano before grilling.
  • Use fresh tortillas if possible; they really make a difference in flavor and texture.

Variations & Substitutions

If you want to switch things up, try using different types of mushrooms like cremini or shiitake for a different flavor profile. You can also substitute the poblano with bell peppers for a milder taste. For a vegan version, skip the cheese or use a plant-based alternative.

Storage

These tacos are best enjoyed fresh, but if you have leftovers, store the grilled vegetable mixture in an airtight container in the refrigerator for up to 3 days. Reheat gently on the stovetop or in the microwave before serving. Assemble the tacos just before eating to keep the tortillas from becoming soggy.

FAQ

Can I make these tacos in advance?

Yes, you can prepare the pico de gallo and grill the vegetables ahead of time. Store them separately in the fridge and assemble the tacos just before serving for the best texture and flavor.

What can I serve with these tacos?

These tacos pair well with a side of Mexican rice, refried beans, or a light salad. A refreshing beverage like a margarita or agua fresca can also complement the meal beautifully.

Nutrition

While the exact nutritional content will vary based on specific brands and quantities used, these tacos are a great source of vitamins and fiber, thanks to the vegetables. They’re also relatively low in calories and can be made even healthier by using whole wheat tortillas and reducing the cheese.

Conclusion

Grilled portabella and poblano tacos are a delightful way to enjoy the vibrant flavors of summer grilling. Whether you’re recreating cherished family memories or starting new traditions, these tacos are sure to become a favorite. Gather your loved ones, fire up the grill, and savor the rich, smoky flavors of this delicious and versatile dish. Enjoy!

Related update: Grilled Portabella and Poblano Tacos

Related update: Baked Chicken Thighs with Satay Sauce and Tomato Salad

Avocado-Mango Salad With Grilled Shrimp | Made by Meaghan Moineau

Avocado-Mango Salad With Grilled Shrimp | Made by Meaghan Moineau

Title: A Taste of Summer: Avocado-Mango Salad with Grilled Shrimp
Description: Dive into the vibrant flavors of summer with our Avocado-Mango Salad with Grilled Shrimp. This delightful dish combines the creamy richness of Hass avocados with the sweet juiciness of mango and the savory succulence of grilled shrimp. A perfect blend of freshness and zest, this salad is ideal for a light lunch or a stunning appetizer at your next gathering. Follow along as we explore this recipe that's not only a treat for the taste buds but also a cherished family tradition.

---


A Journey Through Flavors: Avocado-Mango Salad with Grilled Shrimp

The sun was setting on a warm summer evening, the sky painted with hues of orange and pink, as my family gathered around the patio table. This scene repeats itself in my memory every time I prepare our beloved Avocado-Mango Salad with Grilled Shrimp. It was a dish my grandmother introduced to us during one of those lazy summer days when the air was thick with the scent of blooming jasmine, and laughter echoed through the backyard.


Ingredients:

- 1 lb shrimp, peeled and deveined


- 2 ripe Hass avocados, diced


- 1 cup diced mango


- Lime wedges for serving


- 2 tbsp red wine vinegar


- 2 tbsp fresh lime juice


- 1 tsp freshly grated ginger


- 1 tsp sugar


- 1 tsp Dijon mustard


- 1/4 cup canola oil


- 1/4 cup chopped cilantro


- 1 tsp lime zest


- 1 small diced habanero chile (optional for heat)


- 1/2 cup thinly sliced red onion


- Black salt and pepper to taste


Instructions:
1. Prepare the Grill: Preheat your gas grill to high. The robust flavors of grilled shrimp are the star of this dish, and a hot grill ensures they cook to perfection.
2. Marinate the Shrimp: In a bowl, combine red wine vinegar, fresh lime juice, ginger, sugar, and Dijon mustard. Slowly whisk in canola oil until emulsified. Add shrimp, ensuring they're well coated. Let them marinate for about 10 minutes.
3. Grill the Shrimp: Place the shrimp on the grill, cooking each side for about 2-3 minutes until they turn opaque and have a slight char. Remove and set aside.
4. Assemble the Salad: In a large bowl, combine diced avocados, mango, red onion, cilantro, lime zest, and diced habanero chile. Toss gently to keep the avocado from becoming mushy.
5. Dress and Serve: Drizzle some of the reserved marinade over the salad, season with black salt and pepper, and toss lightly. Top with the grilled shrimp and serve with lime wedges for an extra burst of citrus.
A Family Tradition:

This dish became a family staple not just for its flavor but for the memories it created. My grandmother would hum a little tune as she prepared the ingredients, her hands moving expertly through the tasks. We would gather around, eager to taste the first bite, which was always a symphony of flavors—sweet, tangy, spicy, and savory. Even now, as I prepare this dish for my own family, I am reminded of those precious moments of togetherness and love.


Difficulty Rating: 4/10
Classification: Appetizer

---


Embrace the tastes of summer and the warmth of family memories with this Avocado-Mango Salad with Grilled Shrimp. It's more than just a dish; it's a celebration of flavors and cherished moments shared with loved ones. Whether you're new to cooking or a seasoned chef, this recipe is sure to bring joy to your table. Enjoy!

Read more about Appetizers

Read more about Main Dishes

Read more about Desserts

Game Day Jerk Wings | Made by Meaghan Moineau

Game Day Jerk Wings | Made by Meaghan Moineau

Game Day Jerk Wings: A Spicy Kickoff to Flavorful Memories


Description:

Elevate your game day experience with our mouthwatering Game Day Jerk Wings! Infused with an aromatic blend of spices and a zesty jerk sauce, these wings promise to be the highlight of your gathering. Perfect for those who love a little heat and a lot of flavor, these wings are sure to score a touchdown with your taste buds. As an added bonus, serve them with crunchy carrot and celery sticks along with creamy blue cheese dressing for the ultimate game day snack.

Difficulty: 6/10

Classification: Appetizer


---


Ingredients:


- Split chicken wings


- 2 tbsp pasilla chile powder


- 1 tbsp kosher salt


- 1 tbsp black ground pepper


- 1 tsp ground cayenne pepper


- 1 tbsp Jamaican ground allspice


- 1 cup Pickapeppa sauce


- 1/2 cup unsalted butter


- 1/4 cup honey


- 2 tbsp Tabasco sauce


- 1 tsp red pepper flakes


- Carrot and celery sticks


- Blue cheese dressing


Instructions:


1. Prepare the Wings:

- Split wings apart into 2 sections and slash a slit in the flat part of each wing for quicker cooking.


2. Create the Dry Rub:

- In a bowl, combine the pasilla chile powder, kosher salt, black ground pepper, ground cayenne pepper, and Jamaican ground allspice.


- Sprinkle the mixture liberally over the wings (you don't need to use all of it). Refrigerate for at least 1 hour to let the flavors meld.


3. Make the Jerk Sauce:

- In a medium saucepan over low heat, combine Pickapeppa sauce, unsalted butter, honey, Tabasco sauce, and red pepper flakes. Stir until well incorporated.


4. Grill the Wings:

- Allow the wings to come to room temperature before grilling.


- Prepare your grill for medium-high direct heat. Grill the dry-rubbed wings for 20-25 minutes, turning constantly to achieve good grill marks without over-charring.


- Check the doneness by biting into the largest wing; if the juices run clear, they're ready.


5. Serve:

- Place the grilled wings in a large bowl and toss them with the jerk sauce.


- Serve hot with blue cheese dressing and a side of carrot and celery sticks.


---


A Nostalgic Flavor Journey


Growing up, game days were a family tradition in our house. It wasn’t just about the match on TV; it was an event filled with laughter, cheers, and of course, food that brought everyone together. The aroma of these jerk wings sizzling on the grill takes me back to those vibrant afternoons in my childhood home. My dad, the culinary mastermind, would meticulously prepare these wings, insisting that the secret lay in the perfect balance of spices.


I remember one particular Sunday when I was tasked with being his sous-chef. As we mixed the spices and prepared the grill, he shared stories of his own childhood — of how his father would make similar spicy wings for family gatherings. It was a ritual passed down through generations, each iteration adding its own unique twist.


The wings were always the star of the show, their spicy aroma drawing friends and neighbors alike. We’d gather around the table, each bite a delightful explosion of flavor, accompanied by the creamy cooling effect of blue cheese dressing. These wings weren't just a dish; they were a symbol of family unity and cherished memories.


As I prepare these wings today, I feel a sense of nostalgia, a connection to those joyous moments of togetherness. Whether you're a fan of the game or just a lover of good food, these Game Day Jerk Wings are sure to create lasting memories for your family, just as they have for mine.


---


Indulge in the perfect combination of spicy, sweet, and savory with our Game Day Jerk Wings — a must-have appetizer for any game day celebration!

Read more about Appetizers

Read more about Main Dishes

Read more about Desserts

Coffee-Infused Bbq Baby Back Ribs | Made by Meaghan Moineau

Coffee-Infused Bbq Baby Back Ribs | Made by Meaghan Moineau

Flavorful Fusion: Coffee-Infused BBQ Baby Back Ribs


A Culinary Adventure with a Touch of Nostalgia


Introduction


Welcome to our delightful culinary corner, where flavors dance in harmony and memories are woven into every bite. Today, we embark on a journey that marries rich coffee undertones with the smoky allure of BBQ, creating a masterpiece that deserves a spot in your kitchen repertoire: Coffee-Infused BBQ Baby Back Ribs. Perfectly seasoned and lovingly grilled, this dish promises to captivate your taste buds and transport you to cherished family gatherings.


A Nostalgic Whiff of Memories


As I prepare these ribs, I'm reminded of summer afternoons spent in my grandmother's backyard, where the air was always perfumed with the intoxicating aroma of her secret BBQ sauce. She would deftly mix spices while recounting tales of her youth, her laughter punctuating the sizzle of ribs on the grill. Those sun-dappled days were filled with laughter, love, and the irresistible taste of her signature ribs—a family treasure passed down through generations.


With this recipe, I've added a modern twist by infusing the ribs with coffee, a nod to my grandfather's love for a strong brew. The result is a sensational blend of flavors that brings a sense of warmth and nostalgia, reminiscent of my family's cherished Sunday BBQs.


Recipe: Coffee-Infused BBQ Baby Back Ribs


Difficulty: 6/10
Category: Main Dish

Ingredients


- 1 tablespoon chile powder


- 1 teaspoon dried thyme


- 1 teaspoon ground cumin


- 1 teaspoon garlic powder


- 1 teaspoon salt


- 1 teaspoon pepper


- 1/4 teaspoon cayenne pepper


- 2 racks of baby back ribs


- 1 teaspoon liquid smoke


- 1 tablespoon oil


- 2 cloves garlic, minced


- 1/2 cup cider vinegar


- 1/4 cup soy sauce


- 1 cup canned tomato puree


- 1/4 cup molasses


- 1/4 cup brown sugar


- 2 tablespoons coffee granules


- 1 teaspoon ground cumin


- 1 tablespoon Dijon mustard


- 1 tablespoon paprika


Instructions


1. Preheat and Prepare: Preheat your oven to 350°F (175°C). In a small bowl, mix chile powder, dried thyme, ground cumin, garlic powder, salt, pepper, and cayenne pepper.
2. Season the Ribs: Cut each rack of ribs into smaller sections for easier handling, or leave them whole for a stunning presentation. Generously rub the spice mixture over all rib sections.
3. Bake the Ribs: Pour 4 cups of water and 1 teaspoon of liquid smoke into a roasting pan. Place the ribs in the pan, bone-side down. Cover the pan tightly with aluminum foil and bake for 2 hours. Once done, let the ribs rest until ready to grill.
4. Prepare the BBQ Sauce: In a saucepan over medium heat, add 1 tablespoon of oil. Sauté the minced garlic for 1-2 minutes. Add cider vinegar, soy sauce, tomato puree, molasses, brown sugar, coffee granules, ground cumin, Dijon mustard, and paprika. Simmer for at least 30 minutes, stirring occasionally.
5. Grill with Love: Preheat your grill to medium-low heat. Brush the ribs thoroughly with the BBQ sauce. Grill for 20 minutes, turning and brushing every 5 minutes until a beautiful bark forms.
6. Serve and Enjoy: Serve these delectable ribs with a side of your choice and watch as your family and friends savor each flavorful bite.

Conclusion


This Coffee-Infused BBQ Baby Back Ribs recipe is more than just a meal; it's a tribute to family traditions, shared moments, and the joy of creating something special. Whether you're rekindling old memories or making new ones, this dish is sure to be a hit at your next gathering. So fire up the grill, grab a cup of coffee, and let the flavors of the past and present come together on your plate. Happy grilling!

Read more about Appetizers

Read more about Main Dishes

Read more about Desserts

Cheesy Bacon Burger with Spicy Chipotle Aiolo Sauce | Made by Meaghan Moineau

Cheesy Bacon Burger with Spicy Chipotle Aiolo Sauce | Made by Meaghan Moineau

Savor the Flavor: Cheesy Bacon Burger with Spicy Chipotle Aioli Sauce


Description:

Dive into the delicious world of mouthwatering flavors with our Cheesy Bacon Burger featuring Spicy Chipotle Aioli Sauce. Packed with savory ingredients like lean ground beef, turkey bacon, and creamy Laughing Cow Swiss cheese, this burger promises a delightful culinary experience. Perfectly complemented by a spicy chipotle aioli, this dish is a must-try for burger enthusiasts. Whether you're hosting a backyard barbecue or looking to impress family and friends with a gourmet touch, this burger is your ticket to flavor paradise.

Ingredients:

- For the Burger:

- 1 green bell pepper, diced


- 1 onion, diced


- 1 lb lean ground beef


- 1 tsp garlic powder


- 1/2 tsp ground black pepper


- 4 wedges of Laughing Cow Swiss cheese


- 6 slices of cooked turkey bacon


- 4 whole wheat hamburger buns


- For the Spicy Chipotle Aioli Sauce:

- 3 chipotle chiles in adobo, minced


- 1/2 cup fat-free mayonnaise


- 2 cloves garlic, minced


- 1/4 cup Greek yogurt


- 1 tbsp fresh lime juice


- 1/2 tsp ground cumin


Instructions:


For the Burgers:

1. In a pan, cook the turkey bacon according to package directions. Once cooked, remove and set aside.

2. In the same pan, add the diced bell pepper and onion. Cook until tender, about 10 minutes.


3. In a small bowl, combine the ground beef with garlic powder and ground black pepper. Mix well.


4. Divide the meat into 8 equal portions (approximately 2 oz each). Flatten each portion and place half a cheese wedge onto four of them. Cover with the other four portions and seal the edges to prevent the cheese from oozing out.


5. Preheat the grill and cook the burgers until done, about 5 minutes per side.


6. Assemble the burgers by placing them on whole wheat buns and topping with turkey bacon, sautéed peppers and onions, and a generous dollop of spicy chipotle aioli sauce.


For the Spicy Chipotle Aioli Sauce:

1. In a small bowl, combine all the sauce ingredients: chipotle chiles, fat-free mayonnaise, minced garlic, Greek yogurt, fresh lime juice, and ground cumin.

2. Whisk together until well combined.


A Nostalgic Family Memory:

As I prepare this delectable burger, I'm transported back to summer evenings at my grandparents' house. My grandfather, a culinary enthusiast, always had a knack for combining flavors that left our taste buds dancing. One lazy afternoon, he decided to craft his version of the ultimate burger. Watching him, I was amazed at how he effortlessly mixed spices and lovingly placed cheese inside the patties, explaining that the secret to a great burger is the surprise of flavor with each bite. The smell of sizzling meat and roasting peppers filled the air, creating a sense of warmth and joy that I still cherish today. Sharing these burgers with family, surrounded by laughter and stories, made every bite even more special.

Difficulty Rating: 5/10

Classification: Main Dish


With the blend of savory bacon, creamy cheese, and spicy aioli, this Cheesy Bacon Burger with Spicy Chipotle Aioli Sauce is not just a meal—it's an experience. Whether you're a seasoned chef or a home cook, this recipe offers a delightful challenge and a rewarding payoff. Enjoy the taste of nostalgia and new memories with every bite!

Read more about Appetizers

Read more about Main Dishes

Read more about Desserts

Grilled Lemon Garlic Artichokes | Made by Meaghan Moineau

Grilled Lemon Garlic Artichokes | Made by Meaghan Moineau

Title: Savoring Summer: Grilled Lemon Garlic Artichokes that Transport You Home
Description: Dive into the flavors of summer with our Grilled Lemon Garlic Artichokes recipe. Perfect for a family gathering, this dish blends the zest of lemon, the warmth of garlic, and the earthy aroma of thyme to create an unforgettable appetizer. Rated 6/10 in difficulty, this dish is ideal for those seeking a new culinary challenge that promises to evoke cherished family memories.

---


Savoring Summer: Grilled Lemon Garlic Artichokes that Transport You Home


As the summer sun begins to set, casting a golden hue across the backyard, there's a familiar scent in the air that draws family members to the kitchen. It's the aroma of my grandmother's Grilled Lemon Garlic Artichokes—a dish that has graced our family table for generations, turning ordinary summer nights into memorable gatherings.


Ingredients:


- 4 fresh artichokes


- Fresh thyme leaves


- 4 cloves of garlic, minced


- Fresh ground black pepper


- A handful of fresh herbs such as rosemary


- Kosher salt


- 1 lemon, juiced and zested


- Olive oil


Instructions:


1. Infuse the Oil: In a glass bowl, mix chopped thyme, lemon juice and zest, and minced garlic. Microwave on high heat for 30 seconds. Allow the herbs to seep in the warm olive oil while you prepare the artichokes.
2. Prepare the Artichokes: Set up a large pot with an inch of water at the bottom and a steamer rack. Prepare lemon wedges for rubbing. For a refined look, use scissors to snip away the pointy tips of the artichoke leaves. Rub the cut areas with lemon juice to prevent browning. Use a vegetable peeler to remove the thick outer layer from the stems, trimming them to 2 inches from the base. Cut off and discard the top 1/2 inch of the artichokes, then halve them. Scoop out the fuzzy chokes and small inner leaves with a strong metal spoon. Coat the exposed areas with lemon juice.
3. Steam the Artichokes: Bring the water in the pot to a boil, then reduce to medium-high. Place the artichoke halves cut-side down on the steamer rack. Cover and steam for 20 minutes, or until the outer leaves pull off easily and the heart is tender when pierced with a knife. The artichokes should be slightly undercooked as they will finish cooking on the grill.
4. Grill to Perfection: Preheat your grill for direct, high heat. Toss the steamed artichokes in the infused oil, coating them generously. Sprinkle with salt and pepper. Place cut-side down on the grill grates, cover, and grill for 5 to 10 minutes until grill marks appear.

---


The process of preparing these artichokes always takes me back to my childhood when my grandmother would invite us to her sun-drenched patio. As kids, we were tasked with snipping the artichoke leaves and rubbing them with lemon wedges—a small but significant ritual that made us feel part of the culinary adventure.


There was magic in watching the artichokes transform on the grill, the heat creating beautiful char marks that hinted at the smoky flavors within. As we sat around the table, passing the artichokes and sharing stories, the dish became more than just food; it was a vessel for connection, laughter, and the creation of new memories.


Whether you're looking to recreate a piece of family tradition or simply explore new flavors, these Grilled Lemon Garlic Artichokes promise to deliver a taste of nostalgia and a touch of elegance to your summer gatherings. As an appetizer, they set the stage for a meal filled with warmth and joy—a reminder that the best moments in life are often shared around the table.


Difficulty: 6/10
Classification: Appetizer

Read more about Appetizers

Read more about Main Dishes

Read more about Desserts

Chimichurri Skirt Steak with Grilled Asparagus | Made by Meaghan Moineau

Chimichurri Skirt Steak with Grilled Asparagus | Made by Meaghan Moineau

Title: "A Taste of Tradition: Chimichurri Skirt Steak with Grilled Asparagus"
Description: Dive into a culinary journey with our Chimichurri Skirt Steak and Grilled Asparagus recipe. This main dish combines vibrant flavors with a touch of nostalgia, perfect for gatherings and family dinners. Discover the simplicity and elegance of Argentinian-inspired cooking with a personal story that ties it all together.

---


A Taste of Tradition: Chimichurri Skirt Steak with Grilled Asparagus

There's something remarkably comforting about revisiting cherished family recipes. Each dish is a tapestry of flavors intertwined with memories, weaving a story that transcends generations. Today, we delve into the vibrant world of Chimichurri Skirt Steak with Grilled Asparagus—a dish that has not only graced our table but has also become a symbol of togetherness in our family.


A Family Heritage on a Plate

Growing up, Sundays were synonymous with family gatherings at my grandparents' house. The aroma of grilled meats and fresh herbs would fill the air, mingling with the sounds of laughter and storytelling. My grandfather, an avid cook, would always prepare his signature chimichurri sauce—a recipe passed down from his Argentinean grandmother. I remember standing on tiptoe, barely tall enough to peek over the kitchen counter, as he meticulously blended fresh parsley, oregano, and mint leaves, adding just the right amount of garlic and red wine vinegar.


As the adults chatted and caught up on the week's happenings, my cousins and I would run around the garden, waiting for the moment when the grill was finally ready. The sizzle of skirt steaks hitting the hot grill is a sound I can still hear vividly. Paired with the perfectly grilled green and white asparagus, this dish was a staple at our family gatherings, bringing everyone together around the table.


The Recipe: A Symphony of Flavors

Here's how you can recreate this beloved dish, infusing your own gatherings with a touch of tradition and flavor.


Ingredients:

- Green and white asparagus


- 1-2 teaspoons chili pepper flakes


- 1 cup flat-leaf parsley


- 1/2 cup fresh mint leaves


- 3 to 5 garlic cloves


- Kosher salt


- 2 tablespoons lemon juice


- 1 cup olive oil


- 1/2 cup fresh oregano leaves


- Black freshly cracked pepper


- 1/4 cup red wine vinegar


- 1 shallot, diced


- 2-3 skirt steaks


Instructions:
1. Chimichurri Sauce: Place all chimichurri sauce ingredients except for the olive oil in a food processor and pulse until well chopped. While the processor is running, slowly pour in the olive oil until the mixture is blended. Reserve half of the sauce to serve with the meal.
2. Marinate the Steaks: Season the skirt steaks with salt and pepper on both sides. Spoon the remaining chimichurri sauce over the steaks and let them marinate for 30 minutes up to overnight.
3. Prepare the Grill: Preheat your grill to a temperature between 350 to 400°F.
4. Grill the Asparagus: In a plastic resealable bag, combine asparagus, olive oil, garlic, salt, and pepper. Shake to coat and place in a grill basket. Grill asparagus over direct heat, gently tossing for even cooking. Baste with the garlic and olive oil mixture for about 10 minutes.
5. Grill the Steaks: Grill the skirt steaks to your desired temperature, approximately 5 to 8 minutes per side. Once cooked, remove them from the grill and let them rest for 10 minutes before slicing into long strips.
6. Serve: Spoon the reserved chimichurri sauce over the sliced steak and serve with grilled asparagus on the side.
Difficulty: 5/10

As we gather around the table, this dish continues to be a testament to our family's love for food and togetherness. The vibrant flavors of the chimichurri sauce, paired with the smoky goodness of grilled asparagus and tender skirt steak, create a culinary experience that is as joyful as the memories it evokes.


Whether you're creating new traditions or revisiting old ones, may this Chimichurri Skirt Steak with Grilled Asparagus bring a touch of nostalgia and connection to your next meal. Enjoy!

Read more about Appetizers

Read more about Main Dishes

Read more about Desserts

Balsamic Marinated Lamb Chops | Made by Meaghan Moineau

Balsamic Marinated Lamb Chops | Made by Meaghan Moineau

Title: Unveiling the Charm of Balsamic Marinated Lamb Chops: A Culinary Journey Back in Time
Description: Dive into a flavorful culinary experience with our Balsamic Marinated Lamb Chops recipe. This main dish isn't just a meal; it's a nostalgic trip back to family gatherings and cherished memories. Perfectly seasoned and grilled to perfection, these lamb chops are sure to impress. Prepare to tantalize your taste buds with the aromatic blend of garlic, balsamic vinegar, and fresh herbs. Difficulty: 6/10

---


A Nostalgic Culinary Journey: Balsamic Marinated Lamb Chops

There's something truly magical about the aroma of Balsamic Marinated Lamb Chops sizzling on the grill. It transports me back to those idyllic family gatherings, where laughter mingled with the tantalizing scents of herbs and spices. The recipe I'm about to share isn't just a method for cooking lamb chops; it's a cherished family tradition, lovingly passed down through generations.


Ingredients:

- Lamb loin chops


- 4 cloves of garlic, minced


- 1/2 cup balsamic vinegar


- 2 tablespoons Dijon mustard


- 1 teaspoon fresh oregano


- 1 tablespoon red wine vinegar


- 1/4 cup olive oil


- 2 tablespoons brown sugar


- Kosher salt


- Black pepper


Instructions:
1. Prepare the Marinade: In a mixing bowl, whisk together the garlic, balsamic vinegar, Dijon mustard, oregano, red wine vinegar, olive oil, and brown sugar. This aromatic concoction will serve as the perfect marinade for your lamb chops.
2. Season the Lamb: On a separate plate, generously sprinkle the lamb loin chops with kosher salt and black pepper on both sides. This initial seasoning ensures that the meat is flavorful from the first bite to the last.
3. Marinate the Lamb: Place the seasoned lamb chops into the bowl with the marinade. Toss them gently to ensure each chop is well-coated. Cover the bowl with plastic wrap and refrigerate for at least 1 to 2 hours, turning the chops occasionally to allow the flavors to meld beautifully.
4. Fire Up the Grill: Get your BBQ ready! You'll want medium-high, indirect heat to ensure the lamb chops cook evenly and achieve that perfect medium-rare finish.
5. Grill to Perfection: Place the marinated lamb chops on the grill. Cook each side for approximately 5 to 7 minutes, depending on the thickness of the chops. You're aiming for a luscious medium-rare, where the exterior has a lovely char, and the interior remains juicy and tender.
A Family Memory:

Every time I prepare these lamb chops, I'm reminded of my grandmother's backyard, her garden blooming with the fresh herbs we would use in the marinade. As a child, I was often tasked with picking the freshest oregano leaves, while my siblings helped set up the grill. The air would be filled with the rich scent of balsamic vinegar and garlic, mingling with the laughter and stories shared around the family table. These gatherings weren't just about the food; they were about creating memories and cherishing the time spent with loved ones.


Final Thoughts:

Making Balsamic Marinated Lamb Chops is more than just preparing a meal; it's a celebration of family, tradition, and the timeless joy of sharing good food. With a difficulty rating of 6/10, this dish is approachable for most home cooks and serves as an impressive main dish for any occasion. Whether you're recreating a family memory or starting a new tradition, these lamb chops are sure to become a beloved favorite.

Read more about Appetizers

Read more about Main Dishes

Read more about Desserts

Moroccan Chicken Pitas | Made by Meaghan Moineau

Moroccan Chicken Pitas | Made by Meaghan Moineau

Title: A Taste of Tradition: Moroccan Chicken Pitas
Description: Embark on a flavorful journey with our Moroccan Chicken Pitas, a recipe steeped in rich spices and cherished family memories. Discover how to create this enticing main dish that marries the vibrant flavors of Morocco with a personal touch of nostalgia.

---


A Culinary Adventure: Moroccan Chicken Pitas


When the aroma of paprika, coriander, and cinnamon fills the kitchen, it takes me back to sunny afternoons at my grandmother's house. Our family would gather around the backyard grill, eagerly awaiting the delicious spread that promised to transport us to the bustling souks of Marrakesh. Today, I'm thrilled to share with you our cherished family recipe for Moroccan Chicken Pitas—a dish that's as heartwarming as it is flavorful.


Ingredients:


- For the Chicken:

- Skinless boneless chicken breasts


- 1 teaspoon paprika


- 1 teaspoon coriander


- 1/2 teaspoon cinnamon


- 1 teaspoon cumin


- 1/4 teaspoon cayenne pepper


- 2 cloves garlic, minced


- 1 teaspoon ginger, grated


- Salt to taste


- 2 tablespoons olive oil


- Fresh Italian parsley, finely chopped


- For the Tabbouleh:

- 1 cup cooked quinoa


- 1 can diced petite tomatoes, drained


- 1 yellow onion, diced


- Juice of 1 lemon


- 1/2 cup diced Medjool dates


- 2 tablespoons olive oil


- Sea salt to taste


- For the Yogurt Sauce:

- 1 cup Greek yogurt


- 1/2 cucumber, diced


- Fresh mint, chopped


- Juice of 1 lemon


- Additional:

- Pita bread, halved and split open


Instructions:


1. Prepare the Chicken:

Combine paprika, coriander, cinnamon, cumin, cayenne pepper, garlic, ginger, and salt in a bowl. Mix well to create a fragrant spice blend. Place chicken breasts on a cutting board and pound to about 1/2 inch thick using a meat mallet. Generously rub the spice mixture over all sides of the chicken breasts. Cover and refrigerate for at least an hour to allow the flavors to meld.


2. Make the Tabbouleh:

In a large bowl, combine cooked quinoa, diced tomatoes, onion, lemon juice, Medjool dates, olive oil, and sea salt. Stir well to integrate all the ingredients. Adjust salt and oil to your liking. Cover and chill in the refrigerator while the chicken marinates.


3. Prepare the Yogurt Sauce:

In a separate bowl, combine Greek yogurt, diced cucumber, mint, and lemon juice. Stir to combine and refrigerate until ready to serve.


4. Grill the Chicken:

Preheat your grill to medium heat. Grill the marinated chicken breasts until fully cooked, about 16 minutes, ensuring some crispy edges form for added flavor. Once cooked, let them rest for a few minutes before slicing.


5. Assemble the Pitas:

Take the halved pita bread and fill each with slices of grilled chicken, a generous helping of tabbouleh, and a dollop of the refreshing yogurt sauce.


Nostalgic Family Story:


This dish always reminds me of family gatherings at my grandmother's home. She had a magical way of bringing everyone together with her cooking. I vividly remember my cousins and I playing in the garden while the adults chatted around the grill. The smell of the spices wafted through the air, creating an atmosphere of warmth and anticipation. My grandmother would always remind us that food is not just about nourishment—it's about connection and creating memories. These Moroccan Chicken Pitas are more than just a recipe; they are a piece of our family's history, a tradition we continue to savor and celebrate.


Recipe Difficulty: 6/10


Classification: Main Dish

---


Whether you're introducing your family to the vibrant flavors of Morocco or simply looking to add a new favorite to your meal rotation, these Moroccan Chicken Pitas promise an unforgettable dining experience. Enjoy the journey and create your own cherished memories with every bite.

Read more about Appetizers

Read more about Main Dishes

Read more about Desserts