Vegan Taco bowls with Cilantro Lime Cauliflower Rice | Made by Meaghan Moineau

Vegan Taco bowls with Cilantro Lime Cauliflower Rice | Made by Meaghan Moineau

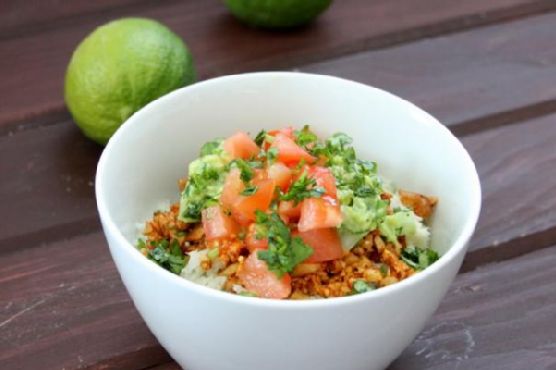
Title: Savoring Simplicity: Vegan Taco Bowls with Cilantro Lime Cauliflower Rice
Description: Discover the vibrant flavors of Vegan Taco Bowls with Cilantro Lime Cauliflower Rice. This wholesome, plant-based dish is not only a feast for your taste buds but also a nod to family traditions and shared meals. Perfect as a main dish, this recipe is a delightful medley of textures and tastes, bringing together creamy guacamole, spicy nut meat, and aromatic cauliflower rice. Rated 5/10 in difficulty, it's an accessible and rewarding culinary experience.

---


A Delicious Dive into Nostalgia


There’s something magical about the way certain dishes can transport us back in time, rekindling cherished memories of laughter-filled kitchens and family gatherings. For me, Vegan Taco Bowls with Cilantro Lime Cauliflower Rice is one such dish—an homage to those warm summer evenings spent at my grandmother's house, where the air was always filled with the tantalizing aroma of spices and fresh herbs.


Growing up, taco nights were a staple in our household, a tradition that never failed to bring the family together. My grandmother, with her infectious smile and knack for storytelling, would regale us with tales from her childhood in New Mexico. Her stories were as rich and vibrant as the flavors she infused into her cooking—each ingredient carefully chosen, every spice a reminder of her roots.


This recipe for Vegan Taco Bowls is my plant-based twist on her classic taco nights, a dish that captures the essence of those evenings while embracing a modern, healthy lifestyle. With every bite, I'm reminded of the joy of family, the importance of tradition, and the simple pleasure of a well-cooked meal.


Ingredients


- Avocado oil


- Cauliflower


- Red New Mexico chili powder


- Fresh cilantro


- Garlic powder


- Hass avocado


- Fresh jalapeño


- Fresh lime juice


- Onion


- Salt


- Tomato


- Walnuts


Instructions


1. Prepare the Nuts: Begin by soaking the walnuts in a bowl of water for 2-8 hours before preparing the "meat."
2. Preheat and Prep: Preheat your oven to 375°F (190°C) and line a baking sheet with aluminum foil. Finely chop the cauliflower into rice-sized pieces or pulse in a food processor until the desired consistency is achieved.
3. Cauliflower Rice: Toss the cauliflower with avocado oil and spread it onto the prepared baking sheet in an even layer. Bake for 18 minutes, stirring halfway through to ensure even cooking.
4. Guacamole: While the cauliflower rice is baking, prepare the guacamole. Cut the avocado into large chunks and place it into a small bowl. Add the lime juice and mash the avocado to your preferred consistency. Stir in the chopped cilantro, jalapeño, onion, and a blend of spices. Set aside.
5. Taco Nut Meat: Drain the soaked walnuts and place them into a small food processor. Pulse until they reach a ground meat-like consistency, about 5-7 pulses. Transfer the mixture to a bowl and stir in salt, cumin, garlic powder, and red chili powder. Set aside.
6. Finish the Rice: Once the cauliflower is done baking, transfer it to a mixing bowl while still warm. Stir in fresh lime juice, cilantro, and salt to taste.
7. Assemble the Bowls: To assemble your taco bowls, layer 1 cup of the cilantro lime cauliflower rice in a bowl. Add a generous scoop of taco nut meat, a dollop of guacamole, fresh tomato slices, and a sprinkling of fresh cilantro. Serve immediately, garnished with an additional slice of lime if desired.

A Culinary Journey


Creating these Vegan Taco Bowls is more than just preparing a meal; it's a journey through flavors and memories. With a difficulty rating of 5/10, this dish is approachable yet satisfying, ideal as a hearty main dish for any occasion. Whether you're a seasoned cook or a kitchen novice, this recipe invites you to explore the vibrant world of plant-based cooking, one delicious bowl at a time.


So, gather your loved ones, share stories, and savor every bite—because sometimes, the simplest meals are the ones that create the most lasting memories.
Read more about Appetizers

Read more about Main Dishes

Read more about Desserts

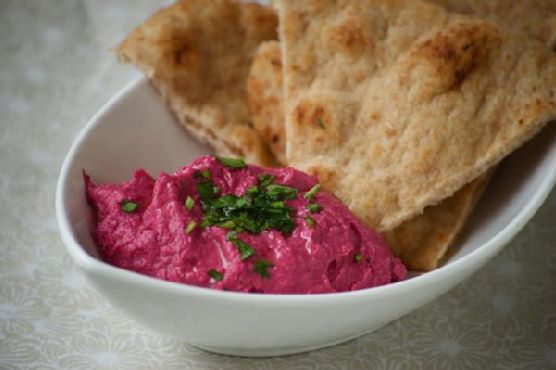
Roasted Beet Hummus | Made by Meaghan Moineau

Roasted Beet Hummus | Made by Meaghan Moineau

Title: A Vibrant Twist on a Classic: Roasted Beet Hummus
Description: Dive into the colorful world of roasted beet hummus, a delightful fusion of flavors that will elevate your appetizer game. This easy-to-make dish combines earthy beets with the creamy texture of traditional hummus, creating a visually stunning and deliciously nutritious treat. Join us as we explore how this vibrant dish became a beloved family favorite, and learn how you can bring this healthy appetizer to your own table.

---


Hummus has been a staple in my family's kitchen for as long as I can remember. Every family gathering, big or small, featured a bowl of this creamy, luscious dip. The traditional hummus, while delicious, took a vibrant turn one summer when my grandmother decided to add roasted beets to the mix. Little did we know, this experiment would become a cherished family tradition.


The summer of the beet hummus was one I’ll never forget. It was a particularly hot July, and my grandparents had invited the whole family over for a weekend barbecue. As we sat around the old wooden table in their backyard, my grandmother emerged from the kitchen with a bowl of hummus that was a vivid shade of magenta. Our eyes widened at the sight, curiosity piqued by this colorful concoction.


As we dipped warm pita bread into the hummus, the combination of flavors was unlike anything we had experienced before. The earthiness of the beets melded perfectly with the creamy chickpeas and tahini, while a hint of garlic and cumin added depth. A squeeze of fresh lemon juice provided a touch of brightness, making each bite refreshing yet satisfying.


From that day forward, roasted beet hummus became a staple at our family gatherings. Its vibrant color and unique flavor always sparked conversations and brought smiles to our faces. It was a dish that not only tasted wonderful but also held the power to bring us together, reminding us of that long, laughter-filled summer afternoon.


Recipe for Roasted Beet Hummus:
Ingredients:

- 2 medium-sized red roasted beets


- 1 can (15 oz) cooked chickpeas, drained and rinsed


- 2 cloves garlic, minced


- 1 teaspoon ground cumin


- Juice of 1 lemon


- 3 tablespoons olive oil (plus more as needed)


- 1 teaspoon salt (or to taste)


- 3 tablespoons tahini sesame seed paste


Instructions:

1. Begin by roasting your beets until they are tender. Once cooled, peel and chop them into smaller pieces.


2. Place the roasted beets, garlic, cumin, lemon juice, salt, and tahini in a food processor or blender. Pulse until well blended and smooth.


3. Add the cooked chickpeas and olive oil to the processor. Pulse until the mixture is just incorporated. If needed, add more olive oil to reach your desired consistency.


4. Taste and adjust seasoning as needed. If you prefer a thinner hummus, gradually add more olive oil while blending.


5. Serve your roasted beet hummus with warm pita or flatbread and enjoy the burst of flavors.


Difficulty Rating: 3/10
Classification: Appetizer

Roasted beet hummus is not only a feast for the eyes but also a nutritious and flavorful appetizer that’s easy to prepare. It's perfect for any gathering and is sure to become a favorite in your home, just as it did in ours. Whether you’re a seasoned cook or a kitchen novice, this dish is a delightful way to bring people together and create lasting memories.

Read more about Appetizers

Read more about Main Dishes

Read more about Desserts

Green Tea Fruit Medley Smoothie | Made by Meaghan Moineau

Green Tea Fruit Medley Smoothie | Made by Meaghan Moineau

A Sip of Nostalgia: Green Tea Fruit Medley Smoothie


Description: Dive into the refreshing world of our Green Tea Fruit Medley Smoothie, a vibrant concoction that seamlessly blends the health benefits of green tea with the sweetness of fresh berries and pineapple juice. This easy-to-make smoothie is perfect for those who crave a flavorful, nutrient-packed drink that evokes cherished family memories. Ideal as a light appetizer or an energizing dessert, our smoothie recipe will transport you back to simpler times with just one sip.

---


Ingredients


- 1 cup boiling water


- 3 Bigelow Green tea bags


- 1 cup fresh berries (such as strawberries, blueberries, or raspberries)


- 1 cup pineapple juice


- 1 cup vanilla yogurt


- 1 cup ice cubes


Instructions


1. Prepare the green tea by steeping 3 Bigelow Green tea bags in 1 cup of boiling water for 5 minutes.


2. Carefully squeeze out the tea bags to extract all the flavor, then discard the bags.


3. In a blender, combine the prepared tea, fresh berries, pineapple juice, vanilla yogurt, and ice cubes.


4. Blend the mixture until smooth and creamy.


5. Pour into glasses and enjoy immediately for the freshest taste.


A Nostalgic Family Memory


Growing up, summers at my grandparents' house were nothing short of magical. Nestled in the heart of the countryside, their home was surrounded by lush berry bushes that seemed to stretch for miles. As kids, my siblings and I spent our days picking berries under the warm sun, competing to see who could fill their basket the fastest.


One particularly hot afternoon, we returned to the house, our faces and fingers stained with berry juice. Grandma greeted us with a smile and a new treat in mind—a cooling smoothie made from our freshly picked berries. She added her own special twist with a splash of pineapple juice and the aromatic touch of green tea, which she swore by for its health benefits. The blend was finished with a dollop of creamy vanilla yogurt and a handful of ice cubes, creating a smoothie that was both refreshing and revitalizing.


Every sip of that vibrant Green Tea Fruit Medley Smoothie was a burst of flavor, capturing the essence of summer in a glass. It became a cherished tradition, a symbol of our summers together, and a treasured memory that I carry with me to this day. Now, I recreate this smoothie to transport myself back to those carefree days, sharing it with my own family and keeping the legacy alive.


Difficulty Rating


Difficulty: 2/10


Classification: Appetizer/Dessert

This Green Tea Fruit Medley Smoothie is simple to prepare, making it a great option for both beginners and seasoned cooks looking for a quick, healthy treat. Whether enjoyed as a light appetizer or a refreshing dessert, it promises to be a hit with family and friends alike.

Read more about Appetizers

Read more about Main Dishes

Read more about Desserts

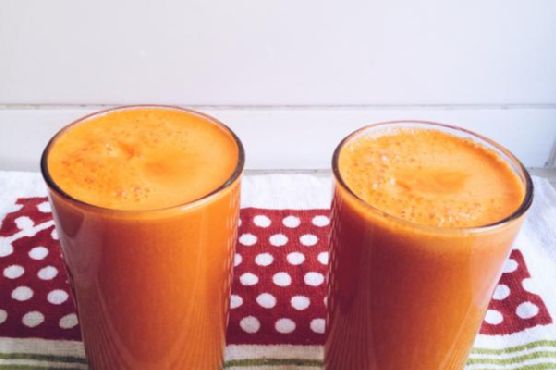
Detox Orange Carrot Juice | Made by Meaghan Moineau

Detox Orange Carrot Juice | Made by Meaghan Moineau

**Title: Sip into Wellness: Detox Orange Carrot Juice Recipe**


**Description:**


Embark on a journey of rejuvenation with our Detox Orange Carrot Juice. This vibrant blend not only boasts an array of health benefits but also invites a wave of nostalgia, reminiscent of cherished family moments. Easy to prepare, this juice is your gateway to feeling lighter and refreshed.


---


In the whirlwind of modern life, finding a moment of peace often feels like a treasure hunt. But what if serenity was just a sip away? Enter our Detox Orange Carrot Juice, a vibrant concoction that harmonizes taste and wellness. With its radiant hue and refreshing flavor, this juice is not just a drink, but an experience—a journey back to simpler times.


**Ingredients:**


- Fresh carrots


- Juicy oranges


- Fresh ginger


- Fresh ground turmeric (or ground turmeric)


- Honey


**Instructions:**


1. Begin by juicing the carrots, oranges, and ginger in your juicer. If available, juice fresh turmeric as well.


2. Stir in ground turmeric and honey until well combined.


3. Pour the juice into two medium glasses or one large glass.


4. Enjoy immediately, feeling lighter and refreshed.


**Difficulty: 3/10**


**Classification: Appetizer**


---


**A Nostalgic Sip: A Family Memory**


I vividly recall summer mornings at my grandmother's cottage, where the sun filtered through the kitchen window, casting golden patterns on the wooden floor. My grandmother, a firm believer in the healing powers of nature, had a ritual: preparing a fresh juice blend to kickstart the day. Her favorite? A simple yet invigorating orange carrot juice, infused with the warmth of ginger and the earthiness of turmeric.


I would watch in awe as she expertly peeled and sliced the ingredients, her hands moving with practiced grace. The juicer hummed softly, filling the air with a melody of citrus and spice. Those mornings were a symphony of laughter, stories, and the gentle clinking of glasses as we toasted to health and happiness.


It was in those moments that I learned the true essence of nourishment—not just for the body, but for the soul. Each sip was a reminder of the love and care that went into creating something wholesome, a tradition I cherish and pass down to my own family today.


As you sip this Detox Orange Carrot Juice, may it transport you to your own treasured memories, inviting you to pause, reflect, and rejuvenate. Whether enjoyed as a refreshing appetizer or a mid-day pick-me-up, let each glass be a step towards a healthier, more mindful you.


---


In a world that never stops, take a moment to savor the simplicity of this delightful juice. Reconnect with nature, with family, and most importantly, with yourself. Cheers to your health!

Read more about Appetizers

Read more about Main Dishes

Read more about Desserts

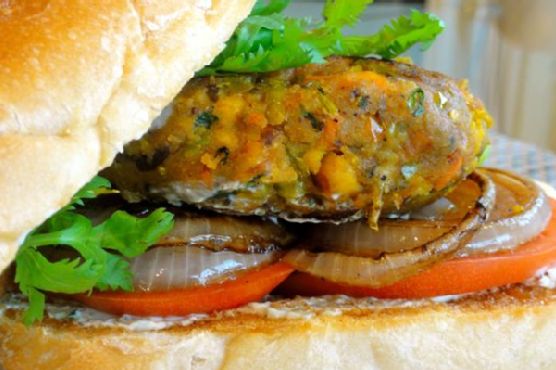
Masala-Tofu Burger | Made by Meaghan Moineau

Masala-Tofu Burger | Made by Meaghan Moineau

# Masala-Tofu Burger: A Flavorful Fusion Delight


## A Wholesome and Spicy Vegan Alternative


If you're looking to spice up your burger game with a healthy, vegan twist, the Masala-Tofu Burger is your answer. This vibrant dish combines the hearty goodness of tofu with the rich, aromatic spices of an Indian kitchen. Perfect for a weekend treat or a summer cookout, this burger is sure to impress family and friends alike. Let's dive into this culinary adventure that beautifully marries flavors and cultures.


### Ingredients You'll Need


- **White Onion:** Shopping list


- **Diced Red/Orange/Green Bell Pepper:** Shopping list


- **Frozen Peas-Carrots Mix:** Shopping list


- **Green Chilies:** Shopping list


- **Tofu:** Shopping list


- **Diced Potato:** Boiled


- **Garlic:** Shopping list


- **Black Mustard Seeds:** Shopping list


- **Curry Leaves:** Shopping list


- **Hing (Asafoetida):** Shopping list


- **Cumin Powder:** Shopping list


- **Turmeric:** Shopping list


- **Lemon:** Shopping list


- **Salt:** Shopping list


- **Cilantro:** Washed and finely chopped, shopping list


- **Indian Breadcrumbs:** Shopping list


- **Vegetable Oil:** Shopping list


- **PAM Original Flavor Spray:** Shopping list


- **Red/White Onion:** For garnish


- **Beefsteak Tomatoes:** Sliced for garnish


- **Mint-Cilantro Chutney Spread:** Shopping list


- **Portuguese Rolls:** Shopping list


### Cooking Instructions


1. **Prepare the Skillet:**


- In a large skillet over medium-high heat, spray a generous amount of PAM and add vegetable oil.


- Add black mustard seeds and sauté for 30 seconds until you hear popping noises.


- Carefully add curry leaves, as they will splatter in the hot oil.


2. **Cook the Vegetables:**


- Add diced onions and bell peppers; sweat them for about 30 seconds.


- Add chopped garlic, green chilies, and turmeric. Sauté for 5-7 minutes until onions and peppers are soft.


- Add the peas-carrots mix, cumin powder, and salt. Cook for another 7-10 minutes until all veggies are soft.


3. **Marinate the Tofu:**


- In a small bowl, combine cubed tofu with a pinch of turmeric, cumin powder, coarse black pepper, and cayenne pepper (optional). Set aside to marinate.


4. **Combine and Cook:**


- Add marinated tofu to the skillet and cook until slightly browned and crumbly.


- Squeeze juice from half a lemon and add half of the chopped cilantro. Mix well.


- Add diced boiled potatoes and toss until everything is coated. Taste for salt and spices.


- Mash the mixture until mushy and veggies are small. Set aside to cool.


5. **Form the Patties:**


- Once cooled, add breadcrumbs and mix with your hands.


- Form into four thick patties. If needed, add more breadcrumbs for consistency.


- Place patties on a plate and wrap with plastic wrap until ready to use.


6. **Cook the Patties:**


- In a small skillet sprayed with PAM over medium-high heat, cook each patty for about 2 minutes on each side until browned and crispy.


- Simultaneously, sauté thick slices of onion until charred and slightly soft.


7. **Assemble the Burger:**


- Spread a generous amount of mint-cilantro chutney on each side of the Portuguese rolls.


- Place the tofu patty, charred onions, tomato slices, and fresh cilantro leaves between the buns.


- Serve with a slice of lemon and reduced-fat chips on the side.


### A Nostalgic Family Memory


Growing up, Sundays were special in our family. My grandmother would gather us around her cozy kitchen, the air filled with a medley of spices and laughter. She had a knack for transforming simple ingredients into magical dishes, and her Masala-Tofu Burger was a family favorite. We would eagerly form an assembly line, each adding our own touch to the burgers. The final product was always met with cheers and anticipation, as we savored the deliciously spiced patty nestled between soft, fresh rolls. Even today, as I recreate this dish in my own kitchen, I am transported back to those cherished moments of family and flavor.


### Difficulty Level


- **Difficulty:** 6/10


- **Classification:** Main Dish


This Masala-Tofu Burger is a delightful blend of spices and textures, perfect for those looking to explore new culinary territories. Whether you're a seasoned cook or a beginner, this recipe offers a rewarding experience with every bite. Enjoy the memories and flavors that come with this unique twist on a classic favorite!

Read more about Appetizers

Read more about Main Dishes

Read more about Desserts

Salmon Caesar Salad | Made by Meaghan Moineau

Salmon Caesar Salad | Made by Meaghan Moineau

**Title: "Savor the Memories: A Family Tradition with Salmon Caesar Salad"**


**Description:**


Dive into a delightful blend of flavors with our Salmon Caesar Salad, a dish that not only tantalizes the taste buds but also brings back treasured family memories. Perfect as a main dish, this recipe is easy to prepare and offers a healthy twist on a classic favorite. Join us as we explore the simplicity of bringing together fresh ingredients and cherished moments in the kitchen.


---


### A Nostalgic Flavor Journey: Salmon Caesar Salad


As the aroma of sizzling salmon fills the kitchen, I'm instantly transported back to Sunday afternoons spent in my grandmother's sunlit dining room. It was there, amidst the laughter and stories shared across generations, that our family tradition of Salmon Caesar Salad was born.


My grandmother, a woman of simple tastes yet an extraordinary cook, had a knack for transforming humble ingredients into culinary masterpieces. Her version of Salmon Caesar Salad was no exception, a dish that became a staple at every family gathering.


#### The Heart of the Recipe


The magic begins with fresh, succulent salmon fillets, seasoned gently with salt and a sprinkle of paprika. As they sear in a hot skillet, the kitchen fills with a warm, inviting aroma, reminiscent of those cherished Sundays. The light seasoning allows the natural flavors of the salmon to shine, while a dash of freshly squeezed lemon juice adds a refreshing zing.


The salad itself is a crisp medley of romaine lettuce tossed in a light Caesar dressing. The crunch of the lettuce paired with the creamy dressing creates a perfect base for the star of the dish. Topped with shredded Parmesan cheese and slivered almonds, each bite offers a delightful contrast in textures and flavors.


#### Bringing it All Together


Once the salmon is perfectly cooked to your liking—I prefer mine slightly undercooked for a tender, melt-in-your-mouth experience—it's time to assemble the dish. In a large bowl, mix the romaine lettuce with the Caesar dressing before spreading it out on a large plate. Layer the salmon slices on top, each piece a testament to the careful preparation and love poured into the dish. A final sprinkle of black pepper and a touch more lemon juice complete the masterpiece, ready to be shared with loved ones.


#### A Family Tradition


Every time I prepare this dish, I'm reminded of the joy and warmth of family gatherings. The simplicity of the ingredients mirrors the uncomplicated happiness we found in each other’s company. Sharing this meal is more than just satisfying hunger; it's about preserving a legacy of love, laughter, and delicious food.


#### Recipe Details


- **Difficulty:** 3/10


- **Classification:** Main Dish


Whether you're a seasoned chef or a beginner in the kitchen, this Salmon Caesar Salad is a delightful way to bring a touch of nostalgia and a burst of flavor to your table. It's a dish that celebrates the beauty of simplicity and the joy of shared moments, one forkful at a time.


---


Embrace the tradition, savor the memories, and enjoy the delicious harmony of flavors with your own family. This Salmon Caesar Salad is more than just a recipe—it's a gateway to cherished memories and new traditions.

Read more about Appetizers

Read more about Main Dishes

Read more about Desserts

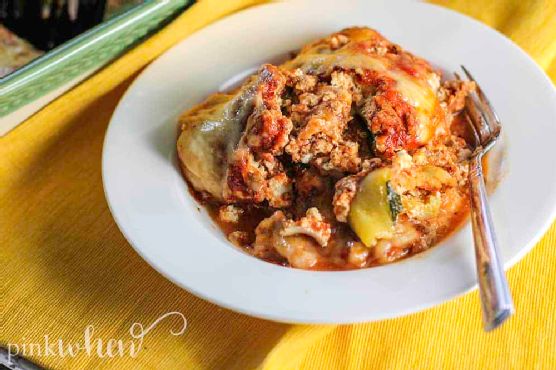
Excellent No Fail and Easy Keto Zucchini Lasagna | Made by Meaghan Moineau

Excellent No Fail and Easy Keto Zucchini Lasagna | Made by Meaghan Moineau

**Title: Savor the Simplicity: The No-Fail, Easy Keto Zucchini Lasagna Recipe**


**Description:** Dive into the comforting nostalgia of family dinners with our Excellent No-Fail and Easy Keto Zucchini Lasagna. This low-carb, nutrient-packed dish is not only a healthier alternative to traditional lasagna but also a delightful journey back to cherished family gatherings. With layers of savory flavors and creamy textures, this main dish promises to be a hit at your dinner table. Rated 3 out of 10 on the difficulty scale, it's perfect for both novice and experienced cooks looking to create something special without the hassle.


---


When I think back to my childhood, the kitchen was always the heart of our home. It was a place filled with laughter, warmth, and the tantalizing aroma of my grandma's cooking. One dish that stands out, evoking a flood of memories, is her famous zucchini lasagna. A healthier twist on the classic, she crafted this masterpiece long before keto became a household term.


I remember the excitement as I watched her expertly slice the zucchini, her hands steady with years of practice. She would hand me scraps of cheese to nibble on while regaling me with stories from her past—stories of growing up in a small town, where everyone knew everyone, and meals were a communal affair. Her zucchini lasagna wasn’t just food; it was a narrative that connected generations.


Now, inspired by her, I bring to you a rendition of this beloved family classic: the Excellent No-Fail and Easy Keto Zucchini Lasagna. It’s a dish that marries nostalgia with the modern-day quest for healthier living, and it’s surprisingly simple to make.


**Ingredients:**


- Fresh basil


- 1 medium bell pepper, diced


- 1 lb lean ground turkey


- 1 ½ cups shredded mozzarella cheese


- 1 medium onion, chopped


- ½ cup shredded parmesan


- Fresh parsley, chopped


- 1 medium red bell pepper, diced


- 1 cup ricotta cheese


- A pinch of sugar (optional)


- 2 cups tomato sauce


- ½ teaspoon white pepper


- 3 medium zucchinis, sliced lengthwise


**Instructions:**


1. **Prep the Zucchini:** Preheat your oven to 375°F. Slice the zucchinis lengthwise and lay them flat on a cookie sheet. Bake for 15 minutes to remove excess moisture—an essential step for avoiding a watery lasagna.


2. **Cook the Meat Sauce:** In a medium saucepan, sauté the onion and bell peppers until they are soft and fragrant. Add the ground turkey, cooking until browned. Stir in the tomato sauce, white pepper, and a pinch of sugar to balance the acidity. Let it simmer over low heat for 5 minutes.


3. **Prepare the Cheese Mixture:** In a bowl, combine ricotta cheese, shredded parmesan, and chopped basil. Mix well and set aside.


4. **Assemble the Lasagna:** In a 9x13 baking dish, begin with a layer of zucchini noodles. Spread a portion of the cheese mixture over the zucchini, followed by a layer of the savory meat sauce. Repeat these steps to form multiple layers, ending with a generous topping of mozzarella cheese.


5. **Bake to Perfection:** Cover the baking dish with foil and bake for 30 minutes. Remove the foil and bake for an additional 10 minutes to achieve a golden, bubbly top. Allow the lasagna to cool for 5 minutes before serving.


This zucchini lasagna is more than just a meal; it’s a tribute to the legacy of family gatherings and culinary traditions. Each bite is a reminder of those cozy nights spent around the table, sharing stories and laughter.


**Difficulty:** 3/10


**Classification:** Main Dish


Indulge in the wholesome goodness of this low-carb delight, and perhaps, like me, you’ll find yourself reminiscing about your own family’s cherished kitchen memories. Enjoy!

Read more about Appetizers

Read more about Main Dishes

Read more about Desserts

Spicy Salad with Kidney Beans, Cheddar, and Nuts | Made by Meaghan Moineau

Spicy Salad with Kidney Beans, Cheddar, and Nuts | Made by Meaghan Moineau

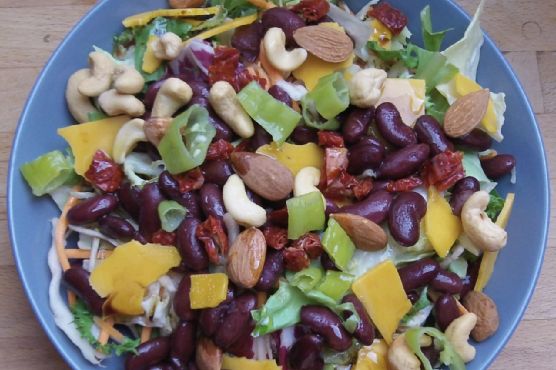
**Title: Zesty Delight: Spicy Salad with Kidney Beans, Cheddar, and Nuts**


**Description:** Dive into a symphony of flavors with our Spicy Salad featuring kidney beans, cheddar, and a medley of nuts. This vibrant dish is not just a treat for your taste buds but also a wholesome meal that can be whipped up in record time. Perfect for a quick lunch or a light dinner, this salad is both nutritious and satisfying, boasting a tantalizing mix of creamy, crunchy, and spicy elements. Join me as I share a cherished family memory that this delightful salad brings to mind.


---


**The Art of Quick and Healthy: Spicy Salad with Kidney Beans, Cheddar, and Nuts**


When it comes to preparing a meal that's both quick and nourishing, salads often take the spotlight. This Spicy Salad with Kidney Beans, Cheddar, and Nuts is a testament to how simple ingredients can come together to create a dish that's delicious and deeply satisfying. As a bonus, it's a meal that carries with it a personal story from my childhood that makes it even more special.


**Ingredients:**


- 1 cup cooked kidney beans, rinsed and drained


- 1/4 cup almonds


- 1 ripe avocado, sliced


- 2 tablespoons balsamic vinegar


- 1/2 cup cheddar cheese, torn into small pieces


- 4 cups mixed greens


- 2 tablespoons olive oil


- 1/4 cup salted roasted cashews


- 1/4 cup sundried tomatoes, cut into strips


- A dash of Tabasco


**Instructions:**


1. Begin by preparing your ingredients: Rinse and drain the kidney beans, cut the sundried tomatoes into strips, and tear the cheddar cheese into small, bite-sized pieces.


2. In a large salad bowl, lay down a bed of mixed greens. Top the greens with kidney beans, sundried tomatoes, cheddar cheese, almonds, and cashews.


3. In a small mixing bowl, combine olive oil, balsamic vinegar, and a dash of Tabasco sauce. Stir well to create a zesty dressing.


4. Drizzle the dressing over the salad, ensuring every ingredient gets a touch of that spicy, tangy goodness.


5. Give it a gentle toss, ensuring all the flavors meld together beautifully.


This salad is not just a wonderful mix of textures and flavors but also a slice of my family's culinary history. Growing up, Sundays were reserved for family picnics in our local park. My mother would pack a wicker basket with freshly prepared dishes, and this spicy salad was always a staple. I remember the vivid flavors of the kidney beans and cheddar mixing with the crunch of the nuts and the tangy kick from the Tabasco-laced dressing. It was the perfect meal to enjoy on a sunny afternoon, surrounded by laughter and the rustling of leaves.


**Difficulty:** 3/10


**Classification:** Main Dish


With its simple preparation and vibrant flavors, this salad is an excellent choice for anyone looking to enjoy a quick, healthy meal that's rich in protein and fiber. Whether you're reminiscing about family picnics or simply seeking a nutritious lunch option, this Spicy Salad with Kidney Beans, Cheddar, and Nuts is sure to become a favorite. Enjoy the journey of flavors and memories with every bite!

Read more about Appetizers

Read more about Main Dishes

Read more about Desserts

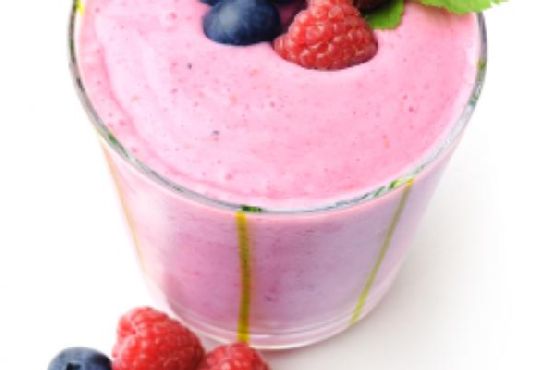
Mixed Berry Yogurt with Almonds | Made by Meaghan Moineau

Mixed Berry Yogurt with Almonds | Made by Meaghan Moineau

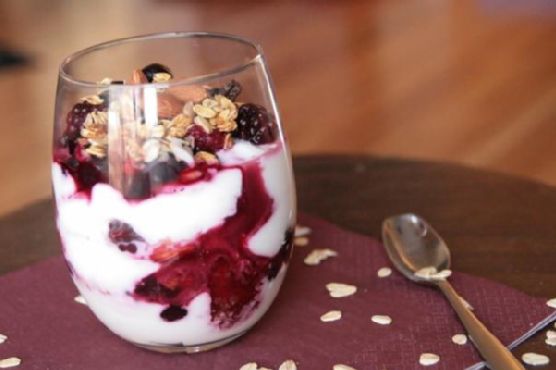
**Title: "A Symphony of Flavors: Mixed Berry Yogurt with Almonds"**


**Description:**


Discover the delightful fusion of flavors in our Mixed Berry Yogurt with Almonds recipe. This versatile dish, perfect for breakfast or dessert, combines the tangy sweetness of berries with the creamy richness of Greek yogurt and the satisfying crunch of almonds. Join us as we explore the endless variations this recipe offers and share a nostalgic family memory that makes this dish truly special.


---


**A Symphony of Flavors: Mixed Berry Yogurt with Almonds**


In the realm of culinary delights, there are few combinations as harmoniously balanced as our Mixed Berry Yogurt with Almonds. This dish, with its vibrant colors and tantalizing textures, transcends the boundaries of a typical breakfast or dessert. It invites you to indulge in its simplicity while offering endless opportunities for creative variations.


**Ingredients:**


- Frozen mixed berries


- Whole oats


- Plain Greek yogurt


- Whole almonds


**Instructions:**


This recipe is as flexible as it is delicious, allowing you to assemble it in a variety of ways. For an aesthetically pleasing presentation, layer the ingredients in a glass cup or bowl. Start with a layer of Greek yogurt, followed by a sprinkle of whole oats, a generous scoop of mixed berries, and a handful of whole almonds. Repeat the layers as desired.


**Variations:**


The beauty of this recipe lies in its adaptability. For a more indulgent dessert, consider using a creamier vanilla yogurt or drizzling a touch of maple syrup over the yogurt layer. Feel free to experiment with different kinds of nuts—toast them for an added depth of flavor and crunch. If you find yourself without berries, fear not; this dish works wonderfully with almost any fruit you have on hand.


**A Nostalgic Family Memory:**


As I prepare this dish, I'm transported back to lazy summer mornings at my grandmother's house. Her kitchen was always filled with the comforting aroma of freshly toasted nuts and the sweet tang of ripe berries. I remember sitting at her wooden table, watching as she effortlessly assembled this dish with whatever fruits she had picked from her garden that morning.


Each spoonful was a burst of flavor, a harmony of textures that seemed to capture the essence of those sunlit days. My grandmother would share stories of her childhood, tales of family gatherings and the joy of creating something delicious with simple, wholesome ingredients. This dish, for me, is a connection to those cherished moments—a reminder that the simplest recipes often hold the most profound memories.


**Difficulty Rating: 2/10**


**Classification: Breakfast/Dessert**


With its minimal preparation and endless customization options, this Mixed Berry Yogurt with Almonds is a delightful dish that anyone can create. Whether you're enjoying it as a nourishing breakfast or a satisfying dessert, may it bring warmth to your table and create memories that last a lifetime.

Read more about Appetizers

Read more about Main Dishes

Read more about Desserts

Szechuan-Style Shirataki Noodles | Made by Meaghan Moineau

Szechuan-Style Shirataki Noodles | Made by Meaghan Moineau

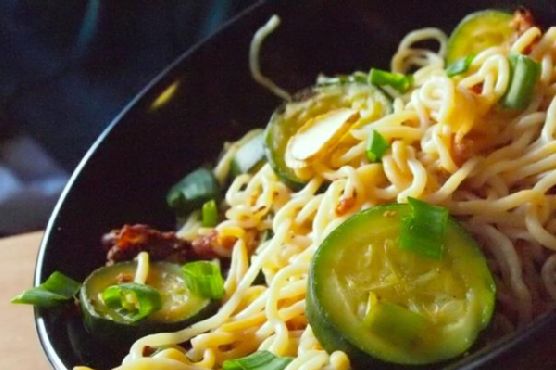
# Spice Up Your Meals with Szechuan-Style Shirataki Noodles


Are you looking for an exciting twist to your weeknight dinners? Look no further! Our Szechuan-Style Shirataki Noodles are a flavorful, easy-to-make dish that will tantalize your taste buds and impress your family and friends. This recipe is packed with bold flavors and is the perfect combination of spicy, savory, and aromatic goodness. Plus, it’s a guilt-free indulgence, thanks to the low-calorie shirataki noodles. Get ready to dive into a delightful culinary adventure!


## A Family Tradition with a Twist


Growing up, family dinners were always a cherished time in our household. My mother, a culinary enthusiast, would often experiment with various global cuisines. One of my fondest memories is the first time she introduced us to Szechuan-style cooking. The spicy aroma that filled the kitchen was unlike anything I had ever smelled before. I remember sitting around the dining table, our eyes wide with anticipation, as she served us a dish that would soon become a family favorite.


Years later, I decided to recreate this dish with a modern twist by incorporating shirataki noodles. Not only did it bring back a flood of happy memories, but it also offered a healthier alternative without compromising on flavor. Sharing this dish with my own family has kept the tradition alive, and it’s now a staple in our home.


## Ingredients You’ll Need


- Shirataki noodles


- Protein of your choice (tofu, chicken, beef, or turkey)


- Soy sauce


- Dry rice wine


- Chili sauce


- Fresh ginger


- Green and white scallions


- Raw veggies (bell peppers, carrots, broccoli, etc.)


- Sesame oil


## Step-by-Step Instructions


1. **Prepare the Noodles**: Microwave the shirataki noodles for 1 minute on high. Drain them thoroughly, pat them dry, and set aside.


2. **Marinate the Protein**: In a bowl, combine soy sauce, rice wine, and chili sauce. Add your chosen protein and toss to coat. If using ground meat, mix thoroughly and set aside.


3. **Stir-Fry Magic**: Spray a non-stick skillet with vegetable oil and heat over high flame. Add fresh ginger and cook for about 30 seconds until fragrant. Add your raw veggies and stir-fry until they’re nearly al dente.


4. **Add Flavor and Protein**: Toss in the scallions and marinated protein. Continue to stir-fry until the protein is cooked through (1-2 minutes for tofu, soy, or turkey).


5. **Combine and Serve**: Add the shirataki noodles to the skillet, sprinkle with an additional 2 tsp. of soy sauce, and stir-fry for about 1 minute until heated through. Transfer to a serving bowl, drizzle with sesame oil, and toss.


## Dish Classification and Difficulty


- **Classification**: Main Dish


- **Difficulty**: 4/10


This delightful dish is not only easy to prepare but also offers a quick escape to the vibrant streets of Szechuan. Whether you’re a seasoned cook or a beginner, this recipe is straightforward and guaranteed to deliver a burst of flavor with every bite.


## Final Thoughts


Our Szechuan-Style Shirataki Noodles are more than just a meal—they’re a journey through family memories and culinary exploration. By combining traditional Szechuan flavors with the modern twist of shirataki noodles, this dish offers a perfect balance of health and taste. Gather your loved ones, share your own stories, and create new memories with this delightful recipe. Enjoy!

Read more about Appetizers

Read more about Main Dishes

Read more about Desserts

Raw Vegan Chocolate and Raspberry Cake | Made by Meaghan Moineau

Raw Vegan Chocolate and Raspberry Cake | Made by Meaghan Moineau

**Title: Indulge in Nostalgia: A Raw Vegan Chocolate and Raspberry Cake to Remember**


**Description:** Dive into the delicious blend of raw vegan ingredients with our Chocolate and Raspberry Cake. Discover the story behind this decadent dessert that ties the past to the present, and find out why it has become a cherished family tradition. Perfect for satisfying sweet cravings while keeping it healthy, this dessert is a testament to the beauty of simple, wholesome ingredients.


---


There’s something undeniably magical about the flavors of chocolate and raspberries. They remind me of my grandmother’s kitchen, a place filled with warmth and the sweet aroma of freshly baked delights. Yet, among all her creations, it was her chocolate and raspberry cake that stood out—a dessert that was as much a treat for the soul as it was for the taste buds.


Fast forward to today, and I’ve embraced a raw vegan lifestyle. The challenge was to recreate this nostalgic dessert without compromising on taste. Enter the Raw Vegan Chocolate and Raspberry Cake, a modern twist on a beloved classic, perfect for celebrating cherished family moments.


**Ingredients:**


- **Crust:**


- Raw walnuts


- Raw cocoa or carob powder


- Sea salt


- Dates


- **Chocolate Cream:**


- Honey


- Bananas


- Cocoa or carob powder


- Fresh raspberries


- 85% dark chocolate flakes


For the full instructions on how to bring this cake to life, visit my blog: [Raw Vegan Chocolate and Raspberry Birthday Cake](http://gourmandelle.com/raw-vegan-chocolate-and-raspberry-birthday-cake/).


**A Family Memory**


Every year, on my grandmother’s birthday, the whole family would gather in her cozy kitchen. The air would be filled with laughter, stories, and the intoxicating smell of chocolate melting into something extraordinary. I remember the anticipation of that first bite—rich chocolate paired with the tartness of fresh raspberries, a symphony of flavors that danced on my tongue.


It was during one of these gatherings that I decided to recreate this cake with a healthier twist. My grandmother watched as I experimented with raw ingredients, and I could see a spark of curiosity in her eyes. When she took the first bite, her smile was all the validation I needed. “It’s different,” she said, “but it’s filled with love, just like mine.”


**Difficulty Rating: 6/10**


This cake is a delightful challenge for those new to raw vegan desserts but well worth the effort. The ingredients are simple, yet the flavors are complex and satisfying, making it a perfect project for a weekend indulgence.


**Classification: Dessert**


This Raw Vegan Chocolate and Raspberry Cake is the quintessential dessert. It’s a guilt-free indulgence that highlights the natural sweetness of fruits and nuts, ensuring that every bite is a celebration of healthy living.


Embrace the nostalgia and create new memories with this Raw Vegan Chocolate and Raspberry Cake. Whether it’s a birthday, an anniversary, or just a craving for something sweet, this dessert is sure to become a favorite in your family, just as it has in mine.

Read more about Appetizers

Read more about Main Dishes

Read more about Desserts