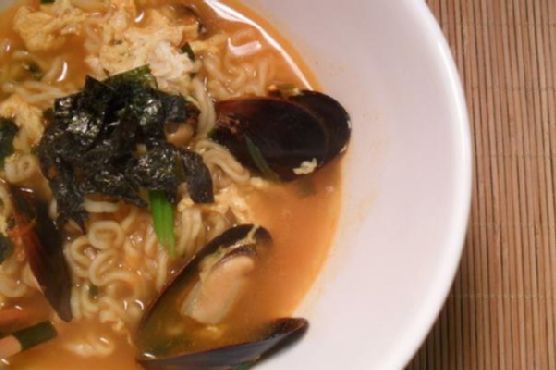
Neoguri (Spicy Seafood Ramen) | Made by Meaghan Moineau
A Nostalgic Bowl of Comfort: Neoguri Spicy Seafood Ramen Recipe
Introduction
In our fast-paced world, sometimes the simplest meals can bring the most comfort. Neoguri Spicy Seafood Ramen is one of those dishes, offering a perfect blend of spice, umami, and warmth. This delicious combination of flavors not only satisfies the taste buds but also evokes fond memories of family gatherings and shared laughter. Rated a 4 out of 10 in difficulty, this main dish is both an easy and delightful way to bring a little spice into your life.
Ingredients
To create this flavorful bowl of Neoguri Spicy Seafood Ramen, you will need the following ingredients:
- 1 egg
- 1 pack of Neoguri ramen
- 200 grams of mussels (fresh or frozen)
- 1 green scallion
- 1 sheet of gim (seaweed)
Instructions
1. Prepare the Broth: Begin by boiling water in a pot. Once boiling, add the mussels and the sauce packets from the Neoguri ramen pack. Allow this to boil for about 5 minutes. If you are using fresh mussels, boil until they open and discard any that remain closed.
2. Cook the Noodles: Add the ramen noodles to the pot and cook for 2 to 3 minutes until they reach your desired level of tenderness.
3. Add the Egg: For a flaky texture, beat the egg and stir it into the noodles in a circular motion. If you prefer a poached egg, gently add it to the side of the pot.
4. Garnish: Thinly slice the green scallion and cut the gim (seaweed) into small pieces. Transfer the ramen to a serving bowl and top with the scallion and seaweed for an added touch of flavor and crunch.
A Nostalgic Memory
Every time I make Neoguri Spicy Seafood Ramen, I am transported back to my grandmother's kitchen. As a child, I would watch her effortlessly prepare this dish, her deft hands creating magic in the pot. The aroma of the rich broth would fill the house, signaling the start of our family dinner. We would gather around the table, bowls in hand, savoring each spicy mouthful while sharing stories of our day.
One particular evening stands out in my memory. It was a rainy day, and we had just returned from a long walk through the local market. My grandmother, unfazed by the weather, decided to make her special ramen. As we sat down to eat, the rain pitter-pattered against the windows, and the warmth of the dish enveloped us, making the world outside fade away. It was in these moments that I learned the true power of food to bring comfort and connection.
Conclusion
Neoguri Spicy Seafood Ramen is more than just a meal; it is a vessel for cherished memories and a testament to the simple joys of life. Whether you're looking to recreate a beloved family dish or simply seeking a quick and satisfying meal, this recipe is sure to become a staple in your kitchen. So, gather your ingredients, embrace the heat, and let this flavorful dish transport you to a place of warmth and nostalgia.