
It was one of those Tuesday evenings when everything seemed to be spinning at a million miles an hour. You know the vibe — the kind of chaos where the idea of cooking dinner feels like a Herculean task. I peeked into my pantry, hoping for inspiration, and that’s when it hit me: Thai Savory Brown Fried Rice. A dish that’s quick to whip up but feels like a comforting hug in a bowl. It’s packed with flavor and gives off that takeout vibe without the takeout guilt. Plus, there’s something about the combination of spicy chili, crunchy cashews, and zesty lime that just sings. Let me tell you, this is a dish that transforms ordinary brown rice into something worth savoring.
Jump to Recipe
What You’ll Need
A lot of this stuff is pantry-friendly, which means you can dodge a grocery trip. You’ll likely have most of these ingredients lounging around already.
- Extra virgin olive oil
- 3 garlic cloves, minced
- 2 red fresh chili peppers, sliced
- Raw cashew nuts
- 1/4 cup dry unsweetened shredded coconut, toasted
- 1 teaspoon stevia powder
- 2 tablespoons Bragg Liquid Aminos
- 1 tablespoon apple cider vinegar
- 1 flax egg (1 tablespoon flaxseed meal + 2.5 tablespoons water)
- 1 cup fresh green beans, trimmed and cut into pieces
- 2 cups shredded regular bok choy
- 2 cups cooked brown rice
- Lime wedges for serving
How to Make Thai Savory Brown Fried Rice
- Start by making my Perfect Brown Rice. In a pot, sauté 1 cup of uncooked brown rice in 1 teaspoon of olive oil until it’s lightly browned. Toss in 2 basil leaves, then pour in 2 cups of filtered water. Quickly cover, bring to a boil, then simmer until all water has evaporated, about 40 minutes.
- As the rice cooks, heat a splash of olive oil in a wok or large frying pan. Add the minced garlic and sizzle until it’s lightly golden and fragrant. Be careful not to burn it — nobody likes bitter garlic.
- Toss in the sliced chili peppers, raw cashews, and toasted coconut. Let them dance around in the pan and get cozy for a good minute.
- In a small bowl, whisk together the stevia powder, Bragg Liquid Aminos, and apple cider vinegar. Pour this into the pan, blending it into your aromatic mix.
- Push everything to one side of the pan, making space for the flax egg. Pour it in and stir, cooking for about a minute until it firms up a bit, then mix it back into the stir-fry party.
- Add the green beans, bok choy, and your cooked brown rice to the pan. Stir well on medium heat for another minute. You want the bok choy wilted but those green beans still a bit snappy.
- Spoon your creation into a serving dish, and don’t forget to add a lime wedge on the side for that final zing.
Cook’s Notes
This dish is a lifesaver on busy nights! Toast the shredded coconut beforehand in a dry pan over low heat — trust me, it’s worth the extra step for that nutty aroma. If you’re prepping ahead, cook the brown rice the day before and keep it in the fridge. Cold rice works wonders for fried rice, soaking up all those flavors. Leftovers? They make for a fantastic lunch the next day. Just reheat in a pan with a splash of water to revive its moist goodness.
Make It Your Own
- Swap the green beans for crispy tofu if you’re feeling a plant-based protein moment.
- Throw in some sliced bell peppers for a pop of color and sweetness.
- Want it extra spicy? Add more chili peppers or a drizzle of sriracha at the end.
- Feel free to switch out the lime for lemon if that’s what you have on hand.
If you try this, I’d love to hear how it turns out — drop a comment or tag me! This dish is a little escape to Thailand in your own kitchen, without the need for a passport. Enjoy!
Related update: Thai Savory Brown Fried Rice
TL;DR
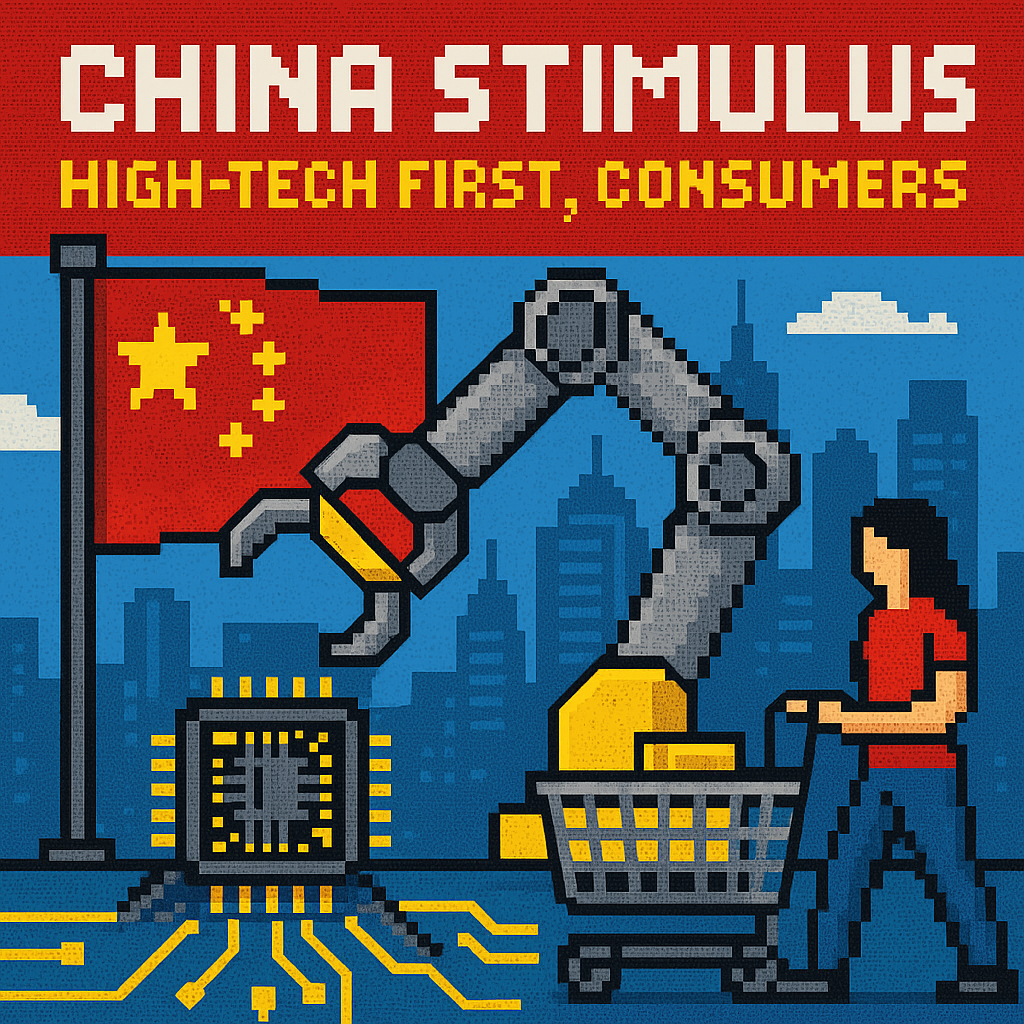
- Beijing is signaling more “China stimulus,” but the playbook still points to targeted support for high‑tech capacity and balance‑sheet repair—not a big-bang cash splash for households, as flagged by the Financial Times ahead of the late‑July 2026 Politburo readout [1].
- With Q2 2026 growth down to 4.3% and June retail sales up just 1.0% y/y, tech‑led support risks propping up factories while domestic demand stays weak, deepening imbalances that invite more foreign tariffs from the US, EU, and Mexico [2][6].
- The key number isn’t the headline pledge—it’s the composition: an 8.1% of GDP 2026 consolidated deficit with only a 0.3% fiscal impulse suggests precision-guided spending; unless more goes to households and property completion, growth hovers near 4.5% and confidence lags [4][5].
What the source said
The Financial Times reports that Chinese leaders in Beijing are preparing stimulus for H2 2026 but are prioritizing “spurring high-tech” over a sweeping consumption package, with signals expected after a late‑July 2026 Politburo meeting [1]. Analysts anticipate measures that channel capital into advanced manufacturing, AI infrastructure, and green tech rather than a 2008‑style broad transfer to households [1]. The backdrop features property stress, weak private investment, soft consumer sentiment, and rising trade frictions with the US and EU in 2026 [1][6]. Markets are therefore watching for targeted—not across‑the‑board—stimulus signals that point to execution via industrial policy rather than vouchers [1].
Why it matters
Three groups have the most at stake in 2026. First, Chinese households: wage growth has cooled, property wealth has eroded, and retail sales rose just 1.0% y/y in June 2026—so a tech‑first package risks bypassing them and prolonging caution on big‑ticket spending [2]. Second, manufacturers in EVs, batteries, and AI hardware: targeted credit and fiscal support can keep capacity humming, but it also courts foreign backlash via duties and probes already discussed in the US, EU, and Mexico this year [6]. Third, local governments: they carry implementation and financing burdens while land‑sale revenues fall, which constrains the pace and breadth of any rollout in 2026 [5].
Original analysis
Consensus view in mid‑2026: China will add stimulus, but it will be selective—aimed at high tech and industrial upgrading—rather than a “big bang” for household consumption [1][6]. I agree on direction but think markets underprice how that mix caps near‑term growth and amplifies external blowback if domestic demand stays weak.
-
Hard data first. Q2 2026 GDP slowed to 4.3% y/y, a 3‑1/2‑year low. June retail sales rose 1.0% while industrial output climbed 5.3%, a picture of strong factories and weak shoppers [2]. The PBoC’s Q2 statement promises “accommodative” conditions but confirms no policy rate or RRR cuts since May 2025, alongside an official growth band near 4.5%–5.0% for 2026—stability over urgency [3].
-
Fiscal reality check. The World Bank estimates China’s 2026 consolidated deficit at 8.1% of GDP, up from 7.2% in 2025, yet the fiscal impulse is only 0.3% of GDP because soft revenues and off‑budget constraints dilute the boost [5]. Translation: big headline deficit, modest net demand support.
-
Property is the fulcrum. Real home prices are down 23% from the July 2021 peak, and a “white‑list” has steered over RMB 7 trillion to viable projects, yet completion remains the choke point; the World Bank pegs inventory clearance at roughly 30 months at current sales rates [5]. Developer financing continued to contract year over year in May 2026, and bank lending to developers has trended lower since 2023, keeping household precautionary saving elevated [5].
-
External friction is the kicker. A tech‑first boost tilts supply toward EVs, solar, batteries, and AI hardware—sectors already under investigation or tariff pressure in Brussels, Washington, and Mexico City in 2026 [6]. Pushing capacity into a world adding barriers means the marginal unit may face a blocked market [6].
Back‑of‑envelope math: how big is “more stimulus,” really?
- China’s 2025 nominal GDP: RMB 140.19 trillion (NBS) [7].
- World Bank estimate of 2026 fiscal impulse: 0.3% of GDP [5].
- 0.3% × RMB 140.19t ≈ RMB 420.6b of net demand support.
Now compare: the property white‑list loan stock is “over RMB 7 trillion”—about 5.0% of 2025 GDP—but it’s allocation for completion, not pure demand stimulus [5][7]. Even with better execution, the near‑term multiplier is smaller than direct household transfers or broad VAT cuts, which is why a 4.5%–5.0% growth outcome is feasible but biased to the low end if consumption drags [4][5].
2×2: China stimulus choices (what Beijing is likely optimizing)
- Short‑term × Broad: Household vouchers, VAT cuts, payroll tax holidays. Fast retail boost; higher import leakage and local fiscal strain.
- Short‑term × Targeted: “White‑list” completions, SOE purchases of unsold inventory for affordable housing, AI‑compute subsidies. Quick but narrow; fixes bottlenecks without lifting mass demand [5].
- Long‑term × Broad: National social insurance upgrades, hukou reform, transfer programs. Durable consumption share gains; requires structural fiscal changes and political will [4].
- Long‑term × Targeted: Industrial policy for semis, EVs, batteries, and grids. Raises potential output; risks overcapacity and retaliation if demand rebalancing lags [6].
Beijing is operating in the lower‑right and upper‑left boxes—targeted now, reform later. That mix preserves control in 2026 and limits moral hazard, but it delays the confidence effect that gets households to spend [4][5].
Named‑stakeholder breakdown
- BYD and CATL: Probable winners from credit‑steered capex into EVs and storage; watch for more grid‑side projects and export headwinds if the EU or Mexico tighten duties in late 2026 [6].
- Huawei and SMIC: Likely beneficiaries of AI‑compute and “self‑reliance” budgets; domestic orders rise, but export channels face controls and scrutiny in 2026 [6].
- State Grid Corporation of China and data‑center operators: More capex for transmission and AI infrastructure aligns with “precision” stimulus and green goals flagged by multilaterals [5].
- Local governments and LGFVs: Higher implementation burden with thinner land‑sale cash; project approval reforms and fiscal limits curb scattershot building in 2026 [5].
- Households: Marginal beneficiaries unless completions accelerate and social spending outpaces GDP; otherwise retail stays soft and precautionary saving persists through H2 2026 [2][5].
What others are missing
Commentary focuses on “how big” the package is, not “how it flows” through China’s clogged transmission channels in 2026. Two plumbing details matter more than the headline: escrow ring‑fencing and completion finance. The World Bank traces delays to weak collateral, shrinking bank appetite, and heavy reliance on presales; despite RMB 7+ trillion in white‑list loans, developer financing remains tight and clearing inventory is a 30‑month job at current sales rates [5]. If policymakers hard‑wire escrow oversight and guarantee last‑mile funding, they deliver the biggest confidence dividend available in 2026—buyers believe keys are imminent, private developers regain cash flow, and consumer durables spending follows [5].
What to watch next
- By October 31, 2026, the PBoC trims the 1‑year MLF rate by at least 10 bps as Q3 data confirm sub‑5% growth and persistent retail weakness, aligning with official “accommodative” guidance [2][3][6].
- By December 31, 2026, cumulative “white‑list” lending tops RMB 8 trillion, and the NBS reports a year‑end backlog‑clearing time under 27 months, down from 30 months in March 2026 [5].
- By Q4 2026, China’s CPI averages 1.0%–1.5% y/y, signaling demand shortfall despite solid industrial output, in line with IMF and World Bank projections for a soft consumption recovery [4][5].
My take
A disciplined, tech‑forward package can move the needle in 2026—but only if it turns presold shells into keys and lifts social outlays from rounding error to anchor [4][5]. If Beijing keeps stimulus precision‑guided and delays household support, growth hugs 4.5%, foreign pushback intensifies, and imbalances widen into 2027 [4][6]. Pair AI kits with apartment keys and a faster safety net, and 2026 lands near 5.0% with a cleaner 2027 glide path; my base case is a Q4 tilt toward households, small in yuan but large in signal [4][5].
Sources
-
Chinese leaders zero in on need for stimulus for economy — Financial Times (https://www.ft.com/content/9cf9b393-3ac7-4cfc-9dd1-4fc23831e6a0?syn-25a6b1a6%5Cu003d1) — Reports Beijing’s stimulus focus on high tech over a broad consumption package and flags the late‑July 2026 Politburo readout.
-
China’s Q2 economic growth cools to 3‑1/2‑year low as imbalances worsen — Reuters via Investing.com (https://www.investing.com/news/economy-news/chinas-q2-gdp-growth-slows-to-43-yy-misses-market-forecast-4792122) — Provides the 4.3% Q2 GDP figure, weak June retail sales, stronger industrial output, and the political timetable.
-
China’s central bank pledges to maintain accommodative policy amid weak demand, external shocks — Reuters via Investing.com (https://m.investing.com/news/economy-news/chinas-central-bank-pledges-to-maintain-accommodativepolicy-amid-weak-demand-external-shocks-4781334?ampMode=1) — Summarizes the PBoC’s Q2 policy stance, absence of rate/RRR cuts since May 2025, and the 2026 growth band.
-
How China’s Economy Can Pivot to Consumption‑led Growth — IMF (https://www.imf.org/en/news/articles/2026/02/18/cf-how-chinas-economy-can-pivot-to-consumption-led-growth) — Shares a 2026 growth projection near 4.5% and concrete rebalancing steps to lift consumption.
-
China Economic Update — July 2026 — World Bank (https://thedocs.worldbank.org/en/doc/0cb2fc6dd88d4db3816dc0433b5cb49b-0070012026/original/CEU-July-2026-EN.pdf) — Details the 8.1% consolidated deficit plan, a 0.3% fiscal impulse, property metrics (−23% from 2021 peak, RMB 7t white‑list), and the ~30‑month clearance estimate.
-
5 takeaways from China’s Central Economic Work Conference as Beijing maps its 2026 growth path — Channel NewsAsia (https://www.channelnewsasia.com/east-asia/china-central-economic-work-conference-5-takeaways-2026-priorities-5578916) — Explains emphasis on fine‑tuning, innovation/green pillars, and the external barrier backdrop in 2026.
-
Statistical Communiqué of the People’s Republic of China on the 2025 National Economic and Social Development — National Bureau of Statistics (https://www.stats.gov.cn/english/PressRelease/202602/t20260228_1962661.html) — Confirms 2025 nominal GDP at RMB 140.19 trillion used in the calculation.
Related update: We recently published an article that expands on this topic: read the latest post.
Related update: We recently published an article that expands on this topic: read the latest post.

Some days, you just need a cake that feels like a warm hug, you know? It was one of those dreary Sunday afternoons when I found myself staring at the contents of my pantry, craving something sweet but not too fussy. The kind of cake you can whip up without a trip to the store, and this Yogurt Cake was the answer. It’s the sort of bake that feels like it should take a whole afternoon but actually comes together in just an hour. Light and airy with just a hint of nutmeg, it’s a comforting treat that’s perfect for any day of the week — especially when life is a little hectic and you need a quick, no-brainer dessert.
Jump to Recipe
What You’ll Need
This cake is all about simplicity. Chances are you already have most of these ingredients hanging out in your pantry or fridge:
- Full-fat yogurt
- Olive oil
- Sugar
- Eggs
- Vanilla
- Flour
- Baking powder
- Baking soda
- Salt
- Nutmeg
How to Make Yogurt Cake
- Preheat your oven to 350°F. Trust me, you don’t want to forget this step and then wait impatiently while the batter sits there looking at you.
- Lightly grease a 9-inch springform pan with baking spray or a little bit of oil. Then, line the bottom with parchment to avoid any sticky situations.
- In a good-sized bowl, whisk together the yogurt, olive oil, sugar, eggs, and vanilla. The mixture should be smooth and slightly frothy.
- Now, sprinkle the flour, baking powder, baking soda, salt, and nutmeg over your wet ingredients. Stir until you’ve got a smooth batter that’s lump-free. Don’t go overboard with stirring, though — just enough to bring it all together.
- Pour the batter into your prepped pan. Slide it into the oven and let the magic happen for 50 to 60 minutes. If it looks like the top is browning too fast, just cover it with some foil.
- The cake is done when a tester or toothpick inserted in the center comes out clean. Let it cool on a rack for about 10 minutes before removing it from the pan.
Cook’s Notes
Here’s a little tip: make sure your eggs and yogurt are at room temperature for the best texture. And don’t skip the parchment paper lining — it makes removing the cake so much easier. If you’re planning to serve it later, this cake stays wonderfully moist for up to three days when tightly wrapped and stored at room temperature. You can also freeze slices wrapped individually — they’ll keep for about a month.
Make It Your Own
- Berry Burst: Fold in a cup of fresh or frozen berries (no need to thaw) for a burst of fruity goodness.
- Citrus Twist: Add the zest of a lemon or orange to the batter for a citrusy kick.
- Nuttier Flavor: Swap out some of the olive oil for melted coconut oil if that’s more your vibe.
- Spice It Up: Add a teaspoon of cinnamon along with the nutmeg for a spicier, warmer flavor profile.
If you try this, I’d love to hear how it turns out — drop a comment or tag me! Let’s make baking fun and delicious together, one yogurt cake at a time. Happy baking!
Related update: Yogurt Cake
Related update: Irish Whiskey Pie
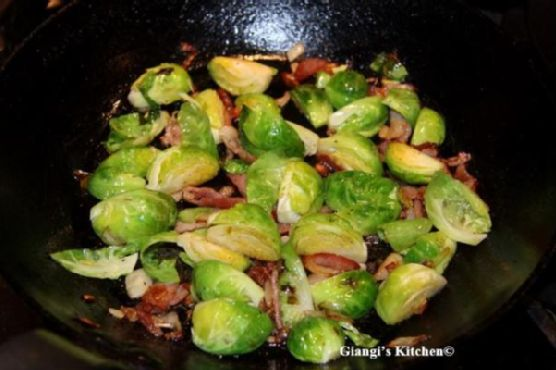
It was one of those evenings where I’d just gotten home from a long day, opened the fridge, and sighed at its contents — or lack thereof. You know what I’m talking about, the classic weeknight scramble where you’re too tired to go out but still want something comforting and a tad bit fancy. That’s when I spotted a lonely pack of bacon and some brussels sprouts I’d forgotten about. A lightbulb moment ensued, and this dish was born out of necessity, quickly becoming a household staple. It’s one of those meals that feels a bit impressive but is ridiculously easy to throw together. Plus, the crispy bacon pairs so perfectly with the tender brussels sprouts and sweet shallots. Trust me, this dish is a game-changer for lazy evenings.
Jump to Recipe
What You’ll Need
Chances are you already have most of this hanging around your kitchen. Just a few ingredients that combine to make magic happen:
- Bacon – the soul of this dish
- Brussels sprouts – trimmed and ready to shine
- Lemon juice – for that bright, zesty finish
- Salt and pepper – essentials, of course
- Shallot – it adds a sweet, delicate flavor
How to Make Brussels Sprouts with Bacon and Shallots
- In a large skillet, toss in the chopped bacon. Cook over medium heat until it’s golden brown and your kitchen smells like pure heaven.
- Next, add the shallots to the skillet. Let them mingle with the bacon, cooking until tender and translucent.
- Crank up the heat to high and introduce the brussels sprouts to the party. Sauté them until they develop that irresistible golden crust, making sure to stir occasionally so they don’t stick.
- Finish with a squeeze of lemon juice and season generously with salt and pepper. Give it all a good toss, letting every ingredient get cozy.
- Serve immediately, preferably with a grin because you just made something delicious with minimal effort.
Cook’s Notes
A couple of things I’ve learned along the way: First, do not overcrowd your skillet. This is a surefire way to end up with soggy sprouts, and nobody wants that. If you’re making a larger batch, definitely work in batches. As for storage, leftovers can be popped in an airtight container and kept in the fridge for a couple of days. Reheat them in the skillet to keep that crispiness alive. Pro tip: if you’re making this for a crowd, you can prep everything in advance and then do the actual cooking just before serving. It’s quick enough that even last-minute is doable!
Make It Your Own
Feeling like switching things up? Here are a few ideas:
- Swap the bacon for crispy pancetta or prosciutto for an Italian twist.
- Try adding a splash of balsamic vinegar instead of lemon juice for a deeper flavor.
- Throw in some toasted pine nuts or almonds for an extra crunch.
- If you’re vegetarian, swap the bacon for crispy tofu — trust me, it works!
If you try this, I’d love to hear how it turns out — drop a comment or tag me! Remember, the best recipes are the ones you make your own. Happy cooking!
Related update: Brussels Sprouts with Bacon and Shallots