Fish Pie With Fresh and Smoked Salmon | Made by Meaghan Moineau

Fish Pie With Fresh and Smoked Salmon

Intro

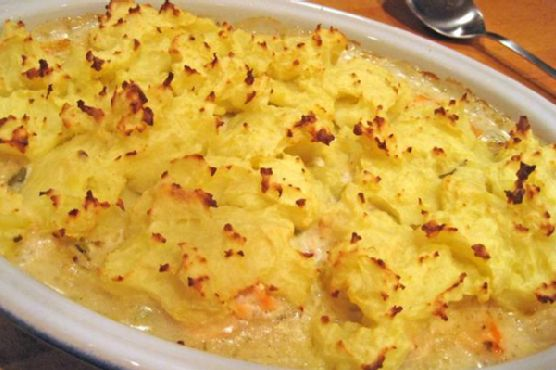
There is something inherently comforting about a fish pie, especially when it’s cold outside and the days grow shorter. This Fish Pie with Fresh and Smoked Salmon takes me back to cozy evenings at my grandmother’s kitchen, where the scent of baking fish pie filled the air, promising warmth and nourishment. The combination of fresh and smoked salmon brings a delightful depth of flavor, reminiscent of those cherished family gatherings. Whether you’re an experienced cook or a kitchen novice, this recipe will guide you in creating a dish that warms both the heart and the stomach.

Why You’ll Love It

This fish pie is a celebration of flavors and textures, perfect for sharing with family and friends. The blend of fresh and smoked salmon creates a rich, smoky profile, while the creamy mashed potatoes provide a comforting topping. The addition of savoy cabbage and a touch of horseradish adds a unique twist that makes this pie stand out. Not only is it delicious, but it’s also a nutritious meal option that’s packed with healthy omega-3s and vitamins from the salmon and vegetables.

Ingredients

  • 3 large potatoes, peeled and cut into chunks
  • 2 tablespoons butter
  • 2 tablespoons prepared horseradish
  • 1/4 cup milk, plus more if needed
  • 1 pound fresh salmon
  • 1/2 lemon, juiced
  • 1 bay leaf
  • 5 black peppercorns
  • 1/4 pound dry smoked salmon, roughly chopped
  • 1 onion, chopped
  • 1 tablespoon olive oil
  • 1/2 small savoy cabbage, chopped
  • 1/2 cup white wine
  • 1/2 cup chicken stock
  • 1 teaspoon dried chives
  • 1 teaspoon dried tarragon
  • 1 tablespoon cornstarch, dissolved in water
  • 1/2 cup plain Greek yogurt

Instructions

  1. Preheat your oven to 400°F (200°C).
  2. In a large pot, boil the peeled and chopped potatoes in salted water until tender, about 15 minutes. Drain and return to the pot.
  3. Add butter, horseradish, and 2 tablespoons of milk to the potatoes. Mash until smooth, adding more milk if needed for a creamy consistency. Set aside.
  4. In a medium skillet, place the fresh salmon and add enough water to almost cover it. Add lemon juice, bay leaf, and peppercorns. Cover and poach over medium heat for 12-15 minutes, until the salmon is opaque and flakes easily. Remove the salmon and cut it into large chunks.
  5. Heat olive oil in a pan over medium heat. Sauté the onion until tender, then add the chopped cabbage. Sauté for 2-3 minutes, stirring occasionally.
  6. Add white wine, chicken stock, chives, and tarragon to the cabbage mixture. Cover and simmer for 10 minutes.
  7. Stir in the cornstarch mixture until the sauce thickens. Remove from heat and add Greek yogurt, stirring well to combine.
  8. Gently fold both the fresh and smoked salmon into the cabbage mixture. Spoon the mixture into a baking dish.
  9. Top with the mashed potato mixture, spreading it evenly over the surface.
  10. Bake in the preheated oven for 15 minutes or until the top starts to brown.

Tips

For a perfectly mashed potato topping, make sure the potatoes are well-drained before mashing. If you prefer a crispier top, consider brushing the mashed potatoes with a bit of melted butter before baking. To save time, you can prepare the salmon and cabbage mixture ahead of time and refrigerate until ready to assemble the pie.

Variations & Substitutions

If you don’t have fresh salmon, feel free to use thawed frozen salmon fillets. You can also experiment with different herbs like dill or parsley for a fresh twist. For a dairy-free version, substitute the Greek yogurt with a plant-based yogurt alternative and use olive oil instead of butter in the mashed potatoes.

Storage

Leftover fish pie can be stored in an airtight container in the refrigerator for up to 3 days. To reheat, cover with foil and bake in a preheated oven at 350°F (175°C) until heated through. You can also freeze the pie before baking for up to 2 months. When ready to eat, thaw overnight in the fridge and bake as directed.

FAQ

Can I use other types of fish in this pie?

Yes, you can substitute the salmon with other firm white fish like cod or haddock. Just ensure the fish you choose is suitable for poaching and flaking.

What can I serve with fish pie?

Fish pie is a complete meal on its own, but it pairs wonderfully with a simple green salad or steamed vegetables for added freshness and crunch.

Is it necessary to use smoked salmon?

While smoked salmon adds a unique depth of flavor, you can omit it if you prefer. Simply increase the quantity of fresh salmon or add another type of fish for variety.

Nutrition

This fish pie is a nutritious option, rich in omega-3 fatty acids from the salmon, which are beneficial for heart health. The addition of cabbage provides fiber and vitamins, making this dish a well-rounded choice for a balanced meal.

Conclusion

This Fish Pie with Fresh and Smoked Salmon is more than just a meal; it’s a comforting embrace on a plate. The harmonious blend of flavors and the nostalgia it brings make it a delightful addition to any dining table. Whether you’re reliving cherished memories or creating new ones, this dish is sure to become a family favorite. Enjoy every bite of this heartwarming classic!

Related update: Fish Pie With Fresh and Smoked Salmon

Related update: Italian Beef Braciole

Baked Tortellini In Red Sauce | Made by Meaghan Moineau

Baked Tortellini In Red Sauce

Intro

Growing up, Sunday family dinners were a beloved ritual in our home. The tantalizing aroma of tomatoes and garlic simmering on the stove would draw everyone into the kitchen, setting the stage for an evening of laughter, stories, and delicious food. One of my all-time favorite dishes from those cherished meals was my grandmother’s Baked Tortellini in Red Sauce. With its warm, comforting flavors and perfectly baked, cheesy top, it’s a dish that brings back fond memories each time I make it. Today, I’m thrilled to share this beloved recipe with you, hoping it becomes a staple in your home too.

Why You’ll Love It

This Baked Tortellini in Red Sauce is the epitome of comfort food, combining the richness of a homemade tomato sauce with the creamy, satisfying texture of cheese-filled tortellini. It’s a dish that feels both indulgent and heartwarming, perfect for a cozy family dinner or a special gathering with friends. The ingredients are simple, yet they come together to create a symphony of flavors with every bite. Plus, it’s easy to prepare, making it perfect for those busy weeknights when you crave something homemade without the fuss.

Ingredients

  • 2 cloves garlic, minced
  • 1/2 cup grated Grana Padano cheese
  • 1 cup coarsely grated mozzarella
  • 2 tablespoons olive oil
  • 1 medium onion, chopped
  • 1 teaspoon dried oregano
  • Salt and pepper to taste
  • 1 teaspoon sugar
  • 2 cans (14 ounces each) chopped tomatoes with juice
  • 1 pound fresh tortellini

Instructions

  1. Preheat your oven to 240°C (464°F) and lightly oil a baking dish.
  2. In a large pan, heat the olive oil over medium heat. Add the chopped onion and minced garlic, sautéing for about 5 minutes until the onion is translucent.
  3. Season the onion and garlic with salt, pepper, and dried oregano.
  4. Add the chopped tomatoes and their juice to the pan. Stir to combine and season again with salt, pepper, and oregano.
  5. Bring the mixture to a boil, then sprinkle in the sugar and reduce the heat. Let it simmer on low heat for 20 minutes, allowing the flavors to meld. Adjust seasoning to taste.
  6. While the sauce is simmering, bring a pot of salted water to a boil. Plunge the fresh tortellini into the boiling water and cook just until they float to the surface. Drain and return them to the pot.
  7. Toss the cooked tortellini with the tomato sauce, ensuring each piece is well coated.
  8. Transfer the tortellini and sauce mixture to the prepared baking dish. Sprinkle evenly with the grated Grana Padano and mozzarella cheese.
  9. Bake in the preheated oven for 20-25 minutes, until the cheese is golden and bubbly and the surface is well baked.
  10. Remove from the oven and let the dish stand for 5 minutes before serving. Enjoy with a fresh green salad for a complete meal.

Tips

For an even richer flavor, consider adding a splash of red wine to the tomato sauce as it simmers. If you prefer a spicier kick, a pinch of red pepper flakes can elevate the dish nicely. Remember to taste and adjust the seasoning of the sauce before combining it with the pasta.

Variations & Substitutions

Feel free to customize this recipe to suit your taste or dietary needs. Substitute the Grana Padano cheese with Parmesan for a slightly different flavor. For a vegetarian version, ensure your tortellini is filled with cheese or vegetables. You can also add sautéed mushrooms or spinach for an extra layer of flavor and nutrition.

Storage

Leftovers can be stored in an airtight container in the refrigerator for up to 3 days. To reheat, simply place the tortellini in a preheated oven at 180°C (356°F) until warmed through, or microwave individual portions until hot.

FAQ

Can I use frozen tortellini instead of fresh?

Yes, you can use frozen tortellini. Simply follow the package instructions for cooking time, and proceed with the recipe as directed.

Is it possible to make this dish ahead of time?

Absolutely! You can prepare the tomato sauce and cook the tortellini ahead of time. Combine them in the baking dish, cover and refrigerate for up to a day. When ready to serve, sprinkle with cheese and bake as directed, adding a few extra minutes to the baking time if needed.

Nutrition

While the exact nutritional information will vary based on the brands and specific ingredients used, a generous serving of this baked tortellini dish is a good source of protein and calcium, thanks to the cheese and pasta. For those watching their sodium intake, consider using low-sodium canned tomatoes and adjusting the amount of salt added throughout the recipe.

Conclusion

There’s something truly special about a dish that can transport you back in time, evoking memories of family gatherings and cherished moments. This Baked Tortellini in Red Sauce is not only a simple, satisfying meal but also a culinary hug that brings warmth and comfort to the table. Whether you’re making it for your family or sharing it with friends, it’s sure to become a favorite in your home, just as it has in mine. Enjoy every bite and the memories it creates!

Related update: Baked Tortellini In Red Sauce

Related update: Liz's Lomo Saltado

Macaroni and Cheese Gratin | Made by Meaghan Moineau

Macaroni and Cheese Gratin

Intro

There’s something magical about the comforting embrace of macaroni and cheese. It’s a dish that transcends age, a warm hug on a plate for both the young and the old. I remember spending countless afternoons in my grandmother’s kitchen, the air filled with the tantalizing aroma of bubbling cheese and freshly baked bread crumbs. She always let me sprinkle the breadcrumbs on top, a task I took to with glee. This Macaroni and Cheese Gratin recipe has been passed down through generations in my family, and today, I’m thrilled to share it with you.

Why You’ll Love It

This Macaroni and Cheese Gratin is the epitome of comfort food, with a crispy, herbed breadcrumb topping that contrasts beautifully with the creamy, cheesy pasta beneath. It’s perfect for family gatherings, potlucks, or a cozy night in. The blend of cheddar and gruyere provides a rich, tangy flavor, while a hint of nutmeg and pepper sauce adds warmth and depth. You’ll love how the top gets golden and crunchy, making every bite a delightful experience.

Ingredients

  • 2 cups herbed bread crumbs
  • 4 tablespoons butter, divided
  • 2 cups grated cheddar cheese
  • 1 pound elbow macaroni
  • 1/4 cup all-purpose flour
  • 1 cup grated gruyere cheese
  • 4 cups milk
  • 1/4 teaspoon freshly grated nutmeg
  • 1/2 cup grated parmesan cheese
  • 2 tablespoons chopped fresh parsley
  • 1 teaspoon pepper sauce
  • Salt, to taste

Instructions

  1. Bring a large pot of water to a boil. Add a generous pinch of salt, then add the elbow macaroni. Cook until just shy of al dente, since the macaroni will continue to cook in the oven. Drain and set aside.
  2. In another pot, melt two tablespoons of butter over medium heat. Add the flour and stir with a whisk or wooden spoon for a couple of minutes to cook the raw flavor out of the flour.
  3. Gradually whisk in the milk, 1/2 cup at a time, allowing the mixture to thicken before adding more. Once all the milk is incorporated, reduce the heat to low and continue to cook, stirring constantly, until the sauce thickens.
  4. Stir in the grated cheddar, gruyere, and parmesan cheeses until melted and smooth. Add the nutmeg, pepper sauce, and salt to taste. Remove from heat and set aside.
  5. Return the drained macaroni to its pot and pour the cheese sauce over it. Stir gently with a wooden spoon to combine.
  6. Spoon the macaroni mixture into individual gratin dishes or a large buttered baking dish. Feel free to add a few tomato slices here and there, pressing them gently into the surface.
  7. To make the topping, melt the remaining two tablespoons of butter and mix it with the herbed bread crumbs until well combined.
  8. Sprinkle the breadcrumb mixture evenly over the macaroni and cheese. Do not smooth out the top; leave a few peaks for extra crispiness.
  9. Bake in a preheated oven at 375°F (190°C) for 20-25 minutes, or until the top is golden brown and the cheese is bubbly.
  10. Garnish with chopped fresh parsley before serving.

Tips

For best results, use high-quality cheeses for a richer flavor. Feel free to make the cheese sauce ahead of time and store it in the refrigerator. When ready to bake, simply reheat the sauce gently and combine with the pasta.

Variations & Substitutions

Feel free to experiment with different types of cheese. A combination of sharp cheddar and smoked gouda can add a delightful twist. For a gluten-free version, use gluten-free pasta and flour. You can also add cooked bacon or diced ham to the macaroni for a meatier version.

Storage

Store any leftovers in an airtight container in the refrigerator for up to 3 days. To reheat, place in a preheated oven at 350°F (175°C) until warmed through. You can also freeze the gratin before baking; just ensure it’s well-covered. When ready to enjoy, bake directly from frozen, adding an extra 10-15 minutes to the cooking time.

FAQ

Can I make this dish ahead of time?

Yes, you can assemble the gratin up to a day in advance and refrigerate. Just add the breadcrumb topping right before baking.

What can I use instead of gruyere cheese?

If you can’t find gruyere, you can substitute it with Swiss cheese or even a mild provolone for a similar texture and flavor.

Nutrition

While I don’t have exact nutritional information for this dish, keep in mind that it’s a rich and indulgent treat. Moderation is key, and pairing it with a light salad can help balance out the meal.

Conclusion

This Macaroni and Cheese Gratin is more than just a meal; it’s a celebration of cheesy, comforting goodness that brings people together. Whether you’re sharing it with loved ones or savoring it solo, know that each bite is a testament to the timeless joy of home-cooked comfort food. Enjoy!

Related update: Macaroni and Cheese Gratin

Herb and Cheddar Cordon Bleu | Made by Meaghan Moineau

Herb and Cheddar Cordon Bleu | Made by Meaghan Moineau

Herb and Cheddar Cordon Bleu: A Flavorful Twist on a Classic Dish


A Hearty Main Dish That Brings Back Warm Family Memories


Herb and Cheddar Cordon Bleu isn't just a meal; it's a culinary journey back to those cherished family gatherings, where the aroma of baked chicken and herbs filled the air, and laughter echoed through the dining room. This delicious main dish combines the comforting flavors of cheddar cheese and deli ham with a crispy herb-infused crust, offering a delightful twist on the classic cordon bleu. Whether you're hosting a dinner party or simply want to treat your family to something special, this dish is sure to impress.


Ingredients:


- 4 chicken breasts


- 4 slices of deli ham


- 4 slices of cheddar cheese


- 1 cup breadcrumbs


- 1 teaspoon dried marjoram


- 1 teaspoon dried parsley


- 1 teaspoon dried rosemary


- 1 egg


- 1/2 cup flour


- Salt and pepper to taste


Instructions:


1. Preparation: Pre-heat your oven to 350°F (about 176°C). Place the chicken breasts between two slices of wax paper and flatten them with a rolling pin or meat mallet until they are about a quarter of an inch thick.
2. Assembly: Lay a slice of ham and a slice of cheddar cheese on each chicken breast. Roll the chicken breast as tightly as possible, securing with toothpicks or small skewers if necessary.
3. Breading Stations: Beat the egg in a shallow baking dish. Prepare two additional "stations" using foil or other dishes: one for the flour and another for the mixture of dried herbs and breadcrumbs.
4. Coating: Coat the rolled chicken breasts in flour, then dip them into the egg mixture. Finally, press them into the mixture of dried herbs and breadcrumbs until they are completely covered on all sides.
5. Baking: Place the chicken in an oiled (or buttered) baking dish and bake for about 30 minutes, or until the chicken is cooked through and the breadcrumb crust is golden brown.

A Nostalgic Story:


Every Sunday, my family would gather at my grandmother’s house for a hearty lunch. It was a tradition that brought us all together, no matter how busy life got. I vividly remember the first time Grandma served her special Herb and Cheddar Cordon Bleu. As the dish emerged from the oven, the kitchen was filled with the enticing aroma of rosemary and cheddar, a scent that felt like a warm hug.


Grandma would always tell us stories as we ate, tales of her childhood and how she learned to cook from her own mother. The Herb and Cheddar Cordon Bleu was a recipe she'd innovated herself, inspired by the classic cordon bleu but with her own herbaceous twist. It was her way of adding a little piece of herself to each meal. We all looked forward to those Sundays, not just for the delicious food but for the love and laughter that always accompanied them.


Difficulty Level: 5/10


This dish is moderately easy to prepare, making it perfect for both novice and seasoned cooks. With a little patience, you can master this recipe and create a memorable meal that your family will love.


Conclusion:


Herb and Cheddar Cordon Bleu is more than just a dish; it’s a celebration of flavors and family memories. It brings together the richness of cheddar, the savory taste of ham, and the fragrant herbs in a beautifully baked chicken roll that is sure to become a favorite at your dinner table. Whether you're cooking for loved ones or simply wanting to treat yourself, this dish is a delightful reminder that the best meals are the ones shared with those you care about.

Read more about Appetizers

Read more about Main Dishes

Read more about Desserts

Summer Veggie Bake | Made by Meaghan Moineau

Summer Veggie Bake | Made by Meaghan Moineau

Title: A Taste of Summer: The Perfect Summer Veggie Bake
Description: Dive into the flavors of summer with our Summer Veggie Bake—a delightful blend of fresh vegetables, tender orzo, and savory cheeses. This main dish is not only a feast for the taste buds but also a heartwarming journey down memory lane. Join us to discover how this dish became a family favorite and learn how to bring this seasonal delight to your table.

---


A Taste of Summer: The Perfect Summer Veggie Bake


When summer rolls around, it's time for sun-kissed afternoons and meals that celebrate the bounty of the season. Our Summer Veggie Bake is a dish that captures the essence of summer in every bite. With its vibrant mix of fresh vegetables and creamy, cheesy goodness, this dish serves as the perfect centerpiece for any summer gathering.


Ingredients:


- 2 ears of corn, kernels removed


- 1 teaspoon garlic powder


- Juice of 1 lemon


- 1 cup low-fat milk


- 1 cup low sodium chicken broth


- 1 teaspoon onion powder


- 1 cup orzo


- 1/2 cup panko breadcrumbs


- 1/2 teaspoon paprika


- 1/2 cup shredded parmesan cheese


- 1/4 cup chopped fresh parsley


- 1/2 teaspoon pepper


- 2 cups shredded rotisserie chicken


- 1 cup shredded mozzarella cheese


- 2 tomatoes, sliced


- 1 zucchini, sliced


Instructions:


1. Preheat and Prep: Preheat your oven to 400 degrees Fahrenheit. In a medium saucepan, combine the low-fat milk and chicken broth. Bring to a boil.
2. Cook the Orzo: Add the orzo to the boiling liquid and reduce the heat to medium. Cook until the orzo is tender and the liquid is absorbed, about 15 minutes.
3. Mix the Ingredients: While the orzo is cooking, in a large mixing bowl, combine the shredded rotisserie chicken, parmesan and mozzarella cheeses, garlic powder, onion powder, paprika, lemon juice, corn kernels, and parsley. Mix well.
4. Combine and Transfer: Once the orzo is ready, add the chicken and cheese mixture to the saucepan. Stir until all ingredients are evenly distributed. Pour the mixture into an 8 by 8-inch glass baking dish.
5. Layer and Season: For the topping, layer the sliced zucchini and tomatoes, alternating each veggie over the orzo mixture. Sprinkle panko breadcrumbs, additional garlic powder, and pepper over the top.
6. Bake to Perfection: Lightly spray the panko with olive oil cooking spray to ensure a crispy topping. Place the dish in the oven and bake for 40 minutes. For an extra golden brown finish, broil for about 2 minutes before serving.
7. Serve and Enjoy: Once out of the oven, serve immediately and enjoy the delightful combination of summer flavors.

---


A Nostalgic Summer Memory:


The Summer Veggie Bake holds a special place in my heart, as it always reminds me of sunny afternoons spent in my grandmother's garden. Each summer, our family would gather for a picnic, with fresh produce picked right from her backyard. The tomatoes were juicy, the corn sweet, and the zucchini perfectly tender. Grandma would whip up her version of the Summer Veggie Bake, adding her secret touch—a sprinkle of love and a dash of laughter.


As we sat around the picnic table, stories of summers past would fill the air, accompanied by the delightful aroma of the baking dish. The bake was more than just a meal; it was a tradition that brought our family together, creating cherished memories that still warm my heart today.


---


Difficulty Rating and Classification:


Difficulty: 4/10
Classification: Main Dish

Our Summer Veggie Bake is a straightforward recipe that delivers big on flavor with minimal effort. Perfect for both novice cooks and seasoned chefs, this dish allows the fresh ingredients to shine, making it an ideal choice for a summer main dish. Whether it's a family gathering or a weekday dinner, this bake is sure to become a staple in your summer recipe rotation. Enjoy!

Read more about Appetizers

Read more about Main Dishes

Read more about Desserts

Stuffed Chicken Breast | Made by Meaghan Moineau

Stuffed Chicken Breast | Made by Meaghan Moineau

Title: A Taste of Home: Cream Cheese and Green Onion Stuffed Chicken Breasts
Description: Discover the joy of cooking with our Stuffed Chicken Breast recipe, featuring a delectable blend of cream cheese and green onions. This easy-to-follow dish transports you back to cherished family gatherings and promises to delight your taste buds. Rated 3/10 in difficulty, it's the perfect main dish for any occasion.

---


Growing up, the kitchen was always the heart of our family home. Every Sunday, the tantalizing aroma of my mom's cooking would waft through the house, drawing us all together. One of her signature dishes was the Stuffed Chicken Breast, a recipe passed down from my grandmother. It was a family favorite, and each bite was infused with the warmth and love of countless shared meals.


Ingredients:

- Skinless, boneless chicken breasts


- Cream cheese


- Green onions, finely chopped


- Your favorite chicken seasoning


- Olive oil-based cooking spray


Instructions:

1. Begin by washing and patting dry the chicken breasts. My grandmother would always say that the secret to a great dish is in the preparation—handle each ingredient with care.


2. Carefully cut each chicken breast lengthwise, ensuring you don't cut all the way through. This was always my favorite part as a kid, watching my mom skillfully create pockets in the chicken for the delicious filling.


3. In a small bowl, mix together the cream cheese and chopped green onions. This creamy concoction brings back memories of laughter and storytelling around the kitchen counter as we prepared the filling.


4. Generously stuff each chicken breast with the cream cheese mixture, pressing firmly to close. I remember my mom teaching me to be patient and precise—skills that have served me well beyond the kitchen.


5. Once stuffed, spray the chicken breasts with olive oil-based cooking spray. This step ensures a beautiful, golden-brown exterior. My mom's kitchen always had an olive oil sprayer handy, a little trick she learned from her mother.


6. Now, rub the chicken with your favorite seasoning. This is where you can make the recipe your own. I still use the same blend my grandmother did—a mix of garlic powder, paprika, salt, and pepper. The smell of it brings me back to those cherished Sundays.


7. Bake the chicken in a preheated oven at 375°F (190°C) for about 25-30 minutes, or until the chicken is cooked through and the cheese is melted and bubbly.


Memories on a Plate:

As the chicken bakes, the house is filled with the comforting aroma of a meal that has stood the test of time. Sitting down to eat, I'm reminded of our family gathered around the table, sharing stories and laughter. Each bite of the Stuffed Chicken Breast is a trip down memory lane—a reminder of the love and joy that comes from sharing food with those you care about.


Difficulty and Classification:

With a difficulty rating of 3/10, this Stuffed Chicken Breast recipe is both simple and satisfying, making it an ideal main dish for any occasion. Whether you're cooking for family or friends, this dish is sure to become a beloved staple in your kitchen, just as it has been in mine.


So, gather your ingredients, and embark on a culinary journey that celebrates tradition, family, and the timeless pleasure of a home-cooked meal.

Read more about Appetizers

Read more about Main Dishes

Read more about Desserts

Savory Carrot Souffle | Made by Meaghan Moineau

Savory Carrot Souffle | Made by Meaghan Moineau

Title: A Whisk of Nostalgia: Crafting the Perfect Savory Carrot Soufflé
Description: Dive into the heartwarming tale of a cherished family recipe that transforms humble carrots into an elegant Savory Carrot Soufflé. Discover the step-by-step process of creating this exquisite dish that promises to be the star of your dining table. With a difficulty rating of 7/10, this delightful dish serves as a sophisticated appetizer sure to impress your guests.

---


In the kitchen of my childhood home, the aroma of simmering carrots and the gentle hum of the mixer whisking egg whites is deeply etched into my memory. Every family gathering was an occasion for my grandmother to work her magic with her signature Savory Carrot Soufflé. The dish not only graced our table but also wrapped us in a warm embrace of nostalgia and familial love.


A Whisk Through Time

The recipe for this soufflé was passed down through generations, each adding their own little twist but always preserving its essence. I remember standing on a stool beside my grandmother, watching her skillfully blend the vibrant orange of the carrot puree with the creamy white sauce. Her stories of learning the recipe from her mother would fill the kitchen, much like the rich scent of nutmeg that lingered in the air.


Ingredients:

- 1 lb carrots, peeled and chopped


- 4 tablespoons butter


- 4 large eggs, separated


- 2 tablespoons flour


- 1 cup heavy cream


- 1 cup milk, divided


- 1/4 teaspoon ground nutmeg


- 1/2 cup grated parmesan cheese


- 1/2 teaspoon salt


Instructions:
1. Prepare the Carrots: Begin by cooking the carrots in a pot of salted boiling water until tender. Drain the water and blend the carrots with half a cup of milk until smooth. Set aside this vibrant carrot puree.
2. Craft the Bechamel Sauce: In a small saucepan, combine the remaining milk, heavy cream, flour, salt, butter, parmesan cheese, and nutmeg. Cook over medium heat, stirring continuously until the mixture reaches a thick consistency. Allow it to cool slightly.
3. Preheat and Prepare: Preheat your oven to 350 degrees Fahrenheit. While the oven warms up, whisk the egg whites in a clean, dry bowl until stiff peaks form. This step is crucial for achieving the soufflé's signature airy texture.
4. Combine and Conquer: Mix the carrot puree with the cooled white sauce. Gently add in the egg yolks one at a time, ensuring each is fully incorporated. Carefully fold in the stiff egg whites, using a spatula to maintain the mixture's lightness.
5. Bake to Perfection: Pour the soufflé mixture into pre-greased ramekins, setting them in a bain-marie (water bath) to ensure even cooking. Bake for approximately 1 hour, or until the soufflés have risen and developed a golden-brown crust.
A Dish to Delight

Classified as an appetizer, the Savory Carrot Soufflé is a sophisticated addition to any meal. With a difficulty rating of 7/10, it requires patience and a gentle hand, but the end result is undeniably rewarding.


As I pull the soufflé from the oven, I am transported back to those cherished family gatherings. This dish, with its delicate balance of flavors and textures, is more than a mere culinary delight—it's a testament to the enduring power of family traditions and the joy of sharing a lovingly prepared meal.


Whether you're honoring an old family recipe or starting a new tradition of your own, the Savory Carrot Soufflé is sure to leave a lasting impression. So gather your loved ones, dust off your ramekins, and let the comforting warmth of this dish fill your home and hearts.

Read more about Appetizers

Read more about Main Dishes

Read more about Desserts

Baked Ziti Or Rigatoni | Made by Meaghan Moineau

Baked Ziti Or Rigatoni | Made by Meaghan Moineau

Title: "Savor the Comfort: Baked Ziti/Rigatoni Recipe to Warm the Heart and Home"
Description: Dive into the rich, comforting flavors of this Baked Ziti or Rigatoni recipe—a classic Italian-American dish that's sure to become a family favorite. With gooey mozzarella, creamy ricotta, and a savory tomato sauce, this main dish is both easy to prepare and delightful to eat. Follow along as we share not only the simple steps to this delicious pasta bake but also a nostalgic family story that highlights the warmth and love this dish brings to the table.

---


A Taste of Home: Baked Ziti/Rigatoni


When the air turns crisp and the leaves begin to fall, there's nothing quite like indulging in a hearty dish that feels like a warm hug. Baked Ziti or Rigatoni is that dish for many families, a staple at gatherings and a beacon of comfort on chilly evenings. This recipe is a straightforward yet flavorful delight, earning a difficulty rating of 4 out of 10, making it an accessible main dish for cooks of all levels.


Ingredients:

- Cooked ziti or rigatoni

- 1 egg


- 1 cup Parmesan cheese, divided


- 1 cup ricotta cheese


- 2 cups shredded mozzarella cheese


- 3 1/2 cups spaghetti sauce, divided


Instructions:

1. Preheat your oven to 375°F (190°C).

2. In a large mixing bowl, combine the cooked ziti, egg, 1/2 cup of Parmesan cheese, ricotta, shredded mozzarella, and 1 1/2 cups of spaghetti sauce. Mix until well blended.


3. In a 2 1/2 quart baking dish, spread 1/2 cup of spaghetti sauce evenly across the bottom.


4. Pour the ziti mixture into the baking dish, spreading it out evenly.


5. Top the ziti mixture with the remaining 1 1/2 cups of spaghetti sauce.


6. Sprinkle the top with the remaining 1/2 cup of Parmesan cheese.


7. Bake in the preheated oven for 30 minutes, or until the top is slightly browned and bubbly.


8. Allow to cool for a few minutes before serving.


A Family Memory


For me, Baked Ziti has always been more than just a meal; it's a cherished family tradition. I remember one particularly chilly autumn day when my grandmother decided to teach me how to make her famous Baked Ziti. The kitchen was filled with the scent of simmering tomato sauce and fresh herbs, a sensory invitation to warmth and comfort.


As we prepared the dish together, my grandmother shared stories of her own childhood, recounting how her mother would make this very dish for Sunday dinners. It was a ritual of love, bringing the family together after a long week. We laughed as we accidentally spilled a bit of mozzarella on the floor, and she playfully nudged me with her elbow, reminding me that cooking is just as much about the memories we create as it is about the food itself.


When the ziti emerged from the oven, golden and bubbling, it was as if time had slowed down, allowing us to savor the moment. Each bite was rich and satisfying, filled with the flavors of tradition and the warmth of family bonds. Even now, years later, every time I bake ziti, I am transported back to that cozy kitchen, enveloped by the love and laughter of generations past.


Conclusion


Baked Ziti or Rigatoni is more than just a recipe; it's a bridge to the past, a tradition to be savored and shared. Whether you're cooking for loved ones or enjoying a quiet meal at home, this dish promises comfort and joy with every bite. So gather your ingredients, preheat your oven, and let this simple yet exquisite recipe become a part of your family's cherished memories.

Read more about Appetizers

Read more about Main Dishes

Read more about Desserts