White Chocolate Mocha Cookies | Made by Meaghan Moineau

White Chocolate Mocha Cookies | Made by Meaghan Moineau

Title: Savoring Sweet Memories: White Chocolate Mocha Cookies
Description: Dive into the world of flavor with our White Chocolate Mocha Cookies, a delightful blend of rich cocoa and espresso that takes you back to cherished family gatherings. Discover the story, the recipe, and the irresistible aroma that makes this dessert a timeless treat.

---


When the air turns crisp and the leaves start to blanket the ground in hues of gold and crimson, my heart often drifts back to the warmth of my grandmother's kitchen. It was a place where magic happened, where flour dusted the countertops like fresh snow, and the aroma of freshly baked cookies wrapped around you like a comforting blanket. Among the many recipes passed down through generations, one always stood out—the White Chocolate Mocha Cookies.


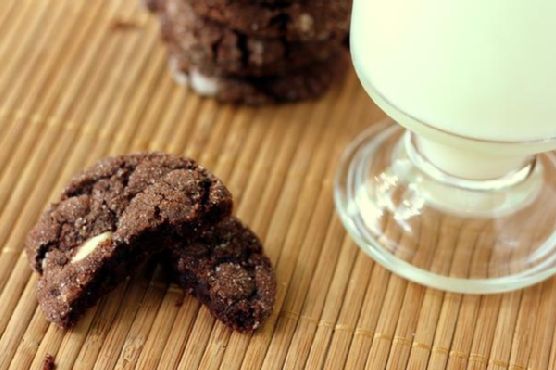
This cookie recipe is a family treasure, one that has been lovingly crafted and perfected over countless holiday seasons. The rich combination of cocoa and espresso powder evokes the comforting essence of a cozy café, while the sweet white chocolate chips offer a delightful contrast. Together, they create a symphony of flavors that sing of joy and nostalgia.


Ingredients:

- All-purpose flour


- Baking soda


- Cocoa powder


- Eggs


- Espresso powder


- Salt


- Semi-sweet chocolate chips


- Sugar


- Unsalted butter


- Vanilla extract


- White chocolate chips


Instructions:

1. Preheat your oven to 350°F (175°C). This is the perfect time to let your kitchen fill with the anticipation of what's to come.


2. In a large mixing bowl, cream together the unsalted butter and sugar until the mixture is light and fluffy—a task that, as a child, I watched my grandmother do with effortless grace.


3. Add in the eggs and vanilla extract, mixing until well combined. This was always my favorite part, watching the rich ingredients come together, much like our family did every Sunday afternoon.


4. Slowly incorporate the flour, cocoa powder, espresso powder, baking soda, and salt into the wet ingredients. Mix until just combined, being careful not to overwork the dough.


5. Gently fold in both the semi-sweet and white chocolate chips, ensuring each bite is packed with chocolatey goodness.


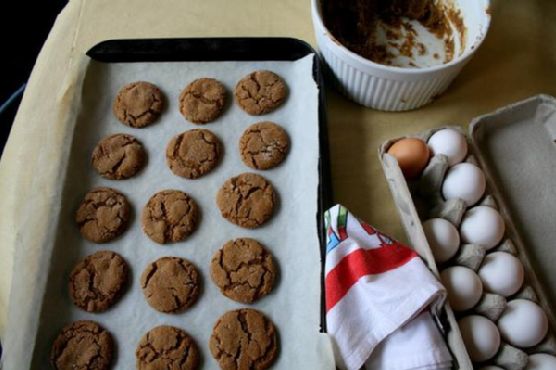
6. Roll the dough into balls, coating them with sugar if desired. Place them on a baking sheet lined with parchment paper or a Silpat mat. This step always reminded me of rolling snowballs in the yard with my siblings.


7. Bake in the preheated oven for 8-10 minutes. If your cookies are too rounded, press down lightly with the back of a measuring cup or the bottom of a glass immediately after removing them from the oven.


These cookies, with their perfect blend of chocolate and coffee, are a testament to those cherished moments spent in my grandmother's kitchen, where laughter was abundant, and love was the secret ingredient in every recipe.


Difficulty: 4/10
Classification: Dessert

Perfect for dessert, these White Chocolate Mocha Cookies are not just a treat for the taste buds but also a beautiful way to relive warm family memories. Whether you're baking them for a special occasion or just because, they promise to fill your home with the love and warmth of my grandmother's kitchen.

Read more about Appetizers

Read more about Main Dishes

Read more about Desserts

Authentic Mexican Wedding Cookies | Made by Meaghan Moineau

Authentic Mexican Wedding Cookies | Made by Meaghan Moineau

Title: Savoring Tradition: Authentic Mexican Wedding Cookies
Description: Discover the sweet allure of Authentic Mexican Wedding Cookies with this easy-to-follow recipe that brings generations of tradition to your kitchen. Delve into the rich flavors of butter, pecans, and cinnamon, and be transported to cherished family gatherings where these delightful treats were always the star of the dessert table.

---


There’s something inherently magical about recipes that have stood the test of time, their aromas and flavors weaving through the tapestry of family memories. Authentic Mexican Wedding Cookies, with their delicate crumble and sugary coating, are one such timeless treat. These cookies, also known as polvorones, have been a beloved staple at celebrations in my family, their presence as comforting as a grandmother’s hug.


Ingredients:

- 1 cup butter, softened


- 2 cups powdered sugar, divided


- 2 teaspoons vanilla extract


- 2 cups all-purpose flour


- 1 cup pecans, finely chopped


- 1 teaspoon ground cinnamon


Instructions:

1. In a large bowl, use an electric mixer to beat the butter until light and fluffy.


2. Add 1/2 cup of powdered sugar and vanilla extract; continue beating until well blended.


3. Gradually beat in the flour, followed by the chopped pecans.


4. Divide the dough in half, forming each half into a ball. Wrap each ball in plastic wrap and chill for about 30 minutes.


5. Preheat your oven to 350°F (175°C).


6. In a pie dish, whisk together the remaining 1 1/2 cups of powdered sugar and the ground cinnamon. Set this cinnamon sugar mixture aside.


7. With half of the chilled dough, roll portions of dough (about 2 teaspoons each) between your palms to form balls. Place them on a large baking sheet, leaving about 1/2 inch between each ball.


8. Bake for 18 minutes, or until the cookies are golden brown on the bottom and just pale golden on top.


9. Allow the cookies to cool on the baking sheet for 5 minutes. While still warm, gently toss them in the cinnamon sugar to coat completely.


10. Transfer the coated cookies to a rack to cool completely. Repeat the process with the remaining dough.


11. Sift any remaining cinnamon sugar over the cooled cookies before serving.


A Family Memory:

These cookies always remind me of my grandmother's kitchen, bustling and warm during family gatherings. I remember one particular afternoon when I was about eight years old. The kitchen was filled with laughter and the rich scent of roasted pecans. My grandmother, with flour-dusted hands, showed me how to carefully roll the dough into perfect little balls. As the cookies baked, their aroma mingled with the cinnamon in the air, creating a scent that felt like home.


After they came out of the oven, she let me help coat them in the cinnamon sugar, warning me not to eat too many at once. Of course, I sneaked a few extra when she wasn't looking, savoring the sweet, nutty flavor. To this day, those cookies are more than just a dessert; they are a bridge to my heritage, a taste of love and tradition.


Difficulty: 4/10
Classification: Dessert

Embrace the simplicity and nostalgic charm of these Authentic Mexican Wedding Cookies. Whether you're a seasoned baker or new to the kitchen, this recipe promises to be a rewarding journey into culinary tradition. With each bite, you’ll find yourself part of a story that has been lovingly passed down through generations.

Read more about Appetizers

Read more about Main Dishes

Read more about Desserts

Brown sugar & Spice Sugar cookie frogs | Made by Meaghan Moineau

Brown sugar & Spice Sugar cookie frogs | Made by Meaghan Moineau

Title: "Jump Into Flavor: Nostalgic Brown Sugar & Spice Sugar Cookie Frogs"
Description: Dive into the world of nostalgic baking with our delightful Brown Sugar & Spice Sugar Cookie Frogs. With a rich blend of spices and a hint of sweetness, these cookies are not just a treat for your taste buds but a journey back to cherished family memories. Perfect for those cozy afternoons when you crave something comforting and delicious. Discover the magic of these charming cookies and learn how to make them at home with our easy-to-follow recipe.

---


Jump Into Flavor: Nostalgic Brown Sugar & Spice Sugar Cookie Frogs

There's something incredibly heartwarming about baking cookies that have a story behind them. The aroma that fills the kitchen, the anticipation of that first bite, and the cherished memories that come flooding back. Our Brown Sugar & Spice Sugar Cookie Frogs are more than just a delightful dessert—they are a portal to nostalgic family gatherings and joyful moments.


A Whisk of Nostalgia:

Growing up, the kitchen was always the heart of our home, especially during the holidays. I vividly remember the laughter and chatter that filled the air as my grandmother and I rolled out cookie dough on the old wooden table. She had a particular fondness for whimsical cookie shapes, and every year, without fail, we would bake her famous "frog" cookies. It wasn't just about baking; it was about the stories she shared of her own childhood, the old family recipes passed down, and the love that went into every batch.


These Brown Sugar & Spice Sugar Cookie Frogs are a tribute to those precious moments. The rich, warming spices of cinnamon, ginger, nutmeg, and allspice, combined with the sweetness of brown sugar, create a flavor profile that's both comforting and irresistible. The subtle crunch of the sugar cookie pairs perfectly with a glass of milk or a cup of tea, making it an ideal treat for any time of day.


Recipe: Brown Sugar & Spice Sugar Cookie Frogs
Ingredients:

- 2 ¾ cups unbleached flour


- 1 teaspoon baking powder


- 1 teaspoon cinnamon


- ½ teaspoon ginger


- ½ teaspoon nutmeg


- ¼ teaspoon allspice


- ¾ cup granulated sugar


- ¾ cup light brown sugar


- 1 cup (2 sticks) butter, softened


- 1 egg


- 1 teaspoon vanilla extract


Instructions:

1. Preheat your oven to 350°F (175°C) and line your baking sheets with parchment paper.


2. In a large bowl, whisk together the flour, baking powder, cinnamon, ginger, nutmeg, and allspice. Set aside.


3. In a separate bowl, cream the granulated sugar, brown sugar, and butter until light and fluffy.


4. Add the egg and vanilla extract to the sugar mixture and mix until well-blended.


5. Gradually add the flour mixture, beating just until combined. Remember to scrape down the bowl to incorporate all ingredients. The dough will be quite thick, so you may need to knead in stray bits of flour by hand.


6. Roll the dough on a floured surface and cut into frog shapes (or any shape you desire).


7. Place the cookies on the prepared baking sheets and bake for 9-12 minutes, depending on the size of your cutter.


8. Allow the cookies to sit for a few minutes on the sheet, then transfer to a cooling rack.


Difficulty Rating: 4/10
Classification: Dessert

These cookies are a delightful way to bring a piece of childhood magic into your home, perfect for sharing with family and friends or enjoying a moment of sweet nostalgia on your own. Whether you're a seasoned baker or a beginner, the simplicity and charm of these cookies make them a joy to create and savor.


So, gather your ingredients, preheat your oven, and let the enchanting aroma of Brown Sugar & Spice Sugar Cookie Frogs fill your kitchen. Relive those cherished memories or create new ones with every delicious bite.

Read more about Appetizers

Read more about Main Dishes

Read more about Desserts

Peanut Butter Sriracha Cookies | Made by Meaghan Moineau

Peanut Butter Sriracha Cookies | Made by Meaghan Moineau

Spicy Sweet Nostalgia: Peanut Butter Sriracha Cookies


Description: Dive into a culinary adventure with our Peanut Butter Sriracha Cookies — where the classic comfort of peanut butter meets a fiery twist of sriracha. This unique dessert not only satisfies your sweet tooth but also tickles your taste buds with a subtle heat, making it the perfect conversation starter at any gathering. Rated a 4 out of 10 in difficulty, even novice bakers can tackle this recipe with ease. Join us as we blend flavors and memories, creating a treat that's as heartwarming as it is intriguing.

---


A Sweet and Spicy Family Tradition


Growing up, our family kitchen was always a bustling hub of activity. The scent of freshly baked cookies often filled the air, drawing us in like moths to a flame. My grandmother, the culinary maestro of the family, believed that every recipe told a story — and her Peanut Butter Sriracha Cookies were no exception.


It was the summer of my tenth birthday, and as a tradition, my grandmother let me choose the special treat for our annual family picnic. Having recently discovered the joys of spicy foods, I boldly requested a cookie that matched my newfound adventurous palate. With a twinkle in her eye, Grandma nodded and said, "Let's spice things up a little, shall we?"


The kitchen became our playground. As she expertly creamed together the unsalted butter, crunchy peanut butter, and sugars, I watched in awe, eagerly awaiting my turn to contribute. Slowly, she added the sriracha, its vibrant red swirling into the creamy mixture like a secret waiting to be uncovered. I was entrusted with the task of cracking eggs and measuring out vanilla extract — a responsibility I took very seriously.


In another bowl, we mixed the flour, baking powder, baking soda, and salt, the dry ingredients resembling the sands of a distant desert, waiting to be united with our spicy concoction. I held my breath as we combined the two mixtures, the batter rich with promise.


After an hour of chilling, the dough was ready. I gleefully rolled it into balls, dipping each top in granulated sugar before placing them on the cookie sheet. Grandma guided my hands as we pressed a criss-cross pattern into each one, the fork leaving its indelible mark.


As the cookies baked, the sweet and spicy aroma wafted through the house, drawing curious family members into the kitchen. When they finally emerged from the oven, we placed a Hershey's chocolate kiss atop each one, the final touch of sweetness to balance the heat.


The picnic was a resounding success, and the cookies were the star of the show. Family members marveled at the unexpected yet delightful combination of peanut butter and sriracha, each bite evoking laughter and joy. To this day, whenever I bake these cookies, I'm transported back to that sunlit kitchen, the warmth of my grandmother's love, and the magic of flavors coming together to create something truly special.


The Recipe: Peanut Butter Sriracha Cookies


Ingredients:

- Unsalted butter


- Crunchy peanut butter


- Sugar


- Brown sugar


- Sriracha


- Eggs


- Vanilla extract


- Flour


- Baking powder


- Salt


- Baking soda


- Granulated sugar


- Hershey's chocolate kiss (for topping)


Instructions:

1. Cream together butter, peanut butter, and sugars in a large mixing bowl.


2. Gradually add sriracha, eggs, and vanilla extract. Beat until well combined.


3. In a separate bowl, mix flour, baking powder, baking soda, and salt.


4. Gently combine the dry mixture with the peanut butter mixture until well incorporated.


5. Refrigerate the dough for 1 hour.


6. Preheat your oven to 375°F (190°C).


7. Roll dough into 1-inch balls or use a medium-sized cookie scoop.


8. Dip the top of each dough ball into granulated sugar and place on a cookie sheet.


9. Flatten each ball with a fork, creating a criss-cross pattern.


10. Bake for 8-10 minutes, ensuring not to over-bake.


11. Cool on wire racks and top each with a Hershey's chocolate kiss. Enjoy!


Conclusion


Our Peanut Butter Sriracha Cookies are more than just a treat; they are a testament to the joy of culinary experimentation and the power of family traditions. Whether you're a seasoned baker or a newcomer to the kitchen, this recipe offers a delightful challenge with a rewarding payoff. Happy baking!

Read more about Appetizers

Read more about Main Dishes

Read more about Desserts

Brown sugar & Spice Sugar cookie frogs | Made by Meaghan Moineau

Brown sugar & Spice Sugar cookie frogs | Made by Meaghan Moineau

Title: Sweet Memories in Every Bite: Brown Sugar & Spice Sugar Cookie Frogs
Description: Dive into the enchanting world of baking with our Brown Sugar & Spice Sugar Cookie Frogs. These delightful treats are more than just cookies; they’re a nostalgic journey back to cherished family gatherings. With a perfect blend of warm spices and a touch of sweetness, these cookies promise to bring warmth and joy to your kitchen. Whether you're a seasoned baker or a beginner, this recipe is sure to captivate your taste buds and your heart.

---


Brown Sugar & Spice Sugar Cookie Frogs: A Recipe Steeped in Family Tradition


Ingredients:


- Unbleached flour


- Baking powder


- Cinnamon


- Ginger


- Nutmeg


- Allspice


- Granulated sugar


- Light brown sugar


- Butter


- Egg


- Vanilla extract


Instructions:


1. Prepare Your Dry Ingredients: Begin by whisking together the flour, baking powder, cinnamon, ginger, nutmeg, and allspice. Set this aromatic mixture aside, letting the spices mingle and infuse their warmth.
2. Creaming Magic: In a separate bowl, cream the granulated sugar and light brown sugar with the butter until light and fluffy. The blend of sugars gives the cookies their distinct, rich flavor.
3. Incorporate Wet Ingredients: Add the egg and vanilla extract to the creamed mixture, mixing until well-blended. The vanilla adds a hint of sweet aroma that perfectly complements the spices.
4. Combine and Conquer: Gradually incorporate the flour mixture into the wet ingredients. Beat just until combined, ensuring to scrape down the bowl, especially the bottom. The dough will be thick; don't hesitate to knead in any stray bits of flour by hand.
5. Shaping Your Frogs: Roll the dough on a floured surface and cut into whimsical frog shapes. Place these playful figures on parchment-lined baking sheets, ready to hop into the oven.
6. Baking to Perfection: Bake in a preheated oven for 9-12 minutes, adjusting the time depending on the size of your cookie cutter. Let them sit on the sheet for a few minutes before transferring them to a cooling rack.

---


A Sweet Nostalgia: The Memory Behind the Recipe


Every time I bake these Brown Sugar & Spice Sugar Cookie Frogs, I am transported back to my grandmother's cozy kitchen. As a child, I’d watch in awe as she effortlessly transformed simple ingredients into magical treats. The aroma of spices wafting through the air was always the first sign that something special was underway.


Grandma had a particular fondness for frogs, often saying they brought good luck. She’d let me help cut out the frog shapes, my small hands struggling to keep the dough intact. We’d laugh at the misshapen ones, claiming they had extra character. Those afternoons filled with laughter and love are some of my most cherished memories.


These cookies were a staple at every family gathering, each bite a reminder of the warmth and joy that surrounded us. Even now, as I bake them for my own family, I feel a connection to those happy days, hoping to create similar memories for my little ones.


---


Difficulty: 3/10


Classification: Dessert


---


Whether you’re creating new memories or reliving old ones, these Brown Sugar & Spice Sugar Cookie Frogs are sure to bring smiles and sweetness to your home. Enjoy the process, savor the flavors, and let the nostalgia wash over you. Happy baking!

Read more about Appetizers

Read more about Main Dishes

Read more about Desserts

Hazelnut & Coconut Shortbread Sandwich Cookies | Made by Meaghan Moineau

Hazelnut & Coconut Shortbread Sandwich Cookies | Made by Meaghan Moineau

Title: "A Sweet Journey: Hazelnut & Coconut Shortbread Sandwich Cookies"


Description: Dive into the delightful world of Hazelnut & Coconut Shortbread Sandwich Cookies. This blog post guides you through creating a delectable dessert, intertwined with a heartwarming family memory. Perfect for a sweet treat, these cookies are a must-try for every dessert enthusiast.


---


A Sweet Journey: Hazelnut & Coconut Shortbread Sandwich Cookies


Growing up, my grandmother's kitchen was a haven of warmth and delicious aromas. Every holiday season, the family would gather around her rustic wooden table, eagerly awaiting the unveiling of her signature Hazelnut & Coconut Shortbread Sandwich Cookies. These delightful treats were more than just cookies; they were little bites of nostalgia that brought our family closer together.


Ingredients:


- 1 cup unsweetened coconut, finely chopped


- 2 cups all-purpose flour


- 1 cup hazelnuts, finely chopped


- 1/4 teaspoon salt


- 1 cup unsalted butter, softened


- 1/2 cup sugar


- 1 teaspoon vanilla extract


- Raspberry jam, for filling


- Powdered sugar, for dusting


Instructions:


1. Preheat Your Oven: Set your oven to 350 degrees F (175 degrees C) and let the anticipation build.
2. Cream Butter and Sugar: In the bowl of an electric mixer fitted with the paddle attachment, blend together the sugar and butter on medium speed until the mixture is soft and light yellow, about 5 minutes.
3. Prepare the Nuts and Coconut: While the butter and sugar mix, finely chop the coconut and hazelnuts, either with a knife or in a food processor.
4. Combine Ingredients: Blend the vanilla extract into the butter and sugar mixture. Gradually add salt and flour with the mixer on low speed. Once incorporated, add in the coconut and hazelnuts, stirring gently until just blended.
5. Chill the Dough: Remove the dough onto a piece of plastic wrap, form it into a disk, wrap, and refrigerate for 30-45 minutes or until firm.
6. Roll Out the Dough: On a floured surface, roll out the dough to 1/8-inch thick. Use a cookie cutter to cut large circles, then cut out a small circle in half of the circles using a smaller cutter, creating a doughnut shape.
7. Bake the Cookies: Place all circles onto cookie sheets. Bake for 12-14 minutes until the edges begin to brown, rotating sheets halfway through if baking more than one sheet at a time. If not baking immediately, refrigerate the dough between batches.
8. Cool and Assemble: Remove trays to a cooling rack to let cool for a few minutes. Once completely cool, spread about 1 tsp or more of raspberry jam onto the bottom circle cookies and top with the doughnut-shaped cookies.
9. Finish with a Dusting: Dust the cookies with powdered sugar before serving.

A Nostalgic Family Memory


I vividly recall the first time I helped my grandmother make these cookies. The kitchen was bustling with the chatter of relatives, the laughter of children, and the sound of holiday music playing softly in the background. As I stood on a stool beside her, she patiently guided my small hands in rolling out the dough and cutting out the circles. The aroma of baking cookies filled the air, and I remember feeling a sense of pride and joy as we assembled the finished cookies. To this day, every bite of these Hazelnut & Coconut Shortbread Sandwich Cookies takes me back to those cherished moments, reminding me of the love and warmth of family gatherings.


Difficulty: 6/10


Classification: Dessert

These cookies are a delightful balance of flavors and textures, perfect for any occasion. While the process involves a few steps, the result is a batch of beautifully crafted cookies that are sure to impress. Enjoy the journey and the memories you'll create along the way!

Read more about Appetizers

Read more about Main Dishes

Read more about Desserts

Easy Homemade Oreo Cookies | Made by Meaghan Moineau

Easy Homemade Oreo Cookies | Made by Meaghan Moineau

Title: Nostalgic Delights: Easy Homemade Oreo Cookies to Sweeten Your Day
Description: Dive into the delightful world of homemade treats with our Easy Homemade Oreo Cookies recipe. This simple yet rewarding dessert will not only satisfy your sweet tooth but also transport you back to fond family memories. Discover how a few ingredients can come together to create magic in your kitchen, and relive the joy of baking with loved ones.

---


There's something undeniably heartwarming about biting into a freshly baked cookie. The soft crunch, the creamy filling, and the burst of sweetness all come together to create a moment of pure joy. Our Easy Homemade Oreo Cookies recipe is a testament to this simple pleasure, and it comes with a sprinkle of nostalgia.


Ingredients:

- 8 oz cream cheese


- 2 eggs


- 1 box of chocolate cake mix


- 1 cup icing sugar


- ½ cup margarine


- 2 tablespoons milk


- ¼ cup oil


- 1 teaspoon vanilla extract


Instructions:

1. Preheat your oven to 325°F (163°C).


2. In a gigantic bowl, combine the cream cheese, eggs, chocolate cake mix, margarine, milk, oil, and vanilla extract. Mix thoroughly. If the bowl seems too crowded, consider mixing in parts to ensure everything is well-blended.


3. Roll the dough into small balls. Remember, the smaller the balls, the more cookies you'll have to enjoy!


4. Place the dough balls on a baking sheet and bake for 8 to 10 minutes. Once done, gently flatten them with a spatula.


5. Transfer the cookies to wire racks and let them cool completely.


6. For the filling, beat the icing sugar with a bit of cream cheese until smooth. Feel free to get creative with flavors and colors—try mint extract with light green food coloring for a refreshing twist.


7. Once cooled, spread the icing between two cookies to form delightful sandwiches.


8. Store your homemade Oreo cookies in the refrigerator or freezer to keep them fresh.


A Sweet Family Memory:

I remember the first time I made these cookies with my grandmother during one rainy afternoon. The house was filled with the comforting aroma of chocolate, and the sound of rain tapping against the windows created a cozy ambiance. We laughed as flour dusted our noses and chocolate smeared our aprons. My grandmother, with her gentle hands, showed me how to roll the dough just right.


After baking, we sat at the kitchen table, assembling the cookies with our chosen mint filling, each bite taking us to a world of sweet nostalgia. It wasn’t just about the cookies; it was about the time spent together, the stories shared, and the love poured into every step. These homemade Oreo cookies became a family favorite, a treat that brought us together time and time again.


Difficulty Rating: 3/10
Classification: Dessert

Whether you’re recreating a cherished family memory or starting a new tradition, these Easy Homemade Oreo Cookies are sure to bring smiles to your table. Enjoy every bite, and remember—the best ingredients are always love and laughter.

Read more about Appetizers

Read more about Main Dishes

Read more about Desserts

Almond and cranberry shortbread | Made by Meaghan Moineau

Almond and cranberry shortbread | Made by Meaghan Moineau

Title: Delight in Every Bite: The Perfect Almond and Cranberry Shortbread
Description: Discover the delicate balance of flavors in this almond and cranberry shortbread recipe, a delightful treat that brings warmth to any occasion. With a story that binds generations, these cookies are more than just a dessert—they're a cherished memory.

---


Almond and Cranberry Shortbread: A Recipe Steeped in Family Tradition


Growing up, the holiday season was never complete without the comforting aroma of freshly baked cookies wafting through our home. Each year, as the first snowflakes fell, my grandmother would gather us in her cozy kitchen, where we would embark on the annual ritual of making her famous Almond and Cranberry Shortbread.


This recipe, passed down through generations, is a testament to the simplicity and love that defines our family gatherings. As we creamed the butter and sugar, my grandmother would regale us with tales of her own childhood, painting vivid pictures of festive tables laden with this delightful dessert. The shortbread, with its crumbly texture and the sweet-tart burst of cranberries, always seemed to embody the warmth and togetherness of the season.


Ingredients:


- Butter: The foundation of any good shortbread, bringing richness and that melt-in-your-mouth quality.
- Icing Sugar: For a smooth, glossy mixture that adds the perfect touch of sweetness.
- Egg Yolks: To bind the ingredients together, adding depth to the flavor.
- Lemon Juice: A hint of citrus that brightens the palate.
- Flour: The canvas for our creation.
- Almonds: Both ground and blanched, adding texture and a nutty richness.
- Dried Cranberries: For a pop of color and tangy sweetness.
- Blanched Almonds: To roll the dough in, offering a satisfying crunch.

Instructions:


1. Cream the Butter: Beat the butter for about 5 minutes until it reaches a fluffy consistency.
2. Add the Sweetness: Incorporate the icing sugar, continuing to beat until the mixture shines.
3. Mix in the Yolks and Juice: Add the egg yolks and lemon juice, whisking until fully blended.
4. Combine Dry Ingredients: Mix the flour and ground almonds, gradually adding to the butter mixture until it forms a thick paste. Be careful not to overmix.
5. Knead in the Cranberries: Gently fold in the dried cranberries by hand.
6. Shape the Dough: Divide into two, shaping each into 20-22 cm rolls. Roll in chopped almonds.
7. Chill: Wrap in foil and refrigerate for several hours or overnight.
8. Slice and Bake: Cut into 5-6 mm slices, bake at 180°C for about 12 minutes. Allow to cool on the sheet before transferring to a rack.

A Family Tradition


Every slice of this shortbread is a bite into my family's history. The crunch of almonds and the burst of cranberry flavor is reminiscent of the laughter and stories shared around our table. While the cookies themselves are a simple treat, their true magic lies in the memories they evoke.


Difficulty Rating: 4/10


This recipe is straightforward, making it accessible for bakers of all levels. Its simplicity is part of what makes it such a beloved tradition.


Classification: Dessert


Perfect for any occasion, these cookies shine as a delightful dessert, ideal for pairing with a warm cup of tea or coffee.


---


As the holiday season approaches, I invite you to try this Almond and Cranberry Shortbread recipe. May it bring as much joy to your home as it has to mine. Whether you're creating a new tradition or adding to an existing one, remember that the true essence of these cookies is in the love and memories they carry.

Read more about Appetizers

Read more about Main Dishes

Read more about Desserts

Chewy Gingersnaps | Made by Meaghan Moineau

Chewy Gingersnaps | Made by Meaghan Moineau

**Title: "Chewy Gingersnaps: A Heartwarming Holiday Tradition"**


**Description:** Dive into the cozy nostalgia of the holiday season with these irresistibly chewy gingersnaps. Infused with the warm spices of ginger and cinnamon, this classic dessert offers a delightful balance of sweet and spicy flavors. Ideal for family gatherings or a quiet night by the fire, these cookies are sure to become a cherished part of your seasonal traditions. With a difficulty rating of 4 out of 10, they're accessible for bakers of all skill levels.


---


As the crisp air of fall deepens into the chill of winter, my kitchen becomes a haven of warmth and spice. The scent of gingersnaps baking in the oven is more than just a delightful aroma; it’s a passport to cherished family memories. These chewy gingersnaps, with their perfect blend of ginger, cinnamon, and molasses, have been a staple at our holiday gatherings for as long as I can remember.


Growing up, the holidays meant a bustling kitchen, filled with the laughter of family and the clatter of pots and pans. My grandmother would always take the lead, orchestrating the preparation of a feast while simultaneously baking batch after batch of her famous gingersnaps. These cookies were more than just a treat; they were a tradition, a symbol of the season, and a testament to the love that bound our family together.


The process of making gingersnaps was a family affair. My siblings and I would gather around the kitchen counter, eager to help in any way we could. Our roles were simple yet crucial: stirring the flour, baking soda, salt, and spices in one bowl while watching my grandmother cream the butter, oil, and sugars in another. The anticipation built as she beat in the eggs, one at a time, followed by the rich, dark molasses that gave the cookies their distinctive flavor.


Once the dough was mixed, it was time for our favorite part: shaping the dough into small balls and rolling them in a generous coating of sugar. As we placed them onto parchment-lined baking trays, my grandmother would remind us that the secret to their perfect chewiness was to bake them for precisely eight minutes. They would still seem a bit underdone when first taken out, but that was exactly how they were supposed to be.


The first bite of a freshly baked gingersnap was always magical. The outside was crisp with a sugar coating, while the inside was soft, chewy, and bursting with flavor. These cookies were often enjoyed with a cup of hot cocoa or mulled cider, completing the cozy holiday experience.


Today, I carry on the tradition with my own family, baking these chewy gingersnaps each year as the holidays approach. Each batch is a tribute to my grandmother and the loving memories she created. I hope that as you try this recipe, it brings warmth, joy, and a touch of nostalgia to your home as well.


**Difficulty: 4/10**


**Classification: Dessert**


**Ingredients:**


- 2 teaspoons baking soda


- 1 cup brown sugar


- 1 cup (2 sticks) butter, softened


- 2 teaspoons ground cinnamon


- 2 large eggs


- 2 cups all-purpose flour


- 2 teaspoons ground ginger


- 1/2 teaspoon kosher salt


- 1/4 cup molasses


- 1/4 cup vegetable oil


- 1/4 teaspoon ground white pepper


- 1/2 cup white sugar (plus extra for rolling)


**Instructions:**


1. Preheat oven to 325°F (160°C).


2. In a large bowl, stir together the flour, baking soda, salt, ginger, cinnamon, and white pepper.


3. In another bowl, cream the butter, oil, brown sugar, and white sugar together until light and fluffy.


4. Beat in the eggs, one at a time, until fully incorporated.


5. Stir in the molasses.


6. Gradually add the dry ingredients to the wet ingredients, stirring until well combined.


7. Shape the dough into small balls and roll them in additional white sugar.


8. Place the dough balls on a baking tray lined with parchment paper.


9. Bake for 8 minutes. The cookies will appear slightly underdone when removed from the oven.


10. Allow to cool on the baking tray for a few minutes before transferring to a wire rack to cool completely.


Enjoy these delightful chewy gingersnaps, and may they fill your home with warmth and joy this holiday season!

Read more about Appetizers

Read more about Main Dishes

Read more about Desserts

Divine Christmas Candy Cane Cookies | Made by Meaghan Moineau

Divine Christmas Candy Cane Cookies | Made by Meaghan Moineau

**Title: Celebrate the Holidays with Divine Christmas Candy Cane Cookies**


**Description:** Embrace the holiday spirit with our delightful Candy Cane Cookies, a heavenly treat that combines the minty freshness of peppermint with the sweetness of a buttery cookie. Perfect for sharing, these cookies will bring joy to every festive gathering. Follow our detailed guide to create these charming confections and discover the heartwarming family story behind this treasured recipe.


---


**A Sweet Holiday Tradition: Divine Christmas Candy Cane Cookies**


As the holiday season approaches, the aroma of freshly baked cookies fills the air, evoking cherished memories of family gatherings and festive celebrations. One such nostalgic treat that has become a staple in our household is the delightful Candy Cane Cookie. With its vibrant colors and refreshing peppermint flavor, this cookie is not just a dessert, but a symbol of holiday joy and togetherness.


**Recipe Overview**


**Ingredients:**


- 2 cups all-purpose flour


- 1 egg yolk


- Red food coloring


- 1 teaspoon peppermint extract


- 1/2 cup powdered sugar


- 1 cup unsalted butter, softened


- 1 teaspoon vanilla extract


**Instructions:**


1. **Creaming the Butter**: Begin by creaming the unsalted butter until it achieves a smooth, fluffy texture. Gradually add the powdered sugar, continuing to beat until the mixture is light and airy.


2. **Mixing the Wet Ingredients**: Incorporate the egg yolk, vanilla extract, and peppermint extract into the butter and sugar mixture, stirring until well combined.


3. **Incorporating the Dry Ingredients**: Add the all-purpose flour in two additions. First, add half of the flour, stirring until fully incorporated, then add the remaining flour. Mix until you attain a firm, smooth dough.


4. **Coloring the Dough**: Divide the dough into two equal portions. Add a few drops of red food coloring to one half, kneading until the color is evenly distributed.


5. **Chilling the Dough**: Wrap both dough balls in plastic wrap and refrigerate for about 30 minutes, allowing the dough to firm up.


6. **Shaping the Cookies**: Preheat your oven to 180°C (356°F). On a lightly floured surface, take a walnut-sized piece of red dough and a walnut-sized piece of white dough. Roll each into a 10-12 cm long rope. Place the ropes side by side and gently twist them together, pressing slightly to form a spiral. Shape by bending one end into a hook, creating the iconic candy cane shape.


7. **Baking**: Line the cookies on baking paper about 2 cm apart. Bake for approximately 10 minutes or until the edges start to brown. Once baked, let the cookies cool completely on a wire rack.


**A Cherished Family Memory**


Every Christmas, my grandmother would gather the family in her cozy kitchen, the heart of her home. With flour dusting the countertops and laughter echoing off the walls, we would embark on our annual cookie-baking adventure. The Candy Cane Cookies were always my favorite part. My siblings and I would compete to see who could create the most perfect twist, our hands sticky with dough and faces smeared with flour. As the cookies baked, the kitchen would be filled with the sweet scent of peppermint, wrapping us in a warm, festive embrace. To this day, the taste of these cookies transports me back to those precious moments, a reminder of the simple joys and loving bonds that define the holiday season.


**Difficulty Level: 5/10**


**Classification: Dessert**


Whether you’re continuing a family tradition or starting a new one, these Candy Cane Cookies are sure to bring a smile to everyone’s face. With their delightful appearance and delicious taste, they’re the perfect addition to your holiday dessert table. Happy baking, and may your holidays be filled with warmth and cheer!

Read more about Appetizers

Read more about Main Dishes

Read more about Desserts

Captain America Shield Cookies | Made by Meaghan Moineau

Captain America Shield Cookies | Made by Meaghan Moineau

# Shielding Sweetness: Captain America Shield Cookies


**Description:** Unleash your inner superhero with these delightful and iconic Captain America Shield Cookies. Perfect for comic book fans and dessert lovers alike, these cookies not only capture the essence of a beloved superhero but also serve as a nostalgic treat that brings families together. With layers of vibrant fondant and a creamy buttercream finish, these cookies are bound to be the star of your next gathering.


---


## A Sweet Nostalgia: A Family Memory


Growing up, superhero movies were a staple in our household. Every summer, my siblings and I would gather around the TV, popcorn in hand, eagerly watching the latest superhero saga unfold. Captain America, with his unwavering sense of justice and iconic shield, was always a favorite. It wasn't just his strength or bravery that captivated us; it was the idea of protection and unity that resonated deeply.


One rainy afternoon, with no new comics to dive into, my mom came up with a brilliant idea to keep us entertained - baking Captain America Shield Cookies. As the aroma of freshly baked sugar cookies wafted through the air, our kitchen transformed into a workshop of creativity and laughter. My siblings and I took turns dipping the cookies in red candy melts, giggling as we tried to perfect the fondant stars.


The joy of creating these cookies was matched only by the delight of sharing them with family and friends. Each bite was a reminder of those cherished days, where superhero adventures and family bonds were seamlessly intertwined.


## Recipe


### Ingredients:


- Red candy melts


- Coconut oil


- Circular cookie cutters (various sizes)


- Star cookie cutter


- Cornstarch


- Blue cake fondant


- White cake fondant


- Pre-made sugar cookies


- Vanilla buttercream


### Instructions:


1. Line a baking sheet with wax paper.


2. Microwave the candy melts and coconut oil in 30-second intervals until completely melted, mixing thoroughly.


3. Using a fork, dip each sugar cookie into the melted candy and set it carefully on the lined baking sheet.


4. Allow to set in the refrigerator for about one hour.


5. Dust a clean working surface with cornstarch and roll out your fondant.


6. Cut your white fondant with the largest cookie cutter, then using the 1.5-inch cookie cutter, cut a hole in the middle.


7. Using the smallest circular cookie cutter, cut out blue fondant circles.


8. Cut star shapes from the white fondant and use buttercream to glue them onto your blue fondant circles.


9. Once the coated cookies are set, remove them from the fridge and start assembling. Using buttercream as the glue, place your large white circle, then the blue one (with the star).


10. Enjoy your superhero creation!


### Difficulty Rating:


**4/10** - This recipe is beginner-friendly and perfect for a fun family activity.


### Classification:


**Dessert**


---


Whether you're celebrating a superhero-themed party or simply indulging your sweet tooth, these Captain America Shield Cookies are more than just a treat. They're a delicious way to bring a slice of nostalgia and the spirit of heroism into your home. Assemble your team, don your aprons, and let the baking adventure begin!

Read more about Appetizers

Read more about Main Dishes

Read more about Desserts

Ginger Molasses Rounds | Made by Meaghan Moineau

Ginger Molasses Rounds | Made by Meaghan Moineau

**Title: The Timeless Delight of Ginger Molasses Rounds: A Nostalgic Treat**


**Description: Discover the sweet nostalgia of Ginger Molasses Rounds, a delicious dessert that brings warmth and memories to the heart and home. With a perfect blend of spices and a chewy texture, this recipe is simple yet rich with family tradition.**


---


### A Taste of Nostalgia: Ginger Molasses Rounds


As the autumn leaves begin to fall and the air grows crisp, there's nothing quite like the comforting aroma of freshly baked cookies wafting through the house. If there's one recipe that embodies the spirit of warmth and family togetherness, it's Ginger Molasses Rounds. These cookies, with their perfect chewiness and spice, have been a beloved tradition in my family for generations.


I vividly remember the first time I helped my grandmother bake these delightful rounds. Her kitchen, always a hub of laughter and the tantalizing scents of spices, was a place where magic happened. I was a curious child, always eager to learn, and my grandmother was a patient teacher. She would gently guide my small hands as I carefully measured out the ingredients — flour, salt, baking soda, and those aromatic spices: cinnamon and ground ginger. Each step was a lesson not just in baking, but in life, as she shared stories of her childhood and how her mother taught her the same recipe.


### The Recipe


#### Ingredients:


- 1 cup butter, softened


- 1 cup sugar


- 1 egg


- 1/4 cup molasses


- 2 cups all-purpose flour


- 2 teaspoons baking soda


- 1/4 teaspoon salt


- 1 teaspoon ground cinnamon


- 1 teaspoon ground ginger


- Additional granulated sugar for rolling


#### Instructions:


1. **Cream the Butter and Sugar:**


In a large bowl, cream together the butter and sugar until smooth and fluffy. This step is essential for that perfect cookie texture.


2. **Add Egg and Molasses:**


Beat in the egg and molasses until well combined. The molasses gives these cookies their rich color and deep flavor.


3. **Mix Dry Ingredients:**


In a separate bowl, whisk together the flour, baking soda, salt, cinnamon, and ground ginger. Gradually blend this dry mixture into the creamed ingredients.


4. **Shape and Roll:**


Shape the dough into small balls, about an inch in diameter. Roll each ball in additional granulated sugar to coat.


5. **Bake:**


Place the balls 2 inches apart on a baking sheet lined with parchment paper. Bake in a preheated 350-degree oven for 8-9 minutes, until the tops are just set and slightly cracked. Remember, they will be soft but will harden as they cool, achieving that perfect chewy texture.


### A Family Tradition


Each time I bake Ginger Molasses Rounds, I'm transported back to those cherished days in my grandmother's kitchen. The cookies not only serve as a sweet treat but as a reminder of the love and lessons passed down through generations. As my own children gather around, eager to help and hear stories of the past, I know this tradition will continue, weaving a tapestry of memories that will last a lifetime.


### Difficulty and Classification


Rated a 3 out of 10 on the difficulty scale, this recipe is both simple and rewarding, making it perfect for bakers of all levels. Classified as a dessert, these cookies are a delightful way to end a meal or share with friends and family over a cup of tea.


As you bake and enjoy these Ginger Molasses Rounds, may they bring warmth to your heart and home, just as they have to mine for so many years.

Read more about Appetizers

Read more about Main Dishes

Read more about Desserts