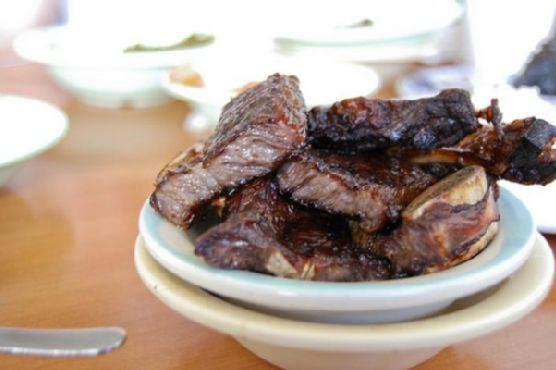
Coffee-braised Short Ribs | Made by Meaghan Moineau

Coffee-braised Short Ribs | Made by Meaghan Moineau

Title: "Savory Memories: The Art of Coffee-Braised Short Ribs"


Description: Dive into the rich, aromatic world of Coffee-Braised Short Ribs—a dish that combines the warmth of family gatherings with the robust flavors of a unique culinary masterpiece. Perfectly tender ribs, braised to perfection with a hint of coffee and a medley of spices, this main dish is your ticket to a memorable dining experience.


---


Introduction


In the heart of every cherished family gathering lies a dish that brings everyone together, sparking joy and nostalgia with every bite. For my family, that dish has always been Coffee-Braised Short Ribs. The mere thought of it conjures images of bustling kitchens, cozy dining rooms, and laughter echoing through the house as we eagerly await the masterpiece emerging from the oven. In this blog post, I'll guide you through creating this heartwarming dish, sharing a piece of my family's history along the way.


A Family Memory


Growing up, Sunday afternoons were reserved for family dinners at my grandmother's house. The aroma of slow-cooked meals wafted through the air, promising a feast that would satisfy both the belly and the soul. My grandmother, a culinary magician in her own right, introduced us to Coffee-Braised Short Ribs one chilly autumn evening. The melding of savory and slightly sweet flavors, enriched by the depth of freshly brewed coffee, created a culinary symphony that left a lasting impression on all of us.


As we sat around the table, my grandmother regaled us with stories of her childhood, where she first learned to cook by her mother's side. Her eyes twinkled with a mix of nostalgia and pride as she recounted how this dish was a staple in their household—an ode to her heritage and a symbol of familial love. Each bite was a journey back in time, a connection to our roots, and a reminder of the warmth and comfort that family brings.


Recipe: Coffee-Braised Short Ribs


Ingredients:

- Short ribs


- Salt and pepper (to taste)


- Olive oil


- 1 yellow onion, chopped


- 1 red bell pepper, chopped


- 1 jalapeño, chopped


- 4 garlic cloves, minced


- 1 tablespoon ancho chile powder


- 1 tablespoon dried oregano


- 1 tablespoon ground cumin


- 1 cup strong freshly brewed coffee


- 1 can diced tomatoes with juice


- 2 tablespoons tomato paste


- 2 tablespoons dark brown sugar


- Fresh cilantro, chopped (for garnish)


Instructions:

1. Preheat your oven to 300°F (150°C).


2. Heat olive oil in a large heavy stockpot over medium-high heat.


3. Season the short ribs with salt and pepper. Add them to the pot in batches, browning each side for about 4 minutes. Transfer to a platter.


4. In the same pot, add onion, red bell pepper, and jalapeño. Reduce heat to medium, cover, and cook until the onion is tender, stirring occasionally (about 6 minutes).


5. Stir in garlic and sauté uncovered for 1 minute.


6. Add brown sugar, ancho chile powder, oregano, and cumin, stirring for 15 seconds.


7. Pour in the coffee, tomatoes with juice, and tomato paste, bringing the mixture to a boil while scraping up the browned bits.


8. Return the ribs and any juices to the pot, bring to a boil, then cover and bake in the oven until the meat is very tender, about 1 hour and 45 minutes.


9. Spoon off fat from the surface of the sauce. Season the sauce to taste with salt and pepper.


10. Transfer ribs to a platter and spoon the sauce over top. Sprinkle with chopped cilantro.


Conclusion


This Coffee-Braised Short Ribs recipe is more than just a meal; it's a journey through time, a celebration of family, and a testament to the power of food to connect us to our roots. With its deep, complex flavors and tender, succulent meat, this dish is sure to become a staple in your own family gatherings, creating new memories and traditions for years to come.


Difficulty Rating: 7/10

Classification: Main Dish


Whether you're creating new memories or revisiting old ones, this dish promises to be a highlight of any gathering. Enjoy, and may your home be filled with warmth, laughter, and the delightful aroma of Coffee-Braised Short Ribs.
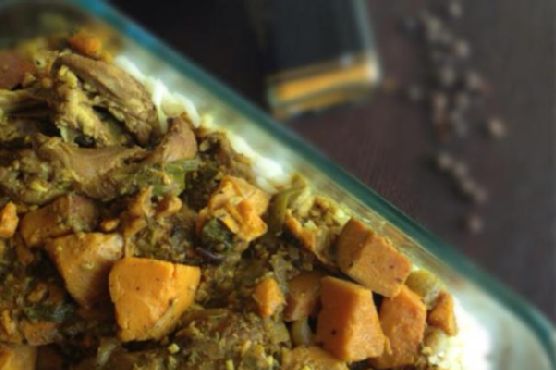
Read more about Appetizers

Read more about Main Dishes

Read more about Desserts

Authentic Jamaican Curry Chicken | Made by Meaghan Moineau

Authentic Jamaican Curry Chicken | Made by Meaghan Moineau

**Title: Savoring Tradition: Crafting Authentic Jamaican Curry Chicken**


**Description:** Dive into the vibrant world of Jamaican cuisine with our Authentic Jamaican Curry Chicken recipe. Infused with rich spices and a touch of nostalgia, this dish captures the essence of Caribbean flavors. Perfect for a cozy family dinner, this main dish will transport your taste buds to the sun-drenched shores of Jamaica.


---


**A Taste of Home: Authentic Jamaican Curry Chicken**


In the heart of every Jamaican kitchen lies a pot of bubbling curry, a symphony of spices and aromas that tell tales of heritage and warmth. Among these beloved dishes is the legendary Jamaican Curry Chicken, a staple that not only tantalizes the senses but also carries cherished memories of family gatherings and laughter-filled evenings.


**Ingredients:**


- 2 lbs skinless chicken thighs


- 2 tablespoons allspice


- 3 tablespoons coconut oil


- 4 tablespoons curry powder


- 4 cloves garlic, minced


- 1 green bell pepper, chopped


- 1 onion, chopped


- Salt and black pepper to taste


- 3 scallions, chopped


- 1 scotch bonnet pepper, whole


- 2 large sweet potatoes, peeled and cubed


- 2 teaspoons fresh thyme


- 3 cups water


**Instructions:**


1. **Marinate:** Begin by seasoning the chicken with allspice, curry powder, garlic, green bell pepper, onion, salt, black pepper, and scallions. Let the flavors meld together by marinating the chicken for at least 2 hours, or for a more intense flavor, leave it overnight in the refrigerator.


2. **Sear the Chicken:** Heat coconut oil in a Dutch oven over high heat. Carefully add the marinated chicken pieces and fry until each side is golden brown and seared, approximately 10 minutes.


3. **Simmer:** Once the chicken is browned, add the remaining marinade, scotch bonnet pepper, and water to the pot. Cover and bring to a boil.


4. **Thicken the Stew:** Add the sweet potatoes to the pot, reduce the heat to a simmer, and let the stew cook for about an hour, or until it reaches a thick, hearty consistency.


**Difficulty:** 6/10


**Classification:** Main Dish


**A Nostalgic Note:**


Growing up, Sunday dinners were a sacred tradition in our household. The aroma of spices would waft through the air as my grandmother prepared her famous curry chicken, a recipe passed down from her own mother. Our small kitchen became a haven, filled with stories and laughter. My siblings and I would gather around the table, eagerly waiting for our plates to be filled with the vibrant curry. Each bite was a celebration of our heritage, a connection to our roots, and a reminder of the love that binds our family together.


To this day, whenever I prepare this dish, I am transported back to those cherished moments, the warmth of my grandmother’s smile, and the comforting embrace of my family. It is more than just a meal; it is a legacy of love and togetherness.


---


Embrace the rich flavors and history of Jamaican cuisine with this classic curry chicken recipe. Whether you're sharing it with family or savoring a quiet meal alone, it promises to bring a taste of the Caribbean to your table.

Read more about Appetizers

Read more about Main Dishes

Read more about Desserts

Moroccan Lemon Shish Kebabs | Made by Meaghan Moineau

Moroccan Lemon Shish Kebabs | Made by Meaghan Moineau

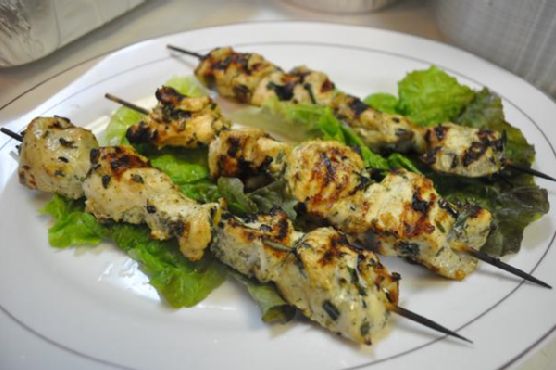
**Title: Savoring Tradition: Moroccan Lemon Shish Kebabs**


**Description:** Dive into the world of Moroccan cuisine with our delightful Moroccan Lemon Shish Kebabs. Discover the vibrant flavors of lemon, herbs, and spices wrapped around juicy chicken skewers. Experience the joy of creating a dish that's not just a meal, but a cherished family tradition.


---


**A Taste of Morocco: Moroccan Lemon Shish Kebabs Recipe**


When it comes to culinary experiences that transport you to another world, Moroccan cuisine never disappoints. Bursting with vibrant flavors and aromatic spices, one dish that stands out is the delectable Moroccan Lemon Shish Kebabs. These tantalizing skewers are not just a feast for the senses but also a cherished family tradition that brings nostalgic memories to life.


**Ingredients:**


- Lean chicken breast fillets, trimmed of fat and cut into 1" cubes


- Moroccan lemon marinade


- Fresh parsley


- Fresh rosemary leaves


- Fresh thyme leaves


- Garlic


- Black peppercorns


- Lemon juice


- Olive oil


**Instructions:**


1. **Prepare the Marinade:** In a large bowl, combine fresh parsley, rosemary leaves, thyme leaves, garlic, black peppercorns, lemon juice, and olive oil. Mix well to create the aromatic Moroccan lemon marinade.


2. **Marinate the Chicken:** Add the cubed chicken breast fillets to the marinade, ensuring each piece is well-coated. Cover the bowl with plastic wrap and let it marinate for at least half an hour. For deeper flavor, consider leaving it in the fridge for a few hours.


3. **Prepare the Skewers:** If using bamboo skewers, soak them in a tray of water to prevent burning during grilling.


4. **Thread the Chicken:** Thread about four pieces of marinated chicken onto each skewer.


5. **Cook the Kebabs:** Grill the shish kebabs over charcoal or on a skillet until the chicken is thoroughly cooked and slightly charred, releasing the irresistible aroma of lemon and herbs.


6. **Serve with a Side:** Once cooked, serve immediately on a bed of rice, Mediterranean couscous, or with warm pita bread.


**Difficulty:** 4/10


**Classification:** Main Dish


**A Nostalgic Family Memory:**


As a child, the aroma of Moroccan Lemon Shish Kebabs sizzling on the grill was a surefire sign that summer had arrived. My family would gather in the backyard, the air filled with laughter and stories shared across generations. My grandfather, a master of the grill, would always recount tales of his own childhood in Morocco, where these kebabs were a staple at family gatherings.


The preparation was a family affair. My mother would meticulously trim the chicken, while my father mixed the marinade, his hands a blur as he combined the fresh herbs and spices. I would watch in awe, occasionally sneaking a taste of the tangy marinade, my fingers sticky with lemon juice and olive oil.


As the sun began to set, the kebabs would be placed on the grill. The smoke rising from the coals seemed to carry with it the essence of Morocco. The first bite was always magical – the tender chicken bursting with flavors that danced on the tongue.


Even now, making these Moroccan Lemon Shish Kebabs feels like stepping back in time, each skewer a bridge to those cherished family moments. It's more than just a recipe; it's a reminder of the joy and love that food can bring to our lives.


Incorporating this dish into your recipe repertoire not only promises a delightful culinary experience but also invites the warmth and nostalgia of family traditions into your home. So, fire up the grill, gather your loved ones, and let the magic of Moroccan Lemon Shish Kebabs create new memories for generations to come.

Read more about Appetizers

Read more about Main Dishes

Read more about Desserts

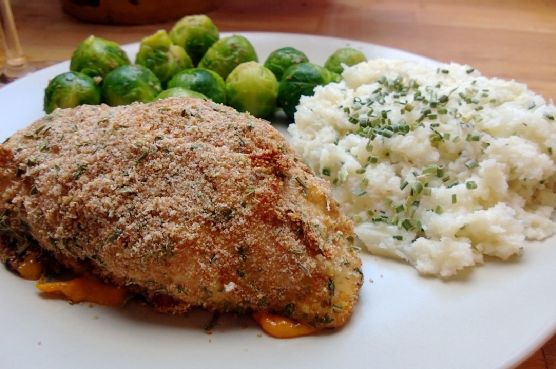
Herb and Cheddar Cordon Bleu | Made by Meaghan Moineau

Herb and Cheddar Cordon Bleu | Made by Meaghan Moineau

### Title: Savoring Memories: Herb and Cheddar Cordon Bleu


**Description:** Dive into a flavorful family favorite with our Herb and Cheddar Cordon Bleu recipe. This delightful dish combines the richness of cheddar cheese with savory herbs and tender chicken, wrapped in a nostalgic story that will warm your heart as much as your palate. Perfect for a cozy meal, this main dish is sure to impress both in taste and presentation.


---


When the aroma of baking chicken mingles with the fragrant notes of rosemary, marjoram, and parsley, it never fails to transport me back to countless Sunday dinners at my grandmother's home. Our Herb and Cheddar Cordon Bleu was more than just a meal; it was a family tradition that brought us together, filling our hearts with warmth and our bellies with satisfaction.


**Ingredients:**


- 4 chicken breasts


- 4 slices of deli ham


- 4 slices of cheddar cheese


- 1 cup breadcrumbs


- 1 tablespoon dried marjoram


- 1 tablespoon dried parsley


- 1 tablespoon dried rosemary


- 1 egg


- 1/2 cup flour


- Salt and pepper to taste


**Instructions:**


1. **Preheat the Oven:** Start by preheating your oven to 350 degrees F (about 176 degrees C). This ensures an even cooking temperature for the perfect bake.


2. **Prepare the Chicken:** Place each chicken breast between two slices of wax paper. Using a rolling pin or meat mallet, gently pound until they are about a quarter of an inch thick.


3. **Assemble the Rolls:** On each flattened chicken breast, place a slice of ham and a slice of cheddar cheese. Roll the chicken as tightly as you can, securing with toothpicks or small skewers if necessary.


4. **Set Up Your Stations:** Beat an egg in a shallow baking dish. Prepare two more stations: one with flour and another with a mix of breadcrumbs, dried marjoram, parsley, and rosemary.


5. **Coat the Chicken:** First, coat the chicken rolls in flour, then dip them into the egg mixture. Finally, press them into the breadcrumb and herb mixture until thoroughly covered.


6. **Bake to Perfection:** Place the rolls in an oiled or buttered baking dish. Bake for about 30 minutes until golden brown and cooked through.


---


**A Walk Down Memory Lane:**


Every bite of this Herb and Cheddar Cordon Bleu is a nostalgic journey to those Sunday afternoons at Grandma's. I remember sitting at the kitchen table, watching her deft hands roll the chicken with precision, her stories flowing as freely as her laughter. It was in these moments that I learned cooking was more than just following a recipe; it was about creating an experience, a legacy of love passed down through generations.


**Difficulty Rating: 6/10**


This dish requires a bit of finesse with the rolling and coating, but is otherwise straightforward and ideal for anyone looking to hone their culinary skills.


**Classification:** Main Dish


---


Incorporate Herb and Cheddar Cordon Bleu into your meal rotation for a dish that encapsulates both flavor and familial love. Whether you're creating new memories or indulging in old ones, this recipe promises to be a cherished addition to your dining experience.

Read more about Appetizers

Read more about Main Dishes

Read more about Desserts

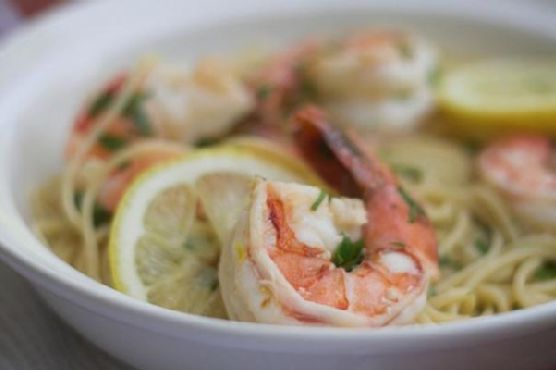
Easy Shrimp Scampi | Made by Meaghan Moineau

Easy Shrimp Scampi | Made by Meaghan Moineau

**Title: A Taste of Home: Easy Shrimp Scampi for the Soul**


**Description:** Dive into the heartwarming flavors of Easy Shrimp Scampi, a quick and delightful main dish that combines the rich taste of garlic, butter, and white wine with succulent shrimp. Perfect for a family dinner or a solo indulgence, this recipe is a nostalgic journey back to cherished family gatherings. Discover the simplicity and joy of cooking this classic dish, rated just 3 out of 10 in difficulty—ideal for both seasoned cooks and beginners alike.


---


There's something magical about the aroma of garlic sizzling in butter and olive oil, a fragrance that transports me back to my grandmother's cozy kitchen. Every Sunday, our family would gather around her wooden dining table, eagerly awaiting the feast she had prepared. Among her culinary masterpieces, her Shrimp Scampi was a standout—simple yet bursting with flavor.


**Ingredients:**


- 2 tablespoons butter


- 2 tablespoons olive oil


- 4 cloves garlic, minced


- 1/2 cup white wine


- 2 tablespoons lemon juice


- 1 pound shrimp, peeled and deveined


- 1/4 cup fresh parsley, chopped


- Salt and pepper to taste


**Instructions:**


1. In a large skillet, melt the butter and olive oil over medium heat. The kitchen fills with the comforting scent, reminiscent of those cherished Sunday gatherings.


2. Add the minced garlic and sauté for about 30 seconds, just until it begins to release its aromatic goodness.


3. Stir in the white wine and lemon juice, letting it simmer for a minute. This step always reminded me of my grandmother's gentle touch as she cooked, her love infusing every dish.


4. Add the shrimp, fresh parsley, salt, and pepper. Cooking over high heat, stir constantly for 2-3 minutes until the shrimp turn pink and are cooked through.


5. Serve immediately over a bed of pasta or rice, just like we did back then, when every bite was accompanied by laughter and stories from our week.


As I recreate this dish today, I remember a particular Sunday during a chilly autumn. The leaves were turning, painting the landscape in shades of gold and crimson. We were all gathered in my grandmother's warm kitchen, the windows fogged up from the heat of the stove. I watched as she moved gracefully, her hands a blur of practiced motions, creating magic with simple ingredients. Her Shrimp Scampi was always the highlight, a dish that brought us together and made us feel at home.


**Difficulty:** 3/10


**Classification:** Main Dish


With every bite of this Easy Shrimp Scampi, I'm reminded of those beautiful moments—an ode to simpler times, where food and family were the heart of our home. May this recipe bring a touch of that warmth and nostalgia to your table, too. Enjoy!

Read more about Appetizers

Read more about Main Dishes

Read more about Desserts

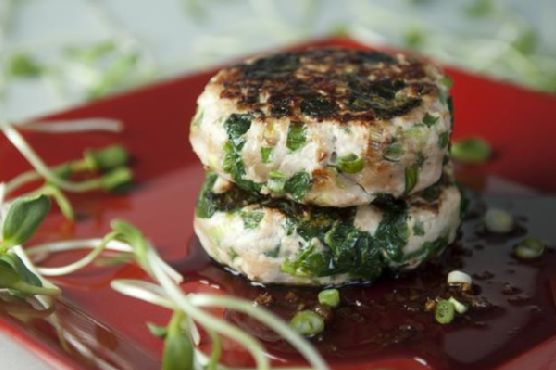
Turkey-Spinach Burgers With Sweet Soy-Ginger Sauce | Made by Meaghan Moineau

Turkey-Spinach Burgers With Sweet Soy-Ginger Sauce | Made by Meaghan Moineau

# Turkey-Spinach Burgers With Sweet Soy-Ginger Sauce: A Fusion of Flavors and Family Memories


## Description


Discover the culinary magic of Turkey-Spinach Burgers with Sweet Soy-Ginger Sauce. This delightful fusion dish combines the wholesome goodness of ground turkey and fresh spinach with a tantalizing Asian-inspired sauce. Perfect as a main dish, these burgers are not just a treat for the taste buds but also a stroll down memory lane, wrapped in a nostalgic family story.


## A Taste of Nostalgia


Cooking has always been a family affair in my household. Every Sunday, my mom and I would gather in the kitchen, aprons tied and ready for adventure. One particular Sunday, we stumbled upon a recipe that would become a staple in our family: Turkey-Spinach Burgers with Sweet Soy-Ginger Sauce.


The aroma of soy sauce and fresh ginger simmering on the stove would fill the kitchen, mingling with the laughter and stories we shared. My mom would recount tales of her childhood, and in those moments, I felt connected to generations past. The sizzling sound of turkey patties on the skillet was the soundtrack to our conversations, and the vibrant green of the spinach reminded us of the garden my grandmother used to tend with love and care.


Every bite of those burgers was a bite of history, flavored with love and memories. It's a recipe that transcends taste; it’s a testament to family bonds and culinary heritage.


## Recipe: Turkey-Spinach Burgers With Sweet Soy-Ginger Sauce


### Ingredients


- Fresh baby spinach


- Black pepper


- Canola oil


- Dark brown sugar


- Fresh ginger


- Ground turkey


- Mirin


- Salt


- Scallions


- Sesame oil


- Soy sauce


### Instructions


1. **Prepare the Sauce**: In a small saucepan, combine soy sauce, mirin, dark brown sugar, and fresh ginger. Bring to a boil over medium-high heat, whisking to dissolve the sugar. Reduce until slightly syrupy, about 3 minutes. Adjust the heat if necessary to prevent boil-over. Remove from heat and allow to cool completely. (Sauce may be prepared up to 2 days in advance and refrigerated in a covered container.)


2. **Prepare the Spinach**: Bring a large pot of water to a boil. Cook the spinach for 1 minute. Drain and transfer to a cold water bath to stop the cooking process. Drain again and dry thoroughly between layers of paper towels. (Spinach may be prepared up to 2 days in advance and refrigerated in a covered container.)


3. **Make the Patties**: In a large bowl, combine ground turkey, scallions, sesame oil, reserved spinach, and 1 tablespoon of the reserved sauce. Season with salt and black pepper and blend well without overworking the mixture. Form the turkey-spinach mixture into 4 patties, about 3 inches across and 1 inch thick.


4. **Cook the Burgers**: Heat canola oil in a large nonstick skillet over medium-high heat. When hot, add the patties and cook for about 5 minutes per side, until nicely browned and cooked through. Lower heat if necessary to prevent burning.


5. **Serve**: Serve the burgers with some of the sauce spooned over. Garnish with sliced scallions if desired.


### Difficulty Rating


Rated 5 out of 10 for difficulty, this dish is approachable for home cooks and offers a rewarding culinary experience.


### Classification


Main Dish


## Conclusion


These Turkey-Spinach Burgers with Sweet Soy-Ginger Sauce are more than just a meal; they are a bridge between past and present, a recipe that brings families together. Whether you're a seasoned chef or a kitchen novice, this dish invites you to create your own memories, one delicious bite at a time. Enjoy the fusion of flavors and the warmth of family tradition in every burger.

Read more about Appetizers

Read more about Main Dishes

Read more about Desserts

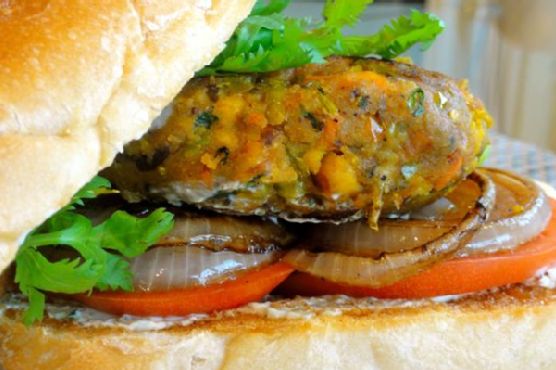
Masala-Tofu Burger | Made by Meaghan Moineau

Masala-Tofu Burger | Made by Meaghan Moineau

# Masala-Tofu Burger: A Flavorful Fusion Delight


## A Wholesome and Spicy Vegan Alternative


If you're looking to spice up your burger game with a healthy, vegan twist, the Masala-Tofu Burger is your answer. This vibrant dish combines the hearty goodness of tofu with the rich, aromatic spices of an Indian kitchen. Perfect for a weekend treat or a summer cookout, this burger is sure to impress family and friends alike. Let's dive into this culinary adventure that beautifully marries flavors and cultures.


### Ingredients You'll Need


- **White Onion:** Shopping list


- **Diced Red/Orange/Green Bell Pepper:** Shopping list


- **Frozen Peas-Carrots Mix:** Shopping list


- **Green Chilies:** Shopping list


- **Tofu:** Shopping list


- **Diced Potato:** Boiled


- **Garlic:** Shopping list


- **Black Mustard Seeds:** Shopping list


- **Curry Leaves:** Shopping list


- **Hing (Asafoetida):** Shopping list


- **Cumin Powder:** Shopping list


- **Turmeric:** Shopping list


- **Lemon:** Shopping list


- **Salt:** Shopping list


- **Cilantro:** Washed and finely chopped, shopping list


- **Indian Breadcrumbs:** Shopping list


- **Vegetable Oil:** Shopping list


- **PAM Original Flavor Spray:** Shopping list


- **Red/White Onion:** For garnish


- **Beefsteak Tomatoes:** Sliced for garnish


- **Mint-Cilantro Chutney Spread:** Shopping list


- **Portuguese Rolls:** Shopping list


### Cooking Instructions


1. **Prepare the Skillet:**


- In a large skillet over medium-high heat, spray a generous amount of PAM and add vegetable oil.


- Add black mustard seeds and sauté for 30 seconds until you hear popping noises.


- Carefully add curry leaves, as they will splatter in the hot oil.


2. **Cook the Vegetables:**


- Add diced onions and bell peppers; sweat them for about 30 seconds.


- Add chopped garlic, green chilies, and turmeric. Sauté for 5-7 minutes until onions and peppers are soft.


- Add the peas-carrots mix, cumin powder, and salt. Cook for another 7-10 minutes until all veggies are soft.


3. **Marinate the Tofu:**


- In a small bowl, combine cubed tofu with a pinch of turmeric, cumin powder, coarse black pepper, and cayenne pepper (optional). Set aside to marinate.


4. **Combine and Cook:**


- Add marinated tofu to the skillet and cook until slightly browned and crumbly.


- Squeeze juice from half a lemon and add half of the chopped cilantro. Mix well.


- Add diced boiled potatoes and toss until everything is coated. Taste for salt and spices.


- Mash the mixture until mushy and veggies are small. Set aside to cool.


5. **Form the Patties:**


- Once cooled, add breadcrumbs and mix with your hands.


- Form into four thick patties. If needed, add more breadcrumbs for consistency.


- Place patties on a plate and wrap with plastic wrap until ready to use.


6. **Cook the Patties:**


- In a small skillet sprayed with PAM over medium-high heat, cook each patty for about 2 minutes on each side until browned and crispy.


- Simultaneously, sauté thick slices of onion until charred and slightly soft.


7. **Assemble the Burger:**


- Spread a generous amount of mint-cilantro chutney on each side of the Portuguese rolls.


- Place the tofu patty, charred onions, tomato slices, and fresh cilantro leaves between the buns.


- Serve with a slice of lemon and reduced-fat chips on the side.


### A Nostalgic Family Memory


Growing up, Sundays were special in our family. My grandmother would gather us around her cozy kitchen, the air filled with a medley of spices and laughter. She had a knack for transforming simple ingredients into magical dishes, and her Masala-Tofu Burger was a family favorite. We would eagerly form an assembly line, each adding our own touch to the burgers. The final product was always met with cheers and anticipation, as we savored the deliciously spiced patty nestled between soft, fresh rolls. Even today, as I recreate this dish in my own kitchen, I am transported back to those cherished moments of family and flavor.


### Difficulty Level


- **Difficulty:** 6/10


- **Classification:** Main Dish


This Masala-Tofu Burger is a delightful blend of spices and textures, perfect for those looking to explore new culinary territories. Whether you're a seasoned cook or a beginner, this recipe offers a rewarding experience with every bite. Enjoy the memories and flavors that come with this unique twist on a classic favorite!

Read more about Appetizers

Read more about Main Dishes

Read more about Desserts

Chicken Adobo & Coconut Ginger Rice | Made by Meaghan Moineau

Chicken Adobo & Coconut Ginger Rice | Made by Meaghan Moineau

# Savoring Memories: Chicken Adobo & Coconut Ginger Rice


## A Culinary Journey Through Time and Flavor


**Description:** Dive into a world where tangy meets savory, and a hint of sweetness dances on your palate. This Chicken Adobo & Coconut Ginger Rice recipe not only promises a symphony of flavors but also brings forth a nostalgic story of family, love, and tradition. Perfect for any dinner occasion, this dish is a main course masterpiece, rated at a moderate difficulty level of 5 out of 10.


---


### A Dish Steeped in Tradition


Whenever I think of Chicken Adobo & Coconut Ginger Rice, I am transported back to my grandmother's cozy kitchen, where the aroma of garlic sizzling in oil melded with the tangy scent of vinegar, creating a comforting embrace. This dish was more than just a meal; it was a ritual that brought our family together every Sunday afternoon.


#### Ingredients:


- 1/2 cup low sodium soy sauce


- 1/2 cup apple cider vinegar


- 4 cloves garlic, minced


- 1 tablespoon peppercorns


- 2 tablespoons brown sugar


- 3 bay leaves


- 6 bone-in chicken thighs


- 2 tablespoons grapeseed oil


- 1 cup chicken broth


- 1 tablespoon cornstarch


- 1/4 cup water


- Kosher salt to taste


- 3 cups water


- 1 1/2 cups rice


- 2 tablespoons fresh ginger, grated


- 1/2 cup sweetened shredded coconut


- 2 scallions, thinly sliced


- 2 tablespoons parsley, chopped


#### Instructions:


1. **Marinate the Chicken:** In a large bowl or flat dish, combine soy sauce, vinegar, garlic, peppercorns, brown sugar, and bay leaves. Add the chicken thighs, ensuring they are well-coated. Marinate for at least an hour, or for a deeper flavor, let them soak overnight.


2. **Brown the Chicken:** Heat grapeseed oil in a pan over medium heat. Once hot, remove the chicken from the marinade and brown each side for 2-3 minutes. Set the chicken aside.


3. **Cook the Sauce:** Pour the marinade into the pan along with chicken broth. Bring to a boil, then add the chicken back in. Cover and cook for 10 minutes.


4. **Thicken the Sauce:** Mix cornstarch with 1/4 cup water. Add this slurry to the pan, turning the chicken pieces over. Cover and cook until the chicken is fully cooked, about 6-9 minutes.


5. **Prepare the Rice:** In a separate pot, bring 3 cups of water to a boil with a pinch of salt. Add the rice and cook as per package instructions. Once cooked, fluff the rice and toss with scallions, parsley, ginger, and coconut.


6. **Serve:** Plate the rice, place the chicken on top, and drizzle with the rich adobo sauce.


### A Family Memory


As a child, I would often sit at the kitchen table, watching my grandmother move with grace and precision, her hands a blur of seasoned expertise. The kitchen was filled with laughter, stories, and the promise of something delicious. When the Chicken Adobo was finally ready, it was more than just food; it was a testament to the love and care my grandmother poured into every meal.


This dish was always the highlight of our gatherings, a symbol of unity and warmth. The blend of flavors in the adobo, with its savory garlic and vinegar base, complemented the subtle sweetness of the coconut-infused rice perfectly. Each bite was a reminder of home, family, and the simple joys of life.


### Conclusion


Chicken Adobo & Coconut Ginger Rice is more than just a meal; it is an experience, a journey into a world of rich, comforting flavors that tell a story of family and tradition. Whether you're looking to recreate a cherished memory or start a new one, this dish is sure to bring warmth and joy to your table.


---


Enjoy this nostalgic culinary adventure and let every bite transport you back to the heartwarming memories of family and togetherness.

Read more about Appetizers

Read more about Main Dishes

Read more about Desserts

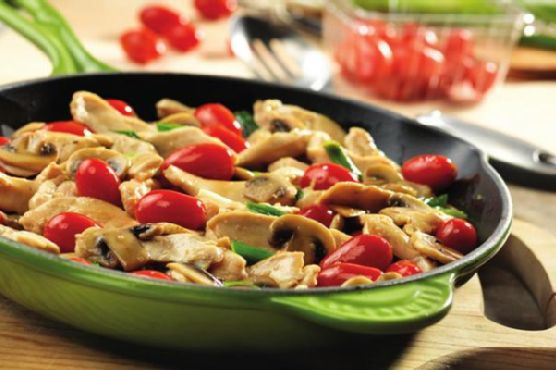
Chicken with Grape Tomatoes and Mushrooms | Made by Meaghan Moineau

Chicken with Grape Tomatoes and Mushrooms | Made by Meaghan Moineau

**Title: Savoring Memories: Chicken with Grape Tomatoes and Mushrooms**


**Description:** Dive into a heartwarming blend of flavors with our Chicken with Grape Tomatoes and Mushrooms recipe. Perfect for a cozy family dinner, this dish brings together juicy chicken, fresh mushrooms, and vibrant grape tomatoes in a delightful medley. With a touch of nostalgia, we'll whisk you away to cherished family moments while guiding you through this simple, yet satisfying main dish.


---


When I think about comfort food that warms both the heart and soul, Chicken with Grape Tomatoes and Mushrooms immediately springs to mind. This dish is not only a delightful blend of flavors but also a tapestry of fond family memories woven into each bite.


**The Ingredients that Tell a Story**


- 2 tablespoons olive oil


- 4 skinless, boneless chicken breast halves


- 8 ounces fresh mushrooms, sliced


- 2 cloves garlic, minced


- 1 pint grape tomatoes, halved


- 4 green onions, sliced


- 1 packet concentrated chicken broth


- 1/2 cup water


**A Journey Down Memory Lane**


Growing up, Sunday dinners were the highlight of my week. Our family gathered around the kitchen, the heart of our home, where laughter mingled with the aroma of delicious meals being prepared. My grandmother, the matriarch of our household, had a knack for turning simple ingredients into something magical.


One of her masterpieces was the Chicken with Grape Tomatoes and Mushrooms. I vividly remember her standing over the stove, her deft hands moving with practiced ease as she cooked. The sizzle of olive oil in the skillet was the opening note of a symphony that promised a comforting meal. The chicken, seared to a golden brown, filled the kitchen with an enticing aroma that drew us all closer.


**Cooking Instructions**


1. Begin by heating 1 tablespoon of olive oil in a 12-inch skillet over medium-high heat. Place the chicken breasts in the skillet and cook until well browned, stirring often. Once browned, remove the chicken from the skillet and set aside.


2. Add the remaining tablespoon of oil to the skillet and reduce the heat to medium. Introduce the sliced mushrooms, allowing them to cook until tender, stirring occasionally.


3. Add the minced garlic, halved grape tomatoes, and sliced green onions to the skillet. Stir for about a minute, letting the flavors meld together.


4. Return the browned chicken to the skillet. Mix in the concentrated chicken broth and water, ensuring everything is well combined. Continue cooking until the chicken is thoroughly cooked and the flavors have infused into the dish.


**A Nostalgic Note**


Every time I prepare this dish, I am transported back to those Sundays in my grandmother's kitchen. The vibrant colors of the grape tomatoes and the earthy aroma of mushrooms are not just ingredients; they are reminders of the stories and laughter shared around our family table. It's amazing how food can connect us to our past, creating a bridge to cherished memories.


**Difficulty Rating: 4/10**


This recipe is accessible for cooks of all skill levels, making it a wonderful choice for a quick yet impressive main dish. Whether you're a seasoned chef or a kitchen novice, this dish promises a rewarding experience.


As you savor each bite of Chicken with Grape Tomatoes and Mushrooms, may it bring you as much warmth and joy as it has brought to my family over the years. Enjoy this delightful main dish, and may it inspire your own cherished memories around the table.

Read more about Appetizers

Read more about Main Dishes

Read more about Desserts

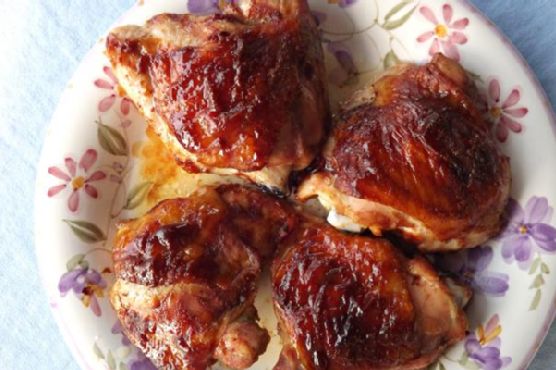
BBQ” Style Chicken Thighs | Made by Meaghan Moineau

BBQ” Style Chicken Thighs | Made by Meaghan Moineau

**Title: "Savoring Memories: BBQ-Style Chicken Thighs That Transport You Back Home"**


**Description:** Dive into a world where the tantalizing aroma of BBQ-style chicken thighs meets cherished family memories. This easy-to-follow recipe promises to be a hit at your dinner table, blending rich flavors with sentimental nostalgia. Perfect as a main dish, this recipe is rated 3 out of 10 in difficulty, making it accessible for cooks at any level.


---


When I think of comfort food, my mind immediately drifts to the warm, inviting aroma of BBQ-style chicken thighs wafting through the kitchen. This dish is more than just a meal; it’s a cherished family tradition that brings us together, evoking laughter, love, and the essence of home.


**Ingredients You’ll Need:**


- Bone-in chicken thighs


- 1 cup ketchup


- 1/4 cup soy sauce


- 2 tablespoons Worcestershire sauce


- 2 tablespoons lemon juice


- 1/4 cup brown sugar


- 1 teaspoon garlic powder


- Salt and black pepper to taste


**Instructions:**


1. **Prepare the BBQ Sauce:** In a small bowl, combine ketchup, soy sauce, Worcestershire sauce, lemon juice, brown sugar, garlic powder, salt, and black pepper. Stir until the brown sugar is fully dissolved and the mixture is smooth.


2. **Prep the Chicken:** Clean the chicken thighs and pat them dry with a paper towel. This step is crucial to ensure the sauce adheres well to the chicken.


3. **Marinate:** Place the chicken thighs in a baking dish. Generously rub them all over with the prepared BBQ sauce, ensuring every nook and cranny is coated with the rich marinade.


4. **Bake:** Preheat your oven to 375°F (190°C). Bake the chicken thighs for 40-45 minutes or until the internal temperature reaches 165°F (75°C) and the skin is beautifully caramelized.


**A Nostalgic Family Memory:**


Growing up, Sunday afternoons were reserved for family gatherings. My grandmother's small kitchen would be filled with the comforting scent of these BBQ-style chicken thighs, a recipe passed down through generations. I remember watching her, apron dusted with flour, as she expertly mixed the ingredients, her hands moving with a rhythm that spoke of years of practice.


As the chicken baked, my siblings and I would gather around the table, setting it with plates and cutlery, the excitement of the impending feast palpable in the air. When the timer finally dinged, the chicken emerged from the oven, its skin a perfect balance of crispy and tender, glistening with the sticky, flavorful sauce.


Each bite was a symphony of flavors—sweet, tangy, and savory—transporting us to a place of warmth and comfort. Even now, every time I prepare this dish, I am reminded of those cherished Sundays, and I can’t help but smile, knowing that I am carrying on a beloved tradition.


**Difficulty Rating: 3/10**


**Classification: Main Dish**


This BBQ-style chicken thigh recipe is straightforward, requiring minimal ingredients and simple steps, making it an ideal choice for a quick weeknight dinner or a leisurely weekend meal. Whether you're a seasoned cook or a kitchen novice, this dish promises to deliver a taste of home that will leave everyone at the table smiling.


So, gather your loved ones, fire up the oven, and let this delicious recipe bring a piece of familial love and nostalgia to your plate.

Read more about Appetizers

Read more about Main Dishes

Read more about Desserts

Arroz Con Pollo | Made by Meaghan Moineau

Arroz Con Pollo | Made by Meaghan Moineau

**Title: Aromatic Arroz Con Pollo: A Journey Through Flavors and Memories**


**Description:** Dive into the rich tapestry of flavors with our Arroz Con Pollo recipe, a comforting main dish that marries the savory allure of spices with the heartwarming essence of family tradition. Easy to prepare and brimming with nostalgic charm, this dish promises a culinary experience that will whisk you away to cherished moments of togetherness.


---


There’s something truly magical about the way certain dishes have the power to transport us back in time, evoking vivid memories of family gatherings and laughter-filled kitchens. Arroz Con Pollo is one such dish for me. Every time I prepare it, the fragrant aroma of cumin, coriander, and turmeric fills the air, and I am instantly reminded of Sunday afternoons spent in my grandmother’s bustling kitchen.


In our household, Sundays were reserved for family. We would gather around her large wooden table, eagerly awaiting the feast that was being lovingly prepared. My grandmother, the maestro of culinary delights, would start by melting butter in her favorite cast-iron pan, the one seasoned with years of family meals. The sizzle of garlic hitting the hot butter was our cue to gather closer, drawn by the promise of the flavors to come.


She would expertly season the chicken breasts with a sprinkle of cumin, coriander, and turmeric, infusing them with a symphony of aromatic spices. As the chicken browned, she’d add diced onions and vibrant bell peppers, their colors as lively as the stories we shared. In went the canned chiles and tomatoes, followed by a generous pour of chicken broth that tied all the ingredients together in a savory embrace.


But the magic truly happened when she added the rice. As it simmered, absorbing the rich broth and spices, we would set the table, stealing glances at the bubbling pot that promised comfort and warmth. The final touch was a blanket of shredded cheese, melting into a luscious topping that crowned the dish with creamy indulgence.


Each bite of Arroz Con Pollo was a celebration—a melody of spices, tender chicken, and perfectly cooked rice, all enveloped in the melted cheese. It was more than just a meal; it was a moment of connection, a reminder of the love that went into every pot my grandmother prepared.


Today, I continue to honor this tradition, crafting Arroz Con Pollo for my own family. As I follow the familiar steps, I feel a sense of continuity, of passing down the flavors and memories to the next generation. It's a hearty main dish that rates a 5 out of 10 in difficulty, making it accessible for home cooks of all skill levels.


Whether it’s a special occasion or a casual dinner, this dish remains a beloved staple, a testament to the power of food in bringing people together. So gather your loved ones, and let the rich flavors of Arroz Con Pollo create new memories that will last a lifetime.

Read more about Appetizers

Read more about Main Dishes

Read more about Desserts

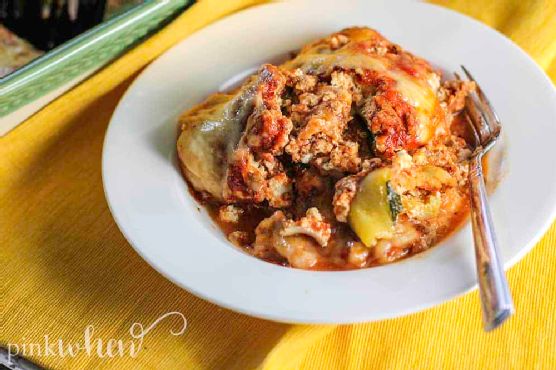
Excellent No Fail and Easy Keto Zucchini Lasagna | Made by Meaghan Moineau

Excellent No Fail and Easy Keto Zucchini Lasagna | Made by Meaghan Moineau

**Title: Savor the Simplicity: The No-Fail, Easy Keto Zucchini Lasagna Recipe**


**Description:** Dive into the comforting nostalgia of family dinners with our Excellent No-Fail and Easy Keto Zucchini Lasagna. This low-carb, nutrient-packed dish is not only a healthier alternative to traditional lasagna but also a delightful journey back to cherished family gatherings. With layers of savory flavors and creamy textures, this main dish promises to be a hit at your dinner table. Rated 3 out of 10 on the difficulty scale, it's perfect for both novice and experienced cooks looking to create something special without the hassle.


---


When I think back to my childhood, the kitchen was always the heart of our home. It was a place filled with laughter, warmth, and the tantalizing aroma of my grandma's cooking. One dish that stands out, evoking a flood of memories, is her famous zucchini lasagna. A healthier twist on the classic, she crafted this masterpiece long before keto became a household term.


I remember the excitement as I watched her expertly slice the zucchini, her hands steady with years of practice. She would hand me scraps of cheese to nibble on while regaling me with stories from her past—stories of growing up in a small town, where everyone knew everyone, and meals were a communal affair. Her zucchini lasagna wasn’t just food; it was a narrative that connected generations.


Now, inspired by her, I bring to you a rendition of this beloved family classic: the Excellent No-Fail and Easy Keto Zucchini Lasagna. It’s a dish that marries nostalgia with the modern-day quest for healthier living, and it’s surprisingly simple to make.


**Ingredients:**


- Fresh basil


- 1 medium bell pepper, diced


- 1 lb lean ground turkey


- 1 ½ cups shredded mozzarella cheese


- 1 medium onion, chopped


- ½ cup shredded parmesan


- Fresh parsley, chopped


- 1 medium red bell pepper, diced


- 1 cup ricotta cheese


- A pinch of sugar (optional)


- 2 cups tomato sauce


- ½ teaspoon white pepper


- 3 medium zucchinis, sliced lengthwise


**Instructions:**


1. **Prep the Zucchini:** Preheat your oven to 375°F. Slice the zucchinis lengthwise and lay them flat on a cookie sheet. Bake for 15 minutes to remove excess moisture—an essential step for avoiding a watery lasagna.


2. **Cook the Meat Sauce:** In a medium saucepan, sauté the onion and bell peppers until they are soft and fragrant. Add the ground turkey, cooking until browned. Stir in the tomato sauce, white pepper, and a pinch of sugar to balance the acidity. Let it simmer over low heat for 5 minutes.


3. **Prepare the Cheese Mixture:** In a bowl, combine ricotta cheese, shredded parmesan, and chopped basil. Mix well and set aside.


4. **Assemble the Lasagna:** In a 9x13 baking dish, begin with a layer of zucchini noodles. Spread a portion of the cheese mixture over the zucchini, followed by a layer of the savory meat sauce. Repeat these steps to form multiple layers, ending with a generous topping of mozzarella cheese.


5. **Bake to Perfection:** Cover the baking dish with foil and bake for 30 minutes. Remove the foil and bake for an additional 10 minutes to achieve a golden, bubbly top. Allow the lasagna to cool for 5 minutes before serving.


This zucchini lasagna is more than just a meal; it’s a tribute to the legacy of family gatherings and culinary traditions. Each bite is a reminder of those cozy nights spent around the table, sharing stories and laughter.


**Difficulty:** 3/10


**Classification:** Main Dish


Indulge in the wholesome goodness of this low-carb delight, and perhaps, like me, you’ll find yourself reminiscing about your own family’s cherished kitchen memories. Enjoy!

Read more about Appetizers

Read more about Main Dishes

Read more about Desserts

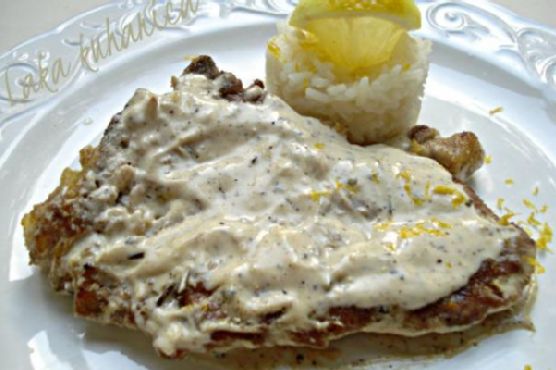
Lemon and pepper veal cutlets | Made by Meaghan Moineau

Lemon and pepper veal cutlets | Made by Meaghan Moineau

# Zesty Comfort: Lemon and Pepper Veal Cutlets


## A Family Classic with a Twist of Nostalgia


### Description


Dive into the delightful blend of tangy lemon and peppery zest with our mouth-watering Lemon and Pepper Veal Cutlets. This classic main dish, enriched with creamy rosemary-infused sauce, promises to tantalize your taste buds while evoking cherished family memories. Perfectly paired with pilaf and a fresh green salad, this recipe is a heartwarming reminder of Sunday dinners at grandma's house.


### Keyword-Rich Content


Whether you're a seasoned chef or a home cook looking to impress, these Lemon and Pepper Veal Cutlets are sure to become a favorite at your dining table. This recipe is straightforward yet sophisticated, offering a burst of flavors that are both comforting and refreshing. With keywords such as "veal cutlets," "lemon zest," "creamy sauce," and "family recipe," our guide will ensure your culinary adventure is a delicious success.


### Ingredients


- 4 veal cutlets


- 2 tablespoons corn flour


- Salt and black cracked pepper to taste


- 2 tablespoons butter


- 1 tablespoon olive oil


- 1 tablespoon lemon rind


- 2 tablespoons lemon juice


- 1/2 cup cream


- 1/4 cup sour cream


- 1 tablespoon fresh rosemary, chopped


- Pilaf and green salad, to serve


### Instructions


1. **Prepare the Veal**: Slightly flatten the veal cutlets using a meat mallet for even cooking. In a shallow dish, combine corn flour, salt, and pepper. Dredge each cutlet through the mixture, ensuring an even coat.


2. **Cook the Cutlets**: Heat butter and olive oil in a large pan over medium heat. Cook the cutlets for about 3 minutes on each side, or until browned and cooked to your liking. Remove the veal from the pan and set aside, covering them to keep warm.


3. **Make the Sauce**: In the same pan, add cream, sour cream, lemon rind, lemon juice, rosemary, salt, and additional black pepper. Mix well and bring to a boil. Lower the heat and let it simmer uncovered for about 5 minutes, allowing the sauce to thicken slightly.


4. **Combine and Serve**: Return the veal cutlets to the pan, gently coating them with the luscious sauce. Serve immediately with a side of pilaf and a crisp green salad for a complete meal.


### A Nostalgic Family Memory


Every time I prepare these Lemon and Pepper Veal Cutlets, I'm transported back to my grandmother's cozy kitchen. Sunday afternoons were a family affair, with everyone gathering around the large oak table, eagerly awaiting the fragrant dishes she prepared with love. Grandma would always say that the secret ingredient was a dash of nostalgia, and indeed, each bite brings back the warmth and laughter we shared. This dish is a tribute to those precious moments, capturing the essence of family and tradition in every savory bite.


### Difficulty Rating


This recipe is rated 6 out of 10 in difficulty. It's an approachable main dish that's perfect for cooks of all levels who are ready to create a flavorful, satisfying meal.


---


Embrace the blend of citrus and spice with our Lemon and Pepper Veal Cutlets, and create new family memories with this timeless recipe. Bon appétit!

Read more about Appetizers

Read more about Main Dishes

Read more about Desserts

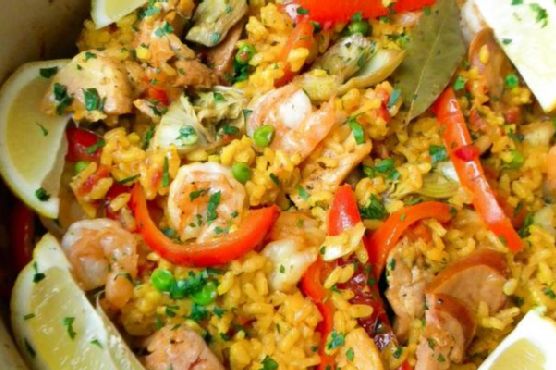
Dutch Oven Paella | Made by Meaghan Moineau

Dutch Oven Paella | Made by Meaghan Moineau

# Dutch Oven Paella: A Flavorful Journey to the Heart of Spain


## Description


Indulge in the vibrant flavors of Spain with our Dutch Oven Paella, a dish that brings the rich traditions of Spanish cuisine to your table. This recipe combines succulent shrimp, savory chorizo, and tender chicken with aromatic saffron-infused rice, creating a delightful symphony of taste and texture. Perfect for a family gathering or an intimate dinner, this paella is sure to be a showstopper. With a difficulty rating of 7/10, this main dish is an impressive yet approachable culinary adventure for any home cook.


### Ingredients


- 1 pound shrimp, peeled and deveined


- 1 teaspoon minced garlic


- 1 tablespoon extra virgin olive oil


- Salt and pepper, to taste


- 1 pound lean skinless boneless chicken thighs


- 4 ounces Spanish chorizo sausage, sliced


- 1 red bell pepper, sliced


- 1 onion, chopped


- 1 can (14.5 oz) diced tomatoes


- 1 1/2 cups arborio rice


- 3 cups low sodium chicken broth


- 1/2 cup dry white wine


- 1/2 teaspoon saffron threads


- 1 bay leaf


- 1 cup frozen artichoke hearts


- 1 cup frozen peas


- Fresh flat-leaf parsley, chopped


- Lemon wedges, for serving


### Instructions


1. **Preparation**: Adjust your oven rack to the lower middle position and preheat the oven to 350°F. In a medium bowl, toss the shrimp with 1 teaspoon minced garlic, 1 tablespoon olive oil, 1/4 teaspoon salt, and 1/4 teaspoon pepper. Refrigerate until needed. Season the chicken with salt and pepper and set aside.


2. **Sauté the Vegetables**: Heat 2 teaspoons of olive oil in a large Dutch oven over medium-high heat until the oil shimmers. Add the bell pepper and cook, stirring occasionally until the skins blister and brown, about 3-4 minutes. Remove to a plate and set aside.


3. **Cook the Meats**: Add 1 tablespoon more oil to the pot, add the chicken thighs, and brown well, flipping once, about 3 minutes per side. Remove the chicken to a bowl. Reduce the heat to medium, add the chorizo, and cook for 4-5 minutes, stirring frequently, until browned and the fat starts to render. Add to the bowl with the browned chicken.


4. **Prepare the Base**: At medium heat, add enough oil to the pot to equal 2 tablespoons. Add the onion and cook, stirring frequently, until tender, about 3 minutes. Add the remaining garlic, cook for 1 minute, then add the tomatoes. Cook and stir until the tomatoes thicken and darken slightly, about 3 minutes.


5. **Combine Ingredients**: Add the rice, cook, and stir for about 2 minutes, ensuring everything is evenly mixed. Add the broth, wine, saffron, bay leaf, and 1/2 teaspoon salt. Add the browned chicken and sausage. Increase the heat to medium-high and bring to a boil, stirring often.


6. **Bake the Paella**: Cover the pot and place it in the oven. Bake for 15 minutes until the liquid is mostly absorbed. Remove the pot from the oven, keep the oven door closed to retain heat, and remove the lid.


7. **Finish Cooking**: Nestle the artichoke hearts into the rice. Sprinkle the shrimp over the top, followed by the peas and bell pepper strips. Replace the lid and return to the oven for another 10 minutes or until the shrimp are opaque.


8. **Create the Soccarat**: Turn the stove burner to medium-high heat. Remove the pot from the oven and place it on the stove. Cook for 5 minutes to form the browned portion on the bottom of the rice, rotating the pot 180 degrees halfway through to ensure even browning.


9. **Serve and Enjoy**: Remove the pot from heat and let the paella rest, covered, for 5 minutes. Sprinkle with fresh chopped parsley and serve with lemon wedges.


### A Nostalgic Story


Growing up, paella was more than just a meal; it was a celebration. I vividly remember the annual family reunions at my grandparents' home, where the aroma of saffron and simmering chorizo would fill the air, drawing everyone to the kitchen. My grandfather, with his Spanish roots, would preside over the Dutch oven, sharing tales of his childhood in Valencia. We would gather around the table, each serving a reminder of our shared heritage and the love that bound us together. This Dutch Oven Paella is a tribute to those cherished memories, a dish that continues to bring our family closer with each flavorful bite.


### Difficulty


7/10


### Classification


Main Dish


Prepare this Dutch Oven Paella to experience the warmth and richness of Spanish cuisine, and create lasting memories with your loved ones. Whether you’re a seasoned cook or a passionate beginner, this dish promises a delightful culinary journey. Enjoy!

Read more about Appetizers

Read more about Main Dishes

Read more about Desserts

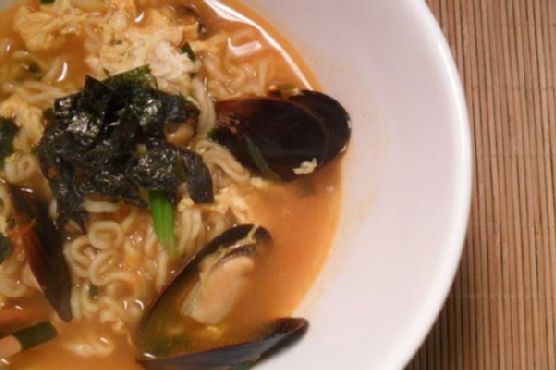
Neoguri (Spicy Seafood Ramen) | Made by Meaghan Moineau

Neoguri (Spicy Seafood Ramen) | Made by Meaghan Moineau

**Title: Embracing the Spice: Crafting Neoguri Ramen with a Splash of Family Nostalgia**


**Description:** Dive into a steaming bowl of Neoguri Ramen, a spicy seafood delight that's as heartwarming as it is mouthwatering. Infused with rich broth and adorned with fresh mussels, scallions, and seaweed, this recipe will transport you to the vibrant kitchens of Korea. Discover the simple joy of creating this dish and the cherished memories it evokes.


---


### Neoguri Ramen: A Taste of Tradition and Love


In the heart of every family kitchen, there lies a recipe that transcends time—a dish that brings comfort, joy, and a sense of belonging. For me, that recipe is Neoguri Ramen. This spicy seafood ramen is more than just a meal; it's a connection to my roots and a cherished family memory.


**Ingredients:**


- 1 pack Neoguri ramen


- 1 egg


- A handful of fresh mussels


- 1 green scallion


- 1 sheet of gim (seaweed)


**Instructions:**


1. **Prepare the Broth:** Start by bringing a pot of water to a rolling boil. Add the mussels and the sauce packets from the Neoguri ramen. Allow the mussels to cook for about 5 minutes. If using fresh mussels, watch for them to open and discard any that remain closed. This step is crucial as it deepens the broth's flavor, enveloping your senses with the aroma of the sea.


2. **Cook the Noodles:** Introduce the ramen noodles to the pot and let them cook for 2 to 3 minutes. This is where the magic of Neoguri happens, as the noodles absorb the spicy broth, becoming a canvas of flavor.


3. **Add the Egg:** For a silky, flaky texture, beat the egg and stir it into the pot in a circular motion. If you prefer a poached egg, gently slide it into the pot off to the side, letting it poach in the spicy embrace of the broth.


4. **Garnish and Serve:** While the ramen finishes cooking, thinly slice the scallion and cut the gim sheet into strips. Once the ramen is ready, transfer it to a serving bowl and top with the fresh scallions and seaweed. The garnish adds a burst of freshness and a hint of the ocean, elevating the dish to new heights.


**Difficulty:** 4/10


**Classification:** Main Dish


### A Nostalgic Journey


Every time I prepare Neoguri Ramen, I am transported back to my grandmother's kitchen, where the air was always filled with laughter and the rich aroma of spices. I remember sitting on a wooden stool, watching her deft hands work magic with simple ingredients. Her secret? A pinch of love and stories from her childhood that she shared as we cooked together.


One chilly winter evening, we crafted this very dish. The warmth of the spicy broth was a perfect contrast to the cold air outside. As we slurped the noodles, she shared tales of her life by the sea, of gathering fresh mussels and seaweed with her siblings. That evening, the kitchen became a bridge between past and present, and the ramen was the catalyst for connection.


**Conclusion**


Neoguri Ramen is more than a spicy seafood dish—it's a symbol of tradition, family, and the simple joys of life. Whether you're a seasoned cook or a beginner, this recipe invites you to savor each moment, creating not just a meal, but a memory. So gather your ingredients, embrace the spice, and let this dish become a cherished part of your family story.

Read more about Appetizers

Read more about Main Dishes

Read more about Desserts

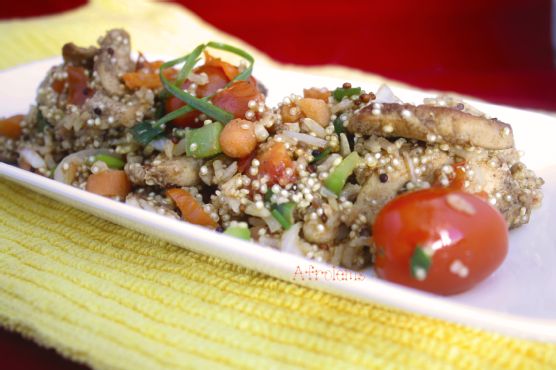
Stir Fried Quinoa, Brown Rice and Chicken Breast | Made by Meaghan Moineau

Stir Fried Quinoa, Brown Rice and Chicken Breast | Made by Meaghan Moineau

# A Taste of Home: Stir Fried Quinoa, Brown Rice, and Chicken Breast


## Bringing Back Memories with Every Bite


There's something magical about the aroma of a well-cooked dish wafting through your kitchen. It has the power to transport you back to cherished moments with loved ones, where laughter was abundant, and time seemed to stand still. Today, I invite you to embark on a culinary journey with a delightful recipe that encapsulates the essence of family, tradition, and the joy of sharing a meal together: Stir Fried Quinoa, Brown Rice, and Chicken Breast.


### A Family Tradition


Growing up, Sundays were a special day in our household. After returning from church, my family would gather in the kitchen, each of us playing a role in preparing the day's feast. My father, with his infectious enthusiasm, would take charge of marinating the chicken, infusing it with a generous sprinkle of suya spice and seasoning cubes. As a child, the vibrant colors of the spices and the tantalizing aroma never failed to captivate my senses.


My mother, the orchestrator of our culinary symphony, would oversee the boiling of the quinoa and brown rice mix—a task I eagerly volunteered for, feeling important as I watched the grains dance in the pot. It was during these moments that I learned the value of patience, as the grains slowly softened and absorbed the rich flavors.


### The Recipe


#### Ingredients:


- Suya spice


- 1 cup quinoa and brown rice mix


- 2 tablespoons butter


- 2 medium carrots, sliced


- 1 cup whole cherry tomatoes


- 2 chicken breasts


- 3 cloves garlic, minced


- 2 seasoning cubes


- 1 green bell pepper, chopped


- 1 roma tomato, chopped


- 1 scotch bonnet pepper, finely chopped


- 2 spring onions, sliced


- 1 teaspoon vegetable oil


- 1 cup water


#### Instructions:


1. **Marinate the Chicken**: In a bowl, season the chicken breasts with seasoning cubes and suya spice. Allow to marinate for 2 hours, or use immediately if pressed for time.


2. **Prepare the Quinoa and Rice**: In a pot of boiling water (1 cup), add the quinoa and brown rice mix along with a teaspoon of vegetable oil. Allow to boil until soft, about 5-7 minutes. Pour into a bowl and set aside.


3. **Cook the Chicken**: In a pan, melt the butter over medium heat and pan fry the chicken breasts, flipping constantly to brown on both sides. Reduce the heat, cover the pan, and allow the chicken to cook thoroughly. If the pan becomes dry, add 2 tablespoons of water.


4. **Combine and Serve**: Stir in the chopped vegetables—carrots, cherry tomatoes, green bell pepper, roma tomato, scotch bonnet pepper, and spring onions—into the pan with the frying chicken. Finally, add the quinoa and brown rice mix. Serve hot!


### Nostalgia on a Plate


As we sat around the dining table, savoring the medley of flavors, stories from the past would surface—of my grandparents' tales of resilience, of my parents' adventurous youth, and of my own childhood escapades. This dish, a delightful amalgamation of textures and tastes, became more than just a meal; it was a bridge connecting generations, a testament to our shared history.


### Difficulty Level


This recipe is rated a 5 out of 10 in terms of difficulty. It strikes a perfect balance between simplicity and the exciting challenge of combining diverse flavors and textures. Classified as a Main Dish, it's hearty, nutritious, and destined to become a staple in your family meals.


### Conclusion


If you're looking to recreate a little magic in your kitchen and perhaps spark a walk down memory lane, this Stir Fried Quinoa, Brown Rice, and Chicken Breast recipe is your ticket. It embodies the warmth of home, the love of family, and the beauty of tradition. Enjoy the journey, one delicious bite at a time.

Read more about Appetizers

Read more about Main Dishes

Read more about Desserts

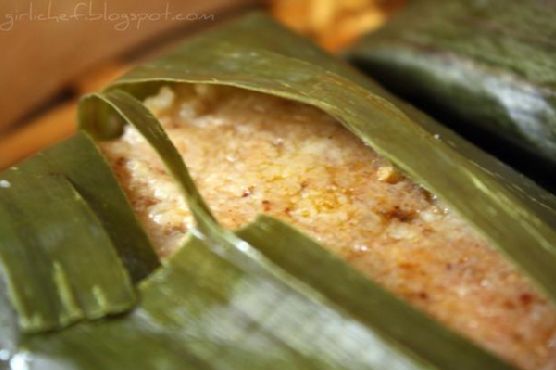
Salmon In Banana Leaf | Made by Meaghan Moineau

Salmon In Banana Leaf | Made by Meaghan Moineau

# Discover the Exquisite Flavors of Salmon in Banana Leaf


## A Culinary Journey Wrapped in Tradition


In the world of gastronomy, few experiences can match the delicate balance of flavors and textures found in a perfectly cooked dish. Today, we're diving into the vibrant and aromatic world of **Salmon in Banana Leaf**. This recipe not only tantalizes the taste buds but also evokes cherished memories of family gatherings and culinary adventures.


### Ingredients that Tell a Story


- Banana leaves


- Cinnamon


- Fennel seed


- Fish sauce


- Garlic


- Ginger


- Peach preserves


- Red chiles


- Rice


- Rice wine vinegar


- Salmon steaks


- Scallions


- Sesame oil


- Soy sauce


- Star anise


- Tahini


- Vegetable oil


### A Nostalgic Culinary Memory


Growing up, our family kitchen was always bustling with activity and delightful aromas. One of my fondest memories is watching my grandmother prepare Salmon in Banana Leaf for our annual summer reunion. As the youngest, I was given the important task of gathering fresh banana leaves from the garden—a task I took on with great pride.


As the salmon marinated, my grandmother would weave stories of her childhood, sharing tales of her own family's gatherings filled with laughter and the clinking of chopsticks. The process of wrapping the salmon in banana leaves, a skill she passed down through generations, felt like a rite of passage. The anticipation built as the fragrant parcels were steamed to perfection, creating an unforgettable sensory experience.


### Step-by-Step Instructions


1. **Marinate the Salmon:** Begin by mixing the marinade ingredients (cinnamon, fennel seed, fish sauce, garlic, ginger, peach preserves, red chiles, rice wine vinegar, soy sauce, sesame oil, star anise, and tahini) in a large bag or container. Add the salmon steaks and refrigerate for at least 30 minutes, or up to 2 hours for maximum flavor infusion.


2. **Prepare the Scented Rice Powder:** While the salmon is marinating, combine rice, fennel seed, and star anise in a spice grinder. Pulse until coarsely ground, leaving some larger crumbles for texture.


3. **Wrap the Salmon:** Remove salmon from the marinade, discarding the excess. Coat each piece with the scented rice powder. Lay banana leaves flat, placing one salmon fillet in the center of each. Fold the leaves over the salmon, creating a neatly wrapped package.


4. **Steam the Salmon:** Place the banana leaf packages in a steamer basket over boiling water. Steam for 10-13 minutes until the salmon is cooked through.


5. **Serve and Enjoy:** Carefully make a slit in the banana leaves to reveal the succulent salmon inside. Serve alongside Chinese noodles, corn, and the remaining marinade as a dipping sauce.


### A Dish with Depth


**Difficulty:** 6/10


**Classification:** Main Dish


Crafting Salmon in Banana Leaf is a culinary adventure that brings together a symphony of flavors and textures. The aromatic blend of spices and the subtle sweetness of peach preserves create a dish that is both exotic and comforting. It's a recipe that transforms a simple meal into an experience, one that is perfect for impressing guests or simply enjoying a quiet evening at home.


### The Legacy of Flavor


As you savor each bite of this delightful dish, take a moment to reflect on the memories that food can evoke. Whether it's a family tradition or a new culinary endeavor, Salmon in Banana Leaf promises to be a recipe that you'll return to time and time again. So gather your ingredients, embrace the process, and let the flavors transport you to a place of nostalgia and joy.

Read more about Appetizers

Read more about Main Dishes

Read more about Desserts

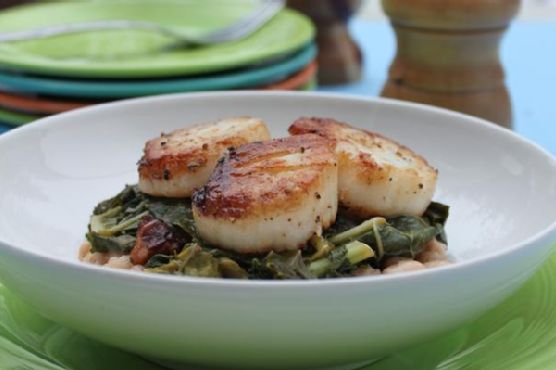
Seared Scallops With Wilted Greens | Made by Meaghan Moineau

Seared Scallops With Wilted Greens | Made by Meaghan Moineau

# A Taste of the Sea: Seared Scallops with Wilted Greens


## A Culinary Journey Through Time and Taste


Step into the kitchen and embrace the art of crafting a dish that combines the delicate flavors of the sea with robust, earthy greens. Our Seared Scallops with Wilted Greens are more than just a meal; they are a culinary experience that will transport you to a place where family memories and exquisite tastes blend seamlessly.


### The Ingredients of Nostalgia


- **Butter** - 2 tablespoons


- **Garlic** - 2 cloves, minced


- **Bunches of Kale** - 2, stems sliced thin, leaves in larger strips


- **Olive Oil** - 2 tablespoons


- **Red Wine Vinegar** - 1 tablespoon


- **Salt and Pepper** - to taste


- **Sea Scallops** - 12 large


- **Shallots** - 2, finely chopped


- **Soy Sauce** - 2 tablespoons


- **Thick-Cut Bacon** - 4 slices, cut into pieces


### A Recipe Etched in Memory


Growing up, our family gatherings were incomplete without a seafood dish that paid homage to our coastal roots. The aroma of sizzling bacon and the sight of scallops perfectly seared to a golden brown would fill the air, drawing everyone to the kitchen. My grandmother, the keeper of our family recipes, would orchestrate the meal with unmatched grace, her hands moving deftly as she coaxed flavors from simple ingredients.


The highlight was always the moment when she added the scallops to the hot iron skillet, a symphony of sizzle and steam ensued, captivating our senses and stirring a sense of nostalgia in all of us. As the butter melted and enveloped each scallop, she would regale us with stories of her childhood by the sea, where this dish first became a beloved family staple.


### Crafting the Dish


1. **Prepare the Kale**: Begin by slicing the kale stems into thin pieces and the leaves into larger strips. This step ensures both texture and flavor in every bite.


2. **Cook the Bacon and Shallots**: In a large, deep pan, heat to medium-high and add the bacon pieces. Cook for 3-4 minutes until they start to crisp. Add the chopped shallots and cook for another 3 minutes until soft.


3. **Add Garlic and Kale Stems**: Toss in the minced garlic and the sliced kale stems. Cook for 4-5 minutes, allowing the flavors to meld.


4. **Wilt the Kale Leaves**: Add the kale leaves, tossing them over the heat until wilted. Stir in the soy sauce and red wine vinegar, then season with salt and pepper to taste. Keep this kale mixture warm as you prepare the scallops.


5. **Sear the Scallops**: Heat an iron skillet to high. Pat the scallops dry thoroughly and season with salt and pepper. Add the olive oil to the pan and swirl it around. As soon as it begins to smoke, quickly place the scallops in the skillet. Sear for 1-2 minutes on each side.


6. **Finish with Butter**: Flip the scallops and add the butter to the pan. Baste the scallops with the melted butter for another 1-2 minutes, enhancing their flavor and ensuring a perfect sear.


7. **Serve**: Plate the warm wilted greens and place the seared scallops on top, allowing the flavors to mingle and create a dish that is both sophisticated and heartwarming.


### A Family Favorite: Difficulty and Classification


Rated at a 7 out of 10 in difficulty, this dish requires attention to detail and timing but rewards with a satisfying blend of flavors and textures. Classified as a **Main Dish**, Seared Scallops with Wilted Greens is perfect for a special occasion or a nostalgic family dinner.


Join us in the kitchen and let this recipe become part of your family’s culinary tradition, creating memories that will last a lifetime.

Read more about Appetizers

Read more about Main Dishes

Read more about Desserts

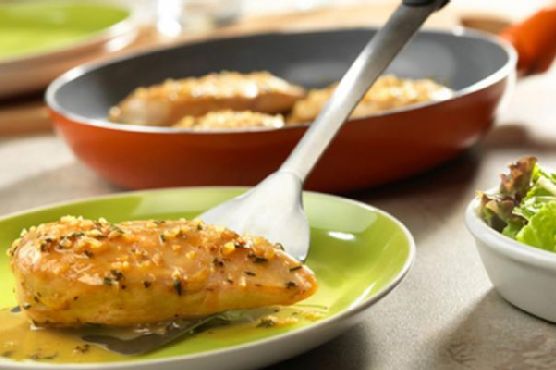
Easy Chicken with White Wine Sauce | Made by Meaghan Moineau

Easy Chicken with White Wine Sauce | Made by Meaghan Moineau

**Title: Savory Memories: Easy Chicken with White Wine Sauce**


**Description:**


Dive into the delicious simplicity of our Easy Chicken with White Wine Sauce, a dish that combines rich flavors with effortless preparation. This main dish captures the essence of home-cooked comfort, with a nostalgic story to warm your heart. Rated a 4 out of 10 in difficulty, it's perfect for both novice cooks and seasoned chefs looking for a quick yet satisfying meal.


---


### A Taste of Home: Easy Chicken with White Wine Sauce


When I was a child, Sunday dinners were a sacred ritual in our household. After a bustling week of school, work, and various activities, Sunday was our day of togetherness. My mother, with her adept culinary skills, would transform our modest kitchen into a haven of inviting aromas and comforting flavors. One dish that always graced our table was her Chicken with White Wine Sauce.


This dish was more than just a meal; it was a centerpiece for laughter, stories, and shared moments. I remember watching her as she heated olive oil in a skillet, her movements graceful and practiced. The sizzle of the chicken as it browned was music to our ears, signaling the start of our family feast.


### Ingredients:


- 2 skinless, boneless chicken breast halves


- 2 tablespoons olive oil


- 1 shallot, finely chopped


- 1 teaspoon fresh thyme leaves


- 1/2 cup dry white wine


- 1/4 cup flavor-concentrated chicken broth


### Instructions:


1. **Prepare the Chicken:** Heat the olive oil in a 10-inch skillet over medium heat. Gently place the chicken breasts in the skillet and brown them for about 10 minutes, ensuring they are golden on both sides. Once cooked, remove the chicken from the skillet and set aside.


2. **Create the Sauce:** Add the chopped shallot and fresh thyme leaves to the skillet. Cook and stir for 30 seconds, allowing the shallot to soften and release its sweet aroma.


3. **Add the Wine:** Pour in the dry white wine, letting it simmer for about 2 minutes until the liquid reduces by half. This step intensifies the flavors, creating a perfect balance of acidity and richness.


4. **Incorporate the Broth:** Stir in the flavor-concentrated chicken broth, combining it with the wine mixture for a robust sauce.


5. **Finish the Dish:** Return the chicken to the skillet, spooning the sauce over it. Let it cook for another 5 minutes, ensuring the chicken is cooked through and tender.


### A Nostalgic Note:


As the fragrant aroma of thyme and wine filled our home, we all gathered in anticipation. My siblings and I would set the table with care, knowing that soon we would be enveloped in the warmth of our family's love and the delectable taste of this cherished dish. Even now, making this Easy Chicken with White Wine Sauce brings back a flood of memories, each bite a reminder of those special Sunday dinners.


### Conclusion:


Our Easy Chicken with White Wine Sauce is more than just a recipe; it's an invitation to create your own family memories. With its straightforward preparation and savory flavor, it's an ideal main dish for any occasion. Whether you're looking to recreate a sense of nostalgia or craft new moments, this dish is sure to become a beloved staple in your culinary repertoire.


So, gather your loved ones around the table, and let this delightful chicken dish be the start of your own treasured memories.

Read more about Appetizers

Read more about Main Dishes

Read more about Desserts

Tex-Mex Burger | Made by Meaghan Moineau

Tex-Mex Burger | Made by Meaghan Moineau

# Savoring the Southwest: Crafting the Perfect Tex-Mex Burger


## A Nostalgic Culinary Journey


Growing up in the heart of Texas, my family and I would often gather in the backyard on warm summer evenings, the air buzzing with laughter and the smell of something delicious wafting from the grill. It was on these golden evenings that my mother introduced us to the Tex-Mex Burger—a dish that would become a family favorite and a symbol of our shared love for bold flavors and simple pleasures.


I remember the first time she made it. The sun was setting, casting an amber glow across our backyard. My siblings and I watched in awe as she skillfully mixed ground beef with salsa and a medley of spices. It was like watching a magician at work. When she handed each of us a burger, the first bite was transformative. The crispy exterior of the patty gave way to a juicy, flavorful core, perfectly balanced by the creamy avocado and the kick of pepper jack cheese.


## Crafting Your Own Tex-Mex Burger


### Ingredients:


- Ground beef


- Salsa


- Avocado


- Pepper jack cheese


- Hamburger buns


- Red onion


- Chili powder


- Cumin


- Paprika


- Cilantro


- Salt


- Pepper


### Instructions:


1. **Preheat the Broiler:** Begin by preheating your broiler. This will ensure a delightful crust on your patties.


2. **Prepare the Frying Pan:** Heat a large frying pan over medium-high heat. We want it hot enough to sear the burgers to perfection.


3. **Make the Patties:** In a large mixing bowl, combine the ground beef with salsa, chili powder, cumin, paprika, salt, and pepper. Mix until the ingredients are evenly distributed.


4. **Form the Patties:** Shape the mixture into patties, pressing slightly in the center for even cooking.


5. **Cook the Patties:** Place the patties in the hot frying pan. Cook each side for approximately 4-5 minutes, ensuring a nice crust forms.


6. **Melt the Cheese:** In the last minute of cooking, place a slice of pepper jack cheese on each patty. Allow it to melt beautifully over the patty.


7. **Assemble the Burger:** Toast the hamburger buns lightly, then layer each with a slice of avocado, a juicy patty, and a few slices of red onion. Garnish with fresh cilantro.


## A Flavorful Main Dish


The Tex-Mex Burger is more than just a meal; it’s a tribute to the culinary melding of robust Texan and vibrant Mexican flavors. With its harmonious blend of spices and fresh ingredients, it promises a taste of the Southwest in every bite.


### Difficulty Rating: 4/10


This dish is surprisingly easy to prepare, making it perfect for both novice cooks and seasoned chefs looking to spice up their culinary repertoire. As a Main Dish, it’s ideal for family dinners, backyard barbecues, or any occasion that calls for a hearty, flavorful meal.


## A Family Tradition


Even now, whenever we gather as a family, someone inevitably suggests we make those unforgettable Tex-Mex Burgers. They’ve become a beloved tradition, a culinary heirloom passed down through flavors and memories. As you embark on crafting your own Tex-Mex Burger, may you find the same joy and connection that this dish has brought to my family for generations. Happy cooking!

Read more about Appetizers

Read more about Main Dishes

Read more about Desserts