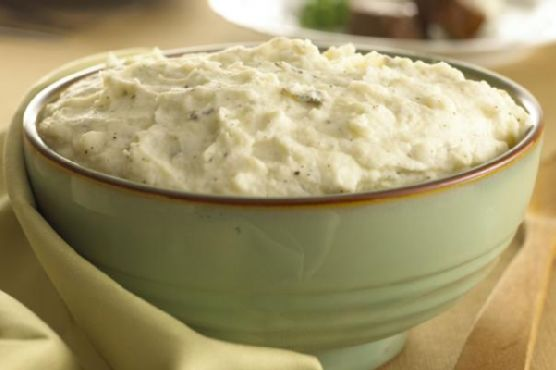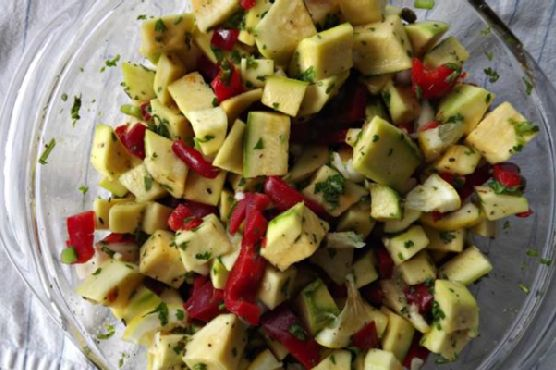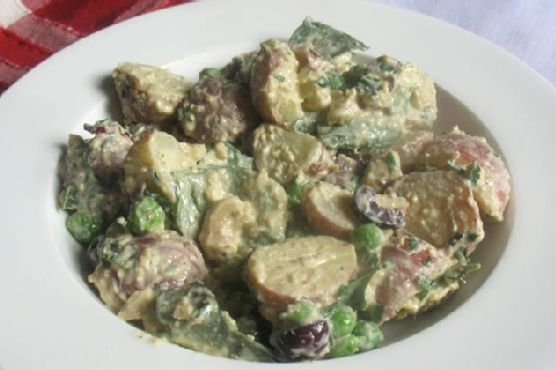
Creamy Potato Salad with Cashew Dressing and Fresh Basil
Intro
There’s something deeply comforting about a bowl of potato salad. For me, it evokes memories of summer picnics with my family, where the air was filled with laughter and the smell of blooming flowers. My grandmother used to make her signature potato salad, which was a staple at every family gathering. Over the years, I’ve experimented with different variations, and today’s recipe combines those nostalgic flavors with a modern twist: a creamy cashew dressing, fresh basil, and vibrant vegetables. It’s a dish that bridges the gap between my childhood memories and my current culinary adventures.
Why You’ll Love It
This Creamy Potato Salad with Cashew Dressing and Fresh Basil is a delightful fusion of flavors and textures that offers something for everyone. It’s creamy yet light, thanks to the velvety cashew dressing, and it’s packed with fresh, vibrant ingredients. The combination of baby potatoes and fresh herbs creates a refreshing taste, while the addition of peas and kalamata olives adds a subtle complexity. Whether you’re looking for a side dish for your next barbecue or a comforting meal on its own, this potato salad is sure to please.
Ingredients
- 1 cup almond milk
- 2 pounds baby potatoes
- 1 cup fresh basil leaves
- 1/4 cup fresh chives, chopped
- 1/4 cup fresh mint leaves, chopped
- 1/4 cup trimmed fresh parsley, chopped
- 1 cup fresh peas
- 1/4 teaspoon black fresh ground pepper
- 1 tablespoon dijon honey mustard
- Juice of one lemon
- 1/2 cup kalamata olives, pitted and sliced (optional)
- 2 tablespoons nutritional yeast
- 1/4 cup olive oil
- 1 cup raw cashews, soaked for at least 2 hours
- 2 tablespoons rice vinegar
- 1 teaspoon sea salt
- 1 tablespoon dijon grain mustard
Instructions
- Bring the baby potatoes to a boil in a large pot of water. Reduce the heat to medium and cook until they are fork-tender, about 10 to 12 minutes. Do not overcook.
- Drain the potatoes well and let them cool for 10 minutes or longer. Transfer them to a large bowl along with the peas, basil leaves, and olives if using.
- To make the dressing, combine the soaked cashews, almond milk, olive oil, rice vinegar, nutritional yeast, dijon honey mustard, dijon grain mustard, lemon juice, sea salt, and black pepper in a small blender or food processor. Pulse until smooth. If the dressing is too thick, add a bit more olive oil or almond milk.
- Taste the dressing for seasoning and adjust the nutritional yeast, salt, and pepper to taste.
- Toss the potatoes with the dressing until they are well coated.
- Garnish with fresh chives, mint, and parsley before serving.
Tips
For the best results, use baby potatoes as they have a creamy texture and cook evenly. Be sure to soak the raw cashews beforehand, as this will ensure the dressing is smooth and velvety. If you’re short on time, you can use frozen peas, but fresh peas will provide a firmer texture and sweeter flavor.
Variations & Substitutions
If you prefer a spicier flavor, consider adding a pinch of cayenne pepper or red pepper flakes to the dressing. You can also substitute the almond milk with another plant-based milk of your choice, such as oat or soy milk. For a more Mediterranean twist, add sun-dried tomatoes or artichoke hearts to the salad.
Storage
This potato salad can be stored in an airtight container in the refrigerator for up to 3 days. The flavors will meld together over time, making it even more delicious the next day. However, it’s best enjoyed fresh to maintain the vibrant texture of the herbs and peas.
FAQ
Can I make this salad ahead of time?
Yes, you can prepare the salad a day in advance. Simply store the potatoes and dressing separately and combine them just before serving to keep the potatoes from absorbing too much moisture and becoming mushy.
Is this salad suitable for vegans?
Absolutely! This salad is entirely plant-based, making it a wonderful option for vegans and anyone looking to incorporate more plant-based meals into their diet.
Can I use regular mustard instead of dijon?
While dijon mustard adds a specific tangy flavor, you can substitute it with regular mustard in a pinch. Keep in mind that the overall taste might differ slightly.
Nutrition
This salad is not just delicious but also packed with nutrients. It’s rich in healthy fats from the cashews and olive oil, vitamins from the fresh herbs and peas, and fiber from the potatoes. It’s a wholesome dish that satisfies both your taste buds and nutritional needs.
Conclusion
This Creamy Potato Salad with Cashew Dressing and Fresh Basil is more than just a side dish; it’s a testament to the power of fresh, wholesome ingredients coming together to create something truly special. Whether you’re reminiscing about family gatherings or simply looking for a new favorite recipe, this salad promises to be a delightful addition to your culinary repertoire. Gather your ingredients, channel your inner chef, and enjoy the comforting flavors of this vibrant potato salad.
Related update: Creamy Potato Salad with Cashew Dressing and Fresh Basil
Related update: Red Quinoa and Roasted Cauliflower Salad