Chocolate recall escalated to highest risk level by FDA, sold in 9 states including Ohio – Fox 28 | Analysis by Brian Moineau

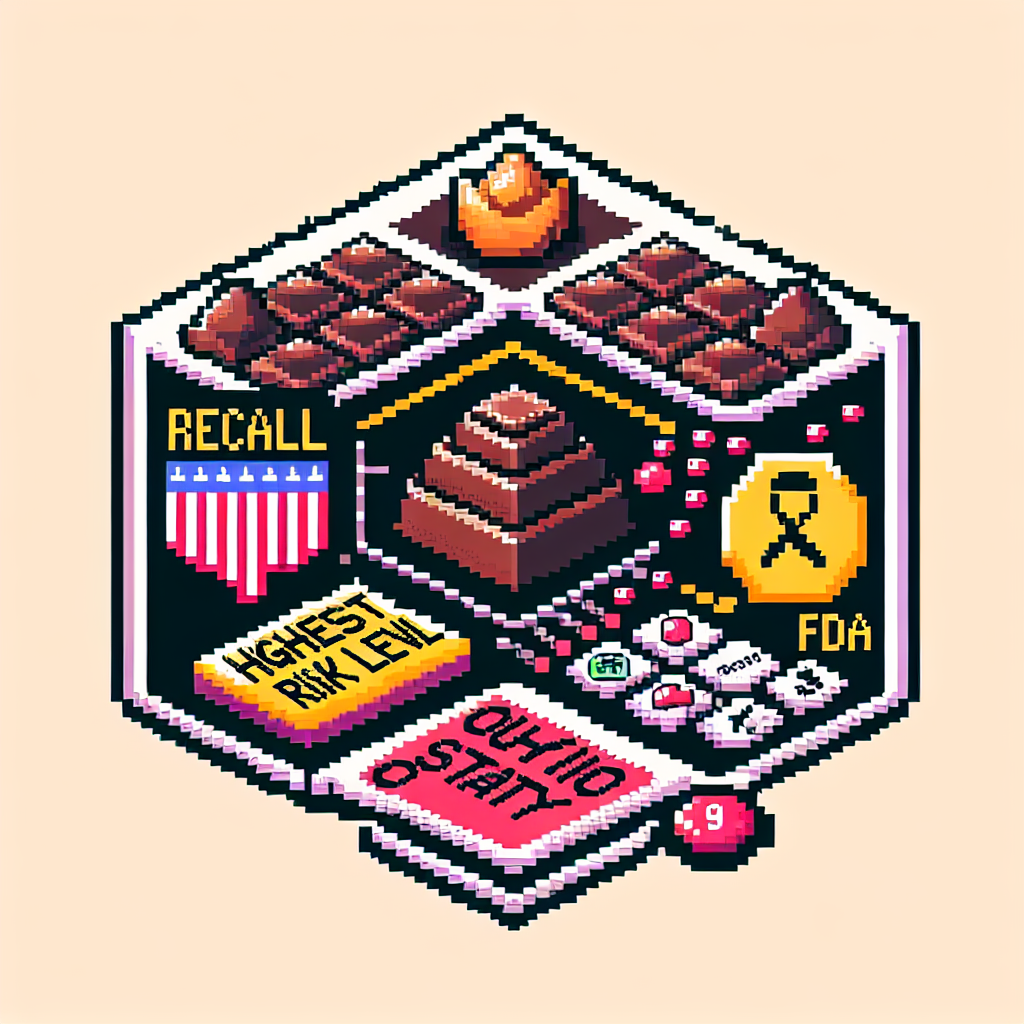
Chocolate recall escalated to highest risk level by FDA, sold in 9 states including Ohio - Fox 28 | Analysis by Brian Moineau

**Chocolate Lovers, Beware: The Sweet Delight Takes a Bitter Turn**

In a world where chocolate is often considered the ultimate comfort food, a recent development has left chocoholics in nine states, including Ohio, in a bittersweet dilemma. The FDA has elevated the recall of certain Cal Yee Farms chocolate products to a Class 1 status, meaning the risk level is at its highest. This escalation underscores the seriousness of the situation, as Class 1 recalls are issued when there is a reasonable probability that the use of or exposure to a violative product will cause serious adverse health consequences or death.

While the specifics of what prompted this recall remain under wraps, it serves as a stark reminder of the importance of food safety and the rigorous processes involved in ensuring that what we consume is safe. Food recalls, particularly those reaching a Class 1 status, are not just about pulling products off shelves; they are about protecting public health and maintaining trust in food systems.

This isn't the first time food safety has made headlines this year. In a parallel event, the Jif peanut butter recall earlier this year had consumers on edge, as the beloved spread was linked to a salmonella outbreak affecting numerous states. Such incidents highlight the fragility of our food supply chain and the critical role that regulatory bodies like the FDA play in safeguarding public health.

The recall of Cal Yee Farms chocolate products is a small chapter in a larger narrative about food safety and consumer trust. It reminds us of the meticulous journey our food takes from farm to table and the myriad checks in place to ensure it arrives safely. Yet, despite these measures, recalls still happen, and when they do, they ripple across industries, affecting businesses and consumers alike.

On a lighter note, this chocolate recall might serve as a gentle nudge for us to explore other delightful treats. Perhaps it's time to diversify our dessert portfolio and explore the wonders of pastries, fresh fruit, or even venture into the world of artisanal candies. After all, variety is the spice of life, and who knows, you might find a new favorite indulgence!

As we navigate these culinary challenges, it's crucial to stay informed and vigilant. For chocolate enthusiasts, this recall is a temporary setback, but one that emphasizes the importance of food safety. In the meantime, let's celebrate the unsung heroes behind the scenes—those who work tirelessly to ensure our food is safe and our plates are full.

**Final Thought:** While this recall might have put a damper on our chocolate cravings, it's a testament to the systems in place to protect us. As consumers, our responsibility is to stay informed and make safe choices. So, here's to a future where every bite of chocolate—or any food, for that matter—is as safe as it is delicious.

Read more about AI in Business

Read more about Latest Sports Trends

Read more about Technology Innovations

Banana in brown sugar ice cream | Made by Meaghan Moineau

Banana in brown sugar ice cream | Made by Meaghan Moineau

**Title: Indulge in Nostalgia with Homemade Banana in Brown Sugar Ice Cream**


**Meta Description: Discover the delightful blend of bananas, rum, and brown sugar in this easy homemade ice cream recipe. Perfect for dessert lovers, this nostalgic treat is a breeze to make!**


---


### Indulge in Nostalgia with Homemade Banana in Brown Sugar Ice Cream


There’s something incredibly comforting about the rich, creamy texture of homemade ice cream. Today, we're diving into a recipe that perfectly marries the sweetness of ripe bananas with the warmth of dark rum and brown sugar. Our Banana in Brown Sugar Ice Cream is not just a dessert; it's a delightful trip down memory lane.


#### Ingredients:


- **Bananas**: The star of the show, providing natural sweetness and creaminess.


- **Dark Rum**: Adds a rich, complex flavor that complements the sweetness.


- **Sour Full-Fat Cream**: For a creamy texture and a hint of tang.


- **Lemon Juice**: Balances the sweetness with a touch of acidity.


- **Light Brown Sugar**: For a caramel-like sweetness.


- **A Pinch of Sea Salt**: Enhances all the flavors.


- **Vanilla Extract**: Adds a lovely aroma and depth to the ice cream.


#### Instructions:


1. **Cook the Base**: In a wide skillet or saucepan, heat the brown sugar with one-quarter of the sour cream, stirring until smooth and bubbly.


2. **Add Bananas**: Incorporate the bananas and a pinch of salt, cooking for about 5 minutes until the bananas are soft and fully cooked.


3. **Remove from Heat**: Stir in the remaining sour cream, dark rum, and vanilla extract. If the mixture is too sweet, add a few drops of fresh lemon juice.


4. **Blend**: Puree the mixture in a blender or food processor until completely smooth.


5. **Chill**: Chill the mixture thoroughly for at least 1 hour or overnight.


6. **Churn**: Pour into an ice cream maker and proceed according to the manufacturer’s instructions.


7. **Serve**: Before serving, let it sit out for 5-10 minutes to reach the right scooping temperature. Serve in chilled glass or porcelain bowls for the best experience.


*Light Note*: If using sour cream, the mixture might curdle during cooking. Don't worry—it will smooth out after blending.


*Easy Suggestion*: Use a hot, but dry, ice cream scoop for perfect serving.


#### A Family Memory


This Banana in Brown Sugar Ice Cream is more than just a treat; it’s a cherished family memory. Growing up, my grandmother would make this dessert every summer during our annual family gatherings. As kids, my cousins and I would gather around the kitchen, watching in awe as she skillfully prepared the ice cream. The sweet aroma of bananas caramelizing in brown sugar would fill the air, making our mouths water with anticipation. These moments were more than just about the ice cream—they were about family, laughter, and creating lasting memories. Every scoop brings back the warmth of those summer days and the love that surrounded us.


#### Difficulty Rating: 4/10


#### Classification: Dessert


This Banana in Brown Sugar Ice Cream is a perfect dessert choice for those looking to impress with minimal effort. With its nostalgic roots and rich flavors, it’s a treat that will have everyone asking for seconds. Whether you're making it for a special occasion or just to indulge yourself, this recipe is sure to become a beloved favorite in your home. Enjoy this creamy journey down memory lane!

Read more about Appetizers

Read more about Main Dishes

Read more about Desserts

Cherry Pancakes for One

### A Nostalgic Morning Delight: Cherry Pancakes for One

There’s something utterly comforting about waking up to the smell of pancakes sizzling on a skillet. The soft morning light streaming through the kitchen window, the gentle clatter of a whisk against a bowl—it all brings back a flood of cherished memories. Growing up, my Sunday mornings were often spent in the cozy kitchen of my grandmother’s house. She had a knack for creating the most delectable pancakes, each bite infused with love and warmth. Among her many creations, cherry pancakes held a special place in my heart. Today, I’m excited to share with you a simplified version of that delightful dish, perfect for a solo breakfast treat.

My grandmother’s kitchen was a treasure trove of flavors and aromas. As a child, I would watch in awe as she worked her magic, transforming simple ingredients into a feast. The memory of cherry pancakes brings back the image of her, standing by the stove, humming softly to herself. She would always let me help by pitting the cherries, a task I took on with great seriousness. The juicy sweetness of fresh cherries was a highlight of those mornings, and the joy of flipping the pancakes was a skill she patiently taught me over time.

### Cherry Pancakes for One

**Ingredients:**

- Plain Greek yogurt

- Egg whites

- Almond extract

- Whole-wheat pastry flour

- Baking soda

- Sugar

- Salt

- Whole cherries

- Pancake syrup

**Instructions:**

1. Mix Greek yogurt, egg whites, and almond extract into a small bowl.

2. In a separate bowl, combine whole-wheat pastry flour, baking soda, sugar, and salt.

3. Combine and whisk the wet and dry ingredients until evenly mixed.

4. Fold in 1/3 cup of whole cherries.

5. Place 1/4 cup of batter onto a non-stick skillet and cook until bubbles start appearing through the top of the pancake, then flip.

- **Note:** Cook on medium heat and flatten out the batter with a spatula for even cooking. It takes about 1-2 minutes on each side.

### A Simple, Sweet Treat

These cherry pancakes are a delightful way to start your day, offering a burst of flavor with every bite. The combination of tangy Greek yogurt and sweet cherries creates a perfect balance, making these pancakes both light and satisfying. Whether you enjoy them with a drizzle of pancake syrup or a sprinkle of powdered sugar, they’re sure to brighten your morning.

**Difficulty:** 3/10

**Category:** Main Dish

Embrace the simplicity of this recipe and let it transport you to a time when life was a little slower, and breakfast was a cherished ritual. Just like my grandmother did for me, I hope these cherry pancakes bring a smile to your face and a warmth to your heart, even if you’re cooking just for yourself.

Sun Dried Tomato Stuffed Mushrooms

### Sun Dried Tomato Stuffed Mushrooms: A Nostalgic Delight

There's something inherently comforting about stuffed mushrooms. For me, they evoke memories of family gatherings and the undeniable warmth of shared meals. This recipe for Sun Dried Tomato Stuffed Mushrooms is a delightful blend of rich flavors and textures that takes me straight back to Sunday afternoons in my grandmother's kitchen.

Growing up, my grandmother was the cornerstone of our family. She had an uncanny ability to turn simple ingredients into culinary masterpieces. Her kitchen was a place of magic and experimentation, where she would often invite me to help with her latest culinary venture. One of her favorite appetizers to make was stuffed mushrooms, and the aroma of them baking in the oven is a memory I cherish deeply.

I remember her meticulously cleaning the mushrooms and explaining the importance of choosing the freshest produce. Her eyes would light up as she blended the ingredients, creating a tapestry of flavors that was both familiar and exciting. Every bite was a testament to her love and dedication, and this particular recipe is inspired by her timeless cooking style.

#### Ingredients:

- White button mushrooms

- Bread crumbs

- Red diced roasted pepper

- Garlic from one roasted bulb

- Diced Kalamata olives

- Diced onion

- Diced sun-dried tomatoes

- Olive oil

- Mozzarella cheese

- Provolone cheese

- Asiago cheese

- Parmesan cheese

- Romano cheese

- Red pepper flakes

- Dried oregano

#### Instructions:

1. Preheat your oven to 350°F (175°C).

2. Clean the mushrooms and remove their stems. Lightly oil the mushroom caps and place them on a greased cookie sheet.

3. Finely dice the mushroom stems and set them aside.

4. In a large bowl, combine cream cheese, cheeses, half of the dried bread crumbs, red pepper flakes, and dried oregano. Stir until well combined. Add salt and pepper to taste, then set aside.

5. Over medium heat, sauté the onions in olive oil until translucent. Add the diced mushroom stems and continue to sauté for one minute.

6. Stir in the roasted garlic, olives, roasted red peppers, and sun-dried tomatoes. Cook until thoroughly heated.

7. Add the sautéed vegetables to the reserved cream cheese mixture and stir to combine.

8. Scoop one tablespoon of the mixture into each prepared mushroom cap.

9. Sprinkle with the remaining bread crumbs and mozzarella cheese.

10. Bake in the oven for 20-25 minutes until browned.

11. Let stand for 5 minutes before serving.

This recipe, rated a 5/10 in difficulty, is perfect as an appetizer. It's simple enough for a casual cook but offers a complexity of flavors that will impress your guests. Every time I make these stuffed mushrooms, I feel a connection to my grandmother, as if she's right there with me, guiding my hands and sharing in the joy of good food and good company.

Simple Whole Wheat Crepes

### Simple Whole Wheat Crepes: A Nostalgic Delight

Ah, crepes—a dish that carries an air of elegance but holds the warmth of home in every bite. For me, the mere mention of crepes instantly transports me back to my grandmother's cozy kitchen. She was a woman of many talents, but it was her culinary skills that left a lasting impression on me. Every Sunday morning, her house was filled with the aroma of freshly cooked crepes, a tradition that brought the family together, bridging generations through a shared love for this simple yet delightful dish.

I remember sitting at the kitchen table, my legs swinging with anticipation as I watched her expertly pour the batter onto a hot pan, her hands moving with the kind of grace that only comes from years of practice. She'd always say, "The secret to good crepes is in the batter, and a little patience." Her crepes were always perfect—thin, light, and golden brown, a testament to her culinary wisdom and love.

Now, as I make my own crepes using her recipe, I feel her presence in the kitchen with me. This version of the recipe uses white whole wheat flour, adding a wholesome twist to the classic. It's a gentle nod to modern nutritional sensibilities without straying too far from the traditional flavors she cherished.

### Ingredients:

- Butter

- Eggs

- Maple syrup

- Milk

- Sea salt

- White whole wheat flour

### Instructions:

1. Place all ingredients in a blender and mix until smooth. The batter should be thin.

2. Let it sit for at least 30 minutes—or even overnight for best results.

3. When it comes time to cook your crepes, you can do it the traditional way, in a crepe pan, or use an electric crepe maker.

### A Dish for Everyone

Rated at a difficulty level of 3 out of 10, this recipe is surprisingly easy to master, making it perfect for both novice cooks and seasoned chefs alike. The key to success lies in the batter's consistency and the gentle art of flipping the crepes without tearing them.

Crepes are versatile enough to be enjoyed as a **Main Dish** or a **Dessert**, depending on the fillings and toppings you choose. Whether you prefer them with a drizzle of maple syrup, a dusting of powdered sugar, or filled with savory ingredients like cheese and vegetables, crepes are a canvas for culinary creativity.

As you embark on your own crepe-making journey, remember that the true magic of this dish lies not just in its taste but in the memories it helps create. Whether you're continuing a family tradition or starting a new one, these Simple Whole Wheat Crepes are sure to become a cherished part of your culinary repertoire. Enjoy every bite and every moment in the kitchen, just as my grandmother did.

White Chocolate Macadamia Banana Bread

# White Chocolate Macadamia Banana Bread: A Sweet Nostalgia

There's something profoundly comforting about the aroma of banana bread wafting through the house. It's a scent that encapsulates warmth, love, and a touch of nostalgia. Today, I'm excited to share a recipe that elevates the classic banana bread to a whole new level of decadence: White Chocolate Macadamia Banana Bread. This delightful treat is perfect for dessert or a sweet afternoon snack, and it comes with a story close to my heart.

## A Slice of Family History

Growing up, my grandmother was the matriarch of our kitchen, known for her unrivaled baking skills and a knack for turning simple ingredients into magic. Every Sunday, her home transformed into a cozy bakery, with breads and pastries lining the countertops. Among her repertoire, banana bread was a staple, a reliable comfort that never failed to bring smiles to our faces.

One day, Grandma decided to experiment with her classic banana bread recipe. Inspired by a visit to the local bakery, she added chunks of creamy white chocolate and crunchy macadamia nuts to her trusty mix. The result was a revelation—a loaf that was simultaneously familiar and new, rich with the sweetness of white chocolate and the buttery crunch of macadamia nuts. It quickly became a family favorite, a recipe passed down through generations, always reminding us of those warm Sundays in Grandma's kitchen.

## White Chocolate Macadamia Banana Bread Recipe

### Ingredients

- Granulated sugar

- Butter

- Banana

- Milk

- Low-fat cream cheese

- Eggs

- All-purpose flour

- Baking soda

- Kosher salt

- Salted macadamia nuts

- White chocolate chips

### Instructions

1. **Preheat the Oven**: Set your oven to 350 degrees Fahrenheit.

2. **Prepare the Wet Ingredients**: In the bowl of an electric mixer, combine the granulated sugar and butter. Beat at medium speed until the mixture becomes fluffy.

3. **Mix in the Additions**: On low speed, add the banana, milk, cream cheese, and eggs. Continue mixing until everything is well combined.

4. **Prepare the Dry Ingredients**: In a separate small bowl, whisk together the all-purpose flour, baking soda, and kosher salt.

5. **Combine Wet and Dry Ingredients**: Keeping the mixer on low speed, slowly add the dry ingredients to the wet ingredients. Beat just until the mixture is blended.

6. **Add the Extras**: Stir in the salted macadamia nuts and white chocolate chips briefly to distribute them evenly throughout the batter.

7. **Bake the Bread**: Pour the batter into a 9x5 inch metal loaf pan coated with cooking spray. Bake at 350 degrees for 1 hour or until a toothpick inserted into the center comes out clean.

8. **Cool and Enjoy**: Allow the bread to cool in the pan for 10 minutes on a wire rack. Then, remove it from the pan and let it cool completely on the rack before slicing and serving.

## Difficulty Rating

This recipe scores a 4 out of 10 on the difficulty scale. It's straightforward enough for novice bakers to tackle, yet it results in a beautifully moist and flavorful loaf that feels like a professional bake.

## A Dessert to Remember

Whether you're looking to recreate cherished family memories or simply indulge in a slice of something sweet and satisfying, this White Chocolate Macadamia Banana Bread is the perfect dessert to try. With its rich flavors and heartwarming story, it's sure to become a beloved addition to your baking repertoire, just as it did in my family. Enjoy a slice of nostalgia with every bite!

Quinoa, Tomato, Green Onion Side Salad

Growing up, my grandma always made the most delicious side salads to accompany our family dinners. One of my absolute favorites was her Quinoa, Tomato, Green Onion Side Salad. Every time she made it, the fresh flavors of the ingredients would come together perfectly, creating a light and refreshing dish that everyone at the table loved.

I remember watching her effortlessly put this salad together in the kitchen, chopping the green onions and tomatoes with precision and squeezing the lemon juice with ease. It was a dish that seemed simple, yet it always managed to impress everyone with its vibrant colors and flavors.

The Quinoa, Tomato, Green Onion Side Salad holds a special place in my heart because it reminds me of those family dinners where we would all gather around the table, sharing stories and enjoying each other's company. It's a dish that brings back fond memories of my grandma's cooking and the love she put into every meal she made for us.

Difficulty: 4/10

This recipe is fairly easy to make, with simple ingredients and straightforward instructions. It would be best served as an appetizer or a side dish, perfect for accompanying any main course. Give it a try and let the flavors of this Quinoa, Tomato, Green Onion Side Salad transport you back to those nostalgic family dinners of the past.

Creamy White Chili

I remember the first time I tried my grandma's Creamy White Chili. It was a cold winter day and she had spent hours in the kitchen preparing this warm and comforting dish for our family. The aroma of the chicken, beans, and spices filled the house, creating a cozy and inviting atmosphere. As we all sat down to enjoy this delicious meal together, I knew that this recipe would become a family favorite for years to come.

Ingredients:

- 1 lb chicken, diced

- 1 onion, chopped

- 2 cloves garlic, minced

- 1 can great northern beans, drained and rinsed

- 1 can chicken broth

- 1 can green chilies

- 1 tsp cumin

- 1 tsp oregano

- 1/2 tsp black pepper

- 1/2 tsp salt

- 1/2 cup heavy whipping cream

- 1/4 cup sour cream

- 1/4 cup shredded cheddar cheese

- 1 tbsp olive oil

Instructions:

1. In a heavy saucepan, sauté chicken, onion, and garlic in olive oil until chicken is cooked.

2. Add chicken broth, beans, green chilies, cumin, oregano, black pepper, and salt. Simmer on low heat for 20 minutes.

3. Remove from heat and stir in heavy whipping cream and sour cream.

4. Top with shredded cheddar cheese before serving.

Making this Creamy White Chili recipe is relatively easy, with a difficulty rating of 5 out of 10. It is a hearty and satisfying main dish that is perfect for a cozy family dinner or a gathering with friends. The creamy texture and flavorful spices make it a standout dish that will become a favorite in your household as well. Enjoy!

Cheddar Pecan Cocktail Biscotti | Made by Meaghan Moineau

Cheddar Pecan Cocktail Biscotti | Made by Meaghan Moineau

**Title: Delightful Cheddar Pecan Cocktail Biscotti: A Savory Family Tradition**


**Meta Description:** Discover the perfect appetizer with our Cheddar Pecan Cocktail Biscotti recipe. Infused with sharp cheddar and crunchy pecans, this savory treat is easy to make and ideal for any gathering. Dive into a nostalgic family story and learn how to create this delectable dish.


---


**Cheddar Pecan Cocktail Biscotti: A Savory Treat Packed with Family Memories**


Are you searching for an appetizer that combines savory flavors with a touch of nostalgia? Look no further than our Cheddar Pecan Cocktail Biscotti. This delightful recipe, rich in sharp cheddar and crunchy pecans, is not only easy to prepare but also brings back fond memories of family gatherings.


**Ingredients You'll Need:**


- 2 cups flour


- 1/2 cup cornmeal


- 1 tablespoon baking powder


- 1/4 teaspoon cayenne pepper


- 1 teaspoon coarse salt


- 1 cup sharp cheddar cheese, grated


- 1 cup pecans, chopped


- 3 large eggs


- 1 tablespoon whole grain mustard


- 1 tablespoon maple syrup


- 2 tablespoons milk


**Step-by-Step Instructions:**


1. **Preheat and Prep:** Begin by preheating your oven to 350°F (175°C). Line a baking sheet with parchment paper for easy cleanup.


2. **Dry Ingredients:** In a large bowl, whisk together the flour, cornmeal, baking powder, cayenne pepper, and salt. Stir in the grated cheddar cheese and chopped pecans until well combined.


3. **Wet Ingredients:** In a separate bowl, mix the eggs, whole grain mustard, maple syrup, and 1 tablespoon of milk. Beat these until thoroughly blended.


4. **Combine:** Add the wet ingredients to the dry mixture, stirring until the dough becomes too stiff. Use your hands to bring the dough together in the bowl, adding an additional tablespoon of milk if needed.


5. **Shape and Bake:** Form the dough into two 3-inch-wide loaves and place them on the prepared baking sheet, keeping about 3 inches apart. Smooth the tops with damp hands. Bake for 25-30 minutes, or until lightly golden. Allow the loaves to cool for 20 minutes.


6. **Slice and Second Bake:** Reduce the oven temperature to 300°F (150°C). Slice the cooled loaves into 1/2-inch-thick slices. Arrange the slices on the baking sheet and bake for 10 minutes. Flip the biscotti and return to the oven for another 10 minutes, or until golden brown.


7. **Cool and Store:** Cool the biscotti on a wire rack before storing in an airtight container to maintain their crispness.


**A Nostalgic Family Story:**


Every year, as the leaves turned golden and the air crisp, our family would gather at my grandmother's house for an annual autumn feast. Among the various dishes, her Cheddar Pecan Cocktail Biscotti held a special place. It was my grandfather’s favorite. I remember how he’d sit by the fire, a plate of biscotti in one hand and a glass of his favorite cocktail in the other, sharing stories of his childhood. Making this biscotti now, I feel connected to those cherished moments, and it’s become a staple at my own family gatherings.


**Difficulty Rating: 4/10**


**Classification: Appetizer**


Enjoy making this Cheddar Pecan Cocktail Biscotti and create your own family memories with this savory appetizer that's sure to be a hit at any gathering.

Read more about Appetizers

Read more about Main Dishes

Read more about Desserts

Whole Wheat Dinner Rolls

Growing up, my grandmother always made the most delicious whole wheat dinner rolls for our family gatherings. They were always a hit and I have such fond memories of sitting around the table with my loved ones, enjoying these warm, fluffy rolls slathered in butter.

I recently stumbled upon her old recipe and decided to give it a try myself. It brought back so many memories of her and all the love she put into her cooking. The process of making these rolls was a labor of love, just like she used to do.

Difficulty: 6/10

Category: Appetizer

These whole wheat dinner rolls are definitely a labor of love, but the end result is so worth it. The combination of cracked wheat, molasses, and honey gives these rolls a sweet, nutty flavor that pairs perfectly with a pat of butter. They are the perfect addition to any meal and are sure to bring back nostalgic memories of family gatherings around the table.

White cake with marzipan and almonds

There's something special about family recipes that have been passed down through generations. They hold memories and nostalgia that can transport us back to simpler times. One such recipe that holds a special place in my heart is the white cake with marzipan and almonds.

This recipe originally belonged to my grandmother, who was known for her delicious baked goods. Whenever she made this cake, the whole house would be filled with the sweet aroma of almonds and amaretto. It was always a special treat when she would bring out this cake for family gatherings or holidays.

I remember watching her carefully mix the ingredients and lovingly pour the batter into the cake pan. She would always save a little extra marzipan to decorate the top with intricate designs, making the cake look almost too beautiful to eat. But of course, we couldn't resist diving into the moist and flavorful cake once it was ready.

The process of making this cake reminds me of the time spent with my grandmother in the kitchen, learning her techniques and soaking up her wisdom. It's a recipe that has been cherished in our family for years, and every time I make it, I feel a connection to her and the memories we shared.

Difficulty: 5/10

Dessert

Ingredients:

- 1 cup almonds, finely ground

- 1/4 cup amaretto liqueur

- 1 tsp baking powder

- 1/2 cup butter, melted

- 1/4 cup cornstarch

- 6 egg whites

- 1 cup flour

- 1 cup marzipan, divided

- 1 cup sugar

Instructions:

1. Beat egg whites and 2 tablespoons of sugar into stiff peaks.

2. In a separate bowl, mix the remaining sugar, flour, cornstarch, and baking powder.

3. Sift the flour and sugar mixture into the egg whites; stir gently until smooth.

4. Stir in the melted butter.

5. Add half of the marzipan and amaretto, mix to combine.

6. Pour the mixture into a suitable silicon mould or regular round shape greased and sprinkled with bread crumbs.

7. Sprinkle the top with the rest of the marzipan and sliced almonds.

8. Bake the cake in the oven at 180C for 30-40 minutes or until done.

9. Let it completely cool in the mould, then turn onto a serving plate.

This white cake with marzipan and almonds is a delightful dessert that will surely impress your family and friends. The sweet almond flavor combined with the subtle hint of amaretto makes it a truly special treat. Give this recipe a try and create your own memories to cherish for years to come.

Gingerbread Mummies

Blog Post:

Growing up, my grandma always made the most delicious gingerbread cookies during the holiday season. They were soft, spicy, and just the right amount of sweet. One year, she decided to get creative and make gingerbread mummies for Halloween. They were a hit with the whole family and became a new tradition for us.

The process of making the gingerbread mummies was always a fun one. My grandma would have all the ingredients laid out on the kitchen counter, and my sister and I would take turns helping her mix the dough and cut out the shapes. We would laugh and chat as we decorated each mummy with icing, making silly faces and designs.

The smell of gingerbread baking in the oven always brought back memories of those special times spent with my grandma and sister in the kitchen. It's amazing how a simple recipe can hold so much nostalgia and warmth.

Difficulty: 5/10

Dessert

Recipe Name: Gingerbread Mummies

Ingredients:

- 1 cup unsalted butter, softened

- 1 cup granulated sugar

- 1 cup molasses

- 1 large egg

- 1 tablespoon balsamic vinegar

- 5 cups all-purpose flour

- 1 1/2 teaspoons baking powder

- 1/2 teaspoon baking soda

- 1/2 teaspoon ground ginger

- 1/2 teaspoon ground cinnamon

- 1/2 teaspoon ground cloves

- 1/2 teaspoon ground nutmeg

- 1/2 teaspoon kosher salt

- 1 cup powdered sugar

- 1 teaspoon vanilla extract

- 2-3 tablespoons whole milk

Instructions:

1. In a bowl of an electric mixer, beat the butter until light and fluffy.

2. In a separate small bowl, whisk together the flour, baking powder, ground ginger, baking soda, cinnamon, cloves, nutmeg and salt. Set aside.

3. Add the sugar to the butter and beat until light and fluffy.

4. Turn the mixer to low and mix in the molasses, egg and balsamic vinegar.

5. Slowly add the dry ingredients to the bowl and continue mixing until thoroughly combined.

6. Cover and chill about 2 hours or until the dough is easy to handle.

7. Preheat oven to 400 degrees.

8. Divide the dough in half and turn out onto a lightly floured surface.

9. Roll each half of the dough to 1/4" thickness adding flour as needed.

10. Using cookie cutters, cut dough into shapes and place on a baking sheet lined with parchment approximately 1" apart.

11. Bake in a 400 degree oven for 5-6 minutes.

12. Cool on baking sheets for one minute and move to a wire rack.

13. In a small bowl, combine the powdered sugar, vanilla and milk. Whisk to combine.

14. Spoon mixture into a pastry bag or zip top bag and snip off the tip.

15. Add two small dots of icing where the eyes should be and then press one eye on each dot.

16. Decorate the mummies using a zig-zag pattern across the surface of the cookie and allow to dry for 2-4 hours or overnight.

17. Store in an airtight container.

These gingerbread mummies are a fun and festive treat that will surely be a hit at your Halloween party. Enjoy making memories with your loved ones as you bake and decorate these adorable cookies.

Spinach Salad with Strawberry Vinaigrette

Title: Spinach Salad with Strawberry Vinaigrette

Ingredients:

- 1/4 cup almonds

- 1/4 cup balsamic vinegar

- 1 cup cooked chicken, diced

- 1 tbsp dijon mustard

- 1/2 cup crumbled feta cheese

- 1 tsp fresh thyme, chopped

- 1/4 tsp ground pepper

- 1 small shallot, minced

- 4 cups fresh spinach leaves

- 1 cup strawberries, sliced

- 1/4 cup water

Instructions:

1. In a blender, combine strawberries, balsamic vinegar, water, dijon mustard, and ground pepper. Blend until smooth to make the vinaigrette.

2. In a large salad bowl, combine spinach leaves, diced chicken, sliced strawberries, crumbled feta cheese, minced shallot, and chopped thyme.

3. Pour the strawberry vinaigrette over the salad and toss to combine.

4. Top the salad with almonds before serving.

Growing up, my mother used to make this spinach salad with strawberry vinaigrette for special family gatherings. It was always a hit and a dish that everyone looked forward to. The combination of fresh spinach, juicy strawberries, and tangy vinaigrette was simply irresistible. I remember how my grandmother would always ask for seconds and rave about how delicious it was. This salad holds a special place in my heart as it reminds me of those happy times spent with loved ones.

Difficulty: 3/10

Category: Main

This Spinach Salad with Strawberry Vinaigrette is a breeze to make and perfect for a light and refreshing meal. The sweet and tangy flavors of the strawberries paired with the savory chicken and feta cheese make for a delicious combination. Whether you're looking for a healthy lunch option or a flavorful side dish, this salad is sure to impress. Give it a try and enjoy a taste of nostalgia with every bite!

Instant Pot Chicken Tacos

I have to admit, Instant Pot Chicken Tacos are a go-to meal in my household. Not only are they incredibly easy to make, but they are also bursting with flavor. The tender, juicy chicken combined with the zesty lime juice and tangy salsa makes for a truly delicious taco experience.

Growing up, my grandma used to make the most amazing shredded chicken tacos. Every time I take a bite of these Instant Pot Chicken Tacos, it takes me back to those special family dinners around her table. The smell of the chicken cooking in the Instant Pot brings back memories of laughter, love, and delicious food shared with loved ones.

Difficulty: 3/10

Category: Main

Ingredients:

- 1 tsp black pepper

- 2 lbs chicken breasts

- 1/4 cup lime juice

- 1/2 purple onion, thinly sliced

- 1 cup canned salsa

- 2 tbsp taco seasoning

Instructions:

1. Season both sides of the chicken with pepper and taco seasoning.

2. Place chicken into the bottom of the Instant Pot.

3. Top chicken with onion and salsa.

4. Secure Instant Pot lid into the lock position.

5. Place the lid onto the Instant Pot and turn on the Poultry setting. Set for 12 minutes.

6. Once finished, allow the Instant Pot to naturally release pressure for 20 minutes.

7. Remove chicken from the Instant Pot and shred.

8. Sprinkle with lime juice.

9. Serve over rice or with tortillas for some amazingly easy and delicious tacos.

Whether you're looking for a quick weeknight dinner or a tasty meal to share with friends and family, these Instant Pot Chicken Tacos are sure to be a hit. Give them a try and let the flavors transport you to a time of cherished memories and delicious food. Enjoy!