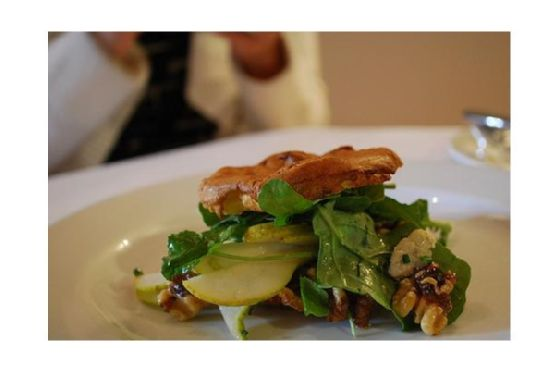
Caramelized Tofu & Gala Apple Salad
Intro
There’s something magical about the combination of sweet and savory flavors, especially when they come together in a perfectly balanced dish. This Caramelized Tofu & Gala Apple Salad is a delightful example of that harmony. I remember the first time I experimented with this recipe; it was a chilly autumn afternoon, and I was inspired by the abundance of apples from a recent orchard visit with my family. The air was crisp and filled with laughter as we picked apples straight from the trees. This salad brings back those warm memories with every bite, combining the sweetness of Gala apples with the rich, savory notes of caramelized tofu.
Why You’ll Love It
This salad is not only delicious but also incredibly satisfying and nourishing. The caramelized tofu provides a hearty, protein-rich element, while the Gala apples add a fresh, crisp sweetness. The greens and pecans add texture and a nutty flavor that ties everything together. This dish is perfect for a light lunch, a side dish at dinner, or even as a part of a holiday feast.
Ingredients
- 1/4 cup brown sugar
- 2 tablespoons butter
- 1 block extra-firm tofu
- 1 diced Gala apple
- 2 cloves garlic, minced
- 4 cups green lettuce, washed and torn
- 1/2 cup raw whole pecans
- 1/4 cup water
Instructions
- First thing of action: bake your tofu. Preheat the oven to 350°F. Let the tofu sit on a kitchen towel for 15 minutes, turning once, to absorb moisture.
- Cut tofu into 1-inch cubes. Brush them lightly with vegetable oil. Place them on a baking sheet and bake for 35 minutes, turning once.
- In a small pan, heat butter and garlic on low until the butter has just almost melted.
- Add the apples, tofu, and salt. Bring heat up to medium, and cook for about 4 minutes.
- Add the water and stir every minute for the next 6-7 additional minutes, or until there is little moisture left in the pan.
- Turn off the heat, and add the brown sugar. Stir to incorporate all of the sugar.
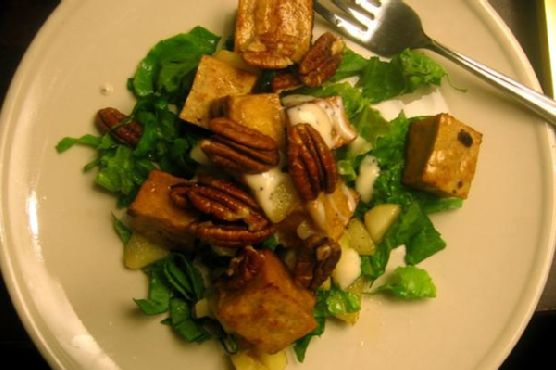
- Place the caramelized mixture on top of the salad lettuce and garnish with pecans.
Tips
To get the best texture out of your tofu, make sure to press it adequately to remove excess moisture. This step is crucial for achieving that perfect golden-brown crust when baking. Additionally, using a high-quality non-stick pan will make caramelizing the tofu and apples a breeze.
Variations & Substitutions
Feel free to customize this salad to your liking. If you prefer a different type of apple, Honeycrisp or Fuji would be excellent choices too. For a spicy kick, consider adding a pinch of cayenne pepper to the caramelization process. If you’re aiming for a nut-free version, sunflower seeds offer a similar crunch without the allergens.
Storage
This salad is best enjoyed fresh, but if you have leftovers, store the caramelized tofu and apples separately from the lettuce to prevent wilting. Keep them in an airtight container in the refrigerator for up to three days. When ready to serve, gently reheat the tofu and apples in a pan and toss them with fresh lettuce.
FAQ
Can I make this salad vegan?
Absolutely! Simply substitute the butter with a plant-based alternative, such as margarine or olive oil. The salad will be just as delicious.
What can I use instead of brown sugar?
If you’re looking for a healthier alternative, try using maple syrup or coconut sugar. Both will provide a similar sweetness and caramelization effect.
How can I make the tofu extra crispy?
To achieve extra crispy tofu, ensure that it’s thoroughly pressed to remove moisture and bake it at a slightly higher temperature, around 375°F, for an additional 5-10 minutes.
Nutrition
This Caramelized Tofu & Gala Apple Salad is not only delicious but also packed with nutrients. Tofu is a fantastic source of plant-based protein and contains all nine essential amino acids. Gala apples provide dietary fiber and vitamin C, while pecans are rich in healthy fats and antioxidants. Together, these ingredients make for a balanced and nourishing meal.
Conclusion
With its delightful blend of flavors and textures, the Caramelized Tofu & Gala Apple Salad is sure to become a favorite in your recipe collection. It’s a dish that not only satisfies the palate but also brings back cherished memories of family and nature. I hope this salad brings as much joy to your table as it does to mine. Enjoy!
Related update: Caramelized Tofu & Gala Apple Salad
Related update: Chapchae (Korean Stir-Fried Noodles)