Italian Beef Braciole | Made by Meaghan Moineau

Italian Beef Braciole

Intro

Italian Beef Braciole is a classic dish that brings back fond memories of Sunday dinners at my grandmother’s house. The aroma of simmering marinara sauce mixed with the rich scent of beef and herbs would fill the kitchen, creating an atmosphere of warmth and love. My grandmother would often regale us with tales of her own childhood in Italy, where this dish was a family favorite, passed down through generations. Today, I share with you this cherished recipe, hoping it brings as much joy to your table as it has to ours.

Why You’ll Love It

This Italian Beef Braciole is more than just a meal; it’s an experience. The tender beef, flavorful stuffing, and rich sauce create a symphony of flavors that are sure to please your taste buds. Whether you’re a seasoned cook or a novice in the kitchen, this dish is surprisingly approachable and rewarding. Perfect for a cozy family dinner or an impressive dish to serve guests, Braciole is a true testament to the beauty of Italian cuisine.

Ingredients

  • Round steak
  • Prosciutto
  • Genoa salami
  • Fresh bread crumbs
  • Italian fresh parsley
  • Romano cheese
  • Olive oil
  • Garlic
  • Cooked marinara sauce
  • Red wine

Instructions

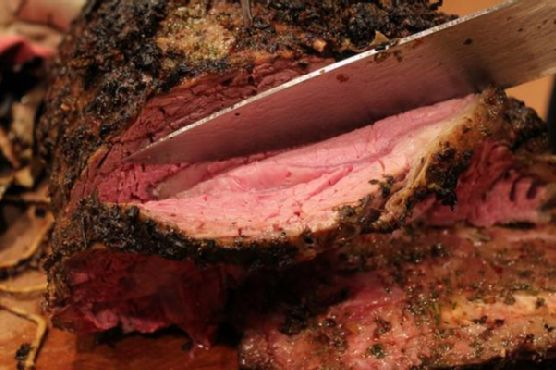
  1. Pound the beef between two sheets of plastic wrap with a meat tenderizer mallet until about 1/4 inch thick, being careful to prevent holes or tears in the meat. Any holes that do happen can be patched with a piece of prosciutto or salami during the next step.
  2. Place the prosciutto and salami in a single layer over the beef. If there are any holes or thin places in the beef, make sure to place the meat over those areas.
  3. Spread the breadcrumbs over the salami in an even layer, leaving an inch on all sides to make rolling the meat easier.
  4. Sprinkle the cheese over the breadcrumbs and drizzle 2 tablespoons of the olive oil over all.
  5. Carefully fold the edges over and begin to roll the beef. Tie the roll in several places with kitchen twine and gently rub the outside of the roll with the remaining oil.
  6. Heat a non-stick skillet over medium-high heat. With the aid of tongs, sear the roll all over, including the ends, until nicely browned all over.
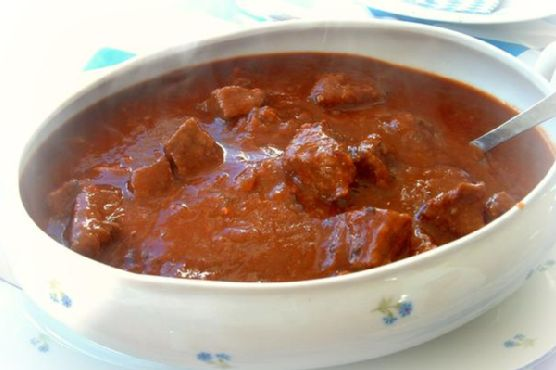
  7. While the meat is browning, heat the marinara sauce, garlic, and wine in a Dutch oven or pan large enough to hold the size of the roll.
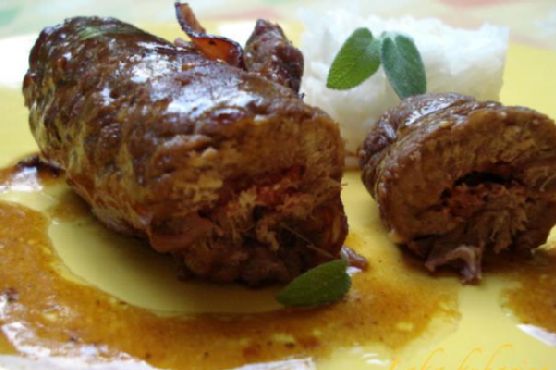
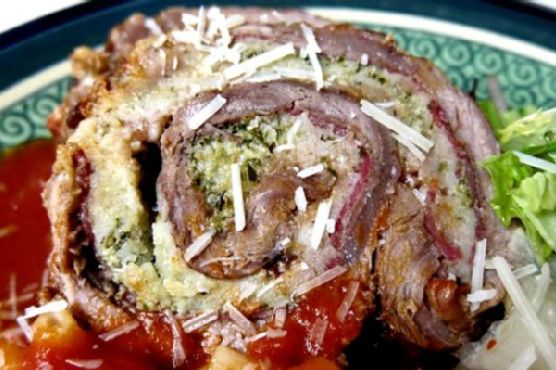
  8. Place the browned braciole in the sauce and bring to a gentle simmer. Cover and braise, over low heat until tender. The braciole in the photograph took 3 hours until a fork inserted into the meat slid in easily.
  9. When tender, carefully remove the beef roll from the sauce and set on a platter. Let the roll cool for about 5-10 minutes and remove the string.
  10. Slice the braciole and serve with pasta or gnocchi with the sauce over the top and plenty of parmesan cheese.

Tips

To ensure your beef braciole turns out perfectly every time, consider these tips:

  • Use a sharp knife to slice the beef if it’s not pre-sliced. This will help achieve uniform thickness.
  • Allow the braciole to rest before slicing to ensure it holds its shape.
  • Feel free to adjust the amount of filling based on your preference for more or less stuffing.

Variations & Substitutions

Italian Beef Braciole is versatile, and you can make it your own by experimenting with different ingredients:

  • Try using pancetta instead of prosciutto for a different flavor profile.
  • Substitute pecorino cheese for romano if you prefer a milder taste.
  • For a spicy kick, add red pepper flakes to the breadcrumb mixture.

Storage

Store any leftover braciole in an airtight container in the refrigerator for up to 3 days. Reheat gently in the oven or on the stovetop to maintain its tenderness. This dish can also be frozen for up to 2 months; just be sure to thaw it thoroughly before reheating.

FAQ

Can I prepare the braciole ahead of time?

Yes, you can assemble the braciole a day in advance. Keep it wrapped in plastic wrap in the refrigerator, and then proceed with the browning and braising steps when ready to cook.

What can I serve with braciole?

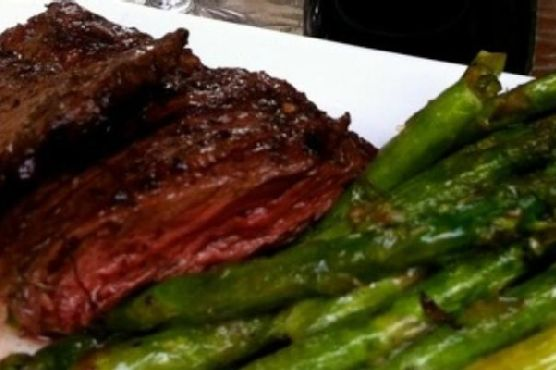
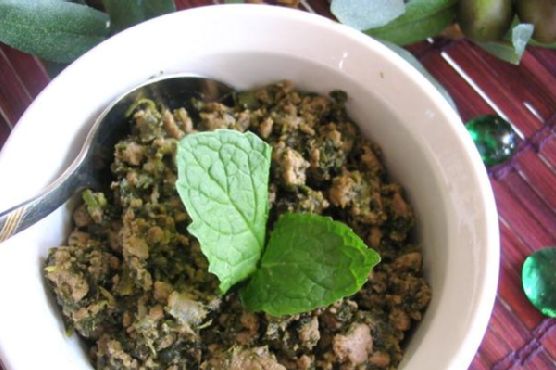
Braciole pairs beautifully with pasta, gnocchi, or even a simple side of sautéed greens. Don’t forget the crusty bread to soak up the delicious sauce!

Is there a non-alcoholic substitution for the red wine?

If you prefer not to use wine, you can substitute beef broth or a mixture of grape juice and vinegar for a similar depth of flavor.

Nutrition

While specific nutritional information will vary based on portion size and exact ingredients used, Italian Beef Braciole is a protein-rich dish often balanced with healthy fats from olive oil and essential nutrients from the herbs and sauce. Enjoy it as part of a balanced meal with plenty of vegetables.

Conclusion

Italian Beef Braciole is not just a recipe, it’s a tradition—a way to bring the warmth and richness of Italian cooking into your home. Whether you’re cooking for family, friends, or just yourself, this dish is sure to impress and comfort. I hope this recipe brings as much joy to your home as it has to mine. Buon appetito!

Related update: Italian Beef Braciole

German Goulash | Made by Meaghan Moineau

Authentic German Goulash: A Hearty, Comforting Stew

Intro

Growing up, Sundays were always special in our household. The aroma of simmering stews would fill our home, and my grandmother would be at the helm, orchestrating the kitchen like a seasoned maestro. One of her time-honored creations was her German Goulash, a dish that brought the family together and warmed our hearts as much as it did our bellies. I can still remember the sound of her cherished wooden spoon clinking against her favorite Dutch oven and the comforting taste of tender meat complimented with rich, savory spices.

Today, I am thrilled to share this cherished recipe with you, so you can recreate those cozy Sunday afternoons with your loved ones. This German Goulash is not only delicious but also a wonderful way to bring warmth and nostalgia to your meal times.

Why You’ll Love It

This German Goulash is a hearty, soul-warming dish that is perfect for any occasion. Whether you’re looking to impress dinner guests or simply want a comforting meal on a cold evening, this recipe is sure to please. The combination of tender beef and rich, flavorful sauce creates a symphony of taste that is both satisfying and delightful. Plus, it’s easy to make with just a few simple ingredients and can be adapted for slow cooking, making it perfect for busy schedules.

Ingredients

  • 2 pounds top round beef roast, cut into 1-inch cubes
  • 1 large onion, chopped
  • 2 tablespoons oil
  • 2 cups water
  • 1 cup tomato sauce
  • 2 beef bouillon cubes
  • 2 tablespoons paprika
  • 1 teaspoon ground pepper
  • 2 tablespoons flour

Instructions

  1. Preheat your Dutch oven over medium heat and add the oil.
  2. Brown the beef cubes and chopped onion in the oil until the meat is seared on all sides, about 5-7 minutes.
  3. Add the water, tomato sauce, beef bouillon cubes, paprika, ground pepper, and flour to the pot.
  4. Stir well to combine all ingredients.
  5. Reduce the heat to low and cover the pot. Let it simmer slowly for about 2 hours, or until the meat is tender and the flavors are well blended.
  6. Stir occasionally to prevent sticking, and add a little more water if the sauce becomes too thick.
  7. Once done, serve the goulash hot over cooked egg noodles.

This dish also cooks up very well in a crock pot. Simply brown the meat and onions first, then transfer all ingredients to the crock pot and cook on low for 6-8 hours.

Tips

For the best results, make sure to sear the meat thoroughly to lock in flavor. Using a well-seasoned cast iron Dutch oven can enhance the depth of flavor as well. If you prefer a thicker sauce, you can adjust the amount of flour to your liking or continue to simmer until you reach the desired consistency. Remember to taste and adjust the seasoning before serving!

Variations & Substitutions

Feel free to add your own twist to this classic goulash. For a spicier kick, consider adding a pinch of cayenne pepper or red pepper flakes. You can also incorporate vegetables like bell peppers or carrots for added nutrition and flavor. If you’re looking for a gluten-free option, use cornstarch in place of flour to thicken the sauce.

Storage

German Goulash can be stored in an airtight container in the refrigerator for up to 3 days. It’s a great dish for meal prep as the flavors continue to develop over time. To reheat, simply warm on the stove over low heat, adding a splash of water if needed to loosen the sauce.

FAQ

Can I make this goulash ahead of time?

Absolutely! In fact, goulash often tastes even better the next day as the flavors continue to meld. Prepare it a day ahead, then reheat gently on the stove before serving.

What cut of beef is best for goulash?

Top round beef roast is ideal for this recipe as it becomes tender and flavorful when slow-cooked. However, you can also use chuck roast or beef stew meat if preferred.

Can I freeze leftover goulash?

Yes, you can freeze goulash in a freezer-safe container for up to 3 months. Thaw in the refrigerator overnight and reheat on the stove, adding a bit of water as needed.

Nutrition

This recipe serves approximately 6 people and is a rich source of protein. While exact nutritional values can vary based on specific ingredients used, a typical serving provides a balanced amount of protein, fats, and carbohydrates, making it a wholesome choice for a family meal.

Conclusion

German Goulash is more than just a meal; it’s a comforting embrace of tradition and flavor passed down through generations. Whether you’re savoring it alone or sharing it with family, this dish is sure to warm your heart and home. I hope this recipe becomes a beloved staple in your culinary repertoire, just as it has in mine. Enjoy the rich history and taste of this classic stew, and don’t forget to savor the moments shared with those you love most.

Related update: German Goulash

Related update: Cheesy Bacon Burger with Spicy Chipotle Aiolo Sauce

Chimichurri Skirt Steak with Grilled Asparagus | Made by Meaghan Moineau

Chimichurri Skirt Steak with Grilled Asparagus

Intro

There’s something magical about the first whiff of a grill heating up on a warm summer evening. It takes me back to childhood summers spent in my grandparents’ backyard, where my grandfather would be at the helm of an old, well-loved grill, flipping steaks with an effortless grace. Those memories inspire me to recreate similar moments for my own family, and one of our favorite recipes is Chimichurri Skirt Steak with Grilled Asparagus. This dish is not just a meal; it’s an experience, a reminder of cherished times, and an invitation to gather around the table for laughter and love.

Why You’ll Love It

This recipe for Chimichurri Skirt Steak with Grilled Asparagus is perfect for so many reasons. First, it’s incredibly flavorful. The chimichurri sauce, with its fresh herbs and hint of spice, perfectly complements the rich, tender skirt steak. Second, it’s an impressive dish that’s surprisingly easy to prepare, making it ideal for both weeknight dinners and special occasions. The grilled asparagus adds a healthy, crunchy side that rounds out the meal beautifully. Plus, grilling keeps the mess to a minimum and the flavor to the max!

Ingredients

  • 1 bunch green asparagus
  • 1 bunch white asparagus
  • 1 teaspoon chili pepper flakes
  • 1 cup flat leaf parsley
  • 1/2 cup fresh mint leaves
  • 4 to 5 garlic cloves
  • 1 tablespoon kosher salt
  • 2 tablespoons lemon juice
  • 1 cup olive oil, divided
  • 1/4 cup fresh oregano leaves
  • 1 teaspoon freshly cracked black pepper
  • 1/4 cup red wine vinegar
  • 1 shallot, roughly chopped
  • 2 skirt steaks

Instructions

  1. Place all chimichurri sauce ingredients except for the olive oil in a food processor and pulse until well chopped.
  2. While the food processor is going, slowly pour the olive oil into the mixture until blended. Reserve half of the sauce to serve on the side with the meal.
  3. Season skirt steaks with salt and pepper on both sides.
  4. Spoon the remaining chimichurri sauce over the steaks and let marinate for 30 minutes up to overnight.
  5. Preheat the grill to 350 to 400°F.
  6. In a plastic resealable bag, add asparagus, olive oil, garlic, salt, and pepper. Shake to coat and place in a grill basket.
  7. Place the steak and grill basket of asparagus directly over a hot grill.
  8. Gently toss the asparagus for even grilling and baste with garlic, olive oil mixture. Grill for about 10 minutes.
  9. Grill the skirt steak to desired temperature, about 5 to 8 minutes per side.
  10. Remove from grill and let steak rest for 10 minutes before slicing into long strips.
  11. Spoon reserved chimichurri sauce over steak and serve with asparagus on the side.

Tips

  • To ensure even cooking, let your steaks come to room temperature before grilling.
  • If you prefer a less spicy chimichurri, reduce the amount of chili pepper flakes.
  • Use a meat thermometer to ensure your steak is cooked to your desired doneness.

Variations & Substitutions

Feel free to get creative with this recipe! You can substitute the skirt steak with flank steak or even chicken breasts if you prefer. If fresh herbs are not available, dried herbs can be used, but remember to use them sparingly as they have a more concentrated flavor. For a different twist, try adding a splash of balsamic vinegar to the chimichurri for a slightly sweeter flavor profile.

Storage

Leftovers can be stored in an airtight container in the refrigerator for up to three days. The chimichurri sauce can be kept in a separate container for up to a week. When reheating the steak, be sure not to overcook it to maintain its tenderness. The asparagus is best enjoyed fresh but can be reheated in a skillet over medium heat.

FAQ

Can I make the chimichurri sauce in advance?

Yes, the chimichurri sauce can be made up to two days in advance. Store it in an airtight container in the refrigerator and give it a good stir before using.

What can I do if I don’t have a grill?

If you don’t have a grill, you can use a grill pan on the stove or broil the steak and asparagus in the oven. Just keep an eye on them to prevent overcooking.

Is skirt steak the same as flank steak?

While skirt steak and flank steak are both long, flat cuts of beef, they come from different parts of the cow and have slightly different textures. Skirt steak is more marbled and has a more intense flavor, while flank steak is leaner.

Conclusion

Chimichurri Skirt Steak with Grilled Asparagus is a delightful dish that brings people together, whether for a casual family dinner or a festive summer gathering. The combination of vibrant chimichurri and perfectly grilled steak and asparagus creates a meal that’s both nourishing and exciting. As you take that first bite, you’ll be reminded of the simple joys of good food and good company. Enjoy this recipe and create your own cherished memories around the grill!

Related update: Chimichurri Skirt Steak with Grilled Asparagus

Related update: Ditalini with peas

Traditional Garlic and Herb Crusted Prime Rib Roast | Made by Meaghan Moineau

Traditional Garlic and Herb Crusted Prime Rib Roast

Intro

There’s something incredibly comforting about a perfectly cooked prime rib roast. It brings to mind family gatherings and festive celebrations, where the aroma of roasted garlic and herbs fills the air. For me, this dish is synonymous with my grandmother’s holiday dinners. I remember the warmth of her kitchen, where she would spend hours preparing the meal, her hands expertly working with the ingredients, and her love infused in every bite. Today, I want to share this cherished recipe with you, so you can create your own delicious memories.

Why You’ll Love It

This Traditional Garlic and Herb Crusted Prime Rib Roast is a showstopper at any dinner table. Here are a few reasons why you’ll adore this recipe:

  • Flavorful Crust: The combination of fresh herbs and garlic creates a savory crust that locks in the meat’s juices, making every bite tender and flavorful.
  • Simple Preparation: Despite its impressive appearance, this recipe requires minimal preparation, allowing you to spend more time with your guests.
  • Perfect for Special Occasions: Whether it’s a holiday feast or a special family dinner, this prime rib roast is sure to impress and satisfy.

Ingredients

  • 2 tablespoons fresh parsley leaves, chopped
  • 2 tablespoons fresh rosemary leaves, chopped
  • 2 tablespoons fresh tarragon leaves, chopped
  • 2 tablespoons fresh thyme leaves, chopped
  • 6 cloves garlic, minced
  • 1 tablespoon kosher salt
  • 1 tablespoon black pepper
  • 1/4 cup olive oil
  • 1 boneless prime rib roast (about 5-6 pounds)
  • 3-4 bay leaves

Instructions

  1. Three hours before you want to begin cooking, take the roast out of the fridge and place it on a cutting board at room temperature. This helps the meat cook more evenly.
  2. Preheat the oven to 325 degrees F (165 degrees C).
  3. Prepare the roast by removing excess fat from the bottom and trimming the layer of fat from the top side, leaving a thin layer for flavor.
  4. In a bowl, combine the minced garlic, chopped parsley, rosemary, tarragon, thyme, kosher salt, and black pepper. Add the olive oil and mix until a paste forms.
  5. Evenly apply the garlic herb rub on all sides of the roast, pressing it gently to adhere.
  6. Tie the roast with kitchen string at 1-inch intervals. Insert a bay leaf underneath each string across the top of the roast.
  7. Place the roast on a rack in a roasting pan, fat side up. Roast in the preheated oven until the internal temperature reaches 120 degrees F (49 degrees C) for medium-rare, about 2 1/2 hours. If you prefer medium, take the roast out when the thermometer reads 130 degrees F (54 degrees C).
  8. Remove the roast from the oven and let it rest for 10 minutes before carving. This allows the juices to redistribute for a more tender and flavorful result.

Tips

  • Room Temperature: Allowing the meat to come to room temperature before roasting helps it cook more evenly.
  • Use a Meat Thermometer: To achieve your desired doneness, always rely on a meat thermometer rather than cooking times alone.
  • Resting Time: Letting the roast rest is crucial as it allows the internal juices to settle, resulting in a juicier roast.

Variations & Substitutions

This recipe is versatile, and there are several ways to make it your own:

  • Herb Variations: Feel free to experiment with other herbs such as oregano or sage if you prefer different flavors.
  • Garlic Lovers: Increase the amount of garlic if you love a stronger garlic flavor.
  • Spicy Kick: Add a pinch of cayenne pepper to the rub for a bit of heat.

Storage

Leftover prime rib roast can be stored in an airtight container in the refrigerator for up to 3 days. To reheat, slice the meat and warm in a 250-degree F oven until just heated through, being careful not to overcook.

FAQ

Can I prepare the garlic herb crust ahead of time?

Absolutely! You can prepare the garlic herb crust up to a day in advance. Store it in an airtight container in the refrigerator until you’re ready to apply it to the roast.

What should I serve with the prime rib roast?

This roast pairs beautifully with classic sides such as mashed potatoes, roasted vegetables, or a fresh green salad. Don’t forget the au jus or horseradish sauce for an extra touch of flavor!

Nutrition

While I don’t have exact nutritional information for this recipe, rest assured that this prime rib roast is a high-protein, flavorful indulgence. As with any rich dish, enjoy it in moderation and balance it with plenty of vegetables and whole grains for a well-rounded meal.

Conclusion

Crafting this Traditional Garlic and Herb Crusted Prime Rib Roast is not just about creating a delicious meal; it’s about making memories and bringing loved ones together. Whether you’re a seasoned cook or a beginner, this recipe is a wonderful way to celebrate life’s special moments. I hope it becomes as cherished in your home as it is in mine. Happy cooking and enjoy every savory bite!

Related update: Traditional Garlic and Herb Crusted Prime Rib Roast

Indian-Spiced Ground Beef Main Dish | Made by Meaghan Moineau

Indian-Spiced Ground Beef Main Dish | Made by Meaghan Moineau

Title: "Savoring Tradition: Indian-Spiced Ground Beef Main Dish That Warms the Soul"
Description: Dive into the heart of Indian cuisine with our Indian-Spiced Ground Beef Main Dish. This aromatic recipe, bursting with spices and herbs, is a delightful journey into flavors that promise to tantalize your taste buds. Join us as we explore the vibrant ingredients, step-by-step cooking process, and the sentimental family memories that make this dish a cherished favorite.

---


A Culinary Journey Through Time: Indian-Spiced Ground Beef Main Dish

There’s a certain magic in the air when the kitchen fills with the heady aroma of spices sizzling in hot oil. It’s a sensory experience that transports me back to warm summer evenings at my grandmother's house, where the kitchen was a vibrant hub of activity and love. Today, I’m excited to share a recipe that is not just a meal, but a cherished memory — the Indian-Spiced Ground Beef Main Dish.


Ingredients:

- 2 tablespoons canola oil


- 1 teaspoon red chili powder


- A handful of fresh cilantro


- 1 cinnamon stick


- A few sprigs of fresh mint leaves


- 1 cup frozen spinach, thawed


- 1 teaspoon garam masala


- 1 garlic clove, finely chopped


- 1 teaspoon ginger paste


- 3–4 green cardamom pods


- 2 green chillies, chopped


- 1 lb ground beef


- 1 teaspoon ground cumin


- 1/2 teaspoon ground black pepper


- 1 large onion, finely chopped


- 1 cup plain yogurt


- Salt to taste


Instructions:

1. Begin by making a vibrant green paste. In a food processor, puree the spinach, cilantro, and mint with a tablespoon or two of water. Remember, a little mint goes a long way!


2. Heat canola oil in a pan over medium heat. Add the cardamom pods, cloves, and cinnamon stick, letting them sizzle and infuse the oil for about a minute.


3. Toss in the chopped onion and sauté until it turns a golden-brown, stirring occasionally to prevent burning.


4. Now, add the green chillies, garlic, and ginger paste, cooking for another minute until fragrant.


5. Stir in the ground beef, red chili powder, ground cumin, garam masala, ground black pepper, and salt. Cook on medium-high heat for about 10 minutes, stirring often to break up the beef and evenly distribute the spices.


6. Mix in half of the yogurt, ensuring it is well incorporated, and cook for another 2 minutes.


7. Pour in the green paste, stirring gently to blend the flavors. Let it simmer for 10 minutes, allowing the spices to marry beautifully.


8. Finally, add the remaining yogurt, cooking the dish for an additional 5 minutes. Taste and adjust the salt as needed.


9. Serve hot with parathas and fresh tomato salsa for a complete meal.


A Nostalgic Note:

Growing up, this dish was more than just food; it was a symbol of family unity. I remember my grandmother lovingly preparing it for our family gatherings. The kitchen would be filled with laughter, stories, and the irresistible aroma of spices. Each bite was a taste of home, a reminder of her warmth and the traditions she passed down. It’s a recipe steeped in love and memories, making each preparation a heartfelt tribute to her.


Difficulty Rating: 6/10
Classification: Main Dish

This Indian-Spiced Ground Beef Main Dish is a delightful blend of tradition and flavor. Though it requires a bit of patience and a love for spices, the result is a rewarding culinary experience. Whether you're hosting a dinner party or enjoying a quiet family meal, this dish is sure to impress and bring a touch of nostalgia to your table.

Read more about Appetizers

Read more about Main Dishes

Read more about Desserts

Beef Pot Pies with Irish Cheddar Crust | Made by Meaghan Moineau

Beef Pot Pies with Irish Cheddar Crust | Made by Meaghan Moineau

Title: A Heartwarming Feast: Beef Pot Pies with Irish Cheddar Crust
Description: Dive into a culinary journey that marries rich, savory beef with the distinctive sharpness of Irish cheddar. Our Beef Pot Pies with Irish Cheddar Crust promise to deliver a comforting meal that not only delights your taste buds but also warms your heart. Discover how this dish, with its flaky, flavorful crust and tender, aromatic filling, has become a cherished family tradition, perfect for any gathering.

---


There’s something undeniably comforting about the aroma of beef pot pies wafting through the house on a chilly evening. For me, the scent is more than just a promise of a delicious meal; it’s a portal to cherished family gatherings, where laughter mingled with the savory aromas, creating memories that have lingered long after the meal was over.


Growing up, Sunday dinners were a sacred ritual in our home. As the seasons changed and the days grew shorter, my grandmother would prepare her signature Beef Pot Pies with Irish Cheddar Crust. The process was a labor of love, and I remember watching in awe as she expertly transformed simple ingredients into a culinary masterpiece.


The magic began with the crust—a buttery, flaky creation that owed its unique flavor to the sharpness of Irish cheddar. As a child, I would sneak small pinches of shredded cheddar from the counter, savoring the sharp, tangy taste that would soon become a golden crust enveloping our pot pies.


The filling was a rich tapestry of flavors. Tender chunks of beef, seasoned to perfection, married with the sweetness of sautéed onions and carrots, all mingling with the fresh earthiness of thyme and marjoram. The addition of Dijon mustard and fresh parsley right before filling the pies added a zing that elevated the dish beyond the ordinary.


As my grandmother and I worked side by side, she’d often share stories of her childhood in Ireland, where the cheese came from. She’d tell me about the rolling green hills and the small village markets filled with fresh produce and local cheeses. Her tales made the meal not just a feast for the body, but a feast for the imagination as well.


When the pot pies finally emerged from the oven, their golden crusts glistening and fragrant, it was as if we had captured a piece of those Irish hills right there in our kitchen. Gathering around the table, our family would dive into the steaming pies, the tender beef and aromatic vegetables enveloped in that perfect crust, savoring each bite as if it were the first.


These pot pies were more than just food; they were a symbol of warmth, love, and family. Even now, each time I prepare them, I am transported back to those cozy evenings, feeling the warmth of my grandmother’s kitchen and the love she infused into every dish.


Difficulty Level: 7/10
Classification: Main Dish

Whether you’re looking to create new memories or relive old ones, these Beef Pot Pies with Irish Cheddar Crust are sure to become a beloved staple in your culinary repertoire. Try this recipe, and let it become a part of your family’s story, just as it has been a cherished part of mine.

Read more about Appetizers

Read more about Main Dishes

Read more about Desserts

Beef Teriyaki Stir Fry | Made by Meaghan Moineau

Beef Teriyaki Stir Fry | Made by Meaghan Moineau

Title: Savoring Memories with Beef Teriyaki Stir Fry: A Nostalgic Family Delight
Description: Dive into the flavors of our Beef Teriyaki Stir Fry—a savory blend of tender beef, vibrant vegetables, and a delectable sauce. This main dish not only tantalizes your taste buds but also brings back cherished memories of family gatherings. Rated a 6/10 on the difficulty scale, this recipe is perfect for both seasoned cooks and culinary novices looking to create a delicious and heartwarming meal.

---


Beef Teriyaki Stir Fry: A Flavorful Journey Through Time

The aroma of soy sauce mingling with ginger and garlic, the sizzle of beef in a hot pan, and the vibrant colors of fresh vegetables—these are the sensations that transport me back to my grandmother's kitchen. It was a place where magic happened, where every meal was a celebration of flavors and family. Today, I want to share a recipe that encapsulates those cherished moments: Beef Teriyaki Stir Fry.


Ingredients:

- 1 lb flank steak, thinly sliced


- 2 cups broccoli florets


- 1 red bell pepper, sliced


- 1 cup mushrooms, sliced


- 2 scallions, sliced


- 2 tablespoons soy sauce


- 1 tablespoon brown sugar


- 1 tablespoon dark sesame oil


- 2 cloves garlic, minced


- 1 inch fresh ginger, grated


- 2 tablespoons vegetable oil


- 1 tablespoon cornstarch


- 2 teaspoons cold water


- Sesame seeds for garnish


Instructions:
1. Marinate the Flavors: In a small bowl, whisk together soy sauce, brown sugar, sesame oil, garlic, and ginger. Add the sliced flank steak to the mixture, ensuring each piece is well-coated. Cover and refrigerate for at least 30 minutes, allowing the flavors to meld.
2. Sizzle and Sauté: Heat vegetable oil in a large frying pan over medium heat. Add the marinated beef, cooking for 3-4 minutes to brown it on all sides. Remove the beef from the pan and set it aside.
3. Vegetable Medley: In the same pan, add broccoli, red bell pepper, and mushrooms. Sauté for about 5 minutes, or until the vegetables begin to soften.
4. Saucy Symphony: Stir in the teriyaki sauce and bring the mixture to a simmer. Return the beef to the pan, including any flavorful drippings. Cook for another 5 minutes, stirring occasionally to ensure even flavor distribution.
5. Thickening Touch: In a small bowl, dissolve cornstarch in 2 teaspoons of cold water. Stir this mixture into the pan, allowing the sauce to thicken over 2 minutes. Toss the beef and vegetables to coat them evenly in the rich teriyaki sauce.
6. Serve and Enjoy: Sprinkle with sesame seeds and sliced scallions before serving. Pair it with steamed rice or noodles for a complete meal.
A Nostalgic Family Memory:

Every Sunday afternoon, my family would gather at my grandmother's house. The kitchen was always a hub of activity, filled with laughter, stories, and the enticing scent of her Beef Teriyaki Stir Fry. I remember standing on a stool, watching her expertly whisk the sauce, her hands moving with the grace of years of practice. The sizzling beef and vibrant vegetables were a feast for the senses, and as we sat around the table, each bite was a reminder of the love and care she infused into every dish.


These meals were more than just food; they were a celebration of our heritage and the bonds that held us together. Even now, whenever I make this dish, I'm reminded of those precious Sundays, and I feel a sense of gratitude for the culinary legacy she passed down to us.


Difficulty Rating: 6/10
Dish Classification: Main Dish
Conclusion:

Beef Teriyaki Stir Fry is more than just a recipe; it's an opportunity to recreate memories and share them with loved ones. Whether you're cooking for family or friends, this dish is sure to bring a sense of warmth and nostalgia to your table. Enjoy the symphony of flavors and the stories woven into each bite, and perhaps, create a few new memories of your own.

Read more about Appetizers

Read more about Main Dishes

Read more about Desserts

Bibimbab (Korean Rice w Vegetables & Beef) | Made by Meaghan Moineau

Bibimbab (Korean Rice w Vegetables & Beef) | Made by Meaghan Moineau

Title: Discover the Heartwarming Flavors of Bibimbab: A Korean Classic
Description: Dive into the rich flavors and vibrant colors of Bibimbab, a beloved Korean dish that brings together a medley of fresh vegetables, savory beef, and perfectly cooked rice. Join us as we explore this deliciously customizable meal, perfect for any palate, and share a nostalgic family memory that highlights its place in our hearts.

---


Bibimbab: A Journey Through Flavor and Memory


Bibimbab, a staple in Korean cuisine, is more than just a dish. It's a tapestry of flavors and textures that unite to create a harmonious and satisfying meal. With its roots steeped in tradition and adaptability to suit any lifestyle, Bibimbab is a culinary delight that welcomes everyone to the table.


Ingredients:

- Carrots, julienned

- Cooked white rice


- Eggs


- English cucumber, sliced


- Garlic clove


- Red sprinkle gochugaru (red pepper flakes)


- Red gochujang (red pepper paste)


- Olive oil


- Sesame oil


- Sesame seeds


- Soy sauce


- Fresh spinach


- Sandwich steaks, thinly sliced


Instructions:


1. Prepare the Rice: Cook rice according to package directions and set aside.
2. Prep the Vegetables: Cut the carrots and cucumber into matchstick pieces. Set aside for sautéing.
3. Cook the Spinach: In a large non-stick pan, bring 2 cups of water to a boil. Add spinach and cook until wilted, stirring constantly. Drain and squeeze the spinach dry into a ball.
4. Sauté the Carrots and Garlic: Wipe out the skillet and heat 1 tsp of olive oil over medium-high heat. Add carrots and cook until soft, about 3 minutes. Add garlic and cook until fragrant, about 1 minute. Mix cucumber slices with gochugaru and set aside.
5. Prepare the Spinach Mixture: Combine the spinach with soy sauce and set aside until serving.
6. Cook the Beef: Add thinly sliced beef to the non-stick pan and heat until browned. Wipe down the pan with a napkin.
7. Fry the Eggs: Heat 1 tsp of olive oil in the non-stick pan over medium-high heat. Add eggs and cook until the whites are set, and the yolks remain runny, about 5 minutes.
8. Assemble the Bibimbab: Divide the cooked rice among four bowls. Top with sautéed vegetables, beef, and eggs. Drizzle with sesame oil and sprinkle with sesame seeds. Finish with a dollop of gochujang or Sriracha sauce for a spicy kick.

A Taste of Nostalgia


Growing up, Bibimbab was more than just a meal; it was a family ritual that brought us together on Sunday afternoons. I vividly recall the comforting aroma of sesame oil and the vibrant colors of the vegetables laid out on the kitchen counter. My grandmother, with her gentle hands, would guide us in chopping the vegetables, teaching us the importance of each ingredient and its place in the dish.


As we gathered around the table, each person was given the freedom to craft their perfect bowl, adding a personal touch to the traditional recipe. It was in these moments that I learned the true essence of Bibimbab—its ability to adapt to each individual's taste while still maintaining its core identity. Even today, every bite takes me back to those cherished family gatherings, filled with laughter and stories, binding us together through the simple joy of sharing a meal.


Difficulty Rating: 4/10


Classification: Main Dish


Bibimbab is a dish that invites creativity and personalization, making it a delightful experience for both novice and experienced cooks alike. Its versatility accommodates vegetarians, dieters, health-conscious eaters, and meat-lovers, ensuring that everyone can partake in its deliciousness. So, gather your ingredients, embrace the process, and enjoy the journey of creating your own Bibimbab masterpiece!

Read more about Appetizers

Read more about Main Dishes

Read more about Desserts

Strip steak with roasted cherry tomatoes and vegetable mash | Made by Meaghan Moineau

Strip steak with roasted cherry tomatoes and vegetable mash | Made by Meaghan Moineau

Title: Savoring Memories: Strip Steak with Roasted Cherry Tomatoes and Vegetable Mash
Description: Dive into the rich flavors of a classic steak dish with a nostalgic twist. Our Strip Steak with Roasted Cherry Tomatoes and Vegetable Mash combines the juicy tenderness of beef with the vibrant notes of fresh vegetables, creating a memorable main dish that's perfect for family gatherings. With a difficulty rating of 7 out of 10, this recipe offers an engaging culinary experience, bringing together a symphony of flavors and cherished family memories.
Body:

There’s something inherently comforting about a well-prepared steak. For me, strip steak isn't just a meal; it's a gateway to cherished family memories that have stood the test of time. I recall summer evenings at my grandparents’ countryside home, where the air was filled with laughter and the irresistible aroma of a sizzling grill.


My grandmother, with her apron dusted with flour and her smile as warm as the July sun, would prepare the marinade with such care. Balsamic vinegar, fresh rosemary, and a touch of garlic infused each strip steak with a depth of flavor that was nothing short of magical. She would let the steaks bathe in this aromatic blend overnight, allowing the flavors to meld perfectly, a testament to her patience and culinary wisdom.


As the steaks marinated, we would gather around the garden, picking fresh cherry tomatoes and herbs, their vibrant colors a promise of the delicious meal to come. The anticipation was palpable, and it was in these moments that I learned the importance of using fresh, quality ingredients - a lesson that resonates in every dish I prepare today.


Instructions:
1. Marinade Preparation: In a bowl, mix balsamic vinegar, olive oil, minced garlic, salt, and pepper. Add a sprig of fresh rosemary to infuse aromatic notes. Pour this marinade over the beef strip steaks, ensuring they are well-coated. Allow them to stand for at least an hour, preferably overnight for the best flavors.
2. Roasting Cherry Tomatoes: Heat a grill pan over medium heat. Toss the cherry tomatoes with a drizzle of olive oil and season with salt and pepper. Grill until they begin to char and burst, then set aside to cool slightly.
3. Cooking the Strip Steaks: Remove the steaks from the marinade. Heat olive oil in a skillet over high heat. Sear the steaks for 2 minutes on each side. Reduce the heat, add unsalted butter, and cook for another 2-4 minutes, turning once, depending on your preferred doneness. Transfer the steaks to a plate and let them rest in a warm place.
4. Preparing the Vegetable Mash: Cook the green beans and fresh peas in boiling water for 8-10 minutes until tender. Drain and cool them under cold water. In a food processor, combine the beans, peas, ricotta cheese, a tablespoon of olive oil, salt, and pepper. Blend until you achieve a rough puree.
5. Final Touches: In the skillet where the steaks were cooked, gently heat the vegetable mash for 1 minute, allowing it to absorb the steak's residual flavors.
6. Serving: On warmed plates, divide the vegetable mash and arrange the steaks on top. Garnish with roasted cherry tomatoes, a drizzle of olive oil, and a sprinkle of fresh chives. For an added touch of nostalgia, serve with steamed new potatoes on the side.

Every bite of this dish transports me back to those cherished family gatherings, where love was the secret ingredient in every meal. Rated at a 7 out of 10 for difficulty, this main dish offers a rewarding cooking experience, perfect for those who enjoy a blend of tradition and flavor. Whether you're making it for a special occasion or simply to savor a moment of nostalgia, this recipe is sure to create new memories while honoring the old. Enjoy every bite!

Read more about Appetizers

Read more about Main Dishes

Read more about Desserts

The Secret to Easy Skillet Filet Mignon Steak Tacos | Made by Meaghan Moineau

The Secret to Easy Skillet Filet Mignon Steak Tacos | Made by Meaghan Moineau

Title: Unlocking the Flavor: Easy Skillet Filet Mignon Steak Tacos
Description: Discover the secret to perfecting filet mignon steak tacos right in your kitchen. This easy-to-follow recipe combines mouth-watering flavors with a touch of nostalgia, creating a memorable dining experience that's sure to impress.

---


The Secret to Easy Skillet Filet Mignon Steak Tacos

There's something undeniably satisfying about biting into a perfectly crafted taco: the warm tortilla, the succulent steak, and the harmonious blend of toppings. Today, I want to share a recipe that holds a special place in my heart—Easy Skillet Filet Mignon Steak Tacos. Whether you're looking to elevate your weeknight meal or surprise guests with a gourmet treat, this dish promises to deliver.


Ingredients:

- Sour cream


- Extra virgin olive oil


- Filet mignon steaks


- Guacamole


- Cracked black pepper


- Shredded cheddar cheese


- White corn tortillas


Instructions:
1. Prepare the Skillet: Begin by heating your skillet on medium to low heat. The key here is patience; you want to gently coax the flavors from the filet without rushing the process.
2. Season the Steaks: Rub the filet mignon steaks with extra virgin olive oil, then season generously with cracked black pepper. This simple seasoning enhances the natural richness of the beef.
3. Cook to Perfection: Place the steaks in the skillet, cooking slowly to maintain their juiciness. Aim for a medium doneness, which typically takes about 7 minutes on each side. Adjust the time based on your preferred level of doneness.
4. Slice the Filets: Once cooked, remove the steaks from the heat and let them rest for a moment. Then, slice them thinly and lengthwise to ensure each bite is tender and flavorful.
5. Warm the Tortillas: Using a clean skillet, warm the white corn tortillas over medium heat. This step is crucial for achieving that perfect, pliable texture.
6. Assemble the Tacos: Top each tortilla with slices of filet mignon, a generous dollop of guacamole, a drizzle of sour cream, and a sprinkle of shredded cheddar cheese. Each ingredient complements the other, creating a symphony of flavors.
A Nostalgic Memory

This recipe always brings me back to summer evenings at my grandparents' house. I vividly remember the aroma of the steaks wafting through the air as my grandfather carefully tended to the grill. As a child, I was in charge of warming the tortillas—a task I took very seriously. It was during these family gatherings that I learned the art of making tacos, surrounded by laughter and stories shared across generations. These tacos are more than just a meal; they're a cherished family tradition that I continue to pass down.


Difficulty Rating: 3/10
Classification: Main Dish

---


Crafting these Easy Skillet Filet Mignon Steak Tacos is a delightful experience that combines simplicity with sophistication. The tender filet mignon, paired with creamy guacamole and sharp cheddar, creates a dish that's as memorable as it is delicious. Whether you're cooking for loved ones or treating yourself, these tacos promise to be a hit. Enjoy every bite and the memories that come with it.

Read more about Appetizers

Read more about Main Dishes

Read more about Desserts

Meat rolls with prosciutto and sage | Made by Meaghan Moineau

Meat rolls with prosciutto and sage | Made by Meaghan Moineau

Title: Savory Elegance: Meat Rolls with Prosciutto and Sage
Description: Discover the delightful fusion of flavors in this classic Italian-inspired dish: Meat Rolls with Prosciutto and Sage. This recipe combines the savory goodness of beef flank steaks with the delicate taste of prosciutto and sage, creating a culinary experience that is sure to impress. Follow along for a step-by-step guide, with a heartwarming family story to bring an extra touch of nostalgia to your kitchen.

---


There’s something inherently comforting about gathering around the dining table with family, sharing stories, and indulging in a meal that’s been passed down through generations. One of my fondest memories is watching my grandmother prepare her famous Meat Rolls with Prosciutto and Sage for our Sunday dinners. The kitchen would fill with the enticing aroma of sizzling beef and fresh sage, a scent that still transports me back to those cherished moments.


Ingredients:

- Beef flank steaks


- Vegeta Natur or similar seasoning


- Prosciutto slices


- Fresh sage leaves


- Corn starch


- White wine


- Olive oil


- Butter


- Black bell pepper


Instructions:

1. Begin by washing and drying the beef flank steaks. Using a meat mallet, gently flatten the steaks to an even thickness.


2. Rub one side of each steak with Vegeta Natur or your preferred seasoning blend. This step infuses the meat with a savory base that enhances the overall flavor profile.


3. On the opposite side of each steak, place a slice of prosciutto and a fresh sage leaf. The prosciutto adds a hint of saltiness, while the sage contributes an earthy aroma.


4. Carefully roll the steaks, ensuring the prosciutto and sage remain inside. Secure each roll with wooden or metal toothpicks to prevent unrolling during cooking.


5. In a small bowl, whisk corn starch into the white wine until smooth. This mixture will form the base of a delicious, silky sauce.


6. Heat a mixture of olive oil and butter in a pan over medium heat. Once hot, sauté the rolls on all sides until they achieve a golden brown crust.


7. Gently pour in the wine mixture, allowing the sauce to thicken and coat the rolls. Season with freshly ground black bell pepper for an added kick.


8. Lower the heat, cover the pan, and let the rolls simmer for about 20 minutes, or until they are tender and flavorful.


9. Before serving, remember to remove the toothpicks. Arrange the rolls on a platter and drizzle with any remaining sauce from the pan.


A Nostalgic Family Story:

This dish was a staple at our family gatherings, often taking center stage during special occasions. I remember my grandmother preparing these rolls with meticulous care, her hands skillfully rolling and securing each piece. She would hum quietly as she cooked, a melody that seemed to weave through the air and into the fabric of our family traditions.


As kids, my siblings and I would eagerly await the moment the rolls would be unveiled at the table, their rich aroma acting as a siren call. The first bite was always magical—an explosion of flavors that made every Sunday feel like a holiday.


Difficulty: 6/10
Classification: Main Dish

This recipe, while requiring some attention to detail, is a rewarding main dish that promises to bring elegance and nostalgia to your dining experience. Whether you're cooking for family or entertaining guests, these Meat Rolls with Prosciutto and Sage are sure to leave a lasting impression. Enjoy this culinary journey, and perhaps create new memories of your own.

Read more about Appetizers

Read more about Main Dishes

Read more about Desserts