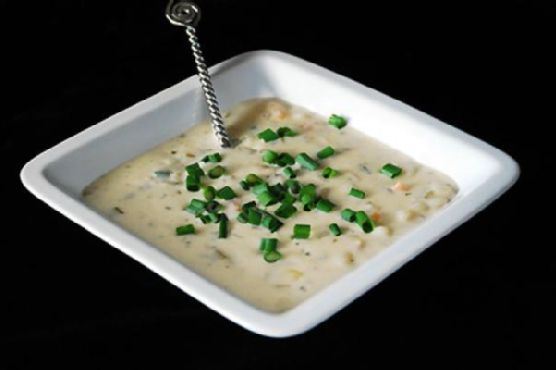
Creamy Shrimp Bisque | Made by Meaghan Moineau
Title: A Bowl of Comfort: Crafting the Perfect Creamy Shrimp BisqueDescription: Dive into the heartwarming flavors of our Creamy Shrimp Bisque, a dish that marries the ocean's bounty with rich, creamy indulgence. With a hint of nostalgia and a sprinkle of warmth, this bisque is not just a meal but a cherished memory in a bowl. Join us as we explore this delightful recipe, its roots, and how to make it a staple in your kitchen.
---
A Bowl of Comfort: Crafting the Perfect Creamy Shrimp Bisque
When the leaves start to turn and the air takes on that familiar crisp chill, there’s nothing quite like a steaming bowl of soup to bring comfort to the soul. For me, the Creamy Shrimp Bisque is more than just a dish—it’s a cherished family tradition, a memory wrapped in the aroma of sautéed onions and the gentle bubbling of a savory broth.
Ingredients:
- 2 celery stalks, chopped
- 4 green onions, sliced
- 4 tablespoons butter
- 3 cloves garlic, minced
- 1/4 cup flour
- 2 cups half & half
- 3 cups fish stock
- 2 tablespoons fresh parsley, chopped
- 1 pound cooked shrimp, peeled and deveined
- 1 cup diced potatoes
- 1/4 teaspoon cayenne pepper
- 1 teaspoon onion powder
- 1 teaspoon garlic powder
- 1 teaspoon Old Bay seasoning
- Salt & pepper to taste
Instructions:
1. In a medium saucepan, melt the butter over medium heat. Add the celery and green onions, stirring occasionally until tender, about 10 minutes.
2. Add the garlic and sauté for another 3-4 minutes until fragrant.
3. Stir in the flour, cooking for about 5 minutes to eliminate the raw flour taste.
4. Add the diced potatoes and half & half, allowing them to simmer over medium heat for another 5 minutes.
5. Stir in the fish stock, parsley, and all of the seasonings, letting the mixture cook for an additional 10 minutes until thick and bubbly.
6. Add the cooked shrimp, and let simmer for another 10 minutes.
7. Optional: Cook crispy bacon pieces and set aside. Use the bacon drippings to sauté the onion and celery for an added smoky flavor. Once the bisque is ladled into bowls, sprinkle the top with crispy bacon bits.
A Journey Through Time:
Every spoonful of this Creamy Shrimp Bisque transports me back to cozy winter evenings spent in my grandmother’s kitchen. The warmth from her stove enveloped us as she lovingly stirred her pot of bisque, the rich aroma filling the room and our hearts. It was a dish that always brought our family together—each bowl a testament to her culinary skill and the love she poured into every meal.
One particular winter, during a rare snowstorm, our family huddled around the fireplace, bowls of her bisque in hand, sharing stories and laughter. That night, the bisque was more than a meal; it was a reminder of the warmth of family and the simple joys of life. It was on that snowy night that my husband suggested adding crispy bacon, a twist that has since become a family favorite.
Difficulty Rating: 5/10
Classification: Main Dish
This Creamy Shrimp Bisque strikes the perfect balance between simplicity and elegance, making it an inviting main dish for any occasion. Whether you’re a seasoned chef or a home cook looking to impress, this recipe promises not only flavor but the creation of lasting memories around your dining table.
So, as you embark on this culinary journey, remember that each ingredient, each stir of the pot, is an opportunity to create your own cherished family traditions. Let this bisque be the canvas upon which you paint your own stories, one comforting spoonful at a time.