Valentine Hearts | Made by Meaghan Moineau

Valentine Hearts | Made by Meaghan Moineau

Title: Sweet Memories and Heartfelt Treats: Crafting Valentine Hearts
Description: Unleash your culinary creativity this Valentine's Day with our delectable Valentine Hearts recipe. This dessert combines the flakiness of puff pastry, the richness of crème fraiche, and the sweetness of fresh strawberries and chocolate. Easy to make and perfect for creating lasting memories with loved ones.

---


Valentine’s Day has always been a cherished occasion in my family. As a child, I fondly remember the kitchen transforming into a haven of sweet aromas and joyful laughter. My grandmother would lead the charge, her hands deftly working with ingredients that would soon become the most delicious treats. Among her repertoire, the Valentine Hearts stood out, not just for their taste, but for the love they symbolized.


Ingredients for a Touch of Love:

- Puff pastry


- 1 egg (for glazing)


- Castor sugar


- Canned crème fraiche


- Fresh strawberries


- Plain chocolate


Instructions: A Journey to Delight
1. Preheat and Prepare: Begin by preheating your oven to 220 degrees C (425 F). This temperature ensures that your pastry puffs up beautifully, achieving that coveted golden-brown hue.
2. Puff Pastry Perfection: Thaw the pastry sheet as instructed on the package. Unroll it gently and, using a medium-sized heart-shaped cookie cutter, carve out around eight hearts. These little shapes are the canvas for your culinary masterpiece.
3. Glaze and Sugar: Prick each heart lightly with a fork to prevent them from puffing unevenly. Brush the tops with beaten egg, then sprinkle a modest amount of castor sugar. This step infuses a hint of sweetness and a glossy finish.
4. Bake to Golden Glory: Arrange the hearts on a greased baking sheet, giving them space to expand. Bake for about 10 minutes, watching as they rise and turn a warm, golden brown. Once done, let them cool completely.
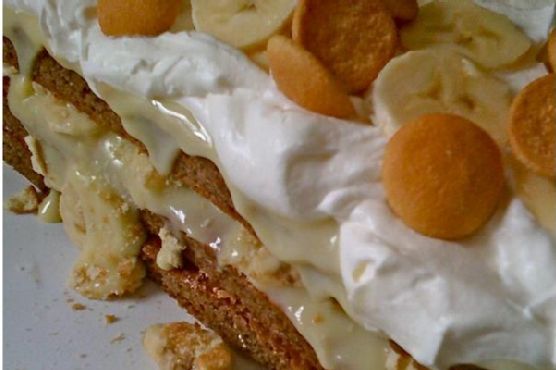
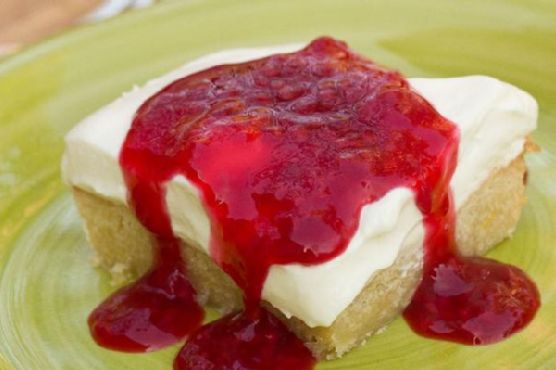
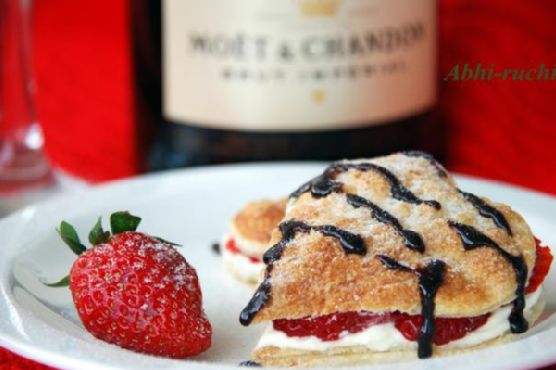
5. Strawberry Splendor: While the pastry cools, slice the fresh strawberries. Using a sharp knife, carefully split each heart horizontally, creating a top and bottom layer.
6. Assemble with Love: Sandwich the hearts with a generous layer of crème fraiche and the sliced strawberries. The combination of creamy and fruity creates a delightful contrast.
7. Chocolate Drizzle and Final Touch: Melt the plain chocolate and drizzle it over the assembled hearts. Finish with a dusting of castor sugar for an elegant touch.
A Family Legacy of Love

Every year, as we prepared these Valentine Hearts, my grandmother would share stories of their origins. She spoke of a time when she and my grandfather first made them together, a symbol of their budding romance. The process of creating these treats became a tradition passed down through generations, each heart a testament to love’s enduring nature.


The sounds of laughter and the sight of flour-dusted hands remain etched in my memory. Sharing these sweet treats with family not only satisfied our taste buds but also nurtured our hearts, bringing us closer with every bite.


Difficulty Rating: 4/10

Creating Valentine Hearts is a simple yet rewarding experience, perfect for novice bakers aiming to impress. The process is straightforward, with each step offering a delightful sense of accomplishment.


Classification: Dessert

This recipe is a quintessential dessert, ideal for concluding a romantic meal or offering as a sweet gesture to those you cherish.


---


As you embark on this culinary journey, remember that Valentine Hearts are more than just a dessert. They are an opportunity to create new memories, to share love, and to indulge in the simple joys of life. Whether you're crafting them for a special someone or enjoying them with family, these hearts are sure to bring warmth and sweetness to your day.

Read more about Appetizers

Read more about Main Dishes

Read more about Desserts

Banana Pudding Cake | Made by Meaghan Moineau

Banana Pudding Cake | Made by Meaghan Moineau

Banana Pudding Cake: A Nostalgic Dessert Delight


Description: Dive into the creamy and rich layers of Banana Pudding Cake, a dessert that perfectly marries the flavors of ripe bananas, velvety custard, and luscious whipped cream. This recipe is a delightful journey that not only satisfies your sweet tooth but also brings back cherished family memories.

---


A Slice of Nostalgia: The Banana Pudding Cake Story


There's something uniquely comforting about desserts that carry a sense of nostalgia. For me, the Banana Pudding Cake isn't just a treat; it's a time machine that takes me back to my grandmother's cozy kitchen. I remember the warm summer afternoons spent there, the windows open, letting in a gentle breeze mixed with the sweet aroma of bananas and vanilla.


Every family gathering was incomplete without this cake. My grandmother had a magical way of making everyone feel welcome, and her Banana Pudding Cake was the star of every reunion. As a child, I would watch her with wide eyes as she carefully layered the cake, custard, and bananas with the precision of an artist. She'd always let me sprinkle the crumbled vanilla wafers—a task I took on with great pride.


One memorable summer, my little brother decided to be my grandmother's "official helper." His enthusiasm was infectious, and he took his role very seriously, even if it meant sneaking a few banana slices into his mouth when he thought no one was looking. We laughed, chatted, and enjoyed the simple joy of creating something delicious together.


The cake wasn't just a dessert; it was a symbol of love, laughter, and family unity. Even now, whenever I make this Banana Pudding Cake, I feel a connection to those joyful days, making it a perfect recipe to share at gatherings or to simply enjoy a taste of the past.


---


Ingredients


- 1 ½ teaspoons baking powder


- 3 ripe bananas, sliced


- 2 tablespoons cocoa powder


- 4 egg yolks


- 6 eggs (4 separated, 2 whole)


- 1 cup all-purpose flour


- 1 cup heavy whipping cream


- 2 cups milk


- 1 ½ cups powdered sugar


- ¼ teaspoon salt


- 1 package vanilla pudding mix


- 1 ½ cups sugar


- 2 teaspoons vanilla extract


- 1 box vanilla wafers, crumbled


- Whipped cream (for topping)


---


Instructions


1. Prepare the Cake Batter

- In a large bowl, beat egg yolks with sugar and set aside.


- In the bowl of an electric mixer, whip egg whites until stiff. Add baking powder, processed wafers, and cocoa to the egg yolk mixture.


- Drop about 1/4 of the egg whites into the larger bowl and fold lightly. Fold in the remaining whites carefully.


- Line a jellyroll sheet pan with parchment paper covering all sides and spray with non-stick floured baking spray. Spread cake batter onto paper, covering the entire pan.


- Bake in a preheated oven at 350°F (175°C) for 15-20 minutes. Let cake cool completely on the sheet (at least 30 minutes to an hour).


2. Make the Custard

- As the cake cools, mix sugar, flour, and salt in the top of a double boiler. Blend in egg yolks and milk.


- Cook, uncovered, over boiling water, stirring constantly for 10 to 12 minutes or until thickened. Remove from heat and stir in vanilla.


3. Assemble the Cake

- Once the cake is cooled, carefully lift the parchment paper, remove from the pan, and place on a flat surface. Cut into three even pieces starting from the short end.


- Place the first layer of cake on a serving platter. Spread half of the custard over the top, then cover with one third of the banana slices. Sprinkle with one third of the crumbled wafers.


- Top with the next piece of cake and repeat, reserving a few bananas and crumbled cookies.


- Spread the final amount of custard onto the top layer of cake, and refrigerate the whole cake for at least 2 hours or until ready to serve.


4. Make the Whipped Cream Topping

- Just before serving, make the whipped cream topping. Combine all ingredients together in a large mixing bowl until cream thickens and becomes stiff.


- Spread whipped cream on the cake and top with remaining banana and wafers.


*Pro Tip:* To keep the bananas fresh and prevent browning, sprinkle them with a bit of lemon juice and store in an airtight container until ready to use.


---


Difficulty: 6/10
Category: Dessert

Whether you're looking to create new memories or relive old ones, this Banana Pudding Cake is sure to become a beloved addition to your dessert repertoire. Enjoy every slice with the warmth of family and the sweetness of nostalgia.

Read more about Appetizers

Read more about Main Dishes

Read more about Desserts

Luscious Lemon Soufflé Pudding | Made by Meaghan Moineau

Luscious Lemon Soufflé Pudding | Made by Meaghan Moineau

Luscious Lemon Soufflé Pudding: A Sweet Trip Down Memory Lane


Description: Dive into the zesty delight of our Luscious Lemon Soufflé Pudding—a dessert that marries the airy lightness of a soufflé with the comforting richness of a pudding. Perfect for any occasion, this recipe is not just a treat for your taste buds but also a delightful journey into cherished family memories.

---


Ingredients


- Unsalted butter, for greasing


- 1 cup sugar (remove 2 tablespoons for later)


- Cream of tartar


- 3 large eggs, separated


- 1/4 cup all-purpose flour


- 1/2 cup fresh lemon juice


- Zest of 1 lemon


- 1/8 teaspoon salt


- 1 teaspoon vanilla extract


- 1 cup low-fat milk


- Powdered sugar, for dusting


Instructions


1. Preheat & Prep: Preheat your oven to 325°F (170°C). Generously butter 6 individual ramekins or Pyrex bowls.
2. Sugar & Eggs: Set aside 2 tablespoons of sugar. Separate the eggs, placing the yolks in a large mixing bowl and the whites in a separate bowl (preferably plastic or metal).
3. Cream the Butter: Cream the butter with the remaining sugar until fluffy. Beat in the yolks one at a time until well blended.
4. Add Flavors: Mix in the vanilla extract and lemon zest. Add the flour and salt, mixing just until combined.
5. Liquid Ingredients: With the mixer on low, gradually add the milk and lemon juice. The mixture will be quite liquid.
6. Whip the Whites: Using clean beaters, beat the egg whites with the cream of tartar until foamy. Gradually add the reserved 2 tablespoons of sugar, continuing to beat until stiff peaks form.
7. Combine: Gently fold the beaten egg whites into the yolk mixture until just incorporated and smooth.
8. Fill & Bake: Ladle the mixture into the prepared ramekins, filling almost to the top. Place the ramekins in a large baking pan, adding hot water to the pan until it reaches halfway up the sides of the ramekins.
9. Bake: Carefully place the baking pan in the oven and bake for 40-45 minutes until the tops are puffed and golden brown.
10. Cool & Serve: Remove from the oven, carefully taking the ramekins out of the water bath. Let them cool slightly before serving. Sprinkle with powdered sugar or add a dollop of whipped cream for an extra touch.

---


Difficulty Rating


Difficulty: 6/10
Classification: Dessert

---


A Nostalgic Tale


As I prepare this delightful Luscious Lemon Soufflé Pudding, I'm transported back to my grandmother's cozy kitchen. Every Sunday afternoon, the citrusy aroma of fresh lemons would fill the air as my grandmother and I embarked on our weekly baking ritual. She would tell stories of her own childhood, weaving tales as vibrant as the lemon zest we grated together.


The soufflé would rise with an almost magical grace, much like the laughter and love that filled the room. Each spoonful was a taste of sunshine, echoing the warmth of those cherished moments. Even now, as I continue this tradition with my own family, I smile at the thought of my grandmother's gentle guidance, a timeless recipe passed down through generations.


---


Creating this Luscious Lemon Soufflé Pudding is more than just making a dessert; it's about reliving memories and crafting new ones. Whether it's a family gathering or a quiet afternoon treat, this soufflé pudding promises an experience as sweet and uplifting as the dessert itself.

Read more about Appetizers

Read more about Main Dishes

Read more about Desserts

Four-Berry Blast Fruit Smoothie | Made by Meaghan Moineau

Four-Berry Blast Fruit Smoothie | Made by Meaghan Moineau

Title: A Sip of Summer: The Four-Berry Blast Fruit Smoothie
Description: Dive into the vibrant world of berries with our delightful Four-Berry Blast Fruit Smoothie, a refreshing treat bursting with flavor and nostalgia. Perfect as a dessert or a revitalizing snack, this smoothie is an easy and delicious way to enjoy the bounty of summer all year round.

---


As the sun dipped below the horizon, casting a golden hue over our backyard, my family would gather on the porch, laughter mingling with the scent of blooming flowers. These were the moments I cherished most—a time when the simple joys of life resonated most deeply. My grandmother, a culinary magician in her own right, always had a way of bringing us together with her culinary creations, and one such masterpiece was her Four-Berry Blast Fruit Smoothie.


This recipe was a family favorite, crafted and perfected over the years. The first time I tasted it, I was a child, eagerly watching as my grandmother's hands moved deftly, tossing frozen blackberries, blueberries, raspberries, and strawberries into the blender. The air was filled with the sweet, tangy aroma of berries—a scent that still transports me back to those cherished evenings.


What made this smoothie truly special was the addition of lemonade concentrate, a secret ingredient that my grandmother insisted was the key to its refreshing zing. As she blended in the whole milk, sugar, and a hint of vanilla extract, I would stand by her side, mesmerized by the whirring sounds of the blender as it transformed the ingredients into a vibrant, purple elixir.


Once the smoothie was ready, my grandmother would pour it into tall glasses, the rich color contrasting beautifully against the glass. We'd each take a sip, smiles spreading across our faces as the flavors burst forth—a harmonious blend of sweet and tart, creamy and smooth. The Four-Berry Blast Fruit Smoothie wasn't just a drink; it was a sip of summer, a reminder of sun-drenched days and warm family gatherings.


Now, as an adult, I've carried on the tradition, whipping up this delightful smoothie whenever I crave a taste of those nostalgic days. It's incredibly easy to make, with a difficulty rating of just 2 out of 10, making it a perfect choice for a quick and satisfying dessert. Each sip is a gateway to fond memories, a testament to the enduring power of food to connect us to our past.


Four-Berry Blast Fruit Smoothie Recipe

*Ingredients:*


- 1 cup frozen blackberries


- 1 cup frozen blueberries


- 1/2 cup lemonade concentrate


- 1 cup frozen unsweetened raspberries


- 1 cup frozen unsweetened strawberries


- 2 tablespoons sugar


- 1 teaspoon vanilla extract


- 1 cup whole milk


*Instructions:*


1. Place the frozen blackberries, blueberries, and lemonade concentrate into a blender. Pulse a few times to combine.


2. Add the frozen raspberries and pulse 2-3 times.


3. Add the frozen strawberries and pulse again.


4. Once all berries are added, blend on high until smooth.


5. Serve immediately and enjoy a taste of summer nostalgia.


Whether you're savoring it on a sunny porch or in the comfort of your home, the Four-Berry Blast Fruit Smoothie is a delicious reminder that the best recipes are those that come with a story—a legacy of love and laughter that transcends time.

Read more about Appetizers

Read more about Main Dishes

Read more about Desserts

Raspberry Cheesecake Bars By Mommie Cooks | Made by Meaghan Moineau

Raspberry Cheesecake Bars By Mommie Cooks | Made by Meaghan Moineau

Title: Savoring Sweet Memories: Raspberry Cheesecake Bars That Transport You Home
Description: Dive into the delightful world of Raspberry Cheesecake Bars by Mommie Cooks. With a perfect blend of creamy cheesecake and tart raspberries atop a buttery shortbread crust, this dessert is a nostalgic journey back to family gatherings filled with laughter and love. Discover the recipe and relive cherished moments in every bite.

---


A Taste of Nostalgia: Raspberry Cheesecake Bars

There's something magical about family recipes. They have the power to transport us back to cherished moments, where the kitchen is filled with laughter, and the air is sweet with the aroma of love and warmth. One such recipe that holds a special place in my heart is the Raspberry Cheesecake Bars by Mommie Cooks. It's a dessert that not only delights the taste buds but also evokes fond memories of family gatherings and shared stories.


The Heartwarming Story Behind the Bars

Growing up, Sundays were reserved for family get-togethers at Grandma's house. The kitchen was a bustling hub of activity, with everyone pitching in to prepare a feast. Among the various dishes that adorned the table, my favorite was always the Raspberry Cheesecake Bars. Grandma would lovingly prepare them, her hands moving with the kind of grace that comes only from years of practice.


I remember sitting on the kitchen counter, eagerly watching as she creamed together butter and sugar, the sweet scent enveloping the room. As she added a hint of almond extract and the vibrant zest of lemon, Grandma would share stories from her childhood, tales of her own mother baking these very bars in a cozy kitchen in the heart of summer.


Crafting the Perfect Raspberry Cheesecake Bars

These bars start with a buttery shortbread crust that is both tender and flavorful. The key ingredients include a combination of butter, brown sugar, and white sugar, creamed together until light and fluffy. A touch of lemon zest and vanilla infuse the dough with a fragrant aroma, while an egg binds it all together.


After a quick chill in the fridge, the dough is pressed into a tart pan and baked until golden brown. The shortbread is then left to cool, creating the perfect foundation for the creamy cheesecake layer.


The cheesecake filling is a luscious blend of cream cheese, sweetened condensed milk, and heavy whipping cream, with a hint of vanilla and almond extract for depth. A swirl of vibrant raspberries, thickened with cornstarch and sweetened with a touch of sugar, adds a burst of tartness that beautifully complements the rich, creamy filling.


Difficulty and Classification

With a difficulty level of 6 out of 10, these Raspberry Cheesecake Bars are an approachable yet impressive dessert. They require some patience and attention to detail, but the end result is well worth the effort. Perfect as a dessert for any occasion, these bars are sure to impress your family and friends.


Conclusion

Every bite of these Raspberry Cheesecake Bars is a sweet reminder of family bonds and cherished moments. Whether you're making them for a special occasion or simply to indulge in a bit of nostalgia, this recipe is sure to become a beloved staple in your home. So gather your ingredients, invite your loved ones into the kitchen, and create new memories with this timeless dessert.

Read more about Appetizers

Read more about Main Dishes

Read more about Desserts

Lemon Curd Cheesecake | Made by Meaghan Moineau

Lemon Curd Cheesecake | Made by Meaghan Moineau

Title: Zesty Delight: A Nostalgic Lemon Curd Cheesecake Recipe
Description: This blog post delves into the delightful world of Lemon Curd Cheesecake, a dessert that captures the essence of summer with its refreshing citrus notes. Alongside a step-by-step guide to creating this creamy masterpiece, enjoy a heartwarming family story that adds a touch of nostalgia to every bite.

---


Lemon Curd Cheesecake: A Zesty Journey Through Family Memories

When life gives you lemons, make a Lemon Curd Cheesecake! This luscious dessert is a delightful blend of creamy textures and vibrant citrus flavors. Perfect for those who crave a refreshing treat, this cheesecake will undoubtedly become a staple in your recipe repertoire. Rated a moderate 6 out of 10 on the difficulty scale, this dessert is an achievable challenge for baking enthusiasts.


Ingredients:


- Crust:

- 1 ½ cups digestive biscuit crumbs


- ½ cup unsalted butter, melted


- Lemon Curd:

- ½ cup lemon juice


- Zest of 2 lemons


- ¾ cup sugar


- ½ cup unsalted butter


- 3 large eggs


- Filling:

- 16 oz cream cheese, softened


- ¾ cup sugar


- Zest of 1 lemon


- ½ cup lemon juice


- 1 cup whipping cream


- 1 tbsp gelatin


- ¼ cup water


- ½ cup reserved lemon curd (for topping)


Instructions:


1. Prepare the Crust:

- Combine the digestive biscuit crumbs with melted butter in a bowl.


- Press the crumb mixture into a loose bottom springform pan.


- Chill in the refrigerator.


2. Make the Lemon Curd:

- Set up a double boiler and combine lemon juice, lemon zest, sugar, butter, and eggs over gently simmering water.


- Cook, stirring continuously, until the mixture thickens and coats the back of a spoon.


- Remove from heat and let it cool completely.


3. Prepare the Filling:

- Bloom the gelatin by sprinkling it over water in a small bowl, allowing it to sit and swell.


- Place the bowl over simmering hot water and stir until gelatin dissolves. Cool before using.


- In a large bowl, beat cream cheese with an electric mixer until smooth.


- Gradually add sugar, then incorporate lemon zest, lemon juice, and lemon curd (reserving ½ cup for topping).


- Whip the whipping cream until thickened and set aside.


- Mix the dissolved gelatin into the cream cheese mixture.


- Gently fold in the whipped cream with a spatula until well combined.


- Pour the mixture into the prepared crust and chill in the refrigerator for at least 3 hours, or until set.


4. Decorate and Serve:

- Decorate the cheesecake by piping whipped cream along its edge.


- Spread the reserved lemon curd over the top.


- To serve, cut the cheesecake with a hot knife for clean slices. Enjoy!


A Slice of Nostalgia:


This Lemon Curd Cheesecake is more than just a dessert; it's a bridge to cherished family memories. Growing up, summers at Grandma's house always meant an abundance of lemon treats, thanks to the bountiful lemon tree in her backyard. Every family gathering ended with a slice of her famous Lemon Curd Cheesecake, a recipe passed down through generations. As kids, we would sit around the table, eagerly waiting for Grandma to cut us a slice while sharing stories of her childhood. The tangy lemon curd, combined with the creamy cheesecake, was a taste of sunshine that never failed to bring smiles to our faces. Recreating this recipe now brings back those warm, sunny afternoons and the joy of being surrounded by family.


Conclusion:


Embrace the tangy delight of Lemon Curd Cheesecake and let its refreshing flavors transport you to sunlit days and fond family memories. Whether you're a seasoned baker or a beginner, this dessert promises to be a rewarding and delectable experience. So, next time you're in the mood for something zesty, give this recipe a try and create your own sweet memories.

Read more about Appetizers

Read more about Main Dishes

Read more about Desserts

Peanut Butter Sriracha Cookies | Made by Meaghan Moineau

Peanut Butter Sriracha Cookies | Made by Meaghan Moineau

Spicy Sweet Nostalgia: Peanut Butter Sriracha Cookies


Description: Dive into a culinary adventure with our Peanut Butter Sriracha Cookies — where the classic comfort of peanut butter meets a fiery twist of sriracha. This unique dessert not only satisfies your sweet tooth but also tickles your taste buds with a subtle heat, making it the perfect conversation starter at any gathering. Rated a 4 out of 10 in difficulty, even novice bakers can tackle this recipe with ease. Join us as we blend flavors and memories, creating a treat that's as heartwarming as it is intriguing.

---


A Sweet and Spicy Family Tradition


Growing up, our family kitchen was always a bustling hub of activity. The scent of freshly baked cookies often filled the air, drawing us in like moths to a flame. My grandmother, the culinary maestro of the family, believed that every recipe told a story — and her Peanut Butter Sriracha Cookies were no exception.


It was the summer of my tenth birthday, and as a tradition, my grandmother let me choose the special treat for our annual family picnic. Having recently discovered the joys of spicy foods, I boldly requested a cookie that matched my newfound adventurous palate. With a twinkle in her eye, Grandma nodded and said, "Let's spice things up a little, shall we?"


The kitchen became our playground. As she expertly creamed together the unsalted butter, crunchy peanut butter, and sugars, I watched in awe, eagerly awaiting my turn to contribute. Slowly, she added the sriracha, its vibrant red swirling into the creamy mixture like a secret waiting to be uncovered. I was entrusted with the task of cracking eggs and measuring out vanilla extract — a responsibility I took very seriously.


In another bowl, we mixed the flour, baking powder, baking soda, and salt, the dry ingredients resembling the sands of a distant desert, waiting to be united with our spicy concoction. I held my breath as we combined the two mixtures, the batter rich with promise.


After an hour of chilling, the dough was ready. I gleefully rolled it into balls, dipping each top in granulated sugar before placing them on the cookie sheet. Grandma guided my hands as we pressed a criss-cross pattern into each one, the fork leaving its indelible mark.


As the cookies baked, the sweet and spicy aroma wafted through the house, drawing curious family members into the kitchen. When they finally emerged from the oven, we placed a Hershey's chocolate kiss atop each one, the final touch of sweetness to balance the heat.


The picnic was a resounding success, and the cookies were the star of the show. Family members marveled at the unexpected yet delightful combination of peanut butter and sriracha, each bite evoking laughter and joy. To this day, whenever I bake these cookies, I'm transported back to that sunlit kitchen, the warmth of my grandmother's love, and the magic of flavors coming together to create something truly special.


The Recipe: Peanut Butter Sriracha Cookies


Ingredients:

- Unsalted butter


- Crunchy peanut butter


- Sugar


- Brown sugar


- Sriracha


- Eggs


- Vanilla extract


- Flour


- Baking powder


- Salt


- Baking soda


- Granulated sugar


- Hershey's chocolate kiss (for topping)


Instructions:

1. Cream together butter, peanut butter, and sugars in a large mixing bowl.


2. Gradually add sriracha, eggs, and vanilla extract. Beat until well combined.


3. In a separate bowl, mix flour, baking powder, baking soda, and salt.


4. Gently combine the dry mixture with the peanut butter mixture until well incorporated.


5. Refrigerate the dough for 1 hour.


6. Preheat your oven to 375°F (190°C).


7. Roll dough into 1-inch balls or use a medium-sized cookie scoop.


8. Dip the top of each dough ball into granulated sugar and place on a cookie sheet.


9. Flatten each ball with a fork, creating a criss-cross pattern.


10. Bake for 8-10 minutes, ensuring not to over-bake.


11. Cool on wire racks and top each with a Hershey's chocolate kiss. Enjoy!


Conclusion


Our Peanut Butter Sriracha Cookies are more than just a treat; they are a testament to the joy of culinary experimentation and the power of family traditions. Whether you're a seasoned baker or a newcomer to the kitchen, this recipe offers a delightful challenge with a rewarding payoff. Happy baking!

Read more about Appetizers

Read more about Main Dishes

Read more about Desserts

Homemade Apple Almond Granola Bars | Made by Meaghan Moineau

Homemade Apple Almond Granola Bars | Made by Meaghan Moineau

Title: Crunchy Nostalgia: Homemade Apple Almond Granola Bars
Description: Dive into the comforting embrace of Homemade Apple Almond Granola Bars, a delightful concoction of wholesome ingredients that bring back the warmth of family gatherings. Easy to make and irresistibly tasty, these bars are perfect for breakfast on-the-go or a guilt-free snack.

---


Homemade Apple Almond Granola Bars: A Family Tradition


Growing up, my family always had a knack for turning simple moments into cherished memories. Among these, Saturday mornings were special. The smell of freshly baked goods wafting through the house was our gentle wake-up call, drawing us out of our slumber and into the kitchen where the magic happened.


One of the most beloved recipes that graced our kitchen was the Homemade Apple Almond Granola Bars. These bars were more than just a treat; they were a symbol of togetherness and the perfect embodiment of autumn afternoons spent with family. The combination of rolled oats, sweet honey, and the crunch of almonds brought a comforting warmth that only a homemade recipe could provide.


Ingredients:


- 2 cups rolled oats


- 1/4 cup ground flax seed


- 1/4 cup oat bran


- 1/4 cup wheat bran


- 1/2 teaspoon salt


- 1 teaspoon baking powder


- 1 teaspoon ground cinnamon


- 1/4 cup sugar substitute


- 1/4 cup unsweetened coconut


- 1/2 cup non-fat milk


- 1/4 cup sweet honey


- 1 egg


- 1 teaspoon vanilla extract


- 1 apple, peeled and diced


- 1/2 cup almonds, chopped


Instructions:


1. Preheat your oven to 350°F (175°C) and spray a 9x13 pan with non-stick cooking spray.
2. Combine in a large bowl the oats, flax seed, oat bran, wheat bran, salt, baking powder, cinnamon, sugar substitute, and coconut. Mix until well combined.
3. Add the milk, honey, egg, and vanilla extract to the dry ingredients. Stir until everything is well incorporated.
4. Fold in the diced apple and chopped almonds, ensuring they are evenly distributed throughout the mixture.
5. Press the mixture firmly into the prepared pan, spreading it out evenly.
6. Bake for 15-20 minutes, or until the edges start to brown lightly.
7. Cool for 10 minutes before cutting into bars. Allow to cool completely before serving or storing.

These granola bars are a perfect example of how food can connect us to our roots and to each other. As we savored these bars, my siblings and I would reminisce about the little things that made our weekend mornings special—like the sound of crunching leaves outside or the laughter that filled the room as we enjoyed our breakfast together.


Difficulty: 3/10 - Easy


Classification: Dessert / Snack


Whether you're yearning for a quick snack or a healthy dessert option, these Homemade Apple Almond Granola Bars are sure to satisfy. They're not just a treat; they're a piece of nostalgia, a way to bring a little bit of my family's warmth into your own home.


So, gather your ingredients and invite your loved ones to the kitchen. Create new memories while indulging in the delightful flavors of this cherished family recipe. Enjoy the simple pleasure of homemade goodness, and perhaps, start a new tradition of your own.

Read more about Appetizers

Read more about Main Dishes

Read more about Desserts

Apple Pie Honey Wheat Scones | Made by Meaghan Moineau

Apple Pie Honey Wheat Scones | Made by Meaghan Moineau

Title: "Warm Memories & Sweet Aromas: Crafting Apple Pie Honey Wheat Scones"


Description:

Dive into the heartwarming world of Apple Pie Honey Wheat Scones, a delightful dessert that combines rustic charm and nostalgic flavors. Explore the easy-to-follow recipe, enriched with a family memory that makes these scones more than just a treat—they're a cherished tradition. Rated for its simplicity and soul, this dish is perfect for any baking enthusiast looking to create something truly special.

---


A Whiff of Nostalgia: Apple Pie Honey Wheat Scones


There's something inherently comforting about the aroma of apple pie mingling with the cozy warmth of freshly baked scones. For me, these Apple Pie Honey Wheat Scones are more than just a dessert; they are a portal back to cherished family gatherings, where love was the main ingredient and laughter was the background music.


The Essence of Home


Growing up, autumn was a magical time in our household. The trees donned their vibrant golden hues, and the air was crisp with the promise of impending festivities. My grandmother, the heart of our family, would gather us in her spacious, sunlit kitchen to create culinary wonders. Among her specialties were these delightful Apple Pie Honey Wheat Scones.


With her apron tied snugly around her, she would expertly blend whole wheat flour and all-purpose flour, setting the stage for what was to come. The warm, spicy aroma of cinnamon and freshly grated ginger would fill the air, a prelude to the sweet symphony of flavors about to unfold.


The Recipe


Here's how you can recreate this beloved family recipe:
Ingredients:

- Whole wheat flour


- All-purpose flour plus 1 rounded tablespoon


- Dark brown sugar


- Cinnamon


- Baking powder


- Salt


- Fresh ginger


- Unsalted butter


- Heavy cream


- Egg


- Honey


- Vanilla extract


- Brandy


- Diced apple


- Turbinado sugar


Instructions:

1. Preheat your oven to 400°F (200°C) and line a baking sheet with parchment paper.


2. In a large mixing bowl, whisk together the first seven ingredients.


3. Add fresh ginger and butter. Work everything together with your fingers until the mixture resembles coarse crumbles. Keep the butter cool and in pieces.


4. Mix in the cream, egg, honey, vanilla, and brandy, kneading until the dough comes together.


5. Incorporate the diced apples, pressing them into the dough until evenly distributed.


6. On a floured surface, flatten the dough into a one-inch-thick disc. Cut into eight equal sections.


7. Place the scones on the baking sheet and sprinkle with turbinado sugar.


8. Bake for 15-18 minutes or until golden brown.


9. Melt butter and drizzle over a warm scone for an extra touch of indulgence.


10. Transfer the remaining scones to a wire rack to cool. Store in a sealed container or freeze for up to 3-4 months.


A Legacy of Love


Every bite of these scones transports us back to those treasured moments in my grandmother's kitchen, where the hustle and bustle of daily life paused, allowing us to savor the simple joys of togetherness. These scones are rated a 4 out of 10 for difficulty, making them accessible even to novice bakers, yet rewarding enough for seasoned pros.


As a dessert, Apple Pie Honey Wheat Scones are a delightful way to end any meal, offering a perfect balance of sweetness and spice. Whether enjoyed with a cup of tea or shared with loved ones around the table, they are more than just a treat—they are a slice of family history, lovingly baked into each scrumptious morsel.


So go ahead, gather your ingredients, and create your own warm memories with this timeless recipe. As my grandmother used to say, "A kitchen full of laughter and love is the recipe for happiness."


---


Nostalgia, warmth, and a touch of sweetness—these scones are sure to become a staple in your own family traditions. Enjoy baking and savor every moment, just as we did in those golden autumn days.

Read more about Appetizers

Read more about Main Dishes

Read more about Desserts

Lemon square bars | Made by Meaghan Moineau

Lemon square bars | Made by Meaghan Moineau

Title: Zesty Lemon Square Bars: A Nostalgic Dessert to Brighten Your Day
Description: Dive into the refreshing world of lemon square bars, a classic dessert that's both delightful and timeless. This blog post will guide you through crafting these tangy treats with ease, while sharing a heartwarming family memory that makes them even more special. Rated a 4 out of 10 for difficulty, these lemon bars are perfect for dessert lovers seeking a simple yet satisfying bake.

---


Zesty Lemon Square Bars: A Nostalgic Dessert to Brighten Your Day

If there's one dessert that has the magical ability to transport me back to my childhood, it's lemon square bars. The tangy zest of lemon combined with a buttery crust and a sweet, chewy topping was a staple in my grandmother's kitchen, and each bite was like a time capsule filled with love and laughter. Today, I'm sharing not just a recipe, but a piece of my family's history that I hope will bring joy to your home as well.


Ingredients You'll Need:

- 2 cups all-purpose flour


- ½ cup confectioners' sugar


- 1 cup unsalted butter, melted


- 1 teaspoon vanilla essence


- 2 cups granulated sugar


- 4 large eggs


- 1 teaspoon baking powder


- ½ cup fresh lemon juice


- 2 tablespoons grated lemon rind


- A pinch of nostalgia (optional, but highly recommended!)


Instructions:
1. Craft the Crust:

Begin by preheating your oven to 170°C (340°F). In a medium-sized bowl, combine 2 cups of flour with the confectioners' sugar. Blend in the melted butter and vanilla essence, stirring until the mixture forms a soft dough. Press this dough evenly into the bottom of a greased 9x13 inch pan. Bake for 15 minutes or until the crust is golden and firm to the touch.


2. Prepare the Filling:

While the crust bakes, whip up the lemony filling. In a large bowl, beat the eggs until they are light and frothy. In a separate bowl, mix together the granulated sugar, baking powder, and ½ cup of flour, ensuring there are no lumps. Gradually stir this sugar mixture into the beaten eggs. Add the lemon juice and lemon rind, mixing until well combined.


3. Assemble and Bake:

Pour the lemon mixture over the pre-baked crust, spreading it evenly. Return the pan to the oven and bake for an additional 30 minutes, or until the lemon topping is set and slightly golden. Allow the bars to cool completely before slicing them into perfectly tangy squares.


A Slice of Family Memory:

Every summer, my family would gather at my grandmother's house for our annual reunion. The highlight was always her legendary lemon square bars, which she would bake in abundance to satisfy our eager appetites. We would sit on her porch, the scent of fresh lemons wafting through the air, as we shared stories and laughter. Those sun-drenched afternoons, filled with the sound of cicadas and the taste of these sweet treats, are memories I cherish deeply. Each bite now reminds me of those precious moments and the warmth of family.


Difficulty Rating: 4/10
Classification: Dessert

These lemon square bars are a testament that sometimes the simplest recipes bring the most joy. With their vibrant citrus flavor and buttery goodness, they are sure to become a beloved addition to your dessert repertoire. Whether you're hosting a family gathering or simply craving a sweet treat, these bars promise a burst of sunshine in every bite. Enjoy baking, and may your kitchen be filled with the same happiness and warmth that my grandmother's once was.

Read more about Appetizers

Read more about Main Dishes

Read more about Desserts

Thick, Fudgy, One Bowl Brownies | Made by Meaghan Moineau

Thick, Fudgy, One Bowl Brownies | Made by Meaghan Moineau

Title: A Journey Back in Time with Thick, Fudgy, One Bowl Brownies
Description: Dive into the comforting embrace of these Thick, Fudgy, One Bowl Brownies, a timeless dessert that promises both simplicity and indulgence. With a rich blend of semi-sweet and unsweetened chocolate, these brownies are as delightful to make as they are to eat. Join me as I share a cherished family memory that makes this recipe truly special.

---


There's something undeniably magical about the aroma of chocolate wafting through the house. It's the kind of scent that transports you back in time, evoking a swirl of cherished memories. For me, that memory is Saturday afternoons in my grandmother's kitchen, where the world seemed to slow down as we baked her famous brownies.


A Sweet Family Tradition

Growing up, weekends were synonymous with family gatherings, and no gathering was complete without Grandma's brownies. Her secret? A recipe that was as straightforward as it was delicious. Thick, fudgy, and requiring just one bowl, these brownies are a testament to the idea that simplicity is often the key to perfection.


As a child, I would perch on a stool, eyes wide with anticipation, watching Grandma melt chocolate in a large, heatproof bowl set over simmering water. The semi-sweet and unsweetened chocolate, combined with unsalted butter, would slowly transform into a smooth, glossy mixture. This was my favorite part—the moment when the kitchen filled with the rich, intoxicating scent of chocolate.


Once cooled, Grandma would let me stir in the cocoa powder, eggs, sugar, vanilla, and salt. Her gentle guidance made the process feel like a grand adventure. The final step was my sacred duty—carefully adding the flour and ensuring it was just combined. Grandma always said that overmixing was the enemy of a perfect brownie.


The Magic of Baking

After spreading the batter into a foil-lined baking pan, we'd slide it into the oven. Those 35 to 40 minutes felt like an eternity to a chocolate-loving child. But the wait was worth it. The brownies emerged slightly puffed, with a toothpick inserted into the center revealing the perfect balance between gooey and set.


Though the recipe suggested cooling them to room temperature, patience was never my strong suit. Five minutes was usually all I could manage before cutting into them. To this day, the first bite of those warm, fudgy brownies takes me back to those precious afternoons.


A Dessert to Cherish

Rated a 3 out of 10 for difficulty, this dessert is not only easy to make but also a delightful way to create lasting memories with loved ones. Whether you're a seasoned baker or a novice, these Thick, Fudgy, One Bowl Brownies are a must-try.


So, gather your ingredients—semi-sweet chocolate, unsweetened chocolate, unsalted butter, cocoa powder, eggs, vanilla extract, table salt, and flour—and embark on a nostalgic baking journey. This simple, yet indulgent treat is perfect for any occasion, but most importantly, it's a reminder that the best recipes are those that bring people together.


Conclusion

In a world that often feels hurried and complex, these brownies offer a moment of pause, a chance to savor the simple joys of life. Whether you're sharing them with family, indulging alone, or gifting them to a friend, these thick, fudgy brownies are sure to warm hearts and create sweet memories.

Read more about Appetizers

Read more about Main Dishes

Read more about Desserts

Lemon square bars | Made by Meaghan Moineau

Lemon square bars | Made by Meaghan Moineau

Title: Nostalgic Lemon Square Bars: A Zesty Slice of Family Memories
Description: Dive into the world of tangy decadence with our Lemon Square Bars recipe. This delightful dessert, rated a 4 out of 10 on the difficulty scale, blends the perfect balance of tart and sweet with a touch of nostalgia that will warm your heart and tantalize your taste buds. Whether you're a seasoned baker or a novice in the kitchen, these bars promise to deliver joy with every bite.

---


As the golden rays of summer began to wane and the crisp embrace of autumn gently took over, my family had a beloved tradition of gathering in the kitchen to bake Lemon Square Bars. The scent of freshly zested lemon rind and the warmth of the oven filled the air, transforming our home into a haven of shared stories and laughter.


Ingredients:

- 2 cups flour


- 1/2 cup confectioners' sugar


- 1 cup unsalted butter, melted


- 1 teaspoon vanilla essence


- 4 eggs


- 2 cups sugar


- 1 teaspoon baking powder


- 1/4 cup flour


- 2/3 cup lemon juice


- Lemon rind from 2 lemons


Instructions:
1. Prepare the Base:

In a medium bowl, stir together 2 cups of flour and 1/2 cup of confectioners' sugar. Blend in the melted butter and vanilla essence. With the palm of your hand, press the soft dough into the bottom of a greased 9x13 inch pan. Bake in a preheated oven at 170°C (338°F) for 15 minutes, or until golden brown.


2. Create the Filling:

While the crust bakes, beat the eggs in a large bowl until light and frothy. In a separate bowl, combine 2 cups of sugar, baking powder, and 1/4 cup of flour to ensure there are no lumps. Gradually stir the sugar mixture into the eggs. Add the lemon juice and freshly grated lemon rind, mixing until well combined.


3. Bake to Perfection:

Pour the lemon mixture over the prepared crust and return to the oven. Bake for an additional 30 minutes or until the bars are set. Allow to cool completely before cutting into squares.


A Slice of Nostalgia:

Every year, as the first leaves began to fall, my grandmother would pull out her treasured, slightly worn recipe card. It was a ritual that marked the transition of seasons—a time when family gathered around the kitchen table, each member assigned a task, from zesting lemons to stirring the batter.


I vividly remember my grandmother's stories, shared as we worked side by side. She spoke of her childhood summers spent in her grandmother's garden, where lemon trees stood tall, their branches heavy with fruit. Those stories, full of warmth and love, were as much an ingredient in our Lemon Square Bars as the lemons themselves.


These bars were more than just a dessert; they were a bridge between generations, a connection to our past, and a sweet promise of future gatherings. Each bite brought with it a flood of cherished memories, a reminder of the enduring power of family traditions.


Conclusion:

These Lemon Square Bars, with their tangy sweetness and buttery crust, are a testament to the joy of baking with loved ones. As you savor each bite, may you find your own slice of nostalgia, a moment of connection, and a delightful escape into the warmth of family memories. Whether you enjoy them as a dessert for a special occasion or a simple treat on a Sunday afternoon, these bars are sure to become a beloved staple in your culinary repertoire.

Read more about Appetizers

Read more about Main Dishes

Read more about Desserts

Ferrero Raffaello Coconut Candy Balls | Made by Meaghan Moineau

Ferrero Raffaello Coconut Candy Balls | Made by Meaghan Moineau

Title: "Sweet Nostalgia: Crafting Ferrero Raffaello Coconut Candy Balls"
Description: Dive into the world of sweet indulgence with our Ferrero Raffaello Coconut Candy Balls. This delightful dessert is a harmony of graham cracker crumbs and hazelnuts, enveloped in a blanket of coconut flakes. Perfect for family gatherings or a solo treat, these candy balls evoke cherished memories while tantalizing your taste buds. Join us as we share a heartfelt family story and guide you through this easy, yet rewarding recipe.

---


A Taste of Home: Ferrero Raffaello Coconut Candy Balls

There's a certain magic that food holds – the ability to transport us back in time, to rekindle memories we hold dear. For me, the creation of Ferrero Raffaello Coconut Candy Balls is a journey back to my grandmother's kitchen, a place where love was the secret ingredient in every recipe.


The Ingredients of Memory
To recreate this nostalgic treat, you'll need:

- 1 cup graham cracker crumbs


- 1 cup unsweetened shredded coconut flakes


- 1/2 cup finely chopped hazelnuts


- 1/2 cup powdered sugar


- 1/4 cup milk


- 1/4 cup melted butter


- Extra shredded coconut flakes for rolling


The simplicity of these ingredients belies the depth of flavor they produce. It's a reminder that sometimes, the most unassuming elements can create the most extraordinary experiences.


Crafting the Delight

In my grandmother's kitchen, the process of making these coconut candy balls was a family affair. We would gather around the large wooden table, the heart of the home, ready to create something special.


1. Combine the Basics: In a large mixing bowl, thoroughly blend the graham cracker crumbs, coconut flakes, chopped hazelnuts, and powdered sugar. The aroma of the hazelnuts would fill the room, creating a warm and inviting atmosphere.
2. Add Liquid Gold: Stir in the milk and melted butter, mixing until everything is well combined. This step always felt like a little piece of alchemy, transforming dry ingredients into a cohesive, tempting dough.
3. Chill and Shape: Cover the bowl and let it chill for an hour. This waiting period was always filled with anticipation, as my siblings and I would sneak peeks into the refrigerator, eager for the next step.
4. Roll and Coat: Once chilled, shape small bits of dough into balls and roll them in the extra coconut flakes. The tactile process of forming each ball was a therapeutic ritual, one that brought laughter and bonding.
5. Refrigerate and Savor: Place the candy balls in the refrigerator for at least two hours before serving. This final step was a test of patience, but it was always worth the wait. The cool, creamy texture paired with the crunch of hazelnuts and the sweetness of coconut was a reward like no other.
A Sweet Conclusion

Rated as a 3 out of 10 in difficulty, this dessert is perfect for beginners and seasoned cooks alike. It's more than just a treat; it's a gateway to cherished memories and an opportunity to create new ones. Whether you're presenting them as a dessert at a family gathering or indulging solo, these Ferrero Raffaello Coconut Candy Balls are a testament to the joys of simple pleasures and shared moments.


So, gather your loved ones, and let the tradition of creating and savoring these delightful coconut candy balls begin anew in your home. I promise, they'll bring as much joy to your heart as they do to your taste buds.

Read more about Appetizers

Read more about Main Dishes

Read more about Desserts

Tru Chocolate Martini | Made by Meaghan Moineau

Tru Chocolate Martini | Made by Meaghan Moineau

Title: Sipping Sweet Memories: The Tru Chocolate Martini
Description: Discover the delightful blend of nostalgia and indulgence with the Tru Chocolate Martini. This elegant dessert cocktail is more than just a drink—it's a gateway to cherished family memories. Join us as we explore a recipe that combines the smooth warmth of vanilla vodka with the rich allure of chocolate, all while sharing a heartfelt story from the past.

---


Sipping Sweet Memories: The Tru Chocolate Martini

When it comes to crafting the perfect cocktail, the Tru Chocolate Martini stands out as a luxurious treat, perfect for dessert lovers. This delightful concoction brings together the creamy richness of vanilla vodka and the bittersweet notes of chocolate, creating a symphony of flavors that dance on the palate. But beyond its exquisite taste, this martini holds a special place in my heart, tied to a cherished family memory that I hold dear.


Ingredients:

- Tru vanilla vodka


- White crème de cocoa


- Ice


- Bittersweet chocolate (for garnish)


- Chocolate kisses (for garnish)


- Martini glasses


Instructions:
1. Prepare the Glasses: Begin by gently melting the bittersweet chocolate in a microwave, using 30-second increments to ensure it doesn’t burn. Pour the melted chocolate onto a flat saucer. Take each chilled martini glass and dip its rim into the chocolate, swirling to coat the lip with a decadent layer of sweetness.
2. Mix the Martini: Fill a metal cocktail shaker with ice and shake for about 10 seconds until the shaker feels icy to the touch. Add the Tru vanilla vodka and white crème de cocoa. Shake again to chill the mixture for 15 seconds.
3. Serve with Style: Strain the very cold liquid into the prepared martini glasses. As the cocktail settles, watch it transform into a clear, elegant drink. For a finishing touch, garnish the rim of the glass with a strip of orange peel or a chocolate kiss.
4. Enjoy: Sip slowly, savoring the flavors and letting each taste transport you to a world of sweet indulgence.
Difficulty Rating: 4/10 - Easy
Classification: Dessert
A Nostalgic Sip of Family History

As I sip on my Tru Chocolate Martini, memories of a particular family gathering flood back to me. It was a chilly winter evening, and my family had gathered around the fireplace for our annual holiday celebration. My grandmother, known for her sweet tooth and love for fine spirits, introduced us to her latest creation—a chocolate martini that promised warmth and indulgence.


I watched with wide-eyed wonder as she expertly dipped the rims of the glasses in melted chocolate, her hands steady and sure. The air was filled with laughter and the aroma of chocolate mingling with the subtle vanilla notes from the vodka. As we clinked our glasses together, I remember feeling an overwhelming sense of belonging and joy.


That evening, as we shared stories and sipped our martinis, I realized that this drink was more than just a cocktail. It was a vessel of connection, bringing us together through shared experiences and cherished traditions. Every time I make a Tru Chocolate Martini, I am reminded of that night and the warmth of family—a reminder that some of the best moments in life are simple, sweet, and shared with those we love.


So, whether you're hosting a gathering or simply indulging in a quiet night at home, let the Tru Chocolate Martini be your companion. Its rich flavors and comforting aroma will surely make any moment feel special, while also inviting you to create your own sweet memories.

Read more about Appetizers

Read more about Main Dishes

Read more about Desserts

Almond Rainbow Cake | Made by Meaghan Moineau

Almond Rainbow Cake | Made by Meaghan Moineau

Title: Almond Rainbow Cake: A Sweet Slice of Nostalgia
Description: Dive into the delightful world of baking with our Almond Rainbow Cake recipe. This visually stunning and delicious dessert is more than just a treat; it's a canvas for cherished family memories. Discover the simple joys of creating a masterpiece that appeals to both the eyes and the palate.

---


Almond Rainbow Cake: A Sweet Slice of Nostalgia


In the world of desserts, few things capture the imagination quite like a beautifully layered cake. The Almond Rainbow Cake is a vibrant testament to the joys of baking, combining the delicate flavor of almond with the visual allure of rainbow hues. This cake isn't just a feast for the eyes and taste buds; it's a portal to cherished family memories that are as sweet as the cake itself.


Ingredients:


- 1 box of white cake mix


- 1 cup of all-purpose flour


- 1 cup of granulated sugar


- ¼ teaspoon of salt


- 1 ⅓ cups of water


- 2 tablespoons of vegetable oil


- 1 teaspoon of real vanilla extract


- 1 teaspoon of almond extract


- 1 cup of sour cream


- 4 large egg whites


Instructions:


1. Prepare the Dry Mix: In a large mixing bowl, combine the white cake mix, flour, granulated sugar, and salt. Stir these dry ingredients together using a wire whisk to ensure even distribution.
2. Blend the Batter: Add water, vegetable oil, vanilla extract, almond extract, sour cream, and egg whites to the dry mixture. Beat the batter for two minutes until smooth and well-combined.
3. Pour and Tap: Grease and flour your chosen cake pans. Pour the batter into the pans, filling each a little over half full. Lightly tap the pans on the counter to release any trapped air bubbles.
4. Bake to Perfection: Preheat your oven to 325°F. Bake the cakes until they are done, testing with a toothpick. The baking time will vary based on the size and depth of your pans, whether you're making cupcakes or a grand 14-inch round cake.

Rating and Classification:


- Difficulty: 5/10
- Classification: Dessert

A Slice of Family History


The Almond Rainbow Cake holds a special place in my heart, closely tied to the vibrant tapestry of my family’s culinary history. Every spring, my grandmother would gather us in her cozy kitchen, the air filled with the sweet aroma of almond and vanilla. As a child, I watched her deftly layer batter in pans of different sizes, her hands moving with the confidence that comes from years of practice.


She would recount stories of her own childhood while teaching us the art of baking. Each layer of the cake represented a family member, a splash of color and flavor that came together to create something beautiful and whole. The rainbow hues weren't just for show; they were a celebration of diversity and unity within our family.


As the cake baked, we would gather around the kitchen table, giggling and sharing stories. The anticipation was almost as delightful as the first bite. When the cake was finally ready, we’d all sit together, savoring each slice as if it were a slice of our shared history.


Conclusion


Baking the Almond Rainbow Cake is more than a culinary endeavor; it's an opportunity to create and relive memories with loved ones. Whether you're an experienced baker or a novice in the kitchen, this cake offers a delightful challenge that's as rewarding to make as it is to eat. Gather your ingredients, preheat your oven, and let the magic of the Almond Rainbow Cake transport you to moments of joy and togetherness.

Read more about Appetizers

Read more about Main Dishes

Read more about Desserts

Fresh Strawberry Yogurt Cake | Made by Meaghan Moineau

Fresh Strawberry Yogurt Cake | Made by Meaghan Moineau

Title: "Sweet Memories: The Timeless Delight of Fresh Strawberry Yogurt Cake"
Description: Dive into the heartwarming flavors of our Fresh Strawberry Yogurt Cake, a dessert that effortlessly marries the sweetness of strawberries with the tangy zest of lemon. This delightful treat not only tantalizes your taste buds but also evokes cherished family memories. With a difficulty rating of 6 out of 10, it's the perfect dessert to impress your loved ones.

---


A Taste of Nostalgia: Fresh Strawberry Yogurt Cake

There's something inherently special about a recipe that transcends generations, weaving itself into the tapestry of family memories. For me, the Fresh Strawberry Yogurt Cake is not just a dessert—it's a portal to cherished times spent in my grandmother's cozy kitchen.


Ingredients:

- 2 cups flour, plus an additional ¼ cup


- 1 teaspoon baking soda


- ½ teaspoon salt


- Zest of 1 lemon


- ¾ cup butter, softened


- 1 ½ cups sugar


- 3 large eggs


- 1 tablespoon lemon juice, plus 2 tablespoons for the glaze


- 1 cup plain vanilla yogurt


- 1 ½ cups diced fresh strawberries


- 1 cup powdered sugar


Instructions:

1. Preheat your oven to 325°F (163°C) and prepare a 10-inch Bundt pan by greasing and flouring it.


2. Sift together 2 cups of flour, baking soda, and salt. Add the lemon zest to this mixture and set aside.


3. In a separate bowl, use an electric mixer to cream together the butter and sugar until the mixture is light and fluffy.


4. Beat in the eggs one at a time, ensuring each is well incorporated before adding the next. Stir in 1 tablespoon of lemon juice.


5. Gradually mix in the flour mixture and the yogurt, alternating between the two until just incorporated.


6. Toss the diced strawberries with the remaining ¼ cup of flour and gently fold them into the batter.


7. Pour the batter into the prepared Bundt pan and bake for 60 minutes, or until a toothpick inserted into the center comes out clean.


8. Allow the cake to cool in the pan for 10 minutes before transferring it to a wire rack to cool completely.


9. Once cooled, whisk together the remaining 2 tablespoons of lemon juice with the powdered sugar, and drizzle this glaze over the top of the cake.


A Journey Back in Time:

As a child, summers meant endless days at my grandparents' farmhouse. Nestled amidst lush strawberry fields, it was a haven of laughter and love. My grandmother, a wizard in the kitchen, would often invite me to help her bake. The Fresh Strawberry Yogurt Cake was her signature dessert, always made with strawberries freshly plucked from the backyard.


I remember the excitement of picking strawberries with my little hands, my grandmother’s gentle guidance ensuring I chose only the ripest ones. The kitchen would soon be filled with the comforting aroma of the cake as it baked, mingling with the sweet, tangy scent of lemon and vanilla.


Once the cake was ready, the whole family would gather around the table. Each slice was a reminder of the love and warmth that my grandmother infused into her cooking. Today, as I prepare this cake for my own family, I am transported back to those idyllic summer days. It’s a recipe I treasure, not only for its deliciousness but for the cherished memories it brings back.


Conclusion:

The Fresh Strawberry Yogurt Cake is more than a delightful dessert; it’s a tribute to family traditions and the joy of shared experiences. With a difficulty rating of 6 out of 10, this dessert is accessible yet impressive, perfect for family gatherings or a sweet treat to end a meal. Whether you're making it for the first time or the hundredth, this cake promises to be a delightful journey through flavors and memories.

Read more about Appetizers

Read more about Main Dishes

Read more about Desserts

Easy Eclairs | Made by Meaghan Moineau

Easy Eclairs | Made by Meaghan Moineau

Sweet Nostalgia: Crafting Easy Eclairs at Home


Introduction


There's something undeniably magical about sinking your teeth into a perfectly crafted éclair. The crisp choux pastry, the decadent pastry cream, and the glossy chocolate ganache create a symphony of flavors and textures that dance on your palate. Today, we're diving into the delightful world of eclairs with a recipe that is not only easy to follow but also rich in nostalgia. Join me as I share my family’s cherished recipe for Easy Eclairs, a dessert that has been a staple in our family gatherings.


A Taste of Memories: The Story Behind the Recipe


Growing up, my grandmother's kitchen was always filled with the inviting aroma of freshly baked goods. Sunday afternoons were reserved for baking, and eclairs were a family favorite. I remember standing on a stool, barely able to reach the counter, watching in awe as my grandmother expertly piped the choux pastry onto the baking tray. Her hands moved with a grace that only years of practice could achieve. The kitchen would fill with laughter and stories, and the sweet anticipation of biting into a freshly made éclair was a feeling I'll never forget. Today, whenever I make these eclairs, I am transported back to those warm afternoons, surrounded by love and the comforting hum of family chatter.


Recipe: Easy Eclairs


Ingredients


Choux Pastry:

- 1 cup water

- 1/2 cup full cream milk


- 1/2 cup butter


- 1 tablespoon sugar


- 1/4 teaspoon salt


- 1 cup plain flour


- 4 eggs


Pastry Cream:

- 2 cups milk

- 1/2 cup sugar


- 4 egg yolks


- 1/4 cup cornstarch


- 1/2 cup cream


Chocolate Ganache:

- 1 cup cream

- 200g dark chocolate, chopped


Instructions


Choux Pastry:

1. Preheat your oven to 180°C (356°F). Line a baking tray with parchment paper or a baking mat.

2. In a saucepan, combine water, milk, butter, sugar, and salt. Bring to a boil over medium heat.


3. Stir in flour quickly and continue to cook over low heat, stirring constantly, until the mixture pulls away from the sides of the pan and forms a ball.


4. Transfer the dough to a mixing bowl. Beat on low speed with an electric mixer for about 3 minutes to cool slightly.


5. Add eggs one at a time, beating well after each addition.


6. Cover the bowl with plastic wrap and chill in the fridge for at least 30 minutes (up to 24 hours if needed).


7. Fill the chilled dough into a piping bag. Pipe into small logs about 5 cm in length on the baking tray.


8. Bake for 20-25 minutes until golden brown. Pierce a small hole to allow steam to escape and prevent sogginess. Optionally, return to the oven for another 2 minutes to dry.


9. Allow to cool on a rack.


Pastry Cream:

1. Place all ingredients in a saucepan and whisk until combined.

2. Heat over medium heat, stirring continuously, until the mixture thickens into a paste.


3. Remove from heat and transfer to a bowl. Cover with plastic wrap and chill until fully set.


4. Once chilled, fill a piping bag with the pastry cream and fill the cooled eclairs.


Chocolate Ganache:

1. Heat cream in a saucepan until just about boiling.

2. Remove from heat and stir in chopped dark chocolate until melted and smooth.


3. Allow to cool and thicken. Dip or drizzle over filled eclairs.


Difficulty Rating: 5/10


Classification: Dessert


Conclusion


Crafting these easy eclairs is not just about the end product; it’s about the journey through memories and the joy of creating something delicious from scratch. Whether you're an experienced baker or a novice, this recipe is a delightful way to bring a touch of elegance to your dessert table. So why not gather your loved ones, share stories, and create your own sweet memories over a batch of homemade eclairs? Happy baking!

Read more about Appetizers

Read more about Main Dishes

Read more about Desserts

Banana & Oreo Muffin | Made by Meaghan Moineau

Banana & Oreo Muffin | Made by Meaghan Moineau

Title: Nostalgia Baked Fresh: Banana & Oreo Muffins
Description: Dive into the delightful fusion of flavors with our Banana & Oreo Muffin recipe! This scrumptious dessert combines the moist sweetness of bananas with the beloved crunch of Oreo cookies, creating a treat that’s sure to bring back fond memories. Perfect as a comforting dessert, this easy-to-follow recipe will transport you back to cozy family gatherings, all while tantalizing your taste buds. Discover the joy of baking and sharing a piece of nostalgia with your loved ones.

---


Banana & Oreo Muffin Recipe


Difficulty: 3/10
Category: Dessert

Ingredients:

- 1/2 cup butter, softened

- 3/4 cup sugar


- 1 1/2 cups all-purpose flour


- 1 tsp baking powder


- 1/2 tsp baking soda


- 1 large egg


- 1/2 cup condensed milk


- 2 ripe bananas, mashed


- 1 tsp vanilla essence


- 1/2 tsp banana essence


- 10 Oreo cookies


Instructions:

1. Prepare the Dry Ingredients:

Sift the flour, baking powder, and baking soda together in a medium-sized bowl and set aside.


2. Crush the Oreos:

Remove the cream from the Oreo cookies. Place the cookies in a ziplock bag and crush them into fine crumbs using a rolling pin.


3. Cream the Butter and Sugar:

In a large mixing bowl, use an electric beater to cream the butter and sugar until the mixture is light and fluffy. This should take about 3 minutes on medium speed.


4. Add Wet Ingredients:

Beat in the egg, ensuring the mixture is well combined with no egg traces. Add the mashed bananas, vanilla essence, and condensed milk. Give it a quick whisk to blend it all together.


5. Combine with Dry Ingredients:

Lower the mixer speed and gradually add the flour mixture to the wet ingredients. Blend until the batter is smooth.


6. Incorporate Oreo Crumbs:

Gently fold the crushed Oreo crumbs into the batter until well combined.


7. Prepare for Baking:

Scoop the batter into prepared muffin cups, filling each about 3/4 full. Top with extra banana slices and Oreo cookie pieces for added flair.


8. Bake:

Preheat the oven to 180°C (350°F). Bake the muffins for 20-25 minutes or until a toothpick inserted into the center comes out clean.


---


A Whiff of Nostalgia


Growing up, Sunday afternoons were always a time for family gatherings at Grandma's house. The aroma of freshly baked goods would greet us as we walked through the door, an invisible hug that promised warmth and love. Among the spread of treats, her Banana & Oreo Muffins stood out, not just for their heavenly taste but for the laughter and stories shared around the kitchen table as we savored each bite.


I remember the first time I helped her bake these muffins. My small hands were clumsy, scattering flour and sugar across the countertop, but Grandma's patient guidance turned it into an adventure rather than a chore. As we crushed the Oreos, she would tell tales of her own childhood, painting vivid pictures of a time long past. Those afternoons taught me the power of food to bring people together, to forge connections across generations.


Today, as I bake these muffins in my own kitchen, the memories come flooding back. Each step of the recipe is a breadcrumb trail leading back to those cherished moments. Every bite is a reminder of the joy and love that flavored my childhood, and I hope it can bring a taste of that nostalgia to your home too.


---


Whether you're a seasoned baker or a beginner, this Banana & Oreo Muffin recipe is a delightful way to create new memories while honoring the old. Enjoy the process and the delicious results!

Read more about Appetizers

Read more about Main Dishes

Read more about Desserts

Easy Homemade Oreo Cookies | Made by Meaghan Moineau

Easy Homemade Oreo Cookies | Made by Meaghan Moineau

Title: Nostalgic Delights: Easy Homemade Oreo Cookies to Sweeten Your Day
Description: Dive into the delightful world of homemade treats with our Easy Homemade Oreo Cookies recipe. This simple yet rewarding dessert will not only satisfy your sweet tooth but also transport you back to fond family memories. Discover how a few ingredients can come together to create magic in your kitchen, and relive the joy of baking with loved ones.

---


There's something undeniably heartwarming about biting into a freshly baked cookie. The soft crunch, the creamy filling, and the burst of sweetness all come together to create a moment of pure joy. Our Easy Homemade Oreo Cookies recipe is a testament to this simple pleasure, and it comes with a sprinkle of nostalgia.


Ingredients:

- 8 oz cream cheese


- 2 eggs


- 1 box of chocolate cake mix


- 1 cup icing sugar


- ½ cup margarine


- 2 tablespoons milk


- ¼ cup oil


- 1 teaspoon vanilla extract


Instructions:

1. Preheat your oven to 325°F (163°C).


2. In a gigantic bowl, combine the cream cheese, eggs, chocolate cake mix, margarine, milk, oil, and vanilla extract. Mix thoroughly. If the bowl seems too crowded, consider mixing in parts to ensure everything is well-blended.


3. Roll the dough into small balls. Remember, the smaller the balls, the more cookies you'll have to enjoy!


4. Place the dough balls on a baking sheet and bake for 8 to 10 minutes. Once done, gently flatten them with a spatula.


5. Transfer the cookies to wire racks and let them cool completely.


6. For the filling, beat the icing sugar with a bit of cream cheese until smooth. Feel free to get creative with flavors and colors—try mint extract with light green food coloring for a refreshing twist.


7. Once cooled, spread the icing between two cookies to form delightful sandwiches.


8. Store your homemade Oreo cookies in the refrigerator or freezer to keep them fresh.


A Sweet Family Memory:

I remember the first time I made these cookies with my grandmother during one rainy afternoon. The house was filled with the comforting aroma of chocolate, and the sound of rain tapping against the windows created a cozy ambiance. We laughed as flour dusted our noses and chocolate smeared our aprons. My grandmother, with her gentle hands, showed me how to roll the dough just right.


After baking, we sat at the kitchen table, assembling the cookies with our chosen mint filling, each bite taking us to a world of sweet nostalgia. It wasn’t just about the cookies; it was about the time spent together, the stories shared, and the love poured into every step. These homemade Oreo cookies became a family favorite, a treat that brought us together time and time again.


Difficulty Rating: 3/10
Classification: Dessert

Whether you’re recreating a cherished family memory or starting a new tradition, these Easy Homemade Oreo Cookies are sure to bring smiles to your table. Enjoy every bite, and remember—the best ingredients are always love and laughter.

Read more about Appetizers

Read more about Main Dishes

Read more about Desserts

Coffee Cream Martinis | Made by Meaghan Moineau

Coffee Cream Martinis | Made by Meaghan Moineau

Sip into Nostalgia: The Irresistible Coffee Cream Martinis


Description

Indulge in the luxurious blend of rich coffee and creamy liqueurs with our Coffee Cream Martinis. This decadent dessert cocktail, dusted with a coffee-sugar rim and drizzled with chocolate, is perfect for savoring cherished memories. Whether you're hosting a dinner party or simply unwinding after a long day, this recipe will transport you to a moment of warmth and nostalgia. Easy to make and even easier to enjoy, these martinis promise to be a delightful end to any evening.

---


A Sip of Memory: The Family Tradition of Coffee Cream Martinis


Coffee Cream Martinis have always been more than just a delicious drink for my family—they're a cherished tradition passed down through generations. I remember my grandmother pulling out her vintage martini glasses every holiday season, the anticipation of her signature cocktail bringing our family together in a way that nothing else could.


As a child, I'd watch in awe as she expertly mixed the ingredients, her hands moving with practiced grace. The kitchen would fill with the rich aroma of coffee and the sweet scent of chocolate, a sensory delight that signaled the festivities had truly begun. Her laughter would echo through the room as she rimmed each glass with a mixture of sugar and coffee grounds, ensuring every sip was perfect.


While the adults enjoyed their Coffee Cream Martinis, I would sit at the kitchen table, sipping on my own "mocktail" version, feeling like a part of the grown-up world. Those moments were filled with stories of past holiday gatherings, laughter, and love, creating a tapestry of memories that I treasure to this day.


Now, as I prepare these martinis for my own family, I feel a connection to my grandmother and the traditions she instilled. The simple act of mixing vodka, Baileys, and Kahlua together, and watching the chocolate syrup cascade down the inside of the glass, brings a piece of the past into the present. It's a reminder that, while life may change, the comfort of family and the joy of shared moments remain constant.


---


Recipe: Coffee Cream Martinis


Ingredients:

- Granulated sugar

- Ground coffee


- Vodka


- Baileys Irish Cream


- Kahlua


- Chocolate syrup


- Ice cubes


Instructions:

1. Prepare the Rim: In a small bowl, combine the granulated sugar and ground coffee, mixing well. Spoon a layer of the mixture onto a plate. Moisten the rim of a martini glass with water, then hold it upside down and press into the sugar-coffee mixture to create a nice rim. Set aside.
2. Mix the Martini: Fill a martini shaker three-fourths full with ice cubes. Add vodka, Baileys, and Kahlua. Shake vigorously until condensation forms on the outside of the shaker.
3. Serve: Drizzle chocolate syrup on the inside of the prepared martini glass. Strain the martini mixture into the glass and serve immediately.

---


Difficulty: 3/10


Classification: Dessert


Indulge in a sip of nostalgia and create cherished memories with every glass of Coffee Cream Martinis. Whether you're revisiting old family traditions or starting new ones, this delightful cocktail is sure to become a beloved staple in your home. Cheers to the joy of family and the timeless pleasure of a well-crafted martini!

Read more about Appetizers

Read more about Main Dishes

Read more about Desserts