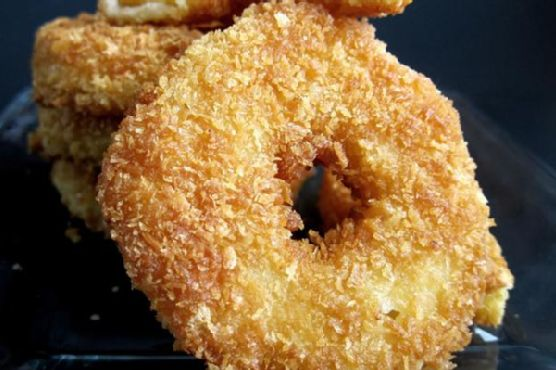
Cinnamon Sugar Fried Apples
Intro
There’s something about the aroma of cinnamon and apples wafting through the kitchen that just feels like home. Growing up, my grandmother would often make a batch of her famous cinnamon sugar fried apples on chilly autumn afternoons. She’d tell me stories of how her mother taught her the recipe, and we’d share laughter and warmth over this simple yet delightful treat. Today, I’m excited to share this beloved recipe with you, allowing you to create your own sweet memories.
Why You’ll Love It
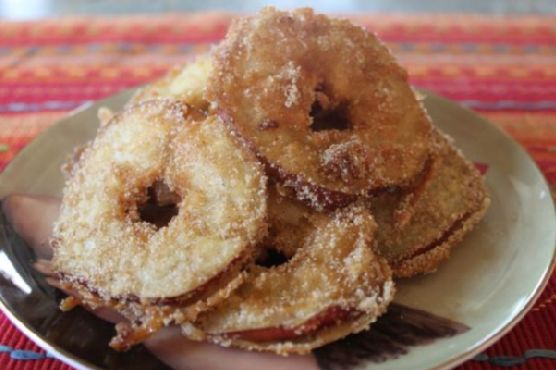
These cinnamon sugar fried apples are a delightful treat that combines the tartness of fresh apples with the warm, sweet flavors of cinnamon and sugar. The crispy batter encasing the tender apple slices provides a perfect texture contrast, making each bite a delicious experience. Whether you serve them as a dessert, a snack, or a unique side dish, these fried apples are sure to become a family favorite.
Ingredients
- 1 cup all-purpose flour
- 3-4 fresh apples, cored and sliced 1 cm thick
- 1/2 cup brown sugar
- 1 tablespoon ground cinnamon
- 2 large eggs, lightly beaten
- 1/4 cup granulated sugar
- Zest of 1 lemon
- 1 cup milk
- Vegetable oil, for frying
- 1/4 teaspoon salt
- 2 tablespoons unsalted butter, melted
Instructions
- In a mixing bowl, combine all-purpose flour, salt, and granulated sugar. Slowly whisk in the milk, followed by the lightly beaten eggs, lemon zest, and melted unsalted butter. Mix until the batter is smooth and lump-free.
- Cover the bowl with plastic wrap and let the batter rest at room temperature for 30 minutes. This step allows the flour to fully hydrate and results in a better texture.
- Meanwhile, prepare your apples by coring and slicing them into 1 cm thick rings. Set them aside.
- Heat the vegetable oil in a deep skillet or frying pan over medium heat until it reaches 350°F (175°C).
- Once the batter has rested, dip each apple slice into the batter, ensuring it is fully coated.
- Carefully place the battered apple slices into the hot oil. Fry them in batches, making sure not to overcrowd the pan.
- Fry each side until golden brown, about 2-3 minutes per side. Use a slotted spoon to remove the apples from the oil and drain them well on a plate lined with double paper towels.
- In a small bowl, mix together the brown sugar and ground cinnamon. Sprinkle this mixture over the hot fried apple slices.
- Serve the cinnamon sugar fried apples immediately for the best taste and texture.
Tips
To ensure the best results, make sure your oil is at the right temperature before frying. If the oil is too hot, the batter will burn before the apple is cooked through. If it’s too cool, the apples will absorb too much oil and become soggy. Use a thermometer for accuracy. Additionally, using a tart apple variety like Granny Smith will provide a nice balance with the sweetness of the cinnamon sugar coating.
Variations & Substitutions
If you’d like to change things up, consider adding a pinch of nutmeg or ginger to the cinnamon sugar mixture for a spicier kick. For a different flavor profile, try using apple cider in place of milk in the batter. If you’re looking for a gluten-free option, substitute the all-purpose flour with a gluten-free flour blend.
Storage
While these fried apples are best enjoyed fresh, you can store any leftovers in an airtight container in the refrigerator for up to two days. To reheat, place them on a baking sheet and warm them in a preheated oven at 350°F (175°C) for about 5-7 minutes. This will help them regain some of their original crispiness.
FAQ
Can I use other fruits instead of apples?
Yes, you can experiment with other fruits like pears or peaches. Make sure the fruit is firm enough to hold its shape during frying.
What is the best type of apple for this recipe?
Granny Smith apples are a great choice because of their tart flavor and firm texture, which holds up well during frying. However, feel free to use your favorite apple variety.
Can I make the batter in advance?
Yes, you can prepare the batter a day in advance. Store it covered in the refrigerator and give it a good stir before using.
Nutrition
While I don’t have exact nutritional information, it’s important to note that these fried apples are a treat and should be enjoyed in moderation. They are rich in sugars and fats, but also offer the benefits of fiber and vitamins from the apples. Pair them with a balanced diet for a delightful indulgence.
Conclusion
Cinnamon sugar fried apples are more than just a dessert; they’re a connection to fond memories and a way to create new ones with family and friends. Whether you’re serving them at a gathering or enjoying them on a cozy night in, these apples are sure to bring warmth and joy. I hope this recipe finds a special place in your heart and kitchen, just as it has in mine.
Related update: Cinnamon Sugar Fried Apples