Oxtail Ragout | Made by Meaghan Moineau

Oxtail Ragout: A Comforting Classic

Intro

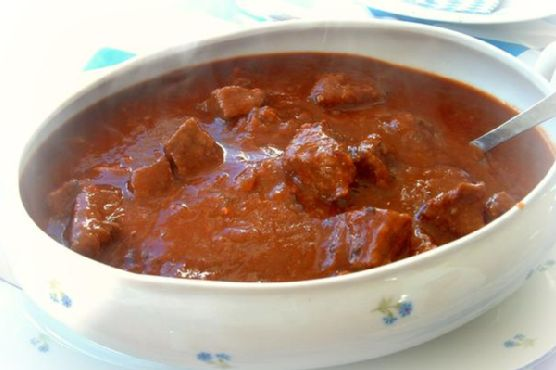
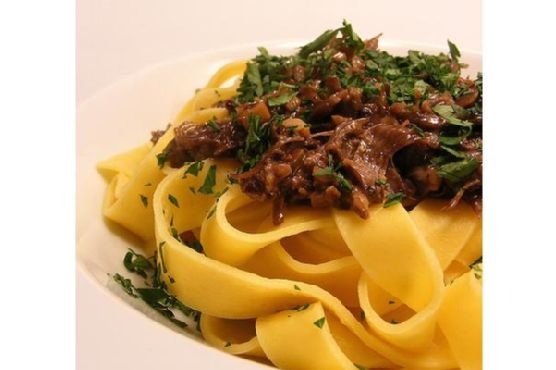
There’s something deeply nostalgic about a simmering pot of Oxtail Ragout, its rich aroma filling the kitchen and warming the soul. Growing up, Sundays were not complete without gathering around the table with family to enjoy a hearty meal. My grandmother, with her well-worn apron and gentle smile, would lovingly prepare this dish, sharing stories of her own childhood. Today, I’m excited to pass on this cherished recipe, inviting you to create your own memories with this delightful and comforting dish.

Why You’ll Love It

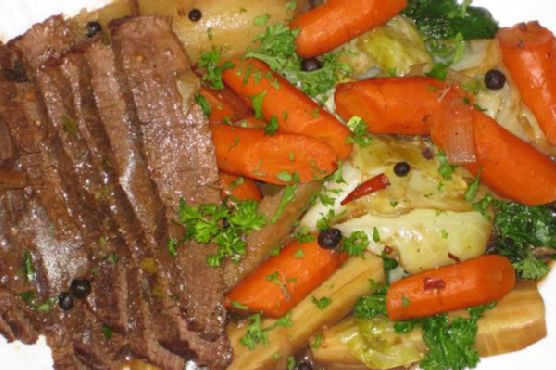
This Oxtail Ragout is the epitome of comfort food. Its succulent, tender meat falls off the bone, while the rich, flavorful broth is perfect for dipping crusty bread. Ideal for a cozy family dinner or a special occasion, this dish is both satisfying and impressive. Whether you’re a seasoned cook or a beginner, you’ll appreciate the simple, rustic preparation and the depth of flavor achieved with humble ingredients.

Ingredients

  • 1 teaspoon whole allspice
  • 1 whole bay leaf
  • 1/4 cup flour
  • 2 cloves garlic, minced
  • 1 tablespoon lemon juice
  • 1 large onion, chopped
  • 2 pounds oxtails
  • 1 teaspoon paprika
  • 1 bell pepper, chopped
  • 1 teaspoon salt
  • 2 cups tomato juice
  • 1 cup water

Instructions

  1. In a small bowl, combine 1 teaspoon of salt, pepper, paprika, and flour.
  2. Roll the oxtails in the seasoned flour mixture until well coated.
  3. In a large pot, heat some fat (such as vegetable oil or lard) over medium-high heat.
  4. Brown the oxtails thoroughly in the hot fat, ensuring all sides are seared.
  5. Add the remaining ingredients except for the lemon juice to the pot: whole allspice, bay leaf, minced garlic, chopped onion, chopped bell pepper, tomato juice, and water.
  6. Cover the pot and reduce the heat to a simmer. Let it cook for 3 hours, stirring occasionally.
  7. After 3 hours, remove the whole allspice and bay leaf from the pot.
  8. Stir in the lemon juice just before serving.
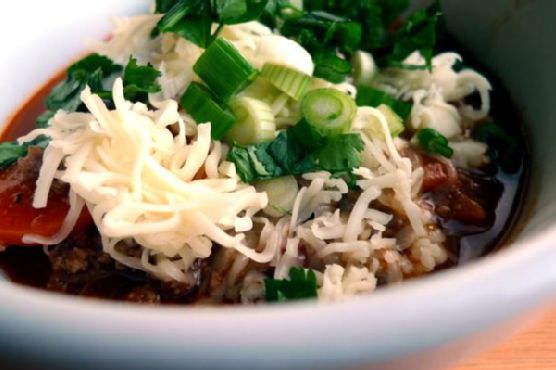
  9. Serve hot, and enjoy with family and friends.

Tips

To elevate your Oxtail Ragout, consider these additional tips:

  • Ensure the oxtails are well browned to develop a deep, rich flavor.
  • Use a heavy-bottomed pot for even heat distribution and to prevent burning.
  • Let the ragout rest for a few minutes after cooking to allow the flavors to meld.

Variations & Substitutions

Feel free to customize your Oxtail Ragout to suit your taste or dietary preferences:

  • Vegetables: Add diced carrots or celery for additional flavor and nutrition.
  • Spices: Experiment with other spices like thyme or rosemary for a different aromatic profile.
  • Protein: If oxtails are unavailable, beef shanks can be used as a substitute.

Storage

Store any leftover ragout in an airtight container in the refrigerator for up to three days. For longer storage, freeze portions in freezer-safe containers for up to three months. Reheat gently on the stove or in the microwave before serving.

FAQ

Can I make Oxtail Ragout in advance?

Yes, Oxtail Ragout is an excellent dish to prepare in advance. In fact, it often tastes better the next day as the flavors have had more time to develop. Simply store it in the refrigerator and reheat before serving.

What should I serve with Oxtail Ragout?

This dish pairs wonderfully with crusty bread, mashed potatoes, or a simple green salad. The hearty flavors also complement a glass of robust red wine.

Nutrition

Oxtail Ragout is a protein-rich dish with a hearty amount of iron and zinc, essential for a balanced diet. While it is not a low-calorie option, its nutritional benefits and comfort factor make it a worthwhile indulgence.

Conclusion

Creating a pot of Oxtail Ragout is more than just preparing a meal; it’s about sharing love and tradition. As you savor each bite, remember the warmth of family gatherings and the joy of creating new memories. I hope this recipe brings as much comfort and happiness to your table as it has to mine. Enjoy the rustic charm of this timeless classic and the smiles it will undoubtedly bring to those you share it with.

Related update: Oxtail Ragout

Related update: French Toast Croissants with Strawberries

German Goulash | Made by Meaghan Moineau

Authentic German Goulash: A Hearty, Comforting Stew

Intro

Growing up, Sundays were always special in our household. The aroma of simmering stews would fill our home, and my grandmother would be at the helm, orchestrating the kitchen like a seasoned maestro. One of her time-honored creations was her German Goulash, a dish that brought the family together and warmed our hearts as much as it did our bellies. I can still remember the sound of her cherished wooden spoon clinking against her favorite Dutch oven and the comforting taste of tender meat complimented with rich, savory spices.

Today, I am thrilled to share this cherished recipe with you, so you can recreate those cozy Sunday afternoons with your loved ones. This German Goulash is not only delicious but also a wonderful way to bring warmth and nostalgia to your meal times.

Why You’ll Love It

This German Goulash is a hearty, soul-warming dish that is perfect for any occasion. Whether you’re looking to impress dinner guests or simply want a comforting meal on a cold evening, this recipe is sure to please. The combination of tender beef and rich, flavorful sauce creates a symphony of taste that is both satisfying and delightful. Plus, it’s easy to make with just a few simple ingredients and can be adapted for slow cooking, making it perfect for busy schedules.

Ingredients

  • 2 pounds top round beef roast, cut into 1-inch cubes
  • 1 large onion, chopped
  • 2 tablespoons oil
  • 2 cups water
  • 1 cup tomato sauce
  • 2 beef bouillon cubes
  • 2 tablespoons paprika
  • 1 teaspoon ground pepper
  • 2 tablespoons flour

Instructions

  1. Preheat your Dutch oven over medium heat and add the oil.
  2. Brown the beef cubes and chopped onion in the oil until the meat is seared on all sides, about 5-7 minutes.
  3. Add the water, tomato sauce, beef bouillon cubes, paprika, ground pepper, and flour to the pot.
  4. Stir well to combine all ingredients.
  5. Reduce the heat to low and cover the pot. Let it simmer slowly for about 2 hours, or until the meat is tender and the flavors are well blended.
  6. Stir occasionally to prevent sticking, and add a little more water if the sauce becomes too thick.
  7. Once done, serve the goulash hot over cooked egg noodles.

This dish also cooks up very well in a crock pot. Simply brown the meat and onions first, then transfer all ingredients to the crock pot and cook on low for 6-8 hours.

Tips

For the best results, make sure to sear the meat thoroughly to lock in flavor. Using a well-seasoned cast iron Dutch oven can enhance the depth of flavor as well. If you prefer a thicker sauce, you can adjust the amount of flour to your liking or continue to simmer until you reach the desired consistency. Remember to taste and adjust the seasoning before serving!

Variations & Substitutions

Feel free to add your own twist to this classic goulash. For a spicier kick, consider adding a pinch of cayenne pepper or red pepper flakes. You can also incorporate vegetables like bell peppers or carrots for added nutrition and flavor. If you’re looking for a gluten-free option, use cornstarch in place of flour to thicken the sauce.

Storage

German Goulash can be stored in an airtight container in the refrigerator for up to 3 days. It’s a great dish for meal prep as the flavors continue to develop over time. To reheat, simply warm on the stove over low heat, adding a splash of water if needed to loosen the sauce.

FAQ

Can I make this goulash ahead of time?

Absolutely! In fact, goulash often tastes even better the next day as the flavors continue to meld. Prepare it a day ahead, then reheat gently on the stove before serving.

What cut of beef is best for goulash?

Top round beef roast is ideal for this recipe as it becomes tender and flavorful when slow-cooked. However, you can also use chuck roast or beef stew meat if preferred.

Can I freeze leftover goulash?

Yes, you can freeze goulash in a freezer-safe container for up to 3 months. Thaw in the refrigerator overnight and reheat on the stove, adding a bit of water as needed.

Nutrition

This recipe serves approximately 6 people and is a rich source of protein. While exact nutritional values can vary based on specific ingredients used, a typical serving provides a balanced amount of protein, fats, and carbohydrates, making it a wholesome choice for a family meal.

Conclusion

German Goulash is more than just a meal; it’s a comforting embrace of tradition and flavor passed down through generations. Whether you’re savoring it alone or sharing it with family, this dish is sure to warm your heart and home. I hope this recipe becomes a beloved staple in your culinary repertoire, just as it has in mine. Enjoy the rich history and taste of this classic stew, and don’t forget to savor the moments shared with those you love most.

Related update: German Goulash

Related update: Cheesy Bacon Burger with Spicy Chipotle Aiolo Sauce

Chicken Stew For The Soul | Made by Meaghan Moineau

Chicken Stew For The Soul

Intro

There’s something magical about a simmering pot of chicken stew, its enticing aroma wafting through the kitchen, enveloping you in warmth and comfort. This Chicken Stew For The Soul is a recipe that has been passed down through generations in my family. I remember spending weekends at my grandmother’s house, eagerly helping her gather ingredients from her lush garden. The anticipation of tasting the rich, flavorful stew made the wait worthwhile. This recipe is not just a dish; it’s a culinary hug, a reminder of love and family gatherings.

Why You’ll Love It

This Chicken Stew for the Soul is everything you want in a comforting meal. It’s aromatic, thanks to a blend of spices like cardamoms and cinnamon, and creamy with the addition of coconut milk. The stew is perfect for gatherings, offering a hearty meal that warms both the heart and the stomach. It’s easy to make, yet feels like a special treat every time. Whether you’re cooking for yourself or for loved ones, this stew is sure to bring smiles all around.

Ingredients

  • Cardamoms
  • Chicken
  • Cinnamon stick, broken
  • Coconut milk
  • Curry leaves
  • Fresh coriander
  • Garam masala
  • Ginger garlic paste
  • Green chillies
  • Red ground chilli
  • Ground coriander
  • Ground turmeric
  • Lemon (juice)
  • Onion
  • Potatoes
  • Salt

Instructions

  1. Slice the onions, slit the chillies, cube the potatoes, and keep aside.
  2. Heat oil in a heavy-bottomed pan or pressure cooker, splutter mustard seeds.
  3. Add the whole spices and stir till you begin to get the aroma of the spices.
  4. Add sliced onions, curry leaves, and green chillies and sauté.
  5. Stir in the ground coriander and add the marinated chicken. Stir so that the chicken is covered well in the sautéed mixture.
  6. Cover and let it cook. When it is half done, add the cubed potatoes.
  7. When the chicken is almost done, add the garam masala, salt, and coconut milk and stir.
  8. When done, turn off the heat and garnish with chopped fresh coriander.
  9. Remember, the most important ingredient is love. Stir it with lots of love for the family and friends who will partake of the meal.
  10. Serve hot chicken stew with freshly made appams.

Tips

– For the best flavors, marinate the chicken with ginger-garlic paste, salt, and a squeeze of lemon juice for at least 30 minutes before cooking.
– If using a pressure cooker, be cautious with the cooking time to avoid overcooking the chicken and potatoes.
– Adjust the spice level according to your taste by varying the amount of green chillies and red ground chilli.

Variations & Substitutions

You can swap chicken with lamb for a richer taste, though it will require a longer cooking time. For a vegetarian version, use a mix of hearty vegetables like carrots and beans, or add chickpeas for protein. If coconut milk is unavailable, you can substitute it with heavy cream, though it will alter the flavor slightly.

Storage

Leftover chicken stew can be stored in an airtight container in the refrigerator for up to 3 days. To reheat, gently simmer the stew on the stove to ensure even heating without drying out the chicken.

FAQ

Can I freeze chicken stew?

Yes, you can freeze chicken stew for up to 3 months. Allow it to cool completely before transferring to a freezer-safe container. Thaw overnight in the refrigerator before reheating.

What can I serve with chicken stew?

Chicken stew pairs beautifully with freshly made appams, rice, or even a warm crusty bread to soak up the savory sauce.

Nutrition

While the exact nutritional content can vary, this chicken stew is a well-balanced meal offering protein from the chicken, healthy fats from coconut milk, and a range of vitamins and minerals from the spices and vegetables. It’s hearty yet healthy, making it a perfect choice for a nourishing family meal.

Conclusion

Chicken Stew For The Soul is more than just a recipe; it’s a heartfelt tradition that brings warmth and joy to any table. Whether shared with family on a cozy evening or enjoyed solo as a comforting indulgence, this stew is a testament to the power of good food to nurture the soul. I hope you enjoy making and savoring this dish as much as we do in our family. Bon appétit!

Related update: Chicken Stew For The Soul

Related update: Pork with Blueberry Sauce

Related update: Moosewood Lentil Soup

Beef Pot Pies with Irish Cheddar Crust | Made by Meaghan Moineau

Beef Pot Pies with Irish Cheddar Crust

Intro

There’s something incredibly heartwarming about the aroma of a savory pot pie wafting through the house, especially on a cool, crisp evening. The first time I made Beef Pot Pies with Irish Cheddar Crust, I was transported back to my grandmother’s kitchen, where the warmth from her oven seemed to envelop us in a comforting embrace. Her stories of growing up in Ireland, where cheddar cheese was a staple in many family dishes, always fascinated me. Now, I cherish the tradition of baking these pies, filling my home with both a sense of nostalgia and the promise of a delicious meal.

Why You’ll Love It

This recipe combines the hearty richness of beef stew with the indulgence of a buttery, cheesy crust. The Irish cheddar adds a sharp, tangy flavor to the dough, perfectly complementing the savory filling. You’ll love how the tender beef melts in your mouth, contrasted by the flaky, golden crust. Whether you’re preparing a cozy family dinner or impressing guests with a classic dish, these pot pies are sure to delight.

Ingredients

  • Unsalted butter
  • Shredded sharp cheddar cheese
  • Flour
  • Sugar
  • Salt
  • Dry mustard
  • Cayenne pepper
  • Ice water
  • Vegetable oil
  • Beef chuck meat
  • Salt & pepper
  • Onion
  • Carrots
  • Garlic
  • Fresh thyme
  • Fresh marjoram
  • Flour
  • Canned beef broth
  • Water
  • Dijon mustard
  • Fresh parsley
  • Egg

Instructions

  1. Place the cut-up butter pieces in the freezer for 15 minutes to chill.
  2. Meanwhile, in the work bowl of a food processor, combine flour, sugar, dry mustard, salt, and cayenne pepper. Pulse to combine.
  3. After the butter has chilled, scatter the pieces over the flour mixture (still in the food processor), along with the cheddar. Pulse about 10 times.
  4. Sprinkle half the ice water over the dough, pulse about 3 times, repeat with remaining water, pulsing 3 more times. Pinch the dough to check if it sticks together; if not, add a tablespoon or two more ice water, until it comes together.
  5. Dump the mix in a large bowl and press it together to form the dough. Divide dough in half, shaping each into a 4-inch disk. Wrap each piece in plastic wrap and refrigerate at least an hour.
  6. Begin the filling: Pat the meat dry with paper towels and season with salt & pepper.
  7. Heat 2 teaspoons of oil in a large skillet over medium-high heat until just smoking. Add the meat in a single layer and cook, without stirring, until the meat browns well on the underside, anywhere between 5-10 minutes.
  8. Stir the meat and cook another couple of minutes, until it loses the raw color. Remove to a plate and set aside.
  9. Reduce heat to medium, add the remaining 2 teaspoons of oil, and the onions and carrots. Sauté until softened and starting to brown, stirring occasionally, around 5 minutes.
  10. Add the garlic, thyme, and marjoram, and cook until very fragrant, about a minute. Stir in flour, cook and stir about a minute.
  11. Slowly add in the beef broth and water, then the meat, along with any juices left on the plate. Bring to a simmer, then reduce the heat to low, to med-low. Cover and cook, stirring occasionally, until the meat is just becoming tender, around 45 minutes.
  12. Remove from heat, add in the Dijon and parsley. Adjust seasoning with salt & pepper. Set aside to cool.

Tips

For the best results, ensure your butter is very cold before incorporating it into the dough. This helps create a flaky texture in the crust. When browning the meat, patience is key—avoid stirring too soon to allow a flavorful crust to form.

Variations & Substitutions

Feel free to experiment with different types of cheese in the crust—an aged Gouda or a sharp Swiss would provide a delightful twist. For a vegetarian version, substitute the beef with hearty mushrooms and swap the beef broth for vegetable stock. You can also add peas or potatoes to the filling for additional texture and flavor.

Storage

These pot pies can be made ahead and stored in the refrigerator for up to three days. To freeze, wrap the unbaked pies tightly in plastic wrap and aluminum foil, and store for up to two months. When ready to bake, simply add a few extra minutes to the baking time.

FAQ

Can I make the dough by hand if I don’t have a food processor?

Yes, you can make the dough by hand. Use a pastry cutter or your fingertips to work the butter and cheese into the flour mixture until it resembles coarse crumbs. Gradually add the ice water, mixing until the dough comes together.

What can I serve with these pot pies?

These pot pies are quite filling on their own, but a light side salad or some roasted vegetables can complement them beautifully. A glass of red wine or a robust ale pairs wonderfully with the rich flavors of the dish.

Can I use store-bought pie dough?

While homemade dough provides a unique flavor and texture, you can certainly use store-bought pie dough for convenience. Just be sure to add some shredded cheddar to the dough if you want to keep the cheesy crust element.

Nutrition

While I don’t have specific nutritional information for this recipe, it’s worth noting that these pot pies are an indulgence, combining buttery crusts and rich beef filling. Moderation is key, and you can always tailor the recipe to your dietary needs by adjusting the salt or using leaner cuts of beef.

Conclusion

Beef Pot Pies with Irish Cheddar Crust are more than just a meal; they’re a connection to cherished memories and a testament to the comforting power of homemade food. Whether you’re new to baking or a seasoned cook, this recipe invites you to enjoy the process and savor the results. Gather your loved ones, share a story or two, and enjoy the warmth and goodness these pot pies bring to your table.

Related update: Beef Pot Pies with Irish Cheddar Crust

Related update: Kung Po Chicken

Pasta with Peas and Italian Sausage | Made by Meaghan Moineau

Pasta with Peas and Italian Sausage

Intro

There’s something incredibly comforting about a hearty pasta dish, especially one that brings back memories of family gatherings around a bustling kitchen. For me, Pasta with Peas and Italian Sausage is not just a recipe; it’s a treasured memory of Sunday dinners at my grandmother’s house, where the aroma of sizzling sausages and simmering tomatoes would fill the air, coaxing everyone to the table. This simple yet flavorful dish has always been a favorite, and I’m thrilled to share it with you. Whether you’re cooking for a large family dinner or a cozy night in, this pasta dish is sure to bring warmth and joy to your table.

Why You’ll Love It

This Pasta with Peas and Italian Sausage recipe is more than just a meal—it’s a celebration of flavors and textures. You’ll love how the sweetness of the peas perfectly complements the savory Italian sausage, while the farfalle pasta catches every bit of the rich tomato sauce. It’s a dish that comes together effortlessly, making it perfect for busy weeknights or leisurely weekends. With its vibrant colors and mouth-watering aroma, this pasta is sure to become a staple in your home.

Ingredients

  • 1 tablespoon olive oil
  • 4 Italian sweet sausages, casings removed
  • 1 cup frozen peas
  • 1 can (14 oz) canned tomatoes, chopped
  • 1/2 cup Pomi strained tomato sauce
  • 12 oz farfalle pasta
  • 2 tablespoons butter
  • Salt and pepper to taste

Instructions

  1. Begin by cooking the farfalle pasta according to the package directions until al dente. Drain and set aside.
  2. In a very large skillet, heat the olive oil over medium heat. Add the sausage meat and sauté until it is slightly browned all over.
  3. Add the frozen peas, canned tomatoes, and Pomi strained tomato sauce to the skillet. Stir well to combine.
  4. Season the mixture with salt and pepper to taste. Lower the heat to medium and let it cook for another 10 to 15 minutes, allowing the flavors to meld together.
  5. Once the sauce is ready, add the cooked pasta to the skillet along with the butter. Toss everything together until the pasta is well coated in the sauce.
  6. Serve hot, garnished with freshly grated parmesan cheese if desired.

Tips

For the best results, use high-quality Italian sausages, as they bring a rich flavor to the dish. If you prefer a spicier kick, you can use hot Italian sausages instead of sweet ones. Also, don’t be afraid to adjust the amount of peas to suit your taste; their sweetness balances the savory elements beautifully. Lastly, remember to reserve a bit of pasta water before draining, just in case you need to loosen the sauce a little when tossing it with the pasta.

Variations & Substitutions

This recipe is quite versatile, allowing for plenty of creative variations. If you’re looking for a vegetarian option, simply omit the sausage and add more peas or other vegetables like bell peppers or zucchini. You can also substitute the farfalle pasta with any other pasta shape you have on hand, such as penne or rigatoni. For a creamier sauce, consider adding a splash of heavy cream or a dollop of ricotta cheese just before serving.

Storage

Leftovers can be stored in an airtight container in the refrigerator for up to 3 days. To reheat, simply warm the pasta in a skillet over medium heat, adding a splash of water or broth to loosen the sauce if needed. This dish is also freezer-friendly; just be sure to let it cool completely before transferring it to a freezer-safe container. It can be frozen for up to 2 months. Thaw overnight in the refrigerator before reheating.

FAQ

Can I use fresh peas instead of frozen?

Absolutely! Fresh peas can be a delightful addition. Simply blanch them in boiling water for a few minutes before adding them to the sauce. This will ensure they remain tender and vibrant.

What can I use instead of Pomi strained tomato sauce?

If you don’t have Pomi strained tomato sauce, you can use any high-quality tomato puree or passata. The key is to ensure it’s a smooth, rich tomato sauce to complement the chunky canned tomatoes.

Is this dish spicy?

This recipe is not inherently spicy, as it uses sweet Italian sausage. However, you can adjust the spice level by using hot Italian sausage or adding a pinch of red pepper flakes to the sauce for an extra kick.

Nutrition

This hearty pasta dish is packed with protein from the sausages and peas, providing a satisfying and balanced meal. The tomatoes add a dose of vitamin C, while the pasta offers plenty of energy-boosting carbohydrates. As always, moderation is key, especially if you’re watching your calorie intake.

Conclusion

Pasta with Peas and Italian Sausage is a dish that embodies comfort and nostalgia, bringing together simple ingredients to create something truly special. Whether you’re reconnecting with family traditions or starting new ones, this recipe is sure to become a beloved favorite. I hope it brings as much joy and warmth to your home as it has to mine. Happy cooking!

Related update: Pasta with Peas and Italian Sausage

Colcannon | Made by Meaghan Moineau

Colcannon: A Delicious Irish Classic

Intro

There’s a special place in my heart for colcannon, a traditional Irish dish that brings back fond memories of family gatherings at my grandmother’s house. I remember sitting at her rustic wooden table, watching as she expertly combined simple ingredients to create a meal that was both hearty and comforting. The creamy potatoes, the vibrant green of the cabbage, and the subtle hint of green onions all melded together to create a dish that was beloved by everyone at the table. As the comforting aroma filled the kitchen, it was clear that colcannon was more than just food; it was a tradition, a connection to our roots, and a testament to the warmth of home-cooked meals.

Why You’ll Love It

Colcannon is not just a dish; it’s an experience. This Irish classic is perfect for cozy dinners and festive occasions alike. You’ll love it for its simplicity, its rich and creamy texture, and its ability to bring people together around the table. Plus, it’s a wonderful way to introduce more greens into your meal in a deliciously sneaky way. Whether you’re Irish or just a fan of hearty comfort food, colcannon is sure to become a favorite in your household.

Ingredients

  • 2 rashers bacon (optional)
  • Butter
  • Cabbage
  • Stems green onions
  • Milk
  • Parsley
  • Pepper
  • Potatoes
  • Salt

Instructions

  1. Cut into the top of the cabbage and hollow it out, leaving 3-4 outside leaves intact, reserving the hollowed-out portion.
  2. Plunge the hollowed-out head into a large amount of boiling water; simmer for 5 minutes or until tender-crisp. It must hold its shape.
  3. Cool quickly in cold water; invert and drain.
  4. Chop reserved cabbage pieces, measure 1 1/2 cups.
  5. Stir fry in butter along with green onions until tender. Set aside.
  6. Boil and mash potatoes, adding milk and seasonings.
  7. Stir in the sautéed mixture and parsley.

Tips

For the creamiest colcannon, make sure to use starchy potatoes like Russets or Yukon Golds. Don’t rush the mashing process—take your time to achieve that perfect, smooth texture. If you want an extra layer of flavor, consider frying the bacon until crispy and crumbling it over the top just before serving.

Variations & Substitutions

If you’re looking to add a twist to traditional colcannon, consider these variations:

  • Dairy-Free: Substitute the butter and milk with plant-based alternatives like olive oil and almond milk.
  • Veggie Boost: Add a handful of chopped kale or spinach for added nutrition and a pop of color.
  • Herb Twist: Incorporate fresh herbs like thyme or chives for an aromatic touch.

Storage

Colcannon stores well in the refrigerator for up to three days. Simply place it in an airtight container to keep it fresh. To reheat, you can use the stove or microwave, adding a splash of milk to restore its creamy consistency. Unfortunately, freezing is not recommended as it can change the texture of the potatoes.

FAQ

Can I make colcannon in advance?

Absolutely! Colcannon can be made a day ahead and stored in the refrigerator. Simply reheat it gently and add a bit of extra milk or butter to freshen it up before serving.

What can I serve with colcannon?

Colcannon pairs beautifully with roasted meats like lamb or beef. It’s also a great side dish for corned beef, especially during St. Patrick’s Day celebrations.

Nutrition

This dish is rich in vitamins and minerals thanks to the cabbage and potatoes. It’s also a good source of dietary fiber and can be made more nutritious by adding extra greens. For those watching their fat intake, using reduced-fat milk and a smaller amount of butter can help lighten the dish.

Conclusion

Colcannon is more than just a recipe; it’s a comforting, nostalgic dish that brings a touch of Irish tradition to your table. Whether you’re enjoying it as a side dish or the star of the meal, colcannon is sure to delight with its creamy texture and savory flavors. So gather your loved ones, share a story or two, and enjoy this delightful dish that’s steeped in history and warmth.

Related update: Colcannon

Mardi Gras Shrimp Étouffée | Made by Meaghan Moineau

Mardi Gras Shrimp Étouffée

Intro

The vibrant celebration of Mardi Gras has always held a special place in my heart. Growing up in Louisiana, the anticipation of the parades, the music, and the lively colors filled the air with excitement. Yet, what truly made the experience unforgettable was gathering around the table with my family to enjoy a warm, hearty bowl of Shrimp Étouffée. The aroma of the simmering roux, mingling with the fresh seafood and spices, was enough to bring everyone into the kitchen, eagerly awaiting their first bite. Today, I’m thrilled to share this cherished recipe with you, hoping it brings the same joy and warmth to your home as it has to mine.

Why You’ll Love It

This Shrimp Étouffée is a celebration in a bowl. It combines the rich flavors of the Gulf Coast with a touch of spice, creating a dish that is both comforting and exciting. Whether you’re looking to bring a taste of Mardi Gras into your kitchen or simply want a cozy meal to share with loved ones, this recipe is sure to become a favorite. The silky roux, the succulent shrimp, and the aromatic vegetables come together harmoniously, offering a culinary experience that is both satisfying and delightful.

Ingredients

  • 1/2 cup butter
  • 1/2 cup flour
  • 2 green bell peppers, diced
  • 3 celery stalks, diced
  • 1 large yellow onion, diced
  • 3 garlic cloves, minced
  • 1 teaspoon dried thyme
  • 2 tablespoons tomato paste
  • 1 tablespoon Worcestershire sauce
  • 1 tablespoon creole seasoning
  • 4 cups chicken broth
  • 1 pound shrimp, peeled and deveined
  • 1 tablespoon butter
  • 2 scallions, sliced
  • 1 fresh tomato, diced
  • Cooked rice, for serving

Instructions

  1. Heat up a heavy pot over low heat. Add in the butter and cook for about 10-12 minutes until it turns a light golden brown. Stir occasionally to prevent burning.
  2. Whisk in the flour until smooth and continue cooking over low heat for about 8 minutes. The mixture should resemble a slightly loose peanut butter when ready.
  3. Add in the diced bell peppers, celery, and onion. Stir to coat the veggies with the roux and cook for another 10-15 minutes until the vegetables are softened.
  4. Stir in the minced garlic and dried thyme, cooking for about a minute until the garlic is fragrant.
  5. Add the tomato paste, Worcestershire sauce, creole seasoning, and chicken broth. Simmer on low for 30-40 minutes, stirring occasionally, until the sauce is slightly thickened.
  6. Stir in the shrimp, turn off the heat, and cover the pot with a lid. Allow the shrimp to cook in the residual heat for about 5-8 minutes, or until cooked through.
  7. Stir in a tablespoon of butter just before serving.
  8. Serve the Shrimp Étouffée over cooked rice and garnish with sliced scallions and fresh diced tomato.

Tips

Creating the perfect roux is key to this dish, so be patient and keep the heat low to avoid burning. Stir consistently and take your time. If you’re new to making roux, consider practicing with smaller batches to build confidence. Additionally, fresh ingredients make a difference, so opt for fresh shrimp and vegetables when possible.

Variations & Substitutions

If you’re looking to mix things up, consider using crab or crawfish instead of shrimp for a different take on this classic dish. For a spicier kick, add some cayenne pepper or hot sauce to taste. If you’re unable to find creole seasoning, you can make your own by combining paprika, garlic powder, onion powder, black pepper, white pepper, cayenne pepper, dried oregano, and dried thyme.

Storage

Store any leftovers in an airtight container in the refrigerator for up to 3 days. To reheat, warm gently on the stove over low heat, adding a splash of chicken broth if needed to loosen the sauce. Unfortunately, this dish doesn’t freeze well due to the delicate texture of the shrimp, so it’s best enjoyed fresh.

FAQ

Can I make this dish ahead of time?

Yes, you can prepare the sauce ahead of time and store it in the refrigerator. When ready to serve, simply reheat the sauce and add the shrimp just before serving to ensure they’re perfectly cooked.

Is this recipe gluten-free?

As written, this recipe is not gluten-free due to the flour used in the roux. However, you can substitute the flour with a gluten-free alternative such as rice flour or a gluten-free all-purpose blend to make it suitable for a gluten-free diet.

Nutrition

This Shrimp Étouffée is a hearty dish that’s rich in flavor and nutrients. While exact nutritional values can vary depending on the specific ingredients used, it is a good source of protein from the shrimp and vitamins from the vegetables. For those watching their calorie intake, consider reducing the amount of butter or serving it over cauliflower rice for a lighter option.

Conclusion

There’s something truly magical about gathering around the table to enjoy a dish that’s as rich in history and culture as it is in flavor. This Mardi Gras Shrimp Étouffée is more than just a meal; it’s an experience, a piece of New Orleans brought to life in your kitchen. Whether you’re celebrating Mardi Gras or simply craving a taste of the South, I hope this recipe brings joy and warmth to your home, just as it has to mine for many years. Bon appétit!

Related update: Mardi Gras Shrimp Étouffée

Related update: Soy Ginger Glazed Sea Scallops With Stir Fry Vegetables

Authentic Bolognese Sauce | Made by Meaghan Moineau

Authentic Bolognese Sauce

Intro

There’s something deeply comforting about a simmering pot of Bolognese sauce on the stove, its rich aromas filling the kitchen and evoking memories of family dinners. Growing up, weekends were synonymous with my grandmother’s Bolognese—an authentic recipe passed down through generations. I fondly recall sitting at the kitchen table, my eyes barely peeking over the edge, watching her expertly chop vegetables and stir the sauce with love and dedication. Today, I’m thrilled to share this cherished recipe with you, hoping it brings warmth to your table and creates new memories with your loved ones.

Why You’ll Love It

This Authentic Bolognese Sauce is a labor of love, but it’s worth every minute of simmering. Here’s why you’ll adore making and eating this classic Italian sauce:

  • Rich Flavor: The combination of pancetta, beef, and aromatic vegetables creates a depth of flavor that is both hearty and inviting.
  • Versatile: While traditionally served with tagliatelle, this sauce pairs beautifully with any pasta, lasagna, or even as a topping for polenta.
  • Family Tradition: It’s a recipe that invites you to slow down, enjoy the cooking process, and share a meal steeped in cultural heritage.

Ingredients

  • 1 carrot, diced
  • 1 celery stalk, diced
  • 1/2 cup dry white wine
  • 2 garlic cloves, minced
  • 1 pound regular ground beef
  • 2 tablespoons olive oil
  • 1 diced onion
  • 4 ounces pancetta, diced
  • 1/2 teaspoon pepper
  • 1 teaspoon salt
  • 2 tablespoons tomato paste
  • 1 cup whole milk

Instructions

  1. In a large skillet, heat the olive oil over medium heat.
  2. Add the pancetta, onion, carrot, celery, and garlic. Cook until the vegetables are soft, about 10-15 minutes, stirring occasionally.
  3. Add the ground beef to the skillet. Cook until it is no longer pink, breaking it up with a wooden spoon as it cooks.
  4. Stir in the dry white wine, allowing it to simmer for about 2 minutes.
  5. Add the whole milk and tomato paste, stirring well to combine.
  6. Season with salt and pepper to taste.
  7. Reduce the heat to low and let the sauce simmer uncovered for 1 hour, or until most of the liquid has been absorbed, stirring occasionally.
  8. Once the sauce has thickened, taste and adjust seasoning if necessary before serving.

Tips

  • Take your time: This sauce benefits from a slow simmer, allowing the flavors to meld beautifully. Resist the urge to rush.
  • Quality ingredients: Use the best quality ingredients you can find, especially when it comes to the wine and beef.
  • Stir occasionally: Make sure to stir the sauce every now and then to prevent it from sticking to the bottom of the skillet.

Variations & Substitutions

While this recipe strives to stay true to its authentic roots, there are always ways to make it your own:

  • Vegetarian Bolognese: Substitute the beef and pancetta with lentils and mushrooms for a hearty vegetarian version.
  • Different Meats: Feel free to use a mix of ground pork and beef for a slightly different flavor profile.
  • Herbs and Spices: Add a bay leaf or a pinch of nutmeg for additional depth.

Storage

Allow the Bolognese sauce to cool completely before storing. Transfer it to an airtight container and refrigerate for up to 3 days. For longer storage, freeze the sauce in airtight containers or freezer bags for up to 3 months. Thaw in the refrigerator overnight before reheating.

FAQ

Can I make this sauce ahead of time?

Absolutely! In fact, Bolognese sauce often tastes even better the next day as the flavors have time to develop further. Simply reheat gently on the stove before serving.

What type of pasta pairs best with Bolognese sauce?

Traditionally, Bolognese sauce is served with tagliatelle, a wide, flat pasta that holds the sauce beautifully. However, it also pairs well with pappardelle, fettuccine, or any pasta you have on hand.

Can I use red wine instead of white?

While white wine is traditional in Bolognese, red wine can be used for a slightly different, richer flavor. Just ensure it’s a dry variety to maintain the sauce’s balance.

Nutrition

This recipe serves approximately 6 people. Each serving contains:

  • Calories: 320
  • Protein: 20g
  • Carbohydrates: 12g
  • Fat: 22g
  • Fiber: 2g

Conclusion

Authentic Bolognese Sauce is more than just a meal—it’s a celebration of tradition, flavor, and the joy of cooking. Whether you’re recreating cherished family memories or crafting new ones, this dish brings warmth and togetherness to any table. I hope this recipe becomes a beloved staple in your home, infusing your kitchen with the same love and care my grandmother infused into hers. Buon appetito!

Related update: Authentic Bolognese Sauce

Related update: Chimichurri Skirt Steak with Grilled Asparagus

Related update: Walnut Pesto

Venison Stew | Made by Meaghan Moineau

Venison Stew: A Hearty and Flavorful Delight

Intro

There’s nothing quite like a bowl of steaming hot venison stew on a chilly evening. As the aroma fills the kitchen, I’m transported back to my childhood days, watching my grandmother expertly prepare this family favorite. She’d hum softly as she worked, her hands moving deftly through well-rehearsed motions. The stew would simmer on the stove, filling our home with warmth and a promise of comfort. Today, I’m excited to share this beloved recipe with you, hoping it brings the same warmth and joy to your table as it has to mine over the years.

Why You’ll Love It

This venison stew is not only a comforting classic but also a versatile dish that offers deep, rich flavors. Here’s why you’ll absolutely love it:

  • Flavorful and Hearty: Venison offers a unique and robust flavor that pairs beautifully with the medley of vegetables and spices.
  • Nutrient-Rich: Packed with protein, vitamins, and minerals, this stew is as nutritious as it is delicious.
  • Perfect for Cold Days: Nothing warms you up better than a bowl of this thick, savory stew.
  • Family Tradition: This recipe has been passed down through generations, ensuring a tried-and-true meal every time.

Ingredients

  • 1 pound venison stew meat, cut into 1-inch pieces
  • 1 cup flour, plus 3 tablespoons for thickening
  • 2 tablespoons vegetable oil
  • 2 tablespoons beef bouillon
  • 4 cups water
  • 4 medium potatoes, peeled and cubed
  • 1 large onion, chopped
  • 1 can baby carrots, drained
  • 4 stalks celery, chopped
  • 1 can mushrooms, drained
  • 1 green bell pepper, chopped
  • Salt and pepper to taste

Instructions

  1. Prepare all ingredients by cutting the venison, potatoes, onion, celery, and green bell pepper into 1-inch pieces.
  2. In a shallow dish, combine 1 cup of flour with salt and pepper. Dredge the venison pieces in the flour mixture, ensuring they are fully coated.
  3. Heat the vegetable oil in a large pot over medium-high heat. Add the venison, browning it on all sides.
  4. Once browned, add the beef bouillon and 4 cups of water to the pot. Bring to a boil, then reduce the heat and let it simmer for 2 hours, allowing the meat to become tender.
  5. Add the potatoes, onion, baby carrots, celery, mushrooms, and green bell pepper to the pot. Continue to simmer for an additional 30 minutes, until the vegetables are tender.
  6. In a small bowl, mix 3 tablespoons of flour with 1 cup of cold water. Stir this mixture into the stew to thicken it. Cook for another 5-10 minutes, stirring frequently.
  7. Season the stew with additional salt and pepper to taste before serving.

Tips

For the best results, follow these tips:

  • Use fresh venison for the most tender and flavorful results.
  • Be patient while simmering. The longer cooking time helps develop deep flavors and tenderize the meat.
  • If you prefer a thicker stew, add more flour and water mixture to your desired consistency.

Variations & Substitutions

Make this stew your own by trying some of these variations and substitutions:

  • Meat: If venison is not available, you can substitute with beef or lamb for a similar texture and flavor.
  • Vegetables: Feel free to add other vegetables such as parsnips, turnips, or sweet potatoes.
  • Spices: Enhance the flavor by adding herbs like thyme, rosemary, or bay leaves.

Storage

This venison stew stores beautifully, making it perfect for meal prep or leftovers:

  • Refrigerate: Allow the stew to cool, then store in an airtight container in the refrigerator for up to 4 days.
  • Freeze: For longer storage, freeze the stew in a freezer-safe container for up to 3 months. Thaw in the refrigerator overnight before reheating.

FAQ

Can I make this stew in a slow cooker?

Yes, absolutely! To make venison stew in a slow cooker, brown the venison as directed, then transfer to a slow cooker along with the remaining ingredients. Cook on low for 6-8 hours or on high for 3-4 hours until the meat is tender.

What should I serve with venison stew?

Venison stew is hearty enough to be enjoyed on its own, but it pairs wonderfully with crusty bread, mashed potatoes, or a simple side salad.

Nutrition

This stew is a nutritious option, packed with protein from the venison and fiber from the vegetables. While exact calories and macros depend on specific brands and quantities, this stew offers a balanced meal rich in essential nutrients.

Conclusion

This venison stew is more than just a dish; it’s a heartwarming experience that brings family and friends together. Whether you’re reliving cherished family memories or starting new traditions of your own, this stew is sure to become a staple in your culinary repertoire. Enjoy the rich flavors, the tender meat, and the joy of sharing a meal steeped in tradition. Happy cooking!

Related update: Venison Stew

Related update: Quinoa Tabouli with Lemon Garlic Grilled Shrimp

Related update: Creamy Cauliflower Chowder

Chili Pie with Green Chile and Cheddar Cornbread Crust | Made by Meaghan Moineau

Chili Pie with Green Chile and Cheddar Cornbread Crust

Intro

Ah, the comforting aroma of chili pie wafting through the kitchen, bringing back warm memories of family gatherings during chilly autumn evenings. I vividly recall my grandmother bustling around her modest kitchen, her apron dusted with flour, as she prepared this delightful dish with a twinkle in her eye. It was always a favorite at our dinner table, and every bite felt like a warm hug. Today, I’m excited to share this cherished recipe with you, hoping it fills your home with the same warmth and joy it brought to mine.

Why You’ll Love It

This Chili Pie with Green Chile and Cheddar Cornbread Crust is the perfect combination of hearty and comforting flavors. The savory chili base, rich with spices and tender vegetables, is topped with a cheesy, golden cornbread crust that adds a delightful contrast in texture. It’s a dish that brings people together—whether you’re serving it at a family dinner or a casual get-together, it never fails to impress. Plus, it’s a versatile recipe that can be adjusted to suit dietary preferences or ingredient availability.

Ingredients

  • 1 tablespoon olive oil
  • 1 yellow onion, diced
  • 2 cloves garlic, minced
  • Salt and pepper to taste
  • 2 (4-ounce) cans diced green chiles
  • 1 pound ground beef
  • 2 teaspoons chile powder, plus more for topping
  • 1 tablespoon Worcestershire sauce
  • 1 teaspoon dried oregano
  • 1 teaspoon smoked paprika
  • 1/2 teaspoon ground cinnamon
  • 1/4 teaspoon ground nutmeg
  • 1/2 cup water
  • 1 (14-ounce) can diced tomatoes, with juices
  • 1 (15-ounce) can cannellini beans, drained and rinsed
  • 1 cup canned or frozen corn
  • 3 cups shredded extra sharp cheddar cheese, divided
  • 1 cup flour
  • 1 cup cornmeal
  • 1 tablespoon baking powder
  • 1 teaspoon table salt
  • 2 large eggs
  • 1 cup milk
  • 1/2 cup melted butter
  • 1/2 cup sour cream

Instructions

  1. In a large skillet, sauté the diced onion in olive oil over medium heat until soft and translucent, about 5 minutes. Season with salt and pepper.
  2. Add minced garlic and sauté until fragrant, about 1 minute.
  3. Remove two-thirds of the onion and garlic mixture from the pan and set aside.
  4. Add the diced green chiles with their juices to the skillet and sauté for 2-3 minutes. Remove and set aside in a separate bowl.
  5. In the same skillet, brown the ground beef, crumbling it as it cooks. Once cooked through, carefully drain any excess grease.
  6. Add the reserved onion mixture back to the skillet along with the chile powder, Worcestershire sauce, oregano, smoked paprika, cinnamon, nutmeg, and water. Mix thoroughly.
  7. Stir in the diced tomatoes with juices, cannellini beans, and corn. Mix well and cook for an additional 3-4 minutes over medium-low heat.
  8. Preheat your oven to 400°F (200°C) and grease a 9×13 inch casserole dish.
  9. Pour the meat mixture into the prepared casserole dish and spread evenly over the bottom. Sprinkle two cups of shredded cheddar cheese on top.
  10. In a large bowl, combine the flour, cornmeal, baking powder, and table salt.
  11. In a separate medium bowl, whisk together the eggs, milk, melted butter, and sour cream.
  12. Pour the wet ingredients into the dry ingredients and stir until just combined.
  13. Fold in the reserved onion/green chile mixture and the remaining cup of shredded cheddar cheese.
  14. Spread the cornbread batter evenly over the meat mixture in the casserole dish. Sprinkle a little extra chile powder on top.
  15. Bake for 25-30 minutes, or until a toothpick inserted into the center of the cornbread comes out clean.
  16. Let the chili pie set for 10 minutes before serving.

Tips

For the best results, make sure to use a high-quality extra sharp cheddar cheese for maximum flavor. If you’re in a pinch, you can use pre-shredded cheese, but freshly shredded cheese will melt better. Also, be sure to let the chili pie set for at least 10 minutes after baking to allow the flavors to meld together and make serving easier.

Variations & Substitutions

Feel free to customize this chili pie to suit your tastes or dietary preferences. You can substitute ground turkey or chicken for the beef for a leaner option. For a vegetarian version, omit the meat altogether and add more beans or vegetables like bell peppers or zucchini. If you like it spicy, add some chopped jalapeños to the chili mixture or use hot chile powder.

Storage

Store any leftovers in an airtight container in the refrigerator for up to 3 days. To reheat, simply microwave individual portions or place the entire casserole dish in a 350°F oven until heated through. This dish also freezes well—wrap it tightly in plastic wrap and foil before freezing for up to 3 months. Thaw in the refrigerator overnight before reheating.

FAQ

Can I make this dish ahead of time?

Absolutely! You can prepare the chili mixture and the cornbread batter separately a day in advance. Store them in the refrigerator, then assemble and bake when you’re ready to serve. This makes it a great option for busy weeknights or entertaining.

What can I serve with chili pie?

This dish is quite filling on its own, but it pairs wonderfully with a fresh green salad or some steamed vegetables. For an extra treat, serve it with a dollop of sour cream or a sprinkle of fresh cilantro on top.

Nutrition

While I don’t have the exact nutritional breakdown, this dish is a hearty meal rich in protein from the beef and beans, and it provides fiber from the beans and cornmeal. The cheese adds calcium, and the use of various spices contributes to its depth of flavor without adding extra calories.

Conclusion

This Chili Pie with Green Chile and Cheddar Cornbread Crust is more than just a meal; it’s a comforting experience that brings warmth to any occasion. I hope you enjoy making and sharing this dish as much as I do. Whether it’s the nostalgia of family dinners or the joy of discovering a new favorite, this recipe is sure to become a beloved staple in your home. Bon appétit!

Related update: Chili Pie with Green Chile and Cheddar Cornbread Crust

Related update: Pasta with Peas and Italian Sausage

Beans With Smoked Pork Hock | Made by Meaghan Moineau

Beans With Smoked Pork Hock: A Soulful and Savory Delight

Intro

When I think of comfort food that warms the heart and soul, my mind drifts back to my grandmother’s kitchen. The heady aroma of smoked pork, mingling with the subtle earthiness of beans, would fill the air, wrapping us in a tender embrace. Her Beans With Smoked Pork Hock was a dish that epitomized family gatherings, laughter, and love. This recipe is not only a nod to my heritage but also a testament to the power of simple ingredients coming together to create something truly special. Join me on this culinary journey, and let’s bring a piece of this cherished tradition to your home.

Why You’ll Love It

This dish is a delightful amalgamation of flavors and textures that are bound to captivate your taste buds. Here’s why you’ll love it:

  • Deep, smoky flavors: The smoked pork hock imparts a rich, smoky essence that permeates the entire dish.
  • Hearty and satisfying: The combination of beans and meat ensures a filling meal that satisfies even the most robust appetites.
  • Easy to make: With just a handful of ingredients and straightforward instructions, this recipe is perfect for cooks of all levels.
  • Nostalgic comfort food: This dish brings a sense of warmth and nostalgia, making it perfect for family dinners or cozy nights in.

Ingredients

  • 1 bay leaf
  • 2 carrots
  • 1 small celery root
  • 2 cloves garlic
  • 2 cups beans, soaked overnight
  • 1 onion
  • 1 smoked pork hock
  • Salt and pepper, to taste
  • 1 vegetable cube

Instructions

  1. Soak the beans the night before to ensure they cook evenly.
  2. Wash the smoked pork hock and remove the skin for a smoother texture.
  3. In a large pan, place the onion and pork hock.
  4. Add the soaked beans, bay leaf, and garlic to the pan.
  5. Cover the beans and meat with water, ensuring everything is submerged.
  6. Crumble in the vegetable cube to enhance the flavor profile.
  7. Cook the beans and meat on low heat for about 60 minutes, keeping the pan covered to retain moisture.
  8. Chop the carrots and celery root in a blender until finely diced.
  9. Add the chopped vegetables to the pan 15 minutes before the end of cooking time and stir to combine.
  10. Once cooked, remove the pork hock from the pan and tear it into smaller, bite-sized pieces.
  11. Remove the bay leaf from the mixture to avoid bitterness.
  12. Season the dish with salt and pepper according to your taste preferences.
  13. Serve the beans with the shredded pork hock and some hearty black bread on the side.

Tips

  • For a richer flavor, consider adding a splash of apple cider vinegar to the dish before serving.
  • Make sure to soak the beans overnight to reduce cooking time and improve digestibility.
  • If the dish thickens too much, add a little more water during cooking to achieve your desired consistency.

Variations & Substitutions

Feel free to customize this dish to suit your preferences or dietary needs:

  • Vegetarian version: Skip the pork hock and incorporate smoked paprika or liquid smoke to mimic the smoky flavor.
  • Different beans: Use navy beans or kidney beans for a different texture and flavor profile.
  • Spice it up: Add a pinch of red pepper flakes for a subtle heat that enhances the dish’s depth.

Storage

This dish stores wonderfully, making it perfect for meal prep:

  • Refrigeration: Store leftovers in an airtight container in the refrigerator for up to 4 days.
  • Freezing: Freeze the dish in a freezer-safe container for up to 3 months. Thaw overnight in the refrigerator before reheating.

FAQ

Can I use canned beans instead of dried beans?

Yes, you can use canned beans to save time. Simply rinse and drain them before adding to the dish. Keep in mind that canned beans are already cooked, so you may need to adjust the cooking time accordingly.

What can I serve with Beans With Smoked Pork Hock?

This dish pairs beautifully with a slice of hearty black bread or a side of steamed vegetables. For a more substantial meal, serve it with a green salad or over a bed of rice or mashed potatoes.

Is it possible to use a slow cooker for this recipe?

Absolutely! Simply place all the ingredients in the slow cooker and cook on low for 6-8 hours or until the beans and pork are tender. Add the carrots and celery root in the last hour of cooking.

Nutrition

While I don’t have the exact nutritional breakdown, this dish is a great source of protein and fiber thanks to the beans and pork. It’s a wholesome meal that provides essential nutrients and energy to keep you satisfied.

Conclusion

Beans With Smoked Pork Hock is more than just a recipe—it’s a comforting embrace from the past, a dish that brings people together around the table. Whether you’re making it for the first time or the fiftieth, each bowl is a reminder of the warmth and love that can be created in the kitchen. I hope this recipe becomes a cherished part of your culinary repertoire, bringing joy and satisfaction to you and your loved ones.

Related Recipes

Also try: Beans With Smoked Pork Hock

Related update: Spinach, Tomato & Onion Couscous

Chicken-Tortilla Chip Soup | Made by Meaghan Moineau

Chicken-Tortilla Chip Soup | Made by Meaghan Moineau

Title: A Warm Hug in a Bowl: Chicken-Tortilla Chip Soup
Description: Dive into the heartwarming flavors of Chicken-Tortilla Chip Soup, a dish that combines simplicity with nostalgia. Perfect for a chilly evening or a family gathering, this soup will transport you back to cherished family memories with every spoonful.

---


As the leaves begin to turn and the air grows crisp, I often find myself yearning for comfort food that not only delights the palate but also stirs the soul. One such dish that never fails to bring a smile to my face is Chicken-Tortilla Chip Soup. This soup is a hearty blend of tender chicken, vibrant carrots, and fragrant cilantro, all simmered together to create a flavor profile that is both familiar and inviting.


Ingredients:

- Water


- Chicken breasts


- Bouillon cubes


- Diced carrots


- Diced cilantro


- Lawry's seasoned salt


- Corn chips


- Monterey Jack cheese


- Slices of avocado


Instructions:

1. Start by boiling the water, chicken breasts, bouillon cubes, diced carrots, diced cilantro, and Lawry's seasoned salt together in a large pot. Allow the ingredients to simmer for about 30-40 minutes, letting the flavors meld into a delicious symphony.


2. Once ready to serve, ladle the soup into bowls and top with crunchy corn chips, a sprinkle of Monterey Jack cheese, and creamy slices of avocado for a delightful finish.


Difficulty Rating: 3/10
Classification: Main Dish

This dish holds a special place in my heart, not just for its comforting taste, but for the memories it revives. I remember cold Sunday afternoons at my grandmother's house, where the aroma of chicken soup would fill the air. My siblings and I would rush inside from playing in the yard, our cheeks red from the chill, and gather around the kitchen table. Grandma would serve the soup with a generous helping of her signature love and care, and we'd eagerly crumble tortilla chips on top, watching them soften in the hot broth. Each bite was like a warm hug, bringing with it stories and laughter shared across generations.


The simplicity of the soup belies its ability to bring people together. It's not just a meal; it's an experience, a tradition passed down and cherished. This Chicken-Tortilla Chip Soup is more than just a recipe; it's a reminder of the warmth of family and the joy of simple pleasures.


So, next time you're looking for a dish that comforts the body and soul, give this Chicken-Tortilla Chip Soup a try. It's a culinary embrace that will undoubtedly become a beloved staple in your home, just as it has in mine.

Read more about Appetizers

Read more about Main Dishes

Read more about Desserts

Wintery Vegetable Beef Soup | Made by Meaghan Moineau

Wintery Vegetable Beef Soup | Made by Meaghan Moineau

Embrace the Chill: A Heartwarming Recipe for Wintery Vegetable Beef Soup


Description

As the winter months approach, there's nothing quite like the comforting embrace of a hearty soup to warm both body and soul. Dive into our Wintery Vegetable Beef Soup, a delightful blend of tender beef, vibrant winter vegetables, and rich, aromatic herbs. Perfect as a main dish for a cozy family dinner, this soup is more than just a meal—it's a memory in the making.

---


Ingredients

- 2 tbsp butter

- 1 tbsp oil


- 2 lbs beef chuck, cut into chunks


- 3 qts stock/broth/water, divided


- 4 slices thick-cut peppered bacon


- 2 sweet potatoes, peeled and diced


- 2 parsnips, peeled and diced


- 3 carrots, peeled and diced


- 3 sticks celery, diced


- 1 large onion, diced


- 4 cloves garlic, minced


- 1 cup red cabbage, chopped


- 1 cup green cabbage, chopped


- 2 tsp fresh thyme


- 2 tbsp fresh parsley, chopped


- 2 bay leaves


- Freshly cracked black pepper, to taste


- Optional: Balsamic vinegar, fresh parmesan, additional herbs for garnish


---


Instructions


1. Prepare the Beef:

- In a large Dutch oven, melt the butter with the oil over medium heat.


- Add the beef chunks and brown well on all sides.


- Once browned, drain off any excess fat, leaving about a teaspoon in the pan.


- Pour in 1 quart of stock and bring to a boil. Reduce to a simmer, cover, and cook until the beef is fork-tender, approximately 2 ½ hours.


2. Shred the Beef:

- Transfer the beef to a large bowl, reserving the juices.


- Once cool enough to handle, shred the beef using two forks.


3. Cook the Bacon and Vegetables:

- In the same pot, cook the bacon until just done, then remove it, leaving the bacon fat in the pan.


- Add the sweet potatoes, parsnips, carrots, celery, onion, garlic, and cabbages to the pot. Cook until the vegetables begin to soften.


4. Combine and Simmer:

- Return the shredded beef and bacon to the pot, adding thyme, parsley, and bay leaves.


- Pour in 2 quarts of stock, or enough to just cover the ingredients.


- Simmer over medium-low heat until the vegetables are tender, about 10 minutes.


- Allow the soup to sit, covered, for at least an hour to let the flavors meld.


5. Finish and Serve:

- Remove the herb stems and bay leaves.


- Season with freshly cracked black pepper and salt, if needed.


- To serve, drizzle with balsamic vinegar and grate fresh parmesan over the top. Garnish with chopped herbs and additional black pepper, if desired.


---


A Nostalgic Memory


Growing up, winter evenings at my grandmother's house were magical. As snowflakes danced outside, the kitchen was a haven of warmth and savory aromas. Grandma would prepare her beloved Wintery Vegetable Beef Soup, her hands moving deftly through the familiar motions.


I remember sitting by the kitchen table, watching the vibrant colors of the vegetables mix with the rich, hearty beef under the soft glow of the kitchen lights. The smell of thyme and bacon would fill the house, a promise of the comforting meal to come.


Grandma would often share stories of how she learned the recipe from her mother, each ingredient a piece of family history. We’d gather around the dining table, bowls steaming, the soup acting as a bridge connecting past to present.


Even now, as I replicate this dish in my own home, I feel her presence with each stir, each taste—a reminder that family is always just a spoonful away.


---


Recipe Difficulty: 5/10


This soup is moderately easy, requiring some time for simmering and shredding, but overall, it's a straightforward process. Perfect for cooks looking to create a hearty dish with a touch of nostalgia.


---


Classification: Main Dish


This Wintery Vegetable Beef Soup is not just a meal—it's an experience. Rich, hearty, and full of flavor, it's best enjoyed as the centerpiece of a cozy winter dinner.

Read more about Appetizers

Read more about Main Dishes

Read more about Desserts

Guinness Braised Corned Beef and Cabbage | Made by Meaghan Moineau

Guinness Braised Corned Beef and Cabbage | Made by Meaghan Moineau

Title: A Hearty Feast: Guinness Braised Corned Beef and Cabbage
Description: Discover the rich flavors of our Guinness Braised Corned Beef and Cabbage recipe—a savory main dish that melds tradition with taste. Perfect for family gatherings, this recipe offers tender, flavor-infused meat and perfectly cooked vegetables, all enhanced by a robust Guinness mustard sauce. Join us as we explore a cherished family memory tied to this meal, making every bite a step into the past.

---


Guinness Braised Corned Beef and Cabbage: A Tradition Reimagined


As the leaves begin to turn and the air takes on a crisp chill, our family kitchen becomes a haven of warmth and delicious aromas. One dish that never fails to make an appearance during these cozy gatherings is our Guinness Braised Corned Beef and Cabbage. This hearty main dish not only satisfies the palate but also stirs up fond memories of family times gone by.


Ingredients:


- Corned beef brisket
- Carrots
- Parsnips
- Potatoes
- Garlic
- Guinness
- Beef broth
- Pickling spice
- Brown sugar
- Bay leaf
- Spicy honey mustard

Instructions:


1. Preparation: Begin by seasoning both sides of the corned beef liberally with pepper. Thanks to the corning process, the beef is already perfectly salty, so no need for additional salt.
2. Searing: Heat 1 tablespoon of oil in a large, shallow oven-safe pot over medium-high heat. Sear each side of the beef for about 3 minutes to develop a rich brown crust, locking in the juices. Remove the beef and set it aside on a plate.
3. Deglazing: Pour the Guinness into the pot to deglaze, scraping up any browned bits that cling to the bottom. This step is crucial for enhancing the depth of flavor.
4. Simmering: Add beef broth, pickling spice, brown sugar, bay leaf, and minced garlic to the pot. Bring the mixture to a simmer before returning the beef to the pot, along with any juices from the plate. Cover the pot and place it on the bottom rack of your oven.
5. Baking: Allow the beef to bake for 2 1/2 to 3 hours, basting with the surrounding juices every 30 minutes. After 2 hours, add carrots, parsnips, and potatoes, letting them simmer for approximately 25-30 minutes.
6. Resting: Once cooked, remove the pot from the oven. Let the beef rest on a cutting board for 15 minutes before slicing thinly against the grain.
7. Final Touches: Arrange the vegetables on a serving platter and cover with foil. Bring the sauce in the pot to a boil, add the cabbage, and cook for about 7 minutes until softened. Place the cabbage with the other vegetables.
8. Sauce: Strain the sauce and incorporate 2-3 tablespoons of spicy honey mustard until dissolved. Serve in a small dish or gravy boat alongside the beef.
9. Serving: After slicing the beef, arrange it on the serving platter, and generously ladle the Guinness mustard sauce over the meat and vegetables for a perfect glaze.

---


A Nostalgic Note


Every time I prepare this dish, I am transported back to chilly winter evenings at my grandmother's house. The windows would fog up from the warmth of the kitchen, and the whole family would gather around the dining table, eager to dig into the feast. My grandmother, with a twinkle in her eye, would share stories of her childhood in Ireland, where similar dishes were a staple. The rich aroma of Guinness and spices would fill the room, and for a moment, it felt like we were all part of something timeless. This recipe is more than just a meal; it's a bridge to our past, a reminder of family bonds, and a celebration of heritage.


---


Difficulty: 6/10
Classification: Main Dish

This Guinness Braised Corned Beef and Cabbage recipe is perfect for those seeking a comforting, flavorful meal that brings both tradition and taste to the table. Whether for a festive occasion or a simple family dinner, it's a dish that promises to create cherished memories of its own.

Read more about Appetizers

Read more about Main Dishes

Read more about Desserts

Irish Colcannon | Made by Meaghan Moineau

Irish Colcannon | Made by Meaghan Moineau

Title: "Irish Colcannon: A Hearty Taste of Home and Heritage"


Description: Dive into the comforting embrace of Irish Colcannon, a traditional dish that marries creamy potatoes with savory bacon, tender leeks, and cabbage. This beloved recipe is more than just a meal; it's a nostalgic journey to the heart of Ireland's culinary heritage. Discover how to blend these simple ingredients into a soul-warming main dish that’s rich in flavor and family memories.


---


Irish Colcannon: A Delectable Journey to My Grandmother's Kitchen

Growing up, Sunday dinners at my grandmother's house were nothing short of magical. The air would be filled with laughter, tales from the week, and the irresistible aroma of Irish Colcannon wafting through the rooms. This dish, a staple in our family, was a testament to my grandmother's love for bringing people together with food.


Ingredients:

- Rashers of bacon


- 2 to 3 cloves of garlic


- 1 can of green cabbage


- 2 split leeks


- A pinch of mace


- 6 yellow or red potatoes


- Salt to taste


- 1 cup whole milk


Instructions:
1. Prepare the Cabbage: Chop the canned green cabbage and steam it using minimal water until it is quite well done. This step is crucial for capturing the tender texture that makes Colcannon so comforting.
2. Boil the Potatoes: In a separate pot, boil the yellow or red potatoes until they are fork-tender. The choice between yellow or red potatoes adds a slight variation in texture and flavor, allowing you to customize the dish to your liking.
3. Simmer the Leeks: Clean and chop the leeks, including the first couple of inches of green. Place them in a saucepan with the whole milk and simmer until tender. The milk infuses the leeks with a creamy, aromatic quality that elevates the entire dish.
4. Crisp the Bacon: If using bacon, sauté the rashers until they are crisp. Once cool enough to handle, break them into bite-size pieces. The crispy bacon adds a delightful crunch and savory depth to the Colcannon.
5. Mash the Potatoes: Drain the boiled potatoes and mash them until smooth. Be gentle to maintain a fluffy texture.
6. Combine Ingredients: Stir in the milk with leeks, steamed cabbage, a pinch of mace, minced garlic, and bacon bits. Mix gently to combine all the ingredients, taking care not to over mash the potatoes, to preserve their texture.
A Nostalgic Family Memory:

As I watched my grandmother gracefully move around the kitchen, I learned that cooking was more than a chore—it was an act of love. The Colcannon she prepared was not just a meal; it was a canvas of our Irish heritage painted with stories and laughter.


On one particular Sunday, I remember her sharing a tale of her own childhood in County Clare, where Colcannon was a staple at family gatherings. She spoke of the long, communal tables where everyone, young and old, would gather to share stories and meals. I realized that this dish was not just filling our stomachs, but also our hearts with a sense of belonging and continuity.


Difficulty Rating: 5/10
Classification: Main Dish

This Colcannon recipe is straightforward, making it accessible for cooks of all skill levels. Its simplicity is part of its charm, allowing the quality of the ingredients to shine. As a main dish, it stands alone as a hearty, comforting meal, perfect for sharing with loved ones. Whether you're reminiscing about family traditions or creating new ones, Irish Colcannon is a delicious way to celebrate heritage and home.

Read more about Appetizers

Read more about Main Dishes

Read more about Desserts

Beef Cottage Pie | Made by Meaghan Moineau

Beef Cottage Pie | Made by Meaghan Moineau

Title: "Hearty Beef Cottage Pie: A Savory Comfort to Warm Your Soul"
Description: Discover the rich, savory flavors of Beef Cottage Pie, a dish that combines hearty ingredients and nostalgic memories to deliver comforting warmth with every bite. Perfect for family gatherings or a cozy night in, this main dish is as delightful to make as it is to eat.

---


Introduction

There's something truly special about a dish that brings back cherished memories while filling your home with an inviting aroma. Beef Cottage Pie is one of those dishes for me—a hearty meal that not only satisfies your taste buds but also warms your heart. Today, I’m excited to share this beloved recipe that has been a staple in my family for generations.


Ingredients:

- 1 pound of lean ground beef


- 1 cup of yellow diced onions


- 1 cup of diced celery


- 2 cloves of garlic, minced


- 1 teaspoon of fresh thyme


- 2 tablespoons of Worcestershire sauce


- 1 tablespoon of vegetable oil


- 1 cup of frozen vegetables (like peas, carrots, and corn)


- 1 cup of beef gravy


- 4 cups of mashed potatoes


- 1/4 cup of parmesan cheese


- Salt and pepper to taste


Instructions:
1. Preheat your oven to 375 degrees Fahrenheit.
2. Prepare the Vegetables: In a large skillet, heat the vegetable oil over medium heat. Add the diced onions, celery, and minced garlic. Cook until the vegetables are translucent but not browned, about 5-6 minutes. Remove to a clean dish.
3. Brown the Beef: In the same skillet, add the ground beef and cook until browned. Use a large spoon to discard any excess fat or grease.
4. Combine Ingredients: Return the onion, celery, and garlic mixture to the skillet with the beef. Stir well. Add the Worcestershire sauce and fresh thyme, cooking for an additional minute. Stir in the frozen vegetables and beef gravy, cooking for another 2-3 minutes. Season with salt and pepper to taste.
5. Assemble the Pie: Spray a large casserole dish with cooking spray. Pour the beef and vegetable mixture into the dish, spreading it evenly. Spoon the mashed potatoes over the top, carefully spreading to create an even layer. Sprinkle the parmesan cheese all over.
6. Bake: Place the dish in the preheated oven and bake for 25-30 minutes. Turn the oven broiler on and brown the top of the Cottage Pie until it turns an even golden brown color.
7. Serve: Remove from the oven and allow to set for 5-10 minutes before serving. Enjoy!
A Nostalgic Family Memory:

Growing up, Sunday dinners were a sacred time in my family. After church, my grandmother would welcome us into her warm, aromatic kitchen with a smile that rivaled the sun. Her Beef Cottage Pie was always the centerpiece of our gatherings. I remember sitting at the kitchen table, eagerly watching as she carefully spread the mashed potatoes over the beef mixture, her hands moving with grace and familiarity. Each bite of her Cottage Pie was a taste of home—rich with savory beef, creamy potatoes, and a sprinkle of love that only a grandmother could provide. Those Sundays, filled with laughter and stories, are a treasured part of my childhood, and this recipe is my way of keeping her spirit alive.


Difficulty Level: 4/10
Classification: Main Dish

---


Whether you're looking to create new memories or rekindle old ones, this Beef Cottage Pie is a timeless dish that promises comfort and satisfaction. Enjoy the process, savor the flavors, and most importantly, share it with those you love.

Read more about Appetizers

Read more about Main Dishes

Read more about Desserts

Jambalaya Stew | Made by Meaghan Moineau

Jambalaya Stew | Made by Meaghan Moineau

Savoring the South: A Heartwarming Jambalaya Stew


Description

Dive into the rich and flavorful world of Southern cuisine with our Jambalaya Stew recipe. This hearty dish combines the savory taste of Italian sweet chicken sausage with the bold spices of Cajun seasoning, creating a symphony of flavors that dance on your palate. Perfect for a cozy family dinner or a gathering with friends, this stew is sure to bring warmth and joy to your table. Join us as we explore the nostalgic memories tied to this beloved dish and learn how to make it yourself.

---


A Flavorful Escape: Our Jambalaya Stew Recipe


Difficulty: 5/10

Classification: Main Dish


Ingredients:

- 4 cooked Italian sweet chicken sausage links, sliced

- 2 cans (14.5 oz each) diced tomatoes


- 1 large onion, chopped


- 1 yellow bell pepper, chopped


- 1 green bell pepper, chopped


- 2 stalks celery, chopped


- 4 cups low sodium chicken broth


- 1 cup uncooked brown rice


- 3 cloves garlic, minced


- 2 tablespoons Cajun seasoning


- 1-2 teaspoons hot sauce (to taste)


- 1 teaspoon dried oregano


- 1 teaspoon dried thyme


- 1 pound raw shrimp, peeled and deveined


Instructions:

1. Combine Ingredients: Add all ingredients except the shrimp to a large pot on the stove. Mix thoroughly to ensure even distribution of spices and vegetables.
2. Boil and Simmer: Bring the mixture to a boil. Once boiling, reduce the heat to medium-low, cover, and allow it to simmer. Cook until the vegetables are tender and the rice is fluffy, about 35 minutes.
3. Add Shrimp: Stir in the raw shrimp and re-cover the pot. Continue to cook until the shrimp are tender and cooked through, approximately 6 minutes.
4. Season to Taste: For those who enjoy a little extra kick, season to taste with salt, black pepper, and additional hot sauce.
5. Serve and Enjoy: Ladle the Jambalaya Stew into bowls, serve hot, and savor every bite of this comforting dish.

A Nostalgic Family Memory:

Growing up, Jambalaya Stew was more than just a meal; it was a cherished family tradition. Every summer, our family would gather at my grandmother's house in the heart of Louisiana. The humid air would be filled with laughter, the sound of children playing, and the irresistible aroma of this hearty dish simmering on the stove.

My grandmother, a true Southern matriarch, would orchestrate the bustling kitchen with precision, calling each of us to lend a hand. I remember the joy of standing on a stool, barely tall enough to reach the counter, as I eagerly chopped bell peppers and onions under her watchful eye. As the stew simmered, she would weave tales of her own childhood and the generations before, each story as rich and vibrant as the dish itself.


When the stew was finally ready, we would gather around the table, bowls in hand, and savor the medley of flavors that had brought us together. Each bite was a reminder of family, love, and the timeless beauty of Southern cooking. Even now, as I prepare Jambalaya Stew in my own kitchen, I'm transported back to those sun-drenched afternoons, where food and family were all that mattered.


---


Experience the magic of Jambalaya Stew for yourself and create your own cherished memories around the table. Whether you're a seasoned chef or a novice in the kitchen, this recipe offers a glimpse into the heart of Southern hospitality and the enduring power of food to bring people together.

Read more about Appetizers

Read more about Main Dishes

Read more about Desserts

Venison Stew | Made by Meaghan Moineau

Venison Stew | Made by Meaghan Moineau

Savoring Heritage: A Hearty Venison Stew Made with Love


A Taste of Tradition


In every family, there are dishes that transcend mere meals, becoming cherished heirlooms passed down through generations. Our Venison Stew is one such recipe, a hearty main dish that encapsulates the warmth of home and the richness of tradition. This stew, with its savory blend of tender venison, vibrant vegetables, and a broth that feels like a comforting hug, is perfect for those chilly evenings when nostalgia beckons.


A Walk Down Memory Lane


Growing up, I remember our family gatherings, where the scent of this stew simmering on the stove would draw everyone to the kitchen. My grandmother, with her gentle hands and warm smile, would tell us tales of her childhood while she cooked. Each spoonful of stew was a journey back in time, connecting us to our roots and to each other. The recipe has evolved slightly over the years, but the essence remains—a testament to the love and care infused into every batch.


Ingredients


- Venison Stew Meat: The star of our dish, providing a rich, gamey flavor.
- Canned Green Baby Carrots & Baby Carrots: For a touch of sweetness and color.
- Celery: Adds a crisp texture and aromatic depth.
- Canned Mushrooms: Earthy and tender, complementing the venison beautifully.
- Green Bell Pepper: Offers a subtle, fresh bite.
- Flour: For dredging and thickening.
- Beef Bouillon: Enhances the broth with a robust depth.
- Onion: Essential for its sweet, caramelized notes.
- Potatoes: A classic addition, making the stew heartier and more filling.
- Vegetable Oil: For browning the meat.
- Water: To create the broth base.

Instructions


1. Prep the Ingredients: Cut all ingredients into 1-inch pieces. This ensures even cooking and a delightful texture in every bite.
2. Dredge the Venison: Coat the venison pieces with flour and your choice of spices. This step locks in flavor and helps brown the meat.
3. Brown the Venison: In a large pot, heat vegetable oil and brown the venison. This caramelization process adds a depth of flavor to the stew.
4. Simmer the Meat: Add water and beef bouillon, bringing the mixture to a boil. Reduce the heat and let it simmer gently for about 2 hours, allowing the venison to become tender and juicy.
5. Incorporate the Vegetables: Add the celery, carrots, green bell pepper, mushrooms, and onion. Let the stew simmer for an additional 30 minutes, letting the flavors meld together.
6. Thicken the Stew: Mix 3 tablespoons of flour with 1 cup of cold water until smooth, then stir into the stew. This will thicken the broth, giving it a luxurious consistency.

A Culinary Journey


Creating this venison stew is more than just preparing a meal; it's an experience filled with memories and love. Sharing it with family and friends is a way to continue the tradition and make new memories around the dinner table.


Difficulty Rating


This recipe is relatively straightforward, with a difficulty rating of 5 out of 10. It's perfect for those looking to explore traditional cooking methods without feeling overwhelmed.

Classification


Our Venison Stew is undoubtedly a Main Dish, offering a satisfying and flavorful experience that's sure to become a family favorite.

In a world where fast-paced lifestyles often overshadow the simple joys of a home-cooked meal, this venison stew invites you to slow down, savor each bite, and reconnect with the past. Whether you're an experienced cook or a novice in the kitchen, this recipe promises to bring warmth and happiness to your table. Enjoy the journey!

Read more about Appetizers

Read more about Main Dishes

Read more about Desserts

Minestrone | Made by Meaghan Moineau

Minestrone | Made by Meaghan Moineau

A Hearty Bowl of Memories: Classic Minestrone Soup Recipe


Description

Dive into the heartwarming world of classic Italian cuisine with our Minestrone Soup recipe. Perfect for a chilly evening, this nutrient-packed dish is brimming with vibrant vegetables and robust flavors. Whether you're a seasoned cook or a kitchen novice, this recipe is sure to bring comfort to your table and warmth to your soul.

A Nostalgic Tale

Growing up, Saturday afternoons were always a time of togetherness in our household. The comforting aroma of simmering soup would fill every corner of our home, drawing us all to the kitchen. My grandmother, with her gentle hands and warm smile, would orchestrate these culinary symphonies, turning ordinary ingredients into extraordinary meals.

Minestrone was her masterpiece—a dish that transcended mere sustenance and ventured into the realm of family tradition. As she sautéed the carrots, celery, onions, and cabbage, she would share stories of her childhood in a small Italian village. Her tales of sun-drenched fields and bustling local markets were as rich and vibrant as the soup itself.


Each ingredient she added seemed to carry a piece of her past. The Worcestershire sauce, a nod to her adventurous spirit, the Italian mixed seasoning, a tribute to her roots. The pot would bubble gently on the stove, much like the laughter and chatter that filled the room. It was more than just a meal; it was a legacy of love and warmth passed down through generations.


Recipe Details


Ingredients

- 2 tablespoons butter

- 2 cups carrots, diced


- 2 cups celery, diced


- 2 cups onions, chopped


- 4 cloves garlic, minced


- 2 cups cabbage, shredded


- 1 can (28 ounces) tomatoes, diced


- 6 cups water


- 1/2 cup brown rice


- 2 teaspoons salt


- 1 tablespoon Worcestershire sauce


- 1 tablespoon Italian mixed seasoning


- 1/2 teaspoon pepper


- 2 cups potatoes, peeled and diced


- 3 beef bouillon cubes


- 1 zucchini, sliced


- 1 can (15 ounces) kidney beans, drained and rinsed


- 1 cup frozen spinach


- Parmesan cheese, for garnish


Instructions

1. In a large soup kettle, melt the butter over medium heat. Add the carrots, celery, onions, garlic, and cabbage. Sauté for about 20 minutes, stirring often, until the vegetables are tender.

2. Stir in the canned tomatoes, water, brown rice, salt, Worcestershire sauce, Italian seasoning, pepper, potatoes, bouillon cubes, and zucchini.


3. Bring the mixture to a boil, then reduce the heat. Cover and simmer for at least 30 minutes.


4. Add the kidney beans and frozen spinach. Return to a boil and cook over medium heat until the spinach is cooked through, adding more water if necessary.


5. Garnish with Parmesan cheese before serving.


Difficulty: 4/10
Classification: Main Dish

Conclusion

This Minestrone Soup is not just a recipe; it's an invitation to create your own memories, to gather loved ones around the table, and to share stories and laughter. As you savor each spoonful, may you feel the comforting embrace of family, tradition, and the enduring warmth of home.

Read more about Appetizers

Read more about Main Dishes

Read more about Desserts

Superbowl Chili | Made by Meaghan Moineau

Superbowl Chili | Made by Meaghan Moineau

Title: "Touchdown Taste: Superbowl Chili Recipe That Scores Big"


Description:

Dive into a warm bowl of Superbowl Chili—a hearty delight that brings the family together like a championship game. Loaded with succulent meats, robust spices, and creamy toppings, this dish isn't just another game-day snack; it's a culinary touchdown. With an easy-to-follow recipe and a heartwarming family story, this blog post will guide you through creating a chili that’s perfect for any occasion, especially the big game day.

---


Superbowl Chili: A Family Tradition That Scores Every Time


As the crisp chill of February settles in and the excitement of the Superbowl electrifies our living room, there’s one game-day tradition that’s been a constant in our household—our Superbowl Chili. This isn't just a dish; it's a family legacy passed down through generations, a recipe that transforms a football gathering into a cherished family reunion.


I remember sitting on the kitchen counter as a child, watching my dad meticulously prepare the ingredients. The smell of diced onions sizzling in olive oil would waft through the house, drawing everyone into the kitchen like moths to a flame. Dad would tell stories of how his father taught him the secret to the perfect chili: a delicate balance of spices and patience.


Ingredients:

- Canned black beans

- Diced canned tomatoes


- Carrots


- Chili powder


- Chipotle chile pepper in adobo sauce


- Cumin


- Fresh cilantro


- Garlic


- Green onions


- Kosher salt


- Lean ground beef


- Lime


- Low sodium chicken stock


- Monterey jack cheese


- Olive oil


- Yellow onions


- Dried oregano


- Sirloin steak


- Sour cream


Instructions:

1. Sear the Meats: In a large heavy pot set over high heat, sauté the ground beef and sirloin steak chunks, stirring frequently, until browned, about 8 minutes. Use a slotted spoon to remove the beef to a plate and pour off the remaining liquid.
2. Sauté Vegetables: Add olive oil to the same pot and set over medium heat. When hot, add carrots, onions, and garlic, sautéing until softened, about 5 minutes.
3. Spice it Up: Return the beef to the pot and add chili powder, cumin, oregano, salt, and chopped chipotle chile; stir and cook for 1 minute. Add tomatoes and broth. Bring to a simmer, reduce heat to a gentle simmer, and cook for 30 minutes more, stirring occasionally.
4. Finish with Beans: Stir in all but 1/3 cup of black beans and cook for 5 minutes more. Mash the reserved beans with a fork and stir into the chili to give it extra body. If too thick, add as much as 1 cup additional broth and heat several minutes to warm.
5. Make-Ahead Tip: This chili can be prepared two days ahead. Cool, cover, and refrigerate. Reheat over medium heat, stirring often.
6. Serve: Ladle into bowls and garnish with green onions, cilantro, Monterey jack cheese, a squeeze of lime, and a dollop of sour cream.

Difficulty:

Rated 5/10 for its straightforward steps and simple ingredients, making it an ideal main dish for both seasoned cooks and beginners alike.

Game Day Nostalgia:

Every year, our family gathers around the TV, bowls of chili in hand, as we cheer for our team. But it’s more than just watching the game; it's about cherishing the laughter, the groans at fumbles, and the joy of shared triumphs. Each spoonful of chili is a reminder of the warmth and love that make these moments unforgettable.

So, whether you're a football fanatic or just in it for the snacks, our Superbowl Chili is sure to be a winning play at your next gathering. Enjoy the game, and more importantly, enjoy the moments that bring us together.


---


Indulge in this Superbowl Chili and let it become a tradition that scores a touchdown with your family and friends, just as it has with ours.

Read more about Appetizers

Read more about Main Dishes

Read more about Desserts