{No Bake} Cinnamon Butterscotch Energy Bites | Made by Meaghan Moineau

{No Bake} Cinnamon Butterscotch Energy Bites | Made by Meaghan Moineau

No Bake Cinnamon Butterscotch Energy Bites: A Sweet Trip Down Memory Lane


A Delightful No-Bake Treat with a Touch of Nostalgia


There's something magical about recipes that require no baking—especially when they're packed with flavors that evoke cherished memories. Today, I'm thrilled to share a recipe that not only satisfies your sweet cravings but also transports you back to simpler times: No Bake Cinnamon Butterscotch Energy Bites.


The Magic Mix of Ingredients


These energy bites combine the perfect blend of brown sugar, butterscotch chips, rice cereal, ground flax seed, honey, oats, peanut butter, and protein powder to create a delectable treat that's both nutritious and delicious. The gentle spice of cinnamon weaves through every bite, adding a comforting warmth that pairs beautifully with the sweet butterscotch.


A Nostalgic Family Memory


Growing up, I spent countless summer afternoons at my grandmother's house, where the kitchen was always filled with the aroma of something sweet. My grandmother had a knack for creating delicious treats without ever turning on the oven, a skill I admired deeply. One of my fondest memories is of her teaching me how to make these very energy bites.


We would gather all the ingredients on her antique wooden countertop. As I carefully measured out the oats and rice cereal, she'd share stories of her childhood, weaving tales as rich as the flavors we were about to create. Once the mixture was prepared, she'd let me press the butterscotch chips into each ball—a task I took very seriously, ensuring each one was perfectly adorned.


When we finished, we'd sit on her porch, enjoying our creations while sipping iced tea, the summer breeze carrying the sound of birds chirping. Those afternoons taught me the joy of cooking with love and intention, a lesson I carry with me to this day.


Recipe Instructions


1. Grind the Oats: Start by grinding 1 cup of oats in a blender until you achieve a fine texture.
2. Mix the Dry Ingredients: In a large bowl, combine the rice cereal, whole oats, ground oats, protein powder, and ground flax seed.
3. Create the Liquid Mixture: In a microwavable safe bowl, mix together brown sugar, peanut butter, and honey. Heat in the microwave in 15-second intervals, stirring intermittently, until melted and well-combined.
4. Combine and Chill: Pour the liquid mixture into the bowl of dry ingredients and stir until thoroughly combined. Refrigerate the mixture for about 30 minutes.
5. Form and Finish: Once chilled, remove the mixture from the fridge and roll it into bite-sized balls. Press butterscotch chips into each ball for that sweet, nostalgic touch.

Difficulty and Classification


Difficulty: 3/10
Classification: Dessert

These No Bake Cinnamon Butterscotch Energy Bites are incredibly easy to make, requiring minimal effort for maximum flavor payoff. Whether you're a seasoned baker or a kitchen novice, this recipe is a delightful way to create something special without the hassle of baking.


Conclusion


These energy bites are more than just a tasty treat—they're a journey back to cherished moments and the warmth of family. I hope this recipe brings you as much joy and nostalgia as it does for me. Enjoy every bite and perhaps, create some sweet memories of your own along the way.

Read more about Appetizers

Read more about Main Dishes

Read more about Desserts

Goat Cheese, Fig And Proscuitto Crostini | Made by Meaghan Moineau

Goat Cheese, Fig And Proscuitto Crostini | Made by Meaghan Moineau

Title: Delightful Nostalgia on a Platter: Goat Cheese, Fig, and Prosciutto Crostini
Description: Dive into a world of flavors with our Goat Cheese, Fig, and Prosciutto Crostini recipe. This easy yet elegant appetizer will transport you back to cherished family gatherings, blending sweet, savory, and creamy notes in every bite. Perfect for any occasion, this dish is sure to impress your guests with its gourmet appeal.

---


A Taste of Memory: The Perfect Appetizer for Family Gatherings


There's something magical about the combination of flavors in a well-crafted appetizer, and our Goat Cheese, Fig, and Prosciutto Crostini is no exception. This dish is a nostalgic nod to the cherished family gatherings of my childhood, where food was the centerpiece of our joyful celebrations.


Ingredients:

- Biscuit-type crackers

- Fig jam


- Prosciutto


- Goat cheese


- White peppercorns, cracked


Instructions:

1. Preheat the Oven: Start by preheating your oven to 350 degrees Fahrenheit. The anticipation of the warm, melting cheese is worth every minute of preparation.
2. Assemble the Crostini: Spread 1 teaspoon of fig jam on each cracker. The sweet, sticky jam forms the perfect base for our savory topping.
3. Layer with Prosciutto: Place a small piece of prosciutto on each cracker. The saltiness of the prosciutto beautifully complements the sweetness of the fig jam.
4. Add the Cheese: Slice the goat cheese and place one slice on each prepared cracker. The creamy texture of the cheese adds a luxurious touch to this simple yet sophisticated dish.
5. Bake to Perfection: Arrange the crostini on sheet trays and bake in the preheated oven for 10-12 minutes until the edges of the cheese start to brown.
6. Finish with Flavor: Remove from the oven and top with cracked white pepper for an added layer of aroma and subtle heat.

A Nostalgic Family Memory


I vividly remember the first time my grandmother introduced this delightful recipe at our annual family reunion. The kitchen was filled with laughter and the irresistible aroma of freshly baked crostini. As we gathered around the table, the crostini became more than just an appetizer; it was a symbol of togetherness and love.


Each bite was a journey back to those precious moments, where the sweet fig jam and savory prosciutto mirrored the harmonious blend of personalities in our family. It was a dish that brought everyone together, regardless of age or preference. The creamy goat cheese was the perfect centerpiece, much like my grandmother, who held our family together with her warmth and kindness.


Difficulty Rating: 3/10


This recipe is wonderfully simple to make, earning a difficulty rating of 3 out of 10. It's perfect for both novice cooks and experienced chefs looking to add a touch of elegance to their appetizer spread.


Classification: Appetizer


Ideal as a starter, this Goat Cheese, Fig, and Prosciutto Crostini sets the stage for any meal. Its blend of flavors and textures makes it an unforgettable appetizer that will delight your guests and create lasting memories.


Incorporate this appetizer into your next gathering, and let the flavors transport you to a place of warmth, love, and cherished family memories. Whether you're hosting a dinner party or enjoying a quiet evening at home, this crostini recipe is sure to become a favorite in your culinary repertoire.

Read more about Appetizers

Read more about Main Dishes

Read more about Desserts

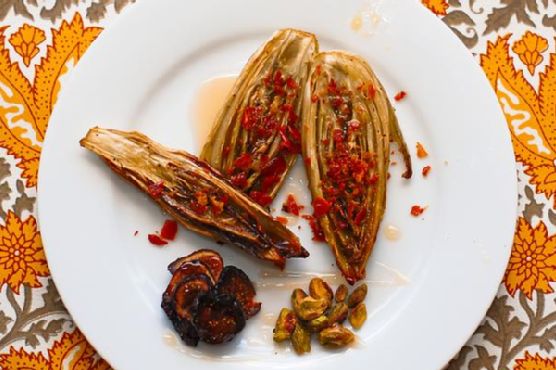
Roasted Endive Salad With Prosciutto, Figs and Pistachios | Made by Meaghan Moineau

Roasted Endive Salad With Prosciutto, Figs and Pistachios | Made by Meaghan Moineau

A Taste of Nostalgia: Roasted Endive Salad With Prosciutto, Figs, and Pistachios


An Ode to Family Gatherings and Flavorful Traditions


Description: Dive into the harmonious blend of flavors in our Roasted Endive Salad with Prosciutto, Figs, and Pistachios. This dish brings together the crisp texture of roasted red and green endive, the rich saltiness of prosciutto, the sweet chewiness of figs, and the crunchy delight of pistachios, all drizzled with a touch of honey. Perfect as an appetizer, this recipe is a testament to how simple ingredients can transform into an unforgettable culinary experience.
Difficulty: 5/10
Category: Appetizer

---


A Culinary Journey Down Memory Lane


Growing up, family gatherings were the highlight of every season. Whether it was a holiday celebration or a simple weekend get-together, the kitchen was always bustling with activity. My grandmother, the heart and soul of our family, had a knack for turning ordinary ingredients into extraordinary dishes. One of her signature creations was the Roasted Endive Salad, a dish that never failed to bring a smile to our faces.


I remember one particular autumn afternoon, the air crisp and leaves painting the ground in hues of gold and crimson. My cousins and I would play outside, our laughter echoing through the trees, while the aroma of roasting endive wafted from the kitchen window. The anticipation of savoring that first bite was almost as delightful as the dish itself.


My grandmother would meticulously prepare the endives, her hands moving with the grace and precision that only years of practice could bring. She'd roast them to perfection, their edges turning a beautiful golden brown. Meanwhile, the prosciutto sizzled in the skillet, its savory scent mingling with the sweet fragrance of dried figs.


When the time came to sit around the table, the Roasted Endive Salad was always a centerpiece. Each bite was a symphony of flavors—the bitterness of the endive balanced by the sweetness of figs, the crunch of pistachios, and the delicate saltiness of prosciutto, all enveloped in the warm embrace of honey.


The Recipe


Ingredients:

- Red and green endive


- Olive oil


- Prosciutto


- Dried figs


- Pistachio nuts


- Honey


Instructions:

1. Preheat your oven (*ding, this is a great toaster oven candidate) to 350°F. Line a rimmed baking sheet with aluminum foil.


2. Wash the endive and remove any unsightly outer leaves. Slice each endive head in half from the stem to the tip.


3. Arrange the endive cut side up on the foil-lined baking sheet. Coat generously with olive oil.


4. Bake at 350°F for 30 minutes, or until the outer edges are golden brown.


5. Meanwhile, fry the prosciutto in a skillet until crispy. Drain onto paper towels, then crumble and set aside.


6. When the endive is done roasting, arrange three pieces on a plate alongside a handful of sliced dried figs and pistachio nuts.


7. Drizzle a spoonful of honey over the plate, then sprinkle the endive with about 1/4th of the crumbled prosciutto.


Conclusion


This Roasted Endive Salad with Prosciutto, Figs, and Pistachios is more than just a dish—it's a bridge to cherished memories and a testament to the power of simple, quality ingredients. Whether you're recreating a family tradition or starting a new one, may each bite bring warmth and joy to your table, just as it has to mine.

Read more about Appetizers

Read more about Main Dishes

Read more about Desserts

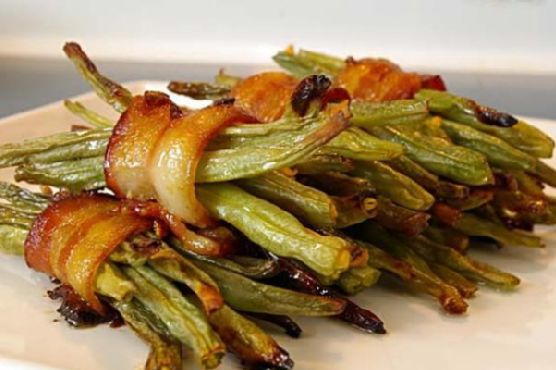
Bacon Wrapped Green Bean Bundles | Made by Meaghan Moineau

Bacon Wrapped Green Bean Bundles | Made by Meaghan Moineau

Title: Savoring Nostalgia: Bacon Wrapped Green Bean Bundles for the Soul


Description:

Discover the delightful blend of savory and sweet with our Bacon Wrapped Green Bean Bundles. This easy-to-make appetizer not only tantalizes your taste buds but also transports you back to cherished family gatherings. Read on for a heartwarming story and a step-by-step guide to creating this delectable dish.

---


A Taste of Tradition: Bacon Wrapped Green Bean Bundles


When the leaves began to fall and the air turned crisp, our family gathered in the cozy warmth of Grandma’s kitchen. It was a scene of bustling activity, laughter, and the irresistible aroma of something delicious baking in the oven. Among the many dishes that graced our holiday table, one stood out for its simplicity and flavor: Bacon Wrapped Green Bean Bundles.


These delightful bundles were a staple at our family feasts, embodying the perfect harmony of savory and sweet. Grandma would always say, “A dish made with love is a dish worth remembering,” and indeed, her green bean bundles were unforgettable. Each bite was a symphony of crispy bacon, tender green beans, and a luscious glaze of butter, brown sugar, garlic, and soy sauce.


Ingredients:

- Fresh green beans

- Bacon


- Butter


- Brown sugar


- Fresh garlic


- Soy sauce


Instructions:


1. Preheat the Oven: Set your oven to 425°F (220°C) and let it warm up while you prepare the dish.
2. Prepare the Baking Dish: Grease a 10x15 inch baking dish and set it aside for later use.
3. Wrap the Green Beans: Take 8 or 9 fresh green beans and wrap them with a strip of bacon. Place each bundle in the prepared baking dish. Repeat this process until all your green beans are used.
4. Create the Glaze: In a small saucepan, combine butter, brown sugar, fresh garlic, and soy sauce. Heat the mixture gently until the butter is melted and the ingredients are well combined.
5. Dress the Bundles: Pour the warm glaze over the green bean bundles, ensuring that each one is coated evenly.
6. Bake to Perfection: Place the baking dish in the preheated oven and bake for 25 to 30 minutes. The bundles are ready when the bacon is browned and crispy, and the green beans are tender.

A Walk Down Memory Lane


As the bundles baked, the kitchen would fill with a mouthwatering scent that drew everyone in. My cousins and I would sneak peeks through the oven door, eagerly waiting for the timer to ring. Once they were finally ready, we would gather around the table, the room buzzing with conversation and the clinking of silverware. It was in these moments that I learned the true essence of family: sharing, laughter, and the simple joy of being together.


Difficulty: 3/10


This recipe is delightfully easy to make, yet it offers an impressive presentation that will wow your guests. It’s the perfect appetizer for any gathering, from casual dinners to festive celebrations.


Classification: Appetizer


Whether you’re hosting a holiday feast or a simple dinner party, these Bacon Wrapped Green Bean Bundles are sure to be a hit. They’re a testament to the idea that sometimes, the simplest dishes hold the most cherished memories.


So, gather your ingredients, preheat your oven, and prepare to create a dish that will not only satisfy your culinary cravings but also warm your heart with nostalgia.

Read more about Appetizers

Read more about Main Dishes

Read more about Desserts

Divine Christmas Candy Cane Cookies | Made by Meaghan Moineau

Divine Christmas Candy Cane Cookies | Made by Meaghan Moineau

**Title: Celebrate the Holidays with Divine Christmas Candy Cane Cookies**


**Description:** Embrace the holiday spirit with our delightful Candy Cane Cookies, a heavenly treat that combines the minty freshness of peppermint with the sweetness of a buttery cookie. Perfect for sharing, these cookies will bring joy to every festive gathering. Follow our detailed guide to create these charming confections and discover the heartwarming family story behind this treasured recipe.


---


**A Sweet Holiday Tradition: Divine Christmas Candy Cane Cookies**


As the holiday season approaches, the aroma of freshly baked cookies fills the air, evoking cherished memories of family gatherings and festive celebrations. One such nostalgic treat that has become a staple in our household is the delightful Candy Cane Cookie. With its vibrant colors and refreshing peppermint flavor, this cookie is not just a dessert, but a symbol of holiday joy and togetherness.


**Recipe Overview**


**Ingredients:**


- 2 cups all-purpose flour


- 1 egg yolk


- Red food coloring


- 1 teaspoon peppermint extract


- 1/2 cup powdered sugar


- 1 cup unsalted butter, softened


- 1 teaspoon vanilla extract


**Instructions:**


1. **Creaming the Butter**: Begin by creaming the unsalted butter until it achieves a smooth, fluffy texture. Gradually add the powdered sugar, continuing to beat until the mixture is light and airy.


2. **Mixing the Wet Ingredients**: Incorporate the egg yolk, vanilla extract, and peppermint extract into the butter and sugar mixture, stirring until well combined.


3. **Incorporating the Dry Ingredients**: Add the all-purpose flour in two additions. First, add half of the flour, stirring until fully incorporated, then add the remaining flour. Mix until you attain a firm, smooth dough.


4. **Coloring the Dough**: Divide the dough into two equal portions. Add a few drops of red food coloring to one half, kneading until the color is evenly distributed.


5. **Chilling the Dough**: Wrap both dough balls in plastic wrap and refrigerate for about 30 minutes, allowing the dough to firm up.


6. **Shaping the Cookies**: Preheat your oven to 180°C (356°F). On a lightly floured surface, take a walnut-sized piece of red dough and a walnut-sized piece of white dough. Roll each into a 10-12 cm long rope. Place the ropes side by side and gently twist them together, pressing slightly to form a spiral. Shape by bending one end into a hook, creating the iconic candy cane shape.


7. **Baking**: Line the cookies on baking paper about 2 cm apart. Bake for approximately 10 minutes or until the edges start to brown. Once baked, let the cookies cool completely on a wire rack.


**A Cherished Family Memory**


Every Christmas, my grandmother would gather the family in her cozy kitchen, the heart of her home. With flour dusting the countertops and laughter echoing off the walls, we would embark on our annual cookie-baking adventure. The Candy Cane Cookies were always my favorite part. My siblings and I would compete to see who could create the most perfect twist, our hands sticky with dough and faces smeared with flour. As the cookies baked, the kitchen would be filled with the sweet scent of peppermint, wrapping us in a warm, festive embrace. To this day, the taste of these cookies transports me back to those precious moments, a reminder of the simple joys and loving bonds that define the holiday season.


**Difficulty Level: 5/10**


**Classification: Dessert**


Whether you’re continuing a family tradition or starting a new one, these Candy Cane Cookies are sure to bring a smile to everyone’s face. With their delightful appearance and delicious taste, they’re the perfect addition to your holiday dessert table. Happy baking, and may your holidays be filled with warmth and cheer!

Read more about Appetizers

Read more about Main Dishes

Read more about Desserts

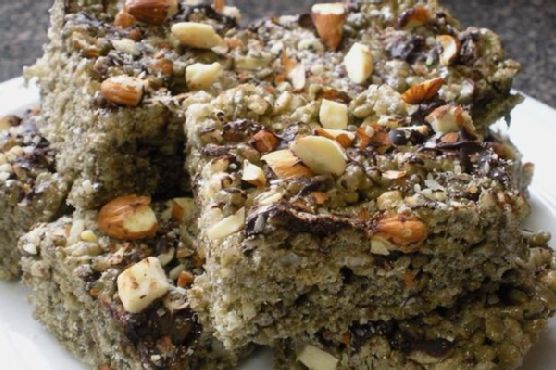
Rocky Road Rice Krispie Treats | Made by Meaghan Moineau

Rocky Road Rice Krispie Treats | Made by Meaghan Moineau

**Title: Rocky Road Rice Krispie Treats: A Nostalgic Twist on a Classic Dessert**


**Description: Dive into the sweet and crunchy world of Rocky Road Rice Krispie Treats. This delightful dessert combines the rich flavors of bittersweet chocolate, almonds, and marshmallows with the crispy texture of rice cereal. Perfect for family gatherings or a nostalgic treat, this recipe is sure to become a cherished favorite.**


---


### Rocky Road Rice Krispie Treats: A Sweet Trip Down Memory Lane


Ah, the sweet nostalgia of childhood desserts. There's something about the combination of chocolate, marshmallows, and almonds that never fails to transport me back to those carefree days. Growing up, my family had a tradition of gathering in the kitchen on Sunday afternoons to whip up sweet treats. The laughter, the scent of melting chocolate, and the joy of creating something delicious together are memories I cherish dearly. One particular favorite was our own twist on the classic rice krispie treats: the Rocky Road Rice Krispie Treats.


#### Ingredients:


- **Butter**: Essential for that rich, creamy base.


- **Chocolate Vanilla Swirl Marshmallows**: The star of our show, adding a delightful twist.


- **Almond Extract & Vanilla Extract**: These extracts enhance the flavor, providing a depth that complements the chocolate beautifully.


- **Rice Krispies**: The foundation of this treat, offering that iconic crunch.


- **Almonds**: One cup mixed in and an additional 1/3 cup for topping, these add a delightful crunch and nutty flavor.


- **Bittersweet Chocolate**: Melted and drizzled on top, it adds a layer of decadence.


- **Kosher Salt**: Just a sprinkle to heighten all the flavors.


#### Instructions:


1. **Melt and Combine**: In a large soup pot, melt the butter and chocolate vanilla swirl marshmallows over a low flame, stirring constantly to create a smooth, creamy mixture.


2. **Flavor Infusion**: Stir in the almond extract and vanilla extract, allowing their rich scents to fill the kitchen and blend into the marshmallow mixture.


3. **Mix It Up**: Add the rice krispies and 1 cup of almonds into the pot. Stir well, ensuring each piece of cereal is coated with the marshmallow blend.


4. **Shape and Set**: Spread the mixture into a 9x13 dish prepped with baking spray. Press down with a spatula until the surface is smooth and even.


5. **Decadent Toppings**: Drizzle the melted bittersweet chocolate over the top and sprinkle with the remaining 1/3 cup of almonds. Finish with a light sprinkle of kosher salt (about 1/2 teaspoon) to enhance the flavors.


6. **Cool and Cut**: Allow the treats to cool completely. For ease of cutting, place them in the fridge for about an hour once they reach room temperature.


#### A Sweet Memory


I recall one particular Sunday when I was around ten years old. It was a rainy afternoon, the kind where you could hear the gentle patter of raindrops against the kitchen window. My mom, my siblings, and I were gathered around the kitchen island, each of us assigned a task. I was in charge of stirring the marshmallows and butter—a task I took very seriously. As we worked, my mom would regale us with stories of her own childhood, sharing how her mother taught her to bake. It was in those moments, surrounded by family and the comforting aroma of chocolate and almonds, that I learned the true meaning of love and tradition.


#### Difficulty: 3/10


**Classification: Dessert**


This Rocky Road Rice Krispie Treats recipe is not only simple to make but also a delightful journey down memory lane. It's perfect for bringing a touch of nostalgia to any gathering, reminding us of the warmth and joy found in family traditions. Whether you're enjoying them on a rainy afternoon or sharing them at a festive gathering, these treats promise to bring smiles and sweet memories to all who indulge.

Read more about Appetizers

Read more about Main Dishes

Read more about Desserts

Crispy Rhubarb Pockets | Made by Meaghan Moineau

Crispy Rhubarb Pockets | Made by Meaghan Moineau

**Title: Crispy Rhubarb Pockets: A Sweet Nostalgia Wrapped in Flaky Phyllo**


**Description:** Dive into the delightful world of Crispy Rhubarb Pockets, where the tangy sweetness of rhubarb meets the buttery flakiness of phyllo pastry. This easy-to-make dessert is perfect for those cozy family gatherings or when you simply want to indulge in a nostalgic treat. Follow our step-by-step guide to create this mouthwatering dessert that will transport you back to simpler times.


---


There's something magical about the way food can transport us back in time, evoking cherished memories with every bite. For me, Crispy Rhubarb Pockets are a ticket to my childhood, where summer afternoons were spent in my grandmother's kitchen. The sun would stream through the windows, and the air was filled with the sweet and slightly tangy scent of rhubarb simmering on the stove.


Grandma always had a knack for turning simple ingredients into something extraordinary. The sight of her gently stirring the diced rhubarb with granulated sugar, cornstarch, and a pinch of salt in her trusty saucepan is etched in my memory. The kitchen would fill with a symphony of bubbling sounds and the unmistakable aroma of rhubarb slowly releasing its liquid and transforming into a thick, chunky sauce.


As the rhubarb mixture cooled, Grandma would prepare the delicate phyllo sheets, brushing each with melted butter, creating a stack that was both crispy and decadent. I would watch in awe as she expertly cut the phyllo into perfect squares, placing a generous spoonful of the rhubarb filling in the center of each one.


The real magic happened when she pinched the corners of the phyllo, creating a beautiful pouch that would soon become a golden-brown masterpiece in our old oven. I remember eagerly waiting for the timer to ding, signaling that the Crispy Rhubarb Pockets were ready to emerge, fragrant and inviting.


Sitting around the kitchen table, we would savor each bite, the warm rhubarb filling mingling with the buttery crunch of the phyllo. It was a simple pleasure, but one that brought our family together, sharing stories and laughter as the afternoon sun dipped below the horizon.


Today, I carry on Grandma's tradition, making Crispy Rhubarb Pockets whenever I need a taste of home. This dessert, with its perfect balance of tart and sweet, is a testament to the power of food to create lasting memories and bring loved ones together.


**Difficulty:** 5/10


**Category:** Dessert


**Recipe:**


**Ingredients:**


- Diced rhubarb


- Granulated sugar


- Cornstarch


- Salt


- Vanilla extract


- Phyllo sheets


- Melted butter


**Instructions:**


1. Combine the diced rhubarb, sugar, cornstarch, and salt in a medium saucepan over medium-low heat.


2. Cook, stirring occasionally, until the rhubarb releases its liquid and begins to break down, creating a thick, chunky sauce (about 10 minutes).


3. Remove the pan from the heat and stir in the vanilla extract. Set aside to cool to room temperature.


4. Layer 4 phyllo sheets, brushing each with melted butter. Preheat the oven to 350 degrees F.


5. Cut four 4-inch squares from the phyllo stack.


6. Place 2 teaspoons of filling in the center of each square.


7. Brush phyllo from the edge of the filling to each point of the square lightly with water.


8. Gather the points of the square and pinch together just above the filling. Brush the pouch with butter.


9. Repeat the process for all 4 pouches.


10. Place filled pouches at least 1" apart on an ungreased cookie sheet or baking pan.


11. Bake in the preheated oven for 12 to 15 minutes or until golden brown.


12. Remove the pouches and let them cool on a wire rack for about 5 minutes.


13. Serve warm or at room temperature.


Indulge in this deliciously nostalgic treat and let the flavors whisk you away to simpler times. Enjoy!

Read more about Appetizers

Read more about Main Dishes

Read more about Desserts

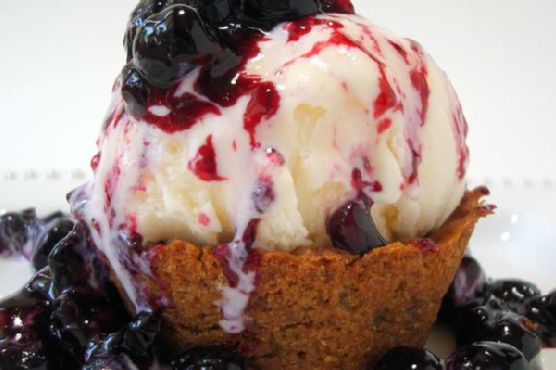
Blueberry-Lavender Sauce and Ginger Snap Ice Cream Cups | Made by Meaghan Moineau

Blueberry-Lavender Sauce and Ginger Snap Ice Cream Cups | Made by Meaghan Moineau

### Title: A Symphony of Flavors: Blueberry-Lavender Sauce & Ginger Snap Ice Cream Cups


#### Description:


Dive into the delightful world of culinary nostalgia with this exquisite dessert recipe. Discover how the harmonious blend of blueberry-lavender sauce and ginger snap ice cream cups can transport you to cherished family moments. With a difficulty level of 5 out of 10, this dessert is perfect for those looking to impress without the stress. Ideal for summer gatherings or a cozy evening treat, this dish will surely become a family favorite.


---


#### A Taste of Tradition: Blueberry-Lavender Sauce & Ginger Snap Ice Cream Cups


There's something extraordinarily comforting about the aroma of blueberries simmering on the stove, mingling with the floral notes of lavender. It's a scent that instantly transports me back to summer afternoons spent in my grandmother's kitchen. She had a knack for turning simple ingredients into magical creations, and her Blueberry-Lavender Sauce was no exception. Paired with the crunch of ginger snap ice cream cups, this dessert was a staple at our family gatherings.


##### Ingredients You'll Need:


- **For the Blueberry-Lavender Sauce:**


- Fresh blueberries


- Dried lavender buds


- Sugar


- Cornstarch


- Lemon juice


- Salt


- **For the Ginger Snap Ice Cream Cups:**


- Ginger snap cookies


- Butter


- Sugar


- Salt


- Your choice of ice cream (vanilla bean, lemon curd, or peach work beautifully)


##### Instructions:


1. **Make the Blueberry-Lavender Sauce:**


- In a small saucepan, bring the blueberries, lavender, sugar, and cornstarch to a boil.


- Lower the heat and let it simmer for about 5 minutes until the mixture thickens slightly.


- Remove from heat and stir in the lemon juice and a dash of salt.


- This versatile sauce is not only perfect for this dessert but also pairs wonderfully with pancakes, pound cake, or cheesecake.


2. **Prepare the Ginger Snap Ice Cream Cups:**


- Preheat your oven to 300°F (150°C).


- Grind the ginger snap cookies in a food processor. Alternatively, place them in a zip bag and crush them with a rolling pin.


- Mix the ground cookies with melted butter, sugar, and a pinch of salt.


- Lightly spray a muffin tin with non-stick spray.


- Scoop about 2 tablespoons of the cookie mixture into each muffin cup.


- Press each scoop with a small cup to shape them into mini cups.


- Bake for 12-15 minutes. Allow them to cool completely before gently lifting them out with your fingers or a small knife.


- Makes about 10 cups.


3. **Assemble the Dessert:**


- Place one scoop of your preferred ice cream in each ginger snap cup.


- Generously top with the blueberry-lavender sauce.


##### A Nostalgic Story:


Growing up, summer vacations meant one thing—spending time at my grandmother's house. Her backyard was a treasure trove of wildflowers and berry bushes. I remember running through the garden, my fingers stained with blueberry juice, as Grandma called us back to the kitchen. There, amidst the warmth and chatter, she would teach us the art of making her beloved blueberry-lavender sauce. The sweet, tangy aroma filled the air, making our mouths water in anticipation.


The ginger snap ice cream cups were a later addition, a recipe my mother introduced after discovering it in an old cookbook. Together, they created a symphony of flavors—sweet, spicy, and floral—that became synonymous with family gatherings. Each bite was a journey back in time, a reminder of those carefree days filled with laughter and love.


##### Difficulty Rating: 5/10


This dessert is straightforward to prepare, making it a great choice for both novice and experienced bakers. The key lies in balancing the flavors and not rushing the process.


##### Classification: Dessert


Perfect as a delightful conclusion to any meal, this dessert shines at both casual get-togethers and more formal occasions. Its unique blend of flavors will leave a lasting impression on your guests.


Embrace the nostalgia and create new memories with this delightful dessert. Your family and friends will thank you for it!

Read more about Appetizers

Read more about Main Dishes

Read more about Desserts

Baked Tofu Cheesecake | Made by Meaghan Moineau

Baked Tofu Cheesecake | Made by Meaghan Moineau

**Title: A Nostalgic Twist: Baked Tofu Cheesecake Recipe for the Soul**


**Description:** Dive into the luscious world of Baked Tofu Cheesecake, a delightful fusion of creamy textures and subtle sweetness. This recipe not only caters to dessert lovers but also carries a heartwarming family memory that brings the essence of togetherness to your kitchen. Rated as a 6 out of 10 on the difficulty scale, this dessert is a perfect blend of tradition and innovation, creating a flavorful experience you'll want to share with loved ones.


---


**A Nostalgic Twist: Baked Tofu Cheesecake Recipe for the Soul**


There’s something inherently magical about recipes that are passed down through generations. They carry more than just flavors; they embody memories, stories, and a sense of belonging. For me, the Baked Tofu Cheesecake is more than just a dessert—it's a cherished link to family gatherings and laughter-filled evenings.


**Ingredients:**


- 250g cream cheese


- 3 egg whites


- 3 egg yolks


- 2 tablespoons lemon juice


- 150ml unsweetened soya milk


- 50g plain flour


- 300g silken tofu


- 150g caster sugar


- 1 teaspoon vanilla extract


**Instructions:**


1. **Preheat and Prepare:** Preheat your oven to 170°C (338°F). Line a 9-inch cake tin with parchment paper and wrap the exterior with heavy-duty aluminum foil. This ensures no water seeps into the cheesecake during the baking process.


2. **Blend Ingredients:** In a food processor, blend the cream cheese, egg yolks, lemon juice, soya milk, plain flour, silken tofu, and vanilla extract until smooth. Transfer this mixture into a large mixing bowl.


3. **Create Soft Meringue:** In a separate bowl, beat the egg whites with the caster sugar until semi-firm peaks form, creating a soft meringue.


4. **Combine Mixtures:** Using a whisk, gently mix one-third of the soft meringue with the blended mixture. Then, using a spatula, fold in the remaining meringue gently to maintain the airiness.


5. **Bake:** Pour the mixture into the prepared cake tin. Steam bake on the lower rack of the oven for about 50 minutes.


6. **Golden Finish:** Move the cheesecake to the upper rack and switch the oven to grill, allowing it to develop a golden top for about 30 seconds to one minute.


7. **Cool and Serve:** Allow the cheesecake to cool at room temperature. It's best enjoyed chilled, so refrigerate before serving.


**A Sweet Family Memory**


The first time I encountered this cheesecake was during one of our extended family reunions at my grandmother's house. The air was filled with the scent of blooming gardenias and the sound of children playing in the backyard. As the adults gathered in the kitchen, my grandmother brought out her trusty, albeit slightly worn, recipe book. Among the many stained pages, she found the handwritten recipe for the Baked Tofu Cheesecake.


I remember sitting on the countertop, my feet dangling, as she patiently explained each step to me and my cousins. The kitchen buzzed with excitement as we took turns blending, whisking, and folding the ingredients. It was a beautiful mess of laughter, flour-dusted aprons, and sticky fingers.


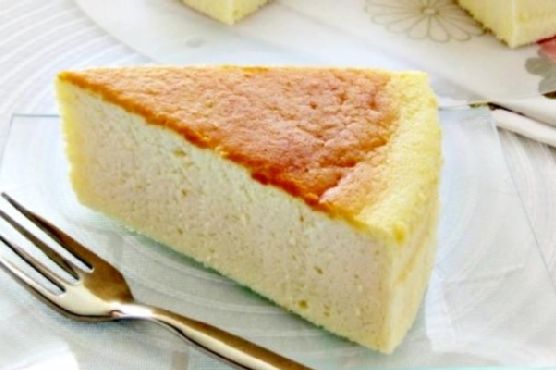
When the cheesecake finally emerged from the oven, it was a masterpiece with its golden top glistening invitingly. We all gathered around the table, each bite a testament to family love and shared moments. To this day, every slice of Baked Tofu Cheesecake transports me back to that warm kitchen, surrounded by the people I cherish most.


**Difficulty:** 6/10


**Classification:** Dessert


This Baked Tofu Cheesecake isn’t just a treat for the taste buds; it's a gateway to nostalgia, perfect for creating new memories while honoring the old. Share it with your family and add your own stories to this delicious tradition.

Read more about Appetizers

Read more about Main Dishes

Read more about Desserts