Herb Roasted Chicken | Made by Meaghan Moineau

Herb Roasted Chicken | Made by Meaghan Moineau

Title: Savoring Tradition: Herb Roasted Chicken for Every Family Gathering


Description: Discover the comforting flavors of Herb Roasted Chicken, a dish that brings family together with its aromatic herbs and juicy tenderness. Perfect for any occasion, this recipe is steeped in tradition and love, making every bite memorable.


---


There's something truly special about the aroma of a perfectly roasted chicken wafting through the house. It’s an aroma that evokes memories of family gatherings, laughter, and shared stories. In our family, Herb Roasted Chicken isn't just a meal—it's a tradition.


Ingredients:

- 2 bay leaves

- 1/4 cup brown sugar


- 4 tablespoons butter, softened


- 2 teaspoons dried basil


- 2 teaspoons dried rosemary


- 2 teaspoons dried thyme


- 1 teaspoon fennel seeds


- 1 quart ice water


- 1 cup kosher salt


- 1 teaspoon black coarse pepper


- 4 quarts water


- 1 whole chicken (about 4-5 pounds)


Instructions:


1. Prepare the Brine: In a large saucepan, combine water, salt, sugar, half of the dried herbs, and bay leaves. Bring to a boil, stirring to dissolve the salt and sugar. Reduce heat to low and simmer for 10 minutes to draw out the flavors of the herbs. Pour the brine into a large bowl and cool it down with ice water. Set aside.
2. Prepare the Chicken: Rinse the chicken cavity and skin thoroughly. Place the chicken in the brine, ensuring it is completely submerged. Cover and marinate for at least 1 hour and up to 6 hours.
3. Preheat and Prep: Preheat the oven to 375°F. Remove the chicken from the brine and pat dry with a paper towel. Carefully separate the skin from the flesh by inserting your fingers underneath the skin.
4. Season and Roast: Rub butter underneath the skin to ensure moist, tender meat. Coat the skin with the remaining herbs. Place the chicken in a roasting pan. Bake for about 1 hour and 10 minutes, basting halfway through and again during the last 10 minutes. The chicken is done when a meat thermometer reads 165°F in the thickest part of the breast.
5. Rest and Carve: Transfer the chicken to a carving board and let it rest for 10-20 minutes. This allows the juices to settle. Carve by starting at the joints, removing wings, legs, and thighs, and finally, slicing the breasts.

A Nostalgic Family Memory:


Every Thanksgiving, our home was filled with the scent of Herb Roasted Chicken. My grandmother, with her apron dusted with flour and a warm smile on her face, would gather us around the kitchen counter. The kitchen was the heart of our home, bustling with activity and chatter. As a child, I remember standing on a stool, peering over the counter as she showed me how to gently rub butter beneath the chicken's skin, a secret she said made all the difference.


After the chicken was roasted to perfection, we would sit around the table, sharing stories of past gatherings and making new memories. The Herb Roasted Chicken was always the centerpiece, a symbol of togetherness and love. Even now, as I prepare this dish for my own family, I can feel her presence, guiding my hands and warming my heart.


Difficulty Rating: 6/10


Classification: Main Dish


This Herb Roasted Chicken is more than just a meal; it's a cherished family tradition that brings warmth and connection to any gathering. Whether you're a seasoned chef or a kitchen novice, this recipe is sure to become a beloved staple in your culinary repertoire. Enjoy the flavors and the memories it brings.

Read more about Appetizers

Read more about Main Dishes

Read more about Desserts

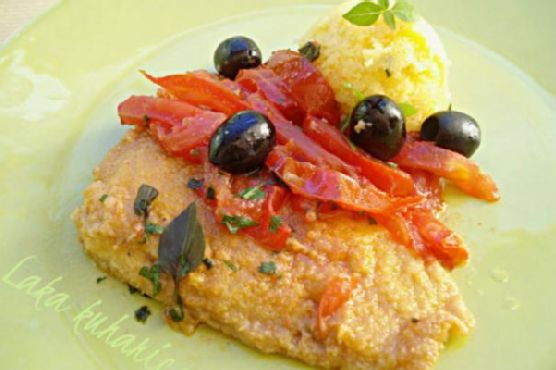
Cod with tomatoes, olives and polenta | Made by Meaghan Moineau

Cod with tomatoes, olives and polenta | Made by Meaghan Moineau

Title: Savoring Tradition: Cod with Tomatoes, Olives, and Polenta - A Heartfelt Italian Feast
Description: Dive into the flavors of the Mediterranean with our Cod with Tomatoes, Olives, and Polenta recipe. This main dish, rated at a moderate difficulty of 5/10, combines the fresh taste of cod with the tangy depth of olives and tomatoes, all served alongside creamy polenta. It's a nostalgic culinary journey that warms the soul and brings back cherished family memories.

---


A Culinary Journey Through Time: Cod with Tomatoes, Olives, and Polenta

In the heart of our family kitchen, the aroma of cod simmering with ripe tomatoes and briny olives was synonymous with Sunday gatherings. This dish, steeped in tradition and rich in flavor, was a staple at our family table. It was a recipe passed down from my Nonna, a cherished family heirloom that we lovingly recreated, preserving its authenticity with each preparation.


Ingredients:

- Fresh cod fillets


- Black olives


- Tomatoes


- Dry white wine


- Fresh parsley


- Olive oil


- Fresh and dry oregano


- Corn flour


- Instant corn polenta


- Salt


- White pepper


- Water


Instructions:
1. Prepare the Cod: If your fillets are frozen, be sure to thaw them beforehand. In a shallow dish, mix corn flour with a pinch of salt and white pepper. Dredge each fillet through the seasoned flour, coating evenly.
2. Sauté the Fillets: Heat olive oil in a large skillet over medium heat. Sauté the fillets, allowing them to cook for about 3 minutes on each side until they develop a golden crust. Once done, sprinkle the fillets with a splash of dry white wine, letting it sizzle and infuse the fish with its delicate aroma.
3. Create the Sauce: Add chopped tomatoes and black olives to the skillet, letting them mingle with the fish. Cook this vibrant mixture for about 5 minutes, until the tomatoes soften and release their juices.
4. Finish with Herbs: Before serving, garnish the fillets with freshly chopped parsley and a sprinkle of oregano, both dry and fresh, to elevate the dish with their fragrant essence.
5. Craft the Polenta: In a separate pot, bring water to a boil. Add a dash of white wine, a sprinkle of salt, and a hint of dry oregano. Gradually stir in the instant polenta, whisking continuously for about 5 minutes until it thickens to your desired consistency. If the mixture becomes too thick, add a bit more boiling water.
6. Serve: Allow the polenta to cool slightly before serving it alongside the cod, ensuring each bite is a comforting blend of flavors.
A Taste of Nostalgia:

This dish is more than just a meal; it's a portal to cherished memories. I remember standing on a stool beside my mother, my small hands eager to help as she expertly coated the cod in flour, her eyes twinkling with the joy of passing down our family tradition. The kitchen was filled with laughter and stories of my grandparents' adventures in the Italian countryside, where this recipe was born.


As the sun dipped below the horizon, our family gathered around the table, the comforting warmth of this dish uniting us. Each bite was a celebration of our heritage, a reminder of the love and labor that went into creating this masterpiece.


Difficulty: 5/10
Classification: Main Dish

---


Whether you're recreating this dish for a special occasion or a cozy family dinner, our Cod with Tomatoes, Olives, and Polenta is a delightful reminder of the simple pleasures of life. It's a taste of nostalgia, a journey through tradition, and a testament to the power of food to bring families together. Enjoy this recipe, and may it become a beloved part of your own culinary story.

Read more about Appetizers

Read more about Main Dishes

Read more about Desserts

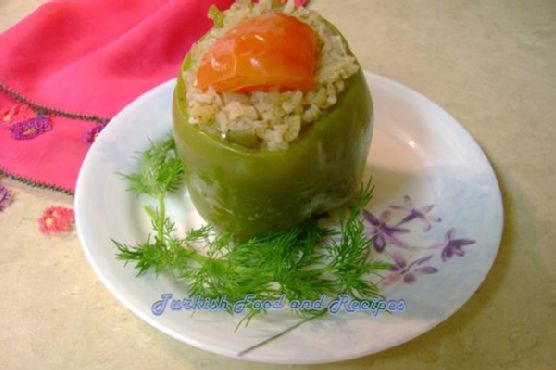
Rice Stuffed Bell Peppers (Zeytinyagli Biber Dolmasi) | Made by Meaghan Moineau

Rice Stuffed Bell Peppers (Zeytinyagli Biber Dolmasi) | Made by Meaghan Moineau

A Taste of Tradition: Rice Stuffed Bell Peppers (Zeytinyağlı Biber Dolması)


Experience the Heartfelt Flavors of a Timeless Turkish Delicacy


Introduction


There's a certain magic that comes with recreating traditional dishes, especially when they transport you back to cherished family gatherings. One such dish, the Rice Stuffed Bell Peppers, or Zeytinyağlı Biber Dolması, is a testament to the rich culinary heritage of Turkey. This delightful blend of aromatic spices and tender bell peppers filled with a savory rice mixture is both comforting and flavorful, making it a must-try for anyone looking to explore authentic Turkish cuisine.


Difficulty Level: 5/10
Category: Main Dish

Ingredients


- Bell peppers


- Olive oil


- Onions


- Tomatoes


- Tomato paste


- Rice


- Salt


- Sugar


- Allspice


- Cinnamon


- Dried or fresh mint


- Water


Instructions


1. Prepare the Peppers:

Begin by cutting the tops off the bell peppers, removing the seeds, and washing them thoroughly. Set aside to dry.


2. Create the Filling:

In a large pan, lightly sauté the onions in olive oil until they are translucent. Stir in the chopped tomatoes and tomato paste, allowing them to cook for an additional 3 minutes.


3. Cook the Rice:

Add the rice to the onion-tomato mixture and braise it for about 5 minutes. Then, add salt, sugar, allspice, cinnamon, and mint, along with hot water. Allow the mixture to simmer until all the liquid has evaporated. Let it cool for a short while.


4. Stuff the Peppers:

Using a spoon, fill each bell pepper with the rice mixture. Place a slice of tomato on top of each pepper to act as a cap.


5. Cook the Dolmasi:

Arrange the stuffed peppers in a large saucepan or pot. Add enough water to reach halfway up the sides of the peppers. Cover with a lid and cook on low heat for about 15-20 minutes.


6. Serve and Enjoy:

Serve the rice-stuffed bell peppers warm or hot, and enjoy the blend of spices and textures that make this dish so special.


A Nostalgic Family Memory


Growing up, Sunday afternoons at my grandmother's house were filled with the intoxicating aromas of her cooking. Zeytinyağlı Biber Dolması was always a family favorite, and its preparation was a cherished ritual. I can still picture my grandmother, her hands deftly crafting each stuffed pepper with care, while recounting tales of her childhood in the vibrant streets of Istanbul.


The kitchen buzzed with laughter and stories, a symphony of clinking pots and shared memories. We would gather around the table, eager to taste the fruits of her labor. Each bite of the dolmasi was a flavor-packed journey, the spices dancing on our tongues, mingling with the sweetness of the peppers.


These meals were more than just food; they were a connection to our heritage, a bridge linking us to generations past. Every time I prepare this dish, I am transported back to those warm, love-filled Sundays, and I feel a deep sense of gratitude for the culinary legacy passed down to me.


Conclusion


Rice Stuffed Bell Peppers (Zeytinyağlı Biber Dolması) is more than just a meal; it's an experience, a journey into the heart of Turkish culture and family traditions. Whether you're a seasoned cook or a curious beginner, this recipe offers a taste of nostalgia and the opportunity to create lasting memories around the dinner table. So, gather your ingredients, embrace the process, and enjoy the rich, savory flavors of this timeless dish.

Read more about Appetizers

Read more about Main Dishes

Read more about Desserts

Jean’s Seafood Gumbo | Made by Meaghan Moineau

Jean's Seafood Gumbo | Made by Meaghan Moineau

Title: "Stirring Up Tradition: Jean's Seafood Gumbo - A Heartfelt Creole Classic"


Description:

Dive into the rich flavors and history of Jean's Seafood Gumbo, a classic Creole dish that brings together family traditions and the bold taste of Louisiana. This main dish, with a difficulty rating of 8/10, promises a culinary journey through the bayous, capturing the essence of Southern hospitality in every savory bite.

---


A Whiff of the Past: The Allure of Jean's Seafood Gumbo


There’s something magical about certain dishes, those that have the power to transport us back in time, evoking memories of family gatherings, laughter, and the comforting hum of a bustling kitchen. One such dish in my family is Jean’s Seafood Gumbo, a recipe that has been passed down through generations, each iteration infused with love and a dash of Creole spirit.


Growing up, Sundays at Grandma Jean’s house were nothing short of an event. The aroma of her gumbo would greet us at the door, a warm invitation that promised a day filled with hearty laughter and full bellies. We’d gather in her cozy kitchen, the heart of our family home, watching as she expertly peeled shrimp and chopped vegetables, her hands a blur of practiced precision. Grandma Jean would often tell stories of her own childhood in Louisiana, where she learned the art of gumbo from her mother, who learned it from her own.


Each ingredient was carefully selected and prepared, with fresh shrimp and blue crabs forming the soul of the dish. The process was a family affair, with each of us taking turns stirring the pot and adding a pinch of this or a dash of that, under Grandma Jean’s watchful eye. It was here, enveloped in the fragrant steam of the gumbo pot, that we learned the importance of patience, of letting the roux develop its deep, nutty hue, and allowing the flavors to meld into a harmonious symphony.


A Step-by-Step Guide to Jean's Seafood Gumbo


Ingredients:

- Fresh shrimp, blue fresh crabs


- Celery, parsley, green peppers, onion, green onions, garlic


- Bay leaves, tomato paste, vegetable oil, flour


- Salt, black ground pepper, dried thyme, Worcestershire sauce


- Whole canned tomatoes, Tabasco sauce, Creole seasoning


- Smoked andouille, filé powder, fresh okra


- White Louisiana rice


Instructions:
1. Create the Stock: In a large 14-16 quart pot, bring two quarts of water to a boil. Peel and devein shrimp, saving the heads and hulls. Boil these in the pot for 30 minutes to an hour for a rich Creole stock. Strain and discard the heads and hulls.
2. Prepare the Crabs: Clean the fresh crabs, discarding the hard shell and yellow insides. Set aside.
3. Chop the Vegetables: Dice celery, parsley, peppers, onions, and garlic, keeping the celery and parsley separate.
4. Start the Gumbo: Return the shrimp stock to the stove, adding crabs and bay leaves. Stir in celery, parsley, and tomato paste, bringing the pot to a gentle boil before reducing to a simmer.
5. Make the Roux: In a heavy skillet, heat vegetable oil over medium-low heat and slowly add flour, stirring continuously until the roux reaches a dark mahogany color.
6. Combine Ingredients: Add onions, garlic, and green peppers to the roux. Pour the mixture into the gumbo pot, adding water if necessary, and bring to a boil. Reduce the heat, cover, and let the gumbo simmer.
7. Season and Simmer: Add salt, pepper, thyme, Worcestershire sauce, Tabasco sauce, and Creole seasoning to taste. Fry the sausages and okra separately before adding to the gumbo. Stir in chopped tomatoes, bringing everything to a boil, then simmer for 2½ to 3 hours.
8. Finish the Dish: Add shrimp and stir in filé powder, cooking for an additional 20-30 minutes. Adjust seasonings as needed.
9. Serve: Serve over white Louisiana rice and enjoy the taste of tradition.

Rating and Classification


Difficulty: 8/10
Classification: Main Dish

As the years have passed, Jean’s Seafood Gumbo has remained a cherished symbol of family unity and culinary heritage. It’s more than just a meal; it’s a celebration of our roots, a testament to the power of food to bring people together. Whether you’re a seasoned chef or a gumbo novice, this dish is sure to fill your home with warmth, laughter, and the irresistible essence of Creole cuisine.

Read more about Appetizers

Read more about Main Dishes

Read more about Desserts

Knockwurst with sauerkraut | Made by Meaghan Moineau

Knockwurst with sauerkraut | Made by Meaghan Moineau

Title: A Taste of Tradition: Knockwurst with Sauerkraut
Description: Dive into a heartwarming culinary journey with our Knockwurst with Sauerkraut recipe. This delightful main dish blends savory and sweet flavors, capturing the essence of a cherished family tradition. Rated 5 out of 10 in difficulty, it's a dish that's as accessible as it is delicious. Join us as we explore the rich history and personal stories behind this comforting classic.

---


A Taste of Tradition: Knockwurst with Sauerkraut


There’s something magical about the way food can transport us back in time, evoking memories long tucked away in the corners of our minds. For me, Knockwurst with Sauerkraut is one such dish that never fails to whisk me back to the warm, bustling kitchen of my grandmother’s house.


Every Sunday, my family would gather around her old wooden dining table, the air thick with anticipation and the fragrant aroma of knockwurst sizzling in the pan. My grandmother, with her flour-dusted apron and twinkling eyes, would hum her favorite tunes as she prepared this beloved meal, a ritual that has since become a cherished family tradition.


Ingredients:

- 1 onion, chopped

- 1 cup beer


- 1 cup water


- 2 tablespoons cornstarch


- 2 tablespoons brown mustard


- 1 tablespoon molasses


- 1 teaspoon caraway seed


- 1/2 teaspoon ground allspice


- 1/4 teaspoon pepper


- 1 rutabaga, peeled and cubed


- 6 cooked knockwurst sausages


- 2 cooking apples, cored and cut into wedges


- 1 can (16 ounces) sauerkraut, drained and rinsed


Instructions:


1. Brown the Knockwurst: Begin by buttering a medium fry pan. Heat the knockwurst until browned, about 10-12 minutes, ensuring they are evenly cooked and flavorful.
2. Prepare the Sauerkraut: Drain the sauerkraut, rinse it under cold water, and drain well to remove excess salt and tang.
3. Cook the Onion: In a large pot, cook the chopped onion until tender but not browned, allowing its natural sweetness to emerge.
4. Combine and Thicken: Stir in the beer for a rich, malty base. In a 2-cup glass measure, combine water, cornstarch, brown mustard, molasses, caraway seed, allspice, and pepper. Stir this mixture into the onions and cook until thickened and bubbly.
5. Add the Vegetables: Add the cubed rutabaga, cover, and cook for 15 minutes until slightly softened.
6. Mix Everything Together: Stir in the browned knockwurst, apple wedges, and rinsed sauerkraut. Cover and cook for an additional 15 to 20 minutes, allowing the flavors to meld and the apples to become tender.

A Nostalgic Memory


As a child, I remember standing on tiptoes, peeking over the kitchen counter to watch my grandmother masterfully blend these ingredients. The kitchen would fill with laughter and stories, as my grandfather shared tales of his childhood in Germany, where knockwurst was a staple on their dinner table. This dish was more than just a meal; it was a celebration of our heritage and a reminder of the love that binds us.


Difficulty Rating: 5/10


This recipe is perfect for those looking to explore traditional flavors without feeling overwhelmed. Its straightforward steps make it accessible to both novice and experienced cooks alike.


Classification: Main Dish


Knockwurst with Sauerkraut is a classic main dish, ideal for family gatherings or a comforting weeknight dinner. Serve it with crusty bread or mashed potatoes to soak up the delicious sauce.


---


Food has a unique way of connecting us to our past, and with each bite of this Knockwurst with Sauerkraut, you too can share in a piece of my family's story. Whether you’re seeking comfort, tradition, or simply a new culinary adventure, this recipe promises to deliver all that and more. Enjoy!

Read more about Appetizers

Read more about Main Dishes

Read more about Desserts

Colcannon | Made by Meaghan Moineau

Colcannon | Made by Meaghan Moineau

A Taste of Tradition: Colcannon, A Hearty Irish Classic


Recreating Family Memories with Every Bite


Colcannon, a traditional Irish dish, is more than just a meal; it's a cherished piece of my family history. This comforting blend of creamy mashed potatoes and cabbage takes me back to my grandmother's kitchen, a place filled with laughter, storytelling, and the warmth of a hearty meal shared among loved ones.


Ingredients You'll Need:


- 2 rashers of optional bacon


- Butter


- 1 head of cabbage


- Stems of green onions


- Milk


- Fresh parsley


- Pepper


- Potatoes


- Salt


A Step-by-Step Guide to Making Colcannon:


1. Prepare the Cabbage: Start by cutting into the top of the cabbage, hollowing it out while leaving 3-4 outer leaves intact. Reserve the hollowed-out portion for later use.
2. Cook the Cabbage: Plunge the hollowed-out cabbage head into a large pot of boiling water. Let it simmer for about 5 minutes or until it is tender-crisp, ensuring it maintains its shape. Quickly cool it in cold water, then invert and drain.
3. Chop and Stir Fry: Chop the reserved cabbage pieces until you have about 1 1/2 cups. Stir fry them in butter along with the green onions until they are tender and set aside.
4. Mash the Potatoes: Boil the potatoes until tender, then mash them, incorporating milk, salt, and pepper to taste.
5. Combine: Stir in the sautéed cabbage mixture and add a sprinkle of fresh parsley for garnish.

A Dish Steeped in Nostalgia


I vividly remember the first time I helped my grandmother make Colcannon. The kitchen was filled with the savory aroma of butter and onions sizzling in the pan. My grandmother, with her gentle hands, showed me how to hollow out the cabbage, a task I found both fascinating and challenging. The kitchen was a flurry of activity, with my cousins setting the table and my grandfather recounting tales of his youth in Ireland.


As we sat down to enjoy the meal, I realized that Colcannon was not just food; it was a vessel of memories, stories, and traditions passed down through generations. Each bite was a reminder of who we were and where we came from, a connection to our roots and to each other.


Difficulty Rating: 4/10


Colcannon is a straightforward dish that even novice cooks can master with a bit of practice. The most challenging part might be hollowing out the cabbage, but with patience, it becomes an enjoyable task.


Classification: Main Dish


Colcannon is hearty and filling, making it a perfect main dish that embodies the essence of comfort food. It pairs beautifully with meats like ham or sausages, but it can also stand alone as a satisfying vegetarian meal.


Conclusion


Recreating this traditional Colcannon recipe allows me to honor my family's heritage while creating new memories in my own kitchen. Each time I prepare it, I am reminded of the love, warmth, and laughter that filled my grandmother's home. I hope this recipe brings the same joy and connection to your family table, creating new stories and memories for generations to come.

Read more about Appetizers

Read more about Main Dishes

Read more about Desserts

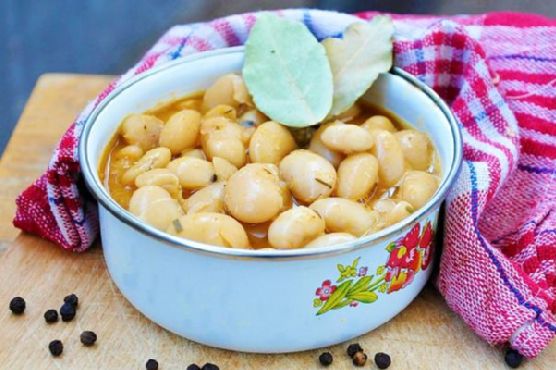
The Perfect Butter Beans Stew | Made by Meaghan Moineau

The Perfect Butter Beans Stew | Made by Meaghan Moineau

Title: A Hearty Hug in a Bowl: The Perfect Butter Beans Stew
Description: Dive into a comforting dish that’s as nourishing as it is delicious. Our Perfect Butter Beans Stew is not only a celebration of simple, wholesome ingredients but also a gateway to cherished family memories. With a difficulty rating of 4 out of 10, this easy-to-master main dish is sure to become a favorite at your dinner table.

---


There’s something undeniably nostalgic about the aroma of a simmering stew, wafting through the kitchen and filling the home with warmth. For me, the Perfect Butter Beans Stew is more than just a meal; it’s a cherished family tradition that brings back fond memories of cozy, laughter-filled gatherings around the dinner table.


Whenever I prepare this dish, I’m reminded of Sundays spent at my grandmother’s house, where the scent of sautéed onions and garlic would greet us at the door. My grandmother was a culinary magician, turning simple ingredients into extraordinary dishes. Her secret? A generous sprinkle of love and a dash of patience.


The star of this recipe is the humble butter bean, also known as the dry lima bean, which has been soaked overnight. This process not only softens the beans but also allows them to absorb flavors more deeply. Paired with the earthy notes of dry tarragon and the subtle heat of sweet paprika, each spoonful of this stew is like a warm hug.


The preparation begins with a drizzle of unrefined sunflower oil in a large pot, where diced onions and minced garlic cloves are gently sautéed until golden. The addition of canned and dry fresh tarragon, combined with bay leaves, infuses the stew with an irresistible aroma. A sprinkle of ground pepper and a pinch of sea salt enhance the flavors, while the sweet paprika adds a vibrant color and a hint of spice.


This dish, rated 4 out of 10 in difficulty, is a testament to the beauty of simplicity. It’s a main dish that celebrates the essence of home-cooked comfort, perfect for those seeking a hearty, nourishing meal without the fuss.


I remember vividly the clatter of bowls and the gentle hum of conversation as we gathered to enjoy this stew. Each serving was a testament to my grandmother’s culinary prowess, her ability to transform humble ingredients into something truly special. It’s a legacy I cherish and one I’m thrilled to share with you.


For the full step-by-step instructions on how to create this delightful dish, visit my blog at [Gourmandelle](http://gourmandelle.com/the-perfect-butter-beans-stew/). Embrace the nostalgia and warmth of the Perfect Butter Beans Stew, and bring a piece of my family’s tradition to your table.


---


Keywords: Butter Beans Stew, Family Recipe, Comfort Food, Main Dish, Simple Ingredients, Nostalgic Cooking, Easy Stew Recipe, Home-Cooked Meal, Wholesome Ingredients, Traditional Stew.

Read more about Appetizers

Read more about Main Dishes

Read more about Desserts

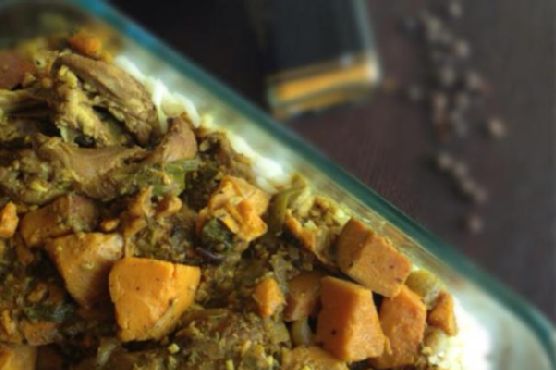
Authentic Jamaican Curry Chicken | Made by Meaghan Moineau

Authentic Jamaican Curry Chicken | Made by Meaghan Moineau

**Title: Savoring Tradition: Crafting Authentic Jamaican Curry Chicken**


**Description:** Dive into the vibrant world of Jamaican cuisine with our Authentic Jamaican Curry Chicken recipe. Infused with rich spices and a touch of nostalgia, this dish captures the essence of Caribbean flavors. Perfect for a cozy family dinner, this main dish will transport your taste buds to the sun-drenched shores of Jamaica.


---


**A Taste of Home: Authentic Jamaican Curry Chicken**


In the heart of every Jamaican kitchen lies a pot of bubbling curry, a symphony of spices and aromas that tell tales of heritage and warmth. Among these beloved dishes is the legendary Jamaican Curry Chicken, a staple that not only tantalizes the senses but also carries cherished memories of family gatherings and laughter-filled evenings.


**Ingredients:**


- 2 lbs skinless chicken thighs


- 2 tablespoons allspice


- 3 tablespoons coconut oil


- 4 tablespoons curry powder


- 4 cloves garlic, minced


- 1 green bell pepper, chopped


- 1 onion, chopped


- Salt and black pepper to taste


- 3 scallions, chopped


- 1 scotch bonnet pepper, whole


- 2 large sweet potatoes, peeled and cubed


- 2 teaspoons fresh thyme


- 3 cups water


**Instructions:**


1. **Marinate:** Begin by seasoning the chicken with allspice, curry powder, garlic, green bell pepper, onion, salt, black pepper, and scallions. Let the flavors meld together by marinating the chicken for at least 2 hours, or for a more intense flavor, leave it overnight in the refrigerator.


2. **Sear the Chicken:** Heat coconut oil in a Dutch oven over high heat. Carefully add the marinated chicken pieces and fry until each side is golden brown and seared, approximately 10 minutes.


3. **Simmer:** Once the chicken is browned, add the remaining marinade, scotch bonnet pepper, and water to the pot. Cover and bring to a boil.


4. **Thicken the Stew:** Add the sweet potatoes to the pot, reduce the heat to a simmer, and let the stew cook for about an hour, or until it reaches a thick, hearty consistency.


**Difficulty:** 6/10


**Classification:** Main Dish


**A Nostalgic Note:**


Growing up, Sunday dinners were a sacred tradition in our household. The aroma of spices would waft through the air as my grandmother prepared her famous curry chicken, a recipe passed down from her own mother. Our small kitchen became a haven, filled with stories and laughter. My siblings and I would gather around the table, eagerly waiting for our plates to be filled with the vibrant curry. Each bite was a celebration of our heritage, a connection to our roots, and a reminder of the love that binds our family together.


To this day, whenever I prepare this dish, I am transported back to those cherished moments, the warmth of my grandmother’s smile, and the comforting embrace of my family. It is more than just a meal; it is a legacy of love and togetherness.


---


Embrace the rich flavors and history of Jamaican cuisine with this classic curry chicken recipe. Whether you're sharing it with family or savoring a quiet meal alone, it promises to bring a taste of the Caribbean to your table.

Read more about Appetizers

Read more about Main Dishes

Read more about Desserts

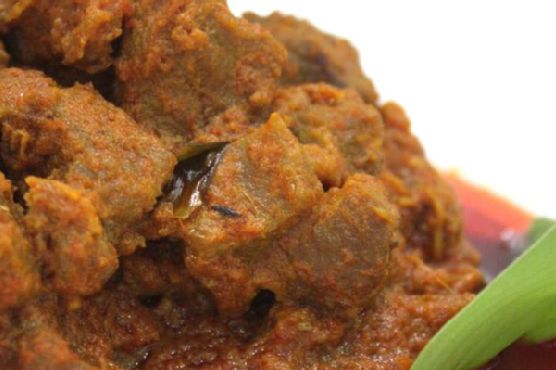
Mutton Rendang | Made by Meaghan Moineau

Mutton Rendang | Made by Meaghan Moineau

## The Art of Mutton Rendang: A Culinary Journey into Tradition


### Description:


Indulge in the rich flavors and aromatic spices of Mutton Rendang, a classic dish that transcends time and brings families together. Unravel the secrets of this beloved recipe, infused with cherished memories and traditional techniques. Perfect for a cozy family dinner or a festive celebration, Mutton Rendang is sure to captivate your taste buds and warm your heart.


---


### A Culinary Nostalgia: The Heartwarming Tale of Mutton Rendang


Cooking has always been more than just preparing food; it’s a journey into the heart of family traditions and shared memories. For me, Mutton Rendang is not just a dish; it’s a delicious reminder of my childhood, spent in my grandmother's warm kitchen. The air filled with the comforting aroma of spices sizzling in hot oil—a scent that, to this day, transports me back to those joyful days.


Every festive season, my family would gather at my grandmother's house. The centerpiece of our celebration was always her legendary Mutton Rendang. I remember watching her skillfully mix mutton pieces with turmeric powder and salt, a ritual that marked the beginning of a culinary masterpiece. She would then carefully cover the saucepan and place it on the stove, letting it boil until the meat was tender and flavorful.


As the meat simmered, my grandmother would blend a fragrant paste of dried chillis, shallots, onion, garlic, ginger, lemongrass, galangal, and fresh turmeric. The kitchen would come alive with the vibrant colors and tantalizing scents of these essential ingredients. The sound of cumin and fennel seeds crackling in hot oil signified the start of a magical transformation.


My grandmother always emphasized the importance of patience. "The longer you sauté the paste, the better the flavor," she would say with a twinkle in her eye. Her dedication to perfection was evident in every stir of the wok, every addition of thin coconut milk, dried tamarind, and turmeric leaf, and in the careful balance of salt. The final touch was the thick coconut milk, which enveloped the mutton in a creamy embrace, and the toasted coconut, adding a delightful texture and nutty aroma.


The result was a symphony of flavors—rich, spicy, and deeply satisfying. As we gathered around the dining table, each bite of Mutton Rendang was a taste of tradition, a spoonful of love passed down through generations. It was more than a meal; it was a celebration of family, heritage, and the art of cooking.


### Recipe Difficulty: 8/10


### Classification: Main Dish


Mutton Rendang is a dish that requires time, patience, and a love for authentic flavors. While the process may seem intricate, the reward is a delectable masterpiece that brings joy and togetherness to any meal. Whether you're a seasoned cook or a culinary enthusiast, this recipe invites you to experience the magic of traditional cooking and create lasting memories with your loved ones.

Read more about Appetizers

Read more about Main Dishes

Read more about Desserts

Chewy Gingersnaps | Made by Meaghan Moineau

Chewy Gingersnaps | Made by Meaghan Moineau

**Title: "Chewy Gingersnaps: A Heartwarming Holiday Tradition"**


**Description:** Dive into the cozy nostalgia of the holiday season with these irresistibly chewy gingersnaps. Infused with the warm spices of ginger and cinnamon, this classic dessert offers a delightful balance of sweet and spicy flavors. Ideal for family gatherings or a quiet night by the fire, these cookies are sure to become a cherished part of your seasonal traditions. With a difficulty rating of 4 out of 10, they're accessible for bakers of all skill levels.


---


As the crisp air of fall deepens into the chill of winter, my kitchen becomes a haven of warmth and spice. The scent of gingersnaps baking in the oven is more than just a delightful aroma; it’s a passport to cherished family memories. These chewy gingersnaps, with their perfect blend of ginger, cinnamon, and molasses, have been a staple at our holiday gatherings for as long as I can remember.


Growing up, the holidays meant a bustling kitchen, filled with the laughter of family and the clatter of pots and pans. My grandmother would always take the lead, orchestrating the preparation of a feast while simultaneously baking batch after batch of her famous gingersnaps. These cookies were more than just a treat; they were a tradition, a symbol of the season, and a testament to the love that bound our family together.


The process of making gingersnaps was a family affair. My siblings and I would gather around the kitchen counter, eager to help in any way we could. Our roles were simple yet crucial: stirring the flour, baking soda, salt, and spices in one bowl while watching my grandmother cream the butter, oil, and sugars in another. The anticipation built as she beat in the eggs, one at a time, followed by the rich, dark molasses that gave the cookies their distinctive flavor.


Once the dough was mixed, it was time for our favorite part: shaping the dough into small balls and rolling them in a generous coating of sugar. As we placed them onto parchment-lined baking trays, my grandmother would remind us that the secret to their perfect chewiness was to bake them for precisely eight minutes. They would still seem a bit underdone when first taken out, but that was exactly how they were supposed to be.


The first bite of a freshly baked gingersnap was always magical. The outside was crisp with a sugar coating, while the inside was soft, chewy, and bursting with flavor. These cookies were often enjoyed with a cup of hot cocoa or mulled cider, completing the cozy holiday experience.


Today, I carry on the tradition with my own family, baking these chewy gingersnaps each year as the holidays approach. Each batch is a tribute to my grandmother and the loving memories she created. I hope that as you try this recipe, it brings warmth, joy, and a touch of nostalgia to your home as well.


**Difficulty: 4/10**


**Classification: Dessert**


**Ingredients:**


- 2 teaspoons baking soda


- 1 cup brown sugar


- 1 cup (2 sticks) butter, softened


- 2 teaspoons ground cinnamon


- 2 large eggs


- 2 cups all-purpose flour


- 2 teaspoons ground ginger


- 1/2 teaspoon kosher salt


- 1/4 cup molasses


- 1/4 cup vegetable oil


- 1/4 teaspoon ground white pepper


- 1/2 cup white sugar (plus extra for rolling)


**Instructions:**


1. Preheat oven to 325°F (160°C).


2. In a large bowl, stir together the flour, baking soda, salt, ginger, cinnamon, and white pepper.


3. In another bowl, cream the butter, oil, brown sugar, and white sugar together until light and fluffy.


4. Beat in the eggs, one at a time, until fully incorporated.


5. Stir in the molasses.


6. Gradually add the dry ingredients to the wet ingredients, stirring until well combined.


7. Shape the dough into small balls and roll them in additional white sugar.


8. Place the dough balls on a baking tray lined with parchment paper.


9. Bake for 8 minutes. The cookies will appear slightly underdone when removed from the oven.


10. Allow to cool on the baking tray for a few minutes before transferring to a wire rack to cool completely.


Enjoy these delightful chewy gingersnaps, and may they fill your home with warmth and joy this holiday season!

Read more about Appetizers

Read more about Main Dishes

Read more about Desserts

Chicken Adobo & Coconut Ginger Rice | Made by Meaghan Moineau

Chicken Adobo & Coconut Ginger Rice | Made by Meaghan Moineau

# Savoring Memories: Chicken Adobo & Coconut Ginger Rice


## A Culinary Journey Through Time and Flavor


**Description:** Dive into a world where tangy meets savory, and a hint of sweetness dances on your palate. This Chicken Adobo & Coconut Ginger Rice recipe not only promises a symphony of flavors but also brings forth a nostalgic story of family, love, and tradition. Perfect for any dinner occasion, this dish is a main course masterpiece, rated at a moderate difficulty level of 5 out of 10.


---


### A Dish Steeped in Tradition


Whenever I think of Chicken Adobo & Coconut Ginger Rice, I am transported back to my grandmother's cozy kitchen, where the aroma of garlic sizzling in oil melded with the tangy scent of vinegar, creating a comforting embrace. This dish was more than just a meal; it was a ritual that brought our family together every Sunday afternoon.


#### Ingredients:


- 1/2 cup low sodium soy sauce


- 1/2 cup apple cider vinegar


- 4 cloves garlic, minced


- 1 tablespoon peppercorns


- 2 tablespoons brown sugar


- 3 bay leaves


- 6 bone-in chicken thighs


- 2 tablespoons grapeseed oil


- 1 cup chicken broth


- 1 tablespoon cornstarch


- 1/4 cup water


- Kosher salt to taste


- 3 cups water


- 1 1/2 cups rice


- 2 tablespoons fresh ginger, grated


- 1/2 cup sweetened shredded coconut


- 2 scallions, thinly sliced


- 2 tablespoons parsley, chopped


#### Instructions:


1. **Marinate the Chicken:** In a large bowl or flat dish, combine soy sauce, vinegar, garlic, peppercorns, brown sugar, and bay leaves. Add the chicken thighs, ensuring they are well-coated. Marinate for at least an hour, or for a deeper flavor, let them soak overnight.


2. **Brown the Chicken:** Heat grapeseed oil in a pan over medium heat. Once hot, remove the chicken from the marinade and brown each side for 2-3 minutes. Set the chicken aside.


3. **Cook the Sauce:** Pour the marinade into the pan along with chicken broth. Bring to a boil, then add the chicken back in. Cover and cook for 10 minutes.


4. **Thicken the Sauce:** Mix cornstarch with 1/4 cup water. Add this slurry to the pan, turning the chicken pieces over. Cover and cook until the chicken is fully cooked, about 6-9 minutes.


5. **Prepare the Rice:** In a separate pot, bring 3 cups of water to a boil with a pinch of salt. Add the rice and cook as per package instructions. Once cooked, fluff the rice and toss with scallions, parsley, ginger, and coconut.


6. **Serve:** Plate the rice, place the chicken on top, and drizzle with the rich adobo sauce.


### A Family Memory


As a child, I would often sit at the kitchen table, watching my grandmother move with grace and precision, her hands a blur of seasoned expertise. The kitchen was filled with laughter, stories, and the promise of something delicious. When the Chicken Adobo was finally ready, it was more than just food; it was a testament to the love and care my grandmother poured into every meal.


This dish was always the highlight of our gatherings, a symbol of unity and warmth. The blend of flavors in the adobo, with its savory garlic and vinegar base, complemented the subtle sweetness of the coconut-infused rice perfectly. Each bite was a reminder of home, family, and the simple joys of life.


### Conclusion


Chicken Adobo & Coconut Ginger Rice is more than just a meal; it is an experience, a journey into a world of rich, comforting flavors that tell a story of family and tradition. Whether you're looking to recreate a cherished memory or start a new one, this dish is sure to bring warmth and joy to your table.


---


Enjoy this nostalgic culinary adventure and let every bite transport you back to the heartwarming memories of family and togetherness.

Read more about Appetizers

Read more about Main Dishes

Read more about Desserts

Easy Key Lime Pie | Made by Meaghan Moineau

Easy Key Lime Pie | Made by Meaghan Moineau

**Title: A Slice of Sunshine: Easy Key Lime Pie Recipe with a Dash of Family Nostalgia**


**Description:** Dive into the zestful world of Key Lime Pie with our easy-to-follow recipe. Perfect for dessert lovers, this pie combines tangy lime flavors with a buttery graham cracker crust. Join us as we explore not just the steps to create this delightful treat, but also a cherished family memory that makes this pie a staple in our home.


---


### A Slice of Sunshine: Easy Key Lime Pie Recipe with a Dash of Family Nostalgia


When the sun is high and the days are long, there's nothing quite like the refreshing bite of a Key Lime Pie to bring a little bit of sunshine to your table. This Easy Key Lime Pie recipe is a breeze to make, and it brings back fond memories of summer afternoons spent in my grandmother's kitchen, surrounded by the laughter of family and the sweet aroma of limes.


**Ingredients:**


- 1/4 cup butter, melted


- 1/4 cup sugar


- 1 1/2 cups crushed graham crackers


- 3 egg yolks


- 1 can (14 ounces) sweetened condensed milk


- 1/2 cup lime juice


- 1/4 cup water


- Whipped cream for topping


- A few drops of green food coloring (optional)


**Instructions:**


**1. Prepare the Crust:**


Start by melting the butter in a small saucepan. Once melted, stir in 1/4 cup of sugar until it's well combined. Add the crushed graham crackers to the mixture and toss until everything is mixed thoroughly.


Spread this mixture evenly into a 9-inch pie plate, pressing it firmly onto the bottom and sides to create a solid crust. Chill the crust for 1 hour or until firm. For a more robust flavor, you can also bake it in a 375-degree oven for 4-5 minutes and then let it cool before filling.


**2. Create the Filling:**


In a medium bowl, beat the egg yolks using a whisk or fork until they are smooth. Gradually whisk in the sweetened condensed milk, ensuring a creamy consistency. Next, add the lime juice and water, stirring the mixture until it begins to thicken. For a touch of color, you can add a few drops of green food coloring.


**3. Assemble and Bake:**


Spoon the lime filling into the prepared crust, spreading it evenly. Bake the pie in a 350-degree oven for 25 minutes. Once baked, allow it to cool for 1 hour before transferring it to the refrigerator to chill for an additional 3-4 hours.


**4. Serve:**


Top your pie with a generous dollop of whipped cream just before serving. Each bite is a perfect balance of creamy sweetness and tangy lime, a true testament to its reputation as a classic dessert.


**A Family Memory:**


Growing up, our family gatherings were never complete without my grandmother's famous Key Lime Pie. Every summer, she would host a picnic in her backyard, a tradition that brought together cousins from near and far. I remember watching her in the kitchen, her hands deftly working through the recipe as she hummed along to her favorite tunes.


The moment the pie emerged from the oven, a sense of anticipation filled the room. We'd gather around the table, each slice bringing with it not just a burst of lime flavor, but a flood of memories. My grandmother would share stories of her childhood in Florida, where Key Limes grew in abundance and pies like these were a staple of every family event.


Those afternoons taught me that food is more than just sustenance; it’s a bridge to the past, a vessel of tradition and love. Now, every time I make this pie, I'm reminded of those cherished moments, making it more than just a dessert, but a slice of family history.


**Difficulty Rating:** 4/10


**Category:** Dessert


---


Embrace the sunshine in every bite with this Easy Key Lime Pie recipe. Whether you're creating new memories or reliving old ones, this pie is sure to become a beloved dessert in your home. Enjoy!

Read more about Appetizers

Read more about Main Dishes

Read more about Desserts

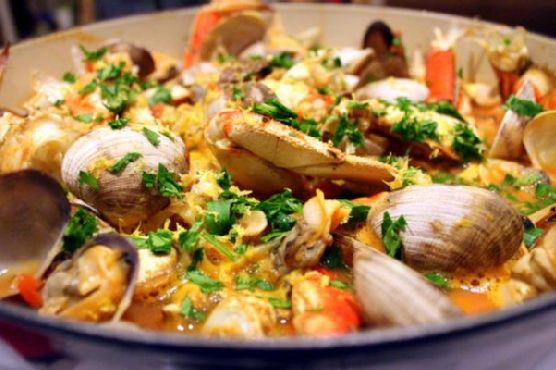
San Francisco Cioppino | Made by Meaghan Moineau

San Francisco Cioppino | Made by Meaghan Moineau

**Title: Dive into Flavor: The Unforgettable Experience of San Francisco Cioppino**


**Description: Discover the rich history and vibrant flavors of San Francisco Cioppino, a seafood lover's dream come true. This classic main dish, with its medley of fresh seafood and aromatic herbs, is as much a feast for the senses as it is a cherished family tradition. Join me as I share a nostalgic memory that makes this dish so special, and learn how to create this culinary masterpiece yourself.**


---


### A Taste of San Francisco: The Legacy of Cioppino


There's something magical about the way a dish can transport you back in time, bringing cherished memories to life with every bite. For me, San Francisco Cioppino is one such dish. A seafood stew with roots in the bustling ports of San Francisco, Cioppino is a symphony of flavors, blending fresh seafood with the aromatic essence of herbs and spices. It's a main dish that not only satisfies the palate but also warms the heart.


#### The Recipe


**Ingredients:**


- Fresh canned tomatoes


- Clams


- Dry white wine


- Cooked freshly Dungeness crabs


- White fresh fish


- Fresh basil


- Fresh parsley


- Garlic


- Black fresh ground pepper


- Olive oil


- Fresh oregano


- Raw shrimp


- Scallops


- Tomato paste


- Yellow onion


**Instructions:**


1. **Prepare the Crabs:** Remove the legs and claws from the crabs and break the body in half, reserving as much of the "crab butter" as possible (the yellow-colored center). Set crab pieces aside and force the crab butter through a sieve into a small bowl. Set aside.


2. **Cook the Clams:** Place the clams in a pan, add 1 cup of wine, and steam, covered, over medium heat for 5 minutes or until clams open. Remove clams and discard any that do not open. Strain the stock through a cheesecloth and reserve.


3. **Build the Base:** In an 8-quart saucepan, heat the oil. Add the onion and garlic and sauté over medium heat until soft, but not browned. Add tomatoes, tomato paste, and remaining 2 cups of wine, pepper, herbs, and clam stock. Partially cover and simmer for 20 minutes.


4. **Add the Seafood:** Add the fish, scallops, shrimp, crab, and crab butter. Simmer for approximately 5 minutes or until all seafood is cooked; do not stir or the fish will break apart.


5. **Finish and Serve:** Add the clams and heat for a scant 1 minute. Sprinkle with parsley and serve immediately from the pot.


#### A Nostalgic Memory


Every time I prepare Cioppino, I'm reminded of family gatherings at my grandparents' cozy home in San Francisco. My grandfather, a retired fisherman, would regale us with stories of the sea as he expertly prepared this dish, his hands moving deftly through the familiar motions. The kitchen would fill with the intoxicating aroma of simmering tomatoes and herbs, drawing everyone together. As we gathered around the table, the world seemed to slow down, and the warmth of family and tradition enveloped us, much like the rich flavors of the Cioppino itself.


#### Difficulty: 7/10


Creating Cioppino requires a bit of finesse, particularly in handling the seafood, but the reward is well worth the effort. With its deep, complex flavors and nostalgic charm, it stands as a testament to the culinary heritage of San Francisco and the enduring power of family traditions.


---


So, roll up your sleeves and dive into the rich, flavorful world of San Francisco Cioppino. Whether you're sharing it with family or enjoying it solo, this dish promises an unforgettable culinary journey.

Read more about Appetizers

Read more about Main Dishes

Read more about Desserts

Holiday Egg Nog | Made by Meaghan Moineau

Holiday Egg Nog | Made by Meaghan Moineau

# A Sip of Nostalgia: Crafting the Perfect Holiday Egg Nog


## Description:


Delve into the comforting embrace of holiday traditions with our delectable Holiday Egg Nog recipe. This creamy, spiced delight is not just a beverage but a cherished memory in a mug. Perfectly balanced with the warm flavors of cinnamon, nutmeg, and allspice, our egg nog offers a rich and creamy texture that’s bound to become a staple at your holiday gatherings. Whether you're reminiscing about festive family gatherings or creating new memories, this recipe is sure to add a touch of nostalgia and warmth to your celebrations.


---


### Ingredients:


- **Egg yolks**


- **Sugar**


- **Milk**


- **Heavy cream**


- **Cinnamon**


- **Nutmeg**


- **Allspice**


### Instructions:


1. **Whisk the Egg Mixture:**


- Begin by adding the egg yolks and sugar to your mixer.


- Whip the mixture until it turns a light yellow color, showcasing its creamy texture.


2. **Prepare the Spiced Milk:**


- In a small saucepan, combine the milk, heavy cream, allspice, nutmeg, and cinnamon.


- Heat until just boiling, then remove from heat.


3. **Temper the Eggs:**


- Gradually add about half a cup of the hot milk to the egg mixture, whisking constantly to prevent curdling.


- Combine the tempered egg mixture with the rest of the milk mixture, continuing to whisk.


4. **Thicken the Egg Nog:**


- Return the combined mixture to medium-low heat.


- Cook until it just begins to boil and has thickened to your desired consistency.


5. **Cool and Serve:**


- Transfer the egg nog to a container and set it in the fridge to cool completely.


- Once chilled, pour yourself a glass, sprinkle a dash of cinnamon or nutmeg on top, and enjoy!


### A Nostalgic Family Memory


Every holiday season, as the first snow dusted the ground, my family would gather in the warmth of my grandmother's kitchen. The air was thick with the scent of spices and laughter, and the centerpiece of our cozy gatherings was always her famous egg nog. I vividly remember watching her deftly whisk the egg yolks and sugar, a process that seemed almost magical to my young eyes.


As a child, my job was to sprinkle the cinnamon and nutmeg, a task I took very seriously, knowing it contributed to the symphony of flavors. My grandmother would always tell the story of how her mother had passed down this recipe, a tradition that had weathered decades of holiday cheer. Each sip was like a hug from the past, filled with the warmth of family and the promise of new memories.


Making this egg nog is more than just a culinary venture; it’s a cherished ritual that connects me to the generations before me, a reminder of the love and joy that the holiday season brings.


### Difficulty:


**3/10** - This recipe is straightforward and perfect for those new to holiday cooking.


### Classification:


**Dessert** - A sweet and creamy conclusion to any festive meal.


---


This Holiday Egg Nog recipe is more than just a drink; it’s a testament to the power of tradition and the joy of shared experiences. Let each glass be a toast to the past and a celebration of the present, as you create new memories with loved ones around the warmth of the holiday hearth.

Read more about Appetizers

Read more about Main Dishes

Read more about Desserts

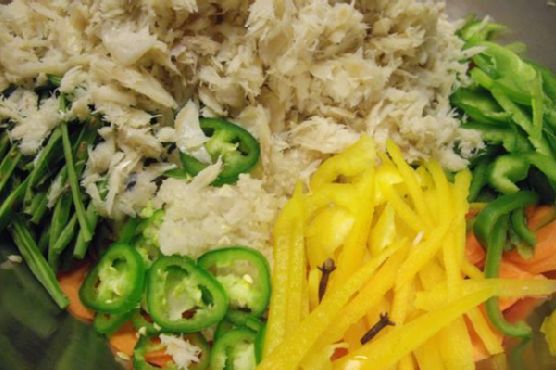
Chiquetaille: Cod Fish Salad | Made by Meaghan Moineau

Chiquetaille: Cod Fish Salad | Made by Meaghan Moineau

**Title: A Taste of Tradition: How to Make Chiquetaille, the Flavorful Cod Fish Salad**


**Description:** Dive into the rich flavors of Chiquetaille, a traditional cod fish salad that tantalizes the taste buds with its vibrant mix of fresh vegetables and salted cod. This dish, steeped in family history and nostalgia, makes for a delightful appetizer or main dish. Join me as I share a cherished family memory and guide you through the steps to create this captivating salad.


---


**Introduction:**


Cooking is often more than just a necessity; it’s a journey through memories and traditions. One dish that holds a special place in my heart is Chiquetaille, a cod fish salad that is as flavorful as it is meaningful. This dish has been a staple in my family for generations, and preparing it always takes me back to sun-drenched afternoons in my grandmother's kitchen.


**Ingredients:**


- Salted cod


- Onion


- Shallots


- Garlic


- Carrots


- Young green beans


- Green bell pepper


- Yellow and red bell pepper


- Green jalapeno


- Vinegar


- Olive oil


- Whole cloves


- Salt and pepper


**Instructions:**


1. **Prep the Cod:** Begin by soaking the salted cod in cold water in the refrigerator for 24 hours, changing the water three times. This process helps to desalinate the fish, ensuring a balanced flavor in the final dish.


2. **Cook the Cod:** In a large pot, bring enough water to a boil to cover the fish. Boil the cod for about 20 minutes. Once cooked, drain the fish in a vegetable strainer and allow it to cool.


3. **Prepare the Fish:** Once the fish is cool, remove the skin, bones, and any unsightly parts. Shred the cod by hand into bite-sized pieces.


4. **Mixing Time:** In a large bowl, combine the shredded fish with the chopped vegetables, olive oil, whole cloves, salt, pepper, and vinegar. Ensure everything is well-mixed to allow the flavors to meld together.


5. **Refrigerate:** For the best flavor, refrigerate the salad for at least four days. This allows the ingredients to marry beautifully, creating a dish that is greater than the sum of its parts.


6. **Serve:** Chiquetaille can be enjoyed in various ways. Spread it on baguette slices for a savory appetizer or serve it as a salad with lettuce, tomatoes, and hard-boiled eggs for a more substantial meal.


**A Family Memory:**


I was ten years old when my grandmother first taught me how to make Chiquetaille. It was a warm summer day, and the kitchen was filled with the aroma of fresh vegetables and briny cod. As we worked side by side, she recounted stories of her childhood in Haiti, where Chiquetaille was a beloved dish at family gatherings. She explained how it was more than just food; it was a symbol of togetherness and celebration.


The memory of her laughter and the joy of learning a cherished family recipe has stayed with me ever since. Every time I prepare Chiquetaille, I am transported back to that kitchen, reliving moments of love and tradition.


**Difficulty Rating:** 4/10


**Classification:** Appetizer / Main Dish


---


**Conclusion:**


Chiquetaille is more than a simple dish; it’s a culinary journey through flavors and memories. With its vibrant mix of ingredients and deep-rooted history, it's a recipe that promises to delight and inspire. Whether you're serving it at a family gathering or enjoying it as a personal treat, Chiquetaille is sure to bring a touch of tradition to your table. So why not try your hand at this flavorful cod fish salad and create your own memories today?

Read more about Appetizers

Read more about Main Dishes

Read more about Desserts

Kolaches | Made by Meaghan Moineau

Kolaches | Made by Meaghan Moineau

### Title: "A Taste of Tradition: Crafting Perfect Kolaches for Every Family Gathering"


#### Description: Discover the heartwarming tradition of making kolaches, a cherished family recipe passed down through generations. With a blend of soft dough and sweet filling, this delightful treat is sure to bring joy to any gathering. Dive into our step-by-step guide and explore a nostalgic story that makes this dish a family favorite.


---


The aroma of freshly baked kolaches wafts through the house, and suddenly, I am transported back to my grandmother’s cozy kitchen. Every family gathering was incomplete without a batch of her famous kolaches, perfectly golden and filled with sweet poppy-seed goodness. As a child, I remember eagerly watching her skilled hands work the dough, transforming simple ingredients into a delightful masterpiece.


### Ingredients:


- 1 tablespoon sugar (for yeast)


- 1 package yeast


- 1 cup warm water


- 1 cup milk


- 1/2 cup shortening


- 1 teaspoon salt


- 3 egg yolks


- 1/2 cup sugar (for dough)


- 4 cups flour


- Canned poppy-seed filling


- 1/2 cup sugar (for Popsika)


- 1/4 cup flour (for Popsika)


- 1 teaspoon cinnamon


- 2 tablespoons melted butter


### Instructions:


1. **Activate the Yeast**: Begin by sprinkling 1 tablespoon of sugar over the yeast in a small bowl. Dissolve the mixture in lukewarm water and set aside to activate.


2. **Prepare the Milk Mixture**: In a small saucepan, heat the milk and dissolve the shortening. Allow it to cool to lukewarm before adding the salt, egg yolks, and sugar. Stir well to combine.


3. **Combine Mixtures**: Pour the milk mixture into the yeast mixture, creating a harmonious blend.


4. **Form the Dough**: Gradually add flour to the liquid mixture, working the dough by hand or with a mixer until it becomes glossy and slightly sticky.


5. **First Rise**: Cover the dough and place it in a warm, draft-free location, allowing it to rise until it doubles in size, approximately 45 minutes to an hour.


6. **Shape the Kolaches**: Once risen, punch down the dough and knead it lightly. Divide into egg-sized portions and form into balls. Arrange them on well-oiled baking pans about an inch apart and butter the tops.


7. **Second Rise**: Let the dough balls rise for about 15 minutes, then make indentations in each for the filling.


8. **Add Filling**: Fill each indentation with a large teaspoon of canned poppy-seed filling.


9. **Prepare the Popsika Topping**: In a small bowl, mix 1/2 cup sugar, 1/4 cup flour, and 1 teaspoon cinnamon. Add 2 tablespoons of melted butter and combine until the mixture resembles crumbs. Sprinkle the Popsika over the filled kolaches.


10. **Final Rise and Bake**: Allow the kolaches to rise again, doubling in size, for about 45 minutes to one hour. Preheat the oven to 375°F, then bake the kolaches until they turn golden brown.


11. **Cool and Enjoy**: Remove from the oven, cool slightly, then transfer the kolaches to wire racks to cool completely.


### A Nostalgic Family Memory


One winter evening, as snowflakes danced outside, my family gathered in the warmth of my grandmother’s kitchen. The laughter of my cousins filled the air as we eagerly awaited the kolaches. My grandmother shared stories of her childhood, lovingly kneading the dough while recounting tales of her own mother teaching her the same recipe. Each bite of the kolaches carried the taste of heritage and the bond of family, a tradition we continue to cherish.


### Difficulty Rating: 6/10


### Classification: Dessert


Kolaches, with their soft, buttery dough and sweet filling, are more than a dessert; they are a symbol of love and tradition, perfect for any family gathering. Whether you’re revisiting cherished memories or creating new ones, this recipe is sure to bring a touch of warmth and nostalgia to your home.

Read more about Appetizers

Read more about Main Dishes

Read more about Desserts

Blueberry Yoghurt Cake | Made by Meaghan Moineau

Blueberry Yoghurt Cake | Made by Meaghan Moineau

Title: "A Slice of Tradition: The Irresistible Blueberry Yoghurt Cake"


Description: Dive into the heartwarming world of baking with our Blueberry Yoghurt Cake recipe, a delightful dessert that marries the tangy sweetness of blueberries with the creamy richness of yoghurt. Perfect for family gatherings or a cozy afternoon treat, this cake not only satisfies your sweet tooth but also brings back cherished memories of family bonding in the kitchen.


---


### A Slice of Tradition: The Irresistible Blueberry Yoghurt Cake


There’s something profoundly comforting about the smell of a cake baking in the oven. It’s a scent that transcends time, often evoking memories of family gatherings and cherished moments spent with loved ones. Our Blueberry Yoghurt Cake is not just a dessert; it's a delicious journey down memory lane, filled with the warmth of tradition and the joy of shared experiences.


**Ingredients:**


- 1 cup butter


- 1 cup sugar


- 1 teaspoon vanilla extract


- 3 eggs


- 1 cup natural yoghurt


- 1 ½ cups plain flour


- 1 ½ teaspoons baking powder


- ½ cup almond meal


- 1 cup blueberry filling


- Fresh or frozen blueberries for topping (optional)


**Instructions:**


1. Begin by sieving the plain flour, baking powder, and almond meal together. Set this mixture aside.


2. In a large bowl, beat the butter, sugar, and vanilla extract until the mixture becomes creamy and white.


3. Gradually add the yoghurt, mixing well to ensure a smooth consistency.


4. Add the eggs one at a time, ensuring each is fully incorporated before adding the next.


5. Pause to use a rubber spatula to gently fold in the flour mixture, ensuring everything is well combined.


6. Finally, fold in the blueberry filling, mixing until just combined.


7. Divide the batter equally into two oval-shaped cake pans. For an extra touch, scatter some fresh or frozen blueberries on top.


8. Bake in a preheated oven at 170°C (338°F) for 30-35 minutes, or until a skewer inserted into the center comes out clean. If the cake top browns too quickly, cover it loosely with aluminum foil halfway through baking.


**Nostalgic Story:**


Growing up, the kitchen was always the heart of our home, especially when my grandmother decided it was time to bake her famous Blueberry Yoghurt Cake. I remember the eager anticipation as the cake baked, filling the house with a tantalizing aroma that promised a sweet, tangy delight.


Every summer, when blueberries were in season, we’d head to the local farm to pick our own. It was more than just gathering ingredients; it was an event that bonded our family. The excitement of finding the biggest, juiciest berries was only rivaled by the joy of seeing them transform into a luscious cake.


As we gathered around the table, waiting for the cake to cool, stories of past summers and family adventures would flow as freely as the laughter. The first bite was always the best, a perfect blend of tart blueberries and creamy yoghurt, wrapped in a tender, buttery cake.


To this day, baking this cake transports me back to those sunlit afternoons, surrounded by family, laughter, and love. It's a tradition that I now share with my children, hoping to create the same fond memories for them.


**Difficulty Rating: 6/10**


**Classification: Dessert**


This Blueberry Yoghurt Cake is a lovely addition to any dessert table, offering a delightful mix of flavors and textures that will surely impress your family and friends. Whether you're a seasoned baker or just starting out, this recipe is straightforward enough to follow, yet sophisticated enough to become a family favorite. Enjoy baking, and more importantly, enjoy the memories you'll create along the way.

Read more about Appetizers

Read more about Main Dishes

Read more about Desserts