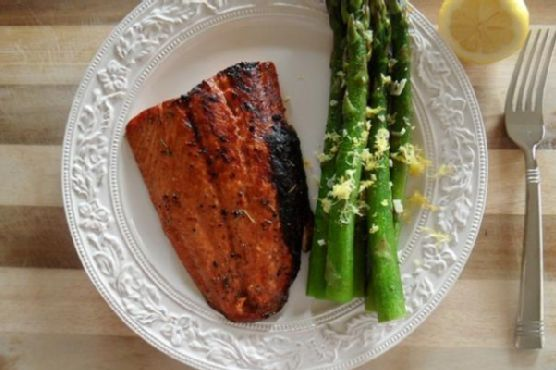
Picture this: It’s Tuesday evening, and you just got home from a day that felt longer than it had any right to be. You’re staring into the fridge, willing it to offer up some inspiration. Then, like a beacon of hope, you spot a lonely salmon fillet tucked behind last night’s leftovers. A lightbulb moment strikes: Balsamic & Honey Glazed Salmon with Lemony Asparagus. Deliciously sweet and tangy salmon, paired with asparagus that’s just the right amount of zesty. It’s the perfect blend of “fancy enough for company” and “easy enough for a weeknight.” This dish is a favorite because it’s quick yet feels special, and it hits all the right notes from tangy to savory. Trust me, your taste buds will thank you.
Jump to Recipe
What You’ll Need
You probably have most of these at home already, with maybe just a quick spice cabinet dive for a few aromatics. Here’s the lineup for this easy-peasy dinner:
- Salmon fillet
- Balsamic vinegar
- Apple cider vinegar
- Honey
- Dried dill
- Herbs de Provence
- Salt and pepper
- Grapeseed oil
- Lemon (juice and zest)
- Asparagus
- Garlic
- Vegetable stock
How to Make Balsamic & Honey Glazed Salmon with Lemony Asparagus
- In a small mixing bowl or blender, throw together all the balsamic marinade ingredients except the lemon juice: balsamic vinegar, apple cider vinegar, 1 tablespoon grapeseed oil, honey, dried dill, herbs de Provence, salt, and pepper. Whisk or blend until the mixture loses its vinegar-and-oil identity crisis.
- Lay the salmon fillet in a cozy little baking dish — I usually opt for a small casserole dish. Pour your freshly mingled marinade over the salmon, letting it settle in for at least 15 minutes. If patience is your virtue, up to 24 hours in the fridge is even better.
- Crank your oven to high broil. Just before the salmon gets its turn in the oven spotlight, drizzle the lemon juice over the top for that extra zing.
- Slide the salmon onto the top rack and broil for 10 to 12 minutes. You’re looking for glazed, browned, and a sizzle that says, “Dinner is almost ready!”
- While the salmon works its magic, prep your asparagus. Wash and trim off the tough ends — about an inch and a half will do. Lay them in a large skillet, as if sunbathing.
- Drizzle grapeseed oil over the asparagus, and use your hands to ensure every stalk gets some love. Sprinkle with salt and pepper, then sauté over medium heat for about 5 minutes.
- Add 2 tablespoons of vegetable stock, cover, and let them steam for 4 minutes. Lift the lid, introduce the minced garlic, and cover again. Let cook for another 3 to 5 minutes, just until tender but with a little bite.
- Finish with a flourish of freshly grated lemon zest over the asparagus, adding a citrusy brightness that ties the whole dish together.
Cook’s Notes
Let’s talk salmon: It should flake easily with a fork when it’s done. If you’re new to broiling, remember that it’s super quick and can go from perfect to overdone in a flash. As for leftovers (if there are any!), this dish reheats beautifully. Store the salmon and asparagus separately in airtight containers for up to two days. Reheat gently, so you don’t dry out that beautiful fish. If you’re meal prepping, the marinade is a fantastic make-ahead step. Whip it up and keep it in the fridge for when inspiration (or hunger) strikes.
Make It Your Own
Here are a few ways to switch things up:
- Swap salmon for crispy tofu if you’re going plant-based. Marinate and bake it the same way for a protein-packed treat.
- Try maple syrup instead of honey for a deeper, earthier sweetness.
- Substitute broccoli for asparagus if that’s more your jam — just adjust the cooking time to keep it crisp-tender.
- Add a sprinkle of red pepper flakes to the marinade for a little heat if you like things spicy.
Hey, if you try this, I’d love to hear how it turns out for you! Drop a comment below or tag me in your delicious photos. Happy cooking!
Related update: Balsamic & Honey Glazed Salmon with Lemony Asparagus
Related update: Yogurt Marinated Lamb Skewers
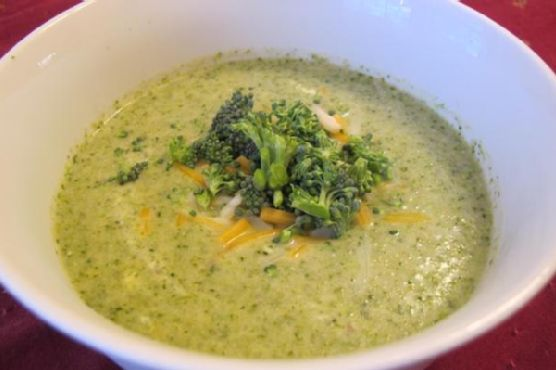
Have you ever had one of those days when the weather just flips from sunny and warm to cold and dreary, like the sky can’t make up its mind? That’s exactly what happened last Tuesday. I was planning on grilling dinner, but as the clouds rolled in, I found myself craving something warm and comforting instead. Enter my trusty Homemade Broccoli Cheddar Soup. It’s one of those recipes that feels like a big, cozy sweater for your insides. Plus, it’s surprisingly easy to whip up, which makes it perfect for those spontaneous soup days. With just a handful of ingredients, most of which are probably lurking in your pantry right now, you’ll have a bowl of creamy, cheesy goodness that hits all the right notes.
Jump to Recipe
What You’ll Need
This soup keeps things simple, but there are a few standout ingredients that make it special and oh-so-delicious. Don’t worry if your pantry is looking a little bare; chances are you already have most of this stuff on hand.
- Olive oil
- 1 shallot, chopped
- 1 red onion, chopped
- 1 jalapeno, optional for heat
- Lemon juice
- 4 cups vegetable broth
- Salt and pepper to taste
- 2 large Yukon Gold potatoes, peeled and diced
- 2 heads of raw broccoli, chopped (save a few florets for garnish!)
- Plain yogurt (like Chobani)
- Plain almond milk
- Fresh parsley, chopped
- Shredded cheddar cheese
- 1 bay leaf
How to Make Homemade Broccoli Cheddar Soup
- In your soup pot, heat 2 tablespoons of olive oil over medium-high heat. Add the shallot, red onion, and jalapeno. Sauté until the onions are translucent and everything smells heavenly.
- Add a splash of lemon juice, all the vegetable broth, the remaining olive oil, salt, and pepper. Give it a good stir, then reduce the heat to medium.
- Toss in the diced potatoes and bring the broth to a boil. Cook until you can easily pierce the potatoes with a fork.
- Stir in the chopped broccoli, but remember to reserve a few florets for later. Cover the pot and let the broccoli get nice and tender.
- Once the broccoli is cooked, turn off the heat. Carefully transfer the contents of the pot to a large mixing bowl and let it cool slightly.
- Add the parsley, yogurt, and almond milk to the bowl. Gently fold these into the soup mixture, letting the heat from the soup meld everything together.
- In batches, puree the mixture in a blender until it’s as smooth as you like it. I’m still dreaming of that Vitamix, but any blender will do!
- In the now-empty soup pot, sauté the reserved broccoli florets with a dash of veggie broth until they’re just tender.
- Return the pureed soup to the pot, add the bay leaf, and a few pinches of chopped basil if you’re feeling fancy. Simmer uncovered for at least 20 minutes, stirring frequently to banish those pesky air bubbles. Remember to fish out the bay leaf before serving!
Cook’s Notes
Let’s chat about some things that might come in handy as you make this soup. First off, if you’re not into spicy, feel free to skip the jalapeno; it’s totally optional. If you’re planning to make this soup ahead of time, it stores beautifully in the fridge for up to 3 days. Just reheat it slowly on the stove, and you’ll be good to go. As for freezing, I wouldn’t recommend it — the texture can get a little funky once thawed. Always remember to remove that bay leaf before serving; no one wants a surprise in their spoon!
Make It Your Own
This is where the fun begins! Here are a few ideas to tweak this soup to your liking:
- Swap the cheddar for Gruyere cheese if you’re feeling fancy; it adds a nutty depth to the soup.
- Want a heartier meal? Stir in some cooked quinoa or white beans for added protein.
- For a vegan twist, use nutritional yeast instead of cheddar cheese. It adds a cheesy flavor without the dairy.
- Love greens? Toss in a few handfuls of spinach or kale before blending for an extra boost of nutrients.
If you try this, I’d love to hear how it turns out — drop a comment or tag me! Whether you’re combating a surprise rainy day or just craving something warm and comforting, I hope this soup brings a bit of joy to your kitchen. Happy cooking!
Related update: Homemade Broccoli Cheddar Soup
Related update: Moroccan Carrot Soup
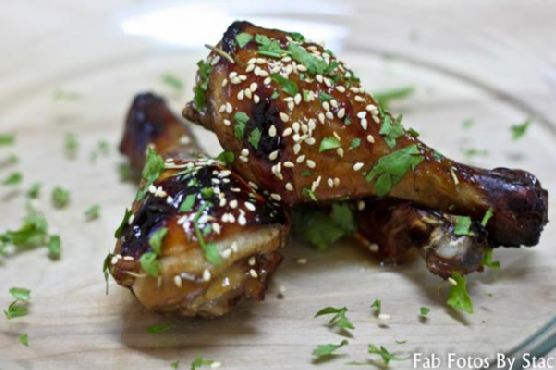
Last Tuesday night, I found myself elbow-deep in a fridge raid, eyeing a pack of chicken drumsticks that had been giving me the side-eye all week. It was one of those evenings where time was not on my side. I needed something quick, but I also craved something that felt a little special. That zingy, sweet, and sticky combination of balsamic vinegar and honey popped into my mind like a lightbulb moment, and let me tell you, it did not disappoint. These Balsamic-Honey Chicken Drumsticks are not only ridiculously easy to throw together but they make your kitchen smell like you’ve been cooking for hours. You know that feeling when a dish makes you look like a kitchen wizard with minimal effort? Yeah, this is one of those recipes. Bonus: The leftovers are a gift that keeps on giving.
Jump to Recipe
What You’ll Need
Let’s be real, the magic here lies in a few pantry staples that you probably already have lurking in your cupboards. Here’s your shopping list:
- Chicken drumsticks
- Balsamic vinegar
- Honey
- Brown sugar
- Soy sauce
- Rosemary sprigs
- Garlic cloves
- Sesame seeds
- Fresh flat-leaf parsley
How to Make Balsamic-Honey Chicken Drumsticks
- Grab a large, resealable plastic bag and toss in the balsamic vinegar, honey, brown sugar, soy sauce, rosemary, and garlic cloves. Now, shake it like a Polaroid picture until the honey and sugar dissolve. You’ll know it’s ready when it’s all shiny and smooth.
- Add the chicken drumsticks to the bag. Try to squeeze out as much air as you can before sealing it up. Give the drumsticks a little massage to make sure they’re all cozy in the marinade. Let them chill in the fridge for about two hours. Trust me, the wait is worth it.
- Preheat your oven to a toasty 450°F. Line a baking sheet with foil — it makes clean-up a breeze later. Lay out the marinated drumsticks, making sure they have some space to breathe.
- Bake the drumsticks for 30 to 35 minutes. You’re looking for that gorgeous caramelized skin, dark in spots, with the smell wafting through your home.
- While the drumsticks are in the oven, pour the leftover marinade into a small saucepan. Bring it to a bubbly boil, then simmer on low until it thickens up, about 15 minutes. This is your golden glaze.
- Once the drumsticks are out of the oven, brush them with the boiled marinade. It’s like giving them a glossy topcoat. Arrange them on a serving platter and sprinkle with sesame seeds and parsley. Voilà!
Cook’s Notes
A few words of wisdom from my kitchen to yours: If you accidentally leave the drumsticks to marinate a bit longer than two hours, it’s no biggie. It’s all about that flavor infusion. Just don’t go beyond 24 hours. This dish is perfect for making ahead; just stop before baking and keep the marinated chicken in the fridge until you’re ready to cook. Leftovers can be stored in an airtight container in the fridge for up to three days. Reheat them in the oven to keep that skin crispy.
Make It Your Own
- Swap the drumsticks for chicken thighs or wings — adjust cooking time accordingly.
- If you’re avoiding soy, coconut aminos make a great substitute.
- Not a fan of rosemary? Try thyme or oregano for a different aromatic twist.
- For a vegetarian option, replace the chicken with crispy tofu squares.
If you try this, I’d love to hear how it turns out — drop a comment or tag me! Whether it’s a weeknight dinner or an impromptu gathering, I promise these drumsticks will steal the show. Happy cooking!
Related update: Balsamic-Honey Chicken Drumsticks
Related update: Balsamic & Honey Glazed Salmon with Lemony Asparagus