Chinese Potstickers | Made by Meaghan Moineau

Chinese Potstickers | Made by Meaghan Moineau

Deliciously Nostalgic: Crafting Perfect Chinese Potstickers at Home


Description

Dive into the rich flavors and textures of Chinese potstickers, a delightful culinary journey wrapped in a delicate dumpling. This detailed guide not only provides a step-by-step recipe but also shares a heartwarming family story that will inspire you to bring a taste of tradition to your kitchen. Perfect as an appetizer or a savory snack, these potstickers will soon become a family favorite.

---


A Taste of Tradition: Chinese Potstickers


The sizzling sound of dumplings hitting the hot pan, the aroma of sesame oil wafting through the kitchen, and the anticipation of that first bite—making Chinese potstickers is more than just preparing a meal; it's about creating memories. For me, these potstickers are a culinary heirloom passed down through generations, each fold and pleat crafted with love.


Ingredients


- 200g lean ground pork (or substitute with ground chicken)


- 100g canned water chestnuts, chopped (or substitute with spinach or cabbage)


- 1 teaspoon sea salt


- 1 teaspoon fine sugar


- 1/2 teaspoon black ground pepper


- 2 teaspoons light soy sauce


- 2 teaspoons sesame oil


- 1 tablespoon Shaoxing Huatiao wine


- 2-3 tablespoons finely chopped scallions


- Dumpling wrappers (thawed if frozen)


- Plain flour for dusting


- 2-3 tablespoons vegetable oil


- 1/3 cup water


Instructions


1. Prepare the Filling:

- In a large mixing bowl, combine the ground pork with sea salt, sugar, ground pepper, soy sauce, sesame oil, and Shaoxing Huatiao wine.


- Add the chopped water chestnuts to the mixture. For a twist, you can use spinach or cabbage instead.


- Stir in the finely chopped scallions and mix all ingredients well.


2. Assemble the Dumplings:

- Dust your working surface with flour. Carefully separate the dumpling wrappers and lay them out.


- Place about 1.5 teaspoons of the pork filling in the center of each wrapper.


- Lightly wet the edges of the wrapper with water. Bring the edges together and pinch at the center.


- Create pleats on one side of the dumpling, folding towards the center and pinching to seal. Repeat on the other side, ensuring three pleats per side.


3. Cooking the Potstickers:

- Heat vegetable oil in a frying pan over high heat.


- Place the dumplings flat-side down in the pan and fry until the bottoms are golden brown.


- Add water, cover the pan, and steam for 4-5 minutes. Remove the cover and let them crisp up for another minute.


4. Serving Suggestion:

- Serve the potstickers with a vinegar dip made of balsamic or black Chinese vinegar and thinly sliced ginger. Enhance the dip with soy sauce, chili oil, or sesame oil for extra flavor.


A Family Memory


Growing up, Sunday afternoons were reserved for dumpling-making in my grandmother's kitchen. Her nimble fingers would work magic, transforming simple ingredients into delectable bites. As children, my siblings and I would gather around the table, our hands dusted with flour, trying to mimic her expert pleats. Laughter and stories filled the room, each dumpling a testament to our shared love and heritage. These potstickers are more than a dish; they're a connection to those cherished days, a reminder that food has the power to bring families together.


Difficulty: 6/10

Classification: Appetizer


Creating Chinese potstickers is a rewarding experience that combines the art of cooking with the joy of tradition. Whether you're new to dumpling-making or a seasoned pro, this recipe promises delicious results that will delight your senses and bring a touch of nostalgia to your dining table. Enjoy!

Read more about Appetizers

Read more about Main Dishes

Read more about Desserts

Sweet and Spicy Nuts | Made by Meaghan Moineau

Sweet and Spicy Nuts | Made by Meaghan Moineau

Title: Sweet and Spicy Nuts: A Family Tradition with a Fiery Twist
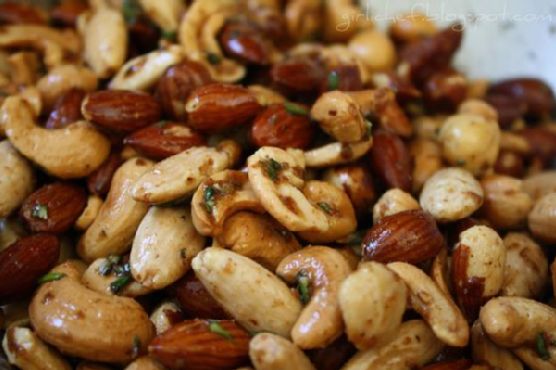
Description: Discover the delightful balance of sweet and spicy flavors in this easy-to-make Sweet and Spicy Nuts recipe. Perfect as an appetizer or a snack, this dish is sure to add a kick to your family gatherings. Reminisce with me as I share a cherished family memory tied to these delectable nuts. Difficulty: 3/10.

---


When I think of Sweet and Spicy Nuts, my mind drifts back to those delightful family gatherings at my grandmother's house. Tucked away in her cozy kitchen, the air was always filled with the comforting aroma of buttery spices, a scent that wrapped around us like a warm hug.


The recipe I'm about to share has become a staple in our family—a perfect blend of sweet and spicy that echoes the warmth of those cherished memories. It's a dish that brings smiles and a bit of nostalgia, as it reminds us of those lively conversations and laughter shared over a bowl of these flavorful nuts.


Sweet and Spicy Nuts Recipe
Ingredients:

- 2 tablespoons butter


- 1/2 teaspoon cayenne pepper


- 1/2 teaspoon ground cinnamon


- 1/2 teaspoon ground cumin


- 1/4 cup light brown sugar


- 2 cups mixed nuts (such as walnuts)


- 1 teaspoon salt


- 1 tablespoon water


Instructions:
1. Mix the Spices: In a small bowl, combine the ground cumin, cayenne pepper, ground cinnamon, and salt. Set aside for later use.
2. Toast the Nuts: Heat a dry skillet over medium heat. Add the mixed nuts and cook, stirring frequently, until they begin to toast, about 4 minutes. Transfer the nuts to a small bowl and set aside.
3. Create the Glaze: In the same hot skillet, add the butter, light brown sugar, water, and the spice mixture. Cook, stirring, until a smooth glaze forms, about 1 minute.
4. Coat the Nuts: Return the toasted nuts to the skillet. Toss them in the glaze, ensuring they are well-coated. Cook for an additional 1 to 2 minutes, or until the nuts are glazed and golden brown.
5. Cool and Store: Remove the skillet from the heat and transfer the glazed nuts to a baking sheet lined with aluminum foil. Use a fork to separate them. Allow the nuts to cool until the sugar hardens, about 10 minutes. Store in an airtight container.
A Nostalgic Note:

The tradition of making Sweet and Spicy Nuts started with my grandmother. She had a knack for turning simple ingredients into something magical. As kids, we would gather around her, eyes wide with anticipation, as she tossed the nuts in the sizzling glaze. The aroma was irresistible, and we eagerly waited for them to cool, often sneaking a few warm morsels when she wasn't looking.


These nuts have now become a symbol of our family's togetherness, a dish that travels with us through generations. Whether it's a holiday party or a casual Sunday afternoon, a bowl of Sweet and Spicy Nuts always makes its way to the table, sparking conversations and creating new memories.


Difficulty: 3/10
Category: Appetizer

---


Next time you're looking for a delightful appetizer to impress your guests or just a snack to enjoy on a cozy afternoon, give these Sweet and Spicy Nuts a try. They are sure to add a fiery twist to your gatherings and maybe even inspire a family tradition of your own.

Read more about Appetizers

Read more about Main Dishes

Read more about Desserts

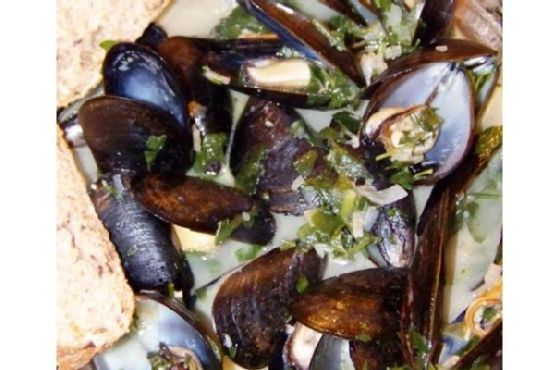
Classic French Mussels | Made by Meaghan Moineau

Classic French Mussels | Made by Meaghan Moineau

Title: Unveiling the Elegance of Classic French Mussels: A Taste of Nostalgia
Description: Dive into the heart of French culinary tradition with our Classic French Mussels recipe. Perfectly blending delicate flavors and cultural richness, this dish offers a taste of nostalgia, transporting you to cherished family gatherings. With simple ingredients like dry white wine, fresh parsley, and garlic, this mussel recipe is a delightful appetizer rated 4 out of 10 in difficulty. Relish the harmony of taste and memory as you savor each bite.

---


There’s something inherently comforting about the ritual of preparing a beloved family dish. For me, Classic French Mussels brings back vivid memories of summer evenings spent at my grandmother’s quaint seaside cottage in Brittany, France. The air was always filled with the briny scent of the ocean, mingling with the aroma of garlic and shallots sizzling in olive oil—a sensory symphony that signaled the beginning of a cherished meal.


Ingredients:

- 2 lbs mussels


- 2 tablespoons olive oil


- 2 shallots, finely chopped


- 4 garlic cloves, minced


- 1 cup dry white wine


- 1/2 cup low-fat buttermilk


- 2 tablespoons unsalted light butter


- 1/4 cup fresh parsley, chopped


- Kosher salt to taste


Instructions:
1. Prepare the Mussels: Begin by scrubbing the mussels under cold water with a stiff brush. Discard any mussels that remain open or have broken shells. Soak them in cool, clean water for at least an hour to allow them to expel any sand.
2. Remove the Beards: Locate the small fibrous "beard" on each mussel and pull it out toward the hinge of the shell to avoid injuring the mussel.
3. Cook the Aromatics: In a large pot, heat the olive oil over medium-high heat. Add the shallots and garlic, cooking until soft and fragrant, approximately 5 minutes.
4. Combine Ingredients: Add the mussels to the pot, followed by the wine, buttermilk, butter, and parsley. Season generously with kosher salt. Stir well to combine all ingredients.
5. Steam the Mussels: Cover the pot and allow the mussels to cook for 10 to 15 minutes, or until they have opened and are cooked through.
6. Serve: Divide the mussels and the flavorful juices between two bowls. Serve immediately with crusty whole-grain bread to soak up the delectable sauce.

This dish, a testament to the simplicity and elegance of French cuisine, is the perfect appetizer for any occasion. It’s rated a 4 out of 10 in difficulty, making it accessible even for those new to cooking mussels.


As I watch the mussels gently open in the pot, I’m reminded of those magical evenings in Brittany, where laughter echoed around the dinner table, and the warmth of family togetherness was as nourishing as the meal itself. Today, I carry on this tradition, serving Classic French Mussels to my own family, creating new memories while honoring the old.


Savor the rich flavors and let this dish transport you to a place of warmth, love, and tradition. Bon appétit!

Read more about Appetizers

Read more about Main Dishes

Read more about Desserts

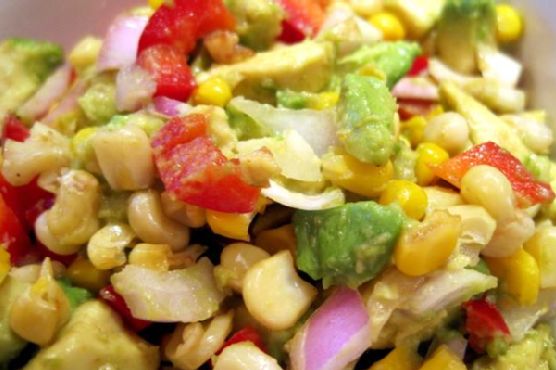
Corn Avocado Salsa | Made by Meaghan Moineau

Corn Avocado Salsa | Made by Meaghan Moineau

Title: A Taste of Summer: Corn Avocado Salsa with a Nostalgic Twist
Description: Dive into a vibrant blend of flavors with our Corn Avocado Salsa recipe. This appetizer is not only a feast for the senses but also a trip down memory lane, filled with family gatherings and summer nostalgia.

---


As the summer sun casts its golden glow over lush gardens and bustling farmers' markets, there's one dish that never fails to capture the essence of the season for me: Corn Avocado Salsa. This vibrant, flavorful appetizer is more than just a recipe; it's a cherished family tradition that brings back fond memories of sun-drenched days and laughter-filled evenings.


Ingredients:

- 1 ripe avocado


- 1 tablespoon balsamic vinegar


- 1 teaspoon cumin


- 1 can of frozen corn, drained


- 1 clove garlic, finely chopped


- 1 red bell pepper, finely chopped


- Olive oil spray


Instructions:

1. Preheat your oven to 375 degrees Fahrenheit.


2. Spread the drained corn evenly on a baking sheet and lightly spray with olive oil.


3. Roast the corn in the oven for about 8-10 minutes, ensuring it doesn't brown too much or burn. Once done, remove from heat and allow it to cool.


4. In a large bowl, combine the finely chopped red pepper and garlic.


5. Peel, coarsely chop the avocado, and add it to the bowl along with the cooled corn.


6. Sprinkle in the cumin and drizzle the balsamic vinegar over the mixture, blending well to ensure all ingredients are evenly coated.


Difficulty Rating: 3/10
Classification: Appetizer

---


The true magic of Corn Avocado Salsa lies not only in its exquisite taste but also in the memories it evokes. Every time I prepare this dish, I'm transported back to my grandmother's kitchen, where the aroma of roasting corn mingled with the laughter of cousins gathered around the table. Grandma always insisted on using the freshest ingredients, and her secret was roasting the corn just to the right point where it retained its sweetness without losing its crispness.


Our family would often gather in the backyard, surrounded by towering sunflowers and the melodious chirping of crickets. Grandma would bring out a large bowl of her famous salsa, and we'd snack on it with tortilla chips, savoring each bite as the sun dipped below the horizon. It was during these moments that I learned the importance of good food and even better company.


Today, I continue this tradition with my own family, and with every bite of Corn Avocado Salsa, I'm reminded of those warm, joyful gatherings. This recipe is more than just a culinary delight; it's an invitation to pause, savor, and create lasting memories with loved ones. So, as you prepare this dish, I hope it brings as much warmth and happiness to your table as it has to mine.


Whether you're hosting a summer barbecue or simply looking to indulge in a refreshing appetizer, Corn Avocado Salsa is sure to impress. Enjoy the blend of creamy avocado, sweet roasted corn, and the subtle kick of cumin, and let it transport you to your own cherished memories.

Read more about Appetizers

Read more about Main Dishes

Read more about Desserts

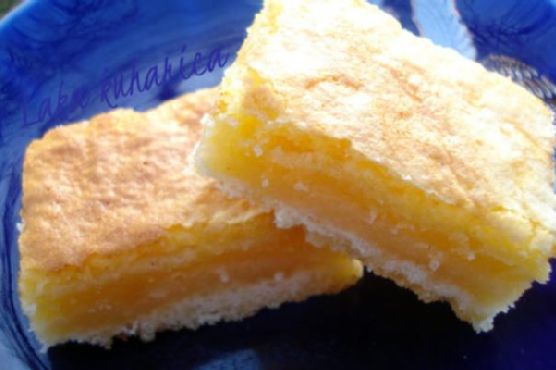
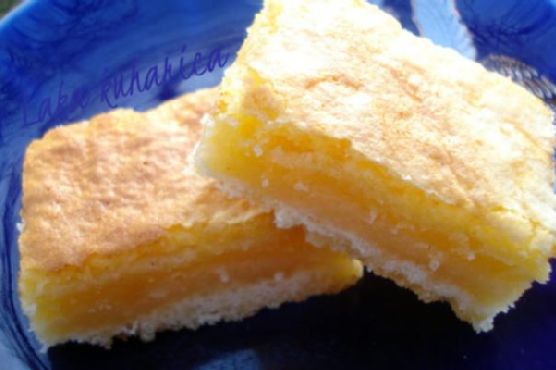
Lemon square bars | Made by Meaghan Moineau

Lemon square bars | Made by Meaghan Moineau

Title: Zesty Lemon Square Bars: A Nostalgic Dessert to Brighten Your Day
Description: Dive into the refreshing world of lemon square bars, a classic dessert that's both delightful and timeless. This blog post will guide you through crafting these tangy treats with ease, while sharing a heartwarming family memory that makes them even more special. Rated a 4 out of 10 for difficulty, these lemon bars are perfect for dessert lovers seeking a simple yet satisfying bake.

---


Zesty Lemon Square Bars: A Nostalgic Dessert to Brighten Your Day

If there's one dessert that has the magical ability to transport me back to my childhood, it's lemon square bars. The tangy zest of lemon combined with a buttery crust and a sweet, chewy topping was a staple in my grandmother's kitchen, and each bite was like a time capsule filled with love and laughter. Today, I'm sharing not just a recipe, but a piece of my family's history that I hope will bring joy to your home as well.


Ingredients You'll Need:

- 2 cups all-purpose flour


- ½ cup confectioners' sugar


- 1 cup unsalted butter, melted


- 1 teaspoon vanilla essence


- 2 cups granulated sugar


- 4 large eggs


- 1 teaspoon baking powder


- ½ cup fresh lemon juice


- 2 tablespoons grated lemon rind


- A pinch of nostalgia (optional, but highly recommended!)


Instructions:
1. Craft the Crust:

Begin by preheating your oven to 170°C (340°F). In a medium-sized bowl, combine 2 cups of flour with the confectioners' sugar. Blend in the melted butter and vanilla essence, stirring until the mixture forms a soft dough. Press this dough evenly into the bottom of a greased 9x13 inch pan. Bake for 15 minutes or until the crust is golden and firm to the touch.


2. Prepare the Filling:

While the crust bakes, whip up the lemony filling. In a large bowl, beat the eggs until they are light and frothy. In a separate bowl, mix together the granulated sugar, baking powder, and ½ cup of flour, ensuring there are no lumps. Gradually stir this sugar mixture into the beaten eggs. Add the lemon juice and lemon rind, mixing until well combined.


3. Assemble and Bake:

Pour the lemon mixture over the pre-baked crust, spreading it evenly. Return the pan to the oven and bake for an additional 30 minutes, or until the lemon topping is set and slightly golden. Allow the bars to cool completely before slicing them into perfectly tangy squares.


A Slice of Family Memory:

Every summer, my family would gather at my grandmother's house for our annual reunion. The highlight was always her legendary lemon square bars, which she would bake in abundance to satisfy our eager appetites. We would sit on her porch, the scent of fresh lemons wafting through the air, as we shared stories and laughter. Those sun-drenched afternoons, filled with the sound of cicadas and the taste of these sweet treats, are memories I cherish deeply. Each bite now reminds me of those precious moments and the warmth of family.


Difficulty Rating: 4/10
Classification: Dessert

These lemon square bars are a testament that sometimes the simplest recipes bring the most joy. With their vibrant citrus flavor and buttery goodness, they are sure to become a beloved addition to your dessert repertoire. Whether you're hosting a family gathering or simply craving a sweet treat, these bars promise a burst of sunshine in every bite. Enjoy baking, and may your kitchen be filled with the same happiness and warmth that my grandmother's once was.

Read more about Appetizers

Read more about Main Dishes

Read more about Desserts

Creamy Tomato Soup | Made by Meaghan Moineau

Creamy Tomato Soup | Made by Meaghan Moineau

Warm Memories in a Bowl: Creamy Tomato Soup Recipe


Description:

Indulge in the comforting embrace of our Creamy Tomato Soup, a soul-warming recipe that marries the richness of tomatoes with a creamy smoothness, creating a symphony of flavors that dance on your taste buds. This delightful dish is perfect for cozy evenings and family gatherings, where stories and laughter are shared over steaming bowls of soup. This Appetizer, rated a 4 out of 10 for difficulty, is sure to become a staple in your culinary repertoire.

---


Ingredients:

- 1 tablespoon olive oil

- 1 diced onion


- 1 teaspoon fresh dried basil


- 1 teaspoon fresh dried thyme


- Salt to taste


- Black pepper to taste


- 2 cans diced tomatoes


- 2 tablespoons tomato paste


- 1/4 cup all-purpose flour


- 3 cups chicken broth, divided


- 1 tablespoon Splenda


- 1 cup evaporated milk


---


Instructions:

1. Sauté the Aromatics: In a large saucepan, heat the olive oil over medium heat. Add the diced onion, basil, thyme, salt, and black pepper. Cook, stirring occasionally, until the onion is tender and golden.
2. Simmer the Tomatoes: Add the diced tomatoes and tomato paste to the saucepan. Stir well and let the mixture simmer for about 10 minutes, allowing the flavors to meld together.
3. Thicken the Base: In a small bowl, whisk together the flour and 1/4 cup of chicken broth until smooth. Stir this mixture into the tomato mixture, ensuring it is well blended.
4. Create the Soup: Add the remaining chicken broth to the saucepan. Let the soup simmer for 30 minutes, stirring frequently to prevent sticking.
5. Blend to Perfection: Use an immersion blender to puree the soup until smooth.
6. Finish with Creaminess: Stir in the Splenda and evaporated milk. Heat through before serving.

---


A Nostalgic Family Memory:


Growing up, our family kitchen was the heart of our home, a place where the aroma of delicious meals would draw us together. I vividly recall a chilly autumn evening when my grandmother decided to make her famous Creamy Tomato Soup. The air outside was crisp, and the leaves painted the ground in hues of gold and red. Inside, the kitchen was warm with the smell of onions sautéing in olive oil, a scent that always signaled something special was brewing.


As we gathered around the table, bowls steaming with the rich, creamy soup, my grandmother regaled us with stories of her childhood. She spoke of simpler times, of a little kitchen in her hometown where tomato soup was a cherished tradition. With each spoonful, we were not just savoring a meal but also connecting with our roots and the love that spanned generations.


Even now, whenever I prepare this Creamy Tomato Soup, I am transported back to that evening, to the laughter and warmth of family. This recipe is more than just a dish; it's a vessel of memories, a reminder of the love that binds us all together.


---


Bring a taste of nostalgia and warmth to your table with this Creamy Tomato Soup. Perfect for nourishing both body and soul, it's a dish that invites you to create new memories while cherishing the old.

Read more about Appetizers

Read more about Main Dishes

Read more about Desserts

Caribbean black bean and sweet potato soup | Made by Meaghan Moineau

Caribbean black bean and sweet potato soup | Made by Meaghan Moineau

Title: A Warm Caribbean Hug in a Bowl: Black Bean and Sweet Potato Soup
Description: Dive into a heartwarming journey with our Caribbean Black Bean and Sweet Potato Soup. Infused with aromatic spices and enriched with sweet potatoes, this delightful dish is a symphony of flavors that will transport you to the sun-kissed beaches of the Caribbean. Join us as we explore this comforting recipe, perfect for any season, and share a nostalgic family memory that makes this dish truly special.

---


A Taste of the Caribbean: Black Bean and Sweet Potato Soup


As the leaves begin to fall and the air turns crisp, there's nothing quite like a steaming bowl of soup to warm the soul. This Caribbean Black Bean and Sweet Potato Soup is more than just a meal; it's a memory, a tradition, and a comforting embrace from the past.


Ingredients:

- 1 cup dry black turtle beans

- 2 tablespoons coconut oil


- 1 yellow sweet onion, diced


- 2 jalapenos, seeded and chopped


- 1 teaspoon ground ginger


- 1/2 teaspoon ground allspice


- 1 teaspoon thyme


- 1 teaspoon coarse sea salt


- 6 cups vegetable broth


- 2 large sweet potatoes, peeled and diced


- 2 tablespoons brown sugar


- 2 green onions, chopped


- 1/4 cup fresh cilantro, chopped


- Salt and pepper to taste


Instructions:

1. Prepare the Beans: Rinse the black turtle beans and place them in a large bowl. Cover with 4 inches of water and soak overnight, or for at least 8 hours. After soaking, strain and rinse the beans.
2. Sauté the Aromatics: In a large soup pot, heat the coconut oil over medium heat. Add the diced onion and chopped jalapenos, sautéing for about 10 minutes until they become soft and fragrant.
3. Simmer the Soup: Add the rinsed beans and vegetable broth to the pot. Stir in the ground ginger, allspice, thyme, and coarse sea salt. Bring the mixture to a boil, then reduce the heat and let it simmer gently for 1 hour and 30 minutes.
4. Add Sweetness and Texture: Introduce the diced sweet potatoes and brown sugar into the pot, allowing the soup to simmer for an additional 30 minutes. This will ensure the beans and sweet potatoes are tender and packed with flavor.
5. Blend for Creaminess: Carefully puree 1 cup of the soup in a blender, then return it to the pot. This step enhances the soup's texture, making it creamy while still maintaining its hearty character.
6. Garnish and Serve: Stir in the chopped green onions and fresh cilantro. Adjust the seasoning with salt and pepper to suit your taste. Serve hot and enjoy!

A Nostalgic Memory


This soup is a beloved family tradition, taking me back to my grandmother's cozy kitchen. I remember the warmth of the stove mingling with the rich aroma of spices, as we gathered around the table for our Sunday family dinner. My grandmother, with her gentle hands, would prepare this soup with love, weaving tales of her own childhood in the Caribbean. Each spoonful was a reminder of those cherished moments, where laughter and stories filled the air, and the soup brought us all closer together.


Difficulty Rating: 5/10


This recipe is moderately challenging, perfect for home cooks looking to expand their culinary repertoire with a dish that is both satisfying and impressive.


Classification: Main Dish


This Caribbean Black Bean and Sweet Potato Soup stands out as a hearty main dish, perfect for a comforting dinner or a cozy lunch. Experience the warmth and flavors of the Caribbean with every delightful bite.

Read more about Appetizers

Read more about Main Dishes

Read more about Desserts

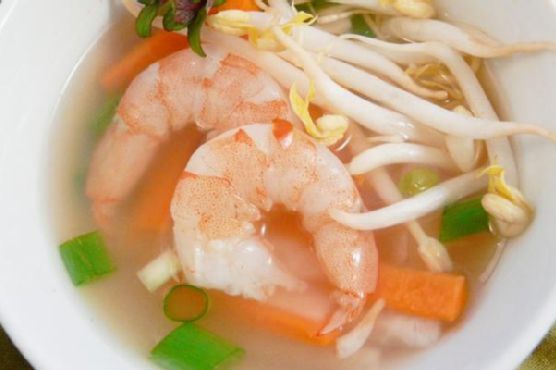
Shrimp and Lemongrass Soup | Made by Meaghan Moineau

Shrimp and Lemongrass Soup | Made by Meaghan Moineau

Title: A Taste of Home: Crafting the Perfect Shrimp and Lemongrass Soup
Description: Dive into a bowl of nostalgia with our Shrimp and Lemongrass Soup, a fragrant and flavorful dish that brings family memories to life. Learn how to make this delightful appetizer that combines the freshness of lemongrass with succulent shrimp, all in a soothing broth that’s sure to warm your soul.

---


There’s something inherently comforting about a bowl of soup that’s been simmered to perfection. For me, Shrimp and Lemongrass Soup is more than just a delicious appetizer; it’s a cherished family tradition that transports me back to my childhood kitchen, where the aromatic scent of lemongrass and the sound of gentle simmering were constants in our home.


Growing up, weekends meant family gatherings filled with laughter and the clinking of spoons against bowls. My grandmother, a culinary genius in her own right, would often whip up her signature Shrimp and Lemongrass Soup. The kitchen was her domain, and I vividly remember watching her expertly slice the lemongrass, her face a picture of concentration and love.


The process of crafting this soup is a labor of love, yet surprisingly simple. Here’s how you can recreate this heartwarming dish:

Ingredients:


- Raw shrimp (shells reserved)


- Lemongrass stems


- Scallion


- Bean sprouts


- Lime juice


- Carrot


- Daikon


- Chicken stock


- Fresh mint for garnish


Instructions:


1. Start by cutting off the white part of the lemongrass stems, saving the tops for later use. Slice the white part into inch-long pieces and gently flatten them with a knife to release their full flavor.


2. In a large stockpot, bring chicken stock to a boil. Add the flattened lemongrass stems and reserved shrimp shells, allowing them to simmer for 2 minutes. This step infuses the stock with a rich, aromatic base.


3. After simmering, set the stock aside to allow the flavors to meld. Strain the stock to remove the lemongrass and shrimp shells, then return the clear, aromatic liquid to the stockpot.


4. Slice the remaining lemongrass stem and finely chop it. Add this to the stock along with the raw shrimp, allowing it to simmer for 3-4 minutes until the shrimp turn a beautiful pink hue.


5. Stir in the lime juice, scallions, bean sprouts, sliced carrots, and daikon. Mix well, ensuring each ingredient is lovingly coated in the flavorful broth. Season to taste with salt and pepper.


6. Serve the soup hot, garnished with fresh mint leaves for an added burst of freshness.


A Trip Down Memory Lane


As a child, I would sit at the kitchen table, eagerly awaiting my bowl of soup. The first sip was always magical—a harmonious blend of tangy lime, aromatic lemongrass, and the subtle sweetness of shrimp. It was a dish that brought our family together, each spoonful a reminder of love and tradition.


This Shrimp and Lemongrass Soup is rated a 4 out of 10 on the difficulty scale, making it an approachable recipe for both novice and seasoned cooks. As an appetizer, it pairs beautifully with a variety of main courses, yet stands confidently on its own as a star dish at any dinner table.


So, gather your ingredients, put on your apron, and invite a little nostalgia into your kitchen. This Shrimp and Lemongrass Soup isn’t just about flavor—it’s about creating memories and sharing a piece of my family’s heritage with yours. Bon appétit!

Read more about Appetizers

Read more about Main Dishes

Read more about Desserts

Lemon square bars | Made by Meaghan Moineau

Lemon square bars | Made by Meaghan Moineau

Title: Nostalgic Lemon Square Bars: A Zesty Slice of Family Memories
Description: Dive into the world of tangy decadence with our Lemon Square Bars recipe. This delightful dessert, rated a 4 out of 10 on the difficulty scale, blends the perfect balance of tart and sweet with a touch of nostalgia that will warm your heart and tantalize your taste buds. Whether you're a seasoned baker or a novice in the kitchen, these bars promise to deliver joy with every bite.

---


As the golden rays of summer began to wane and the crisp embrace of autumn gently took over, my family had a beloved tradition of gathering in the kitchen to bake Lemon Square Bars. The scent of freshly zested lemon rind and the warmth of the oven filled the air, transforming our home into a haven of shared stories and laughter.


Ingredients:

- 2 cups flour


- 1/2 cup confectioners' sugar


- 1 cup unsalted butter, melted


- 1 teaspoon vanilla essence


- 4 eggs


- 2 cups sugar


- 1 teaspoon baking powder


- 1/4 cup flour


- 2/3 cup lemon juice


- Lemon rind from 2 lemons


Instructions:
1. Prepare the Base:

In a medium bowl, stir together 2 cups of flour and 1/2 cup of confectioners' sugar. Blend in the melted butter and vanilla essence. With the palm of your hand, press the soft dough into the bottom of a greased 9x13 inch pan. Bake in a preheated oven at 170°C (338°F) for 15 minutes, or until golden brown.


2. Create the Filling:

While the crust bakes, beat the eggs in a large bowl until light and frothy. In a separate bowl, combine 2 cups of sugar, baking powder, and 1/4 cup of flour to ensure there are no lumps. Gradually stir the sugar mixture into the eggs. Add the lemon juice and freshly grated lemon rind, mixing until well combined.


3. Bake to Perfection:

Pour the lemon mixture over the prepared crust and return to the oven. Bake for an additional 30 minutes or until the bars are set. Allow to cool completely before cutting into squares.


A Slice of Nostalgia:

Every year, as the first leaves began to fall, my grandmother would pull out her treasured, slightly worn recipe card. It was a ritual that marked the transition of seasons—a time when family gathered around the kitchen table, each member assigned a task, from zesting lemons to stirring the batter.


I vividly remember my grandmother's stories, shared as we worked side by side. She spoke of her childhood summers spent in her grandmother's garden, where lemon trees stood tall, their branches heavy with fruit. Those stories, full of warmth and love, were as much an ingredient in our Lemon Square Bars as the lemons themselves.


These bars were more than just a dessert; they were a bridge between generations, a connection to our past, and a sweet promise of future gatherings. Each bite brought with it a flood of cherished memories, a reminder of the enduring power of family traditions.


Conclusion:

These Lemon Square Bars, with their tangy sweetness and buttery crust, are a testament to the joy of baking with loved ones. As you savor each bite, may you find your own slice of nostalgia, a moment of connection, and a delightful escape into the warmth of family memories. Whether you enjoy them as a dessert for a special occasion or a simple treat on a Sunday afternoon, these bars are sure to become a beloved staple in your culinary repertoire.

Read more about Appetizers

Read more about Main Dishes

Read more about Desserts

Ferrero Raffaello Coconut Candy Balls | Made by Meaghan Moineau

Ferrero Raffaello Coconut Candy Balls | Made by Meaghan Moineau

Title: "Sweet Nostalgia: Crafting Ferrero Raffaello Coconut Candy Balls"
Description: Dive into the world of sweet indulgence with our Ferrero Raffaello Coconut Candy Balls. This delightful dessert is a harmony of graham cracker crumbs and hazelnuts, enveloped in a blanket of coconut flakes. Perfect for family gatherings or a solo treat, these candy balls evoke cherished memories while tantalizing your taste buds. Join us as we share a heartfelt family story and guide you through this easy, yet rewarding recipe.

---


A Taste of Home: Ferrero Raffaello Coconut Candy Balls

There's a certain magic that food holds – the ability to transport us back in time, to rekindle memories we hold dear. For me, the creation of Ferrero Raffaello Coconut Candy Balls is a journey back to my grandmother's kitchen, a place where love was the secret ingredient in every recipe.


The Ingredients of Memory
To recreate this nostalgic treat, you'll need:

- 1 cup graham cracker crumbs


- 1 cup unsweetened shredded coconut flakes


- 1/2 cup finely chopped hazelnuts


- 1/2 cup powdered sugar


- 1/4 cup milk


- 1/4 cup melted butter


- Extra shredded coconut flakes for rolling


The simplicity of these ingredients belies the depth of flavor they produce. It's a reminder that sometimes, the most unassuming elements can create the most extraordinary experiences.


Crafting the Delight

In my grandmother's kitchen, the process of making these coconut candy balls was a family affair. We would gather around the large wooden table, the heart of the home, ready to create something special.


1. Combine the Basics: In a large mixing bowl, thoroughly blend the graham cracker crumbs, coconut flakes, chopped hazelnuts, and powdered sugar. The aroma of the hazelnuts would fill the room, creating a warm and inviting atmosphere.
2. Add Liquid Gold: Stir in the milk and melted butter, mixing until everything is well combined. This step always felt like a little piece of alchemy, transforming dry ingredients into a cohesive, tempting dough.
3. Chill and Shape: Cover the bowl and let it chill for an hour. This waiting period was always filled with anticipation, as my siblings and I would sneak peeks into the refrigerator, eager for the next step.
4. Roll and Coat: Once chilled, shape small bits of dough into balls and roll them in the extra coconut flakes. The tactile process of forming each ball was a therapeutic ritual, one that brought laughter and bonding.
5. Refrigerate and Savor: Place the candy balls in the refrigerator for at least two hours before serving. This final step was a test of patience, but it was always worth the wait. The cool, creamy texture paired with the crunch of hazelnuts and the sweetness of coconut was a reward like no other.
A Sweet Conclusion

Rated as a 3 out of 10 in difficulty, this dessert is perfect for beginners and seasoned cooks alike. It's more than just a treat; it's a gateway to cherished memories and an opportunity to create new ones. Whether you're presenting them as a dessert at a family gathering or indulging solo, these Ferrero Raffaello Coconut Candy Balls are a testament to the joys of simple pleasures and shared moments.


So, gather your loved ones, and let the tradition of creating and savoring these delightful coconut candy balls begin anew in your home. I promise, they'll bring as much joy to your heart as they do to your taste buds.

Read more about Appetizers

Read more about Main Dishes

Read more about Desserts

Roasted Cauliflower and Leek Soup | Made by Meaghan Moineau

Roasted Cauliflower and Leek Soup | Made by Meaghan Moineau

Title: Comfort in a Bowl: Roasted Cauliflower and Leek Soup Recipe
Description: Discover the warmth and nostalgia of our Roasted Cauliflower and Leek Soup, an easy-to-make recipe that brings families together. With its rich, savory flavors, this dish is perfect for cozy dinners or as a starter to any meal.

---


As the leaves turn golden and a crisp chill fills the air, there's nothing quite like the comforting embrace of a warm bowl of soup. Today, I'm excited to share a beloved family recipe that has warmed our hearts and filled our home with delightful aromas—Roasted Cauliflower and Leek Soup.


Ingredients:

- 1 head of cauliflower, chopped


- 3 green and white parts of leeks, cleaned and chopped


- 4 cloves of garlic, peeled


- 2 tablespoons olive oil


- 2 cans of chicken broth


- Kosher salt, to taste


- Freshly ground black pepper, to taste


Instructions:
1. Preheat Your Oven: Start by preheating your oven to 425°F (220°C).
2. Prepare the Vegetables: Spread the chopped cauliflower, leeks, and garlic evenly on a baking sheet. Drizzle with olive oil and toss the vegetables until they are thoroughly coated. Sprinkle with kosher salt.
3. Roast to Perfection: Place the baking sheet in the oven and roast for 40-45 minutes. You'll know they're ready when the vegetables are browned on the edges and slightly softened.
4. Create the Soup Base: Transfer the roasted vegetables into a saucepan. Add the chicken broth and season with freshly ground black pepper to taste.
5. Bring to a Bubble: Heat the mixture over medium-high heat until it begins to bubble gently.
6. Blend Until Smooth: Using an immersion blender, puree the soup until it reaches a smooth, creamy consistency. If you’re using a regular blender, be cautious with hot liquids—vent the lid slightly to avoid any kitchen mishaps.
Nostalgic Family Memory:

This soup has been a staple in our family for as long as I can remember. Every autumn, my mother would gather us around in the kitchen, teaching us the art of roasting vegetables. I vividly recall the way the kitchen would fill with the sweet, nutty aroma of cauliflower and leeks mingling in the oven. It was more than just a soup—it was an event. We would eagerly await that first creamy spoonful, knowing it signaled the start of cozy nights spent together, sharing stories and laughter. This dish, with its deep flavors and heartwarming memories, always reminds me of the love and warmth that comes with family.


Difficulty Rating: 3/10
Classification: Appetizer

This Roasted Cauliflower and Leek Soup is not only easy to prepare but also a delightful way to bring a touch of nostalgia and comfort to your table. Whether you serve it as an appetizer or enjoy it as a light meal, it's sure to become a cherished favorite in your culinary repertoire. So, gather your loved ones, and let this simple yet flavorful soup create new memories for you and your family. Enjoy!

Read more about Appetizers

Read more about Main Dishes

Read more about Desserts

Siew Mai | Made by Meaghan Moineau

Siew Mai | Made by Meaghan Moineau

Savoring Tradition: Unveiling the Art of Making Siew Mai


Description:

Dive into the heart of traditional Chinese cuisine with our delectable Siew Mai recipe. This comprehensive guide not only walks you through the step-by-step process of crafting these delightful dumplings but also shares a nostalgic family memory that makes this dish truly special. Classified as an appetizer, this recipe boasts a difficulty rating of 7/10, perfect for those looking to challenge themselves in the kitchen.

---


The Perfect Siew Mai Recipe: A Culinary Journey


In the world of dim sum, few dishes evoke as much joy and nostalgia as Siew Mai. These succulent dumplings, wrapped delicately in wonton wrappers, are a staple at any dim sum feast. With a rich filling of fatty pork, shrimp, and savory glutinous rice, each bite is a symphony of flavors that instantly transports you to the bustling streets of Hong Kong or a cherished family gathering. Today, I invite you to join me on this culinary journey, where tradition meets taste.


Ingredients:

- Wonton wrappers
- For Pork Filling:

- 700g fatty pork, minced


- 2 tablespoons corn starch


- 1 teaspoon salt


- 1 teaspoon white ground pepper


- 1/2 teaspoon sugar


- 1 teaspoon Worcestershire sauce


- 2 tablespoons Shaoxing Huatiao wine


- 2 tablespoons sesame oil


- 80g canned water chestnuts, finely chopped


- 4 large mushrooms, finely chopped


- 1 small carrot, finely diced


- Cooked whole shrimp for topping


- For Glutinous Rice Filling:

- Raw glutinous rice (prepared as per linked recipe)


- 2 lap cheongs (Chinese sausages), diced


- Dried shrimps and scallops, cooked


- 1 tablespoon cooking oil


- Shallots and ginger, finely chopped


- Light soy sauce, oyster sauce, salt, white ground pepper


Instructions:


1. Prepare the Pork Filling:

- In a large mixing bowl, combine the minced pork with corn starch, salt, white ground pepper, sugar, Worcestershire sauce, Shaoxing Huatiao wine, and sesame oil.


- Add the chopped water chestnuts and mushrooms to the pork mixture. Mix well to combine.


- Set aside the pork mixture and diced carrots until ready to wrap the dumplings.


2. Prepare the Glutinous Rice Filling:

- Soak the lap cheongs in boiling water until the skin separates. Remove the skin and dice.


- Pan fry the diced lap cheongs until golden. Set aside.


- Prepare the glutinous rice as per the linked recipe, incorporating the diced lap cheongs.


3. Wrap the Dumplings:

- Place a sheet of wonton wrapper on a flat surface. Add a teaspoon of filling in the center.


- Wet the edges of the wrapper, gather, and squeeze gently to wrap the filling tightly.


- Top each pork Siew Mai with a shrimp and garnish with diced carrots or your choice of toppings.


4. Steam and Serve:

- Arrange the dumplings in a steamer lined with baking paper. Cut holes in the paper for steam.


- Steam over boiling water for 14-15 minutes or until cooked. Serve hot.


---


A Nostalgic Memory


Growing up, Siew Mai was more than just a dish; it was a family ritual. Every Sunday, my grandmother would gather us in her cozy kitchen, the air filled with the aromas of spices and laughter. She would share stories of her childhood, teaching us the art of wrapping dumplings with the patience only a grandmother possesses. As we gathered around the table, savoring each delicious bite, I realized that Siew Mai was more than just food—it was a symbol of love and tradition, a legacy I now share with my own family.


Difficulty Rating: 7/10


Classification: Appetizer


Crafting Siew Mai is an art that demands attention to detail and a touch of patience. The result, however, is a dish that not only delights the palate but also warms the heart, making it a perfect appetizer for any occasion. Whether you're a novice or a seasoned chef, this recipe offers a rewarding challenge that celebrates the timeless joy of cooking and sharing.

Read more about Appetizers

Read more about Main Dishes

Read more about Desserts

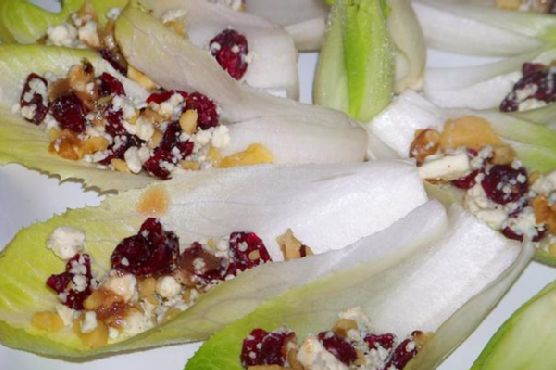
Endive Appetizer With Blue Cheese, Dried Cranberries and Walnuts | Made by Meaghan Moineau

Endive Appetizer With Blue Cheese, Dried Cranberries and Walnuts | Made by Meaghan Moineau

Title: A Taste of Tradition: Endive Appetizer with Blue Cheese, Dried Cranberries, and Walnuts
Description: Discover the delicious blend of flavors in our Endive Appetizer with Blue Cheese, Dried Cranberries, and Walnuts. This elegant yet simple appetizer is perfect for any gathering and brings back cherished family memories. Learn how to create this delightful dish with our easy-to-follow recipe.

---


A Taste of Tradition: Endive Appetizer with Blue Cheese, Dried Cranberries, and Walnuts

There’s something magical about a dish that can transport you back in time, evoking memories of family gatherings and shared laughter. Our Endive Appetizer with Blue Cheese, Dried Cranberries, and Walnuts does just that. This delightful appetizer, with its perfect balance of flavors, has been a staple at our family reunions for as long as I can remember.


Ingredients:

- 2 apples, thinly sliced


- 1/4 cup light balsamic vinaigrette


- 3 heads of Belgian endive, leaves separated


- 1 cup crumbled blue cheese


- 1/2 cup dried cranberries


- 1/2 cup walnut pieces


Instructions:
1. Toast the Walnuts: Begin by toasting the walnut pieces in a dry skillet over medium heat for about two minutes, or until they become fragrant. Make sure to stir them occasionally to prevent burning. Once toasted, set them aside to cool.
2. Prepare the Platters: Arrange the apple slices on one platter, and the endive leaves on another. The contrast of colors from the apples and endive will make for an impressive presentation.
3. Mix the Toppings: In a medium bowl, combine the cooled walnuts, dried cranberries, and blue cheese. This mixture will serve as the flavorful topping for your endive leaves.
4. Assemble the Appetizer: Top each endive leaf with approximately one tablespoon of the cheese mixture. Add a drop or two of light balsamic vinaigrette to each leaf for a touch of acidity that complements the flavors.
5. Serve with Apples: Place the remaining cheese mixture in a bowl to serve alongside the apple slices. The crispness of the apples pairs wonderfully with the creamy blue cheese and the sweet-tart cranberries.
A Nostalgic Journey:

This dish is more than just a combination of flavors; it’s a journey back to summer picnics at my grandparents’ house. I can still picture the large oak tree in their backyard, under which we’d spread out a checkered blanket. My grandmother, with her gentle smile, would bring out a tray of these endive appetizers. The adults would savor them with a glass of wine, while we, the kids, would nibble on the apple slices, occasionally sneaking bites of the cheese mixture.


As the years have passed, this appetizer has become a symbol of those cherished moments. Whenever I make it, I’m reminded of the laughter, the stories, and the love that surrounded us. It’s a dish that not only delights the palate but also warms the heart.


Difficulty: 3/10
Classification: Appetizer

Whether you’re hosting a formal dinner or a casual get-together, this Endive Appetizer with Blue Cheese, Dried Cranberries, and Walnuts is sure to impress your guests. Its simplicity belies its elegance, making it the perfect choice for any occasion. Enjoy the delightful flavors and create your own treasured memories with this timeless recipe.

Read more about Appetizers

Read more about Main Dishes

Read more about Desserts

Mangoes with Rum and Ice Cream | Made by Meaghan Moineau

Mangoes with Rum and Ice Cream | Made by Meaghan Moineau

Title: Tropical Bliss: Mangoes with Rum and Ice Cream


Description:

Dive into a tropical paradise with our delectable Mangoes with Rum and Ice Cream recipe. This exquisite dessert, brimming with vibrant flavors and a hint of nostalgia, will transport you to sun-kissed beaches and carefree summer days. Easy to prepare yet impressively indulgent, this dish is a must-try for fruit and dessert lovers alike.

---


A Nostalgic Journey with a Tropical Twist


As the summer sun began to set, casting a golden hue over the horizon, our family would gather on the porch, eagerly anticipating the sweet treat that had become a cherished tradition. Mangoes with Rum and Ice Cream was more than just a dessert; it was a celebration of the season and a gentle reminder of cherished moments shared with loved ones.


I vividly remember my grandmother, her hands deftly peeling the ripe mangoes, ensuring every slice was free of the green flesh that might mar the golden perfection. She had a knack for transforming simple ingredients into culinary masterpieces, and this dish was no exception. The scent of fresh lime and dark rum would waft through the air, mingling with the laughter and stories that filled the evening.


The secret to her Mangoes with Rum and Ice Cream was in the marinade—a tantalizing blend of sugar, dark rum, freshly squeezed lime juice, and the zest of lime rind. The mango pieces would soak up this flavorful concoction, chilling to perfection while we shared stories and memories on those warm summer nights.


When served, the dessert was a feast for the senses. The vibrant mango slices, glistening with their rum-infused marinade, nestled atop velvety scoops of vanilla ice cream, creating a symphony of flavors with every bite. Each spoonful was a tropical escape, a small indulgence that captured the essence of summer.


This recipe is not just about the flavors; it's about the memories that accompany each serving. It's about the joy of sharing a lovingly prepared dessert with those closest to you, and the simple pleasure of savoring a dish that transcends the ordinary.


Recipe: Mangoes with Rum and Ice Cream


Ingredients:

- Fresh mangoes


- 1/4 cup sugar


- 1/4 cup dark rum


- 2 tablespoons fresh lime juice


- 1 teaspoon grated lime rind


- Vanilla ice cream


Instructions:

1. Peel the mangoes, ensuring all green-colored flesh is removed. Carefully slice the mango around the pit into 1/2-inch thick pieces, discarding the pit.


2. In a bowl, combine the sugar, dark rum, grated lime rind, and fresh lime juice. Mix well until the sugar is dissolved.


3. Add the mango slices to the bowl, gently mixing to ensure each piece is coated with the marinade.


4. Chill the mixture in the refrigerator for a couple of hours, allowing the flavors to meld beautifully.


5. Serve the mangoes alone in chilled glasses or over generous scoops of vanilla ice cream for an indulgent treat.


Difficulty Rating: 3/10
Classification: Dessert

Embrace the nostalgia and share this tropical delight with your loved ones, creating new memories that will be cherished for years to come. Whether enjoyed on a balmy evening or as a refreshing end to a meal, Mangoes with Rum and Ice Cream is a testament to the simple joys of life.

Read more about Appetizers

Read more about Main Dishes

Read more about Desserts

Minted Pea & Spinach Soup | Made by Meaghan Moineau

Minted Pea & Spinach Soup | Made by Meaghan Moineau

Title: A Taste of Nostalgia: Minted Pea & Spinach Soup
Description: Discover the heartwarming flavors of our Minted Pea & Spinach Soup, a dish that marries simplicity with elegance. Infused with the freshness of mint and the earthiness of spinach, this soup is not only a feast for the senses but also a journey down memory lane. Perfect as an appetizer, this recipe is rated a 4 out of 10 in difficulty, making it an accessible yet sophisticated addition to your culinary repertoire.

---


A Taste of Nostalgia: Minted Pea & Spinach Soup


There's something incredibly comforting about a warm bowl of soup, especially when it carries with it the whispers of cherished family memories. Our Minted Pea & Spinach Soup is a dish that does just that—bringing together flavors that are both familiar and refreshing, while evoking a sense of nostalgia for family gatherings and cozy evenings spent by the fire.


Ingredients:

- 1 cup chicken stock

- 1/2 cup cream


- 1 teaspoon canned dried mint


- 1/2 cup milk


- 2 cups frozen peas


- 2 diced potatoes


- Salt & pepper to taste


- 1 cup fresh spinach


- 1 teaspoon sugar


- 1/4 cup water


- 1/4 cup yoghurt


Instructions:


1. Prepare the Potatoes: In a medium-sized pot, place the diced potatoes with a little water and a dash of salt and pepper. Cover with a lid and let them cook for approximately 20 minutes until they are nearly soft.
2. Add the Peas: Introduce the frozen peas to the pot, allowing them to cook for an additional 5 minutes until both the peas and potatoes are tender.
3. Incorporate the Spinach: Gently stir in the fresh spinach and let it cook for 3-5 minutes until it is wilted. Remove the pot from heat and allow it to cool slightly.
4. Blend to Perfection: Use an immersion blender to puree the mixture until smooth. Return the pot to the stovetop.
5. Finish with Creamy Goodness: Add the cream, milk, water, and chicken stock to the pot. Reheat the mixture until it's piping hot.
6. Season and Serve: Stir in the yoghurt, mint, sugar, and adjust the salt and pepper to taste. Serve immediately, garnished with crispy croutons or bacon bits. For a delightful twist, try topping with thinly sliced cheesegrillers fried in sweet chili sauce.

A Family Memory


This soup always takes me back to my grandmother's kitchen, a place where the aromas of home-cooked meals danced through the air. I remember the way she would hum softly while preparing this very dish, her hands deftly working through the motions that seemed like second nature to her. On cold winter nights, my family would gather around the table, bowls of this minted pea and spinach soup steaming before us, warming our hands and hearts alike. The simplicity of the ingredients belied the complexity of flavors, each spoonful a reminder of those precious family moments.


As I prepare this soup today, I am transported back to those evenings, the warmth of the soup a comforting embrace, and the taste a gentle reminder of the love and care that went into every meal.


Difficulty Rating: 4/10


Category: Appetizer

Whether you're looking to create new memories or relive old ones, this Minted Pea & Spinach Soup is sure to become a beloved staple in your home. Its rich, velvety texture and vibrant flavors make it the perfect way to begin any meal, ensuring that every gathering is both delicious and memorable.

Read more about Appetizers

Read more about Main Dishes

Read more about Desserts

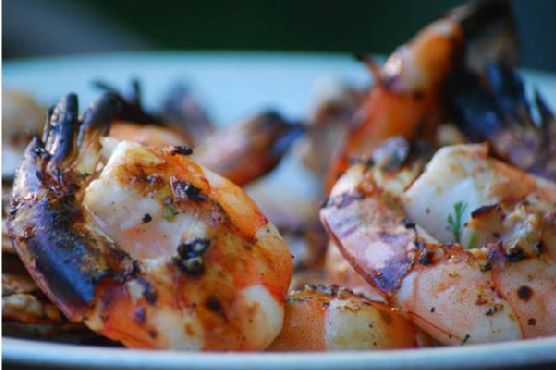
Tequila Lime Shrimp | Made by Meaghan Moineau

Tequila Lime Shrimp | Made by Meaghan Moineau

Title: Savoring Summer: Tequila Lime Shrimp with a Dash of Nostalgia
Description: Dive into the vibrant flavors of Tequila Lime Shrimp, a dish that brings together zesty lime, smooth tequila, and succulent shrimp. Perfect as a main dish, this recipe not only tantalizes your taste buds but also stirs up cherished family memories. Experience a taste of summer with this easy-to-follow, flavorful recipe. Difficulty: 4/10.

---


Savoring Summer: Tequila Lime Shrimp with a Dash of Nostalgia


As the warm breeze of summer fades into the crisp air of autumn, I often find myself reminiscing about sun-drenched family gatherings and the laughter that echoed through our backyard. One dish that always stood out during these summer feasts was Tequila Lime Shrimp—a recipe that not only satisfied our taste buds but also became a cherished family tradition.


Ingredients:


- Shrimp: A pound of large, juicy shrimp, peeled and deveined.
- Tequila: The star of the show, adding a smooth, rich flavor.
- Lime Juice: Freshly squeezed for that zesty punch.
- Honey: Just a touch to balance the acidity with sweetness.
- Garlic: A couple of cloves, minced to perfection.
- Fresh Cilantro: Chopped, for a burst of freshness.
- Kosher Salt: To taste.
- Black Fresh Ground Pepper: For a subtle kick.

Instructions:


1. Prepare the Shrimp: Start by peeling and deveining the shrimp, ensuring they are clean and ready to absorb all the delicious flavors.
2. Create the Marinade: In a large mixing bowl, whisk together the tequila, lime juice, honey, garlic, salt, pepper, and cilantro. The aroma itself is enough to make your mouth water.
3. Marinate the Shrimp: Add the shrimp to the bowl, making sure each piece is well-coated. Let them marinate for about 15 minutes, allowing the flavors to meld.
4. Reduce the Marinade: Remove the shrimp from the marinade and set them aside. Transfer the marinade to a saucepot and place it over medium-high heat. Bring it to a boil, then reduce the heat and let it simmer until it reduces by half, intensifying the flavors.
5. Grill the Shrimp: Fire up the grill and place the shrimp over direct-high heat. Grill for about 2 minutes on each side, ensuring they are perfectly cooked with a slight char.
6. Serve and Enjoy: Drizzle the reduced marinade over the shrimp just before serving. This not only enhances the flavor but also adds a beautiful glaze.

A Taste of Nostalgia


Every time I prepare this dish, I am transported back to those lazy summer afternoons. I can almost hear the sizzle of the grill and my grandfather's voice, as he recounted stories of his youth. It was his idea to infuse the traditional shrimp dish with tequila and lime—a nod to his Mexican heritage, and a twist that became a family favorite.


As we gathered around the table, each bite of the Tequila Lime Shrimp was a celebration of flavors and memories. It was more than just a meal; it was a reminder of the love and laughter that bound us together.


Conclusion


Tequila Lime Shrimp is more than just a main dish; it's a journey back to those joyful summer days. With a difficulty rating of 4/10, it’s an accessible recipe that brings gourmet flavors to your home kitchen. So, gather your loved ones, fire up the grill, and create your own lasting memories with this delightful dish.


---


Whether you're a seasoned chef or a home cook, this Tequila Lime Shrimp recipe offers a simple yet flavorful way to bring a taste of summer to your table. Enjoy the blend of tangy lime, sweet honey, and the subtle warmth of tequila, and let it become a tradition in your home too.

Read more about Appetizers

Read more about Main Dishes

Read more about Desserts

Chavrie Caramelized Red Onion Tarts | Made by Meaghan Moineau

Chavrie Caramelized Red Onion Tarts | Made by Meaghan Moineau

Title: A Taste of Nostalgia: Chavrie Caramelized Red Onion Tarts
Description: Dive into the rich and savory world of Chavrie Caramelized Red Onion Tarts. This delightful appetizer combines the creamy allure of goat cheese with the deep, complex flavors of caramelized red onions. Perfect for gatherings or a cozy night in, this recipe not only satisfies the palate but also tugs at the heartstrings with a cherished family memory.

---


A Taste of Nostalgia: Chavrie Caramelized Red Onion Tarts

There's something magical about the way certain dishes can transport us back in time, evoking fond memories and cherished moments. For me, Chavrie Caramelized Red Onion Tarts do just that. This delectable appetizer is not only a treat for the senses but also a beloved family recipe that carries with it the warmth of home and the joy of togetherness.


Growing up, my family often gathered at my grandmother's house for Sunday dinners. The aroma of her cooking would greet us the moment we stepped through the door, filling the air with an irresistible warmth. One of her signature dishes was her Chavrie Caramelized Red Onion Tarts, a recipe passed down through generations. As children, we'd eagerly watch her work her culinary magic, our mouths watering in anticipation.


The secret, she would say with a twinkle in her eye, lay in the delicate balance of flavors—the creamy goat cheese, the sweet yet tangy caramelized onions, and the subtle hint of red grape jelly. It was a symphony of tastes that danced on the palate, each bite leaving us yearning for more.


Ingredients:

- 1 package of goat cheese


- 1/2 cup red grape jelly


- 2 medium red onions, minced


- 2 tablespoons red wine vinegar


- 1 tablespoon sugar


- 2 tablespoons unsalted butter


- 1 tablespoon vegetable oil


- Pre-made tart shells


Instructions:

1. In a heavy gauge skillet, heat the vegetable oil and unsalted butter over medium heat.


2. Add the minced red onions and cook until they become translucent, about 10 minutes.


3. Stir in the sugar, red grape jelly, and red wine vinegar. Continue cooking, stirring occasionally, until the mixture reaches a syrupy consistency, approximately 15 minutes.


4. Remove the skillet from the heat and allow the onion mixture to cool to room temperature.


5. Arrange the tart shells on a baking tray. Spoon one tablespoon of the caramelized onion mixture into each shell, topping it with a generous dollop of goat cheese.


6. Bake the tarts as per tart shell package instructions or until the goat cheese is slightly golden and bubbly.


This recipe is rated a 5 out of 10 on the difficulty scale, making it accessible for both novice and seasoned chefs. As an appetizer, it sets the perfect tone for any gathering, providing a delightful prelude to the meal ahead.


Whenever I prepare these tarts, I'm reminded of those cherished Sunday dinners at my grandmother's house. The taste instantly brings back the laughter, the stories shared, and the feeling of being surrounded by love. It’s a reminder that food is more than just sustenance; it’s a bridge to our past, a way to connect with those we hold dear.


So, gather your loved ones, and let the flavors of Chavrie Caramelized Red Onion Tarts weave their magic, creating new memories to be cherished for years to come.

Read more about Appetizers

Read more about Main Dishes

Read more about Desserts

Sardine Croquettes (Croquetas De Sardinas) | Made by Meaghan Moineau

Sardine Croquettes (Croquetas De Sardinas) | Made by Meaghan Moineau

Title: "Sardine Croquettes: A Taste of Tradition with a Modern Twist"
Description: Dive into the delightful world of Sardine Croquettes, or Croquetas De Sardinas, where the classic flavors of canned sardines and cassava meet the modern convenience of a quick and easy recipe. Perfect as an appetizer, these croquettes are crispy on the outside and tender on the inside, offering a taste of nostalgia with every bite.

---


As the aroma of sizzling Sardine Croquettes wafts through my kitchen, I'm instantly transported back to my grandmother's cozy dining room. The memory is as vivid as the flavors dancing on my palate. I recall sitting at her rustic wooden table, eagerly watching her skillfully prepare her famous croquetas. It was a family tradition to gather every weekend, sharing stories and laughter over a platter of these golden delights.


My grandmother's version was simple yet exquisite, a recipe passed down through generations. She would always remind me, with a twinkle in her eye, that the secret ingredient was love. Today, as I recreate this dish, I feel a deep connection to my roots and a sense of nostalgia that warms my heart.


Ingredients:

- 1 can of sardines

- 1 pack of frozen cassava (yuca)


- 1/2 cup parmesan cheese


- 2 egg yolks


- 2 egg whites


- 1 teaspoon baking powder


- 1 cup plain bread crumbs


- 1/4 cup chopped cilantro


- Oil for frying


- Salt & pepper to taste


Instructions:

1. Prepare the Cassava: In a pot with salted water, cook the frozen cassava until fork-tender. This is a significant time-saver and ensures perfect results every time.
2. Mash and Mix: Once the cassava is thoroughly cooked, mash it until smooth. Add in the canned sardines, parmesan cheese, egg yolks, baking powder, chopped cilantro, and season with salt and pepper. Mix until well combined.
3. Form the Croquettes: Preheat oil in a frying pan. With wet hands, start forming balls with the sardine batter. Dip each ball in the egg whites, then roll it in the bread crumbs to coat evenly. Continue until all the batter is used.
4. Fry to Perfection: Carefully place the croquettes in the hot oil, frying them until they are golden brown on all sides. Once done, let them rest on a double-lined paper towel to remove any excess oil.
5. Serve: These croquettes are best enjoyed fresh, served with a side of ketchup or your favorite dipping sauce.

Difficulty Rating: 5/10


Classification: Appetizer


This dish is not just a culinary delight but a bridge to cherished memories. Whether you're crafting a new tradition or revisiting a beloved recipe, Sardine Croquettes bring a taste of history to your table. Their crispy exterior and flavorful interior make them an irresistible appetizer that promises to be a hit at any gathering. So go ahead, indulge in this family favorite and create your own stories around the table.


Bon Appétit!

Read more about Appetizers

Read more about Main Dishes

Read more about Desserts

Lemon Fish with Sweet Potatoes | Made by Meaghan Moineau

Lemon Fish with Sweet Potatoes | Made by Meaghan Moineau

Title: Zesty Lemon Fish with Sweet Potatoes: A Flavorful Journey Down Memory Lane
Description: Dive into the delightful flavors of Lemon Fish with Sweet Potatoes, a dish that brings together the zesty tang of lemon and the creamy richness of coconut sauce. This easy-to-follow recipe is not only a treat for the taste buds but also a heartwarming trip down memory lane. Rated at a difficulty of 5 out of 10, this main dish is perfect for both family gatherings and cozy dinners.

---


There’s something about the aroma of fresh lemon and sizzling butter that instantly transports me back to my childhood kitchen. The scent wafts through the air, mingling with the sweet notes of coconut milk and the earthy tones of sweet potato. Every time I prepare Lemon Fish with Sweet Potatoes, I'm reminded of the Sunday afternoons spent in my grandmother's warm kitchen, where the family would gather and share stories over a hearty meal.


Ingredients:

- Butter


- Chili pepper


- Coconut sauce


- Coconut milk


- Croaker fish


- Garlic clove


- Seasoning cube


- Half of a seasoning cube


- Lemon


- Red bulb of onion


- Sprinkle of parsley


- Pepper soup spice


- Sweet potato


- Vegetable oil


Instructions:
1. Prepare the Sweet Potatoes: Begin by washing and placing your sweet potatoes in a pot. Bring them to a boil until they are soft. Once cooked, peel, slice, and set them aside. The sweet potatoes add a creamy texture that perfectly complements the zesty fish.
2. Season the Fish: Take your croaker fish and season it generously with pepper soup spice. Set it aside to allow the flavors to meld together.
3. Sauté the Aromatics: In a pan, preheat butter and vegetable oil over medium heat. Add the chopped onions and chili pepper, frying them for a minute until they release their fragrant aroma. This step always reminds me of the laughter and chatter that filled my grandmother’s kitchen as we eagerly awaited our meal.
4. Cook the Fish: Gently place the seasoned fish into the pan. Squeeze a fresh lemon over the fish, adding a vibrant zest to the dish. Sprinkle half of a seasoning cube over the fish. Allow it to cook on low heat until it turns a beautiful golden brown. Flip the fish to brown the other side, ensuring it’s cooked through.
5. Create the Coconut Sauce: In a separate saucepan, heat coconut milk with minced garlic, the remaining seasoning cube, and a sprinkle of parsley. Allow the sauce to thicken slightly, creating a luscious, rich complement to the fish.
6. Serve: Arrange the fish and sweet potatoes on a plate. Generously drizzle the coconut sauce over the top and garnish with extra chili for a kick of heat. The harmony of flavors in this dish is reminiscent of the comforting meals that brought my family together.
A Nostalgic Memory:

Preparing this dish often brings back vivid memories of my grandmother, a master of creating magic in the kitchen with seemingly simple ingredients. I remember her teaching me how to balance flavors, her hands deftly crafting meals infused with love and tradition. Each bite of Lemon Fish with Sweet Potatoes is more than just a culinary experience; it’s a cherished connection to my past and the moments spent in the warmth of family love.


Difficulty Rating: 5/10
Classification: Main Dish

This Lemon Fish with Sweet Potatoes recipe is a testament to the power of food to evoke memories and create new ones. Whether you're cooking for family or friends, this dish promises to be a delightful centerpiece, rich in flavor and history. Enjoy not just a meal, but a story that continues to unfold with every preparation.

Read more about Appetizers

Read more about Main Dishes

Read more about Desserts

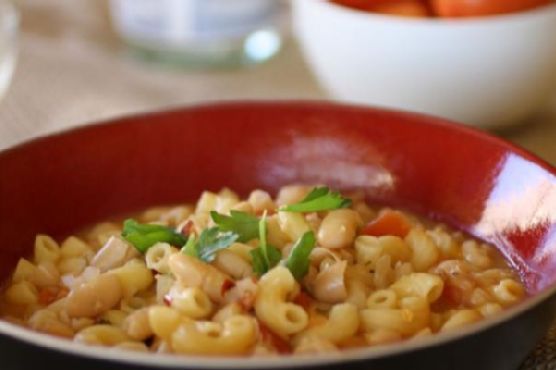
Pasta e Fagioli (Pasta and Beans) | Made by Meaghan Moineau

Pasta e Fagioli (Pasta and Beans) | Made by Meaghan Moineau

Title: A Hearty Hug in a Bowl: The Comforting Magic of Pasta e Fagioli
Description: Dive into the heartwarming world of Pasta e Fagioli, a classic Italian dish that wraps you in warmth and nostalgia. Discover the simple, yet flavorful recipe that has been a cherished family tradition, bringing loved ones together around the dinner table.

---


Pasta e Fagioli: A Timeless Italian Classic

There's something undeniably comforting about a bowl of Pasta e Fagioli. As the leaves begin to turn and the air grows crisp, this hearty dish becomes a staple in my kitchen—a recipe passed down through generations, each spoonful steeped in love and tradition. Today, I'll share not only the recipe but also a treasured family memory that makes this dish so special.


Ingredients:

- 2 tablespoons olive oil


- 1 cup diced onion


- 2 cups diced tomatoes (or marinara sauce)


- 1 garlic clove, minced


- 4 cups low sodium vegetable stock


- 2 cups water


- 1 teaspoon salt


- 1/2 teaspoon black pepper


- 1/4 teaspoon red pepper flakes


- 1 cup elbow macaroni


- 1 can (15 oz) cannellini beans, drained and rinsed


- 1/4 cup fresh parsley, chopped


- Parmesan cheese, for serving


- Additional parsley for garnish


Instructions:

1. In a large stock pan over medium-high heat, add the olive oil and diced onion. Sauté until the onion becomes tender and translucent, about 3 minutes.


2. Stir in the diced tomatoes and minced garlic. Cook for 1-2 minutes, ensuring the garlic doesn't burn.


3. Pour in the vegetable stock and water, then season with salt, black pepper, and red pepper flakes. Bring to a gentle boil.


4. Add the elbow macaroni, reduce the heat, and let it cook until it's about 3/4 of the way done (still slightly firm).


5. Stir in the cannellini beans and continue cooking until the pasta is fully cooked, approximately 10-15 minutes.


6. Fold in the fresh parsley towards the end of the cooking time. Adjust seasoning to taste.


7. Serve in individual bowls, garnished with extra parsley and a generous sprinkle of Parmesan cheese.


Nostalgic Memory:

The aroma of Pasta e Fagioli always transports me back to my grandmother's cozy kitchen, where laughter and love filled the air as much as the smell of simmering soup did. Every autumn, our family would gather at her house for Sunday dinner—a tradition that felt like an unspoken promise of warmth and togetherness. I remember sitting around the long wooden table, my grandmother proudly ladling “pasta fazool” into each bowl, her eyes twinkling as she recounted tales from her childhood in Italy. These stories, woven into the fabric of our family history, served as the perfect seasoning for our meal. This dish was not just sustenance; it was a celebration of heritage, a reminder of where we came from, and a testament to the simple joy of sharing a meal with loved ones.


Difficulty Rating: 4/10
Category: Main Dish

Pasta e Fagioli is an uncomplicated, yet deeply satisfying dish. Its simplicity is part of its charm, making it an accessible recipe for both novice and seasoned cooks alike. As you prepare it, I hope you find as much warmth and connection in this dish as our family has over the years. Buon appetito!

Read more about Appetizers

Read more about Main Dishes

Read more about Desserts