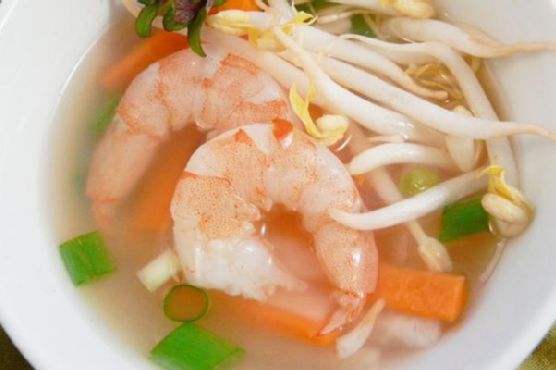
Shrimp and Lemongrass Soup | Made by Meaghan Moineau
Title: Savoring Memories: How to Make Delicious Shrimp and Lemongrass SoupDescription: Dive into the aromatic world of Shrimp and Lemongrass Soup, a delightful blend of flavors that transports you back to cherished family gatherings. Discover the perfect balance of ingredients, coupled with a heartwarming personal story that makes this dish a cherished family favorite. Perfect as an appetizer, this recipe is easy to make and scores a 4 out of 10 on the difficulty scale.
---
A Journey Through Flavor: Crafting the Perfect Shrimp and Lemongrass Soup
There’s something magical about a bowl of steaming Shrimp and Lemongrass Soup. It’s a dish that effortlessly combines the vibrant flavors of Southeast Asia with the joy of shared family moments. Today, I invite you on a culinary journey to recreate this soul-warming soup, and I’ll share a little family nostalgia to go with it.
Ingredients You'll Need:
- Raw shrimp
- Lemongrass stems
- Scallion
- Bean sprouts
- Lime (juice)
- Carrot
- Daikon
- Chicken stock
- Fresh mint
Instructions:
1. Prepare the Lemongrass: Begin by cutting off the white parts of the lemongrass stems, keeping the tops aside. Slice these white sections into inch-long pieces and flatten them gently with your knife.
2. Infuse the Stock: In a large stockpot, bring your chicken stock to a rolling boil. Add the flattened lemongrass stems and the shrimp shells. Allow them to simmer for about two minutes to infuse their flavors into the stock. Once done, set it aside to steep for a few more minutes.
3. Strain and Enhance the Stock: Strain the stock to remove the shells and lemongrass pieces, then return it to the stockpot. Slice the remaining lemongrass tops and finely chop them. Add these, along with the raw shrimp, to the stock. Simmer gently for 3-4 minutes until the shrimp turns a delightful pink.
4. Add Fresh Ingredients: Next, add lime juice, scallions, bean sprouts, carrots, and daikon to the pot. Stir the contents well, allowing all the flavors to meld together seamlessly. Season according to your taste preferences.
5. Finish with a Minty Garnish: Ladle the soup into bowls and finish each serving with a fresh mint garnish. The mint not only enhances the aroma but also adds a refreshing touch to each spoonful.
A Nostalgic Glimpse:
As a child, I vividly remember visiting my grandmother’s house during the holidays. Her kitchen was always bustling with activity, and the air was filled with the comforting scents of her cooking. Of all the dishes she prepared, her Shrimp and Lemongrass Soup was a family favorite.
Gathered around the dining table, we'd eagerly wait as she ladled the fragrant soup into our bowls. The first sip was always magical, a harmonious blend of tangy lime, aromatic lemongrass, and sweet shrimp. It was a dish that brought us together, sparking laughter and stories that would be cherished for years to come.
Creating this soup today is more than just following a recipe; it’s reliving those precious moments of togetherness. As you prepare this dish, I hope it brings you the same warmth and joy it has brought to my family.
Difficulty and Classification:
This Shrimp and Lemongrass Soup is an ideal starter, perfect for whetting the appetite without being overly filling. On a scale of difficulty, I’d rate it a 4 out of 10. With a little preparation and attention to timing, you’ll have a delicious appetizer ready to impress your guests.
Incorporate this delightful soup into your culinary repertoire and create your own cherished memories around the table. Enjoy!