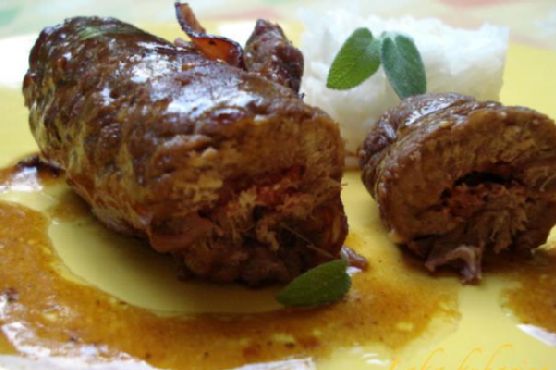
Meat rolls with prosciutto and sage | Made by Meaghan Moineau
Title: Savory Elegance: Meat Rolls with Prosciutto and SageDescription: Discover the delightful fusion of flavors in this classic Italian-inspired dish: Meat Rolls with Prosciutto and Sage. This recipe combines the savory goodness of beef flank steaks with the delicate taste of prosciutto and sage, creating a culinary experience that is sure to impress. Follow along for a step-by-step guide, with a heartwarming family story to bring an extra touch of nostalgia to your kitchen.
---
There’s something inherently comforting about gathering around the dining table with family, sharing stories, and indulging in a meal that’s been passed down through generations. One of my fondest memories is watching my grandmother prepare her famous Meat Rolls with Prosciutto and Sage for our Sunday dinners. The kitchen would fill with the enticing aroma of sizzling beef and fresh sage, a scent that still transports me back to those cherished moments.
Ingredients:
- Beef flank steaks
- Vegeta Natur or similar seasoning
- Prosciutto slices
- Fresh sage leaves
- Corn starch
- White wine
- Olive oil
- Butter
- Black bell pepper
Instructions:
1. Begin by washing and drying the beef flank steaks. Using a meat mallet, gently flatten the steaks to an even thickness.
2. Rub one side of each steak with Vegeta Natur or your preferred seasoning blend. This step infuses the meat with a savory base that enhances the overall flavor profile.
3. On the opposite side of each steak, place a slice of prosciutto and a fresh sage leaf. The prosciutto adds a hint of saltiness, while the sage contributes an earthy aroma.
4. Carefully roll the steaks, ensuring the prosciutto and sage remain inside. Secure each roll with wooden or metal toothpicks to prevent unrolling during cooking.
5. In a small bowl, whisk corn starch into the white wine until smooth. This mixture will form the base of a delicious, silky sauce.
6. Heat a mixture of olive oil and butter in a pan over medium heat. Once hot, sauté the rolls on all sides until they achieve a golden brown crust.
7. Gently pour in the wine mixture, allowing the sauce to thicken and coat the rolls. Season with freshly ground black bell pepper for an added kick.
8. Lower the heat, cover the pan, and let the rolls simmer for about 20 minutes, or until they are tender and flavorful.
9. Before serving, remember to remove the toothpicks. Arrange the rolls on a platter and drizzle with any remaining sauce from the pan.
A Nostalgic Family Story:
This dish was a staple at our family gatherings, often taking center stage during special occasions. I remember my grandmother preparing these rolls with meticulous care, her hands skillfully rolling and securing each piece. She would hum quietly as she cooked, a melody that seemed to weave through the air and into the fabric of our family traditions.
As kids, my siblings and I would eagerly await the moment the rolls would be unveiled at the table, their rich aroma acting as a siren call. The first bite was always magical—an explosion of flavors that made every Sunday feel like a holiday.
Difficulty: 6/10
Classification: Main Dish
This recipe, while requiring some attention to detail, is a rewarding main dish that promises to bring elegance and nostalgia to your dining experience. Whether you're cooking for family or entertaining guests, these Meat Rolls with Prosciutto and Sage are sure to leave a lasting impression. Enjoy this culinary journey, and perhaps create new memories of your own.