Guacamole | Made by Meaghan Moineau

The Perfect Guacamole Recipe

Intro

There’s something incredibly comforting about making guacamole. It takes me back to my childhood, where Sunday afternoons meant family gatherings at my grandparents’ house. My grandmother’s guacamole was always the star of the meal, a creamy, flavorful delight that perfectly complemented the lively conversations and laughter that filled the room. Today, I’m excited to share a recipe that captures that same warmth and flavor. Whether you’re preparing it for a party or just a night in, this guacamole is sure to become a favorite in your household too.

Why You’ll Love It

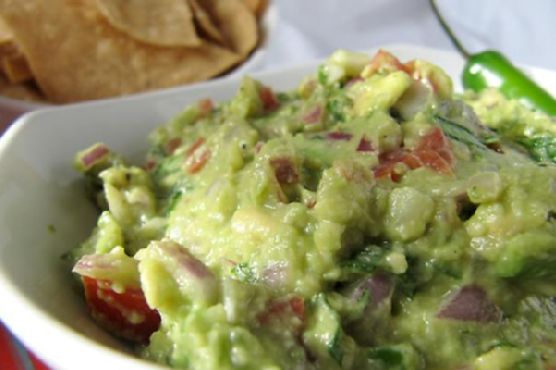
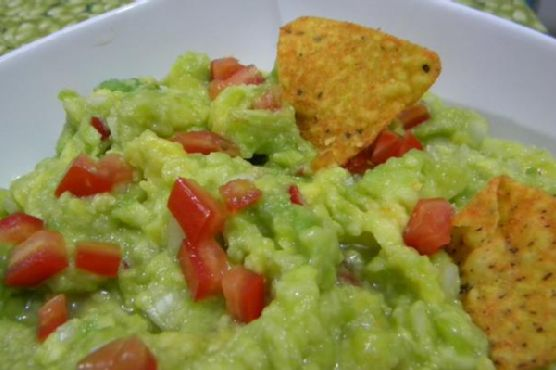
This guacamole recipe is more than just an appetizer; it’s a celebration of fresh, vibrant flavors. You’ll love how the creamy avocados blend beautifully with the sharpness of onions, the heat of jalapenos, and the aromatic hints of cilantro, basil, and oregano. The addition of fresh lime juice not only enhances the taste but also keeps the guacamole looking green and fresh. It’s easy to make and can be customized to suit your taste preferences, making it a versatile choice for any occasion.

Ingredients

  • 3 ripe Haas avocados
  • 1 small onion, finely chopped
  • 1 jalapeno pepper, seeded and minced
  • 2 tablespoons fresh cilantro, chopped
  • 1 teaspoon salt
  • 1/2 teaspoon black pepper
  • 2 tablespoons fresh lime juice
  • 1 tablespoon fresh basil, chopped
  • 1 tablespoon fresh oregano, chopped

Instructions

  1. Cut the avocados in half lengthwise.
  2. Carefully drive a chef’s knife into the large pit and twist to remove it.
  3. Scoop the avocado out from the skin using a spoon and place it into a mixing bowl.
  4. Mash the avocado with a fork to your desired consistency.
  5. Add in the chopped onion, cilantro, oregano, and basil.
  6. Mix the ingredients to incorporate fully.
  7. Season the guacamole to taste with salt, pepper, and lime juice.
  8. Serve immediately or chill in the refrigerator.
  9. If not eating immediately, store in the refrigerator with plastic film wrap pressed directly onto the guacamole to prevent browning.

Tips

For the best guacamole, choose avocados that are ripe but not overripe. They should yield slightly when gently squeezed but not feel mushy. To keep your guacamole fresh, make sure to press the plastic wrap directly onto the surface to minimize exposure to air. This helps prevent browning. Finally, don’t skip the lime juice; it adds essential tartness and acts as a natural preservative.

Variations & Substitutions

If you’d like to change things up, try adding diced tomatoes or roasted corn for extra texture and sweetness. For those who prefer less heat, reduce or omit the jalapeno. You can also experiment with adding garlic or a dash of cumin for a different flavor profile. If you’re out of fresh herbs, dried ones can be used in smaller amounts, though fresh is always preferable for the best flavor.

Storage

Guacamole is best enjoyed fresh, but if you need to store it, keep it in an airtight container with a piece of plastic wrap pressed directly on the surface. This helps minimize browning. Stored this way, it should last about two days in the refrigerator. Remember to give it a good stir before serving again to refresh its appearance and flavor.

FAQ

Can I make guacamole in advance?

Yes, you can make guacamole a few hours in advance. Just be sure to store it properly with plastic wrap pressed directly onto the surface to minimize browning. Adding extra lime juice can also help preserve its color and flavor.

Is guacamole healthy?

Guacamole is a healthy addition to any diet, as it is rich in heart-healthy fats, vitamins, and minerals. Avocados are high in monounsaturated fats, which are good for cardiovascular health, and they also provide fiber, potassium, and vitamins C, E, and K.

Nutrition

A serving of this guacamole provides approximately 150 calories, primarily from the healthy fats in avocados. It’s low in carbohydrates and contains fiber, making it a satisfying and nutritious option. Be mindful of portion size, especially when pairing it with chips, to keep your meal balanced.

Conclusion

Whether you’re reminiscing about family gatherings or creating new memories, this guacamole recipe is sure to bring joy to your table. Its simple preparation, fresh ingredients, and irresistible taste make it a staple that you’ll return to time and again. Enjoy it with friends, family, or even as a solo treat, and savor the vibrant flavors that make guacamole an all-time favorite.

Related update: Guacamole

Pork Carnitas Tacos | Made by Meaghan Moineau

Pork Carnitas Tacos: A Deliciously Savory Mexican Delight

Intro

There’s something uniquely comforting about a warm, freshly made taco filled with tender, flavorful pork carnitas. It takes me back to my childhood, where every Sunday, my family would gather at my grandmother’s house. The aroma of sizzling pork and freshly made tortillas would fill the air, creating an atmosphere of warmth and togetherness. These pork carnitas tacos are a tribute to those cherished family gatherings, and I’m excited to share this recipe with you.

Why You’ll Love It

This pork carnitas taco recipe is a game-changer for your weeknight dinners or festive gatherings. Here are a few reasons why you’ll fall in love with it:

  • Flavorful and Tender: The combination of citrusy notes from the orange juice and the creamy richness of the milk ensures that the pork is both tender and bursting with flavor.
  • Simple Ingredients: You probably already have most of these ingredients in your pantry or fridge, making it a convenient dish to prepare.
  • Versatile: These tacos are perfect for any occasion, whether it’s a quick family dinner or a lively fiesta with friends.
  • Customizable: You can easily adjust the toppings to suit your taste, making it a dish everyone will enjoy.

Ingredients

  • Water
  • Lean pork butt
  • Garlic
  • Sea salt and ground pepper
  • Olive oil
  • Orange juice
  • Milk
  • Corn tortillas
  • Salsa fresca
  • Avocado
  • Cilantro
  • Onion
  • Limes

Instructions

  1. In a large Dutch oven, add the pork, garlic, salt, pepper, and water. Bring to a boil, then reduce heat, cover, and simmer over medium-low for 45 minutes to one hour.
  2. Drain the pork well. When cool enough to handle, shred the meat by hand or with the tines of a fork. Remove and discard any remaining fat.
  3. Transfer the shredded pork back to the Dutch oven and heat the olive oil.
  4. Add the orange juice and milk and cook until the liquid has evaporated and the pork has browned, stirring occasionally. Season with salt and pepper to taste.
  5. Chop the onions and cilantro, and slice the avocado and limes. Place each in small individual bowls for serving.
  6. Heat the tortillas in a dry frying pan and keep them warm.
  7. For each taco, stack two tortillas and layer with warm carnitas, chopped cilantro, onion, and avocado slices. Give it a good squeeze of lime juice.

Tips

  • Choose Quality Pork: Opt for a lean pork butt to ensure your carnitas are tender and juicy.
  • Shredding: Shredding the pork while it’s still warm makes the process much easier.
  • Heating Tortillas: Heating the tortillas on a dry pan gives them the perfect texture and flavor.

Variations & Substitutions

This recipe is versatile, so feel free to experiment:

  • Spicy Kick: Add jalapeños or chili powder to the carnitas for some heat.
  • Different Protein: Try using chicken or beef as an alternative to pork.
  • Vegetarian Option: Substitute the pork with jackfruit for a plant-based version.

Storage

Store any leftover carnitas in an airtight container in the refrigerator for up to 3 days. To reheat, simply warm them in a skillet with a little olive oil. You can also freeze the carnitas for up to 2 months; just thaw them in the refrigerator overnight before reheating.

FAQ

Can I use flour tortillas instead of corn tortillas?

Absolutely! While corn tortillas are traditional for carnitas, flour tortillas work just as well if you prefer their softer texture.

Is there a way to make this recipe more budget-friendly?

You can make this recipe more budget-friendly by purchasing pork in bulk or on sale and freezing portions for future use. Additionally, using canned salsa instead of fresh salsa fresca can reduce costs.

Nutrition

While this dish is rich and savory, you can control portion sizes and toppings to fit your dietary needs. The key ingredients—pork, avocado, and tortillas—provide a good balance of protein, healthy fats, and carbohydrates.

Conclusion

These pork carnitas tacos are more than just a meal; they’re an experience. From the tantalizing aroma to the burst of flavors in every bite, they bring a taste of Mexico to your home. Whether you’re enjoying them with family or sharing them with friends, these tacos are sure to become a beloved staple in your culinary repertoire. So gather your ingredients and get ready to create some delicious memories!

Related update: Pork Carnitas Tacos

Related update: Kunna (A Delicious Chinioti Dish, Punjab, Pakistan)

Blast Of Color Mexican Stuffed Bell Peppers | Made by Meaghan Moineau

Blast Of Color Mexican Stuffed Bell Peppers

Intro

Welcome to a vibrant culinary journey where every bite is a delightful explosion of flavors! Our Blast Of Color Mexican Stuffed Bell Peppers are not just a feast for the palate but also a joy for the eyes. These stuffed peppers are a wonderful medley of hearty ingredients and bold spices, reminiscent of family gatherings where food was the centerpiece of laughter and love.

I remember the first time I had stuffed bell peppers at my grandmother’s house. The kitchen was filled with the warm, inviting smell of roasted peppers mingling with spices, and the table was surrounded by family eagerly awaiting the meal. Today, I bring you a modern twist to that classic memory with a Mexican flair, perfect for any occasion.

Why You’ll Love It

This recipe is not only delicious but also packed with nutrients, making it a perfect meal for both busy weeknights and leisurely weekends. Here’s why you’ll fall in love with these stuffed peppers:

  • Colorful and Nutritious: Each bell pepper is a rainbow of ingredients, offering a punch of vitamins and minerals.
  • Flavorful and Satisfying: The combination of rotisserie chicken, black beans, and fire-roasted green chiles creates a satisfying and savory filling.
  • Easy to Prepare: With just a few simple steps, you can create a meal that looks gourmet but comes together quickly.
  • Customizable: Easily tweak the ingredients to suit your taste or dietary needs.

Ingredients

  • 4 large bell peppers
  • 1 cup black beans, drained and rinsed
  • 2 cups rotisserie chicken breast, shredded
  • 1/2 cup fire roasted green diced chiles
  • 1 tablespoon chili seasoning
  • 1 cup cooked brown rice
  • 1 cup frozen corn kernels, thawed
  • 3 cloves garlic, minced
  • 1 cup low-fat shredded cheddar cheese, divided
  • 1/2 cup red onion, diced
  • 1 roma tomato, diced
  • 2 tablespoons sour light cream

Instructions

  1. Preheat your oven to 400 degrees Fahrenheit.
  2. In a large bowl, combine the cooked brown rice, shredded chicken, thawed corn, diced roma tomato, diced red onion, black beans, 1/2 cup of cheddar cheese, minced garlic, fire roasted green chiles, and chili seasoning.
  3. Line a baking dish with foil and spray it lightly with cooking spray to prevent sticking.
  4. Prepare the bell peppers by cutting off the tops and removing the seeds and membranes inside.
  5. Stuff each bell pepper with the chicken mixture, pressing it firmly into the pepper and mounding it slightly over the top.
  6. Top each stuffed pepper with 1/2 tablespoon of the remaining cheddar cheese.
  7. Place the stuffed peppers in the prepared baking dish and bake in the preheated oven for 30 to 40 minutes, or until the peppers are just tender.
  8. Once out of the oven, top each pepper with 1/2 tablespoon of sour cream before serving.

Tips

  • For uniform cooking, try to select bell peppers that are similar in size and shape.
  • If you prefer softer peppers, you can pre-cook them in the microwave for a couple of minutes before stuffing.
  • To add a bit more spice, consider adding a dash of cayenne pepper to the filling mixture.

Variations & Substitutions

One of the best things about this recipe is its versatility. Here are some variations and substitutions you might consider:

  • Vegetarian Option: Omit the chicken and increase the amount of black beans or add cooked quinoa for a plant-based version.
  • Cheese Choices: Swap the cheddar cheese for pepper jack or Monterey Jack for a different flavor profile.
  • Low Carb: Substitute cauliflower rice for the brown rice to reduce the carbohydrate content.

Storage

These stuffed peppers can be stored in an airtight container in the refrigerator for up to 3 days. To reheat, place them in a preheated oven at 350 degrees for about 10-15 minutes or until warmed through. Alternatively, you can use a microwave for a quicker option.

FAQ

Can I freeze stuffed bell peppers?

Yes, you can freeze these peppers! Once baked, allow them to cool completely, then wrap each pepper individually in plastic wrap and place them in a freezer-safe bag. They can be frozen for up to 3 months. To reheat, thaw them overnight in the refrigerator and bake as directed in the storage section.

What can I serve with stuffed bell peppers?

These stuffed peppers are a meal on their own, but you can serve them with a side salad, guacamole, or tortilla chips for added texture and flavor. A refreshing glass of iced tea or a citrusy margarita would also complement the meal nicely.

Nutrition

Each serving of these colorful stuffed peppers is not only packed with flavor but also with nutrition. Here’s a quick overview:

  • Calories: Approximately 280 per stuffed pepper
  • Protein: 25g
  • Carbohydrates: 35g
  • Fat: 7g
  • Fiber: 8g

Conclusion

Our Blast Of Color Mexican Stuffed Bell Peppers are more than just a meal; they are a celebration of flavors and memories. Whether you’re looking to impress at a dinner party or simply want a comforting meal for your family, these peppers are sure to be a hit. We hope this recipe brings as much joy to your table as it has to ours. Happy cooking!

Related update: Blast Of Color Mexican Stuffed Bell Peppers

Related update: Perfect fish cakes

Beef, Poblano & Cheese Tamales | Made by Meaghan Moineau

Beef, Poblano & Cheese Tamales

Intro

There’s something incredibly comforting about the process of making tamales. I remember watching my grandmother in her cozy kitchen, the sun filtering through the lace curtains, as she expertly spread masa on corn husks. I would sit on a stool, mesmerized by her swift, skilled hands and the fragrant aroma that filled the room. Now, every time I make tamales, I feel her warmth guiding me, bringing a piece of my childhood into my home.

Why You’ll Love It

This recipe for Beef, Poblano & Cheese Tamales is a beautiful blend of rich flavors and comforting textures. The tender beef combined with the smoky poblano peppers and creamy cheese creates a savory filling that is simply irresistible. Making tamales at home allows you to control the ingredients, and this combination is sure to become a family favorite.

Ingredients

  • Dried corn husks
  • Dried California chili pods
  • Ground beef
  • Shredded mozzarella cheese
  • Diced poblano pepper
  • Garlic
  • Olive oil
  • Goya seasoning
  • Salt
  • Chili powder

Instructions

  1. In a large bowl, soak the corn husks in hot water until they are pliable.
  2. In a large saucepan, bring 4 cups of water to a boil. Remove any string-like particles from the chili pods before adding them to the boiling water along with half a packet of Goya seasoning. Cover and boil for about 20 minutes.
  3. After boiling, blend the chili pods with 2 cups of the stock to create a chili sauce.
  4. Drain the remaining stock from the saucepan and return it to the stovetop over medium heat. Once the stock evaporates, add olive oil, onion, and beef, breaking apart the meat as it cooks.
  5. Add 1 packet of Goya seasoning and chili powder, cooking for 5 more minutes before adding the chili sauce. Cook for an additional 5 minutes.
  6. Add garlic and 2 teaspoons of salt. Stir in the poblano pepper if you haven’t already, then reduce heat to medium-low and cook for one hour, partially covering the pan for the last twenty minutes to reduce the sauce.
  7. In a large bowl, combine instant corn masa mix, water, baking powder, salt, and olive oil to create a spongy masa mix.
  8. To assemble the tamales, spread the masa thinly on the corn husks, leaving about 2 inches on the left-hand side. Add 2 tablespoons of meat mixture and a sparse amount of cheese before rolling the tamale.
  9. Use a double boiler or a metal colander placed in a large pot to cook the tamales. Ensure they are snug but not too tight to prevent unraveling.
  10. Boil 2 cups of water in the pot or enough to reach 1 inch in height. Once boiling, reduce the heat, add the tamales, cover with a towel, and cook for 30 minutes.

Tips

Be sure to soak the corn husks long enough to make them pliable. This will make it much easier to spread the masa and roll the tamales. Also, don’t overfill the tamales as this can cause them to burst during cooking.

Variations & Substitutions

If you prefer a spicier tamale, consider adding jalapeños or serrano peppers. For a vegetarian option, substitute the beef with sautéed mushrooms or beans, and use vegetable stock instead of beef stock. Feel free to experiment with different types of cheese for a unique flavor profile.

Storage

Once cooked, tamales can be stored in the refrigerator for up to 5 days. To freeze, wrap each tamale in foil and place them in a zip-top bag. They can be frozen for up to 3 months. To reheat, steam them again or microwave them wrapped in a damp paper towel.

FAQ

Can I prepare the tamale filling in advance?

Yes, the filling can be prepared a day or two in advance. Store it in an airtight container in the refrigerator until you’re ready to assemble the tamales.

Do I need a special pot to cook tamales?

While a tamale steamer is ideal, you can improvise with a metal colander placed inside a large pot. Just make sure to create enough steam by adding water to the pot and keep the lid covered tightly.

Nutrition

While nutritional content may vary based on specific ingredients and portions, each tamale typically contains around 250-300 calories, 12g of fat, 20g of carbohydrates, and 15g of protein.

Conclusion

Making Beef, Poblano & Cheese Tamales is more than just a culinary project; it’s an opportunity to connect with tradition and create memories with family and friends. Whether you’re an experienced cook or trying tamales for the first time, this recipe offers a delicious and rewarding experience. Enjoy the process and savor the flavors of this classic dish.

Related update: Beef, Poblano & Cheese Tamales

Related update: Chicken Farfalle with Low-Fat Alfredo Sauce

Blast Of Color Mexican Stuffed Bell Peppers | Made by Meaghan Moineau

Blast Of Color Mexican Stuffed Bell Peppers

Intro

There’s something magical about the vibrant colors of fresh vegetables, especially when they’re stuffed with a delicious mix of spices and wholesome ingredients. Our Blast Of Color Mexican Stuffed Bell Peppers bring a rainbow of flavors to your table, reminiscent of the lively street markets of Mexico. As a child, I remember accompanying my grandmother to those bustling markets. The air was filled with the aroma of spices and roasted vegetables, and my eyes were captivated by the vivid displays of fresh produce. These stuffed peppers are a tribute to those cherished days, a perfect blend of tradition and modern convenience.

Why You’ll Love It

This recipe is not only visually stunning but also incredibly satisfying. Here’s why you’ll fall head over heels for these Mexican Stuffed Bell Peppers:

  • Nutritious and Balanced: Packed with protein from chicken and black beans, fiber from brown rice, and vitamins from fresh vegetables.
  • Easy to Prepare: With a few simple steps, you can create a dish that feels gourmet yet is perfect for a weeknight dinner.
  • Customizable: Easily adapt the recipe to fit your dietary needs or personal preferences.
  • Great for Meal Prep: These peppers can be made ahead and stored for quick lunches or dinners throughout the week.

Ingredients

  • 6 large bell peppers (any color)
  • 1 cup black beans, drained and rinsed
  • 1 cup shredded rotisserie chicken breast
  • 1 can (4 oz) fire roasted green diced chiles
  • 1 tablespoon chili seasoning
  • 1 cup cooked brown rice
  • 1 cup frozen corn kernels, thawed
  • 2 cloves garlic, minced
  • 1 cup low-fat shredded cheddar cheese, divided
  • 1/2 cup red onion, diced
  • 1 roma tomato, diced
  • 1/3 cup sour light cream

Instructions

  1. Preheat your oven to 400 degrees Fahrenheit (200 degrees Celsius).
  2. In a large bowl, combine the cooked brown rice, shredded chicken, thawed corn, diced tomato, diced onion, black beans, 1/2 cup of the shredded cheddar cheese, minced garlic, fire roasted green chiles, and chili seasoning. Mix well.
  3. Prepare a baking dish by lining it with foil and spraying it with cooking spray.
  4. Slice the tops off the bell peppers and remove the seeds and membranes. Stuff each bell pepper with the chicken mixture, pressing firmly to fill the cavity and mounding the mixture on top.
  5. Place the stuffed peppers in the prepared baking dish. Top each pepper with an additional 1/2 tablespoon of cheese.
  6. Bake in the preheated oven for 30 to 40 minutes, or until the peppers are just tender.
  7. Remove from the oven and top each pepper with 1/2 tablespoon of sour cream before serving.

Tips

  • If the tops of the peppers brown too quickly in the oven, cover them loosely with foil.
  • For an extra kick, consider adding a dash of hot sauce or a sprinkle of cayenne pepper to the filling mixture.
  • Ensure your rice is cool before mixing it with other ingredients to prevent the cheese from melting prematurely.

Variations & Substitutions

  • Vegetarian Option: Omit the chicken and add extra black beans or some cooked quinoa for added protein.
  • Cheese Substitute: Use a dairy-free cheese to make this recipe lactose-intolerant friendly.
  • Different Grains: Swap out brown rice for quinoa or farro for a different texture and flavor.

Storage

These stuffed peppers can be stored in an airtight container in the refrigerator for up to 3 days. To reheat, simply place them in a microwave-safe dish and heat for 2-3 minutes, or until warmed through. You can also freeze them for up to 2 months; thaw in the refrigerator overnight before reheating.

FAQ

Can I use fresh chiles instead of canned?

Absolutely! If you prefer using fresh chiles, simply roast them until charred, peel off the skin, and dice them before adding to the mixture.

Can I make these peppers spicier?

Yes, you can adjust the spice level to your liking by adding more chili seasoning or incorporating chopped jalapeños into the stuffing mix.

Is there a way to reduce the sodium content?

To reduce sodium, use low-sodium black beans and chicken, and opt for a no-salt-added chili seasoning. You can also rinse the canned beans to remove some of the sodium.

Nutrition

Each serving of these Mexican Stuffed Bell Peppers is approximately 250 calories, with 30g of protein, 10g of fat, and 20g of carbohydrates. They are a rich source of fiber, vitamins A and C, and calcium, making them a nutritious option for any meal.

Conclusion

Our Blast Of Color Mexican Stuffed Bell Peppers are a delightful way to bring vibrant flavors and colors to your dinner table. Whether you’re reminiscing about family traditions or simply looking for a delicious meal to share with loved ones, these peppers will not disappoint. We hope you enjoy making and savoring this recipe as much as we do. Happy cooking!

Related Recipes

Also try: Blast Of Color Mexican Stuffed Bell Peppers

Also try: Beans With Smoked Pork Hock

Guacamole | Made by Meaghan Moineau

Guacamole | Made by Meaghan Moineau

Title: Savoring Family Moments: Crafting the Perfect Guacamole
Description: Dive into the delightful world of guacamole with this easy-to-follow recipe that combines traditional flavors with a nostalgic twist. Discover how this simple dish can serve as a bridge to cherished family memories, all while tantalizing your taste buds.

---


Guacamole has always been more than just a delicious appetizer in my family; it's a symbol of togetherness and cherished memories. As I share this recipe with you, I am taken back to countless summer gatherings at my grandmother's house, where the aroma of fresh avocados and herbs filled the air. This guacamole recipe captures those nostalgic moments with each creamy bite.


Ingredients:

- 3 ripe Haas avocados

- 1 small onion, finely chopped


- 1 jalapeño pepper, seeded and minced


- A handful of fresh cilantro, chopped


- 1 teaspoon salt


- 1/2 teaspoon black pepper


- Juice of 1 fresh lime


- Fresh basil, chopped (about 1 tablespoon)


- Fresh oregano, chopped (about 1 tablespoon)


Instructions:


1. Prepare the Avocados: Begin by cutting the avocados in half lengthwise. Carefully drive a chef's knife into the large pit and twist to remove it. Scoop the avocado flesh out from the skin into a mixing bowl.
2. Mash and Mix: Using a fork, gently mash the avocados to your desired consistency. I prefer my guacamole with a bit of texture rather than completely smooth. Add the finely chopped onion, jalapeño, cilantro, basil, and oregano into the bowl. Mix thoroughly to incorporate all the flavors.
3. Season to Perfection: Season the mixture to taste with salt, black pepper, and freshly squeezed lime juice. The lime juice not only adds a tangy zest but also helps to keep the guacamole vibrant green.
4. Serve or Store: For the best flavor, serve the guacamole immediately with your favorite tortilla chips or as a topping for tacos. If you need to store it, press a piece of plastic film wrap directly onto the surface of the guacamole to prevent browning, and refrigerate.

A Taste of Nostalgia


Every time I make this guacamole, I'm reminded of those warm summer days at grandma's house. The kitchen was always filled with laughter and the sounds of family catching up. My grandmother would show us how to carefully remove the avocado pit, a trick passed down through generations. We would gather around the table, each contributing to the guacamole-making process, and share stories of our day.


This guacamole recipe is rated a 3 out of 10 in difficulty, making it an easy yet rewarding appetizer that anyone can enjoy crafting. It's not just about the taste—although that's undeniably delicious—but about the joy of creating something together, a tradition I proudly pass on to the next generation.


Conclusion


Crafting the perfect guacamole is more than just mixing ingredients; it's about connecting with loved ones and reliving cherished memories. Whether you're a seasoned cook or a kitchen novice, this simple dish invites you to enjoy the flavors of tradition while creating new moments to remember. Enjoy your guacamole, and may it bring your family as much joy as it has brought mine.

Read more about Appetizers

Read more about Main Dishes

Read more about Desserts

The Secret to Easy Skillet Filet Mignon Steak Tacos | Made by Meaghan Moineau

The Secret to Easy Skillet Filet Mignon Steak Tacos | Made by Meaghan Moineau

Title: Unveiling the Secret to Easy Skillet Filet Mignon Steak Tacos: A Culinary Masterpiece
Description: Dive into the exquisite world of gourmet tacos with our Easy Skillet Filet Mignon Steak Tacos recipe. Perfectly seasoned and cooked filet mignon pairs beautifully with creamy guacamole, tangy sour cream, and sharp cheddar cheese, all nestled in warm white corn tortillas. This dish is not just a meal; it's an experience that will transport you back to cherished family gatherings. Easy to prepare yet sophisticated in flavor, these tacos are the perfect main dish for any occasion.

---


Who doesn't love tacos? They are versatile, flavorful, and bring people together in a way that few other foods can. But when you elevate the humble taco with luxury ingredients like filet mignon, you create something truly special. This recipe for Easy Skillet Filet Mignon Steak Tacos not only satisfies your cravings but also evokes heartwarming memories of family gatherings.


A Nostalgic Trip Down Memory Lane

Growing up, Sunday dinners were a sacred ritual in my family. My grandmother would spend the entire afternoon preparing a feast that would bring us all together. One of her most beloved dishes was her special steak tacos. I can still remember the aroma of sizzling steak filling the kitchen, mingling with the warmth of laughter and stories shared around the dinner table.


My grandmother had a knack for turning a simple meal into a grand celebration. Her tacos, much like these Easy Skillet Filet Mignon Steak Tacos, were more than just food; they were a symbol of love and togetherness. Every bite was a reminder of those cherished moments spent with family, making memories that would last a lifetime.


Ingredients:

- 2 filet mignon steaks


- Olive oil extra virgin


- Cracked black pepper


- White corn tortillas


- Guacamole


- Sour cream


- Shredded cheddar cheese


Instructions:
1. Prepare the Skillet: Heat a skillet over medium to low heat. This gentle heat ensures the steaks cook evenly without losing their tenderness.
2. Season the Steaks: Rub the filet mignon steaks with extra virgin olive oil and season generously with cracked black pepper. This simple seasoning allows the natural flavors of the steak to shine.
3. Cook the Steaks: Place the steaks in the heated skillet. For medium doneness, cook each side for about 7 minutes, adjusting as necessary for your preferred level of doneness. The key is to cook them slowly to maintain their juicy tenderness.
4. Slice the Steaks: Once cooked to perfection, remove the steaks from the heat and let them rest for a few minutes. Then, slice them thinly and lengthwise for easy taco assembly.
5. Warm the Tortillas: In a clean skillet over medium heat, warm the white corn tortillas until they're soft and pliable.
6. Assemble the Tacos: Generously top each tortilla with slices of steak. Add dollops of guacamole and sour cream, then sprinkle with shredded cheddar cheese for that perfect cheesy finish.
A Delicious Main Dish

These Easy Skillet Filet Mignon Steak Tacos are more than just a meal; they're an invitation to gather around the table, share stories, and create new memories. Rated at a difficulty level of 4 out of 10, this dish is accessible to both seasoned cooks and kitchen novices alike. Perfect as a main dish, it's sure to impress your family and friends with its gourmet appeal and nostalgic charm.


As you savor each bite, may you be reminded of the simple joys of life and the power of food to bring us together. Enjoy!

Read more about Appetizers

Read more about Main Dishes

Read more about Desserts

Pork Carnitas Tacos | Made by Meaghan Moineau

Pork Carnitas Tacos | Made by Meaghan Moineau

Unforgettable Pork Carnitas Tacos: A Taste of Tradition and Togetherness


A Culinary Journey Down Memory Lane


There's something truly magical about the way food can evoke cherished memories and transport us back to special moments spent with loved ones. In our family, Pork Carnitas Tacos have always held a special place in our hearts. Not only is this dish a tantalizing blend of flavors and textures, but it also serves as a delicious reminder of countless family gatherings, where the kitchen buzzed with laughter and the air was filled with the irresistible aroma of simmering pork and fresh cilantro.


The Recipe: Pork Carnitas Tacos


Difficulty: 6/10
Category: Main Dish

Ingredients:

- 2 cups water

- 3 lbs lean pork butt


- 4 cloves garlic, minced


- Sea salt and ground pepper to taste


- 2 tablespoons olive oil


- 1 cup orange juice


- 1 cup milk


- Corn tortillas


- Salsa fresca


- 2 ripe avocados, sliced


- Fresh cilantro, chopped


- 1 onion, finely chopped


- 2 limes, sliced into wedges


Instructions:

1. Prepare the Pork:

In a large Dutch oven, combine the pork, garlic, sea salt, ground pepper, and water. Bring the mixture to a boil, then reduce the heat, cover, and let it simmer over medium-low heat for 45 minutes to one hour. This slow cooking process ensures the meat becomes tender and infused with the aromatic flavors of garlic and spices.


2. Shred and Brown the Pork:

Once cooked, drain the pork well. Allow it to cool until it's manageable, then shred the meat by hand or with the tines of a fork, discarding any remaining fat. Return the shredded pork to the Dutch oven, heating the olive oil over medium heat. Add the orange juice and milk, cooking until the liquid evaporates and the pork is beautifully browned. Season with additional salt and pepper to taste.


3. Prepare the Toppings:

Chop the onion and cilantro, and slice the avocado and limes. Place each in small individual bowls for an inviting serving presentation.


4. Assemble the Tacos:

Heat the corn tortillas in a dry frying pan to keep them warm and pliable. For each taco, stack two tortillas and layer them with warm carnitas. Top with chopped cilantro, onion, avocado slices, and a squeeze of fresh lime juice for that perfect burst of citrusy brightness.


A Nostalgic Family Memory


Growing up, weekends at Grandma's house were synonymous with the sizzle of carnitas on the stove. I remember sitting on a stool by the kitchen counter, watching in awe as she effortlessly transformed simple ingredients into a feast that brought us all together. The highlight of those afternoons was gathering around the table, each of us eagerly assembling our tacos, swapping stories, and savoring the rich, savory flavors that felt like a warm embrace.


Even as I recreate this dish today, I can almost hear the echoes of playful banter and feel the familial warmth that made those gatherings so special. Pork Carnitas Tacos are more than just a meal; they are a bridge to the past, a reminder of the joy that comes from shared moments and the love that binds us together.


Conclusion


Pork Carnitas Tacos are a delightful main dish that combines the heartiness of seasoned pork with the freshness of vibrant toppings. With a difficulty rating of 6/10, it's a recipe that balances simplicity with a touch of culinary finesse. Whether you're creating new memories or reliving cherished ones, these tacos promise to bring a touch of tradition and a whole lot of flavor to your table. So gather your loved ones, roll up your sleeves, and let the delicious journey begin!

Read more about Appetizers

Read more about Main Dishes

Read more about Desserts

Tequila Lime Shrimp | Made by Meaghan Moineau

Tequila Lime Shrimp | Made by Meaghan Moineau

Title: Savoring Summer: Tequila Lime Shrimp with a Dash of Nostalgia
Description: Dive into the vibrant flavors of Tequila Lime Shrimp, a dish that brings together zesty lime, smooth tequila, and succulent shrimp. Perfect as a main dish, this recipe not only tantalizes your taste buds but also stirs up cherished family memories. Experience a taste of summer with this easy-to-follow, flavorful recipe. Difficulty: 4/10.

---


Savoring Summer: Tequila Lime Shrimp with a Dash of Nostalgia


As the warm breeze of summer fades into the crisp air of autumn, I often find myself reminiscing about sun-drenched family gatherings and the laughter that echoed through our backyard. One dish that always stood out during these summer feasts was Tequila Lime Shrimp—a recipe that not only satisfied our taste buds but also became a cherished family tradition.


Ingredients:


- Shrimp: A pound of large, juicy shrimp, peeled and deveined.
- Tequila: The star of the show, adding a smooth, rich flavor.
- Lime Juice: Freshly squeezed for that zesty punch.
- Honey: Just a touch to balance the acidity with sweetness.
- Garlic: A couple of cloves, minced to perfection.
- Fresh Cilantro: Chopped, for a burst of freshness.
- Kosher Salt: To taste.
- Black Fresh Ground Pepper: For a subtle kick.

Instructions:


1. Prepare the Shrimp: Start by peeling and deveining the shrimp, ensuring they are clean and ready to absorb all the delicious flavors.
2. Create the Marinade: In a large mixing bowl, whisk together the tequila, lime juice, honey, garlic, salt, pepper, and cilantro. The aroma itself is enough to make your mouth water.
3. Marinate the Shrimp: Add the shrimp to the bowl, making sure each piece is well-coated. Let them marinate for about 15 minutes, allowing the flavors to meld.
4. Reduce the Marinade: Remove the shrimp from the marinade and set them aside. Transfer the marinade to a saucepot and place it over medium-high heat. Bring it to a boil, then reduce the heat and let it simmer until it reduces by half, intensifying the flavors.
5. Grill the Shrimp: Fire up the grill and place the shrimp over direct-high heat. Grill for about 2 minutes on each side, ensuring they are perfectly cooked with a slight char.
6. Serve and Enjoy: Drizzle the reduced marinade over the shrimp just before serving. This not only enhances the flavor but also adds a beautiful glaze.

A Taste of Nostalgia


Every time I prepare this dish, I am transported back to those lazy summer afternoons. I can almost hear the sizzle of the grill and my grandfather's voice, as he recounted stories of his youth. It was his idea to infuse the traditional shrimp dish with tequila and lime—a nod to his Mexican heritage, and a twist that became a family favorite.


As we gathered around the table, each bite of the Tequila Lime Shrimp was a celebration of flavors and memories. It was more than just a meal; it was a reminder of the love and laughter that bound us together.


Conclusion


Tequila Lime Shrimp is more than just a main dish; it's a journey back to those joyful summer days. With a difficulty rating of 4/10, it’s an accessible recipe that brings gourmet flavors to your home kitchen. So, gather your loved ones, fire up the grill, and create your own lasting memories with this delightful dish.


---


Whether you're a seasoned chef or a home cook, this Tequila Lime Shrimp recipe offers a simple yet flavorful way to bring a taste of summer to your table. Enjoy the blend of tangy lime, sweet honey, and the subtle warmth of tequila, and let it become a tradition in your home too.

Read more about Appetizers

Read more about Main Dishes

Read more about Desserts

Spicy Seasoned Loaded Guacamole | Made by Meaghan Moineau

Spicy Seasoned Loaded Guacamole | Made by Meaghan Moineau

**Title: Unleashing Flavor: The Art of Crafting Spicy Seasoned Loaded Guacamole**


**Description:**


Dive into the vibrant world of flavors with our Spicy Seasoned Loaded Guacamole. This recipe transforms simple avocados into a fiesta of tastes with the perfect balance of heat and zest. Join me on a nostalgic journey as I share a cherished family memory linked to this beloved appetizer. With a difficulty rating of 3 out of 10, this dish is perfect for any occasion, whether you’re hosting a party or simply enjoying a cozy night in.


---


**Blog Post:**


When it comes to appetizers that steal the show, guacamole is undeniably a front-runner. There's something magical about the creamy texture of avocados enhanced by a medley of spices and fresh ingredients. Today, I invite you to experience a personal favorite: Spicy Seasoned Loaded Guacamole. This recipe not only excites the taste buds but also carries a piece of my family history, making it all the more special.


### A Nostalgic Journey


Growing up, Sunday afternoons were a sacred time in my family. It was a day dedicated to relaxation, laughter, and, most importantly, coming together over good food. My grandmother, a culinary wizard, always had the knack for taking simple ingredients and turning them into something extraordinary. Her guacamole was legendary, and I still remember the first time I watched her make it.


In her sunlit kitchen, the air was thick with anticipation. As she mashed the avocados with a well-loved fork, she would tell stories of her childhood in Mexico, where avocados were a staple at every meal. Her secret, she revealed with a wink, was a splash of white wine vinegar—a twist that added unexpected brightness to the dish.


The entire family would gather around the table, eagerly scooping up the guacamole with homemade tortilla chips. The conversation flowed as freely as the laughter, each bite a reminder of our shared heritage and the love that bound us together. Those afternoons left an indelible mark on my heart, and every time I make this guacamole, I feel my grandmother’s presence, guiding my hands and warming my spirit.


### Crafting the Perfect Guacamole


**Ingredients:**


- 2 ripe avocados


- 1 tablespoon lime juice


- 1 teaspoon white wine vinegar


- 1/4 cup finely chopped red onion


- 1 finely chopped serrano pepper (adjust for desired heat)


- 2 tablespoons chopped cilantro


- 1/2 cup diced Roma tomato


- Salt and black pepper to taste


- 1/2 teaspoon cumin


- 1/4 teaspoon garlic powder


**Instructions:**


1. In a medium bowl, begin by mashing the avocados until smooth yet chunky, achieving that perfect creamy consistency.


2. Mix in the lime juice and white wine vinegar, which not only enhance the flavor but also keep the guacamole vibrant and green.


3. Stir in the salt, black pepper, cumin, and garlic powder, ensuring each spice is evenly distributed to create a harmonious blend.


4. Incorporate the red onion, serrano pepper, cilantro, and diced Roma tomato, stirring gently to maintain the integrity of the ingredients.


5. Serve immediately for the freshest taste, or cover with plastic wrap directly on the surface to prevent browning if preparing ahead.


### Why You'll Love It


This Spicy Seasoned Loaded Guacamole is more than just an appetizer—it's an experience. The heat from the serrano pepper, the tang of vinegar and lime, and the aromatic spices come together in a dance of flavors that is as exciting as it is comforting. It’s a dish that invites you to slow down, savor each bite, and perhaps even create your own cherished memories around the table.


With a difficulty rating of 3 out of 10, this recipe is accessible to chefs of all levels, ensuring that anyone can recreate this family treasure. Whether you're hosting a lively gathering or enjoying a quiet evening, this guacamole is sure to impress.


So, next time you find yourself reaching for avocados at the market, remember this recipe and the warmth of shared stories and flavors. It’s a reminder that the simplest ingredients often hold the most profound connections. Enjoy!

Read more about Appetizers

Read more about Main Dishes

Read more about Desserts