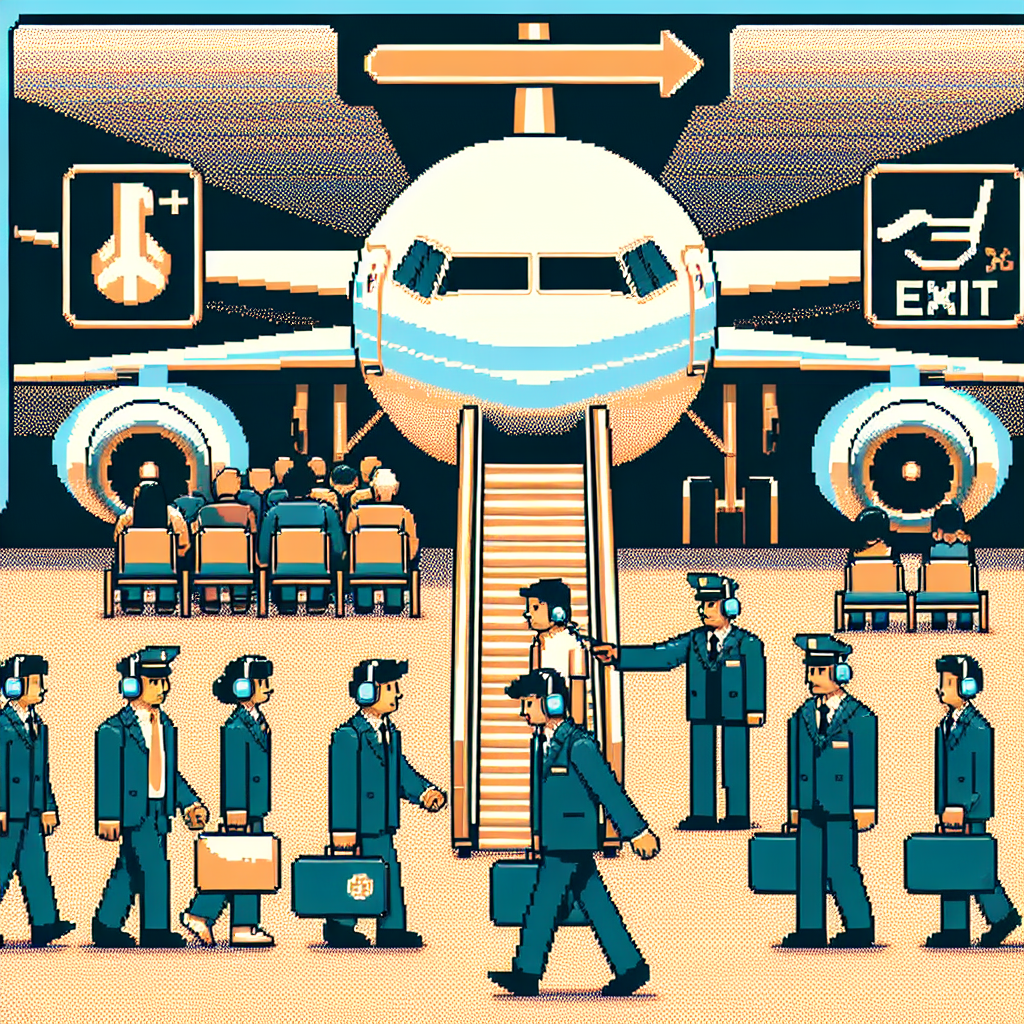
Riot’s MMR Reset: What It Means for Climbs | Analysis by Brian Moineau

Why Riot is re-mapping MMR to rank — and why it matters for your climb

When Riot quietly tweaked the way hidden MMR maps to visible ranks, a lot of players felt it immediately: different LP swings, weirder promotion timing, and—if you’re in Iron or Diamond—maybe finally facing opponents who actually match what your rank should mean. Riot’s dev post on March 2, 2026 announced those changes and explained the reasoning: make ranked games feel fairer and more consistent across the entire ladder. This isn’t just technical housekeeping. It’s a nudge at how the whole competitive experience reads to players.

Below I unpack what they changed, why they changed it, who wins (and who doesn’t), and what to expect next for Ranked climbs.

What Riot changed (the short version)

  • Riot adjusted the MMR-to-rank distribution so that the mapping between hidden skill (MMR) and visible rank (Iron → Challenger) better reflects differences in demonstrated ability.
  • At the bottom of the ladder, Iron’s MMR band was shifted so more seasoned-but-struggling players move into Bronze, leaving Iron closer to a true “learning” tier.
  • At the top, the upper Diamond MMRs were pushed into Master’s range to reduce the enormous skill spread inside Diamond and make climbing through Diamond less painful.
  • These shifts widened Master’s MMR range and raised practical LP thresholds for Grandmaster and Challenger, which Riot says they’re monitoring and may adjust before next season.
  • Riot also flagged upcoming work on autofill, role parity, Apex tier duoing, and LP resolution for Master+ games.

(Source: Riot dev post, March 2, 2026.)

Why this matters for players

  • Match quality: Better alignment between MMR and rank should reduce the number of matches where one team contains players who are clearly over- or under-skilled for the division label on their profile.
  • Clarity of skill expectations: If you’re in Gold or Platinum, Riot’s goal is that players within the same rank should share a baseline of game knowledge and macro expectations—making games more predictable for learning and teaching.
  • More meaningful progression: Iron becomes a safer place for real beginners to play without being dominated by veterans who “belong” at higher visible ranks but have stayed in Iron due to LP quirks or alternating demotions/promotions.
  • Harder apex tiers (for now): Master, Grandmaster and Challenger players may see different LP dynamics while Riot balances population vs. MMR spread.

Who benefits and who might feel the friction

  • Beneficiaries

    • Newer players: Iron being more of a true learn-to-play tier can reduce stomps and help new players find teammates with similar fundamentals.
    • Skilled-but-stuck players: People who actually belong in Bronze/low Silver but were trapped in Iron could see more consistent matchmaking.
    • Climbers in Diamond: Narrowing the skill spread within Diamond should make promotions feel more linear and less grindy.
  • Players who may notice pushback

    • Some Master+ players: Wider MMR in Master made LP math shift for Grandmaster/Challenger; Riot is aware and monitoring LP consistency.
    • People used to exploit rank irregularities (smurfs, account sellers): Changes aim to reduce those edge cases, so some old tricks will be less effective.

The broader competitive design thinking

Riot’s changes are a window into how modern competitive systems balance two things that often pull in opposite directions:

  • Psychological progression: Visible ranks and promotions are motivating. Letting players feel upward movement keeps people engaged.
  • Statistical fairness: Matchmaking must pair players of similar demonstrated skill to make games meaningful and teachable.

Too much emphasis on visible progression without aligning the hidden MMR leads to mismatches, confusing LP swings, and a poorer learning environment. Riot’s mapping adjustment is an attempt to reset that balance: keep the motivational benefits of ranks while reducing the mismatch noise.

What to watch next (and practical takeaways)

  • Autofill and role parity tests (noted for 26.4/26.5 rollout) — these directly affect queue fairness and how long you wait to play your chosen role.
  • LP fixes for Master+ — if you play Apex tiers, expect changes aimed at stabilizing +/− LP outcomes.
  • Potential new tier below Iron — Riot hinted they might add a true-stepping-stone tier for fresh players if Iron still isn’t distinct enough.

Practical advice for climbers:

  • Focus on wins, not short-term LP swings. MMR moves your long-term trajectory even when visible LP looks weird.
  • Track average LP gain per win over multiple games—those numbers are the best signal of whether your MMR is above or below your visible rank.
  • If you’re a high-skill player stuck in a low visible rank, expect the system to pull you up faster now that Riot is re-mapping ranges.

A few implementation notes (for context nerds)

  • Riot didn’t change how MMR is calculated per game (it’s still primarily win/loss driven); they changed how that hidden number translates into the visible rank bands.
  • Expanding MMR ranges at the top or shifting bands at the bottom is a blunt tool—effective for population-level fixes, but it requires listening to player data after deployment (which Riot said they’re doing).
  • These changes are iterative. Expect small follow-up patches over the coming months as Riot checks queue times, LP distribution, and player experience signals.

My take

This feels like a long-overdue re-centering. Visible ranks are the social language of League—the badge you and your friends talk about. If that language stops meaningfully matching the players behind the badge, it erodes the ladder’s usefulness for learning and for measuring progress. Riot’s MMR-to-rank re-mapping aims to restore that trust: make ranks informative again, reduce weird LP variance, and give beginners a safer space to learn.

It won’t be perfect overnight—changes like this always create ripple effects—but Riot’s transparency about the goals and the planned follow-ups (autofill, LP fixes, Apex duoing) is a good sign. If you play ranked seriously, keep an eye on your LP per win trends and the Master+/Grandmaster LP behavior Riot said they’ll address.

Sources


Related update: We recently published an article that expands on this topic: read the latest post.


Related update: We recently published an article that expands on this topic: read the latest post.

Spiced Apple Cider | Made by Meaghan Moineau

Spiced Apple Cider

Intro

As the leaves begin to turn and the air grows crisp, there’s nothing quite like the comforting warmth of a mug of spiced apple cider. I still remember the autumn afternoons spent at my grandmother’s house, where the scent of cinnamon and apples would fill the air. She would always have a pot simmering on the stove, ready to fill our mugs as we returned from playing in the fallen leaves. Those moments have stayed with me, and now, I find joy in recreating this cozy tradition for my family and friends. Let me share with you my take on this timeless beverage, perfect for any fall gathering or a quiet night in.

Why You’ll Love It

This spiced apple cider is a hug in a mug. It’s incredibly easy to make, filling your home with an inviting aroma that embodies the essence of fall. The combination of freshly pressed apple juice with warming spices like cinnamon, nutmeg, and allspice creates a rich and flavorful drink. Plus, it’s versatile—you can keep it family-friendly or add a splash of dark rum for a grown-up treat. Whether you’re serving it at a festive gathering or sipping it by the fire, this cider is sure to become a seasonal favorite.

Ingredients

  • 1 gallon freshly pressed apple juice
  • 1 tablespoon allspice
  • 4 cinnamon sticks
  • 2 inches fresh ginger, sliced
  • 1/4 cup maple syrup
  • 1/2 teaspoon ground nutmeg
  • 1 orange, sliced
  • 2 cups water

Instructions

  1. In a large non-reactive pot, combine all the ingredients: apple juice, allspice, cinnamon sticks, ginger, maple syrup, nutmeg, orange slices, and water. Stir to mix the spices thoroughly.
  2. Place the pot over medium-high heat and bring the mixture to a boil. Allow it to boil for about 5 minutes to help the flavors meld.
  3. Cover the pot with a lid, reduce the heat, and let it simmer for 30-40 minutes. This will allow the spices to infuse deeply into the cider.
  4. Line a colander with cheesecloth and carefully strain the cider to remove solids. This will leave you with a smooth, spiced liquid.
  5. Serve the cider warm. For an adult version, consider spiking it with a splash of dark rum.

Tips

To enhance the flavor of your cider, try to use freshly pressed apple juice if possible. This makes a significant difference in taste compared to store-bought versions. If you find the cider too sweet, adjust the maple syrup to your liking. Additionally, keep an eye on the simmering time; if you prefer a stronger spice flavor, allow it to simmer longer.

Variations & Substitutions

If you’re missing an ingredient or want to change things up, there are plenty of ways to adapt this recipe. You can substitute honey or brown sugar for the maple syrup if desired. For a citrusy twist, add a few lemon slices along with the orange. If you’re out of fresh ginger, ground ginger can work in a pinch, though fresh is always best for a more robust flavor. For a non-alcoholic zing, consider adding a splash of pomegranate juice before serving.

Storage

Store any leftover cider in an airtight container in the refrigerator for up to a week. To reheat, simply warm it on the stove over low heat, stirring occasionally. Avoid boiling it again to preserve the flavors.

FAQ

Can I make this cider in a slow cooker?

Absolutely! Combine all the ingredients in a slow cooker and cook on low for 4-6 hours. This method is great for keeping the cider warm for a party.

Can I use ground spices instead of whole?

Yes, you can substitute ground spices, but use them sparingly to avoid overpowering the cider. About 1 teaspoon of ground cinnamon and 1/4 teaspoon of ground allspice should suffice.

Is it possible to make this cider sugar-free?

Yes, you can omit the maple syrup if you prefer a sugar-free version. The natural sweetness of the apple juice should still provide plenty of flavor.

Nutrition

While the precise nutritional content can vary based on the specific ingredients used, a typical serving of spiced apple cider (without alcohol) contains approximately:

  • Calories: 120
  • Sugars: 24g
  • Vitamin C: 10% of Daily Value
  • Calcium: 2% of Daily Value

Conclusion

This spiced apple cider is more than just a drink; it’s an experience, a journey back to simpler times when the warmth of a kitchen and the love of family were all you needed to feel at home. Whether you’re serving it at a festive gathering or enjoying a quiet moment by yourself, this cider brings comfort and joy with every sip. I hope this recipe finds a cherished place in your fall traditions, just as it has in mine.

Related update: Spiced Apple Cider

When Love Enables: Ending Family | Analysis by Brian Moineau

When Love Enables Stagnation: Helping an Unmotivated Adult Grandson

A grandfather watches his 26-year-old grandson, fresh with a master’s degree, spend nights gaming and days sleeping while his daughter quietly keeps him afloat. He worries that helping has become enabling — and asks how to break the cycle without wrecking family ties. That exact letter ran in R. Eric Thomas’s “Asking Eric” column in The Washington Post on March 1, 2026, and it’s a situation many families recognize: good intentions that accidentally shop for someone’s excuses.

Below I unpack that dilemma, offer practical ways to hold boundaries with compassion, and suggest next steps families can use to move from enabling to empowering.

Why enabling happens (and why it’s so sticky)

  • Emotional loyalty and love: A parent (or grandparent) often believes shielding a loved one from discomfort is kindness — especially if the child once struggled or is seen as “different.”
  • Fear of fallout: Saying “no” feels like risking rejection, guilt, or family conflict.
  • Immediate relief, long-term harm: Paying bills, excusing behavior, or covering consequences reduces immediate stress but removes incentives for growth.
  • Cultural and economic friction: Today’s job market, mental-health strains, and online lifestyles (overnight gaming, gig economy norms) complicate simple comparisons to earlier generations.

R. Eric Thomas’s advice to the grandfather is practical: start with curiosity and a conversation, ask about goals and obstacles, and work as a coach rather than a commander. He also cautions against simply removing support without a jointly agreed plan — that risks conflict without progress. (R. Eric Thomas, Washington Post, March 1, 2026.)

Practical steps: what the grandfather (and his daughter) can try now

  • Open with curiosity, not accusation
    • Ask specific questions: “What are you trying to do next? What’s gotten in the way of job hunting? What would you like help with this week?”
    • Listen without immediate fixes. People are more responsive when they feel heard.
  • Set clear, limited supports — not blank checks
    • Replace vague “help” with concrete offers (example: “I’ll pay for a resume rewrite if you apply to five jobs this month”).
    • Tie assistance to measurable steps and timelines.
  • Define household expectations
    • If he lives at home, require contributions: chores, job-search hours, partial rent, or a reasonable household role.
    • Create a written, short agreement so expectations are unambiguous.
  • Use natural consequences, not shame
    • Let consequences reflect reality: missed rent means losing privileges; not looking for work may mean a plan to move out.
    • Frame consequences as learning tools, not punishment.
  • Encourage small wins and structure
    • Replace “find a career” pressure with bite-sized goals: apply to X jobs this week, attend one networking event, join a course or volunteer role.
    • Celebrate incremental progress to build confidence.
  • Offer coaching and resources, not rescue
    • Help with practical job-hunt steps (resume, LinkedIn, mock interviews) but don’t submit applications for him.
    • Suggest counseling if there are signs of depression, anxiety, or addiction — mental health often underlies motivation issues.
  • Keep the daughter included and aligned
    • The grandfather and mother should present a united, consistent approach. Mixed signals (one enabling, one enforcing) undermine any plan.
    • Encourage the daughter to set boundaries for her own wellbeing, perhaps starting with a small, enforceable change.

What to avoid

  • Sudden, total withdrawal with no plan — abrupt cutoffs may sever trust and provoke conflict.
  • Rewarding avoidance — paying for leisure, bailing out of obligations, or doing work the grandson can and should do.
  • Moralizing or shaming — lecturing about character rarely motivates sustained change.

Ways to structure a short “family agreement”

  • Duration: 30 or 90 days, then reassess.
  • Responsibilities: hours per week devoted to job search, daily household tasks, and a modest financial contribution if feasible.
  • Support offered: two coaching sessions for resume/CV, one budget review, help researching training programs.
  • Consequences: loss of certain privileges (car use, gaming time, additional allowance) if milestones aren’t met.
  • Check-ins: weekly 20–30 minute progress conversation with one consistent family member acting as coach.

A note on gaming, degrees, and expectations

A master’s degree doesn’t guarantee immediate employment, and the rise of online gaming or nocturnal schedules can be both a symptom and a trap. Distinguish between:

  • Legitimate obstacles (mental-health issues, systemic hiring challenges, skill mismatches) that need support and services.
  • Avoidant patterns (using gaming to escape job search) that need boundary-based redirection.

If the grandson claims he’s applied but isn’t, request proof (copies of applications, timestamps). Tracking progress removes fuzzy excuses and gives everyone factual footing.

Helpful resources and expert perspectives

  • Guidance on moving from enabling to empowering often emphasizes boundaries, measurable expectations, and consistency. Practical guides and therapy-oriented summaries suggest similar steps: set limits, require contribution, and help with skill-building resources. (SkillsYouNeed; BetterHelp.)
  • If mental-health concerns arise, a clinician can check for depression, ADHD, or other conditions that frequently reduce motivation. Professional evaluation is not an admission of failure — it’s a tool.

What to expect: pushback and a path forward

  • Expect resistance at first. Changing learned dynamics triggers guilt, anger, or manipulation attempts.
  • Stay steady. One relaxed boundary breach often erodes progress. Small, consistent enforcement wins over time.
  • Be prepared that change may be slow or incomplete. The family can still reclaim peace and reduce enabling even if the grandson’s trajectory takes time.

What matters most

  • Preserve the relationship, but stop being the only safety net for harmful habits.
  • Turn “help” into a partnership for growth rather than a maintenance contract for stagnation.
  • Keep compassion and accountability in balance.

Three quick reminders

  • Boundaries are acts of love when they teach responsibility.
  • Support can be conditional and still be kind.
  • Professional help (career services or mental-health care) often accelerates progress.

My take

The Washington Post letter is a familiar, aching scenario: the line between help and harm blurs when love tries too hard to protect. The best move usually isn’t dramatic withdrawal but a deliberate, compassionate reframe — from bailing someone out to training them up. That means clear expectations, measurable steps, and the willingness to feel uncomfortable for a while. Over the long run, that discomfort is the bridge to self-reliance and healthier family dynamics.

Sources

Drive‑Thru Violence Shakes Fast‑Food | Analysis by Brian Moineau

A chaotic night at Wendy’s: what the Ewing Township drive-thru video tells us about public safety and fast-food flashpoints

A viral video of violence at a Wendy’s drive-thru in Ewing Township, New Jersey, landed in people’s feeds and raised the same uneasy question: how did a late-night trip for fries and a Frosty turn into breaking windows and attempted assaults? The footage — and the police account that followed — feel like a snapshot of broader tensions playing out in public, commercial and late-night spaces.

What happened (the essentials)

  • Date and place: The incident occurred in the early hours of February 21, 2026, at the Wendy’s on the 1700 block of Olden Avenue in Ewing Township, New Jersey.
  • Who: Police identified three people from Trenton — 23-year-old Honesty Harrison, 18-year-old Saniyah Brittingham and 19-year-old Leah Williford Stevens.
  • Police account: Investigators say the trio damaged property inside the restaurant and attempted to assault employees with various items just before 3 a.m. Two of the suspects face burglary, criminal mischief and unlawful possession of a weapon charges; the third faces burglary and criminal mischief charges. Two turned themselves in; police were asking the public for help locating the third. (Published February 28, 2026). (6abc.com)

Why the video resonated

  • Violence in plain sight: Fast-food restaurants are public, highly visible spaces. Surveillance and phone video make it easy for incidents to spread quickly, sparking community alarm and online debate.
  • Late-night dynamics: After-hours shifts, reduced staffing, and customers under stress (fatigue, alcohol, conflict) can create conditions where small disputes escalate. The Wendy’s video taps into a pattern we’ve unfortunately seen in other fast-food altercations across the country. (cbsnews.com)
  • Emotional response: Viewers don’t only react to the specific actors in the clip — they react to the vulnerability of workers and the breakdown of ordinary civility where people expect quick service and little drama.

Broader context and patterns

  • Not an isolated phenomenon: Incidents at drive-thrus and fast-food locations — from assaults to robberies to crashes into buildings — recur in local news. Those stories highlight vulnerabilities: 24/7 operations, limited security presence late at night, and the physical layout of drive-thrus that can funnel conflict into tight spaces. (cbsnews.com)
  • Worker safety as a policy issue: The footage revives policy questions about protection for frontline employees — from better lighting and barriers to panic buttons, clearer late-night staffing protocols, and collaboration with local police.
  • Social-media ripple effects: Viral video can accelerate investigations (public IDs, tips) but also inflame speculation. Responsible reporting and community restraint help ensure investigations proceed fairly.

What to watch next

  • Legal outcomes: Charges listed in early reports may change as prosecutors review evidence and surveillance is formally entered into court records. Expect updates from local law enforcement and county prosecutors. (6abc.com)
  • Business and community response: Restaurants often respond with temporary closures, revised opening hours, or added security measures after violent incidents. Community leaders may call for interventions to address root causes (youth outreach, mental health supports, curfews).
  • The missing suspect: As of the report, one person had not been located; public tips to police were encouraged. That kind of public lead can be decisive in fast-moving local investigations. (6abc.com)

What this means for customers and workers

  • For customers: Keep interactions calm, especially late at night. If you witness violence, prioritize safety — get to a safe place, call 911, and preserve video only for law enforcement if you're asked to share it.
  • For workers: If your workplace lacks emergency procedures, raise the issue with management. Small protections — training on de-escalation, clear lockup procedures, access to a manager or dispatcher — can make a big difference.
  • For businesses: Reassess late-night staffing, lighting, camera coverage, and partnerships with local police. Investing in safety is both a moral and a business imperative.

Key takeaways

  • The February 21, 2026 Wendy’s incident in Ewing Township shows how quickly late-night disagreements can escalate into property damage and attempted assaults. (6abc.com)
  • Fast-food locations remain vulnerable because of hours of operation, limited security, and layouts that concentrate conflict. (cbsnews.com)
  • Video can spur rapid public reaction and aid investigations, but it also requires careful handling to avoid rushed judgments and misinformation.

My take

The clip is jarring, partly because it strips away the mundane expectation of a frictionless, anonymous late-night purchase. It’s a reminder that public safety and civility depend on small systems — sensible operating policies, visible deterrents, and community supports — not just individual good behavior. Protecting workers and customers doesn’t require grand gestures; it requires practical, often inexpensive steps plus clear communication and community cooperation.

Sources

Nano Banana 2: Google’s Photorealism Leap | Analysis by Brian Moineau

A photo editor that bends reality — sometimes spectacularly: Nano Banana 2, hands-on

Google just pushed another fast, polished step into the world where photos are as editable as text. Nano Banana 2 (officially Gemini 3.1 Flash Image) stitches the speed of Gemini Flash with the higher-fidelity tricks of Nano Banana Pro, and it’s now the default image model sprinkled across Google apps. That means anyone with access to Gemini, Search’s AI mode, or Google Lens can iterate edits and generate photorealism at four‑K resolutions in seconds.

This post walks through what Nano Banana 2 does well, where it still trips up, and what that means for creators, storytellers, and anyone who scrolls through images online.

Why this matters right now

  • Generative image models have shifted from novelty to everyday tools: marketing assets, social posts, family edits, quick mockups.
  • Google’s decision to make Nano Banana 2 the default across Gemini, Search, Lens, AI Studio, and Cloud brings higher-fidelity editing and faster iteration to a massive user base.
  • Improvements in text rendering, subject consistency, and web-aware generation make these tools more practical — and more potentially misleading — in real contexts.

What Nano Banana 2 actually brings to the table

  • Speed meets polish: It combines the “Flash” speed of Gemini with many of the Pro-level visual improvements (textures, lighting, higher resolution up to 4K). This means faster A/B iterations without waiting for long renders.
  • Better text and data visuals: Google highlights improved on-image text rendering and the ability to pull up-to-date web information for infographics and diagrams. That’s useful for mockups, posters, or quick data-driven visuals.
  • Consistent subjects and object fidelity: The model claims to keep the look of up to five characters consistent across edits and maintain fidelity for up to 14 objects in a single workflow — handy for sequential scenes or branded assets.
  • Platform integration and provenance: Outputs are marked with SynthID watermarking and C2PA content credentials to help identify AI-generated media. The model is rolling out across multiple Google products and available through APIs and Google Cloud integrations.

Where it dazzles

  • Photo edits that keep small details: When the source image contains distinct clothing patterns or jewelry, Nano Banana 2 often reproduces those subtle cues faithfully, even when the pose or scene changes.
  • Faster creative loops: For designers or social creators who test many variants, the speed difference is a real productivity win.
  • Cleaner text in images: Marketing mockups and greeting-card style images benefit from much less “wobbly text” than older models produced.

Where it still shows its seams

  • Reality punctured, not perfected: In tests reported by WIRED and hands-on reviews, faces and compositing can look unconvincing — heads pasted on mismatched bodies, odd facial proportions, or age morphing that overshoots the prompt.
  • Web-aware but fallible: The model uses real-time web context for things like weather or infographics, but it can pull stale or misaligned data (for example, an incorrect date) and embed that into an image. A human still needs to fact-check.
  • The uncanny valley remains for complex, bespoke scenes: Fast, high-energy action shots or implausible body positions sometimes return caricatured or “decoupaged” results rather than seamless photorealism.

The ethical and social brushstrokes

  • Democratised manipulation: Making high-quality image editing and realistic generation free and widely available lowers the technical barrier for image-altering content — both creative and deceptive.
  • Better provenance helps but isn’t foolproof: SynthID/C2PA metadata can indicate AI origin, but watermarks aren’t impossible to strip and content credentials aren’t universally checked by platforms or viewers.
  • Verification becomes more important: As generative visuals look more convincing, media literacy — checking sources, reverse image search, and trusting verified channels — becomes a practical necessity.

Use cases that feel right for Nano Banana 2

  • Rapid marketing and ad mockups where many variants are needed quickly.
  • Content that benefits from localized text and translations embedded directly into visuals.
  • Creative storytelling where consistent subject appearance matters (storyboards, character sequences).
  • Fun personal edits and social content — with a grain of skepticism about realism.

My take

Nano Banana 2 is a strong, pragmatic step forward: it doesn’t magically fix every compositing or realism problem, but it makes high-quality editing and generation markedly faster and more accessible. That combination is powerful — and a bit disquieting. When tools make it trivially easy to produce photorealistic fictions, the onus shifts further to platforms, creators, and consumers to signal intent and vet facts. Google’s provenance efforts are a positive move, but they’re not a substitute for skepticism.

If you’re a creator, think of Nano Banana 2 as an accelerant for ideas — great for drafts, storyboards, and mockups — but not always final-deliverable certainties for pixel-perfect realism. If you’re a consumer, keep the verification habits tight: check dates, look for provenance metadata, and assume an image could be crafted rather than captured.

Plausible next steps for the technology

  • Continued improvements in face/pose blending and consistency across complex scenes.
  • Wider adoption of content credentials by social platforms and image-hosting services.
  • More nuanced UI signals in apps (clearer provenance badges, easier access to creation metadata) so viewers can instantly tell when something is AI-made.

A few short takeaways

  • Nano Banana 2 makes pro-level image edits much faster and more widely available.
  • It improves text rendering, subject consistency, and fidelity, but can still produce unconvincing faces and compositing errors.
  • Provenance tools are baked in, but human verification remains essential.
  • For creators it’s a productivity boost; for the public it heightens the need for media literacy.

Sources


Related update: We recently published an article that expands on this topic: read the latest post.

Savory Slow Roasted Tomatoes with Filet of Anchovy | Made by Meaghan Moineau

Savory Slow Roasted Tomatoes with Filet of Anchovy

Intro

There’s something incredibly comforting about a kitchen filled with the sweet aroma of slow-roasting tomatoes. It takes me back to lazy summer afternoons spent in my grandmother’s kitchen, where time seemed to slow down just enough to savor each moment. Her garden was always brimming with ripe, juicy tomatoes, and she would often let me help her prepare them for roasting. Those afternoons, with the sun filtering through the curtains and the smell of herbs dancing in the air, are memories I cherish deeply. Today, I want to share a recipe that captures that nostalgia — Savory Slow Roasted Tomatoes with Filet of Anchovy.

Why You’ll Love It

This dish is a delightful blend of rich, sweet, and savory flavors that come together beautifully. The slow-roasted tomatoes become wonderfully caramelized, their natural sugars intensified by the long cooking process. The subtle hint of herbs, combined with the salty punch of anchovy filets, creates a complex flavor profile that is simply irresistible. Whether served as an appetizer, a side dish, or even a topping for bruschetta, these tomatoes are sure to impress your guests and become a staple in your culinary repertoire.

Ingredients

  • Round tomatoes
  • Any fresh herbs you like
  • Salt & pepper
  • Extra virgin olive oil
  • Anchovy filets

Instructions

  1. Preheat your oven to 150°C (280°F).
  2. Cut the top third off the tomatoes and discard the tops.
  3. Place the tomatoes on a baking tray lined with parchment paper.
  4. Sprinkle generously with salt, pepper, and your choice of fresh herbs.
  5. Drizzle the tomatoes with a generous amount of olive oil.
  6. Place the tray in the oven and roast for 4-6 hours, depending on the size of your tomatoes.
  7. Occasionally, baste the tomatoes with the juices and olive oil from the pan.
  8. Once the tomatoes are shriveled and begin to resemble sun-dried tomatoes, they are ready. They should still hold their shape and not become mushy.
  9. Remove from the oven and top each tomato with a whole anchovy filet.
  10. Serve warm or at room temperature, drizzling olive oil from the baking pan over the top.

Tips

To enhance the flavor, consider using a variety of herbs such as thyme, rosemary, or basil. Each brings a unique taste that complements the tomatoes beautifully. Additionally, choose tomatoes that are firm and ripe for the best texture and sweetness.

Variations & Substitutions

If anchovies aren’t to your liking, you can substitute them with capers or olives for a different type of umami flavor. For a vegetarian option, consider topping the tomatoes with crumbled feta cheese or a sprinkle of nutritional yeast.

Storage

These slow-roasted tomatoes can be stored in an airtight container in the refrigerator for up to a week. They also freeze well, allowing you to enjoy a taste of summer long after tomato season has passed. Simply thaw in the refrigerator before serving.

FAQ

Can I use cherry tomatoes instead of round tomatoes?

Yes, cherry tomatoes can be used, though the roasting time will be shorter. Keep an eye on them to ensure they don’t overcook.

What type of olive oil should I use?

Extra virgin olive oil is recommended for its rich flavor and health benefits. However, feel free to use any good-quality olive oil you have on hand.

Nutrition

This dish is not only delicious but also nutritious. Tomatoes are packed with vitamins C and K, potassium, and folate, while anchovies provide a good source of omega-3 fatty acids, protein, and essential nutrients. A serving of this dish offers a healthy dose of antioxidants and healthy fats, making it a guilt-free indulgence.

Conclusion

Savory Slow Roasted Tomatoes with Filet of Anchovy is a dish that beautifully marries simplicity with sophistication. It’s a recipe that not only fills your home with an irresistible aroma but also promises a burst of flavor with every bite. Whether you’re reminiscing about sunlit afternoons in a nostalgic kitchen or looking to create new memories with loved ones, this dish is sure to be a hit. Enjoy the luxurious taste and embrace the joy of slow cooking with this delightful recipe.

Related update: Savory Slow Roasted Tomatoes with Filet of Anchovy

Grilled Guacamole with Pistachios | Made by Meaghan Moineau

Grilled Guacamole with Pistachios

Intro

Welcome to a culinary journey where tradition meets innovation with our Grilled Guacamole with Pistachios. This recipe brings a smoky twist to the classic guacamole, elevating it to a gourmet experience that is perfect for any occasion. I remember the first time I tried grilled guacamole at a summer barbecue hosted by an old friend. The subtle smokiness intertwined with creamy avocado and crunchy pistachios was a revelation. Ever since that day, this dish has become a staple in my summer gatherings. Let me share this delightful recipe with you, and perhaps it will become a cherished part of your culinary repertoire as well.

Why You’ll Love It

This grilled guacamole is not your ordinary dip. Here are a few reasons why you’ll fall head over heels for this recipe:

  • Smoky Flavor: Grilling the vegetables adds a depth of flavor that is both intriguing and satisfying.
  • Texture Heaven: The crunchy pistachios contrast beautifully with the creamy avocado, creating a delightful texture.
  • Fresh and Nutritious: Packed with fresh ingredients and healthy fats, this recipe is both delicious and nutritious.
  • Versatile: Perfect as a dip, a topping for burgers, or even as a side dish.

Ingredients

  • 2 avocados, split
  • 1 teaspoon cumin
  • 1 ear of corn, split
  • 1/4 cup fresh cilantro, chopped
  • 2 cloves garlic, minced
  • 1/4 teaspoon red ground pepper
  • 1/4 teaspoon black fresh ground pepper
  • 2 jalapeño peppers, split
  • 1 lime, juiced
  • Olive oil, for brushing vegetables
  • 1 small onion, split
  • 1/4 cup pistachios, chopped
  • Salt to taste
  • 1/2 cup diced tomatoes

Instructions

  1. Lightly brush the avocado flesh, corn, onion, and jalapeño peppers with olive oil.
  2. Place all vegetables except the avocado in a grill basket and on the grill over medium-high heat.
  3. Place the avocados cut side up directly on the grill and cook for 2 minutes, then flip and cook cut side down for another 2 minutes. Remove and set aside.
  4. Allow the other vegetables to cook, turning, until they are tender and lightly charred (10-12 minutes). The corn may take a few minutes longer.
  5. When the vegetables have cooled enough to touch, cut the corn off the cob and dice the other vegetables.
  6. In a large bowl, combine the tomatoes, corn, onion, peppers, garlic, and cilantro, and toss to mix.
  7. Add the avocado to the mixture, lightly tossing and mashing it.
  8. Add the lime juice, cumin, red and black pepper, and salt. Mix together and adjust seasoning as needed.
  9. Add the pistachios, toss the mixture again, and serve.

Tips

  • Ensure your grill is properly heated before placing the vegetables to get that perfect char.
  • Adjust the level of spiciness by varying the amount of jalapeño and red ground pepper according to your preference.
  • Use ripe avocados for the best texture and flavor.

Variations & Substitutions

There are numerous ways to adapt this recipe to your tastes:

  • Cheese: Add crumbled feta or cotija cheese for an extra burst of flavor.
  • Nuts: Swap pistachios with pecans or almonds for a different nutty twist.
  • Herbs: Replace cilantro with parsley or basil for a different herbal note.

Storage

Store any leftover guacamole in an airtight container in the refrigerator for up to two days. To prevent browning, place a layer of plastic wrap directly on the surface of the guacamole before sealing the container.

FAQ

Can I make this recipe without a grill?

Absolutely! You can achieve a similar effect by using a grill pan on your stovetop. If neither is available, roasting the vegetables in the oven will also work, though you’ll miss a bit of the smoky flavor.

What if I don’t like spicy foods?

No problem! You can reduce or omit the jalapeño and red ground pepper for a milder version. Consider adding bell peppers for a sweet alternative.

Can I prepare this dish in advance?

Yes, you can grill the vegetables ahead of time and store them in the refrigerator. Assemble the guacamole just before serving to ensure the freshest flavor and texture.

Nutrition

This recipe is rich in healthy fats, fiber, and antioxidants. Avocados provide heart-healthy monounsaturated fats while pistachios offer protein and additional healthy fats. The vegetables add vitamins and minerals, making this a nutrient-dense dish perfect for any diet.

Conclusion

Grilled Guacamole with Pistachios is a delightful twist on the classic guacamole that brings a smoky flavor and a satisfying crunch from the pistachios. This dish is perfect for summer barbecues, family gatherings, or as a unique addition to your weeknight meals. With its combination of fresh, nutritious ingredients and vibrant flavors, it’s sure to become a favorite. We hope you enjoy making and sharing this recipe as much as we do!

Related update: Grilled Guacamole with Pistachios

Related update: Savory Slow Roasted Tomatoes with Filet of Anchovy

Caramelized Tofu & Gala Apple Salad | Made by Meaghan Moineau

Caramelized Tofu & Gala Apple Salad

Intro

There’s something magical about the combination of sweet and savory flavors, especially when they come together in a perfectly balanced dish. This Caramelized Tofu & Gala Apple Salad is a delightful example of that harmony. I remember the first time I experimented with this recipe; it was a chilly autumn afternoon, and I was inspired by the abundance of apples from a recent orchard visit with my family. The air was crisp and filled with laughter as we picked apples straight from the trees. This salad brings back those warm memories with every bite, combining the sweetness of Gala apples with the rich, savory notes of caramelized tofu.

Why You’ll Love It

This salad is not only delicious but also incredibly satisfying and nourishing. The caramelized tofu provides a hearty, protein-rich element, while the Gala apples add a fresh, crisp sweetness. The greens and pecans add texture and a nutty flavor that ties everything together. This dish is perfect for a light lunch, a side dish at dinner, or even as a part of a holiday feast.

Ingredients

  • 1/4 cup brown sugar
  • 2 tablespoons butter
  • 1 block extra-firm tofu
  • 1 diced Gala apple
  • 2 cloves garlic, minced
  • 4 cups green lettuce, washed and torn
  • 1/2 cup raw whole pecans
  • 1/4 cup water

Instructions

  1. First thing of action: bake your tofu. Preheat the oven to 350°F. Let the tofu sit on a kitchen towel for 15 minutes, turning once, to absorb moisture.
  2. Cut tofu into 1-inch cubes. Brush them lightly with vegetable oil. Place them on a baking sheet and bake for 35 minutes, turning once.
  3. In a small pan, heat butter and garlic on low until the butter has just almost melted.
  4. Add the apples, tofu, and salt. Bring heat up to medium, and cook for about 4 minutes.
  5. Add the water and stir every minute for the next 6-7 additional minutes, or until there is little moisture left in the pan.
  6. Turn off the heat, and add the brown sugar. Stir to incorporate all of the sugar.
  7. Place the caramelized mixture on top of the salad lettuce and garnish with pecans.

Tips

To get the best texture out of your tofu, make sure to press it adequately to remove excess moisture. This step is crucial for achieving that perfect golden-brown crust when baking. Additionally, using a high-quality non-stick pan will make caramelizing the tofu and apples a breeze.

Variations & Substitutions

Feel free to customize this salad to your liking. If you prefer a different type of apple, Honeycrisp or Fuji would be excellent choices too. For a spicy kick, consider adding a pinch of cayenne pepper to the caramelization process. If you’re aiming for a nut-free version, sunflower seeds offer a similar crunch without the allergens.

Storage

This salad is best enjoyed fresh, but if you have leftovers, store the caramelized tofu and apples separately from the lettuce to prevent wilting. Keep them in an airtight container in the refrigerator for up to three days. When ready to serve, gently reheat the tofu and apples in a pan and toss them with fresh lettuce.

FAQ

Can I make this salad vegan?

Absolutely! Simply substitute the butter with a plant-based alternative, such as margarine or olive oil. The salad will be just as delicious.

What can I use instead of brown sugar?

If you’re looking for a healthier alternative, try using maple syrup or coconut sugar. Both will provide a similar sweetness and caramelization effect.

How can I make the tofu extra crispy?

To achieve extra crispy tofu, ensure that it’s thoroughly pressed to remove moisture and bake it at a slightly higher temperature, around 375°F, for an additional 5-10 minutes.

Nutrition

This Caramelized Tofu & Gala Apple Salad is not only delicious but also packed with nutrients. Tofu is a fantastic source of plant-based protein and contains all nine essential amino acids. Gala apples provide dietary fiber and vitamin C, while pecans are rich in healthy fats and antioxidants. Together, these ingredients make for a balanced and nourishing meal.

Conclusion

With its delightful blend of flavors and textures, the Caramelized Tofu & Gala Apple Salad is sure to become a favorite in your recipe collection. It’s a dish that not only satisfies the palate but also brings back cherished memories of family and nature. I hope this salad brings as much joy to your table as it does to mine. Enjoy!

Related update: Caramelized Tofu & Gala Apple Salad

Related update: Chapchae (Korean Stir-Fried Noodles)

Related update: Zucchini Ribbon Caper Salad

Julia Child’s Vichyssoise | Made by Meaghan Moineau

Julia Child’s Vichyssoise: A Timeless Classic for Every Season

Intro

There’s something incredibly comforting about a bowl of soup, particularly one that carries the rich history and culinary expertise of a legend like Julia Child. When I was a child, my grandmother would often make vichyssoise on Sunday afternoons, filling the kitchen with its soothing aroma. Sitting at the kitchen table, I would eagerly watch her every move, fascinated by how a few simple ingredients transformed into a luxurious dish. This soup not only warms the belly but also the heart, evoking memories of family gatherings and laughter. Today, I share with you the recipe for Julia Child’s Vichyssoise, a chilled soup that’s perfect for any season and situation.

Why You’ll Love It

Julia Child’s Vichyssoise is more than just a soup; it’s a culinary experience. Here’s why you’ll love making and eating it:

  • Simple Ingredients: This recipe uses basic, easily accessible ingredients, making it convenient for any home cook.
  • Rich and Creamy: The combination of leeks and potatoes creates a perfectly smooth and creamy texture.
  • Versatile: Whether served hot or cold, this soup is delightful in any weather.
  • Elegant Presentation: With a simple garnish of chives or parsley, it’s an impressive dish for entertaining.
  • Nostalgic Comfort: Each spoonful is a trip down memory lane for those who grew up with classic French cuisine.

Ingredients

  • White leeks
  • Diced baking potatoes (recommended)
  • Water
  • Salt
  • Sour crème fraîche
  • Fresh chives

Instructions

  1. Bring the leeks, potatoes, and water to the boil in a saucepan.
  2. Salt lightly, cover partially, and simmer for 20-30 minutes, or until the vegetables are tender.
  3. Puree the soup if you wish for a smoother texture.
  4. Taste and correct the seasoning as needed.
  5. Chill the soup thoroughly.
  6. Once chilled, stir in a little more crème fraîche if desired.
  7. Taste carefully again and correct the seasoning.
  8. Top each serving with a sprinkle of chives or parsley and a drizzle or dollop of crème fraîche.

Tips

To ensure your Vichyssoise is perfect every time, keep these tips in mind:

  • Use Fresh Ingredients: The flavor of your soup depends heavily on the freshness of your leeks and potatoes.
  • Chill Thoroughly: For the best flavor, make sure the soup is well chilled before serving.
  • Adjust Consistency: If the soup is too thick, you can thin it out with a bit more water or broth.

Variations & Substitutions

While Julia Child’s original recipe is a classic, there are endless ways to make it your own:

  • Herbs: Add fresh herbs like thyme or basil for an additional layer of flavor.
  • Dairy-Free: Substitute the crème fraîche with a plant-based cream to make the soup vegan-friendly.
  • Broth: Swap water for chicken or vegetable broth for a richer taste.

Storage

This soup is perfect for make-ahead meals. Store it in an airtight container in the fridge for up to three days. If you want to enjoy it later, freeze it for up to two months. Just be sure to thaw it in the fridge overnight before reheating.

FAQ

Can I use other types of potatoes?

Yes, absolutely! While baking potatoes are recommended for their texture, you can use any type of potatoes you have on hand. Just be aware that the texture and flavor may vary slightly.

Is it necessary to puree the soup?

Pureeing the soup is optional but recommended for a smooth, creamy texture. If you prefer a chunkier soup, you can skip this step.

How can I make this recipe vegetarian or vegan?

This recipe is naturally vegetarian if you use vegetable broth in place of water. To make it vegan, replace the crème fraîche with a non-dairy alternative. The rest of the ingredients are already plant-based.

Nutrition

Vichyssoise is a nutritious option, thanks to its vegetable-rich base. While precise nutritional values depend on the specific quantities and brands used, a serving typically contains around 150-200 calories, with a healthy amount of vitamins and minerals derived from the leeks and potatoes. For a lighter version, reduce or omit the crème fraîche.

Conclusion

Julia Child’s Vichyssoise is a testament to the beauty of simplicity in cooking. It’s a dish that transcends time and trends, offering a luxurious yet comforting experience with every spoonful. Whether you’re revisiting childhood memories or creating new ones, this recipe is sure to become a beloved staple in your home. So, gather your ingredients, channel your inner Julia Child, and savor the delight of homemade vichyssoise.

Related update: Julia Child’s Vichyssoise

Related update: Pulled Pork Sandwich with Mango BBQ sauce

Related update: Grilled Guacamole with Pistachios

Related update: Loaded Baked Potato Soup with Crispy-Fried Potato Skins

Marina F1 Free-Run: Spectacle and Mayhem | Analysis by Brian Moineau

When a Free F1 Showrun Became a Neighborhood Free-for-All

The roar of an F1 engine turned a Sunday in the Marina into a magnet for tens of thousands — and for a few hours the neighborhood looked less like a carefully managed showcase and more like the edges of a music festival that never got its permits. Red Bull’s free Showrun on February 21, 2026, delivered high-speed spectacle and social-media moments: donuts, skids, and an extra helping of chaos as people climbed roofs, trespassed onto private property, and — yes — urinated in yards. San Francisco police ultimately reported no arrests and called the event “extremely safe,” but neighbors’ accounts and local reporting tell a messier story about planning, public space, and how cities host blockbuster events.

Why everyone showed up (and why that matters)

  • Free access + Formula 1 hype = huge turnout. The Red Bull Showrun in the Marina was advertised as an open, public showcase featuring real F1 cars and drivers, which lowered barriers for attendance and raised expectations for spectacle.
  • The Marina is visually perfect for an F1 promo: waterfront views, a straight stretch of road (Marina Blvd.), and dense urban population nearby. That makes it attractive for organizers — and irresistible for thousands of onlookers.
  • What was missing was infrastructure: elevated viewing platforms, adequate restroom and trash facilities, clear crowd flows, and more visible, active crowd control — all the details that turn a pop-up spectacle into a safely run public event.

Neighborhood accounts vs. official line

  • Residents describe roof-climbing, trampling of landscaping, broken tiles and planters, damaged windows, and people relieving themselves on private property. Multiple accounts to local outlets said the scale of the crowd overwhelmed nearby streets and left behind visible damage. (sfstandard.com)
  • SFPD’s public statement to The San Francisco Standard: “Overall, the event was extremely safe, and there were no major public safety incidents.” The department said it responded to calls but made no arrests. That contrast — a calm official assessment versus vivid resident complaints — is at the heart of the controversy. (sfstandard.com)
  • Social media and neighborhood threads amplified the sense that planning and resource allocation were insufficient: limited policing presence at critical choke points, overwhelmed cell service, and a lack of amenities and signage. (reddit.com)

The mayor’s role and optics

  • Mayor Daniel Lurie donned a branded suit and appeared in promotional clips, a move some called a PR-friendly photo op. He later characterized such disruptions as part of the city’s comeback momentum. That framing — prioritize big events and accept some inconveniences — sits uneasily with residents who faced property damage and sanitation issues. (sfstandard.com)
  • When city officials embrace headline events, they also inherit responsibility for ensuring public-safety planning and neighborhood protections. The lack of clear pre-event coordination and post-event accountability has drawn criticism from local supervisors and community leaders. (sfstandard.com)

What went wrong — and what could have helped

  • Insufficient crowd management: no visible, phased entry points or dedicated bleachers meant people improvised with ladders, signs, balconies, and roofs.
  • Not enough public services: portable toilets, trash capacity, first-aid stations, and on-the-ground marshals were reportedly minimal or poorly signposted.
  • Communications and coordination gaps: residents said they received little advance notice and saw a limited on-site presence of city leadership directing logistics.
  • Traffic and emergency access: gridlock stretched across multiple neighborhoods, raising real concerns about ambulance access and urgent response capability. (axios.com)

Takeaway bullets

  • The formula for a successful free public spectacle requires as much logistics as it does hype — sightlines, sanitation, crowd flows, and emergency planning matter.
  • Official assessments that focus on arrests or major incidents don’t always capture the everyday harms neighbors experience (property damage, unsanitary conditions, feeling unheard).
  • High-profile events offer civic benefits — economic activity, tourism, global visibility — but those must be balanced with advance planning and local protections.
  • City leaders and promoters share responsibility: one provides the platform and visibility, the other must ensure the neighborhood survives the afterparty intact.

My take

Large-scale urban events are a test of civic muscle. The Marina Showrun proved that excitement and spectacle are easy to manufacture; the harder part is engineering for tens of thousands of unpredictable humans in a tight space. Calling the day “extremely safe” because there were no arrests feels incomplete. Safety isn’t just arrests avoided — it’s protecting property, ensuring sanitary conditions, preserving access for emergencies, and leaving neighborhoods as intact as they were before the party.

If San Francisco wants the benefits of world-class, headline-making events, the city needs to match that ambition with event infrastructure: meaningful advance coordination with neighbors, clear sightline solutions (paid or free elevated platforms), designated stewarding crews, and contingencies for crowd overflow. Otherwise the story repeats: thrillers on camera, headaches at home.

Sources


Related update: We recently published an article that expands on this topic: read the latest post.


Related update: We recently published an article that expands on this topic: read the latest post.


Related update: We recently published an article that expands on this topic: read the latest post.

Mashed Potatoes with Garlic, Sage & Goat Cheese | Made by Meaghan Moineau

Mashed Potatoes with Garlic, Sage & Goat Cheese

Intro

There’s a certain magic in the air when the aroma of garlic and sage wafts through the kitchen, bringing back fond memories of family gatherings and celebrations. I remember my grandmother’s cozy kitchen, where we would gather around the table, eagerly waiting for her famous mashed potatoes to be served. The rich, creamy texture and the subtle tang of goat cheese would melt in our mouths, creating a symphony of flavors that lingered long after the meal was over. Today, I’m excited to share with you a recipe that brings those cherished memories to life: Mashed Potatoes with Garlic, Sage & Goat Cheese. This dish is a perfect combination of comfort and elegance, making it a delightful addition to any meal.

Why You’ll Love It

This recipe for Mashed Potatoes with Garlic, Sage & Goat Cheese is a game-changer for several reasons:

  • Rich and Creamy: The addition of goat cheese provides a luxurious creaminess that elevates traditional mashed potatoes.
  • Flavorful: Garlic and sage add depth and complexity, transforming a simple side dish into a gourmet experience.
  • Easy to Make: With just a handful of ingredients and straightforward instructions, you’ll have this dish ready in no time.
  • Versatile: Perfect for holiday feasts, intimate dinners, or as a comforting treat on a chilly evening.

Ingredients

  • 4 large baking potatoes, peeled and cubed
  • 3 cloves of garlic, minced
  • 1 Chavrie goat cheese pyramid (5.3 oz)
  • 2 tablespoons olive oil
  • 1 tablespoon fresh sage, finely chopped
  • Salt and black pepper to taste

Instructions

  1. In a medium saucepan, cook the potatoes in salted water until tender, about 15 minutes.
  2. Drain the potatoes and return them to the saucepan.
  3. While still warm, add the olive oil, garlic, and Chavrie Goat Cheese.
  4. Whip the potatoes with hand-held mixers until the ingredients are blended and the desired consistency is obtained.
  5. Season with salt and black pepper to taste.
  6. Garnish with fresh sage before serving.

Tips

  • Use Starchy Potatoes: Russet or Yukon Gold potatoes work best for this recipe, providing a fluffy and creamy texture.
  • Don’t Overmix: To avoid gummy mashed potatoes, mix just until the ingredients are combined.
  • Infuse the Oil: For an extra flavor boost, gently heat the olive oil with the minced garlic before adding it to the potatoes.

Variations & Substitutions

  • Dairy-Free Option: Substitute the goat cheese with a dairy-free cheese alternative for a lactose-free version.
  • Herb Variations: Experiment with different herbs like rosemary or thyme for a unique twist.
  • Cheese Alternatives: Try using cream cheese or feta for a different flavor profile.

Storage

Store any leftover mashed potatoes in an airtight container in the refrigerator for up to 3 days. To reheat, gently warm them on the stove over low heat, adding a splash of milk or cream to restore their creamy consistency.

FAQ

Can I prepare the mashed potatoes ahead of time?

Yes, you can prepare the mashed potatoes a day in advance. Simply reheat them gently on the stove or in the microwave before serving, adding a little cream or milk to bring back their creamy texture.

What can I serve with these mashed potatoes?

These mashed potatoes are incredibly versatile and pair well with a variety of dishes, including roasted chicken, grilled steak, or even a hearty vegetable stew.

Can I freeze the mashed potatoes?

While it’s possible to freeze mashed potatoes, the texture may change upon thawing. If you choose to freeze them, store in an airtight container and reheat gently, adding cream or milk to improve texture.

Nutrition

Each serving of these mashed potatoes provides approximately:

  • Calories: 230
  • Protein: 5g
  • Carbohydrates: 25g
  • Fat: 12g
  • Fiber: 3g
  • Sugar: 2g

Conclusion

Mashed Potatoes with Garlic, Sage & Goat Cheese are more than just a side dish—they’re a celebration of flavors that bring warmth and joy to any table. Whether you’re hosting a holiday gathering or simply treating yourself to a cozy meal at home, this recipe is sure to impress. With its blend of rich, creamy textures and aromatic herbs, you’ll find yourself returning to this dish time and again. So gather your ingredients, embrace the nostalgia, and savor the comforting taste of these gourmet mashed potatoes. Happy cooking!

Related update: Mashed Potatoes with Garlic, Sage & Goat Cheese

Chinese Potstickers | Made by Meaghan Moineau

Delicious Chinese Potstickers: A Culinary Adventure

Intro

Growing up, Chinese potstickers were a staple in my household. I remember the comforting aroma wafting through the kitchen as my grandmother expertly folded each dumpling with swift, practiced motions. We would gather around the kitchen table, sharing stories and laughter as we eagerly awaited the moment we could dig into these delectable treats. There’s something about these crispy, juicy dumplings that instantly transports me back to those warm family gatherings. Today, I’m excited to share this cherished recipe with you so you can create your own memories around the table with these scrumptious Chinese potstickers.

Why You’ll Love It

This Chinese potsticker recipe is a delightful blend of flavors and textures that will satisfy your cravings for a savory, mouthwatering treat. They’re not only delicious but also fun to make, especially if you involve family or friends in the dumpling-folding process. The fragrant filling, coupled with the crispiness of the wrapper, makes them an irresistible dish that you’ll want to make again and again. Plus, they’re perfect for serving at parties, family dinners, or simply as a comforting snack.

Ingredients

  • 200g lean ground pork (or ground chicken)
  • 100g canned water chestnuts (or spinach/cabbage)
  • 1 teaspoon sea salt
  • 1 teaspoon fine sugar
  • 1/2 teaspoon ground black pepper
  • 2 teaspoons light soy sauce
  • 2 teaspoons sesame oil
  • 1 tablespoon Shaoxing Huatiao wine
  • 2 to 3 tablespoons finely chopped scallions or spring onions
  • Dumpling wrappers
  • Plain flour, for dusting
  • 2 to 3 tablespoons vegetable oil
  • 1/3 cup water

Instructions

  1. Place 200g of ground pork in a large mixing bowl. If preferred, pork may be substituted with ground chicken.
  2. Add 1 teaspoon of sea salt, 1 teaspoon of fine sugar, 1/2 teaspoon of ground black pepper, 2 teaspoons of light soy sauce, 2 teaspoons of sesame oil, and 1 tablespoon of Shaoxing Huatiao wine.
  3. Place 100g of canned water chestnuts in a chopper/blender and chop them into small pieces. Add the chopped water chestnuts to the pork mixture. If preferred, use spinach or cabbage in place of water chestnuts.
  4. Add 2 to 3 tablespoons of finely chopped scallions or spring onions to the pork mixture. Combine all the filling ingredients well.
  5. Thaw the dumpling wrappers if they are frozen and keep them well covered until ready to use. Dust a dish and the table generously with flour.
  6. Fill each dumpling wrapper with about 1.5 teaspoons of the prepared pork filling. Prepare a bowl of water for sealing the wrappers.
  7. Dip a finger into the water and lightly wet the rim of each dumpling wrapper. Bring the wrapper together till the opposite ends meet, then gently push the filling into the wrapper and pinch the top tip to seal it.
  8. From the center, fold a pleat on one side and bring it to the other side of the dumpling. Repeat to create two more pleats, ensuring each side has three pleats. Repeat on the other end of the dumpling.
  9. Place the prepared dumplings in a well-floured dish, ensuring they do not touch each other. Set aside or freeze until ready to cook.
  10. To cook, add 2 to 3 tablespoons of vegetable oil to a very hot frying pan. Cook potstickers in batches, ensuring the flat surfaces face down.
  11. Pan fry until the bottoms are golden brown, then add 1/3 cup of water to the pan. Cover immediately and steam for 4 to 5 minutes.
  12. Once the water evaporates, remove the cover and let the dumplings sit in the hot pan for another minute to crisp up the base.
  13. Gently transfer the potstickers to a plate and serve immediately with a vinegar dip made with balsamic or black Chinese vinegar and thinly sliced ginger. Soy sauce, chili oil, or sesame oil can also be added to the dipping sauce.

Tips

When making potstickers, it’s important to ensure all the edges are sealed tightly to prevent the filling from spilling out. If you’re new to pleating dumplings, practice makes perfect! Don’t worry if your first few attempts aren’t perfect—each potsticker will still taste delicious. Additionally, make sure to use a non-stick pan to ensure the dumplings don’t stick during cooking. And remember, patience is key when frying and steaming to achieve that perfect crispy bottom.

Variations & Substitutions

This potsticker recipe is highly versatile and can be adapted to suit your tastes. You can swap the pork for ground chicken, turkey, or even shrimp for a different protein profile. Vegetarians can enjoy these dumplings by substituting the meat with finely chopped mushrooms or tofu. Feel free to experiment with different vegetables like finely chopped carrots or bell peppers for added color and texture in the filling. Additionally, you can spice things up by adding a pinch of chili flakes or a few drops of chili oil to the filling for a hint of heat.

Storage

Uncooked potstickers can be stored in the freezer for future enjoyment. Simply place them on a baking sheet in a single layer, making sure they don’t touch each other, and freeze until solid. Once frozen, transfer them to a zip-top bag or airtight container for long-term storage. Cooked potstickers can be refrigerated in an airtight container for up to three days. To reheat, simply pan fry them again until heated through.

FAQ

Can I make potstickers in advance?

Yes! Potstickers can be made in advance and stored in the freezer. Just follow the instructions up to the cooking step, then freeze the uncooked dumplings. When you’re ready to enjoy them, simply cook them directly from frozen, adding a couple of extra minutes to the steaming time.

What dipping sauce pairs well with potstickers?

Potstickers are traditionally enjoyed with a simple vinegar dipping sauce made from balsamic or black Chinese vinegar and thinly sliced ginger. You can also add soy sauce, chili oil, or sesame oil for extra flavor. Feel free to experiment with different combinations to find your perfect dipping sauce!

Can I use homemade dumpling wrappers?

Absolutely! Homemade dumpling wrappers can add a personal touch to your potstickers. If you have the time and inclination, making your own wrappers can be a fun and rewarding experience. Just make sure to roll them out thinly and evenly for best results.

Nutrition

While nutritional content can vary, a typical serving of Chinese potstickers (3-4 dumplings) may contain around 200 calories, with a balance of protein, carbohydrates, and fats. They’re a great source of protein and can be part of a balanced diet when enjoyed in moderation.

Conclusion

Chinese potstickers are more than just a delightful treat; they’re a gateway to cherished memories and shared experiences around the table. Making these dumplings at home allows you to bring a taste of traditional Chinese cuisine into your own kitchen. Whether you’re a seasoned home cook or a beginner looking to try something new, this recipe offers a wonderful opportunity to explore your culinary skills. So gather your ingredients, call your loved ones, and embark on a delicious adventure with these homemade Chinese potstickers. Enjoy the flavors, the process, and most importantly, the company as you savor every bite!

Related update: Chinese Potstickers

Related update: Korean Sweet n Sour Chicken

Gold Medal Hug: Spotlight on Caregivers | Analysis by Brian Moineau

The hug that changed the narrative: what Elana Meyers Taylor’s embrace of her nanny tells us about caregiving

The image is simple and powerful: Elana Meyers Taylor, gold medal around her neck at the 2026 Winter Olympics, bends down and hugs the woman who helped raise her children while she chased a lifetime dream. The first person she hugged after standing on sport’s highest podium was her nanny. That moment—captured in photos and shared across social media—did more than warm hearts. It pulled a spotlight onto the invisible labor and complex logistics that make elite achievement possible.

Why that hug resonated

  • It interrupts the romantic myth of lone genius and replaces it with a truer story: success is a team sport.
  • It makes visible a caregiver who usually operates offstage, reminding viewers that parenting and elite performance often rely on paid and unpaid support.
  • It humanizes a champion who is also a mother of two children with special needs, showing the emotional and practical stakes behind every training run, flight, and night away from home.

Those reactions aren’t accidental. Commentators, parent advocates, and caregiving experts used the moment to sharpen a conversation that’s been quietly building: when public figures acknowledge their caregiving teams, it can reshape cultural expectations about work, family and who gets credit.

Context: Elana’s story and the caregiving reality

Elana Meyers Taylor’s gold was the culmination of a long career—five Olympics, multiple medals—and a life lived in public and private challenge: managing training, travel, injuries, and parenting two sons who are deaf and require specialized attention. She thanked a wide circle—her husband, her parents, and her nannies—then ran to hug Macy, the nanny who helps care for her children. That photo became shorthand for a larger truth: elite performance often rides on a scaffolding of care. (yahoo.com)

The moment also lands against stark statistics. Care.com’s 2026 Cost of Care Report finds nearly half of U.S. parents say they don’t have enough help, and many families spend roughly 20% of income on child care. The report lays bare the emotional and financial strain of piecing together childcare—something many working parents know intimately. When a world-champion athlete publicly credits her nanny, it validates an experience shared by millions: success frequently depends on paid caregivers and informal village networks. (care.com)

What this moment reveals about caregiving as infrastructure

  • Care is core, not peripheral. From elite sport to corporate leadership, caregiving enables participation and peak performance. Acknowledging that publicly helps destigmatize the practical choices parents make—hiring nannies, relying on relatives, or creating hybrid care plans.
  • Visibility can drive respect. When public figures name caregivers in their victory narratives, they shift how society values caregiving work—encouraging respect, fair wages, and professional recognition rather than secrecy or embarrassment.
  • The gap between gratitude and policy. A hug is symbolic and beautiful; policy change is the structural next step. Families still face unaffordable care, burnout, and career trade-offs. Visibility should be a step toward concrete supports—subsidies, employer benefits, and accessible care options—so gratitude doesn’t remain performative. (care.com)

Cultural ripple effects

  • Normalizing teamwork at home: When athletes and celebrities publicly credit caregivers, it validates building a “village” rather than hiding help. That can reduce shame around paid childcare and encourage parents to ask for the support they need.
  • Elevating caregiver professionalism: Spotlight moments can reframe nannies, family members, and childcare workers as skilled contributors to household stability and professional success—not just “help.”
  • Sparking public conversation: Images from stadiums and podiums travel fast. They can prompt news cycles, op-eds, parenting communities, and policymakers to reexamine caregiving’s social value—and to demand better supports. (yahoo.com)

Practical implications for families and employers

  • For parents: owning your caregiving network publicly (when comfortable and safe) can normalize the reality that no one does it all alone. It also opens conversations with employers about flexible schedules and caregiving benefits.
  • For employers: visible moments like this are a reminder that benefits matter—employer-subsidized childcare, flexible leave, and caregiver resources aren’t perks; they remove barriers that keep talented people from contributing their best.
  • For policymakers: the crisis in care is measurable and costly. Reports show measurable economic harm when caregiving is under-resourced; policy responses (tax credits, expanded subsidies, investment in childcare infrastructure) would reduce that drag. (care.com)

Takeaways worth keeping

  • Public gratitude matters—it humanizes success and makes caregiving visible.
  • Visibility alone isn’t enough; it should fuel respect, better pay and real policy fixes.
  • Caregiving is infrastructure: when it’s stable and affordable, more people can pursue demanding careers, including in sport and other high-performance fields.

My take

That hug on the podium was more than a touching image; it was a quiet rebuke to cultural stories that equate success with singular sacrifice. Elana Meyers Taylor’s embrace acknowledged a truth many parents live: achievement usually rests on a web of relationships, labor, and love. Let that image do more than make us feel good—let it nudge us toward practical change that honors and sustains the caregivers who make so much possible.

Sources


Related update: We recently published an article that expands on this topic: read the latest post.


Related update: We recently published an article that expands on this topic: read the latest post.

Chattanooga Win, Southern Momentum Stalls | Analysis by Brian Moineau

When a Win Isn't the Wave We Expected

Two years after a surprising victory in Chattanooga, Tennessee, Volkswagen workers have just ratified their first United Auto Workers contract — a clear, emphatic win for those on the shop floor. But the larger story is less tidy than a parade of banners and confetti: what looked in 2024 like the beginning of a Southern labor renaissance has, so far, been a sputter rather than a surge. The Chattanooga pact proves unions can win in the South, but it also highlights how hard it is to convert a single historic triumph into a sweeping movement.

What happened in Chattanooga

  • Volkswagen Chattanooga workers voted to ratify their first UAW contract in February 2026, approving a deal that includes a lump-sum bonus, a 20% wage increase over the contract’s life (through February 2030), lower health-care premiums and added job-protection language. The ratification passed overwhelmingly. (nwpb.org)

  • The path to that contract was long: the plant had twice voted against unionization (2014, 2019) before joining the UAW in April 2024. Negotiations extended for many months before the tentative agreement was announced in early February 2026. (nwpb.org)

Why the win mattered — and still matters

  • Symbolic weight: A union victory at a foreign-owned Southern auto plant felt seismic. The South has been the key battleground because automakers shifted production there in return for generous incentives, historically keeping wages and organizing weak to protect their investments. A Chattanooga union was a crack in that model. (nwpb.org)

  • Tangible gains: The new contract raises pay to levels competitive with — or higher than — nonunion wages in the region, and it secures health-care and job protections that change workers’ day-to-day calculus about long-term security. Those are real effects for families in Chattanooga. (vpm.org)

The momentum question: why the spark didn’t become a prairie fire

Two years on, the broader campaign to unionize the South hasn’t produced the cascading victories many organizers hoped for. Several forces explain why:

  • Deep-pocketed countermeasures. State and corporate incentives — plus political opposition and targeted anti-union messaging — continue to raise the cost and complexity of organizing in Southern states. That infrastructure didn’t evaporate after Chattanooga voted to unionize. (theguardian.com)

  • Local variations matter. Automotive plants are not identical: ownership structure, workplace culture, local politics and existing pay/benefits differ widely. Volkswagen’s situation — with particular grievances among workers and a high-profile national UAW push — was a specific alignment that won once but is not easily replicated. (wlrn.org)

  • Time and fatigue. Organizing takes sustained effort. The UAW’s campaign invested heavily (including a multi-million dollar push to organize Southern plants) and saw big wins with the Big Three that energized members — yet translating that into dozens of successful drives requires years of patient groundwork. One landmark contract doesn’t automatically create the field infrastructure for dozens more. (nwpb.org)

  • Competing employer strategies. Nonunion automakers have raised pay and improved benefits in recent years to blunt the union pitch — an effective short-term deterrent. For example, some nonunion employers have announced significant wage increases to remain competitive for labor. (nwpb.org)

The implications for the labor movement

  • Proof of possibility: Chattanooga demonstrates that unions can win meaningful contracts in the South — including at foreign-owned plants — and that those contracts can offer substantial economic improvement. That evidence will help organizers and swing workers make the case on the ground. (vpm.org)

  • Organizing remains tactical: Future success will rely on tailored, long-term organizing, not just national headlines. Community ties, local legal strategies, and worker-to-worker trust-building matter more than media momentum. (theguardian.com)

  • Political and economic chess continues: States and companies that benefitted from Southern plant construction still have incentives to resist unionization. The fight will be as much about laws, incentives and political pressure as it is about shop-floor conversations. (apnews.com)

Lessons for organizers, workers and observers

  • Wins need follow-through: Ratifying a good contract is the start of a new phase — stewarding membership, demonstrating value to non-members, and building local capacity are critical next steps.

  • Local wins don’t universalize: Expect variation. What worked in Chattanooga won’t automatically work at every plant in Alabama, Georgia, or other Southern states.

  • Messaging matters: Demonstrating concrete improvements (pay, benefits, job security) — not abstract ideals — is the clearest way to persuade skeptical workers in regions where union ties are weak.

How workers see it

The contract’s terms — lump-sum bonuses, a 20% wage increase, lower health premiums and explicit plant-commitment language — are meaningful to many employees who had felt stuck despite the plant’s success. For them, this is a material improvement in daily life and future security. But some workers voiced the same mixed feeling: proud of the progress, yet aware that the broader movement must keep building if this is to become more than an isolated victory. (vpm.org)

My take

Chattanooga’s contract is an important, heartening win — a necessary proof point that organizing in the modern Southern auto industry can pay off. But single victories are not the same as structural change. The UAW and organizers have won a persuasive argument: unions can deliver. Turning persuasion into scale requires patience, local investment and political shifts that aren’t negotiated at the bargaining table alone.

If the UAW and allied movements want to convert this encouraging result into a lasting regional revival, they’ll need to translate headlines into long-term infrastructure: local leadership development, legal strategy to counter state resistance, and sustained organizing that addresses the everyday questions workers ask — not just the rallying cries.

Final thoughts

Historic votes and big numbers make for compelling stories, but real power accumulates slowly. Chattanooga’s workers did what organizers had long hoped for — they won a contract that changes lives. The next challenge is making sure that win becomes a stable step on a longer staircase, not an isolated summit.

Sources


Related update: We recently published an article that expands on this topic: read the latest post.

Rustic Brie Toasts with Wild Mushroom, Cranberry and Shallot | Made by Meaghan Moineau

Rustic Brie Toasts with Wild Mushroom, Cranberry, and Shallot

Intro

Growing up, my family always gathered around the kitchen on chilly autumn evenings, our home filled with the cozy aroma of freshly baked bread and warm, melted cheese. These moments are etched in my memory, and they inspire my love for creating comforting, rustic dishes that bring people together. Today, I’m excited to share a recipe that not only embodies that comfort but also highlights the beautiful flavors of the season: Rustic Brie Toasts with Wild Mushroom, Cranberry, and Shallot.

This recipe came to life during a trip to the farmers’ market, where the vibrant colors of fresh produce and the earthy scent of wild mushrooms inspired me to create something special. The combination of creamy brie, tangy cranberries, and savory mushrooms on a crunchy baguette makes for the perfect appetizer or snack to enjoy with loved ones.

Why You’ll Love It

  • Simple yet sophisticated: This dish is easy to prepare but offers a gourmet experience.
  • Seasonal flavors: It captures the essence of fall with its earthy and tangy components.
  • Perfect for gatherings: These toasts are ideal for a party appetizer or a cozy night in.

Ingredients

  • Diced wild mushrooms
  • Diced shallot
  • 1/4 cup dried cranberry (juice sweetened if possible)
  • Fresh thyme
  • Rustic baguette
  • Olive oil
  • Wedge of beautiful brie cheese
  • Salt and pepper

Instructions

  1. Start by pre-heating your oven to 350 degrees Fahrenheit.
  2. While the oven is pre-heating, heat the olive oil in a sauté pan over medium heat.
  3. Add the diced shallot, wild mushrooms, cranberries, and fresh thyme to the pan.
  4. Sauté for a few minutes until the shallot begins to wilt. Season with salt and pepper to taste.
  5. Set the sautéed mixture aside to cool slightly.
  6. Slice the rustic baguette into 12 pieces and place one slice of brie on each slice of bread.
  7. Top each piece with a spoonful of the cranberry, mushroom, and shallot mixture.
  8. Place the prepared toasts on an oiled cookie sheet.
  9. Bake in the oven for about 15 minutes or until the brie is just melted.
  10. Serve warm and enjoy the delightful blend of flavors.

Tips

  • For the best texture, use a crusty rustic baguette that can hold up to the toppings.
  • Feel free to prepare the mushroom mixture ahead of time and assemble the toasts just before baking.
  • When selecting a brie, choose one that is creamy and slightly firm for easy slicing.

Variations & Substitutions

  • If you prefer a sweeter flavor, drizzle a bit of honey over the toasts before baking.
  • Experiment with different herbs such as rosemary or sage for a unique twist.
  • If brie isn’t your favorite, try using camembert or goat cheese as an alternative.

Storage

These toasts are best enjoyed fresh from the oven. However, if you have leftovers, store them in an airtight container in the refrigerator for up to two days. To reheat, place them in a pre-heated oven at 350 degrees Fahrenheit for about 5 minutes or until warmed through.

FAQ

Can I use fresh cranberries instead of dried?

Yes, you can use fresh cranberries, but you may want to cook them down with a bit of sugar to balance their tartness.

What can I serve with these toasts?

These toasts pair beautifully with a light salad or a bowl of hearty soup, making for a complete and satisfying meal.

Are there any gluten-free options?

Absolutely! You can substitute the rustic baguette with your favorite gluten-free bread to accommodate dietary needs.

Nutrition

While I don’t have exact nutritional information, these toasts are a rich source of calcium from the brie and antioxidants from the cranberries. Keep in mind that they are a decadent treat, perfect for indulging in moderation.

Conclusion

Rustic Brie Toasts with Wild Mushroom, Cranberry, and Shallot are more than just a dish; they’re a way to bring warmth and togetherness to your table. Whether you’re sharing them at a festive gathering or enjoying them as a personal treat, they promise to deliver comfort and joy with every bite. I hope this recipe becomes a cherished favorite in your home, just as it has in mine. Happy cooking!

Related update: Rustic Brie Toasts with Wild Mushroom, Cranberry and Shallot

Why Chrome’s Tiny Home Icon Matters | Analysis by Brian Moineau

A tiny icon, a surprising ripple: Chrome’s Home icon quietly changed on Android

It’s funny how a tiny symbol can feel like the end of the world — or the start of a fresh design language. In mid-February 2026 Google rolled Chrome 145 out to Android devices, and if you updated (or simply noticed), you might have seen a small but noticeable tweak: the Home icon in the address bar was redesigned. It’s just a house, right? But the new one drops the rounded corners, adds a visible door, and aligns the roof differently — and some people are already nostalgic for the old, softer mark.

This post looks at why this matters, what else is in Chrome 145, and why UI micro-changes like this land with more force than their pixel count suggests.

Why a little Home icon matters

  • Visual cues are anchors. The Home icon sits next to the omnibox where your eye naturally goes when you want to return to a start point. Changing that mark—even subtly—affects familiarity.
  • Consistency across platforms. The new house matches an icon style Chrome has used on desktop for a while, which suggests Google is nudging toward a unified Chrome look across form factors.
  • Perception of polish. Small changes telegraph intent: either a careful refinement or a UI team experimenting with tone. Users interpret those signals emotionally (comfortable, modern, robotic, cold), not just functionally.

What changed (and what didn’t)

  • The icon swap: The old Home icon had rounded corners and a softer silhouette. The Chrome 145 update replaces it with a sharper, squarer house with a visible door and a roof that sits flush with the side. The difference is subtle at typical phone-screen sizes, but visible when you look closely. (9to5google.com)
  • How to remove it: If you dislike the Home icon or want a slightly wider address bar, you can disable the homepage shortcut in Chrome’s Settings > Homepage (or set the Home action to a custom URL or New Tab). (9to5google.com)
  • Bigger picture of Chrome 145: Beyond the icon tweak, Chrome 145 for Android was released as a stable update that includes stability and performance fixes; the icon swap is the most visible user-facing change reported. Google’s Chrome Releases blog lists the rollout and version numbers. (chromereleases.googleblog.com)

A small change, bigger implications

  • Design language and platform parity
    • Matching desktop iconography hints at Google’s continued effort to harmonize Chrome’s visual language across desktop, Android, and other platforms. For people who use multiple devices, consistent icons reduce friction.
  • Accessibility and legibility tradeoffs
    • Sharper geometry can improve legibility on high-contrast displays and when icons are shown at small sizes. But some users prefer softer shapes because they feel friendlier—so any change risks alienating part of the audience.
  • User reaction cycle
    • Minor UI swaps are easy to notice and easy to mock online. The reaction usually follows a predictable arc: quick complaints and comparisons, then either acceptance or a request for a toggle. Google already exposes a way to hide the home icon, so power users have an escape hatch. (9to5google.com)

Quick tips for users

  • Don’t like the new Home icon? Disable the Home button in Chrome Settings > Homepage to reclaim address-bar space. (9to5google.com)
  • Want the address bar in a different place? Chrome has been gradually giving Android users more address-bar positioning options (bottom vs top) across recent updates — explore the long-press options or Settings if the placement matters to you. (theverge.com)
  • If you want to confirm your Chrome version after an update, check Chrome in your Android app list or the Play Store to see the version number (Chrome 145 began rolling out in late January/February 2026). (chromereleases.googleblog.com)

A few broader design lessons

  • Microcopy and micrographics matter. Tiny things—icons, labels, spacing—drive user trust and perceived care.
  • Test with the real world. What looks great on a desktop mockup can feel cramped or weird on a 6.8-inch phone held in one hand.
  • Give users control. Optional toggles (show/hide Home, move the bar, choose homepage) turn a forced change into a configurable preference, smoothing backlash.

My take

Design is negotiation: between brand voice, usability, platform consistency, and a noisy audience. This Home icon tweak is the kind of low-risk, high-visibility change that reveals how much weight users place on familiar pixels. It’s not a paradigm shift, but it’s a reminder that small interface elements are part of a larger conversation about how software communicates personality. For those who care — and many do — the option to hide the icon keeps everyone reasonably happy.

Sources


Related update: We recently published an article that expands on this topic: read the latest post.

Green Beans with Garlic Chips | Made by Meaghan Moineau

Green Beans with Garlic Chips

Intro

Welcome to a delightful culinary journey with our Green Beans with Garlic Chips recipe! This dish brings back cherished memories of family gatherings around the dinner table. I remember my grandmother preparing this recipe for special occasions, the aroma of garlic and onions wafting through the house, creating a warm and inviting atmosphere. It’s a simple yet elegant dish that has become a family favorite over the years. Now, I’m thrilled to share it with you, so you can create your own cherished memories with this flavorful side dish.

Why You’ll Love It

This Green Beans with Garlic Chips recipe is a delightful blend of simplicity and sophistication. You’ll love the contrasting textures of tender green beans and crispy garlic chips, while the combination of apple cider and white balsamic vinegar adds a tangy sweetness that perfectly complements the savory flavors. This dish is not only easy to prepare but also makes a stunning addition to any meal, whether it’s a weeknight dinner or a festive holiday feast.

Ingredients

  • 2 tablespoons olive oil
  • 4 garlic cloves, thinly sliced
  • 1 pound trimmed green beans
  • 2 tablespoons unsalted butter
  • 1 yellow onion, thinly sliced
  • Salt and pepper, to taste
  • 1 tablespoon apple cider vinegar
  • 1 tablespoon white balsamic vinegar

Instructions

  1. Heat the olive oil with the garlic in a heavy skillet over medium heat. Cook, stirring occasionally, until the garlic is golden. Remove the garlic from the skillet with a slotted spoon and transfer to a paper towel to drain.
  2. Add the unsalted butter to the oil in the skillet and heat over medium heat. Add the sliced onions, season with salt and pepper, and sauté until the onions are translucent and starting to turn golden, about 5-7 minutes.
  3. Add the trimmed green beans to the skillet and continue cooking, stirring occasionally, until the beans are tender but still crisp, about 8-10 minutes.
  4. Stir in the apple cider vinegar and white balsamic vinegar, and season with additional salt and pepper to taste.
  5. Transfer the beans to a serving dish and sprinkle with the crispy garlic chips before serving.

Tips

For the best flavor, choose fresh green beans that are bright in color and free from blemishes. When cooking the garlic, keep a close eye on it to prevent burning, as it can turn bitter quickly. If you prefer your beans with a bit more crunch, reduce the cooking time slightly. Lastly, be sure to taste and adjust the seasoning before serving to ensure the perfect balance of flavors.

Variations & Substitutions

If you’re looking to switch things up, consider adding a pinch of red pepper flakes for a spicy kick. You can also substitute shallots for the yellow onion for a milder flavor, or use sherry vinegar instead of white balsamic for a different tangy note. For a touch of sweetness, toss in a handful of toasted almonds or pine nuts just before serving.

Storage

Leftover Green Beans with Garlic Chips can be stored in an airtight container in the refrigerator for up to 3 days. To reheat, simply warm them in a skillet over medium heat until heated through. While the dish is best enjoyed fresh, the flavors will meld beautifully overnight, making it a great make-ahead option for busy days.

FAQ

Can I use frozen green beans for this recipe?

Yes, you can use frozen green beans if fresh ones aren’t available. Be sure to thaw and drain them well before adding to the skillet to avoid excess moisture, which can affect the texture of the dish.

What can I serve with Green Beans with Garlic Chips?

This dish pairs wonderfully with a variety of main courses. Try serving it alongside roasted chicken, grilled fish, or a hearty steak. It also complements vegetarian mains like mushroom risotto or lentil loaf beautifully.

How can I make this dish vegan?

To make this recipe vegan, simply replace the unsalted butter with your favorite plant-based butter or additional olive oil. The dish will retain its delicious flavor without any animal products.

Nutrition

This dish is not only delicious but also nutritious. Green beans are a great source of vitamins A, C, and K, as well as fiber and folate. Garlic adds an immune-boosting element, and the use of olive oil provides healthy monounsaturated fats. Overall, it’s a heart-healthy side dish that you can feel good about serving to your family.

Conclusion

Whether you’re preparing a cozy family meal or entertaining guests, Green Beans with Garlic Chips is a versatile and delightful choice. Its rich flavors, appealing textures, and simple preparation make it a go-to recipe in any kitchen. I hope you enjoy making and sharing this dish as much as I do. Let it be a part of your cherished culinary traditions, creating new memories with every bite. Enjoy!

Related update: Green Beans with Garlic Chips

Roasted red peppers and tomatoes salad | Made by Meaghan Moineau

Roasted Red Peppers and Tomatoes Salad

Intro

There’s something magical about the aroma of roasted red peppers wafting through the kitchen. It instantly transports me back to summers spent at my grandmother’s house, where she would prepare the most delightful salads with freshly picked vegetables from her garden. The vibrant colors and rich flavors were a staple at family gatherings, and it’s a tradition I’ve lovingly carried on in my own home. This roasted red peppers and tomatoes salad is a true celebration of those cherished memories and a testament to the simple joys of wholesome cooking.

Why You’ll Love It

This salad is not just another side dish; it’s a symphony of flavors and textures that will captivate your senses. The sweetness of roasted red peppers pairs beautifully with the juicy tartness of ripe tomatoes. Add the mild sharpness of red onions and the briny pop of capers, and you’ve got a dish that’s as satisfying as it is refreshing. It’s a versatile recipe that works equally well as a light lunch, a side for grilled meats, or even a vibrant addition to a picnic spread. Not to mention, it’s incredibly easy to prepare, making it a perfect choice for both novice cooks and seasoned chefs.

Ingredients

  • 2 red bell peppers
  • 1 ripe tomato, thickly sliced
  • 1/2 red onion, thinly sliced
  • 2 tablespoons capers
  • 3 tablespoons olive oil
  • Coarse salt, to taste
  • Cracked black pepper, to taste
  • Fresh thyme, for garnish

Instructions

  1. Char the red bell peppers over a grill or gas flame, or on a cookie sheet under the broiler. Turn the peppers frequently as their skin blisters and chars on all sides.
  2. Transfer the charred peppers to a bowl and cover it to let them steam. This will make the skin easier to peel off.
  3. Once the peppers are cool to the touch, peel off the skin with your fingers, pull off the stems, then tear them open and remove and discard the seeds.
  4. Cut the peeled peppers into large pieces.
  5. Arrange the thickly sliced ripe tomato and large bell pepper pieces on a serving platter.
  6. Scatter the thinly sliced red onion and capers over the tomatoes and peppers.
  7. Drizzle the salad with olive oil and season to taste with coarse salt and cracked black pepper.
  8. Garnish with fresh thyme before serving.

Tips

To make peeling the peppers even easier, you can place them in a sealed plastic bag or a covered bowl after roasting. The trapped steam will help loosen the skin, making it more effortless to remove. Additionally, choosing ripe, firm tomatoes will ensure they hold their shape and add a burst of flavor to the salad.

Variations & Substitutions

Feel free to get creative with this salad. If you’re not a fan of capers, olives can be a great substitute, offering a similar briny kick. For a bit of creaminess, add slices of fresh mozzarella or sprinkle some crumbled feta over the top. Herbs like basil or parsley can replace thyme if you prefer a different aromatic note.

Storage

This salad is best enjoyed fresh, but if you have leftovers, store them in an airtight container in the refrigerator for up to two days. Keep in mind that the flavors will meld together over time, which can enhance the taste, but the texture of the tomatoes and peppers might become a bit softer.

FAQ

Can I use yellow or orange bell peppers instead?

Absolutely! Yellow or orange bell peppers can be used in place of red ones. They will add a slightly different sweetness and color to the salad, but the overall flavor will remain delicious.

Is this salad suitable for a vegan diet?

Yes, this salad is naturally vegan. It’s packed with plant-based goodness, and its vibrant ingredients make it a nutritious choice for anyone following a vegan lifestyle.

Nutrition

This salad is not only flavorful but also packed with nutrients. It’s rich in vitamins A and C from the bell peppers and tomatoes, while the olive oil provides healthy fats. It’s low in calories, making it a perfect choice for those looking to enjoy a healthy and satisfying meal.

Conclusion

This roasted red peppers and tomatoes salad is more than just a dish; it’s a nostalgic journey back to simpler times, where the focus was on fresh ingredients and bold flavors. Whether you’re hosting a family gathering or simply looking to enjoy a wholesome meal, this salad is sure to impress. It’s a tribute to the beauty of uncomplicated cooking and a reminder that the best recipes are often the ones passed down through generations. Enjoy this delightful salad and savor the moments it brings to your table.

Related update: Roasted red peppers and tomatoes salad

Related update: Green Beans with Garlic Chips

Related update: Easy Gluten Free Vegetarian Pasta Salad

Steamed Artichokes With Roasted Red Pepper Aioli | Made by Meaghan Moineau

Steamed Artichokes With Roasted Red Pepper Aioli

Intro

There’s something magical about gathering around the table with family, sharing stories, laughter, and, of course, a delicious meal. I vividly remember summers at my grandmother’s house, where the kitchen was always filled with the aroma of simmering pots and freshly baked bread. One dish that always stood out was her steamed artichokes, served with a creamy dip that left us licking our fingers. Inspired by those cherished memories, I created this recipe for Steamed Artichokes with Roasted Red Pepper Aioli. It combines the tender, earthy flavor of artichokes with a rich, tangy aioli that’s sure to bring a smile to your face and warmth to your heart.

Why You’ll Love It

This recipe is a celebration of simplicity and elegance. Here’s why it’s bound to become a favorite in your culinary repertoire:

  • Flavorful & Fresh: The artichokes are steamed to perfection, preserving their natural flavor, while the roasted red pepper aioli adds a burst of tangy goodness.
  • Healthy & Nutritious: Artichokes are rich in fiber, vitamins, and antioxidants, making this dish as good for your body as it is for your taste buds.
  • Versatile: Perfect as an appetizer, a side dish, or even a light main course. The aioli also pairs wonderfully with other vegetables and even grilled meats.
  • Easy to Prepare: With just a handful of ingredients and straightforward steps, you’ll have a gourmet dish ready in no time.

Ingredients

  • Artichokes
  • Cayenne pepper
  • Egg yolks
  • Garlic clove
  • Lemon juice
  • Oil
  • Red roasted pepper
  • Salt

Instructions

  1. Place the egg yolks, garlic, cayenne, and salt in the food processor. Puree until smooth.
  2. Add the red pepper and puree until smooth again.
  3. While the mixture is pureeing, slowly pour in the oil. Puree until the mixture has emulsified to your desired consistency.
  4. Taste, then salt as needed. Cover and refrigerate until ready to serve.
  5. Fill a large pot with 2 inches of water and place a steaming basket over it. Cover and bring to a boil.
  6. Trim the artichoke stems off, and trim 1/2 inch off the top of the artichoke flower. Pull off any damaged leaves around the base.
  7. Using kitchen shears, trim each point off the outer leaves.
  8. Squeeze lemon juice over the cut edges to reduce browning. Sprinkle with salt and place in the steam basket.
  9. Cover and steam the artichokes for 30-40 minutes, until a center leaf pulls out easily.
  10. Serve the artichokes with the aioli on the side for dipping! Or try it with fingerling potatoes.

Tips

Here are some tips to ensure your dish turns out perfectly:

  • Freshness is Key: Choose artichokes that are heavy for their size with tightly packed leaves for maximum freshness.
  • Avoid Over-Steaming: Keep an eye on the artichokes as they steam; overcooking can make them mushy.
  • Adjust the Aioli: If you prefer a spicier aioli, feel free to add more cayenne pepper to taste.

Variations & Substitutions

Feel free to mix things up with these variations and substitutions:

  • Herb Infusion: Add fresh herbs like basil or parsley to the aioli for an extra layer of flavor.
  • Vegan Option: Substitute the egg yolks with aquafaba (the liquid from canned chickpeas) for a plant-based aioli.
  • Alternative Dips: Try serving the artichokes with a classic garlic butter or a balsamic vinaigrette instead of the aioli.

Storage

If you have leftovers, here’s how to store them:

  • Store the steamed artichokes in an airtight container in the refrigerator for up to 3 days.
  • The aioli can be refrigerated in an airtight jar for up to a week. Stir well before serving again.

FAQ

Can I prepare the aioli in advance?

Absolutely! The aioli can be prepared up to three days in advance. In fact, allowing it to sit for a day can help the flavors meld together beautifully. Just ensure it’s stored in an airtight container in the fridge.

What can I serve with steamed artichokes?

Steamed artichokes pair well with a variety of dishes. Consider serving them alongside grilled chicken or fish, or as a part of a vibrant vegetable platter. They also make a delightful appetizer for any meal.

Why is my aioli not emulsifying?

If your aioli isn’t emulsifying, it might be that the oil was added too quickly. Try adding the oil slowly, in a steady stream, while blending. If it still doesn’t emulsify, try adding a teaspoon of warm water to help bind the ingredients together.

Nutrition

Artichokes are a nutrient powerhouse. They are low in calories but high in fiber, vitamins C and K, folate, phosphorus, and magnesium. The aioli, while richer, contributes healthy fats from the oil, and the roasted red pepper provides additional vitamins and antioxidants.

Conclusion

Steamed Artichokes with Roasted Red Pepper Aioli is more than just a dish; it’s a warm invitation to savor the simple pleasures of life. Whether you’re sharing it with loved ones around the dinner table or enjoying it as a peaceful solo meal, this recipe is sure to bring joy and satisfaction. So go ahead, gather your ingredients, and create a meal that’s both a nod to nostalgia and a celebration of bold, fresh flavors. Happy cooking!

Related update: Steamed Artichokes With Roasted Red Pepper Aioli

Related update: Rustic Brie Toasts with Wild Mushroom, Cranberry and Shallot

Sweet Potato and Celery Soup | Made by Meaghan Moineau

Sweet Potato and Celery Soup

Intro

As the leaves start to turn and the air gets crisp, there’s nothing quite like a warm bowl of soup to bring comfort to your soul. I remember as a child, coming home from school on chilly autumn days to the inviting aroma of my grandmother’s kitchen. She would often make a simple yet delicious soup that filled the house with warmth and love. This Sweet Potato and Celery Soup is inspired by those cherished memories, combining the earthy sweetness of sweet potatoes with the refreshing crunch of celery. It’s a recipe that’s both nourishing and heartwarming, perfect for cozying up with on a cool evening.

Why You’ll Love It

This Sweet Potato and Celery Soup is not just a treat for your taste buds, but also a hug in a bowl. Here are a few reasons why you’ll fall in love with this recipe:

  • Simple Ingredients: Made with just a handful of kitchen staples, this soup is easy to prepare and budget-friendly.
  • Rich in Flavor: The combination of sweet potatoes and celery creates a hearty, flavorful base, enhanced by aromatic herbs and spices.
  • Nutritious: Packed with vitamins and minerals, this soup is a wholesome choice for a healthy meal.
  • Customizable: Easily adaptable to suit dietary preferences or ingredient availability.

Ingredients

  • 2 large sweet potatoes, peeled and chopped
  • 4 stalks of celery, chopped
  • 1 onion, chopped
  • 2 tablespoons olive oil
  • 1 teaspoon dried sweet basil
  • 2 bay leaves
  • Salt and pepper to taste
  • 4 cups vegetable broth
  • Optional: croutons and fresh basil for garnish

Instructions

  1. In a large soup pot, heat the olive oil over medium heat. Add the chopped sweet potatoes, celery, and onion. Sauté the vegetables for about 3 minutes, stirring occasionally, until they begin to soften.
  2. Add the bay leaves, sweet basil, and vegetable broth to the pot. Stir to combine all the ingredients.
  3. Bring the mixture to a boil, then reduce the heat to low and let it simmer for 25-30 minutes, or until the vegetables are very soft.
  4. Remove the pot from the heat and allow the soup to cool slightly, which will make it safer to handle.
  5. Carefully transfer the soup to a food processor or blender in batches, and process until smooth. Alternatively, you can use an immersion blender directly in the pot.
  6. Return the smooth soup to the pot and reheat gently over low heat. Taste and adjust the seasoning with salt and pepper as needed.
  7. Serve hot, garnished with croutons and a sprinkle of fresh basil, if desired.

Tips

  • Chopping: For faster cooking, chop the vegetables into smaller, even pieces.
  • Blending: Be cautious when blending hot liquids. Allow the soup to cool slightly, and blend in batches to avoid overflow.
  • Consistency: For a chunkier soup, blend only half of the mixture and combine with the unblended portion.

Variations & Substitutions

  • If you prefer a creamier texture, add a splash of coconut milk or cream during the reheating stage.
  • For added protein, consider incorporating cooked lentils or chickpeas into the soup.
  • Feel free to experiment with different herbs such as thyme or rosemary for a unique flavor twist.

Storage

Sweet Potato and Celery Soup can be stored in an airtight container in the refrigerator for up to 5 days. For longer storage, freeze the soup in portion-sized containers for up to 3 months. To reheat, thaw in the refrigerator overnight and warm on the stovetop over low heat.

FAQ

Can I use a different type of potato?

Yes, you can substitute sweet potatoes with regular potatoes or even butternut squash for a slightly different flavor profile. Just keep in mind that the sweetness and texture might vary.

Is this soup vegan?

Absolutely! This recipe is naturally vegan as it uses vegetable broth and no animal products. Ensure any garnishes, like croutons, are also vegan if you are following a strict vegan diet.

What can I serve with this soup?

This soup pairs beautifully with a slice of crusty bread or a fresh green salad. You can also serve it as a starter to a larger meal.

Nutrition

While the exact nutritional content can vary based on specific ingredients and portion sizes, this Sweet Potato and Celery Soup is generally low in calories and fat while being rich in fiber, vitamins A and C, and potassium, thanks to the sweet potatoes and celery.

Conclusion

This Sweet Potato and Celery Soup is a delightful blend of flavors and textures that will warm your heart and nourish your body. It’s a versatile recipe that welcomes customization and fits seamlessly into any meal plan. Whether you’re savoring it as a comforting solo meal or sharing it with loved ones, this soup is sure to become a beloved staple in your kitchen. I hope it brings as much joy and warmth to your home as it does to mine.

Related update: Sweet Potato and Celery Soup

Related update: Steamed Artichokes With Roasted Red Pepper Aioli

Related update: Kale and Roasted Sweet Potato Soup with Chicken Sausage