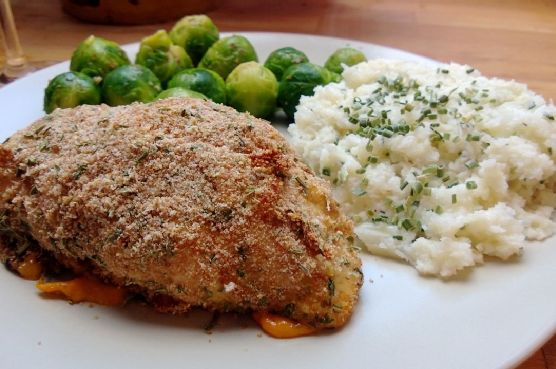
Herb and Cheddar Cordon Bleu | Made by Meaghan Moineau
Title: Savoring Tradition: Herb and Cheddar Cordon BleuDescription: Dive into a heartwarming family recipe that brings the comfort of home to your kitchen. Our Herb and Cheddar Cordon Bleu is a savory main dish that combines the richness of cheddar cheese, the smoky tenderness of deli ham, and the aromatic blend of herbs, providing an unforgettable culinary experience. Join us as we explore this dish that has been passed down through generations, complete with a nostalgic family story that adds a pinch of love to every bite.
---
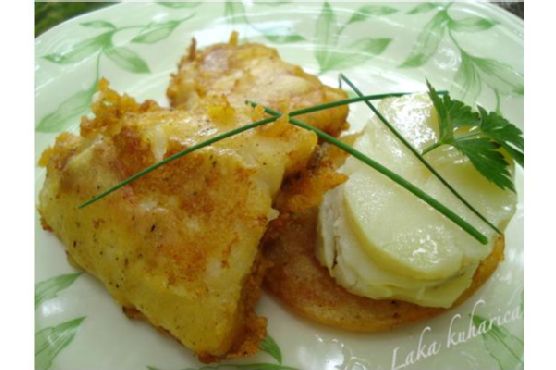
Herb and Cheddar Cordon Bleu: A Taste of Family Legacy
There is something about the combination of herbs and cheddar that speaks directly to the heart. Every time I prepare this Herb and Cheddar Cordon Bleu, I am transported back to Sunday afternoons spent in my grandmother's kitchen, where the air was always filled with the comforting aroma of her culinary creations.
Ingredients You'll Need:
- 4 chicken breasts
- 4 slices of deli ham
- 4 slices of cheddar cheese
- 1 cup of breadcrumbs
- 1 teaspoon of dried marjoram
- 1 teaspoon of dried parsley
- 1 teaspoon of dried rosemary
- 1 egg
- 1/2 cup of flour
- Salt and pepper to taste
Instructions:
1. Preheat and Prep: Preheat your oven to 350°F (about 176°C). Take the chicken breasts and place them between two slices of wax paper. Using a rolling pin or meat mallet, flatten them until they're about a quarter of an inch thick.
2. Layer and Roll: On each flattened chicken breast, place a slice of ham and a slice of cheddar cheese. Roll each chicken breast as tightly as possible, securing with toothpicks or small skewers if needed.
3. The Coating Process: In a shallow baking dish, beat the egg. Prepare two more stations with foil or dishes: one for flour and another for a mixture of dried herbs and breadcrumbs. Coat each rolled chicken breast in flour, dip in the egg mixture, then press into the breadcrumb and herb mixture until fully covered.
4. Bake to Perfection: Place the prepared chicken in an oiled or buttered baking dish. Bake for about 30 minutes, or until the chicken is cooked through and the coating is golden brown.
A Bite of Nostalgia:
Growing up, Sunday dinners were a cherished tradition in our family. My grandmother, the matriarch of our culinary clan, would often prepare this Herb and Cheddar Cordon Bleu, filling her cozy kitchen with its irresistible scent. As a child, I would stand by her side, eagerly watching her every move, hoping to someday recreate her magic. The warmth of her kitchen, the gentle hum of her stories, and the love she infused into every dish were the soul of our family gatherings.
This dish, much like the memories it holds, is simple yet deeply satisfying. The medley of herbs and cheese wrapped in succulent chicken transports me back to those joyful Sundays, surrounded by laughter and love.
Difficulty Rating: 6/10
Category: Main Dish
Our Herb and Cheddar Cordon Bleu is a delightful nod to family traditions, perfect for any gathering that calls for warmth and nostalgia. Whether you're creating new memories or savoring old ones, this dish is sure to become a beloved staple in your home, too.