Guacamole | Made by Meaghan Moineau

Guacamole | Made by Meaghan Moineau

**Title: A Taste of Tradition: Crafting the Perfect Guacamole**


**Description: Dive into the rich, flavorful world of homemade guacamole, a dish that not only tantalizes the taste buds but also evokes cherished family memories. Discover the simple yet exquisite recipe that has been a staple at our family gatherings and learn how to make it yourself.**


---


### A Taste of Tradition: Crafting the Perfect Guacamole


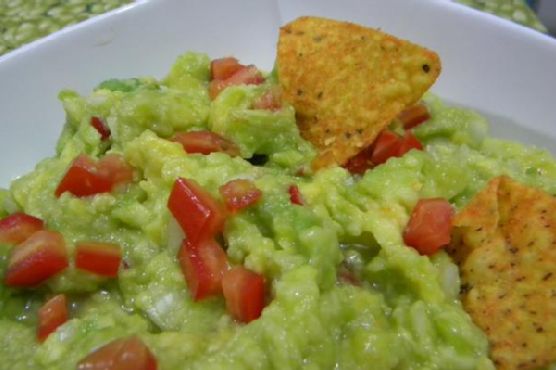
Guacamole is more than just a dish; it's a celebration of flavors that brings people together. Its creamy texture and vibrant taste have the power to transform any meal, making it an essential appetizer in many households. Today, I want to share not only a delightful guacamole recipe but also a heartwarming story of how this dish became a beloved tradition in my family.


#### Ingredients:


- 3 Haas avocados


- 1 small onion, finely chopped


- 1 jalapeño pepper, seeded and minced


- 2 tablespoons fresh cilantro, chopped


- 1 teaspoon salt


- 1/2 teaspoon black pepper


- 1 tablespoon fresh lime juice


- 1 tablespoon fresh basil, chopped


- 1 tablespoon fresh oregano, chopped


#### Instructions:


1. **Prepare the Avocados**: Begin by cutting the avocados in half lengthwise. Carefully drive a chef's knife into the large pit and twist to remove it. Scoop the avocado flesh from the skin into a mixing bowl.


2. **Mash and Mix**: Using a fork, gently mash the avocado to your desired consistency. Add in the finely chopped onion, minced jalapeño pepper, fresh cilantro, basil, and oregano. Mix well to incorporate all the ingredients.


3. **Season to Perfection**: Season the mixture with salt, black pepper, and fresh lime juice. Stir to combine, ensuring every bite is packed with flavor.


4. **Serve or Store**: Serve your guacamole immediately for the freshest taste. If you're not planning to enjoy it right away, press a plastic film wrap directly onto the surface of the guacamole to prevent browning, and store it in the refrigerator.


#### A Nostalgic Family Memory


Every summer, my family would gather at my grandparents' house for a weekend of laughter, storytelling, and, of course, food. The centerpiece of these gatherings was always my grandfather's famous guacamole. He had learned the recipe from his mother, who had brought it from her hometown in Mexico.


I remember as a child, standing on a stool beside him as he prepared the guacamole, eagerly waiting to be handed the fork to mash the avocados. He would tell stories of his childhood in the bustling markets of Guadalajara, where he first learned to select the perfect avocados. The kitchen would fill with the fresh aroma of cilantro and lime, a scent that still transports me back to those warm summer afternoons.


Guacamole was more than just an appetizer; it was a symbol of our family's heritage and love, a dish that connected us to our roots and to each other. Even now, as I prepare this recipe, I feel a sense of nostalgia and a deep appreciation for the family traditions that shape our lives.


#### Difficulty: 3/10


#### Classification: Appetizer


In conclusion, this guacamole recipe is not only simple and delicious but also a reminder of the power of food to evoke memories and bring people together. Whether you're hosting a family gathering or simply want a taste of tradition, this dish promises to delight your taste buds and warm your heart. Enjoy!

Read more about Appetizers

Read more about Main Dishes

Read more about Desserts

Divine Christmas Candy Cane Cookies | Made by Meaghan Moineau

Divine Christmas Candy Cane Cookies | Made by Meaghan Moineau

**Title: Celebrate the Holidays with Divine Christmas Candy Cane Cookies**


**Description:** Embrace the holiday spirit with our delightful Candy Cane Cookies, a heavenly treat that combines the minty freshness of peppermint with the sweetness of a buttery cookie. Perfect for sharing, these cookies will bring joy to every festive gathering. Follow our detailed guide to create these charming confections and discover the heartwarming family story behind this treasured recipe.


---


**A Sweet Holiday Tradition: Divine Christmas Candy Cane Cookies**


As the holiday season approaches, the aroma of freshly baked cookies fills the air, evoking cherished memories of family gatherings and festive celebrations. One such nostalgic treat that has become a staple in our household is the delightful Candy Cane Cookie. With its vibrant colors and refreshing peppermint flavor, this cookie is not just a dessert, but a symbol of holiday joy and togetherness.


**Recipe Overview**


**Ingredients:**


- 2 cups all-purpose flour


- 1 egg yolk


- Red food coloring


- 1 teaspoon peppermint extract


- 1/2 cup powdered sugar


- 1 cup unsalted butter, softened


- 1 teaspoon vanilla extract


**Instructions:**


1. **Creaming the Butter**: Begin by creaming the unsalted butter until it achieves a smooth, fluffy texture. Gradually add the powdered sugar, continuing to beat until the mixture is light and airy.


2. **Mixing the Wet Ingredients**: Incorporate the egg yolk, vanilla extract, and peppermint extract into the butter and sugar mixture, stirring until well combined.


3. **Incorporating the Dry Ingredients**: Add the all-purpose flour in two additions. First, add half of the flour, stirring until fully incorporated, then add the remaining flour. Mix until you attain a firm, smooth dough.


4. **Coloring the Dough**: Divide the dough into two equal portions. Add a few drops of red food coloring to one half, kneading until the color is evenly distributed.


5. **Chilling the Dough**: Wrap both dough balls in plastic wrap and refrigerate for about 30 minutes, allowing the dough to firm up.


6. **Shaping the Cookies**: Preheat your oven to 180°C (356°F). On a lightly floured surface, take a walnut-sized piece of red dough and a walnut-sized piece of white dough. Roll each into a 10-12 cm long rope. Place the ropes side by side and gently twist them together, pressing slightly to form a spiral. Shape by bending one end into a hook, creating the iconic candy cane shape.


7. **Baking**: Line the cookies on baking paper about 2 cm apart. Bake for approximately 10 minutes or until the edges start to brown. Once baked, let the cookies cool completely on a wire rack.


**A Cherished Family Memory**


Every Christmas, my grandmother would gather the family in her cozy kitchen, the heart of her home. With flour dusting the countertops and laughter echoing off the walls, we would embark on our annual cookie-baking adventure. The Candy Cane Cookies were always my favorite part. My siblings and I would compete to see who could create the most perfect twist, our hands sticky with dough and faces smeared with flour. As the cookies baked, the kitchen would be filled with the sweet scent of peppermint, wrapping us in a warm, festive embrace. To this day, the taste of these cookies transports me back to those precious moments, a reminder of the simple joys and loving bonds that define the holiday season.


**Difficulty Level: 5/10**


**Classification: Dessert**


Whether you’re continuing a family tradition or starting a new one, these Candy Cane Cookies are sure to bring a smile to everyone’s face. With their delightful appearance and delicious taste, they’re the perfect addition to your holiday dessert table. Happy baking, and may your holidays be filled with warmth and cheer!

Read more about Appetizers

Read more about Main Dishes

Read more about Desserts

Crème Fraiche Coconut Bavarians | Made by Meaghan Moineau

Crème Fraiche Coconut Bavarians | Made by Meaghan Moineau

**Title: Indulge in Nostalgia with Crème Fraiche Coconut Bavarians: A Dessert That Transcends Time**


**Description: Dive into the rich, creamy world of Crème Fraiche Coconut Bavarians—a dessert that perfectly blends tradition and modern culinary artistry. Infused with the tropical allure of coconut and the luxurious texture of crème fraiche, this dessert is not just a treat for the palate but also a journey down memory lane. Discover how this delectable creation became a cherished family tradition and learn how to create it yourself with our step-by-step guide.**


**Crème Fraiche Coconut Bavarians: A Sweet Taste of Memory**


The gentle hum of our family kitchen was always punctuated by the rhythmic clattering of dishes and the soft laughter of loved ones. Among the many desserts that graced our dining table, one stood out for its sumptuous texture and evocative flavor—Crème Fraiche Coconut Bavarians. It wasn't just a dessert; it was the embodiment of family gatherings, a sweet testament to our shared history.


**Ingredients:**


- 1 packet gelatin


- 1 can coconut milk, divided


- 1 can sweetened condensed milk


- 1/2 cup sugar


- 4 egg yolks


- 1 cup Alouette Cuisine Crème Fraiche


- 1/2 cup shredded coconut


**Instructions:**


1. **Bloom the Gelatin:** In a small bowl, combine the gelatin with 4 tablespoons of coconut milk. Let it sit to bloom while you prepare the rest of the ingredients.


2. **Simmer the Milks:** In a medium saucepan, bring the sweetened condensed milk and remaining coconut milk to a gentle simmer over medium-high heat. Stir occasionally to ensure it doesn't stick to the bottom.


3. **Temper the Egg Yolks:** Meanwhile, whisk together the sugar and egg yolks in a separate bowl until well combined. Slowly add a small amount of the heated milk mixture to the egg yolks, whisking continuously to temper them without cooking the eggs.


4. **Combine and Thicken:** Gradually pour the tempered egg yolk mixture back into the saucepan. Stir constantly and heat until the mixture thickens enough to coat the back of a spoon, about 5 to 7 minutes. Remove from heat and stir in the bloomed gelatin until fully dissolved.


5. **Chill and Whip:** Transfer the mixture to a bowl and refrigerate until it begins to gel. While waiting, whip the Alouette Cuisine Crème Fraiche in a separate bowl until soft peaks form.


6. **Fold and Mold:** Once the gelatin mixture has slightly set, gently fold it together with the whipped crème fraiche. Pour the combined mixture into your chosen molds immediately.


7. **Refrigerate Overnight:** Allow the Bavarians to set in the refrigerator overnight.


8. **Serve with Nostalgia:** Unmold the Bavarians just before serving and generously sprinkle with shredded coconut. Enjoy the dessert that has become a beloved part of our family's culinary heritage.


**A Nostalgic Family Memory**


I remember the first time my grandmother made Crème Fraiche Coconut Bavarians. The kitchen was filled with the enticing aroma of coconut, a scent that still evokes memories of those bustling family gatherings. As children, we watched in awe as she carefully folded the whipped crème fraiche into the gelling mixture, her hands moving with the grace of years of practice. Each bite was a reminder of her warmth and the love she poured into every dish. Even today, making this dessert feels like a sweet conversation with her, a way to keep her spirit alive in our hearts and taste buds.


**Difficulty Rating:** 6/10


**Classification:** Dessert


Creating Crème Fraiche Coconut Bavarians is not just about following a recipe—it's about connecting with the past, savoring the present, and crafting memories for the future. Whether you're a seasoned chef or a culinary novice, this dessert promises a rewarding experience that goes beyond taste. So, gather your ingredients, embrace the process, and indulge in a dessert that truly transcends time.

Read more about Appetizers

Read more about Main Dishes

Read more about Desserts

Jambalaya Stew | Made by Meaghan Moineau

Jambalaya Stew | Made by Meaghan Moineau

# A Hearty Bowl of Jambalaya Stew: A Taste of Tradition


**Description:** Dive into the rich flavors of New Orleans with our Jambalaya Stew, a delightful blend of savory chicken sausage, succulent shrimp, and vibrant vegetables. This hearty dish is perfect for family gatherings and a breeze to make. Join us as we explore the comforting nostalgia of this family favorite, with a sprinkle of history and a dash of spice.


---


## A Culinary Journey: Rediscovering Jambalaya Stew


There's something magical about a pot of Jambalaya simmering on the stove, the aroma of spices filling the kitchen, and the promise of a comforting meal waiting to be shared. This Jambalaya Stew is not just a recipe; it's a journey back to cherished family memories, a dish that brings loved ones together around the table.


### Ingredients You'll Need


- **4 cooked Italian sweet chicken sausage links**


- **1 can of diced tomatoes**


- **1 onion, chopped**


- **1 yellow and 1 green bell pepper, diced**


- **2 stalks of celery, chopped**


- **4 cups of low sodium chicken broth**


- **1 cup of brown rice**


- **3 cloves of garlic, minced**


- **2 tablespoons of Cajun seasoning**


- **A dash of hot sauce (or to taste)**


- **1 teaspoon of dried oregano**


- **1 teaspoon of dried thyme**


- **1 pound of raw shrimp, peeled and deveined**


### Cooking Instructions


1. **Combine Ingredients:** In a large pot, add all ingredients except the shrimp. Stir them together until well mixed.


2. **Bring to a Boil:** Heat the pot on the stove until it reaches a boil.


3. **Simmer:** Reduce the heat to medium-low. Cover the pot and let it simmer for about 35 minutes, or until the vegetables are tender and the rice is fluffy.


4. **Add Shrimp:** Stir in the shrimp, then re-cover the pot. Cook for an additional 6 minutes, or until the shrimp are tender and cooked through.


5. **Season to Taste:** If desired, add salt, black pepper, or more hot sauce to suit your taste.


6. **Serve and Enjoy:** Ladle the stew into bowls, serve hot, and enjoy the flavors of this traditional dish.


### A Nostalgic Family Tale


Growing up, Sundays were always a special day in our household. It was a time to slow down, gather the family, and enjoy a hearty meal together. My grandmother's Jambalaya Stew was the star of these Sunday gatherings. The kitchen would be a flurry of activity, with family members chopping vegetables, stirring pots, and sharing stories.


One particular Sunday stands out in my memory. It was a chilly afternoon, and as the stew simmered away on the stove, the warmth from the kitchen crept into every corner of the house. I remember my grandmother, her apron dusted with flour, telling tales of her own childhood in New Orleans, where Jambalaya was a staple at every family feast. Each spoonful of the stew was like a warm hug, a reminder of the love and care that went into every meal.


Even today, every time I make this Jambalaya Stew, I'm transported back to those cherished Sundays. It's more than just a dish—it's a celebration of family, tradition, and the simple joy of sharing a meal with those you love.


### Difficulty Rating and Classification


- **Difficulty:** 4/10 - This recipe is straightforward, making it perfect for both novice cooks and seasoned chefs.


- **Classification:** Main Dish - With its hearty ingredients and robust flavors, this Jambalaya Stew is sure to be the centerpiece of any meal.


Embrace the flavors of the South and create your own family memories with this Jambalaya Stew. Whether it's a casual weeknight dinner or a special family gathering, this dish is sure to warm hearts and fill bellies. Enjoy!

Read more about Appetizers

Read more about Main Dishes

Read more about Desserts

Salmon Caesar Salad | Made by Meaghan Moineau

Salmon Caesar Salad | Made by Meaghan Moineau

**Title: "Savor the Memories: A Family Tradition with Salmon Caesar Salad"**


**Description:**


Dive into a delightful blend of flavors with our Salmon Caesar Salad, a dish that not only tantalizes the taste buds but also brings back treasured family memories. Perfect as a main dish, this recipe is easy to prepare and offers a healthy twist on a classic favorite. Join us as we explore the simplicity of bringing together fresh ingredients and cherished moments in the kitchen.


---


### A Nostalgic Flavor Journey: Salmon Caesar Salad


As the aroma of sizzling salmon fills the kitchen, I'm instantly transported back to Sunday afternoons spent in my grandmother's sunlit dining room. It was there, amidst the laughter and stories shared across generations, that our family tradition of Salmon Caesar Salad was born.


My grandmother, a woman of simple tastes yet an extraordinary cook, had a knack for transforming humble ingredients into culinary masterpieces. Her version of Salmon Caesar Salad was no exception, a dish that became a staple at every family gathering.


#### The Heart of the Recipe


The magic begins with fresh, succulent salmon fillets, seasoned gently with salt and a sprinkle of paprika. As they sear in a hot skillet, the kitchen fills with a warm, inviting aroma, reminiscent of those cherished Sundays. The light seasoning allows the natural flavors of the salmon to shine, while a dash of freshly squeezed lemon juice adds a refreshing zing.


The salad itself is a crisp medley of romaine lettuce tossed in a light Caesar dressing. The crunch of the lettuce paired with the creamy dressing creates a perfect base for the star of the dish. Topped with shredded Parmesan cheese and slivered almonds, each bite offers a delightful contrast in textures and flavors.


#### Bringing it All Together


Once the salmon is perfectly cooked to your liking—I prefer mine slightly undercooked for a tender, melt-in-your-mouth experience—it's time to assemble the dish. In a large bowl, mix the romaine lettuce with the Caesar dressing before spreading it out on a large plate. Layer the salmon slices on top, each piece a testament to the careful preparation and love poured into the dish. A final sprinkle of black pepper and a touch more lemon juice complete the masterpiece, ready to be shared with loved ones.


#### A Family Tradition


Every time I prepare this dish, I'm reminded of the joy and warmth of family gatherings. The simplicity of the ingredients mirrors the uncomplicated happiness we found in each other’s company. Sharing this meal is more than just satisfying hunger; it's about preserving a legacy of love, laughter, and delicious food.


#### Recipe Details


- **Difficulty:** 3/10


- **Classification:** Main Dish


Whether you're a seasoned chef or a beginner in the kitchen, this Salmon Caesar Salad is a delightful way to bring a touch of nostalgia and a burst of flavor to your table. It's a dish that celebrates the beauty of simplicity and the joy of shared moments, one forkful at a time.


---


Embrace the tradition, savor the memories, and enjoy the delicious harmony of flavors with your own family. This Salmon Caesar Salad is more than just a recipe—it's a gateway to cherished memories and new traditions.

Read more about Appetizers

Read more about Main Dishes

Read more about Desserts

Goat Cheese, Fig And Proscuitto Crostini | Made by Meaghan Moineau

Goat Cheese, Fig And Proscuitto Crostini | Made by Meaghan Moineau

**Title: Elegance on a Cracker: Goat Cheese, Fig, and Prosciutto Crostini**


**Description:** Dive into a symphony of flavors with our Goat Cheese, Fig, and Prosciutto Crostini recipe. This simple yet sophisticated appetizer brings together creamy goat cheese, sweet fig jam, and savory prosciutto on a crisp cracker. Perfect for any gathering, this dish is a delightful nod to cherished family memories and culinary traditions.


---


When it comes to crafting the perfect appetizer, simplicity and elegance often go hand in hand. Our Goat Cheese, Fig, and Prosciutto Crostini exemplify this concept beautifully. With just a handful of ingredients, you can create an appetizer that looks stunning and tastes even better. This dish holds a special place in my heart, as it brings back fond memories of family gatherings filled with laughter and love.


**Ingredients:**


- Biscuit-type crackers


- Fig jam


- Prosciutto


- Goat cheese


- White peppercorns, cracked


**Instructions:**


1. Preheat your oven to 350°F (175°C).


2. Spread 1 teaspoon of fig jam on each cracker, ensuring even coverage for a balanced sweetness.


3. Gently place a small piece of prosciutto atop each cracker, allowing the savory richness to complement the sweet fig jam.


4. Slice the goat cheese into rounds and place one slice on each prepared cracker.


5. Arrange the crostini on sheet trays, ensuring they have enough space to bake evenly.


6. Bake in the oven for 10-12 minutes, or until the edges of the cheese start to brown.


7. Remove from the oven, and while still warm, top each crostini with a sprinkle of cracked white pepper for an added touch of subtle heat.


**Nostalgic Family Memory:**


Growing up, my family had a tradition of hosting Sunday brunches, where the kitchen became a bustling hub of activity and delicious aromas. My grandmother, the heart of our culinary adventures, would often prepare her signature Goat Cheese, Fig, and Prosciutto Crostini. I remember sitting at the kitchen table, watching her work her magic, fascinated by how a few simple ingredients could transform into something so extraordinary.


The crostini were always the first to disappear from the table, eagerly devoured by family and friends alike. Each bite reminded us of the warmth of togetherness and the joy of sharing good food. To this day, whenever I prepare this dish, I am transported back to those cherished Sundays, surrounded by the laughter of loved ones and the comforting smells of home.


**Difficulty Rating: 3/10**


This recipe is perfect for both novice cooks and seasoned chefs alike, with its straightforward preparation and delightful results.


**Classification: Appetizer**


Whether you're hosting a formal dinner party or a casual get-together, these Goat Cheese, Fig, and Prosciutto Crostini are sure to impress your guests. Enjoy this elegant appetizer, and perhaps it will inspire you to create new memories and traditions of your own.

Read more about Appetizers

Read more about Main Dishes

Read more about Desserts

Sticky Toffee Pudding | Made by Meaghan Moineau

Sticky Toffee Pudding | Made by Meaghan Moineau

**Title: The Sweet Nostalgia of Sticky Toffee Pudding: A Family Tradition**


**Description:** Dive into the delightful warmth of Sticky Toffee Pudding, a classic dessert that bridges generations with its rich flavors and comforting texture. From its simple ingredients to its captivating taste, this recipe is a heartwarming reminder of family gatherings and cherished memories. Discover the story behind this beloved dessert and learn how to make it a staple in your own family traditions.


---


There’s something undeniably magical about Sticky Toffee Pudding. Its rich, gooey texture and sweet, caramelized aroma have the power to transport us back to simpler times. In my family, this dessert has always held a special place, particularly during the festive season.


**A Nostalgic Family Tradition**


Growing up, Sticky Toffee Pudding was the star of our holiday dinners. I remember my grandmother bustling in the kitchen, her apron dusted with flour, as she lovingly prepared this dessert. The moment the cake went into the oven, the house would fill with the heartwarming scent of dates and vanilla, a scent that signaled the start of our family’s festive celebrations.


One particular memory stands out vividly. It was a crisp winter evening, and snowflakes danced outside the window as my siblings and I gathered around the kitchen table, impatiently waiting for our grandmother to finish her culinary masterpiece. As she poured the rich toffee sauce over the freshly baked cake, she shared stories of how her own mother had made this dessert for her as a child. It was more than just a dish; it was a thread connecting our family through generations.


**Ingredients You'll Need:**


- 1 teaspoon plus 1 teaspoon baking powder


- 1 stick of butter (1/2 cup), softened


- 1/4 cup dark corn syrup


- 1 cup chopped dates


- 2 large eggs


- 1 1/2 cups all-purpose flour


- 1 cup heavy cream


- 3/4 cup light brown sugar


- 1/4 teaspoon salt


- 1 cup sugar


- 1 teaspoon vanilla extract


- 1 1/4 cups boiling water


**Instructions:**


1. Preheat your oven to 350 degrees Fahrenheit. Prepare the dates by placing them in a bowl, sprinkling them with 1 teaspoon of baking powder, and pouring boiling water over them. Stir slightly and let them soak until soft and cool.


2. In a separate bowl, combine the flour, the remaining teaspoon of baking powder, and salt. Set aside.


3. In a mixer, cream the butter and sugar until light and fluffy. Add the eggs, one at a time, mixing well after each addition. Beat in the corn syrup and vanilla extract.


4. Incorporate the date mixture and the flour mixture into the batter, mixing until just combined. Spread the batter into a greased 8-inch round or square cake pan, smoothing the top.


5. Bake in the preheated oven for 30-40 minutes, or until a tester inserted in the middle comes out with a few crumbs clinging.


6. While the cake is baking, prepare the toffee sauce. Melt the butter in a saucepan, then stir in the sugar until dissolved. Add the heavy cream and salt, simmering over medium heat until thickened and reduced to about 2 1/2 cups. Stir frequently to prevent overboiling.


7. Once the cake is done, remove it from the oven and invert it onto a plate to loosen it from the pan, then return it to the pan. Poke holes all over the cake with a skewer or fork.


8. Spoon about a cup of the sauce over the cake and leave it to soak for several hours or overnight for the best flavor. Once cooled, cover loosely with foil and refrigerate until ready to serve.


9. To serve, warm the cake gently in a low oven, if desired, but keep an eye on it to prevent burning the sauce. Invert the saucy cake onto a platter, pour about 1/2 cup more sauce over it, and let it soak in for a few minutes. Cut into wedges and serve with additional sauce on each slice.


**Difficulty Rating:** 6/10


**Classification:** Dessert


---


Sticky Toffee Pudding is more than just a dessert; it's a vessel of cherished memories and family bonds. Whether you're making it for the first time or continuing a beloved tradition, this recipe is sure to bring warmth and sweetness to your table. So gather your loved ones, share stories, and indulge in the nostalgic delight of Sticky Toffee Pudding.

Read more about Appetizers

Read more about Main Dishes

Read more about Desserts

BBQ” Style Chicken Thighs | Made by Meaghan Moineau

BBQ” Style Chicken Thighs | Made by Meaghan Moineau

**Title: "Savoring Memories: BBQ-Style Chicken Thighs That Transport You Back Home"**


**Description:** Dive into a world where the tantalizing aroma of BBQ-style chicken thighs meets cherished family memories. This easy-to-follow recipe promises to be a hit at your dinner table, blending rich flavors with sentimental nostalgia. Perfect as a main dish, this recipe is rated 3 out of 10 in difficulty, making it accessible for cooks at any level.


---


When I think of comfort food, my mind immediately drifts to the warm, inviting aroma of BBQ-style chicken thighs wafting through the kitchen. This dish is more than just a meal; it’s a cherished family tradition that brings us together, evoking laughter, love, and the essence of home.


**Ingredients You’ll Need:**


- Bone-in chicken thighs


- 1 cup ketchup


- 1/4 cup soy sauce


- 2 tablespoons Worcestershire sauce


- 2 tablespoons lemon juice


- 1/4 cup brown sugar


- 1 teaspoon garlic powder


- Salt and black pepper to taste


**Instructions:**


1. **Prepare the BBQ Sauce:** In a small bowl, combine ketchup, soy sauce, Worcestershire sauce, lemon juice, brown sugar, garlic powder, salt, and black pepper. Stir until the brown sugar is fully dissolved and the mixture is smooth.


2. **Prep the Chicken:** Clean the chicken thighs and pat them dry with a paper towel. This step is crucial to ensure the sauce adheres well to the chicken.


3. **Marinate:** Place the chicken thighs in a baking dish. Generously rub them all over with the prepared BBQ sauce, ensuring every nook and cranny is coated with the rich marinade.


4. **Bake:** Preheat your oven to 375°F (190°C). Bake the chicken thighs for 40-45 minutes or until the internal temperature reaches 165°F (75°C) and the skin is beautifully caramelized.


**A Nostalgic Family Memory:**


Growing up, Sunday afternoons were reserved for family gatherings. My grandmother's small kitchen would be filled with the comforting scent of these BBQ-style chicken thighs, a recipe passed down through generations. I remember watching her, apron dusted with flour, as she expertly mixed the ingredients, her hands moving with a rhythm that spoke of years of practice.


As the chicken baked, my siblings and I would gather around the table, setting it with plates and cutlery, the excitement of the impending feast palpable in the air. When the timer finally dinged, the chicken emerged from the oven, its skin a perfect balance of crispy and tender, glistening with the sticky, flavorful sauce.


Each bite was a symphony of flavors—sweet, tangy, and savory—transporting us to a place of warmth and comfort. Even now, every time I prepare this dish, I am reminded of those cherished Sundays, and I can’t help but smile, knowing that I am carrying on a beloved tradition.


**Difficulty Rating: 3/10**


**Classification: Main Dish**


This BBQ-style chicken thigh recipe is straightforward, requiring minimal ingredients and simple steps, making it an ideal choice for a quick weeknight dinner or a leisurely weekend meal. Whether you're a seasoned cook or a kitchen novice, this dish promises to deliver a taste of home that will leave everyone at the table smiling.


So, gather your loved ones, fire up the oven, and let this delicious recipe bring a piece of familial love and nostalgia to your plate.

Read more about Appetizers

Read more about Main Dishes

Read more about Desserts

Almond Butter and Chocolate Squares | Made by Meaghan Moineau

Almond Butter and Chocolate Squares | Made by Meaghan Moineau

**Title: Nostalgic Indulgence: Almond Butter and Chocolate Squares**


**Description:** Dive into a world of delectable nostalgia with our Almond Butter and Chocolate Squares. This vegan dessert is not only a treat for your taste buds but also a heartwarming journey into cherished family memories.


---


There's something undeniably magical about the combination of almond butter and chocolate. It's as if they were destined to be together, creating a symphony of flavors that dance on your palate. Today, I invite you to join me on a journey down memory lane, as I share a recipe that's become a beloved tradition in my family: Almond Butter and Chocolate Squares.


**Ingredients:**


- Vegan butter


- Powdered sugar


- Vegan vanilla cookie crumbs


- Canned almond butter


- Dark vegan chocolate


**Instructions:**


1. Stir the melted vegan butter, powdered sugar, vegan vanilla cookie crumbs, and canned almond butter together until all of the ingredients are perfectly incorporated.


2. Line a 9 x 13-inch dish with foil, ensuring to drape the foil over the sides for easy removal once the bars set.


3. Press the mixture firmly into the bottom of the dish.


4. Melt the dark vegan chocolate in a double boiler and spread it generously over the almond butter mixture.


5. While the chocolate is still warm, cut the bars to desired sizes.


6. Allow the bars to set for at least an hour before serving.


**A Nostalgic Family Memory:**


As I prepare this delightful dessert, I'm transported back to my grandmother's cozy kitchen. The aroma of chocolate and almond wafting through the air always signaled a special occasion. My grandmother, a culinary enthusiast, believed that food was not just sustenance but a way to bring people together.


Every year, during the holiday season, our family would gather in her warm, welcoming home. The dining table would be laden with an array of dishes, but the Almond Butter and Chocolate Squares were always the highlight. I remember being a child, eagerly watching my grandmother as she skillfully prepared the mixture, her hands moving with practiced ease. She would let me spread the chocolate over the almond butter layer — a task I took very seriously, knowing it was the final touch to this culinary masterpiece.


The first bite was always the best: the rich, creamy almond butter mingling with the deep, luscious chocolate, creating a taste that lingered long after the squares were gone. These squares became a symbol of love and togetherness, a reminder of the warmth and joy that family brings.


**Difficulty Rating:** 3/10


**Classification:** Dessert


Incorporating this recipe into your repertoire not only guarantees a delicious treat but also an opportunity to create lasting memories with your loved ones. Whether you're a seasoned chef or a kitchen novice, this simple yet satisfying recipe is sure to become a favorite in your home. So, gather your ingredients, and let's create a dessert that's as rich in flavor as it is in family tradition.

Read more about Appetizers

Read more about Main Dishes

Read more about Desserts

Ginger Molasses Rounds | Made by Meaghan Moineau

Ginger Molasses Rounds | Made by Meaghan Moineau

**Title: The Timeless Delight of Ginger Molasses Rounds: A Nostalgic Treat**


**Description: Discover the sweet nostalgia of Ginger Molasses Rounds, a delicious dessert that brings warmth and memories to the heart and home. With a perfect blend of spices and a chewy texture, this recipe is simple yet rich with family tradition.**


---


### A Taste of Nostalgia: Ginger Molasses Rounds


As the autumn leaves begin to fall and the air grows crisp, there's nothing quite like the comforting aroma of freshly baked cookies wafting through the house. If there's one recipe that embodies the spirit of warmth and family togetherness, it's Ginger Molasses Rounds. These cookies, with their perfect chewiness and spice, have been a beloved tradition in my family for generations.


I vividly remember the first time I helped my grandmother bake these delightful rounds. Her kitchen, always a hub of laughter and the tantalizing scents of spices, was a place where magic happened. I was a curious child, always eager to learn, and my grandmother was a patient teacher. She would gently guide my small hands as I carefully measured out the ingredients — flour, salt, baking soda, and those aromatic spices: cinnamon and ground ginger. Each step was a lesson not just in baking, but in life, as she shared stories of her childhood and how her mother taught her the same recipe.


### The Recipe


#### Ingredients:


- 1 cup butter, softened


- 1 cup sugar


- 1 egg


- 1/4 cup molasses


- 2 cups all-purpose flour


- 2 teaspoons baking soda


- 1/4 teaspoon salt


- 1 teaspoon ground cinnamon


- 1 teaspoon ground ginger


- Additional granulated sugar for rolling


#### Instructions:


1. **Cream the Butter and Sugar:**


In a large bowl, cream together the butter and sugar until smooth and fluffy. This step is essential for that perfect cookie texture.


2. **Add Egg and Molasses:**


Beat in the egg and molasses until well combined. The molasses gives these cookies their rich color and deep flavor.


3. **Mix Dry Ingredients:**


In a separate bowl, whisk together the flour, baking soda, salt, cinnamon, and ground ginger. Gradually blend this dry mixture into the creamed ingredients.


4. **Shape and Roll:**


Shape the dough into small balls, about an inch in diameter. Roll each ball in additional granulated sugar to coat.


5. **Bake:**


Place the balls 2 inches apart on a baking sheet lined with parchment paper. Bake in a preheated 350-degree oven for 8-9 minutes, until the tops are just set and slightly cracked. Remember, they will be soft but will harden as they cool, achieving that perfect chewy texture.


### A Family Tradition


Each time I bake Ginger Molasses Rounds, I'm transported back to those cherished days in my grandmother's kitchen. The cookies not only serve as a sweet treat but as a reminder of the love and lessons passed down through generations. As my own children gather around, eager to help and hear stories of the past, I know this tradition will continue, weaving a tapestry of memories that will last a lifetime.


### Difficulty and Classification


Rated a 3 out of 10 on the difficulty scale, this recipe is both simple and rewarding, making it perfect for bakers of all levels. Classified as a dessert, these cookies are a delightful way to end a meal or share with friends and family over a cup of tea.


As you bake and enjoy these Ginger Molasses Rounds, may they bring warmth to your heart and home, just as they have to mine for so many years.

Read more about Appetizers

Read more about Main Dishes

Read more about Desserts

Peppermint White Chocolate Fudge | Made by Meaghan Moineau

Peppermint White Chocolate Fudge | Made by Meaghan Moineau

**Title: Peppermint White Chocolate Fudge: A Sweet Trip Down Memory Lane**


**Description:** Dive into the world of festive flavors with our Peppermint White Chocolate Fudge recipe. Easy to make, yet rich in taste and tradition, this dessert is perfect for the holiday season. Discover how this delightful treat not only satisfies your sweet tooth but also brings back cherished family memories.


---


The holiday season is a time for family gatherings, laughter, and, of course, indulgent treats that bring warmth and joy to our hearts. One such treat that has always held a special place in my family's holiday tradition is the Peppermint White Chocolate Fudge. This dessert isn't just a delightful blend of flavors; it's a sweet reminder of the love and joy shared in my grandmother's kitchen.


**Ingredients:**


- 2 cups white chocolate chips


- 1 container of vanilla frosting


- Red food coloring


- 1 teaspoon peppermint flavoring


- Fresh peppermint candies, crushed


**Instructions:**


1. Begin by lining an 8x8 pan with plastic wrap or wax paper, ensuring easy removal of the fudge later.


2. In a large microwave-safe bowl, melt the white chocolate chips. Microwave them in 30-second intervals, stirring between each session to ensure a smooth consistency.


3. Once melted, add the container of vanilla frosting to the bowl. Stir until the mixture is well combined.


4. Incorporate the peppermint flavoring, stirring thoroughly to distribute the flavor evenly. If the mixture begins to stiffen, reheat it for an additional 10 seconds to maintain a pourable consistency.


5. Pour the mixture into the prepared pan, spreading it evenly.


6. Place 6-8 drops of red food coloring on the surface of the warm fudge. Using a toothpick or knife, swirl the color into the top of the fudge to create a marbled effect.


7. Sprinkle the crushed peppermint candies over the top, adding a festive crunch to each bite.


8. Cool the fudge in the refrigerator until it hardens. Once firm, cut into squares and enjoy!


**Nostalgic Story:**


Every Christmas Eve, my grandmother would gather all the grandchildren around her worn, wooden kitchen table, the air filled with the sweet scent of vanilla and peppermint. We were her little helpers, eagerly waiting to swirl the red food coloring into the smooth, white canvas of fudge. As she gently guided our hands, she'd recount stories from her childhood—tales of snowy holidays and simple joys that seemed to dance around us like the snowflakes outside.


The swirling of red into white became more than just a step in a recipe; it was a ritual, a moment where time seemed to stand still, capturing the essence of family togetherness. The finished product, adorned with crushed peppermint candies, was not just a treat we shared, but a memory we cherished.


**Difficulty: 2/10**


**Classification: Dessert**


This Peppermint White Chocolate Fudge is an easy-to-make dessert that brings a bit of holiday magic to your table. With simple ingredients and fond memories infused in every bite, it's sure to become a cherished tradition in your home as well. Whether you're creating new memories or reliving old ones, this fudge is a testament to the sweetness of family and festive cheer.

Read more about Appetizers

Read more about Main Dishes

Read more about Desserts

Stir Fried Cabbage and Tomatoes | Made by Meaghan Moineau

Stir Fried Cabbage and Tomatoes | Made by Meaghan Moineau

# A Taste of Home: Stir-Fried Cabbage and Tomatoes


## A Nostalgic Culinary Journey with a Simple Yet Flavorful Dish


### Introduction


In the realm of comfort food, simplicity often reigns supreme. Stir-Fried Cabbage and Tomatoes is one such dish that epitomizes the beauty of humble ingredients coming together to create something greater than the sum of its parts. This recipe, with its roots deeply embedded in family tradition, offers a quick, flavorful, and nutritious meal that can easily become a household favorite. Rated at a 3 out of 10 in difficulty, it’s perfect for both novice and seasoned cooks. Classified as a **Main Dish**, it pairs beautifully with steamed rice or crusty bread for a complete meal experience.


### Ingredients


- 1 head of Beijing cabbage, coarsely shredded


- 2-3 ripe tomatoes, rinsed and diced


- 3 cloves of garlic, minced


- Salt, to taste


- 1 teaspoon sugar


- 2 tablespoons ketchup


- 2-3 tablespoons water


- Vegetable oil, for sautéing


### Instructions


1. Begin by preparing your ingredients. Coarsely shred the cabbage and rinse it well under cold water. Drain thoroughly and set aside.


2. Rinse and dice the tomatoes, then set them aside.


3. Heat a wok over medium-high heat and add a splash of vegetable oil. Sauté the minced garlic until it becomes fragrant and lightly golden.


4. Add the shredded cabbage to the wok, stirring frequently. Cook until the cabbage softens, adding a splash of water if necessary to prevent sticking.


5. Incorporate the diced tomatoes into the wok, stirring to combine with the cabbage.


6. Season the mixture with salt, sugar, and ketchup. Add 2-3 tablespoons of water to help meld the flavors.


7. Continue to stir-fry until the tomatoes have softened and the flavors are well combined.


8. Serve immediately, savoring every bite of this nostalgic dish.


### A Walk Down Memory Lane


As I prepare this dish, I am transported back to my grandmother's cozy kitchen, where the aroma of garlic sizzling in a wok was a daily symphony. My grandmother, with her deft hands and warm smile, would often prepare Stir-Fried Cabbage and Tomatoes as a quick lunch during the long summer days. The simplicity of the ingredients belied the complex flavors that would emerge as she skillfully combined them.


I remember the stories she would share, tales of her own childhood and the vibrant markets where she learned to select the freshest produce. Each meal was a lesson in love, patience, and the art of cooking from the heart. As a child, watching her transform simple vegetables into a delightful meal was nothing short of magical.


This dish, with its balance of sweet and savory, carries the warmth of family gatherings and the joy of shared meals. It’s a reminder that the best recipes are more than just a list of ingredients and instructions—they're a bridge to cherished memories and a testament to the love passed down through generations.


### Conclusion


Whether you're seeking a quick and satisfying meal or a nostalgic journey through flavors, Stir-Fried Cabbage and Tomatoes is a dish that offers both. Its ease of preparation and delightful taste make it a staple in any kitchen. Try it for yourself, and perhaps it will become a beloved part of your own family's culinary traditions.

Read more about Appetizers

Read more about Main Dishes

Read more about Desserts

Arroz Con Pollo | Made by Meaghan Moineau

Arroz Con Pollo | Made by Meaghan Moineau

**Title: Aromatic Arroz Con Pollo: A Journey Through Flavors and Memories**


**Description:** Dive into the rich tapestry of flavors with our Arroz Con Pollo recipe, a comforting main dish that marries the savory allure of spices with the heartwarming essence of family tradition. Easy to prepare and brimming with nostalgic charm, this dish promises a culinary experience that will whisk you away to cherished moments of togetherness.


---


There’s something truly magical about the way certain dishes have the power to transport us back in time, evoking vivid memories of family gatherings and laughter-filled kitchens. Arroz Con Pollo is one such dish for me. Every time I prepare it, the fragrant aroma of cumin, coriander, and turmeric fills the air, and I am instantly reminded of Sunday afternoons spent in my grandmother’s bustling kitchen.


In our household, Sundays were reserved for family. We would gather around her large wooden table, eagerly awaiting the feast that was being lovingly prepared. My grandmother, the maestro of culinary delights, would start by melting butter in her favorite cast-iron pan, the one seasoned with years of family meals. The sizzle of garlic hitting the hot butter was our cue to gather closer, drawn by the promise of the flavors to come.


She would expertly season the chicken breasts with a sprinkle of cumin, coriander, and turmeric, infusing them with a symphony of aromatic spices. As the chicken browned, she’d add diced onions and vibrant bell peppers, their colors as lively as the stories we shared. In went the canned chiles and tomatoes, followed by a generous pour of chicken broth that tied all the ingredients together in a savory embrace.


But the magic truly happened when she added the rice. As it simmered, absorbing the rich broth and spices, we would set the table, stealing glances at the bubbling pot that promised comfort and warmth. The final touch was a blanket of shredded cheese, melting into a luscious topping that crowned the dish with creamy indulgence.


Each bite of Arroz Con Pollo was a celebration—a melody of spices, tender chicken, and perfectly cooked rice, all enveloped in the melted cheese. It was more than just a meal; it was a moment of connection, a reminder of the love that went into every pot my grandmother prepared.


Today, I continue to honor this tradition, crafting Arroz Con Pollo for my own family. As I follow the familiar steps, I feel a sense of continuity, of passing down the flavors and memories to the next generation. It's a hearty main dish that rates a 5 out of 10 in difficulty, making it accessible for home cooks of all skill levels.


Whether it’s a special occasion or a casual dinner, this dish remains a beloved staple, a testament to the power of food in bringing people together. So gather your loved ones, and let the rich flavors of Arroz Con Pollo create new memories that will last a lifetime.

Read more about Appetizers

Read more about Main Dishes

Read more about Desserts

Eggplant and Tomato Sauce | Made by Meaghan Moineau

Eggplant and Tomato Sauce | Made by Meaghan Moineau

# A Taste of Tradition: Eggplant and Tomato Sauce Pasta


## Description


Dive into a world of rich flavors and family traditions with our Eggplant and Tomato Sauce Pasta. This hearty main dish will transport you to a cozy Italian kitchen, where the aroma of simmering tomatoes and fresh basil fills the air. Not only is this recipe a delight for your taste buds, but it also holds a special place in my heart as it evokes cherished memories of family gatherings. Perfect for a comforting dinner, this dish combines the earthiness of eggplant with the tanginess of tomatoes and the umami of Romano cheese for a symphony of flavors that is sure to become a staple in your household.


### Ingredients:


- 1 medium eggplant, cut into cubes


- 1 can (28 oz) crushed tomatoes


- 1 red onion, sliced


- 3 cloves garlic, chopped


- 1 cup grape tomatoes, halved


- 2 tablespoons lemon juice


- Salt and freshly ground black pepper


- 1 red bell pepper, diced


- 1 teaspoon dried oregano


- A handful of fresh basil leaves


- 1/2 cup red wine


- Your favorite macaroni


- Fresh Romano cheese, grated


- 4 tablespoons olive oil


- Red pepper flakes (optional)


### Instructions:


1. **Prepare the Eggplant Mixture**: In a large bowl, combine the cubed eggplant, chopped garlic, sliced onion, and halved grape tomatoes. Add 2 tablespoons of olive oil, lemon juice, 1 teaspoon of salt, and a sprinkle of ground black pepper. Toss everything together until well coated.


2. **Sauté the Vegetables**: Heat a large frying pan over medium heat and add 2 tablespoons of olive oil. Once hot, add the eggplant mixture and sauté until the eggplant is softened, about 10-12 minutes.


3. **Simmer the Sauce**: Add the crushed tomatoes, diced red bell pepper, dried oregano, another 1 teaspoon of salt, and a dash of ground black pepper to the pan. Stir to combine. Pour in the red wine and let the sauce simmer on low heat for about 30-35 minutes, stirring occasionally. The longer it cooks, the deeper the flavors will develop.


4. **Cook the Macaroni**: While the sauce is simmering, prepare your favorite macaroni according to the package instructions. Drain and set aside.


5. **Toss the Pasta**: In a large bowl, drizzle a little olive oil and add a few dashes of red pepper flakes, dried oregano, and grated Romano cheese. Add the cooked macaroni and toss to coat.


6. **Combine and Serve**: Add the eggplant sauce to the macaroni and toss gently to combine. Finish with more grated Romano cheese and fresh basil leaves. Serve warm.


### Difficulty: 5/10


### Classification: Main Dish


---


## A Nostalgic Bite: Family Memories


Every time I prepare this Eggplant and Tomato Sauce, I'm transported back to my grandmother's kitchen. It was a place of warmth, where the walls echoed with laughter and the clinking of pots and pans. I vividly remember the summer afternoons spent at her house, where she would let me help her in the kitchen. My task was simple yet crucial: stirring the sauce as it simmered, releasing an aroma that enveloped the entire house.


My grandmother would tell stories of her childhood in Italy, where each ingredient was carefully selected from her family's garden. She taught me that cooking was an art, one that required patience and love. As we cooked together, she would share her wisdom, reminding me that the secret to a perfect dish was to cook with your heart.


This recipe is more than just a meal; it's a bridge to my heritage and a testament to the love passed down through generations. It's a reminder that the best dishes are those that bring people together, creating new memories while honoring the old.


Every bite of this Eggplant and Tomato Sauce Pasta is a tribute to my grandmother, a celebration of family, and a cherished tradition that I hope will continue for many generations to come.

Read more about Appetizers

Read more about Main Dishes

Read more about Desserts

Gingerbread | Made by Meaghan Moineau

Gingerbread | Made by Meaghan Moineau

**Title: "Grandma's Timeless Gingerbread: A Warm Slice of Family Tradition"**


**Description:** Dive into the rich, aromatic world of gingerbread with this classic recipe that has been lovingly passed down through generations. Infused with the comforting flavors of molasses and spices, this gingerbread is not just a dessert—it's a piece of family history. Perfect for creating new memories or reliving cherished ones, this recipe is simple enough for a cozy weekend bake and special enough for festive gatherings.


---


There's something magical about the smell of gingerbread baking in the oven. For me, it immediately conjures up memories of my grandmother's kitchen, a warm haven filled with the symphony of spices and laughter. Every holiday season, my family comes together to recreate Grandma’s legendary gingerbread, a tradition that binds us across time and generations.


**Ingredients:**


- 1 cup molasses


- 1 teaspoon salt


- 2 eggs


- 1/2 cup salad oil


- 1 cup sugar


- 1 teaspoon soda


- 1 cup boiling water


- 2 1/2 cups flour


- 1 teaspoon ginger


- 1 teaspoon cinnamon


**Instructions:**


1. **Begin the Journey:** Start by preheating your oven to 350 degrees. In a large mixing bowl, combine the molasses, salad oil, sugar, ginger, cinnamon, and salt. Stir together these ingredients, allowing their fragrances to mingle and fill the air with nostalgia.


2. **Add a Touch of Love:** Crack in the eggs and beat the mixture until smooth. This step was always my favorite as a child, eagerly watching the transformation under Grandma's expert hands.


3. **The Secret Ingredient:** Dissolve the soda in 1/8 cup of boiling water, then stir it into the mixture. This little trick was Grandma’s secret to creating a perfectly airy texture.


4. **Create the Canvas:** Gradually add the flour and the remaining water, stirring gently. The batter will be thin, but don't worry—it's exactly how it should be.


5. **Bake to Perfection:** Pour the batter into a 9"x13" pan and bake until done. The anticipation builds as the spicy aroma wafts through every corner of the house.


6. **Optional Glaze:** To add an extra layer of decadence, prepare the glaze. Melt 1 stick of butter in a saucepan, add 1/4 cup milk and 1 cup brown sugar, and bring to a boil. Let it bubble away for about four minutes before drizzling generously over the gingerbread.


**Nostalgic Memory:**


One chilly afternoon, as the snowflakes danced outside, I sat by the kitchen table watching Grandma prepare her famous gingerbread. She shared stories of her childhood, her eyes twinkling with joy. Each slice of gingerbread was a gateway to the past, a comforting reminder of the enduring bonds of family. There was something inherently special about knowing that this simple recipe had brought warmth to so many generations before me.


**Difficulty Rating:** 3/10


**Classification:** Dessert


---


Whether served hot with a dollop of whipped cream or enjoyed cold with a steaming cup of tea, this gingerbread is more than just a dessert; it's a testament to the enduring power of family traditions. As you bake, may the memories of loved ones fill your heart and home with warmth and cheer. Happy baking!

Read more about Appetizers

Read more about Main Dishes

Read more about Desserts

Dutch Oven Paella | Made by Meaghan Moineau

Dutch Oven Paella | Made by Meaghan Moineau

# Dutch Oven Paella: A Flavorful Journey to the Heart of Spain


## Description


Indulge in the vibrant flavors of Spain with our Dutch Oven Paella, a dish that brings the rich traditions of Spanish cuisine to your table. This recipe combines succulent shrimp, savory chorizo, and tender chicken with aromatic saffron-infused rice, creating a delightful symphony of taste and texture. Perfect for a family gathering or an intimate dinner, this paella is sure to be a showstopper. With a difficulty rating of 7/10, this main dish is an impressive yet approachable culinary adventure for any home cook.


### Ingredients


- 1 pound shrimp, peeled and deveined


- 1 teaspoon minced garlic


- 1 tablespoon extra virgin olive oil


- Salt and pepper, to taste


- 1 pound lean skinless boneless chicken thighs


- 4 ounces Spanish chorizo sausage, sliced


- 1 red bell pepper, sliced


- 1 onion, chopped


- 1 can (14.5 oz) diced tomatoes


- 1 1/2 cups arborio rice


- 3 cups low sodium chicken broth


- 1/2 cup dry white wine


- 1/2 teaspoon saffron threads


- 1 bay leaf


- 1 cup frozen artichoke hearts


- 1 cup frozen peas


- Fresh flat-leaf parsley, chopped


- Lemon wedges, for serving


### Instructions


1. **Preparation**: Adjust your oven rack to the lower middle position and preheat the oven to 350°F. In a medium bowl, toss the shrimp with 1 teaspoon minced garlic, 1 tablespoon olive oil, 1/4 teaspoon salt, and 1/4 teaspoon pepper. Refrigerate until needed. Season the chicken with salt and pepper and set aside.


2. **Sauté the Vegetables**: Heat 2 teaspoons of olive oil in a large Dutch oven over medium-high heat until the oil shimmers. Add the bell pepper and cook, stirring occasionally until the skins blister and brown, about 3-4 minutes. Remove to a plate and set aside.


3. **Cook the Meats**: Add 1 tablespoon more oil to the pot, add the chicken thighs, and brown well, flipping once, about 3 minutes per side. Remove the chicken to a bowl. Reduce the heat to medium, add the chorizo, and cook for 4-5 minutes, stirring frequently, until browned and the fat starts to render. Add to the bowl with the browned chicken.


4. **Prepare the Base**: At medium heat, add enough oil to the pot to equal 2 tablespoons. Add the onion and cook, stirring frequently, until tender, about 3 minutes. Add the remaining garlic, cook for 1 minute, then add the tomatoes. Cook and stir until the tomatoes thicken and darken slightly, about 3 minutes.


5. **Combine Ingredients**: Add the rice, cook, and stir for about 2 minutes, ensuring everything is evenly mixed. Add the broth, wine, saffron, bay leaf, and 1/2 teaspoon salt. Add the browned chicken and sausage. Increase the heat to medium-high and bring to a boil, stirring often.


6. **Bake the Paella**: Cover the pot and place it in the oven. Bake for 15 minutes until the liquid is mostly absorbed. Remove the pot from the oven, keep the oven door closed to retain heat, and remove the lid.


7. **Finish Cooking**: Nestle the artichoke hearts into the rice. Sprinkle the shrimp over the top, followed by the peas and bell pepper strips. Replace the lid and return to the oven for another 10 minutes or until the shrimp are opaque.


8. **Create the Soccarat**: Turn the stove burner to medium-high heat. Remove the pot from the oven and place it on the stove. Cook for 5 minutes to form the browned portion on the bottom of the rice, rotating the pot 180 degrees halfway through to ensure even browning.


9. **Serve and Enjoy**: Remove the pot from heat and let the paella rest, covered, for 5 minutes. Sprinkle with fresh chopped parsley and serve with lemon wedges.


### A Nostalgic Story


Growing up, paella was more than just a meal; it was a celebration. I vividly remember the annual family reunions at my grandparents' home, where the aroma of saffron and simmering chorizo would fill the air, drawing everyone to the kitchen. My grandfather, with his Spanish roots, would preside over the Dutch oven, sharing tales of his childhood in Valencia. We would gather around the table, each serving a reminder of our shared heritage and the love that bound us together. This Dutch Oven Paella is a tribute to those cherished memories, a dish that continues to bring our family closer with each flavorful bite.


### Difficulty


7/10


### Classification


Main Dish


Prepare this Dutch Oven Paella to experience the warmth and richness of Spanish cuisine, and create lasting memories with your loved ones. Whether you’re a seasoned cook or a passionate beginner, this dish promises a delightful culinary journey. Enjoy!

Read more about Appetizers

Read more about Main Dishes

Read more about Desserts

Roasted Pumpkin and Barley Risotto | Made by Meaghan Moineau

Roasted Pumpkin and Barley Risotto | Made by Meaghan Moineau

# Cozy Autumn Nights: Savoring Roasted Pumpkin and Barley Risotto


## A Hearty Dish That Warms the Soul


### Description:


Experience the flavors of fall with our Roasted Pumpkin and Barley Risotto, a comforting main dish that combines the rich, earthy taste of roasted pumpkin with the nutty texture of barley. This recipe is not only a feast for the taste buds but also a nostalgic journey that brings back fond family memories. Rated 6 out of 10 in difficulty, it’s a rewarding culinary challenge fit for any home chef eager to create something special.


---


### Ingredients:


- 1 cup barley


- 2 tablespoons butter


- 4 cups chicken stock


- 1 teaspoon cumin powder


- 1 teaspoon dried thyme


- Fresh mint leaves for garnish


- 2 cloves of garlic, minced


- 1 small piece of ginger, grated


- 1 diced onion


- 1 teaspoon oregano


- 1 teaspoon pink peppercorns


- 2 cups pumpkin puree


- Salt and pepper to taste


- 1/2 cup sour cream


- 1 tablespoon Worcestershire sauce


### Instructions:


1. **Prepare the Pumpkin:**


- Preheat your oven to 400°F (200°C).


- Cut the pumpkin, removing the seeds and strings.


- Place the pumpkin halves cut side down in a baking dish with 1/4 inch of water.


- Bake for 45 minutes or until the flesh is soft and cooked through.


- Scoop out the cooked flesh and puree it with a splash of milk until smooth.


2. **Sauté and Season:**


- In a large skillet, melt the butter over medium heat.


- Add the diced onions and minced garlic, cooking until translucent.


- Stir in the barley, toasting lightly for about 2 minutes.


- Season with salt, pepper, cumin, thyme, and oregano.


3. **Cook the Risotto:**


- Add 2 cups of chicken stock to the skillet.


- Cook, stirring occasionally, until the liquid is nearly absorbed.


- Stir in the pumpkin puree.


- Gradually add the remaining stock, 1/2 cup at a time, allowing each addition to be absorbed before adding more.


- Continue to cook until the barley becomes creamy and tender.


4. **Finish and Serve:**


- Remove from heat and stir in the sour cream and Worcestershire sauce.


- Serve immediately, garnished with fresh mint leaves and a dollop of pumpkin-sour cream.


### A Trip Down Memory Lane


As the aroma of roasted pumpkin fills the kitchen, I am transported back to my grandmother's cozy house on chilly autumn evenings. She would prepare this comforting risotto with love, her hands skillfully working the ingredients into a symphony of flavors. The warmth of the dish, combined with the laughter and stories shared around the dinner table, made each meal a cherished memory. My grandmother always knew how to turn simple ingredients into a dish that not only nourished our bodies but also our souls. This Roasted Pumpkin and Barley Risotto is more than just a meal; it’s a reminder of family, love, and the beauty of home-cooked food.


---


### Conclusion:


Whether you're looking to impress guests or simply indulge in a cozy night in, this Roasted Pumpkin and Barley Risotto is the perfect main dish. With its blend of spices and creamy texture, it captures the essence of fall while offering a heartwarming nod to family traditions. Enjoy the process of creating this delightful dish and savor the memories it may bring to your table.

Read more about Appetizers

Read more about Main Dishes

Read more about Desserts

Roasted Beet Hummus | Made by Meaghan Moineau

Roasted Beet Hummus | Made by Meaghan Moineau

**Title: Rediscovering Tradition with a Modern Twist: Roasted Beet Hummus**


**Description:** Dive into the vibrant world of roasted beet hummus, a delightful twist on the classic Middle Eastern dish. Perfect as an appetizer, this recipe combines the earthy sweetness of roasted beets with the creamy richness of tahini and chickpeas. Inspired by fond family memories, this dish is not just about flavors but also about creating new traditions around the dining table.


---


**Rediscovering Tradition with a Modern Twist: Roasted Beet Hummus**


There's something magical about the vibrant hue of roasted beet hummus. It beckons you to the table, not just with its bright, alluring color but with the promise of flavors that are both familiar and refreshingly new. This recipe, an appetizer that rates a 4 out of 10 on the difficulty scale, is a testament to how food can bridge past and present, creating a tapestry of memories and new experiences.


**Ingredients:**


- Red roasted beets


- Cooked chickpeas


- Garlic


- Ground cumin


- Lemon juice


- Olive oil


- Salt


- Tahini sesame seed paste


**Instructions:**


1. Begin by placing all ingredients except for the chickpeas and olive oil in a food processor or blender. Pulse until well blended.


2. Add the chickpeas and olive oil and pulse until just incorporated.


3. If needed, add more olive oil to help blend the chickpeas into a paste or to adjust the hummus to your desired consistency.


4. Serve with warm pita or flatbread for a delicious appetizer.


As I prepare this dish, I'm transported back to my grandmother's kitchen—a place filled with warmth, laughter, and the irresistible aroma of freshly baked bread. Every Sunday, our family would gather around her large oak table, sharing stories and savoring her culinary creations. Grandma had a knack for taking traditional recipes and infusing them with her own unique flair, much like this roasted beet hummus.


The beets, often harvested from her own garden, were roasted to perfection, their earthy sweetness a perfect complement to the creamy chickpeas. She'd regale us with tales from her childhood, stories that seemed to come alive with every bite we took. Her hands, though weathered with age, moved with practiced ease as she blended ingredients, creating a hummus that was not just food, but a memory in the making.


Today, as I share this recipe with you, it's more than just a delightful appetizer; it's a piece of my heritage, passed down through generations. The roasted beet hummus is a reminder of simpler times, of family gatherings filled with love and laughter, and of the timeless tradition of sharing a meal with those we hold dear.


Whether you're looking to recreate a beloved family memory or simply seeking a new addition to your culinary repertoire, this roasted beet hummus offers a burst of flavor that promises to delight and inspire. So, gather your loved ones, serve up this beautiful dish, and create your own stories to cherish for years to come.

Read more about Appetizers

Read more about Main Dishes

Read more about Desserts

Stir Fried Quinoa, Brown Rice and Chicken Breast | Made by Meaghan Moineau

Stir Fried Quinoa, Brown Rice and Chicken Breast | Made by Meaghan Moineau

# A Taste of Home: Stir Fried Quinoa, Brown Rice, and Chicken Breast


## Bringing Back Memories with Every Bite


There's something magical about the aroma of a well-cooked dish wafting through your kitchen. It has the power to transport you back to cherished moments with loved ones, where laughter was abundant, and time seemed to stand still. Today, I invite you to embark on a culinary journey with a delightful recipe that encapsulates the essence of family, tradition, and the joy of sharing a meal together: Stir Fried Quinoa, Brown Rice, and Chicken Breast.


### A Family Tradition


Growing up, Sundays were a special day in our household. After returning from church, my family would gather in the kitchen, each of us playing a role in preparing the day's feast. My father, with his infectious enthusiasm, would take charge of marinating the chicken, infusing it with a generous sprinkle of suya spice and seasoning cubes. As a child, the vibrant colors of the spices and the tantalizing aroma never failed to captivate my senses.


My mother, the orchestrator of our culinary symphony, would oversee the boiling of the quinoa and brown rice mix—a task I eagerly volunteered for, feeling important as I watched the grains dance in the pot. It was during these moments that I learned the value of patience, as the grains slowly softened and absorbed the rich flavors.


### The Recipe


#### Ingredients:


- Suya spice


- 1 cup quinoa and brown rice mix


- 2 tablespoons butter


- 2 medium carrots, sliced


- 1 cup whole cherry tomatoes


- 2 chicken breasts


- 3 cloves garlic, minced


- 2 seasoning cubes


- 1 green bell pepper, chopped


- 1 roma tomato, chopped


- 1 scotch bonnet pepper, finely chopped


- 2 spring onions, sliced


- 1 teaspoon vegetable oil


- 1 cup water


#### Instructions:


1. **Marinate the Chicken**: In a bowl, season the chicken breasts with seasoning cubes and suya spice. Allow to marinate for 2 hours, or use immediately if pressed for time.


2. **Prepare the Quinoa and Rice**: In a pot of boiling water (1 cup), add the quinoa and brown rice mix along with a teaspoon of vegetable oil. Allow to boil until soft, about 5-7 minutes. Pour into a bowl and set aside.


3. **Cook the Chicken**: In a pan, melt the butter over medium heat and pan fry the chicken breasts, flipping constantly to brown on both sides. Reduce the heat, cover the pan, and allow the chicken to cook thoroughly. If the pan becomes dry, add 2 tablespoons of water.


4. **Combine and Serve**: Stir in the chopped vegetables—carrots, cherry tomatoes, green bell pepper, roma tomato, scotch bonnet pepper, and spring onions—into the pan with the frying chicken. Finally, add the quinoa and brown rice mix. Serve hot!


### Nostalgia on a Plate


As we sat around the dining table, savoring the medley of flavors, stories from the past would surface—of my grandparents' tales of resilience, of my parents' adventurous youth, and of my own childhood escapades. This dish, a delightful amalgamation of textures and tastes, became more than just a meal; it was a bridge connecting generations, a testament to our shared history.


### Difficulty Level


This recipe is rated a 5 out of 10 in terms of difficulty. It strikes a perfect balance between simplicity and the exciting challenge of combining diverse flavors and textures. Classified as a Main Dish, it's hearty, nutritious, and destined to become a staple in your family meals.


### Conclusion


If you're looking to recreate a little magic in your kitchen and perhaps spark a walk down memory lane, this Stir Fried Quinoa, Brown Rice, and Chicken Breast recipe is your ticket. It embodies the warmth of home, the love of family, and the beauty of tradition. Enjoy the journey, one delicious bite at a time.

Read more about Appetizers

Read more about Main Dishes

Read more about Desserts

Vegan Pumpkin Bundt Cake | Made by Meaghan Moineau

Vegan Pumpkin Bundt Cake | Made by Meaghan Moineau

**Title: Autumn Nostalgia: A Vegan Pumpkin Bundt Cake to Warm Your Heart**


**Description: Experience the flavors of fall with our Vegan Pumpkin Bundt Cake, a delightful dessert that captures the essence of autumn. With the earthy sweetness of pumpkin and the warming spices of cinnamon, cloves, and nutmeg, this cake is perfect for cozy gatherings or a quiet evening at home. Discover a family story that makes this dessert even more special.**


---


As the leaves begin to turn and the air grows crisp, there’s one recipe that always brings back the warmth of family gatherings and the comfort of home: Vegan Pumpkin Bundt Cake. This delightful dessert, with its rich blend of spices and the subtle sweetness of date sugar, is more than just a treat; it’s a cherished tradition.


I remember the first time my grandmother made this cake. It was a blustery October afternoon, and the scent of cinnamon and nutmeg wafted through the house as we gathered in the kitchen. My grandmother, with her apron dusted in flour, showed me how to carefully fold the pumpkin mixture into the dry ingredients, a technique she insisted was crucial to achieving the perfect texture.


The kitchen was filled with laughter and the sound of pecans being chopped, the occasional burst of storytelling punctuating the rhythm of our work. As the cake baked, Grandma shared tales of her childhood, of autumns spent in the countryside, where the harvest was celebrated with feasts that brought the community together. Her stories were as comforting as the cake itself, weaving a tapestry of family history that made every bite even more meaningful.


Creating this cake is a journey in itself, with each ingredient playing a vital role. The apple cider vinegar adds a subtle tang, while the maple syrup and date sugar provide a depth of sweetness that complements the spices perfectly. The golden raisins and toasted pecans add texture and bursts of flavor, making each slice a delightful surprise.


Here's how you can bring this slice of nostalgia into your own kitchen:


### Ingredients:


- 1 tablespoon apple cider vinegar


- 2 teaspoons baking powder


- 1 teaspoon baking soda


- 2 cups barley flour


- 1/2 cup canola oil


- 1 cup date sugar


- 1/2 cup golden raisins


- 1 teaspoon ground allspice


- 2 teaspoons ground cinnamon


- 1/2 teaspoon ground cloves


- 1 teaspoon ground ginger


- 1/4 cup maple syrup


- 1/2 teaspoon nutmeg


- 1 cup pecans


- 1 cup pumpkin puree


- 1/2 teaspoon salt


- 1 cup soymilk


- 1 teaspoon vanilla extract


### Instructions:


1. Preheat your oven to 350 degrees Fahrenheit. Oil a bundt pan and dust it lightly with flour.


2. Spread pecans on a baking sheet and toast for 10 minutes. Let them cool completely, then chop roughly.


3. Cover raisins with boiling water and soak for 25 minutes. Drain and set aside.


4. In a bowl, whisk together pumpkin puree, canola oil, maple syrup, soymilk, apple cider vinegar, and vanilla extract.


5. In a large bowl, mix date sugar, barley flour, baking soda, baking powder, ground spices, and salt with a clean whisk.


6. Using a rubber spatula, gently fold the pumpkin mixture into the dry ingredients. When the dry ingredients are halfway incorporated, add the raisins and chopped pecans.


7. Continue folding just until the mixture comes together; be careful not to overmix.


8. Pour the batter into the prepared bundt pan and smooth the top with a rubber spatula.


9. Bake for 45 minutes, rotating the cake from front to back after 20 minutes, or until a toothpick inserted into the center comes out clean.


10. Cool the cake in the pan for 15 minutes, then invert it onto a wire rack to continue cooling.


11. Transfer to a plate and dust with powdered sugar. Serve warm or at room temperature.


### Difficulty: 6/10


### Classification: Dessert


Whether served warm with a cup of herbal tea or enjoyed at room temperature, this Vegan Pumpkin Bundt Cake is a testament to the timeless joy of baking. It's not just about the delicious flavors but also about the memories and connections that come with it. So, gather your loved ones, share a slice of this cake, and create your own stories to pass down through the generations.

Read more about Appetizers

Read more about Main Dishes

Read more about Desserts