Upside-Down Blueberry Puffs Brunch | Made by Meaghan Moineau

Upside-Down Blueberry Puffs Brunch

Intro

There’s something magical about a lazy Sunday brunch at home, where the air is filled with the aroma of freshly baked delights. Growing up, my grandmother would often whip up her famous Upside-Down Blueberry Puffs for our family brunches. The anticipation would build as the delectable scent wafted through the house, drawing everyone to the kitchen. These delightful puffs are a cherished family recipe that I’m excited to share with you today. I hope they bring as much joy to your table as they have to mine over the years.

Why You’ll Love It

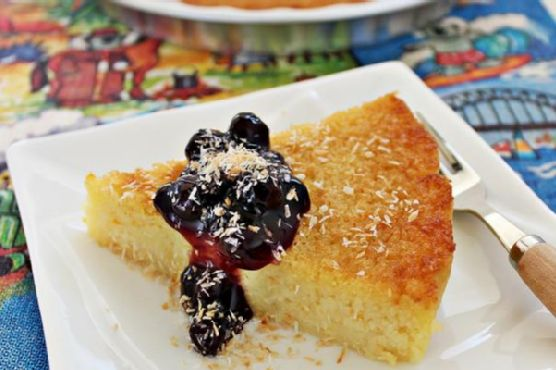
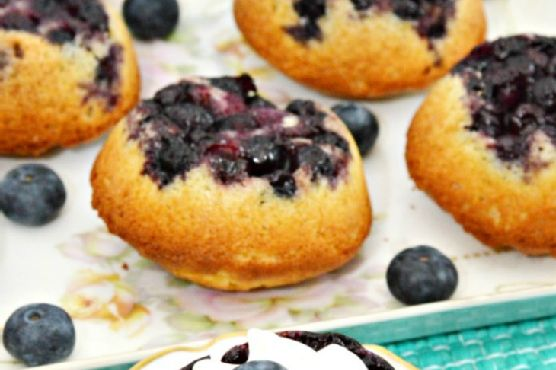
This Upside-Down Blueberry Puffs recipe is a delightful fusion of simplicity and indulgence. With a tender, buttery crumb and the sweet tang of blueberries, these puffs are the perfect addition to any brunch spread. You’ll love how the blueberries caramelize at the bottom, creating a juicy, flavorful topping once the puffs are flipped. Not only are they delicious, but they are also visually stunning, sure to impress your family and guests alike. Plus, they’re surprisingly easy to make, which means you can enjoy a gourmet brunch experience with minimal effort.

Ingredients

  • 1 teaspoon baking powder
  • 1 cup blueberries, plus 6 extra for topping
  • 1/2 cup butter, softened
  • 1 teaspoon butter vanilla bakery emulsion
  • 1/4 teaspoon cream of tartar
  • 2 large eggs, separated
  • 1 1/2 cups all-purpose flour
  • 1/2 cup milk
  • 1/4 teaspoon salt
  • 3/4 cup sugar

Instructions

  1. Preheat your oven to 375 degrees Fahrenheit.
  2. Wash the blueberries and gently pat them dry.
  3. Spray six 6-ounce custard cups with baking spray and divide the blueberries among the cups, reserving 6 berries to top the cakes later.
  4. In a mixing bowl, combine the flour, salt, and baking powder, then set aside.
  5. Beat the egg whites until foamy, then add the cream of tartar and continue beating until stiff peaks form. Set the beaten egg whites aside.
  6. In a separate bowl, cream the butter, gradually adding the sugar and continuing to cream until light and fluffy.
  7. Add the egg yolks and butter vanilla bakery emulsion to the creamed mixture and mix until well blended.
  8. Alternately add the flour mixture and milk to the butter mixture, beating until well combined. The batter will be thick.
  9. Gently fold the beaten egg whites into the batter until fully incorporated.
  10. Spoon the batter into the prepared custard cups over the blueberries, filling no more than 3/4 full.
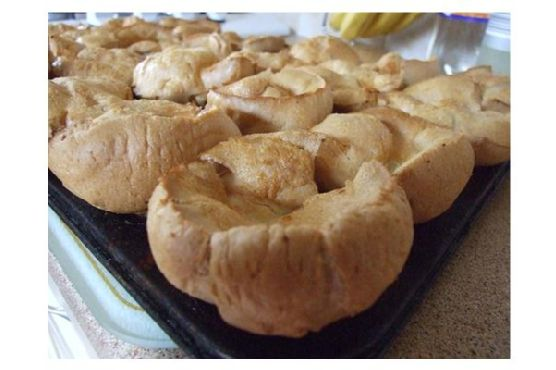
  11. Place the custard cups on a baking sheet and bake for 30 minutes, or until a toothpick inserted near the center of the cakes comes out clean.
  12. Turn out the cakes directly from the oven onto wire racks and allow them to cool slightly. Serve warm or at room temperature, optionally with whipped cream or ice cream topped with a blueberry.

Tips

To ensure your Upside-Down Blueberry Puffs turn out perfectly, consider these tips:

  • Use fresh, ripe blueberries for the best flavor. If fresh blueberries are unavailable, you can substitute with frozen ones, but make sure to thaw and drain them first.
  • When beating the egg whites, make sure your bowl and beaters are completely clean and dry to achieve stiff peaks.
  • Let the butter soften at room temperature before creaming to achieve a smooth, creamy texture.

Variations & Substitutions

Feel free to customize this recipe to suit your taste or dietary needs:

  • Fruit Substitution: Swap out the blueberries for other berries like raspberries or blackberries for a different flavor profile.
  • Gluten-Free Option: Use a 1:1 gluten-free flour blend in place of all-purpose flour.
  • Dairy-Free Version: Substitute the butter with a dairy-free margarine and the milk with almond or oat milk.

Storage

If you have any leftovers, store the Upside-Down Blueberry Puffs in an airtight container at room temperature for up to two days. For longer storage, cover them and place in the refrigerator for up to a week. Reheat them in the oven at a low temperature to enjoy them warm again.

FAQ

Can I make these puffs ahead of time?

Yes, you can prepare the batter and divide the blueberries into the custard cups the night before. Store them in the refrigerator and bake fresh in the morning for a warm brunch treat.

What can I serve with these puffs?

These puffs pair beautifully with a side of crispy bacon, a fresh fruit salad, or a simple arugula salad with a lemon vinaigrette to balance the sweetness.

Can I use frozen blueberries?

Yes, you can use frozen blueberries if fresh ones are not available. Make sure to thaw and drain them well before using to prevent excess moisture in the batter.

Nutrition

Each serving of Upside-Down Blueberry Puffs contains approximately:

  • Calories: 250
  • Fat: 12g
  • Carbohydrates: 32g
  • Protein: 4g
  • Sugar: 15g
  • Fiber: 1g

Conclusion

Upside-Down Blueberry Puffs are a delightful way to start your day with a touch of nostalgia and a burst of flavor. Whether you’re hosting a brunch or simply treating yourself to a special breakfast, these puffs are sure to become a favorite in your household. Easy to make and even easier to enjoy, they offer a perfect balance of sweetness and texture. I hope this recipe brings as much warmth and joy to your home as it has to mine. Happy baking!

Related update: Upside-Down Blueberry Puffs Brunch

Bourbon Street Beignets | Made by Meaghan Moineau

Bourbon Street Beignets: A Taste of New Orleans

Intro

There’s something magical about the first bite of a warm beignet, dusted with a generous layer of powdered sugar. My first encounter with these delightful pastries was on a humid summer evening in New Orleans. The air was filled with the lively sounds of jazz, and the sweet aroma of these golden bites wafted through the streets. Every bite took me back to that bustling corner of the French Quarter, where laughter mingled with the sounds of trumpets and saxophones. Today, I’m thrilled to share with you a recipe that brings a piece of Bourbon Street right into your kitchen.

Why You’ll Love It

This Bourbon Street Beignets recipe is a love letter to New Orleans’ vibrant culinary scene. You’ll love the simplicity and authenticity of this recipe, which captures the essence of traditional beignets found in the heart of the French Quarter. The light, airy texture paired with the delicate sweetness of powdered sugar is an unbeatable combination. Plus, making these at home is a delightful way to bring a touch of Southern charm to your dessert table.

Ingredients

  • 1 egg
  • 3 1/2 cups flour, divided
  • 1 cup heavy cream
  • Vegetable oil, for frying
  • Powdered sugar, for dusting
  • 1/2 teaspoon salt
  • 2 tablespoons shortening
  • 1/4 cup sugar
  • 1 cup hot water
  • 1 package (or 2 1/4 teaspoons) active dry yeast

Instructions

  1. Dissolve the yeast in warm water according to package instructions and set aside.
  2. In a large bowl, combine sugar, shortening, salt, and hot water. Stir until the shortening is melted and the sugar is dissolved. Allow the mixture to cool to lukewarm.
  3. Add the heavy cream, egg, 3 cups of flour, and the yeast mixture to the sugar-shortening mix.
  4. Attach the bowl to a stand mixer with a dough hook. Turn to speed “2” and mix for 2 minutes.
  5. Add the remaining flour, 1/2 cup at a time, mixing until the dough clings to the hook and cleans the sides of the bowl, about 5 minutes longer.
  6. Place the dough on a lightly floured board and roll into a 10×24 inch rectangle.
  7. Using a sharp knife, cut the dough into 2-inch squares.
  8. In a large heavy saucepan or deep fat fryer, heat the oil to 360 degrees Fahrenheit.
  9. Fry the doughnuts, turning to brown on both sides, about 3 minutes.
  10. Drain on absorbent towels and sprinkle generously with powdered sugar while warm.

Tips

For the best results, ensure your water is warm but not too hot when dissolving the yeast, as excessively hot water can kill the yeast. When frying, maintain a consistent oil temperature to achieve that perfect golden brown color. A candy thermometer can be a helpful tool to ensure the oil stays at the right temperature.

Variations & Substitutions

If you’re feeling adventurous, try adding a splash of vanilla extract or a hint of nutmeg to the dough for additional depth of flavor. For a gluten-free version, substitute the all-purpose flour with a gluten-free flour blend, keeping in mind that the texture might vary slightly. You can also experiment with different toppings; a drizzle of chocolate or caramel sauce can add a decadent twist.

Storage

Beignets are best enjoyed fresh and warm, but if you have leftovers, store them in an airtight container at room temperature for up to 2 days. To reheat, pop them in a preheated oven at 350 degrees Fahrenheit for a few minutes until warmed through. Avoid the microwave, as it can make them tough.

FAQ

Can I make the dough ahead of time?

Yes, you can prepare the dough ahead of time. Once the dough is mixed and kneaded, cover it tightly with plastic wrap and store it in the refrigerator for up to 24 hours. Allow it to come to room temperature before rolling and cutting.

Why are my beignets greasy?

Greasy beignets are often a result of oil that’s not hot enough. Make sure your oil is at 360 degrees Fahrenheit before frying. If the temperature drops too low, the beignets will absorb more oil instead of cooking quickly on the outside.

Can I freeze beignets?

Yes, you can freeze beignets. After frying, allow them to cool completely, then place them in a single layer on a baking sheet and freeze until solid. Transfer to a freezer-safe bag or container. To reheat, bake in a preheated oven at 350 degrees Fahrenheit until heated through.

Nutrition

While beignets are a treat to be savored, it’s worth noting that they are an indulgent dessert. High in carbohydrates and sugar, they are best enjoyed in moderation. Pairing them with a cup of coffee can create a balanced experience, reminiscent of a New Orleans café.

Conclusion

Making Bourbon Street Beignets at home is a delightful adventure that brings the spirit of New Orleans right to your kitchen. With their crisp exterior and soft, airy center, these beignets are sure to become a family favorite. Whether you’re reminiscing about a past visit to the French Quarter or simply looking to enjoy a taste of the South, this recipe is your ticket to a sweet escape. So go ahead, dust off that powdered sugar, and let the good times roll!

Related update: Bourbon Street Beignets

Vegetarian Ratatouille | Made by Meaghan Moineau

Vegetarian Ratatouille: A Classic French Delight

Intro

Ah, ratatouille! This classic French dish transports me back to my grandmother’s kitchen, where the air was always filled with the comforting aroma of roasted vegetables and fresh herbs. As a child, I would spend summer afternoons on her porch, watching her expertly dice eggplants and zucchini, her hands moving with the rhythm of someone who had perfected the art of cooking over decades. The vibrant colors of the vegetables were as captivating as the dish itself, and the first bite was always a revelation: a warm, hearty medley of flavors that seemed to capture the very essence of summer.

This vegetarian ratatouille recipe is my tribute to those cherished memories. It’s a simple yet flavorful dish that combines fresh vegetables and herbs in a way that epitomizes rustic French cooking. Whether you’re a seasoned chef or a beginner in the kitchen, this recipe is sure to delight your senses and become a cherished addition to your culinary repertoire.

Why You’ll Love It

  • Healthy and Nutritious: Packed with fresh vegetables and herbs, this dish is a nutritious powerhouse that’s perfect for any meal.
  • Easy to Make: With simple ingredients and straightforward instructions, this ratatouille is accessible for cooks of all skill levels.
  • Versatile: Enjoy it as a main dish, a side, or even a topping for pasta or rice.
  • Seasonal Delight: Make the most of summer’s bounty with this recipe that showcases fresh produce at its best.
  • Make-Ahead Friendly: Its flavors deepen over time, making it ideal for meal prep or next-day leftovers.

Ingredients

  • 1 eggplant, diced
  • 1 zucchini, sliced
  • 1 yellow squash, sliced
  • 2 tomatoes, chopped
  • 1 red bell pepper, chopped
  • 1 orange bell pepper, chopped
  • 1 onion, diced
  • 2 cloves garlic, minced
  • Fresh basil leaves, torn
  • 1 teaspoon thyme
  • 1 teaspoon dried oregano
  • 3 tablespoons extra virgin olive oil
  • Sea salt, to taste

Instructions

  1. In a large saucepan over medium-low heat, warm the extra virgin olive oil.
  2. Add the diced onion and minced garlic. Sauté until the onions are translucent, stirring occasionally to prevent sticking.
  3. Stir in the chopped tomatoes and let them cook for about 5 minutes, allowing their juices to release.
  4. Add the diced eggplant, sliced zucchini, yellow squash, and chopped bell peppers to the saucepan.
  5. Sprinkle in the thyme, dried oregano, and sea salt. Stir to combine all the ingredients.
  6. Reduce the heat to low and cover the pan. Let the mixture simmer for about 30 minutes, stirring occasionally, until the eggplant is tender and the flavors have melded together.
  7. Remove from heat and stir in the fresh basil leaves just before serving.
  8. Taste and adjust the seasoning if necessary. Serve warm and enjoy!

Tips

For the best flavor, use fresh, ripe vegetables. If possible, visit your local farmer’s market for ingredients. Cut your vegetables uniformly to ensure even cooking, and be patient with the simmering process to allow the flavors to fully develop. Remember, the key to a good ratatouille is in its simplicity and the quality of its ingredients.

Variations & Substitutions

Feel free to experiment with this recipe by adding or substituting vegetables based on what’s in season or your personal preferences. Mushrooms and carrots can add depth and sweetness. If you prefer a bit of heat, consider adding a pinch of red pepper flakes. For a protein boost, toss in some chickpeas or serve the ratatouille over quinoa.

Storage

Ratatouille stores beautifully. Once cooled, transfer it to an airtight container and refrigerate for up to 5 days. Reheat gently on the stovetop or in the microwave. It can also be frozen for up to 3 months. Thaw in the refrigerator overnight and reheat before serving.

FAQ

Can I make ratatouille ahead of time?

Absolutely! Ratatouille is one of those dishes that tastes even better the next day as the flavors continue to meld. It’s perfect for meal prep or an easy make-ahead option for a gathering.

What should I serve with ratatouille?

Ratatouille is versatile and can be served with a variety of accompaniments. It pairs well with crusty bread, rice, or pasta. You can also serve it as a side dish with grilled fish or chicken for a more substantial meal.

Is ratatouille vegan?

Yes, this ratatouille recipe is completely vegan, making it a great option for those following a plant-based diet. It’s naturally gluten-free as well, accommodating a range of dietary needs.

Nutrition

This dish is not only delicious but also a health-conscious choice. It’s low in calories and rich in vitamins, antioxidants, and fiber. The combination of fresh vegetables provides a wealth of nutrients, while the olive oil adds healthy fats that are beneficial for heart health.

Conclusion

Incorporating this vegetarian ratatouille into your culinary repertoire is like inviting a touch of Provence into your home. It’s a dish that’s not only steeped in tradition but also vibrant with the colors and flavors of fresh produce. Whether you’re savoring it on a warm summer evening or cozying up with it on a cooler day, ratatouille is a celebration of simplicity and flavor. So, gather your ingredients, embrace the art of slow cooking, and enjoy making a dish that’s as delightful to prepare as it is to eat. Bon appétit!

Related update: Vegetarian Ratatouille

Blast Of Color Mexican Stuffed Bell Peppers | Made by Meaghan Moineau

Blast Of Color Mexican Stuffed Bell Peppers

Intro

Welcome to a vibrant culinary journey where every bite is a delightful explosion of flavors! Our Blast Of Color Mexican Stuffed Bell Peppers are not just a feast for the palate but also a joy for the eyes. These stuffed peppers are a wonderful medley of hearty ingredients and bold spices, reminiscent of family gatherings where food was the centerpiece of laughter and love.

I remember the first time I had stuffed bell peppers at my grandmother’s house. The kitchen was filled with the warm, inviting smell of roasted peppers mingling with spices, and the table was surrounded by family eagerly awaiting the meal. Today, I bring you a modern twist to that classic memory with a Mexican flair, perfect for any occasion.

Why You’ll Love It

This recipe is not only delicious but also packed with nutrients, making it a perfect meal for both busy weeknights and leisurely weekends. Here’s why you’ll fall in love with these stuffed peppers:

  • Colorful and Nutritious: Each bell pepper is a rainbow of ingredients, offering a punch of vitamins and minerals.
  • Flavorful and Satisfying: The combination of rotisserie chicken, black beans, and fire-roasted green chiles creates a satisfying and savory filling.
  • Easy to Prepare: With just a few simple steps, you can create a meal that looks gourmet but comes together quickly.
  • Customizable: Easily tweak the ingredients to suit your taste or dietary needs.

Ingredients

  • 4 large bell peppers
  • 1 cup black beans, drained and rinsed
  • 2 cups rotisserie chicken breast, shredded
  • 1/2 cup fire roasted green diced chiles
  • 1 tablespoon chili seasoning
  • 1 cup cooked brown rice
  • 1 cup frozen corn kernels, thawed
  • 3 cloves garlic, minced
  • 1 cup low-fat shredded cheddar cheese, divided
  • 1/2 cup red onion, diced
  • 1 roma tomato, diced
  • 2 tablespoons sour light cream

Instructions

  1. Preheat your oven to 400 degrees Fahrenheit.
  2. In a large bowl, combine the cooked brown rice, shredded chicken, thawed corn, diced roma tomato, diced red onion, black beans, 1/2 cup of cheddar cheese, minced garlic, fire roasted green chiles, and chili seasoning.
  3. Line a baking dish with foil and spray it lightly with cooking spray to prevent sticking.
  4. Prepare the bell peppers by cutting off the tops and removing the seeds and membranes inside.
  5. Stuff each bell pepper with the chicken mixture, pressing it firmly into the pepper and mounding it slightly over the top.
  6. Top each stuffed pepper with 1/2 tablespoon of the remaining cheddar cheese.
  7. Place the stuffed peppers in the prepared baking dish and bake in the preheated oven for 30 to 40 minutes, or until the peppers are just tender.
  8. Once out of the oven, top each pepper with 1/2 tablespoon of sour cream before serving.

Tips

  • For uniform cooking, try to select bell peppers that are similar in size and shape.
  • If you prefer softer peppers, you can pre-cook them in the microwave for a couple of minutes before stuffing.
  • To add a bit more spice, consider adding a dash of cayenne pepper to the filling mixture.

Variations & Substitutions

One of the best things about this recipe is its versatility. Here are some variations and substitutions you might consider:

  • Vegetarian Option: Omit the chicken and increase the amount of black beans or add cooked quinoa for a plant-based version.
  • Cheese Choices: Swap the cheddar cheese for pepper jack or Monterey Jack for a different flavor profile.
  • Low Carb: Substitute cauliflower rice for the brown rice to reduce the carbohydrate content.

Storage

These stuffed peppers can be stored in an airtight container in the refrigerator for up to 3 days. To reheat, place them in a preheated oven at 350 degrees for about 10-15 minutes or until warmed through. Alternatively, you can use a microwave for a quicker option.

FAQ

Can I freeze stuffed bell peppers?

Yes, you can freeze these peppers! Once baked, allow them to cool completely, then wrap each pepper individually in plastic wrap and place them in a freezer-safe bag. They can be frozen for up to 3 months. To reheat, thaw them overnight in the refrigerator and bake as directed in the storage section.

What can I serve with stuffed bell peppers?

These stuffed peppers are a meal on their own, but you can serve them with a side salad, guacamole, or tortilla chips for added texture and flavor. A refreshing glass of iced tea or a citrusy margarita would also complement the meal nicely.

Nutrition

Each serving of these colorful stuffed peppers is not only packed with flavor but also with nutrition. Here’s a quick overview:

  • Calories: Approximately 280 per stuffed pepper
  • Protein: 25g
  • Carbohydrates: 35g
  • Fat: 7g
  • Fiber: 8g

Conclusion

Our Blast Of Color Mexican Stuffed Bell Peppers are more than just a meal; they are a celebration of flavors and memories. Whether you’re looking to impress at a dinner party or simply want a comforting meal for your family, these peppers are sure to be a hit. We hope this recipe brings as much joy to your table as it has to ours. Happy cooking!

Related update: Blast Of Color Mexican Stuffed Bell Peppers

Related update: Perfect fish cakes

Turkey Pot Pie With Cornbread Crust | Made by Meaghan Moineau

Turkey Pot Pie With Cornbread Crust

Intro

There’s something about the aroma of a homemade pot pie wafting through the house that instantly transports me back to my childhood. I remember those chilly autumn evenings when my grandmother would pull a bubbling pot pie out of the oven, the golden crust perfectly crisp. We’d gather around the table, the warmth of the meal and the love in the room keeping the cold at bay. This Turkey Pot Pie with Cornbread Crust is my twist on that nostalgic dish, combining tender turkey and hearty vegetables with a sweet and savory cornbread topping. It’s a comforting classic with a delightful twist that I’m excited to share with you.

Why You’ll Love It

This Turkey Pot Pie with Cornbread Crust is not just any pot pie. Here are a few reasons why you’ll absolutely love it:

  • Comfort Food at Its Best: The combination of flavors from the savory turkey filling and the sweet cornbread crust is the ultimate comfort food experience.
  • Perfect for Leftovers: This recipe is a wonderful way to use up leftover turkey, especially after the holidays.
  • Family-Friendly: It’s a dish that both kids and adults will enjoy, making it perfect for family dinners.
  • Simple Ingredients: Made with pantry staples, you won’t have to make a special trip to the store.

Ingredients

  • 2 tablespoons olive oil
  • 1 onion, chopped
  • 2 carrots, diced
  • 2 stalks celery, sliced
  • 1 cup trimmed green beans, cut into 1-inch pieces
  • 2 cloves garlic, minced
  • 2 tablespoons flour
  • 2 cups chicken stock
  • 2 cups cooked turkey, shredded or diced
  • 1 teaspoon ground sage
  • 1 teaspoon ground thyme
  • Salt and cracked pepper to taste
  • 1 cup yellow white cornmeal
  • 1 cup flour
  • 1 tablespoon baking powder
  • 1 tablespoon sugar
  • 1/2 teaspoon salt
  • 1 cup milk
  • 1 large egg
  • 1/4 cup canola oil

Instructions

  1. Preheat the Oven: Preheat your oven to 400°F (200°C). Generously coat a pie plate or baking dish with nonstick cooking spray.
  2. Prepare the Filling: Heat olive oil in a large pan over medium heat. Add the onion, carrots, celery, and green beans, and sauté for about 10 minutes until the vegetables are tender.
  3. Add minced garlic to the pan and stir constantly for 30 seconds until fragrant.
  4. Sprinkle flour over the vegetables and stir until it coats them evenly, about 30 seconds.
  5. Slowly stir in the chicken stock, letting it thicken slightly with the flour.
  6. Add cooked turkey, sage, thyme, salt, and pepper to the mixture. Stir well to combine and let it cook for another 5 minutes. Pour the filling into the prepared baking dish.
  7. Make the Cornbread Crust: In a large bowl, whisk together the cornmeal, flour, baking powder, sugar, and salt.
  8. In a separate bowl, mix the milk, egg, and canola oil until well combined.
  9. Stir the wet ingredients into the dry ingredients until just combined. Do not overmix.
  10. Spoon the cornbread batter evenly over the turkey filling in the baking dish.
  11. Bake in the preheated oven until the cornbread is golden brown, about 22 to 25 minutes.
  12. Let the pot pie cool for at least 15 minutes before serving to allow the flavors to meld together.

Tips

  • Ensure the vegetables are tender before adding the flour to avoid a raw flour taste in your filling.
  • If the filling seems too thick, add a splash more chicken stock to loosen it up.
  • For a richer flavor, substitute half of the milk in the cornbread crust with buttermilk.

Variations & Substitutions

  • Protein Variations: Swap out turkey for chicken, beef, or even a vegetarian protein like chickpeas or tofu.
  • Vegetable Additions: Feel free to add other vegetables like mushrooms, peas, or corn for extra flavor and nutrition.
  • Gluten-Free Option: Use a gluten-free flour blend for both the filling and cornbread crust.

Storage

Store any leftovers in an airtight container in the refrigerator for up to three days. To reheat, place in a preheated oven at 350°F (175°C) until warmed through. You can also freeze the pot pie before baking. Thaw in the refrigerator overnight and bake as directed.

FAQ

Can I make this pot pie ahead of time?

Yes, you can prepare the filling and cornbread batter separately, then assemble and bake when you’re ready to serve. This makes it a great option for a make-ahead meal.

What can I serve with turkey pot pie?

This pot pie is quite filling on its own, but you can complement it with a simple green salad or roasted vegetables for a complete meal.

Can I use canned vegetables instead of fresh?

While fresh vegetables are recommended for the best flavor and texture, you can use canned vegetables in a pinch. Just be sure to drain them well and reduce the cooking time during the sautéing step.

Nutrition

This Turkey Pot Pie with Cornbread Crust provides a balanced meal with protein, carbohydrates, and plenty of vegetables. Each serving is approximately 350 calories, making it a satisfying yet moderate meal choice.

Conclusion

This Turkey Pot Pie with Cornbread Crust is more than just a meal; it’s a slice of nostalgia wrapped in warmth and comfort. Whether you’re recreating cherished memories or starting new traditions, this dish is sure to become a family favorite. Enjoy the medley of flavors and the heartwarming satisfaction it brings to your table. Happy cooking!

Related update: Turkey Pot Pie With Cornbread Crust

Related update: Blast Of Color Mexican Stuffed Bell Peppers

Impossible” Coconut Pie | Made by Meaghan Moineau

Impossible Coconut Pie: A Nostalgic Treat

Intro

There is something magical about certain recipes that transport us back to simpler times, and this “Impossible” Coconut Pie does just that for me. As a child, I remember visiting my grandmother’s house, the scent of coconut wafting through the air as she baked this pie that seemed to defy logic. The magic, she said, was in the way the ingredients blended together to create a crust, custard, and topping all in one go. It’s a recipe that brings warmth to my heart and a smile to my face every time I make it.

Why You’ll Love It

This Impossible Coconut Pie is not only a delight for the taste buds, but it’s also incredibly easy to make. With just a handful of ingredients and a food processor, you can whip up a dessert that looks and tastes like it took hours to prepare. The pie is rich with tropical flavors, thanks to the coconut milk and zest of citrus fruits, and has a unique texture that combines creamy custard with a lightly browned top. It’s a perfect dessert for any occasion, whether you’re hosting a dinner party or simply looking to satisfy a sweet tooth.

Ingredients

  • 4 eggs
  • 1 cup sugar
  • 1/2 cup butter, melted
  • 1 cup desiccated coconut
  • Zest of 1 lemon
  • Zest of 1 orange
  • Juice of 1 lemon
  • Juice of 1 orange
  • 1 cup coconut milk
  • 1/2 cup plain flour

Instructions

  1. Preheat your oven to 170°C (340°F).
  2. In a food processor, combine the eggs, sugar, melted butter, desiccated coconut, lemon zest, orange zest, lemon juice, orange juice, coconut milk, and plain flour.
  3. Blend the ingredients until they are well combined and smooth.
  4. Pour the mixture into a buttered 22cm (9 inch) pie tray.
  5. Place the pie tray on the lower rack of the oven and bake for 60 to 80 minutes.
  6. If the pie starts to brown too quickly, loosely cover it with aluminum foil halfway through baking.
  7. Once baked, set the pie aside to cool completely, then refrigerate for at least 1 hour to chill.
  8. Slice and serve with a dollop of whipped cream and a spoonful of passionfruit or blueberry jam. Sprinkle with toasted desiccated coconut for extra flavor.

Tips

To ensure your Impossible Coconut Pie turns out perfectly every time, consider these helpful tips:

  • Make sure the butter is fully melted and slightly cooled before adding it to the mixture to prevent scrambling the eggs.
  • For a more pronounced coconut flavor, lightly toast the desiccated coconut before blending it into the batter.
  • If you don’t have a food processor, you can use a blender or mix by hand, but ensure the mixture is as smooth as possible.

Variations & Substitutions

Feel free to get creative with this recipe. Here are some variations and substitutions you might consider:

  • Swap the coconut milk with almond milk or regular milk if you prefer a different flavor profile.
  • Add a teaspoon of vanilla extract for an extra layer of flavor.
  • For a gluten-free version, substitute the plain flour with almond flour or a gluten-free flour blend.

Storage

The Impossible Coconut Pie can be stored in the refrigerator for up to 3 days. Ensure it is covered with plastic wrap or stored in an airtight container to maintain its freshness. This pie does not freeze well, as the texture may change upon thawing.

FAQ

Can I make this pie in advance?

Yes, you can prepare the pie a day in advance. Simply bake it as directed, let it cool, and then refrigerate until you’re ready to serve. This makes it a great option for dinner parties or holiday gatherings.

What if I don’t have a food processor?

No worries! You can use a blender to achieve the same smooth consistency. Alternatively, you can mix by hand, though it may require a bit more effort to ensure the ingredients are well combined.

Nutrition

This dessert, while delicious, is rich and should be enjoyed in moderation. Each slice, assuming 8 slices per pie, contains approximately:

  • Calories: 320
  • Fat: 21g
  • Carbohydrates: 30g
  • Protein: 5g
  • Sugar: 20g

Conclusion

The Impossible Coconut Pie is a delightful dessert that brings a touch of magic to any occasion. Its ease of preparation paired with its rich, tropical flavors make it a standout choice for both novice and experienced bakers. Whether you’re reminiscing about fond memories or creating new ones, this pie is sure to become a cherished favorite. Enjoy each bite and the warm memories it brings!

Related update: Impossible” Coconut Pie

Related update: Delicious Rhubarb Custard Pie

Mummy Meatballs with Spaghetti | Made by Meaghan Moineau

Mummy Meatballs with Spaghetti

Intro

When my kids were young, Halloween was always a cherished time filled with giggles, costumes, and whimsical meals. One of the highlights of the season was our tradition of making Mummy Meatballs with Spaghetti. I still remember their wide eyes and delighted laughter as they helped wrap the meatballs in “bandages” of rice noodles, eagerly anticipating the spooky feast to come. Now, I’m thrilled to share this beloved family recipe with you. It’s a dish that combines hearty meatballs with playful presentation, making it perfect for a Halloween dinner or any time you want to add a bit of fun to your meal.

Why You’ll Love It

This recipe is more than just a clever presentation; it’s a delicious and hearty meal that brings smiles to both kids and adults alike. The meatballs are juicy and flavorful, with a perfect blend of Italian seasoning and parmesan cheese, while the spaghetti provides a comforting base. The “mummy” wrapping adds an element of surprise and whimsy, making it a great hit at Halloween parties. Plus, it’s a wonderful way to involve the whole family in the kitchen. The process of assembling the mummies encourages creativity and fun, turning meal prep into a delightful activity.

Ingredients

  • 1 pound lean ground beef
  • 1/4 cup bread crumbs
  • 1 egg
  • 1 teaspoon garlic paste
  • 1 teaspoon Italian seasoning
  • 1/4 cup grated parmesan cheese
  • Salt, to taste
  • Black pepper, to taste
  • 8 green pimiento stuffed olives
  • 8 ounces cooked spaghetti noodles
  • 2 cups spaghetti sauce
  • 4 ounces cooked extra wide egg noodles

Instructions

  1. In a large bowl, combine the lean ground beef, bread crumbs, egg, garlic paste, Italian seasoning, parmesan cheese, salt, and black pepper. Mix until well combined.
  2. Preheat your oven to 350°F (175°C) and grease an 8-hole muffin tin.
  3. Using an ice cream scoop, divide the meatball mixture into the muffin tin, ensuring each portion is evenly distributed.
  4. Bake the meatballs for 35 minutes or until they reach an internal temperature of 160°F (71°C) using an instant-read thermometer.
  5. Once cooked, drain the meatballs on a cookie rack.
  6. While the meatballs are baking, heat the spaghetti sauce in a saucepan over medium heat.
  7. Cook the spaghetti and rice noodles separately according to package directions.
  8. Drain the spaghetti and keep it warm, then cool the rice noodles in cold water and drain.
  9. Slice the meatballs in half horizontally to create two pieces, each with a flat surface.
  10. Pat the rice noodles dry with paper towels, then layer them over the top of each meatball half to resemble mummy bandages. Tuck sliced olives in for eyes.
  11. Let the meatballs sit for about 15 minutes so they become more tacky and hold together better.
  12. Reheat the meatballs by microwaving them on a microwave-safe plate for a minute.
  13. Carefully place each mummy meatball onto a nest of sauced spaghetti and serve immediately.

Tips

For best results, make sure to pat the rice noodles dry thoroughly to ensure they stick to the meatballs effectively. You can use a paper towel to gently press and remove excess moisture. If you’re working with young children, let them help by arranging the rice noodles and olives – it’s a fun way to get them involved. Lastly, if you want a richer flavor, consider simmering your spaghetti sauce with a splash of red wine or additional herbs before serving.

Variations & Substitutions

Feel free to experiment with this recipe based on your dietary preferences or ingredient availability. You can substitute ground turkey or chicken for the beef if you prefer a lighter option. For a gluten-free version, use gluten-free bread crumbs and spaghetti noodles. Vegetarians can substitute the meatballs with plant-based alternatives and use vegan cheese. You can also spice up the meatballs by adding a pinch of red pepper flakes for a bit of heat.

Storage

Leftover mummy meatballs can be stored in an airtight container in the refrigerator for up to three days. To reheat, simply microwave them until warmed through or place them in a preheated oven at 350°F (175°C) for about 10 minutes. If you have extra spaghetti and sauce, store them separately to maintain the best texture.

FAQ

Can I make the meatballs ahead of time?

Yes, you can prepare the meatballs in advance. Simply follow the recipe to bake them, then allow them to cool and store them in the refrigerator. When ready to serve, reheat them in the oven or microwave, then assemble the mummies with rice noodles and olives.

What can I serve with Mummy Meatballs?

These meatballs pair wonderfully with a simple side salad or garlic bread. If you’re hosting a Halloween party, consider serving them alongside other themed dishes like “witch’s brew” soup or “ghostly” mashed potatoes for a complete festive meal.

Can I freeze the meatballs?

Absolutely! You can freeze the baked meatballs before assembling them into mummies. Simply place them in a freezer-safe container and store them for up to two months. Thaw in the refrigerator overnight before reheating and assembling.

Nutrition

This recipe offers a balanced meal with protein from the meatballs and carbohydrates from the pasta. The inclusion of parmesan cheese adds calcium, while the olives contribute healthy fats. To enhance the nutritional profile, consider serving with a side of steamed vegetables or a fresh salad.

Conclusion

Mummy Meatballs with Spaghetti is a delightful dish that brings joy and nostalgia to the table. Whether you’re crafting a fun Halloween meal or simply indulging in a playful dinner, this recipe is sure to be a hit. With its flavorful meatballs, creative presentation, and versatility, it’s a meal that’s as enjoyable to make as it is to eat. I hope this recipe becomes as cherished in your home as it has been in ours. Enjoy the smiles and laughter it brings, and happy cooking!

Related update: Mummy Meatballs with Spaghetti

Related update: Turkey Pot Pie With Cornbread Crust

Traditional Panzanella | Made by Meaghan Moineau

Traditional Panzanella Recipe: A Taste of Italian Summer

Introduction

There’s something truly magical about the simplicity of Italian cuisine, and nothing epitomizes this more than the traditional Panzanella. I remember the first time I tasted this delightful Tuscan bread salad; it was a warm summer afternoon in Florence, sitting in a quaint trattoria with my grandmother. The vibrant colors of the fresh tomatoes, the aroma of basil, and the satisfying crunch of day-old bread soaked in olive oil and vinegar created an unforgettable symphony of flavors. This dish not only filled our bellies but also our hearts with cherished memories. I hope this recipe brings a little piece of Italy to your table and becomes a staple in your home, just as it has in mine.

Why You’ll Love It

Traditional Panzanella is a celebration of the freshest ingredients and the beauty of rustic cooking. Here’s why it’s sure to become a favorite:

  • Simple Ingredients: Made with just a handful of pantry staples and fresh produce, this recipe is all about quality ingredients shining through.
  • Quick and Easy: With minimal preparation and no cooking required, this dish is perfect for those hot summer days when you want something light yet satisfying.
  • Versatile and Adaptable: Easily customizable to suit your taste preferences, Panzanella is a great way to use up any leftover bread or vegetables you have on hand.
  • Healthy and Delicious: Packed with fresh vegetables and healthy fats from olive oil, it’s a nutritious option for any meal.

Ingredients

  • Six slices of day-old Tuscan bread
  • Extra virgin olive oil
  • Fresh basil leaves
  • One red onion
  • Red wine vinegar
  • Salt and pepper, to taste
  • Four ripe tomatoes

Instructions

  1. In a bowl, combine the bread with water and let it stand for at least 20 minutes or until it’s soft.
  2. Drain the bread and squeeze out as much water as you can. Crumble the bread and place it in a serving bowl.
  3. Scatter the tomatoes, onions, and chopped basil over the top of the bread.
  4. Dress the Panzanella with extra-virgin olive oil and vinegar. Season with salt and pepper and toss well.
  5. Taste and adjust the seasoning with more oil, salt, and vinegar according to your preference.
  6. Leave the Panzanella to stand for 15 minutes to allow the flavors to meld together. Serve at room temperature.

Tips

  • Choose the right bread: A rustic, crusty bread like Tuscan or sourdough works best. It should be slightly stale for the perfect texture.
  • Use the best tomatoes: Opt for ripe, juicy tomatoes for the best flavor. Heirloom varieties can add beautiful color and taste.
  • Let it rest: Allow the salad to sit for at least 15 minutes before serving to let the flavors meld.

Variations & Substitutions

Panzanella is incredibly adaptable, so feel free to make it your own:

  • Add protein: Include grilled chicken or tuna for a more substantial meal.
  • Incorporate more veggies: Cucumbers, bell peppers, or even olives can add extra flavor and texture.
  • Herb it up: Try adding parsley, oregano, or mint for a different aromatic profile.

Storage

Panzanella is best enjoyed fresh, but if you have leftovers, store them in an airtight container in the refrigerator for up to 2 days. Note that the bread will continue to absorb the dressing and may become softer. If you plan on making it ahead, keep the bread separate and combine just before serving.

FAQ

Can I use fresh bread instead of day-old bread?

While day-old bread is traditional and helps to achieve the right texture, you can use fresh bread in a pinch. Simply toast it lightly to dry it out before soaking.

Is there a gluten-free option for Panzanella?

Yes, you can make a gluten-free version by using gluten-free bread. Ensure the bread is sturdy enough to hold up to the soaking process.

Can I prepare Panzanella in advance?

It’s best to prepare Panzanella fresh to maintain the texture of the bread. However, you can chop the vegetables and prepare the dressing ahead of time, then combine just before serving.

Nutrition

This traditional Panzanella is a nutritious option that offers a balance of carbohydrates, healthy fats, and fresh vegetables. A typical serving provides approximately:

  • Calories: 250
  • Fat: 15g
  • Carbohydrates: 26g
  • Protein: 4g
  • Fiber: 3g

Conclusion

Traditional Panzanella is more than just a salad; it’s a testament to the beauty of simple, fresh ingredients coming together to create something extraordinary. Whether you’re enjoying it as a light lunch, a side dish, or a main course with added protein, this Tuscan classic is sure to delight your taste buds and transport you to a sun-drenched Italian countryside. Share it with loved ones, and create your own cherished memories around the table. Enjoy!

Related update: Traditional Panzanella

Related update: Zucchini Ribbon Caper Salad

Slow Cooker Red Beans and Rice | Made by Meaghan Moineau

Slow Cooker Red Beans and Rice

Intro

There’s something incredibly comforting about a pot of slow-cooked red beans and rice simmering away, filling your home with tantalizing aromas. This dish takes me back to my childhood, spent in the vibrant kitchens of my grandmother’s house in the South. She would often prepare this hearty meal on Sundays, letting it cook slowly as we went about our day. By evening, we’d gather around her large wooden table, eager to dig into the savory goodness before us. The recipe I’m sharing today is inspired by those cherished memories, but with a convenient twist for the modern cook—a slow cooker!

Why You’ll Love It

This Slow Cooker Red Beans and Rice recipe is not just delicious, it’s also incredibly easy to make. Here are a few reasons why you’ll fall head over heels for this dish:

  • Effortless Preparation: Simply add all ingredients to your slow cooker and let it do its magic.
  • Rich, Savory Flavors: The combination of spices, sausage, and red beans creates a depth of flavor that is both comforting and satisfying.
  • Perfect for Busy Days: With minimal prep and the ability to cook all day, it’s an ideal choice for busy weeknights or lazy weekends.
  • Budget-Friendly: Utilizing pantry staples and affordable ingredients, this dish is kind to your wallet.
  • Family Favorite: The comforting flavors are a hit with kids and adults alike.

Ingredients

  • Ancho chili powder
  • Bay leaves
  • Butter
  • Canned red beans
  • Diced canned tomatoes
  • Cayenne pepper
  • Red onion
  • Rice
  • Sausage
  • Water
  • White pepper

Instructions

  1. Place all of your ingredients into the slow cooker and stir to mix everything well.
  2. Allow to cook all day on low for 6 hours (if with rice), or longer if needed without rice.
  3. Serve with cornbread and enjoy! (I like to take a whole piece and mix it up really well, YUM!)

Tips

  • Soak Your Beans: If you’re using dried beans instead of canned, be sure to soak them overnight before adding them to the slow cooker to ensure they cook fully.
  • Spice Levels: Adjust the cayenne pepper to suit your heat preference. Start with a pinch and add more if you like it spicy.
  • Use Good Quality Sausage: This will greatly enhance the flavor of the dish. Consider using smoked sausage for an extra depth of flavor.

Variations & Substitutions

This recipe is wonderfully adaptable. Here are some variations and substitutions you can try:

  • Vegetarian Option: Skip the sausage and add more vegetables like bell peppers and zucchini.
  • Different Beans: While red beans are traditional, you can use black beans or kidney beans for a different twist.
  • Spice Mix: Experiment with adding smoked paprika or cumin for a smoky flavor profile.
  • Grains Variety: Substitute rice with quinoa or farro for a different texture and added nutrients.

Storage

This dish makes great leftovers! Here’s how you can store it:

  • Refrigerate: Store in an airtight container in the fridge for up to 4 days.
  • Freeze: Portion into freezer-safe bags or containers and freeze for up to 3 months. Thaw in the refrigerator overnight before reheating.
  • Reheat: Warm on the stovetop over medium heat, stirring occasionally, until heated through. You can also reheat in the microwave in 1-minute intervals, stirring in between.

FAQ

Can I make this dish on the stovetop instead of a slow cooker?

Yes, absolutely! To prepare on the stovetop, sauté the onion and sausage in butter until the onion is translucent. Add the remaining ingredients and simmer on low heat for about 1-2 hours, stirring occasionally, until the beans are tender.

What kind of sausage works best for this recipe?

Smoked sausage is a great choice for this recipe as it adds a wonderful smoky flavor. Andouille sausage is traditional and particularly delicious, but you can use any spicy or mild sausage you prefer.

Can I add more vegetables to this recipe?

Definitely! This recipe is very flexible, and adding more vegetables like bell peppers, celery, or carrots can enhance the flavor and nutrition.

Nutrition

While I don’t have the exact nutritional breakdown for this dish, it’s worth noting that red beans are a great source of protein and fiber, and using whole grain rice can boost the fiber content even more. Just be mindful of the sodium content if you’re using canned beans and tomatoes. Balancing with fresh ingredients where possible is always a good idea!

Conclusion

Slow Cooker Red Beans and Rice is a warm, comforting, and flavorful dish that’s perfect for any day of the week. Whether you’re reminiscing about Southern roots or simply looking for an easy and delicious meal, this recipe is sure to satisfy. With its rich flavors and simple preparation, it’s a dish that brings people together, just like it did in my grandmother’s kitchen. Give it a try, and let me know how it brings warmth and happiness to your table!

Related update: Slow Cooker Red Beans and Rice

Related update: Mummy Meatballs with Spaghetti

Japanese Gyoza Pot Stickers | Made by Meaghan Moineau

Japanese Gyoza Pot Stickers

Intro

There’s something incredibly comforting about a plate of perfectly cooked gyoza, or Japanese pot stickers, their crispy bottoms contrasting with a tender, juicy filling. I remember visiting my grandmother’s house on weekends, the kitchen filled with the aromatic scent of sizzling gyoza. She would always let me assist, my small hands struggling to pleat the delicate wrappers just right. It was in those moments that I learned the art of cooking and the love that goes into each fold. Today, I’m excited to share this cherished recipe with you, bringing a piece of my childhood into your home.

Why You’ll Love It

This Japanese Gyoza recipe is a delightful blend of savory, spicy, and aromatic flavors. The combination of ground beef, cabbage, and spices wrapped in a delicate shell is truly irresistible. Whether you’re a seasoned cook or a beginner, these pot stickers are easy to make and perfect for any occasion. Plus, you can customize them with ingredients you love or have on hand!

Ingredients

  • 1/2 teaspoon black pepper
  • 2 cups finely chopped cabbage
  • 1 teaspoon chili sesame oil
  • 1/2 cup dried mushrooms, soaked in warm water and chopped
  • 2 teaspoons grated ginger root
  • 3 to 4 green onions, chopped
  • 1/2 pound ground beef
  • 2 tablespoons salad oil
  • 1 tablespoon sesame oil
  • 2 tablespoons Kikkoman soy sauce
  • 1 tablespoon cooking wine
  • Gyoza wrappers

Instructions

  1. Chop the cabbage finely, place it in a colander, and pour boiling water over it. Allow it to cool to the touch, then squeeze the cabbage well to remove excess water.
  2. In a large bowl, mix the cabbage, chopped green onions, chopped mushrooms, and grated ginger.
  3. In a separate bowl, combine the ground beef, cooking wine, soy sauce, sesame oil, and black pepper. Add this mixture to the bowl of vegetables and mix well.
  4. Place about 1 teaspoon of filling in the center of a gyoza wrapper. Fold the wrapper in half and pleat the edges to seal. If the edges don’t stick, dampen the inside edge with a little water, then pleat.
  5. Heat 2 tablespoons of salad oil in a large skillet over medium heat. Place the gyoza into the skillet, flat side down, and cook until the bottoms are golden brown.
  6. At the edge of the pan, carefully pour in a little water, up to 1/4 of the depth of the pot stickers. Cover the skillet, turn the heat to low, and simmer until the water has evaporated.

Tips

For best results, make sure to squeeze out as much water from the cabbage as possible to prevent the filling from becoming too wet. Also, when pleating the gyoza, try to make small, even pleats to ensure they cook uniformly and look appealing.

Variations & Substitutions

If you’re looking to switch things up, consider these variations:

  • Vegetarian: Replace the ground beef with finely chopped tofu or tempeh.
  • Spicy: Add a dash of chili flakes or a bit more chili sesame oil for an extra kick.
  • Different Proteins: Try ground pork or chicken instead of beef for a different flavor profile.

Storage

Leftover gyoza can be stored in an airtight container in the refrigerator for up to 3 days. To reheat, simply pan-fry them again to regain their crispy texture. You can also freeze uncooked gyoza for up to a month; just be sure to place them in a single layer on a baking sheet to freeze initially before transferring to a freezer bag.

FAQ

Can I use store-bought gyoza wrappers?

Absolutely! Store-bought gyoza wrappers are a convenient option and work perfectly for this recipe. Just be sure to keep them covered with a damp cloth to prevent them from drying out while you work.

How do I prevent the gyoza from sticking to the pan?

Make sure your pan is well-oiled and preheated before adding the gyoza. Adding water to the pan and covering it helps to steam the gyoza, which also prevents sticking. If they still stick, let them sit for a moment after cooking to allow them to release naturally.

Nutrition

While exact nutritional values can vary, each gyoza pot sticker typically contains around 70-80 calories, with a good balance of protein from the beef and vegetables. This makes them a tasty yet relatively light appetizer or main dish. For those watching their sodium intake, be mindful of the soy sauce content, or opt for a low-sodium version.

Conclusion

Japanese Gyoza Pot Stickers are a delightful treat that brings warmth and joy to any meal. Whether you’re making them for a family gathering, a dinner party, or simply to enjoy a taste of Japan at home, these pot stickers promise to be a hit. I hope this recipe brings the same joy to your kitchen as it has to mine. Happy cooking!

Related update: Japanese Gyoza Pot Stickers

Related update: Vegetarian Ratatouille

Croissants With Sesame Seeds (Kifli) | Made by Meaghan Moineau

Croissants With Sesame Seeds (Kifli)

Intro

There is something truly magical about the smell of freshly baked croissants wafting through the house on a Sunday morning. It takes me back to my grandmother’s kitchen, where the warmth from the oven and her loving presence made everything feel just right. She would often bake these delicious croissants with sesame seeds, known as kifli in our family, and they quickly became a beloved tradition. I remember sitting on the counter, eagerly watching her every move and waiting for the moment when I could sink my teeth into the first warm, flaky bite. This recipe carries forward that cherished memory, and I am thrilled to share it with you today.

Why You’ll Love It

These croissants are not only a treat for your taste buds, but they are also a feast for your senses. From the irresistible aroma as they bake to the satisfying crunch of sesame seeds with each bite, these croissants are a perfect blend of nostalgia and flavor. Whether you’re enjoying them as a special breakfast, a delightful brunch addition, or a comforting snack, these kifli will surely become a favorite in your household.

Ingredients

  • 1 cup lukewarm milk
  • 2 tablespoons dry active yeast
  • 1 tablespoon sugar
  • 6 cups flour
  • 1 teaspoon baking powder
  • 1 teaspoon salt
  • 1/4 cup vegetable oil
  • 4 eggs (separated – yolks and whites)
  • Margarine (small pieces for baking)
  • Sesame seeds

Instructions

  1. In a large, deep mixing bowl, pour in the lukewarm milk. Stir in the sugar, 2 tablespoons of flour, and the yeast. Let stand for ten minutes to activate the yeast.
  2. Add in the baking powder, salt, vegetable oil, egg whites, and 6 cups of flour. Stir with a wooden spoon until the mixture is well incorporated. You may need to use your hands toward the end.
  3. Transfer the dough to a lightly floured surface and knead it for 10 minutes until smooth and elastic.
  4. Place the dough in a large bowl, cover it, and let it stand for one hour until doubled in size.
  5. Preheat your oven to 375°F (190°C).
  6. Bring the dough back to your working area and knead it again for another 5 minutes to remove any air bubbles.
  7. Form the dough into a log and cut it into 5 or 6 equal pieces.
  8. Take one piece (cover the rest with a kitchen towel), and roll it out to a size as big as a medium pizza.
  9. With a knife, cut the rolled-out dough into 8 equal slices. Beginning at the widest point of each slice, start rolling it toward the narrowest point to form a crescent shape.
  10. Place the croissants on a lightly greased baking sheet. Repeat with the remaining dough pieces.
  11. In a small mixing bowl, whisk the 4 egg yolks. Brush each croissant with the egg yolk wash and then top with sesame seeds.
  12. Distribute 4 or 5 small pieces of margarine throughout the baking sheet.
  13. Bake for 15 to 20 minutes, or until golden brown. Once baked, cover the croissants with a kitchen towel while they cool slightly.
  14. Serve immediately or store in an airtight container for later enjoyment.

Tips

For best results, make sure your milk is lukewarm, not hot, to activate the yeast properly. If the dough feels sticky, gradually add a little more flour until you achieve the right consistency. When rolling the croissants, ensure they are tightly rolled to prevent them from unrolling during baking.

Variations & Substitutions

If you’re looking to experiment with flavors, consider adding a sprinkle of dried herbs to the dough or incorporating cheese into the filling for a savory twist. For a sweet version, substitute the sesame seeds with a light dusting of sugar or cinnamon before baking.

Storage

These croissants are best enjoyed fresh out of the oven. However, if you have leftovers, store them in an airtight container at room temperature for up to two days. For longer storage, freeze them in a single layer before transferring to a freezer-safe bag. Reheat in the oven to regain the fresh-baked taste and texture.

FAQ

Can I use butter instead of margarine?

Yes, you can substitute butter for margarine in this recipe. It will add a rich flavor to the croissants, but ensure to use it sparingly during baking to prevent excessive greasiness.

Can I make the dough ahead of time?

Absolutely! You can prepare the dough a day in advance. After the first rise, cover it tightly and store it in the refrigerator overnight. Allow it to come to room temperature before proceeding with the remaining steps.

How can I ensure my croissants are flaky?

The key to flaky croissants lies in the kneading and rolling process. Be sure to knead the dough thoroughly and roll it tightly when forming each croissant. This will help create the desired layers and texture.

Nutrition

Each croissant offers a delightful balance of carbohydrates and proteins, making it a satisfying treat. While not low in calories, these croissants are made with wholesome ingredients and offer a moderate amount of healthy fats from the sesame seeds and vegetable oil.

Conclusion

Bringing the aroma and taste of freshly baked sesame seed croissants into your home is a wonderful way to create new memories while honoring old ones. Whether you’re sharing them with family or enjoying a quiet moment alone, these kifli croissants are sure to bring joy to your day. I hope you find as much delight in baking and savoring them as I have. Happy baking!

Related update: Croissants With Sesame Seeds (Kifli)

Related update: Bourbon Street Beignets

Pan Seared Lamb Loin With Chimichurri & Roasted Trio Squash Salad With Goat Cheese and Pinenuts | Made by Meaghan Moineau

Pan Seared Lamb Loin With Chimichurri & Roasted Trio Squash Salad With Goat Cheese and Pinenuts

Intro

Growing up, Sunday dinners were a special affair in our household. My grandmother would gather us around the table, and there was always an air of anticipation as we eagerly awaited the culinary delight she had prepared. One of my cherished memories is of her lamb dishes, which were always perfectly seasoned and cooked to tender perfection. Inspired by those cherished times, I’ve recreated a modern twist on her classic lamb recipe. This Pan Seared Lamb Loin with Chimichurri and Roasted Trio Squash Salad with Goat Cheese and Pinenuts brings together vibrant flavors and textures, just like those unforgettable Sunday dinners.

Why You’ll Love It

This recipe is a celebration of flavors and textures that will make your taste buds dance with joy. The juicy, tender lamb loin chops are perfectly complemented by the fresh and zesty chimichurri sauce, adding an aromatic flair to the dish. The roasted trio squash salad, with its creamy goat cheese and crunchy pinenuts, provides a delightful contrast in both flavor and texture. This meal is not only a feast for your palate but also a visual delight that will impress any dinner guest.

Ingredients

  • Cilantro
  • Extra virgin olive oil
  • Flat leaf parsley
  • Garlic clove
  • Black ground pepper
  • Kosher salt and pepper
  • Lamb loin chops
  • Lemon
  • Mint
  • Pinenuts
  • Red pepper flakes
  • Shallot

Instructions

  1. Preheat your oven to 400°F (200°C).
  2. For the Chimichurri, combine cilantro, parsley, garlic, lemon juice, olive oil, red pepper flakes, salt, and pepper in a large bowl. Mix well and set aside.
  3. Heat a large, heavy-bottomed pan with a drizzle of olive oil over medium-high heat.
  4. Sprinkle each side of the lamb loin chops evenly with kosher salt and freshly ground black pepper.
  5. Once the oil is hot and begins to smoke slightly, sear the lamb loin chops for approximately 2 minutes on each side.
  6. Transfer the seared lamb chops to the preheated oven. Cook according to your preference:
    • Rare: 2-3 minutes
    • Medium Rare: 6-8 minutes
    • Medium: 9-11 minutes
    • Well Done: 12-14 minutes
  7. Remove the lamb from the oven and let it rest, as it will continue to cook slightly during this time.
  8. Serve the lamb loin chops topped with the chimichurri sauce and accompanied by the roasted trio squash salad.

Tips

To ensure the lamb is cooked to your liking, use a meat thermometer. For rare, aim for an internal temperature of 125°F (51°C), for medium-rare, 135°F (57°C), and for medium, 145°F (63°C). Always allow the lamb to rest for a few minutes before serving to let the juices redistribute, ensuring tender and flavorful meat.

Variations & Substitutions

If you don’t have lamb loin chops on hand, this recipe works beautifully with beef steaks or pork chops as well. For a vegetarian twist, consider using portobello mushrooms as a meaty substitute. You can also customize the chimichurri by adding your favorite herbs or spices, such as oregano or cumin, for a unique flavor profile.

Storage

If you have leftovers, store the lamb and salad separately in airtight containers in the refrigerator. The lamb will keep well for up to 3 days. The chimichurri sauce can be stored in a sealed jar in the fridge for up to a week. When reheating the lamb, do so gently to avoid overcooking.

FAQ

Can I make the chimichurri sauce ahead of time?

Absolutely! Chimichurri can be made a day or two in advance. In fact, allowing it to sit for a few hours or overnight can enhance the flavors as the ingredients meld together. Just store it in an airtight container in the refrigerator.

What can I serve with this dish?

This dish pairs beautifully with a side of crusty bread to mop up any extra chimichurri sauce. You might also consider serving it with roasted potatoes or a simple green salad for a well-rounded meal.

Can I use dried herbs instead of fresh for the chimichurri?

While fresh herbs are recommended for the best flavor, you can use dried herbs in a pinch. Just remember that dried herbs are more concentrated, so use about one-third of the amount of fresh herbs called for in the recipe.

Nutrition

This dish is packed with nutritious ingredients. Lamb is an excellent source of high-quality protein, essential vitamins, and minerals such as iron and zinc. The chimichurri sauce provides healthy fats from olive oil and antioxidants from the fresh herbs. The trio squash salad adds fiber and vitamins A and C, while goat cheese offers calcium and healthy fats. Pinenuts contribute additional protein and healthy fats, making this meal a well-balanced and satisfying option.

Conclusion

There you have it – a delightful dish that brings together the warmth of tradition with the vibrancy of modern flavors. This Pan Seared Lamb Loin with Chimichurri and Roasted Trio Squash Salad is perfect for a special occasion or a comforting family dinner. Whether you’re reminiscing about cherished memories or creating new ones, this dish is sure to become a favorite in your home. Enjoy every bite!

Related update: Pan Seared Lamb Loin With Chimichurri & Roasted Trio Squash Salad With Goat Cheese and Pinenuts

Related update: Slow Cooker Red Beans and Rice

Coconut Cream Pie Vegan Milkshake | Made by Meaghan Moineau

Coconut Cream Pie Vegan Milkshake

Intro

There’s something magical about the creamy, tropical sweetness of coconut. It takes me back to sun-drenched summer days spent at my grandmother’s house, where she would whip up her famous coconut cream pie. As a child, I would eagerly watch her mix the ingredients, my mouth watering in anticipation of the first bite. Now, as a vegan, I wanted to capture that nostalgic flavor in a refreshing new form. Introducing: the Coconut Cream Pie Vegan Milkshake. This recipe is a delightful fusion of nostalgia and modern plant-based cooking, perfect for those hot afternoons when you crave something cool and satisfying.

Why You’ll Love It

This Coconut Cream Pie Vegan Milkshake is a decadent treat that is both dairy-free and delicious. It combines the rich, creamy texture of coconut with the natural sweetness of bananas, creating a smoothie that feels indulgent yet is made with wholesome ingredients. It’s incredibly simple to prepare, requiring just a blender and a few minutes of your time. Whether you’re vegan or simply looking for a lighter, plant-based dessert option, this milkshake is sure to delight your taste buds.

Ingredients

  • Fresh coconut meat
  • Lemon juice
  • Coconut oil
  • Light coconut milk
  • Frozen banana
  • Vanilla extract
  • Graham cracker crumbs
  • Coconut flakes
  • Ice cubes

Instructions

  1. In a blender, combine the fresh coconut meat, lemon juice, coconut oil, light coconut milk, frozen banana, and vanilla extract.
  2. Add the graham cracker crumbs to the blender.
  3. If you like your milkshake a little sweeter, you can add agave nectar to taste.
  4. Blend all the ingredients until smooth and creamy.
  5. Pour the milkshake into glasses and top with your choice of soy or dairy-based whipped cream.
  6. Sprinkle additional graham cracker crumbs on top.
  7. Garnish with toasted coconut flakes for an extra touch of coconut flavor.
  8. Serve immediately and enjoy! This recipe serves 2-3 people.

Tips

To ensure your milkshake is as creamy as possible, use fresh coconut meat and a high-speed blender. The frozen banana helps to thicken the shake, so make sure it’s well frozen before blending. For an extra frosty treat, chill your glasses in the freezer before serving.

Variations & Substitutions

If you want to play around with the flavors, there are plenty of options! Try adding a tablespoon of cocoa powder for a chocolatey twist, or a pinch of cinnamon for a warm spice note. You can substitute almond or oat milk for the coconut milk if you prefer, though it will slightly alter the flavor. If you’re gluten-free, ensure your graham crackers are gluten-free as well.

Storage

This milkshake is best enjoyed immediately to maintain its creamy texture. If you have leftovers, you can store them in the refrigerator for up to 24 hours, though the texture may become more liquid. Give it a good stir before drinking.

FAQ

Can I use canned coconut milk instead of light coconut milk?

Yes, you can use canned coconut milk, but it will result in a richer and creamier milkshake. If you prefer a lighter version, stick to the light coconut milk or dilute the canned coconut milk with water.

Is there a substitute for the banana?

If you’re not a fan of bananas, you can use a scoop of vegan vanilla ice cream to achieve a similar creamy texture. Keep in mind, this will alter the flavor profile slightly.

Nutrition

This milkshake is a great source of healthy fats from the coconut and provides natural sweetness from the banana. It’s a delightful treat that satisfies your sweet tooth without the need for refined sugars, especially if you omit the agave nectar. If you’re monitoring your intake, be mindful of the graham crackers and whipped cream toppings, as these add extra calories.

Conclusion

The Coconut Cream Pie Vegan Milkshake is not just a drink; it’s an experience that transports you to a tropical paradise with every sip. It’s a wonderful homage to traditional coconut cream pie, yet adapted for a modern, vegan lifestyle. Whether you’re serving it as a dessert at a summer gathering or enjoying it as a midday treat, this milkshake is sure to become a favorite. Enjoy the creamy, dreamy taste of coconut in a whole new way, and relish the joy that comes with every delicious sip.

Related update: Coconut Cream Pie Vegan Milkshake

Related update: Impossible” Coconut Pie

Related update: Cranberry Margarita

Brussel Sprouts in Bacon and Garlic Sauce | Made by Meaghan Moineau

Brussel Sprouts in Bacon and Garlic Sauce

Intro

When I think of family gatherings during the festive season, one particular dish always stands out in my memory: Brussel Sprouts in Bacon and Garlic Sauce. This recipe was a staple at our holiday table, lovingly prepared by my grandmother. I remember sitting in her cozy kitchen, stealing crispy bacon bits while she wasn’t looking, and watching in awe as she transformed humble ingredients into a dish that even the pickiest eater couldn’t resist. Today, I’m delighted to share this beloved recipe with you, hoping it brings as much warmth and joy to your table as it did to ours.

Why You’ll Love It

This dish is a perfect blend of savory and tangy flavors that complement the natural taste of brussel sprouts. The bacon and garlic sauce add richness, while a hint of lemon juice brightens the dish. It’s quick and easy to prepare, making it an excellent side dish for busy weeknights or special occasions. Plus, the crispy bacon bits add a delightful texture that even those who usually shy away from green vegetables will enjoy.

Ingredients

  • 250g whole brussel sprouts
  • 1/2 teaspoon salt
  • 4 cups water
  • 1 tablespoon salted butter
  • 1 tablespoon minced garlic
  • 1 tablespoon bacon bits
  • Salt and pepper to taste
  • 1 teaspoon lemon juice

Instructions

  1. Wash the brussel sprouts thoroughly and remove any old, hard outer leaves.
  2. Bring 4 cups of water to a boil in a saucepan and add 1/2 teaspoon of salt.
  3. Add the brussel sprouts to the boiling water and cook at medium heat for 4 minutes, or until they are tender but still slightly crunchy.
  4. Drain the brussel sprouts and set them aside.
  5. Return the saucepan to the hot stove and add 1 tablespoon of butter.
  6. While the butter is melting, cut the brussel sprouts in half.
  7. Add 1 tablespoon of minced garlic to the melted butter and sauté for a few seconds until the garlic is fragrant but not brown.
  8. Return the cut brussel sprouts to the saucepan and toss them lightly in the garlic-butter sauce.
  9. Add 1 tablespoon of bacon bits and toss to combine. For convenience, I always keep a jar of ready-to-use bacon bits in the fridge, but freshly pan-fried and crumbled bacon works just as well.
  10. Season to taste with salt and pepper. I personally love using Masterfoods Garlic Pepper for an extra flavor kick.
  11. Add a squeeze of fresh lemon juice (about 1 teaspoon) for a tangy finish.
  12. Toss everything together once more and serve. For an extra touch, garnish with toasted almond flakes or serve with fresh lemon wedges on the side.

Tips

To ensure your brussel sprouts are perfectly cooked, check them after 4 minutes of boiling. They should be tender but still retain a bit of crunch. Overcooking can lead to mushy sprouts, which we want to avoid. If you prefer a smokier flavor, try using smoked bacon bits. Remember, fresh lemon juice is key; it brightens the dish and balances the savory elements beautifully.

Variations & Substitutions

If you’re vegetarian or looking to reduce your meat intake, you can substitute the bacon bits with smoked paprika or sun-dried tomatoes for a similar depth of flavor. For a nutty crunch, consider adding toasted pine nuts or walnuts instead of almond flakes. If garlic isn’t your favorite, shallots or onions can also complement the sprouts nicely. Feel free to experiment with different herbs like thyme or rosemary for an aromatic twist.

Storage

Store any leftovers in an airtight container in the refrigerator for up to 3 days. To reheat, simply warm them in a skillet over medium heat until heated through. You can also use a microwave, though the skillet method will help retain their texture better. Unfortunately, this dish doesn’t freeze well, as the texture of the brussel sprouts can become unappealing when thawed.

FAQ

Can I use frozen brussel sprouts for this recipe?

Yes, you can use frozen brussel sprouts, but the texture might differ slightly. Make sure to thaw them thoroughly and pat them dry before cooking to remove excess moisture. Adjust the boiling time as needed since frozen sprouts might cook faster.

How do I make this dish vegan?

To make this dish vegan, simply replace the butter with a plant-based alternative and omit the bacon bits. You can use smoked paprika or nutritional yeast to add depth of flavor.

Can I prepare this dish ahead of time?

Yes, you can prepare the brussel sprouts and the garlic sauce a day in advance. Store them separately in the fridge. When ready to serve, reheat the sauce, toss in the brussel sprouts, and add the bacon bits and lemon juice for a fresh finish.

Nutrition

This dish is a great source of fiber, vitamins C and K, and antioxidants from the brussel sprouts. The bacon and butter add a dose of healthy fats, while garlic is known for its immune-boosting properties. Keep in mind that the nutritional content will vary based on the specific brands and quantities used.

Conclusion

Brussel Sprouts in Bacon and Garlic Sauce is a dish that has stood the test of time in my family, bringing smiles and satisfied sighs from everyone around the table. I hope this recipe becomes a cherished favorite in your home as well. Its simplicity and delightful flavors make it a winner for any occasion. So, gather your loved ones, share a meal, and create new memories with this heartwarming dish. Enjoy!

Related update: Brussel Sprouts in Bacon and Garlic Sauce

Medenjaci – Croatian Honey Spice Cookies | Made by Meaghan Moineau

Medenjaci – Croatian Honey Spice Cookies

Intro

Growing up in Croatia, the holiday season was always a magical time filled with family, laughter, and the distinct aroma of spices wafting through the house. One particular scent that signaled the beginning of festivities was that of Medenjaci, the Croatian honey spice cookies. These delightful treats were a staple in our home, lovingly prepared by my grandmother, whose recipe has been passed down through generations. As a child, I would eagerly wait by her side, watching as she skillfully mixed the ingredients, her hands moving with a rhythm that only years of practice could perfect. Now, I carry on this tradition, sharing these cherished cookies with my family and friends, hoping to evoke the same warmth and joy that I felt so many years ago.

Why You’ll Love It

These Medenjaci are more than just cookies; they are a bite of nostalgia, a piece of history, and a heartwarming treat perfect for any occasion. Packed with aromatic spices and the natural sweetness of honey, they offer a delightful balance of flavors that will transport you straight to the cozy kitchens of Croatia. Whether enjoyed with a cup of tea or as part of a festive holiday spread, Medenjaci are sure to be a hit among both kids and adults. Plus, the recipe is simple enough for anyone to follow, allowing you to create your own sweet memories in the kitchen.

Ingredients

  • 100g butter
  • 200g demerara sugar
  • 150g honey
  • 2 eggs
  • 1 teaspoon baking soda
  • 1 teaspoon ground cinnamon
  • 1/2 teaspoon ground cloves
  • 1/2 teaspoon ground nutmeg
  • 1/2 teaspoon powdered ginger
  • 200g all-purpose flour
  • 100g whole wheat flour
  • 50g cake flour
  • Whole walnut kernels, quartered

Instructions

  1. In a saucepan, heat the butter, demerara sugar, and honey over low heat, stirring constantly until the sugar and butter have melted completely. Set aside to cool for about 10 minutes.
  2. In a small bowl, lightly whisk the eggs.
  3. In a separate bowl, mix and combine the baking soda, ground cinnamon, ground cloves, ground nutmeg, powdered ginger, all-purpose flour, whole wheat flour, and cake flour.
  4. Add the lightly beaten eggs, flour, and spice mixture to the melted honey, sugar, and butter mixture.
  5. Mix and combine until you obtain a smooth and soft dough.
  6. Cover the dough with foil and leave it in a cool place for 1-3 days to allow the flavors to develop.
  7. After resting, divide the dough and roll it into long rolls approximately 1.5 cm in diameter. Cut them into smaller rolls, and shape each roll into a walnut-sized ball.
  8. Place the dough balls a few centimeters apart on a baking sheet lined with parchment paper or a silicone sheet.
  9. Insert, only halfway, a quarter of a walnut kernel at the top of each cookie.
  10. Bake the cookies in a preheated oven at 190°C for 10-12 minutes, or until golden brown.
  11. Allow the cookies to cool completely before storing them in an airtight container.

Tips

For the best flavor, let the dough rest for the full three days. This allows the spices to fully infuse into the dough, giving the cookies a richer taste. Be sure to cool the butter, sugar, and honey mixture before adding the eggs to prevent them from cooking prematurely. When shaping the cookies, ensure they are evenly sized to promote even baking.

Variations & Substitutions

If you’re looking to experiment with flavors, consider adding a pinch of ground cardamom for a unique twist. For a nut-free version, simply omit the walnut topping. You can also substitute the all-purpose flour with a gluten-free blend if desired, though this may slightly alter the texture of the cookies.

Storage

Medenjaci can be stored in an airtight container at room temperature for up to two weeks. They can also be frozen for up to three months, making them a convenient option for make-ahead holiday treats. Just be sure to let them return to room temperature before serving to preserve their delightful texture.

FAQ

Can I use regular sugar instead of demerara sugar?

Yes, you can substitute demerara sugar with regular granulated sugar. However, demerara sugar adds a subtle molasses flavor and a slightly chewy texture that complements the spices beautifully.

What can I use if I don’t have cake flour?

If you don’t have cake flour on hand, you can make a substitute by measuring 50g of all-purpose flour, removing 1 tablespoon, and replacing it with 1 tablespoon of cornstarch. Sift the flour and cornstarch together to ensure a uniform mixture.

Can I add other nuts or dried fruits to the cookies?

Absolutely! Feel free to customize your Medenjaci by adding chopped almonds, hazelnuts, or dried fruits such as raisins or cranberries. Just be mindful not to overcrowd the dough to maintain the cookies’ structure.

Nutrition

While exact nutritional values may vary based on specific ingredients and portion sizes, each cookie is approximately 100 calories. These cookies are a delightful treat, best enjoyed in moderation as part of a balanced diet.

Conclusion

Medenjaci, with their aromatic spices and rich honey flavor, truly encapsulate the essence of Croatian holiday baking. Whether you’re making them for the first time or continuing a family tradition, these cookies are sure to bring warmth and joy to your home. I hope this recipe becomes a beloved addition to your baking repertoire and that it fills your kitchen with the same delightful scents that have wafted through mine for generations. Enjoy every bite, and share the love with those you hold dear.

Related update: Medenjaci – Croatian Honey Spice Cookies

Related update: Coconut Cream Pie Vegan Milkshake

Candied Spiced Pecans | Made by Meaghan Moineau

Candied Spiced Pecans: A Sweet and Savory Delight

Intro

There’s something magical about the aroma of spiced pecans wafting through the house, especially during the holiday season. As a child, I remember my grandmother making batches of these delightful treats for family gatherings. The warmth of the spices combined with the sweetness of the sugar created an irresistible snack that had everyone reaching for more. Today, I’m excited to share this cherished recipe with you, hoping it brings as much joy to your home as it has to ours.

Why You’ll Love It

These Candied Spiced Pecans are a perfect blend of sweet and spicy, offering a crunchy texture that is as satisfying as it is delicious. Whether you’re looking for a quick snack, a topping for salads, or a thoughtful homemade gift, these pecans fit the bill. The combination of spices like cinnamon, cloves, and nutmeg, along with a hint of maple, makes them an irresistible treat that captures the essence of comfort and warmth.

Ingredients

  • 1 tsp allspice
  • 1/2 cup brown sugar
  • 2 tbsp butter
  • 1 tsp cinnamon
  • 1/2 cup granulated sugar
  • 1/4 tsp ground cloves
  • 1 tsp maple extract
  • 1/4 tsp nutmeg
  • 2 cups pecans
  • 1/4 cup water

Instructions

  1. Preheat your oven to 300°F (150°C). Line a cookie sheet with tin foil and coat it with cooking spray. Set aside.
  2. In a shallow bowl, sift together the granulated sugar, cinnamon, allspice, cloves, and nutmeg. Set aside.
  3. In a small bowl, whisk together the maple extract, brown sugar, and water.
  4. Over medium heat, melt the butter in a skillet. Slowly whisk in the brown sugar mixture and bring it to a boil.
  5. Add the pecans to the skillet and stir to coat them thoroughly. Simmer for about 1-2 minutes until well-coated.
  6. Using a slotted spoon, transfer the pecans to the reserved sugar and spice bowl. Coat the pecans evenly with the sugar mixture.
  7. Place the pecans evenly on the prepared cookie sheet and bake for 15 minutes. Stir the pecans and bake for an additional 15 minutes.
  8. Let the pecans cool completely before serving or storing.

Tips

For the best results, make sure to use fresh pecans. Older nuts can lose their natural oils and flavor. Be sure to stir the pecans halfway through the baking process to ensure even coating and roasting. Lastly, allow them to cool completely before storing to maintain their crispiness.

Variations & Substitutions

If you’re looking to switch things up, you can easily substitute walnuts or almonds for the pecans. For a spicier kick, consider adding a pinch of cayenne pepper to the spice mix. If maple extract isn’t available, vanilla extract works as a great alternative, providing a subtly different flavor profile.

Storage

Store your candied spiced pecans in an airtight container at room temperature. They should stay fresh for up to two weeks. You can also freeze them for longer storage, just be sure to let them thaw completely before serving to retain their crisp texture.

FAQ

Can I use salted butter for this recipe?

Yes, you can use salted butter, but it will slightly alter the flavor profile by adding a hint of saltiness. If you prefer to keep the recipe sweet, stick with unsalted butter.

How do I prevent the pecans from sticking together?

Ensure that the pecans are spread out evenly on the baking sheet and stirred halfway through the baking process. This will help prevent clumping and ensure each nut is evenly coated and roasted.

Can I make these pecans in advance?

Absolutely! These candied spiced pecans are perfect for making ahead of time. Just store them in an airtight container as mentioned, and they’ll be ready for any occasion.

Nutrition

While these candied spiced pecans are a treat, they’re also packed with nutrients. Pecans are a great source of healthy fats, fiber, and protein. However, due to the sugar content, it’s best to enjoy them in moderation as part of a balanced diet.

Conclusion

These Candied Spiced Pecans are not just a treat; they’re a tradition that brings warmth and joy to any occasion. Easy to make and incredibly versatile, they’re sure to become a favorite in your home, just as they have in ours. I hope this recipe inspires you to create delicious memories with your loved ones. Enjoy!

Related update: Candied Spiced Pecans

Related update: Medenjaci – Croatian Honey Spice Cookies

Related update: Japanese Gyoza Pot Stickers

Tortellini In Brodo | Made by Meaghan Moineau

Tortellini In Brodo: A Cozy Italian Classic

Intro

There’s something truly magical about a steaming bowl of tortellini in brodo. It transports me back to my grandmother’s kitchen on a chilly winter evening. I still remember sitting at her rustic wooden table, the warmth from the stove filling the room, as she ladled the aromatic broth into our bowls. The air was filled with laughter, comfort, and the irresistible scent of homemade goodness. Tortellini in brodo is more than just a dish; it’s a memory, a hug in a bowl, and a testament to the power of simple, quality ingredients.

Why You’ll Love It

This recipe for Tortellini in Brodo is not only deeply comforting but also incredibly easy to prepare. It’s perfect for busy weeknights when you crave something warm and satisfying without the fuss. The beauty of this dish lies in its simplicity and the way each ingredient shines through. The rich chicken stock forms a flavorful base, while the lemon juice and zest add a bright, zesty contrast. Topped with a generous grating of parmigiano-reggiano, this dish is a delightful symphony of flavors that will warm your soul and elevate your dinner experience.

Ingredients

  • 6 cups chicken stock
  • 2 tablespoons fresh lemon juice
  • 1 teaspoon lemon zest
  • 1/4 cup grated parmigiano-reggiano
  • Salt and pepper to taste
  • 1 package frozen tortellini

Instructions

  1. In a large pot, bring the chicken stock to a boil over medium-high heat.
  2. Add the frozen tortellini to the boiling stock and cook according to the package instructions until the tortellini are tender and cooked through.
  3. Once cooked, ladle the tortellini and broth into serving bowls.
  4. Squeeze fresh lemon juice into each bowl and stir gently to combine.
  5. Top each serving with a generous amount of grated parmigiano-reggiano and a sprinkle of lemon zest.
  6. Season with freshly ground salt and pepper to taste.
  7. Serve immediately and enjoy the comforting flavors.

Tips

To elevate your Tortellini in Brodo, use the best quality chicken stock you can find or make your own at home. Homemade stock adds depth and richness unmatched by store-bought versions. Be sure to taste the broth before serving to ensure the seasoning is just right. Since the parmigiano-reggiano is quite salty, you may want to adjust the salt level accordingly.

Variations & Substitutions

If you’re looking to personalize this classic dish, consider these variations:

  • Vegetarian Version: Substitute the chicken stock with a robust vegetable broth to make a delightful vegetarian alternative.
  • Protein Boost: Add some shredded rotisserie chicken or cooked Italian sausage to the broth for a heartier meal.
  • Herby Twist: Toss in a handful of fresh spinach or arugula just before serving for a touch of green and added nutrients.
  • Cheese Alternatives: While parmigiano-reggiano is classic, feel free to experiment with other hard cheeses like pecorino romano for a different flavor profile.

Storage

Tortellini in Brodo is best enjoyed fresh, but if you have leftovers, store them in an airtight container in the refrigerator for up to 3 days. When reheating, warm the soup gently on the stove over low heat, adding a splash of stock or water if the broth has thickened. Keep in mind that the tortellini may absorb some of the broth, so you might want to have extra stock on hand to refresh the soup.

FAQ

Can I use fresh tortellini instead of frozen?

Absolutely! Fresh tortellini will work beautifully in this recipe. Just be sure to adjust the cooking time according to the package instructions, as fresh pasta often cooks faster than frozen.

What can I serve with Tortellini in Brodo?

This dish pairs wonderfully with a simple side salad and crusty bread. The salad adds a fresh contrast, while the bread is perfect for soaking up every last drop of the delicious broth.

Is there a way to make this dish gluten-free?

Yes, you can make Tortellini in Brodo gluten-free by using gluten-free tortellini, which is available in many grocery stores. Ensure your chicken stock is also gluten-free, and you’ll have a safe and delicious meal for those with gluten sensitivities.

Nutrition

While Tortellini in Brodo is a comforting and delicious dish, it’s also worth noting its nutritional benefits. The chicken stock is rich in proteins and minerals, while the parmigiano-reggiano provides a good source of calcium. The lemon adds a dose of vitamin C, and if you opt to add greens, you’ll further boost the nutritional profile of this meal. It’s a well-rounded dish that can fit into a balanced diet.

Conclusion

Tortellini in Brodo is more than just a soup; it’s a warm embrace, a nostalgic taste of Italy, and a simple pleasure that brings comfort to any table. Whether you’re seeking to relive cherished memories or create new ones, this dish is sure to become a beloved staple in your kitchen. Its simplicity is its strength, allowing each ingredient to shine and offering a canvas for your culinary creativity. So go ahead, gather your loved ones, and savor the cozy, delightful experience that is Tortellini in Brodo.

Related update: Tortellini In Brodo

Related update: Brussel Sprouts in Bacon and Garlic Sauce

Related update: Pan Seared Lamb Loin With Chimichurri & Roasted Trio Squash Salad With Goat Cheese and Pinenuts

Related update: Wisconsin Beer Cheese Soup

Spicy Lemongrass Soup | Made by Meaghan Moineau

Spicy Lemongrass Soup

Intro

There’s something inherently comforting about a bowl of soup—especially one that’s bursting with complex flavors and a hint of heat. Spicy Lemongrass Soup is a delightful dish that takes me back to my childhood. Growing up, my grandmother would often prepare a steaming pot of soup on chilly days, filling the house with a fragrant aroma that meant warmth and love. Lemongrass was a staple in her kitchen, and its citrusy scent evokes memories of her bustling around, always with a smile and a story. Today, I share with you a modern twist on her classic recipe. This Spicy Lemongrass Soup is not only a tribute to her but also a celebration of flavors that will surely become a favorite in your household too.

Why You’ll Love It

This Spicy Lemongrass Soup is a culinary delight, offering a harmonious blend of flavors that dance on your palate. It’s a perfect balance of spicy, tangy, and savory, with the lemongrass adding a refreshing citrus undertone. This soup is not only delicious but also nourishing, thanks to ingredients like tofu and fresh vegetables. Whether you’re craving something hearty on a cold day or looking for a light yet satisfying meal, this soup ticks all the boxes.

Ingredients

  • 2 stalks fresh lemongrass, chopped into 2-inch pieces and sliced down the center
  • 4-5 red dried peppers
  • 1 knob ginger, grated
  • 3 cloves garlic, minced
  • 4 cups vegetable broth
  • 1 can fresh coconut milk
  • 1 cup tofu cubes
  • 1 cup snow peas
  • 1 cup mushrooms, sliced
  • 4 oz rice noodles
  • Juice of 1 lime

Instructions

  1. Chop the lemongrass into 2-inch pieces and slice down the center. Add to a soup pot along with the vegetable broth, coconut milk, garlic, and ginger.
  2. Bring the mixture to a boil, then reduce the heat and let it simmer on low for 30 minutes. This allows the flavors to meld beautifully.
  3. Once the broth is done simmering, strain it through cheesecloth to remove the lemongrass stalks and any solid bits. The lemongrass stalks are not edible, a lesson I learned the hard way.
  4. Return the strained broth to a simmer and add the tofu, mushrooms, snow peas, and rice noodles.
  5. Add the lime juice. You can add some at the beginning and more at the end before serving for an extra burst of freshness.
  6. Simmer the soup until the noodles are soft, then garnish with grated ginger or scallions before serving.

Tips

For the best results, use fresh lemongrass and ginger. These ingredients are key to the depth of flavor in this soup. If you’re sensitive to spice, you can reduce the number of dried red peppers or remove them altogether. Taste as you go to adjust the seasoning according to your preference.

Variations & Substitutions

This recipe is quite flexible. Feel free to add more vegetables like bell peppers or carrots for added nutrition. If you’re not a fan of tofu, you can substitute it with chicken or shrimp. For a gluten-free option, ensure that the rice noodles are certified gluten-free.

Storage

This soup stores well in the refrigerator for up to 3 days. Simply transfer it to an airtight container once it’s cooled. Reheat it gently on the stove, adding a splash of water or broth if needed. It can also be frozen for up to 2 months. Thaw overnight in the fridge before reheating.

FAQ

Can I use dried lemongrass instead of fresh?

While fresh lemongrass is preferred for its vibrant flavor, dried lemongrass can be used in a pinch. Use about 1 tablespoon of dried lemongrass for this recipe. Remember to adjust the cooking time as dried lemongrass may require a bit longer to release its flavors.

How can I make this soup more filling?

To make this soup more substantial, consider adding more protein like chicken or shrimp. You can also increase the amount of tofu or include additional vegetables such as bell peppers or carrots. Serving it with a side of crusty bread can also make it a heartier meal.

Nutrition

This Spicy Lemongrass Soup is packed with nutritious ingredients. It’s a great source of protein from the tofu, and rich in vitamins from the vegetables. Coconut milk adds a healthy dose of fats, while lemongrass and ginger provide antioxidants. It’s a well-rounded meal that nourishes the body and soul.

Conclusion

Spicy Lemongrass Soup is more than just a meal; it’s a sensory experience that warms the heart and excites the taste buds. With its rich flavors and comforting warmth, it’s a wonderful dish to share with loved ones or enjoy on your own. Whether it’s a nod to nostalgic family recipes or a new addition to your culinary repertoire, I hope this soup brings joy and deliciousness to your table. Enjoy every spoonful!

Related update: Spicy Lemongrass Soup

Related update: Tortellini In Brodo

Dump Cake | Made by Meaghan Moineau

Deliciously Easy Dump Cake: A Nostalgic Dessert

Intro

There’s something uniquely comforting about a dessert that reminds you of home, isn’t there? For me, it’s the simple yet delightful Dump Cake. I still remember those Sunday afternoons at my grandmother’s house. The aroma of baking cake would fill the air, mingling with her laughter as she recounted stories from her youth. My siblings and I would impatiently wait for the oven timer to chime, our anticipation growing with every tick. This cake was a staple of our childhood, a dessert that required little effort but delivered immense joy. Today, I’m thrilled to share this cherished recipe with you, hoping it brings your family as much warmth and happiness as it has brought mine.

Why You’ll Love It

Dump Cake is one of those magical desserts that’s incredibly simple to make yet tastes like you’ve spent hours in the kitchen. Here are a few reasons why you’ll love it:

  • Effortless Preparation: With just four ingredients, you’ll have this cake prepped and in the oven in minutes.
  • Versatile and Adaptable: The beauty of a Dump Cake lies in its flexibility. You can mix and match fruit fillings to suit your taste or the contents of your pantry.
  • Perfectly Delicious: Each bite combines the sweet, tangy flavors of fruit with the soft, buttery crunch of cake, making it a crowd-pleaser at any gathering.
  • Great for Any Occasion: Whether it’s a family get-together, a potluck, or just a cozy night in, this cake is the perfect sweet treat.

Ingredients

  • 1 can of pineapple (20 oz)
  • 1 can of pie filling (21 oz, any flavor you prefer)
  • 1 box of cake mix (yellow or white)
  • 1 stick of butter (1/2 cup)

Instructions

  1. Preheat your oven to 350°F (175°C).
  2. Spread the canned pineapple evenly over the bottom of a 9×13 inch baking pan. Ensure that it’s well-distributed for even flavor throughout the cake.
  3. Cover the pineapple with the canned pie filling. Again, spread it out to ensure every bite gets a taste of fruity goodness.
  4. Sprinkle the dry cake mix evenly over the fruit layers. You don’t need to mix it in; just ensure it covers the entire surface.
  5. Cut the stick of butter into small pieces and distribute them evenly over the surface of the cake mix. This will ensure a rich, buttery top layer as it melts and bakes.
  6. Bake in the preheated oven for 1 hour or until the top is golden brown and bubbly.
  7. Allow to cool slightly before serving. For a nostalgic touch, serve it “Old School” style with a dollop of Cool Whip or freshly whipped cream.

Tips

Here are some helpful tips to ensure your Dump Cake is perfect every time:

  • Butter Distribution: Make sure the butter is evenly distributed over the cake mix. This will ensure the entire top becomes beautifully golden and crisp.
  • Pan Variations: If you don’t have a 9×13 pan, you can use a slightly smaller or larger one, but keep an eye on the baking time as it may vary.
  • Crumb Topping: For a little extra crunch, sprinkle some chopped nuts or rolled oats over the top before baking.

Variations & Substitutions

The classic combination of pineapple and cherry pie filling is just a starting point. Here are some ideas to make this recipe your own:

  • Fruit Swaps: Try using apple pie filling with a dash of cinnamon for a fall-inspired dessert, or peach filling for a summery twist.
  • Cake Mix Options: Experiment with different cake flavors like spice cake or chocolate for a unique taste.
  • Butter Alternatives: If you’re looking for a slightly lighter option, you can use margarine instead of butter.

Storage

Dump Cake is best enjoyed fresh out of the oven, but it can be stored for later enjoyment as well:

  • Refrigeration: Store leftover cake in an airtight container in the refrigerator for up to 3 days. The flavors meld even more as it sits, making it delicious even after a couple of days.
  • Freezing: Although not recommended for the best texture, you can freeze Dump Cake. Wrap portions tightly in plastic wrap and store in a freezer-safe container for up to 1 month. Thaw in the refrigerator before reheating.

FAQ

Can I use fresh fruits instead of canned?

Yes, you can use fresh fruits, although using canned fruits is part of what makes this recipe so quick and easy. If using fresh fruit, you might need to add a bit of sugar to mimic the sweetness of canned pie filling.

Can I make this Dump Cake gluten-free?

Absolutely! Simply swap the regular cake mix for a gluten-free variety. Many stores carry gluten-free cake mixes that work perfectly in this recipe.

What if I don’t have a 9×13 pan?

No worries! You can use any baking dish with similar dimensions. Just be sure to monitor the cake as it bakes, as the cooking time may vary slightly with different pan sizes.

Nutrition

While this cake is a delightful treat, it’s always good to be mindful of nutrition:

  • Calories: Approximately 350 calories per serving.
  • Fat: 15g
  • Sugar: 28g
  • Carbohydrates: 52g

Please note that these values are estimates and can vary based on specific ingredients used.

Conclusion

Dump Cake is more than just a dessert; it’s a blend of simplicity, nostalgia, and flavor that brings people together. Whether you’re reminiscing about childhood memories or creating new ones with your loved ones, this cake is sure to be a hit. Its ease of preparation makes it perfect for both novice bakers and seasoned cooks looking for a quick, satisfying treat. I hope you enjoy making and sharing this beloved family recipe. Here’s to creating sweet memories, one slice at a time!

Related update: Dump Cake

Related update: Candied Spiced Pecans

Yorkshire Pudding | Made by Meaghan Moineau

Perfectly Puffy Yorkshire Pudding

Intro

Ah, Yorkshire Pudding! Just the name conjures up images of cozy Sunday roasts, family gatherings, and the irresistible aroma of sizzling beef. I remember my grandmother bustling around the kitchen, her floral apron slightly askew, as she expertly whipped up these golden delights. She always said the secret was in the love you put into the batter—and perhaps a bit of hot pan drippings too! This traditional British side dish has been a staple in our family for generations, always ensuring smiles around the dinner table.

Why You’ll Love It

Yorkshire Pudding is more than just a side dish; it’s an experience. With its crispy exterior and soft, airy interior, it provides the perfect contrast to a hearty roast. Whether you’re serving it with beef, chicken, or even on its own, this versatile dish is bound to become a favorite. The best part? It’s incredibly simple to make with just a few pantry staples. Plus, it’s a great way to use up those delicious pan drippings from your roast!

Ingredients

  • 3 large eggs
  • 1 cup all-purpose flour
  • 1 cup milk
  • Pan drippings from roast beef (preferably)
  • 1/2 teaspoon salt

Instructions

  1. Preheat your oven to 400-450°F. This may vary slightly depending on your specific oven, but you’ll find the sweet spot after a few tries.
  2. Sift the flour and salt together to ensure there are no lumps.
  3. In a separate bowl, beat the eggs and milk until well combined.
  4. Gradually mix the wet ingredients into the dry ingredients, whisking until you have a smooth batter.
  5. Pour the pan drippings into your Yorkshire pudding tray. A muffin or cupcake tray will work too.
  6. Place the tray in the oven to get the oil nice and hot.
  7. Carefully remove the tray and spoon a couple of tablespoons of batter into each section.
  8. Return the tray to the oven and bake for about 20 minutes. Do not open the oven during this time to ensure your puddings rise properly.

Tips

Here are a few tips to ensure your Yorkshire puddings turn out perfectly every time:

  • Make sure your oven is fully preheated before you begin baking.
  • Resist the temptation to open the oven door while baking—this can cause your puddings to collapse.
  • If you’re out of pan drippings, vegetable oil can be a good substitute, though it might not have the same rich flavor.

Variations & Substitutions

While traditional Yorkshire Pudding is made with beef drippings, there are plenty of ways to customize your recipe:

  • Herb-Infused: Add a pinch of dried rosemary or thyme to the batter for an aromatic twist.
  • Cheesy Delight: Sprinkle a little grated cheddar into the batter for a cheesy version.
  • Vegetarian: Use vegetable oil and add a touch of vegetable broth to the batter for an equally delicious vegetarian option.

Storage

Yorkshire Puddings are best enjoyed fresh out of the oven. However, if you have leftovers, allow them to cool completely before storing them in an airtight container. They can be kept at room temperature for up to two days. To reheat, pop them in a preheated oven at 350°F for about 5-7 minutes until warmed through.

FAQ

Can I make Yorkshire Pudding batter ahead of time?

Yes, you can prepare the batter up to a day in advance. Just cover and refrigerate it. Give it a good whisk before using, as some separation may occur.

Why didn’t my puddings rise?

If your puddings didn’t rise, it could be due to a few reasons. Ensure your oven is hot enough before baking, and avoid opening the door during cooking. Also, make sure your batter is smooth and well-mixed.

Can I freeze Yorkshire Puddings?

Absolutely! Once cooled, freeze them in a single layer on a baking sheet. Once frozen, transfer them to a freezer bag. They can be reheated directly from frozen in a preheated oven at 350°F for about 10 minutes.

Nutrition

Yorkshire Pudding is a delightful treat, but like most indulgences, moderation is key. Each pudding typically contains around 100 calories, offering a balance of proteins, fats, and carbohydrates. Keep in mind these are estimates and can vary based on the specific ingredients and quantities used.

Conclusion

There you have it—a classic Yorkshire Pudding recipe that promises to become a cherished addition to your culinary repertoire. Whether you’re indulging in a traditional Sunday roast or simply craving a taste of nostalgia, these puddings are sure to deliver. Remember, cooking is as much about the memories you create as it is about the food itself. So gather your loved ones, share stories, and enjoy every bite of these delightful golden treats!

Related update: Yorkshire Pudding