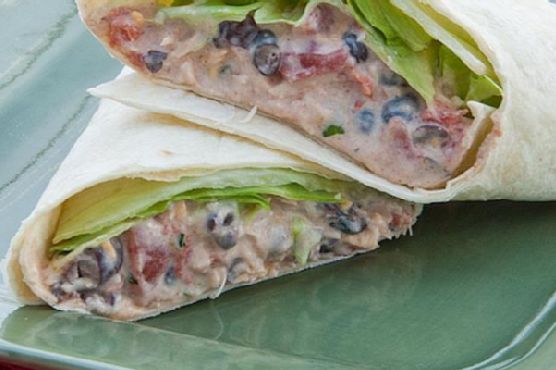
Chicken Enchilada Salad Wraps | Made by Meaghan Moineau
Title: A Wholesome Twist on Tradition: Chicken Enchilada Salad WrapsDescription: Dive into a delightful fusion of flavors with our Chicken Enchilada Salad Wraps. Easy to make and packed with wholesome ingredients, these wraps are perfect for a quick lunch or a satisfying dinner. With a hint of nostalgia and a sprinkle of spice, this dish is sure to become a family favorite.
---
Chicken Enchilada Salad Wraps: A Nostalgic Culinary Journey
There’s something magical about a dish that can transport you back to cherished moments with family. For me, the aroma of chili powder and cumin wafting through the kitchen brings me back to sunny Sunday afternoons at my grandmother’s house. With a bustling kitchen and the sound of laughter in the air, these Chicken Enchilada Salad Wraps were the centerpiece of many memorable family gatherings.
Ingredients:
- 1/2 cup light cream cheese
- 1/4 cup light sour cream
- 1 teaspoon chili powder
- 1 teaspoon cumin
- 1 clove garlic, minced
- 1 can (12.5 oz) Swanson Premium Chicken, drained
- 1 cup shredded cheddar cheese
- 1 can diced tomatoes with green chilies, drained
- 1/4 cup diced green onions
- 2 tablespoons fresh cilantro, chopped
- 6 burrito-sized tortillas
- Fresh lettuce leaves
Instructions:
1. Blend the Base: In a medium-sized bowl, combine light cream cheese, light sour cream, chili powder, cumin, and minced garlic. Stir until the mixture is smooth and well-blended.
2. Add the Essentials: Gently fold in the shredded cheddar cheese, drained chicken, diced tomatoes with green chilies, diced green onions, and fresh cilantro into the cream cheese mixture. Mix until all ingredients are evenly distributed.
3. Assemble the Wraps: Lay out the burrito-sized tortillas and divide the mixture evenly among them. Top each with a fresh lettuce leaf.
4. Roll and Serve: Roll up each tortilla burrito-style, ensuring the ends are tucked in to hold the delightful filling. Serve immediately and enjoy!
A Taste of Home
These wraps are more than just a meal; they’re a gateway to the past. I vividly remember sitting at the kitchen table, my mother teaching me how to blend the spices just right, while my siblings eagerly awaited their turn to roll up their wraps. The sensation of biting into that first wrap, with the creamy filling and the burst of flavors from the spices, was a moment of pure comfort and joy.
Difficulty: 3/10
This dish is rated as a 3 out of 10 for difficulty, making it accessible for cooks of all levels. Its simplicity doesn’t compromise on taste, making it an ideal choice for a quick and satisfying meal.
Classification: Main Dish
Perfect for lunch or dinner, these Chicken Enchilada Salad Wraps serve as a hearty main dish. Pair them with a side of rice or a fresh salad for a complete and satisfying meal.
Incorporate this recipe into your routine, and let it bring a touch of nostalgia and warmth to your table, just as it has to mine. Enjoy the journey down memory lane with each delicious bite.