Greek-Style Baked Fish: Fresh, Simple, and Delicious
Intro
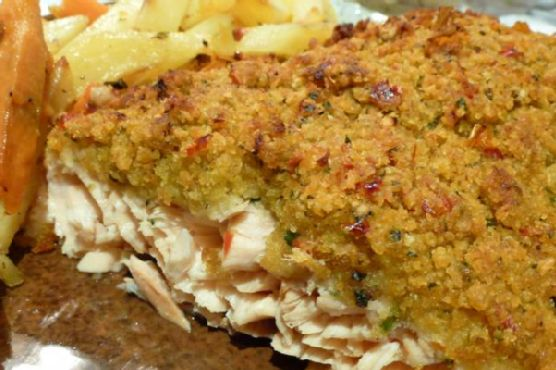
The aroma of freshly baked fish mingling with herbs and spices transports me back to my grandmother’s kitchen in Athens. Every Sunday, our family gathered around a long wooden table, eagerly awaiting the unveiling of her signature dish: Greek-style baked fish. With its flaky texture, vibrant colors, and Mediterranean flavors, this dish was a celebration of simplicity and freshness. Today, I’m thrilled to share this cherished recipe with you, bringing a little piece of my heritage to your table.
Why You’ll Love It
This Greek-style baked fish recipe is a treasure trove of flavors and textures that will make your taste buds dance. Not only is it easy to prepare, but it’s also a healthy and nutritious meal that fits perfectly into a busy lifestyle. The combination of fresh vegetables, herbs, and tender fish creates a dish that’s both light and satisfying. Whether you’re looking for a quick weeknight dinner or an impressive dish for entertaining, this recipe is sure to become a family favorite.
Ingredients
- Fish fillets
- Red onion, sliced
- Bell pepper, sliced
- Tomato, chopped
- Feta cheese, crumbled
- Dried basil
- Dried oregano
- Olive oil
- White wine
- Salt & pepper
- Lemon wedges
- Fresh basil and/or oregano, for garnish
- Cooked rice, for serving
Instructions
- Preheat the oven to 450 degrees F.
- Choose an oven-proof baking dish that your fish will fit in without overlapping and spray it with cooking spray.
- Lay the fish fillets in the baking pan in a single layer, season with salt and pepper.
- Top the fish with red onion and bell pepper.
- Sprinkle with dried basil and oregano, the tomato, and the feta cheese.
- Drizzle the white wine and olive oil over top.
- Grind some fresh pepper over the top.
- Bake uncovered for about 12 – 15 minutes or until the fish flakes easily with a fork.
- Squeeze the lemon wedges over the cooked fish, garnish with the fresh basil and/or oregano.
- Serve with hot cooked rice.
Tips
For the best results, use fresh fish fillets. If possible, visit your local fish market to find the freshest catch of the day. Don’t skimp on the herbs; they add a delightful aroma and flavor that make this dish truly special. If you’re using frozen fish, make sure it’s fully thawed and patted dry before cooking to ensure even baking.
Variations & Substitutions
This recipe is incredibly versatile. You can substitute the fish fillets with salmon or cod for a different twist. If you’re not a fan of feta cheese, try using goat cheese or ricotta for a milder taste. For a spicier kick, add a pinch of red pepper flakes before baking. Vegetarians can replace the fish with hearty vegetables like eggplant or zucchini for a delicious plant-based version.
Storage
Store any leftovers in an airtight container in the refrigerator for up to 3 days. To reheat, place the fish in a preheated oven at 350 degrees F until warmed through. Avoid microwaving, as it can make the fish rubbery. This dish is also great for meal prepping; simply prepare the ingredients ahead of time and bake when ready to serve.
FAQ
Can I use frozen fish for this recipe?
Yes, you can use frozen fish fillets. Just make sure they are completely thawed and patted dry before you start preparing the dish. This will help them cook evenly and maintain the right texture.
What type of white wine should I use?
Choose a dry white wine like Sauvignon Blanc or Pinot Grigio for this recipe. The acidity and flavor profile of these wines complement the dish’s ingredients without overpowering them.
Is there a non-alcoholic substitute for white wine?
If you prefer not to use wine, you can substitute it with an equal amount of chicken or vegetable broth. Add a splash of lemon juice for a hint of acidity that mimics the wine’s flavor.
Nutrition
This Greek-style baked fish is a nutritious meal packed with protein, healthy fats, and essential vitamins and minerals. Fish is an excellent source of omega-3 fatty acids, which are beneficial for heart health. The vegetables provide fiber and antioxidants, while olive oil adds a dose of healthy monounsaturated fats. Serve with brown rice for added fiber and a complete meal.
Conclusion
Infused with the flavors of the Mediterranean, this Greek-style baked fish is a simple yet exquisite dish that honors tradition while offering modern convenience. It’s a recipe that brings people together, creating lasting memories around the dining table. I hope this dish becomes as cherished in your home as it has been in mine. Bon appétit, or as we say in Greece, Kali Orexi!
Related update: Greek-Style Baked Fish: Fresh, Simple, and Delicious
Related update: Blackened Cajun Chicken