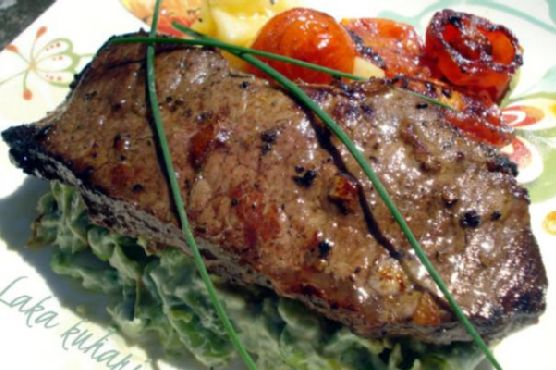
Strip steak with roasted cherry tomatoes and vegetable mash | Made by Meaghan Moineau
Title: Savoring Memories: Strip Steak with Roasted Cherry Tomatoes and Vegetable MashDescription: Dive into the rich flavors of a classic steak dish with a nostalgic twist. Our Strip Steak with Roasted Cherry Tomatoes and Vegetable Mash combines the juicy tenderness of beef with the vibrant notes of fresh vegetables, creating a memorable main dish that's perfect for family gatherings. With a difficulty rating of 7 out of 10, this recipe offers an engaging culinary experience, bringing together a symphony of flavors and cherished family memories.
Body:
There’s something inherently comforting about a well-prepared steak. For me, strip steak isn't just a meal; it's a gateway to cherished family memories that have stood the test of time. I recall summer evenings at my grandparents’ countryside home, where the air was filled with laughter and the irresistible aroma of a sizzling grill.
My grandmother, with her apron dusted with flour and her smile as warm as the July sun, would prepare the marinade with such care. Balsamic vinegar, fresh rosemary, and a touch of garlic infused each strip steak with a depth of flavor that was nothing short of magical. She would let the steaks bathe in this aromatic blend overnight, allowing the flavors to meld perfectly, a testament to her patience and culinary wisdom.
As the steaks marinated, we would gather around the garden, picking fresh cherry tomatoes and herbs, their vibrant colors a promise of the delicious meal to come. The anticipation was palpable, and it was in these moments that I learned the importance of using fresh, quality ingredients - a lesson that resonates in every dish I prepare today.
Instructions:
1. Marinade Preparation: In a bowl, mix balsamic vinegar, olive oil, minced garlic, salt, and pepper. Add a sprig of fresh rosemary to infuse aromatic notes. Pour this marinade over the beef strip steaks, ensuring they are well-coated. Allow them to stand for at least an hour, preferably overnight for the best flavors.
2. Roasting Cherry Tomatoes: Heat a grill pan over medium heat. Toss the cherry tomatoes with a drizzle of olive oil and season with salt and pepper. Grill until they begin to char and burst, then set aside to cool slightly.
3. Cooking the Strip Steaks: Remove the steaks from the marinade. Heat olive oil in a skillet over high heat. Sear the steaks for 2 minutes on each side. Reduce the heat, add unsalted butter, and cook for another 2-4 minutes, turning once, depending on your preferred doneness. Transfer the steaks to a plate and let them rest in a warm place.
4. Preparing the Vegetable Mash: Cook the green beans and fresh peas in boiling water for 8-10 minutes until tender. Drain and cool them under cold water. In a food processor, combine the beans, peas, ricotta cheese, a tablespoon of olive oil, salt, and pepper. Blend until you achieve a rough puree.
5. Final Touches: In the skillet where the steaks were cooked, gently heat the vegetable mash for 1 minute, allowing it to absorb the steak's residual flavors.
6. Serving: On warmed plates, divide the vegetable mash and arrange the steaks on top. Garnish with roasted cherry tomatoes, a drizzle of olive oil, and a sprinkle of fresh chives. For an added touch of nostalgia, serve with steamed new potatoes on the side.
Every bite of this dish transports me back to those cherished family gatherings, where love was the secret ingredient in every meal. Rated at a 7 out of 10 for difficulty, this main dish offers a rewarding cooking experience, perfect for those who enjoy a blend of tradition and flavor. Whether you're making it for a special occasion or simply to savor a moment of nostalgia, this recipe is sure to create new memories while honoring the old. Enjoy every bite!