Thai Shrimp | Made by Meaghan Moineau

Thai Shrimp: A Flavorful Journey to the Heart of Thailand

Intro

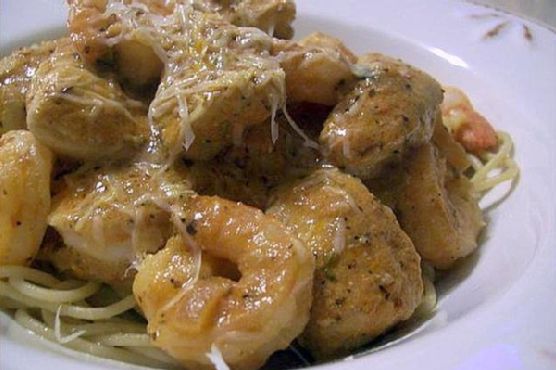
There’s something truly magical about the aroma of Thai cuisine wafting through your kitchen. It reminds me of the first time I visited Thailand. I was wandering through the bustling streets of Bangkok when I stumbled upon a tiny street food stall. The vendor, with a warm smile, served me a dish that would forever change my culinary journey: Thai Shrimp. The combination of fresh basil, spicy chilies, and succulent shrimp immediately captivated my senses. This dish not only brings back fond memories but also allows me to share a piece of Thailand with my loved ones every time I make it. Join me as we recreate this vibrant and flavorful dish in the comfort of your own kitchen.

Why You’ll Love It

This Thai Shrimp recipe is a delightful symphony of flavors and textures. The fragrant basil leaves and spicy chilies create a perfect balance with the savory notes of soy sauce and fish sauce. The shrimp are cooked to perfection, tender yet firm, absorbing the rich broth that envelops them. What makes this dish stand out is its simplicity and quick preparation, making it a perfect choice for a weekday dinner or a special weekend treat.

Ingredients

  • Basil leaves
  • Chicken stock
  • Cooked rice
  • Fish sauce
  • Green onions
  • Peanut oil
  • Red green chilies
  • Cooked shrimp
  • Soy sauce
  • Sugar

Instructions

  1. Peel and devein the shrimp, ensuring they’re clean and ready for cooking.
  2. Wash and dry the basil leaves, then steam them until they are wilted and fragrant.
  3. Mince the garlic cloves and thinly slice the red green chilies, ensuring they are seeded for a milder heat.
  4. Mince the white part of the green onions and cut the green part into 1-inch pieces.
  5. Heat a wok over high heat until it’s hot, then swirl in the peanut oil, heating it almost to smoking point.
  6. Add the minced garlic, sliced chilies, and the white part of the onions to the wok, cooking for 10-15 seconds until aromatic.
  7. Add the shrimp to the wok and stir-fry for about 20 seconds or until they start to change color.
  8. Pour in the fish sauce, soy sauce, sugar, and chicken stock, bringing the mixture to a boil.
  9. Stir in the green parts of the onions and the basil leaves, cooking for another 20 seconds until the basil wilts and the shrimp are firm and pink.
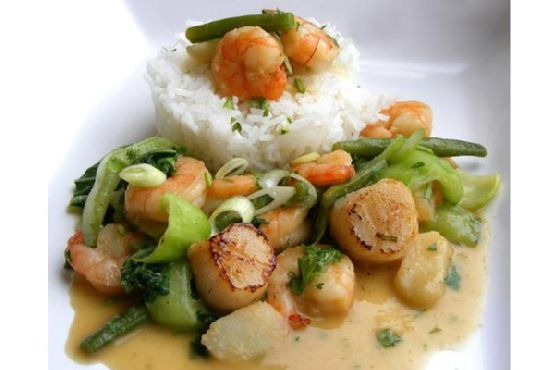
  10. Serve the dish over hot cooked rice, ensuring some of the delicious soup is poured over the rice.

Tips

To ensure the best flavor, use fresh basil leaves and high-quality shrimp. Be cautious with the chilies if you prefer a milder dish, and consider wearing gloves when handling them to avoid skin irritation. If you’re short on time, prep the ingredients ahead of time and store them in the refrigerator until you’re ready to cook.

Variations & Substitutions

If you want to switch things up, consider these variations:

  • Swap the shrimp for chicken or tofu for a different protein source.
  • Use coconut milk instead of chicken stock for a creamier, richer sauce.
  • Add vegetables like bell peppers or snap peas for extra crunch and nutrition.
  • Substitute soy sauce with tamari for a gluten-free option.

Storage

Leftover Thai Shrimp can be stored in an airtight container in the refrigerator for up to 3 days. To reheat, gently warm it in a saucepan over medium heat, adding a splash of chicken stock or water if needed to maintain the soupy consistency. Avoid microwaving to prevent the shrimp from becoming rubbery.

FAQ

Can I make this dish ahead of time?

Yes, you can prepare the ingredients ahead of time and store them in the fridge. However, it’s best to cook the shrimp just before serving to maintain their texture and flavor.

How can I adjust the spiciness of the dish?

To adjust the spiciness, simply reduce the number of chilies or remove the seeds for a milder flavor. You can also add more chilies if you prefer a spicier kick.

What can I use if I don’t have a wok?

If you don’t have a wok, a large skillet or frying pan will work just fine. Ensure it’s hot enough to quickly stir-fry the ingredients, mimicking the wok’s high-heat cooking.

Nutrition

This dish is not only delicious but also nutritious. Shrimp is a great source of protein and low in calories, while basil and chilies provide vitamins and antioxidants. Served with rice, it offers a balanced meal with carbohydrates and essential nutrients.

Conclusion

Cooking Thai Shrimp at home is a wonderful way to bring the exotic flavors of Thailand into your kitchen. It’s a dish that resonates with nostalgia for me, and I hope it becomes a favorite in your household as well. Whether you’re a seasoned cook or a beginner, this recipe is approachable and rewarding. Enjoy the vibrant flavors and the joy of sharing a meal that’s as heartwarming as it is delicious.

Related update: Thai Shrimp

Siew Mai | Made by Meaghan Moineau

Siew Mai: A Delightful Dim Sum Classic

Intro

Growing up, dim sum Sundays were a cherished tradition in my family. We would gather around a bustling table, eagerly anticipating the arrival of steaming bamboo baskets filled with an assortment of dumplings. Among my favorites was siew mai, a delectable pork and shrimp dumpling that quickly won my heart with its savory filling and delightful textures. Today, I’m excited to share my family’s recipe for siew mai, a dish that brings back fond memories and continues to be a beloved part of our dining experience.

Why You’ll Love It

Siew mai is a timeless dish that has captivated taste buds for generations. Here’s why you’ll love making and eating these delicious dumplings:

  • Flavorful Filling: The combination of pork, shrimp, and Chinese sausages creates a savory and satisfying flavor profile.
  • Texture Delight: The tender pork is complemented by the crunch of water chestnuts and the chewy texture of glutinous rice.
  • Customizable: Easily adapt the recipe to suit your taste preferences with variations and substitutions.
  • Perfect for Sharing: These bite-sized delights are perfect for gatherings and will surely impress your guests.

Ingredients

  • Wonton wrappers
  • 700g fatty pork
  • 2 tablespoons corn starch
  • 1 teaspoon salt
  • 1 teaspoon white ground pepper
  • 1/2 teaspoon sugar
  • 1 teaspoon Worcestershire sauce or Maggie Seasoning Sauce
  • 2 tablespoons Shaoxing Huatiao wine
  • 2 tablespoons sesame oil
  • 80g canned water chestnuts
  • 4 large Chinese mushrooms
  • Cooked whole shrimp
  • Carrot
  • 2 lap cheongs (Chinese sausages)
  • Raw glutinous rice
  • Shallots
  • Ginger
  • Cooking oil
  • Dried shrimps
  • Cooked dried scallops
  • Light soy sauce
  • Oyster sauce

Instructions

  1. To prepare the pork filling, mince 700g of pork and place it in a large mixing bowl.
  2. Add 2 tablespoons of corn starch, 1 teaspoon of salt, 1 teaspoon of ground white pepper, 1/2 teaspoon of sugar, 1 teaspoon of Worcestershire sauce, 2 tablespoons of Shaoxing Huatiao wine, and 2 tablespoons of sesame oil. Mix well.
  3. Roughly chop 80g of canned water chestnuts and 4 large Chinese mushrooms into fine pieces. Add to the pork mixture and combine thoroughly.
  4. Finely dice a small carrot to garnish the siew mai later. Set aside.
  5. For the glutinous rice filling, soak 2 lap cheongs in boiling water until the skin separates. Remove the skin and dice the sausages.
  6. In a large saucepan over medium-high heat, pan fry the diced lap cheong until they are golden. Follow the instructions for glutinous rice preparation and stir-fry until fragrant. Add the fried lap cheong pieces and set aside to cool.
  7. Prepare the wonton wrappers by placing a sheet on a flat surface. Place a teaspoon of filling in the center of each wrapper.
  8. Dampen your finger with water and wet the edges of the wonton wrapper. Gather the wrapper around the filling and squeeze gently to seal.
  9. Top each pork siew mai with a shrimp and garnish with chopped carrot.
  10. Place the dumplings in a steamer lined with perforated baking paper. Steam over boiling water for 14-15 minutes or until cooked through.
  11. Serve hot, or freeze uncooked dumplings for later use.

Tips

To ensure the best results when making siew mai, keep these tips in mind:

  • Keep it Tight: Make sure the dumplings are tightly wrapped to prevent them from falling apart while steaming.
  • Use Fresh Ingredients: Fresh shrimp and quality pork make a significant difference in taste.
  • Steam Properly: Ensure steam can circulate by cutting holes in the baking paper lining the steamer.

Variations & Substitutions

Feel free to experiment with these variations to suit your preferences:

  • Vegetarian Siew Mai: Replace meat with chopped vegetables such as mushrooms, carrots, and bamboo shoots.
  • Spicy Twist: Add a dash of chili oil or finely chopped fresh chili for a spicy kick.
  • Flavor Enhancers: Add a touch of grated ginger or garlic for additional depth of flavor.

Storage

Siew mai is best enjoyed fresh, but if you have leftovers, store them in an airtight container in the refrigerator for up to 2 days. To freeze uncooked siew mai, place them on a baking sheet lined with parchment paper, freeze until solid, and then transfer to a freezer-safe container. They can be steamed directly from frozen.

FAQ

Can I make siew mai without shrimp?

Yes, you can omit the shrimp if desired. The pork filling is flavorful enough on its own, or you could increase the amount of pork or add other ingredients like mushrooms for added texture and taste.

What can I use instead of wonton wrappers?

If you don’t have wonton wrappers, you can use dumpling wrappers or even make your own from scratch using flour and water. The texture may vary slightly, but they’ll still be delicious.

Nutrition

While exact nutritional values can vary, siew mai is a protein-rich dish thanks to the pork and shrimp. The inclusion of vegetables like mushrooms and water chestnuts adds fiber and vitamins. Opt for leaner pork cuts to reduce fat content if desired.

Conclusion

Siew mai is more than just a dish; it’s a culinary tradition that brings people together. Whether you’re enjoying it as part of a dim sum spread or making it the star of your meal, siew mai is sure to delight with its savory flavors and satisfying textures. I hope this recipe brings joy to your kitchen and adds a touch of nostalgia to your dining table. Happy cooking!

Related update: Siew Mai

Related update: Red, White, and Blue Fruit Salsa

Related update: Lamb Tagine Stew

Mardi Gras Shrimp Étouffée | Made by Meaghan Moineau

Mardi Gras Shrimp Étouffée | Made by Meaghan Moineau

Title: Celebrate Mardi Gras with a Classic Shrimp Étouffée Recipe
Description: Dive into the vibrant flavors of New Orleans with our Mardi Gras Shrimp Étouffée recipe. This classic dish combines perfectly seasoned shrimp with a rich, savory sauce, served over fluffy rice. Whether you're celebrating Mardi Gras or simply craving some Southern comfort, this dish is sure to delight. Plus, discover a heartwarming family memory that makes this dish even more special.

---


Mardi Gras Shrimp Étouffée: A Flavorful Journey to New Orleans


Mardi Gras is a time of celebration, vibrant colors, and tantalizing flavors. It's that time of year when the streets of New Orleans come alive with parades, music, and culinary delights that captivate the senses. One dish that stands out among the festive foods is the classic Shrimp Étouffée. With its rich blend of spices and succulent shrimp, this dish is the perfect way to bring a taste of Mardi Gras into your home.


Ingredients:


- 4 tablespoons butter


- 4 tablespoons flour


- 2 green bell peppers, diced


- 3 celery stalks, diced


- 1 large yellow onion, diced


- 3 garlic cloves, minced


- 1 teaspoon dried thyme


- 2 tablespoons tomato paste


- 1 tablespoon Worcestershire sauce


- 2 tablespoons Creole seasoning


- 2 cups chicken broth


- 1 pound shrimp, peeled and deveined


- 1 tablespoon butter


- 3 scallions, sliced


- 1 diced fresh tomato


- Cooked rice for serving


Instructions:


1. Prepare the Roux: Heat a heavy pot over low heat. Add the butter and cook for about 10-12 minutes until it turns a light golden brown, stirring occasionally to prevent burning. Whisk in the flour until smooth, continuing to cook for about 8 minutes on low. The mixture should resemble slightly loose peanut butter.
2. Cook the Vegetables: Add in the diced bell peppers, celery, and onion. Stir to coat the veggies with the roux. Cook for another 10-15 minutes until softened.
3. Enhance the Flavor: Stir in the minced garlic and dried thyme, cooking for about a minute until fragrant. Add the tomato paste, Worcestershire sauce, Creole seasoning, and chicken broth. Simmer on low for 30-40 minutes, stirring occasionally, until the sauce is slightly thickened.
4. Add the Shrimp: Stir in the shrimp, turn off the heat, and cover with a lid. Allow the shrimp to cook for 5-8 minutes until they're just cooked through. Finish with an additional tablespoon of butter for added richness.
5. Serve and Garnish: Serve the Shrimp Étouffée over a bed of cooked rice. Garnish with sliced scallions and fresh diced tomato.

A Nostalgic Family Memory:


Growing up, Mardi Gras was more than just a festival; it was a cherished family tradition. Every year, my grandmother would gather the family in her cozy kitchen to prepare her famous Shrimp Étouffée. The air would be filled with laughter, stories, and the aroma of simmering spices. As a child, I remember being entrusted with the "important" job of stirring the roux, feeling a sense of pride as I watched the mixture transform.


Grandma would recount tales of her own childhood in New Orleans, weaving stories of parades and jazz into the fabric of our meal. To this day, whenever I make Shrimp Étouffée, I am transported back to those joyful gatherings, and I feel a connection to the generations before me who celebrated with this same beloved dish.


Difficulty Rating: 6/10


Classification: Main Dish


Bring the spirit of Mardi Gras into your home with this Shrimp Étouffée recipe. It's a dish that not only delights the taste buds but also warms the heart with its rich history and family ties. Enjoy and laissez les bons temps rouler! (Let the good times roll!)

Read more about Appetizers

Read more about Main Dishes

Read more about Desserts

Fire-Breathing Dragon Pasta | Made by Meaghan Moineau

Fire-Breathing Dragon Pasta | Made by Meaghan Moineau

# Unleash the Heat: Mastering Fire-Breathing Dragon Pasta


### A Fiery Culinary Adventure with a Nostalgic Twist


If you’re on the hunt for a dish that combines bold flavors with a touch of nostalgia, look no further than Fire-Breathing Dragon Pasta. This vibrant recipe not only delivers a spicy kick but also warms the heart with memories of family gatherings and shared laughter. Dive into this culinary journey where robust ingredients come together to create a main dish that’s both memorable and mouth-watering.


### Ingredients for a Fiery Feast


- 1 yellow onion, diced


- 2 tablespoons olive oil


- Salt and pepper to taste


- 3 cloves garlic, minced


- 2 chipotles in adobo sauce


- 2 skinless boneless chicken breasts, cubed


- 1 teaspoon Italian seasoning


- 1 cup tomato sauce


- 1 teaspoon red pepper flakes


- ½ pound shrimp, peeled and deveined


- 1 cup whole heavy cream


- ½ cup sour cream


- 1 pound pasta (such as spaghetti)


- 2-3 red dried chile peppers


- Freshly grated Parmesan cheese


### Instructions: Igniting the Culinary Flame


1. **Prep the Base:** In a large, deep-sided skillet or medium-sized saucepan, heat two tablespoons of olive oil over medium heat. Add the diced onion and sauté until tender and translucent. Season with salt and pepper to taste.


2. **Build the Flavor:** Stir in the minced garlic and sauté until fragrant. Add the chipotles, cubed chicken, and Italian seasoning. Season again with salt and pepper, ensuring each piece of chicken is well-coated. Sauté, turning the chicken to sear on all sides.


3. **Simmer the Sauce:** Pour in the tomato sauce and sprinkle with red pepper flakes. Bring the mixture to a simmer and continue to cook for about ten minutes, or until the chicken is cooked through.


4. **Prepare the Pasta:** While the sauce simmers, cook the pasta to al dente according to package directions. Add the dried chiles to the boiling water with the spaghetti to infuse it with subtle heat.


5. **Complete the Dish:** Add the shrimp and heavy cream to the sauce, stirring gently. Slowly incorporate the sour cream, maintaining a slow simmer. Cook until the shrimp begin to curl, indicating they are perfectly done.


6. **Serve with Flair:** Remove the skillet from heat and serve the sauce over drained pasta (remember to remove the dried chiles). Finish with a generous sprinkle of freshly grated Parmesan cheese.


### A Nostalgic Flavor Journey


The inspiration for Fire-Breathing Dragon Pasta hails from family get-togethers in the heart of summer. I vividly recall the lively backyard barbecues where my uncle, a self-proclaimed spice aficionado, would challenge us with his fiery culinary creations. Each dish was a testament to his adventurous spirit and love for bold flavors. His signature pasta, which we lovingly nicknamed the "Fire-Breathing Dragon," became a family favorite, sparking laughter and a few teary eyes from the heat. Recreating this dish is like reliving those cherished moments, where the warmth of family and fiery flavors blend seamlessly.


### Recipe Difficulty & Classification


- **Difficulty:** 6/10


- **Classification:** Main Dish


Embrace the heat and nostalgia with Fire-Breathing Dragon Pasta. It’s a dish that not only tantalizes your taste buds but also brings a piece of cherished family history to your table. Perfect for those who dare to spice up their culinary repertoire, this recipe promises an unforgettable dining experience.

Read more about Appetizers

Read more about Main Dishes

Read more about Desserts