Chicken Mulligatawny Soup | Made by Meaghan Moineau

Chicken Mulligatawny Soup | Made by Meaghan Moineau

A Hearty Hug in a Bowl: Chicken Mulligatawny Soup Recipe


A Taste of Tradition and Warmth


There's something magical about a bowl of soup that can transport you back in time, enveloping you in warmth and comfort. Chicken Mulligatawny Soup is one such dish, a delightful blend of flavors and textures that brings a touch of spice and a whole lot of love to your table. This recipe is not only a feast for the senses but also a cherished family tradition in many homes, including mine.


Description:

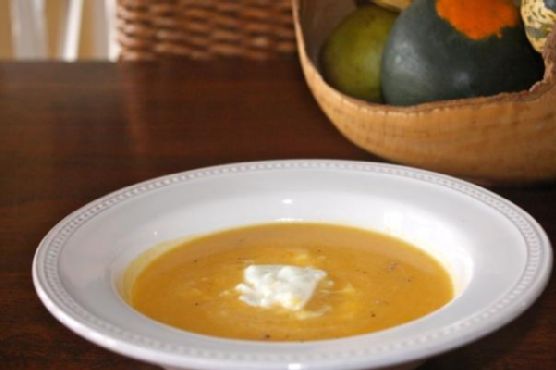
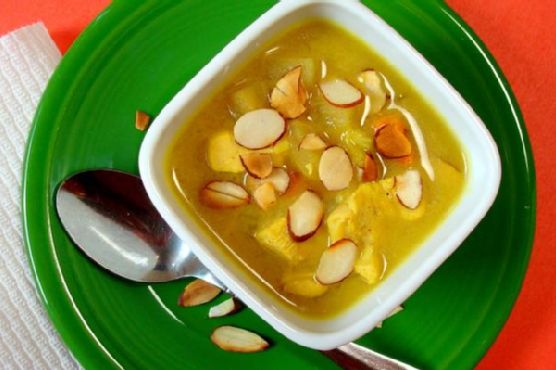
Discover the heartwarming flavors of Chicken Mulligatawny Soup, a rich and aromatic dish that combines tender chicken, crisp apples, and fragrant basmati rice with the exotic notes of curry and coconut. Perfect for chilly evenings or as a comforting meal any day of the week, this soup is sure to become a new favorite. With a preparation time of 45 minutes and a difficulty rating of 4 out of 10, it's a straightforward recipe that delivers complex flavors with minimal effort. Classified as a Main Dish, this soup is both satisfying and nourishing.


Ingredients:


- 2 tablespoons butter


- 1 onion, chopped


- 2 stalks celery, chopped


- 2 carrots, diced


- 2 apples, peeled and diced


- 1 tablespoon fresh ginger, grated


- 2 tablespoons flour


- 2 teaspoons curry powder


- 1/4 teaspoon cayenne pepper


- 6 cups chicken stock


- 1/2 cup basmati rice


- 2 skinless boneless chicken breasts, chopped


- 1 teaspoon salt


- 1 cup lite coconut milk


- Salt and pepper to taste


- Optional: Toasted almonds or cilantro for garnish


Instructions:


1. Sauté the Aromatics: Heat the butter in a large pot over medium heat. Add the onions, celery, carrots, apples, and ginger. Sauté for 5 minutes, stirring occasionally, until the vegetables are tender and fragrant.
2. Build the Base Flavor: Mix in the flour, curry powder, and cayenne pepper. Stir for another 3-5 minutes to allow the spices to bloom and the flour to cook off its raw taste.
3. Simmer the Soup: Add the chicken stock, basmati rice, chopped chicken, and 1 teaspoon of salt. Bring the mixture to a boil, then lower the heat to a simmer. Allow it to simmer for about 15 minutes, or until the rice is tender and the chicken is cooked through.
4. Finish with Creaminess: Stir in the lite coconut milk and season with additional salt and pepper to taste. Let the soup warm through, but do not boil.
5. Serve and Enjoy: Ladle the soup into bowls and garnish with toasted almonds or fresh cilantro for an added layer of texture and flavor.

A Family Memory: The Soup That Binds Us


I remember the first time my grandmother made Chicken Mulligatawny Soup for our family. It was a crisp autumn evening, the kind where the chill in the air makes you crave something warm and hearty. As soon as the kitchen filled with the aroma of sautéed onions and curry, we all gravitated toward the stove, eager to taste what was simmering in the pot.


Grandma would always tell us stories of her childhood in India, where this dish was a staple. She spoke of how her mother would make it on special occasions, filling the house with its captivating scent. As we sat around the dining table, bowls in hand, each spoonful was like a warm hug from her, a reminder of our roots and the love that binds our family together. That night, the kitchen wasn't just a place for cooking; it was a space for sharing stories, laughter, and creating memories that would last a lifetime.


Conclusion


Chicken Mulligatawny Soup is more than just a meal; it's a connection to heritage, a blend of cultures, and an expression of love. Whether you're making it for the first time or it's a family favorite, this soup promises to warm your heart as much as it does your body. Enjoy this culinary journey and savor the moments it creates around your table.

Read more about Appetizers

Read more about Main Dishes

Read more about Desserts

Creamy Polenta with Egg, Arrabiata & Bacon | Made by Meaghan Moineau

Creamy Polenta with Egg, Arrabiata & Bacon | Made by Meaghan Moineau

Title: Savor the Comfort: Creamy Polenta with Egg, Arrabiata & Bacon
Description: Dive into a world of creamy comfort with our Creamy Polenta with Egg, Arrabiata & Bacon recipe. This flavorful blend of polenta, rich cheeses, and crispy bacon, topped with a perfectly cooked egg, is sure to become a family favorite. With a touch of nostalgia and a hint of spice, this dish is as much about the memories it evokes as it is about its tantalizing taste. Easy to make yet packed with flavor, this main dish is perfect for a cozy weekend brunch or a hearty dinner.

---


When the winter chill wraps its icy fingers around our home, I find solace in the warmth of the kitchen, where hearty aromas mingle in the air. My mind drifts back to Sunday mornings with my grandmother, her hands deftly working over the stove, a ritual as comforting as the dish she prepared – a creamy polenta that was as much a cure for the cold as it was a feast for the soul. This Creamy Polenta with Egg, Arrabiata & Bacon recipe is a loving nod to those cherished memories.


Ingredients:

- Bacon


- Cream cheese


- Eggs


- Fresh parsley


- Goat cheese


- Olive oil


- Polenta


- Black salt & pepper


Instructions:
1. Preheat and Prepare: Preheat your oven to 425 degrees F. Prepare a medium saucepan by bringing 4 cups of water to a boil. Gradually whisk in the polenta, ensuring a smooth mix with no lumps. Allow it to simmer over medium-low heat for 30 minutes, stirring occasionally.
2. Incorporate the Cheeses: Once the polenta has reached a tender and thick consistency, stir in the goat cheese and cream cheese until fully melted and incorporated. Season with salt and pepper to taste.
3. Crisp the Bacon: Arrange the bacon on a parchment-lined baking sheet, placing it in the oven's middle rack. Roast for 15-18 minutes until golden and crisp. Once done, let the bacon rest on a paper towel-lined plate.
4. Heat the Arrabiata: Warm the marinara sauce in a small saucepan or microwave until simmering. Keep it warm for assembly.
5. Fry the Eggs: In a large non-stick skillet, heat 1 tablespoon of olive oil over medium heat. Add the eggs, cooking until the whites are opaque yet still runny on top. Cover with a lid, turning off the heat, allowing them to cook until the whites set while keeping the yolk runny.
6. Assemble the Bowls: Spoon generous portions of polenta into each bowl. Add a dollop of arrabiata, an egg, and two slices of crispy bacon. Garnish with freshly chopped parsley for a burst of color and freshness. Serve immediately, savoring each bite and the memories it rekindles.
A Nostalgic Family Memory:

The sight of this dish takes me back to my grandmother's kitchen, where the wooden table was always set for family. She would hum softly, a melody only she knew, as she prepared this dish with love. Her polenta, always perfectly creamy, served as the canvas for crispy bacon and eggs cooked just right. We would gather around, bowls in hand, sharing stories and laughter. It was more than a meal; it was a moment in time, a tradition passed through generations.


Difficulty Rating: 4/10
Classification: Main Dish

---


This Creamy Polenta with Egg, Arrabiata & Bacon is more than just a recipe; it's an experience, a reminder of the warmth and love that food can bring into our lives. Perfect for family gatherings or a quiet evening at home, it offers a taste of nostalgia with every bite. Enjoy the comfort and joy it brings, and perhaps create new memories of your own.

Read more about Appetizers

Read more about Main Dishes

Read more about Desserts

Creamy Mushroom Soup ~ with a “Kick” | Made by Meaghan Moineau

Creamy Mushroom Soup ~ with a “Kick” | Made by Meaghan Moineau

Title: A Hearty Embrace: Creamy Mushroom Soup with a Kick
Description: Dive into a bowl of comfort and nostalgia with our Creamy Mushroom Soup with a Kick. This flavorful blend combines the earthy richness of mushrooms with a spicy twist from long pepper, topped with crispy bacon and zesty lime. Perfect as a cozy main dish, this soup will warm your heart and soul, bringing back cherished family memories.

---


When the leaves turn golden and the air starts to carry a crisp whisper of winter, my mind inevitably drifts back to my grandmother's kitchen. It was the heart of her home—a place where laughter mingled with the aroma of simmering soups and the promise of a hearty meal. Among her many culinary treasures, one dish stands out: her Creamy Mushroom Soup with a Kick.


A Nostalgic Tale:

Growing up, Sunday afternoons meant gathering at Grandma's for a family feast. As the youngest, I was often tasked with keeping a watchful eye on the soup pot—a role I embraced with enthusiasm. The kitchen would come alive with the sizzling of bacon on the griddle, filling the room with its irresistible aroma. Grandma would hand me a wooden spoon and let me stir the pot as button mushrooms, sweet onions, and garlic danced in a drizzle of olive oil.


The excitement in her voice was palpable when she would add a sprinkle of long pepper—her secret ingredient. "This," she would say with a wink, "is the kick that keeps everyone coming back for more." I watched as she stirred in the vegeta bouillon and cups of water, the flavors mingling into a savory symphony. The potato buds were next, lending their creamy texture to the bubbling mixture.


As we waited for the soup to simmer, Grandma and I would sit at the old wooden table, where she shared stories of her childhood, tales woven with warmth and wisdom. When it was time to add the milk, I knew we were nearing the end of our culinary journey. A squeeze of lime juice added that final touch of zest, brightening the flavors.


Finally, the soup was ladled into bowls, crowned with crispy bacon bits, a handful of shredded cheddar cheese, and a sprinkle of fresh cilantro. With each spoonful, I was enveloped in a tapestry of flavors and memories, a comforting reminder of those cherished Sundays spent in Grandma's kitchen.


Instructions:

1. Heat a large saucepot with a drizzle of olive oil.


2. Sauté garlic, long hot pepper, onion, and mushrooms until the onion is translucent.


3. Prepare bacon on a heated griddle until crispy, then set aside.


4. Add one tablespoon of bouillon and six cups of water to the pot, simmer.


5. Stir in one cup of potato buds, continuing to simmer on low.


6. Gradually add two cups of milk, simmering on low for a few minutes.


7. When ready to serve, stir in lime juice.


8. Top with bacon bits, cilantro, and cheddar cheese before serving.


Difficulty Rating: 5/10
Classification: Main Dish
Conclusion:

This Creamy Mushroom Soup with a Kick is more than just a recipe—it's a vessel for memories, a celebration of family, and a testament to the power of food to bring people together. Whether you're recreating a cherished family tradition or starting a new one, this hearty soup is sure to become a beloved staple in your culinary repertoire. Warm your heart and soul with this flavorful embrace, and relish the nostalgia with every spoonful.

Read more about Appetizers

Read more about Main Dishes

Read more about Desserts

Chinese Chicken Salad With Chipotle Dressing | Made by Meaghan Moineau

Chinese Chicken Salad With Chipotle Dressing | Made by Meaghan Moineau

Title: Savory Nostalgia: Chinese Chicken Salad with Chipotle Dressing


Description:

Dive into the fusion of flavors with our Chinese Chicken Salad with Chipotle Dressing. This delightful dish combines the rich, nutty essence of pea-mond dressing with the smoky heat of chipotle, creating a salad that tantalizes the taste buds. Perfect as a main dish, this easy-to-make recipe is a nostalgic journey to cherished family gatherings.

---


A Taste of Memories: Chinese Chicken Salad with Chipotle Dressing


There’s something magical about a dish that evokes memories of family gatherings and cherished times. Growing up, Sundays were sacred in our household — a time for family, laughter, and a delicious meal that brought us all together. One of those meals was the Chinese Chicken Salad with Chipotle Dressing, a dish that became a family favorite for its unique blend of flavors and textures.


The Ingredients


- Pea-mond Dressing: A blend of smooth peanut and almond butters for a rich, creamy texture.
- Rice Wine Vinegar: Adds a tangy kick that complements the nutty flavors.
- Fresh Ginger: Provides a zesty warmth that refreshes the palate.
- Adobo Chipotle Pepper Juice & Puree: Infuses the dressing with smoky, spicy notes that elevate the dish.
- Soy Sauce & Honey: Balances the heat with a sweet, salty depth.
- Sesame & Canola Oils: Create a silky consistency with a hint of nuttiness.
- Shredded Napa Cabbage & Romaine Lettuce: Offer a crisp, fresh base.
- Shredded Carrots & Snow Peas: Add vibrant color and crunch.
- Fresh Cilantro & Mint Leaves: Bring a burst of freshness.
- Green Onion & Roasted Peanuts: Lend a savory, crunchy finish.
- Shredded Rotisserie Chicken: The protein-packed heart of the salad.
- Chili Oil & Lime: For those who crave an extra zing.

Instructions


1. Dressing Magic: In a medium bowl, whisk together the rice wine vinegar, smooth peanut and almond butters, fresh ginger, adobo chipotle pepper puree, soy sauce, honey, sesame oil, and canola oil. Season with salt and pepper to taste. This dressing, with its blend of nutty richness and smoky chipotle heat, is the star of the show.
2. Assemble the Salad: In a large bowl, combine the shredded napa cabbage, romaine lettuce, carrots, snow peas, cilantro, green onion, and rotisserie chicken. Toss gently to mix.
3. Finish with Flair: Drizzle the chipotle dressing over the salad, tossing to coat evenly. Sprinkle with roasted peanuts and fresh mint leaves for an added layer of flavor. For an extra kick, add a dash of chili oil and a squeeze of fresh lime.

A Dish with Heart


This Chinese Chicken Salad is more than just a meal; it’s a walk down memory lane. I remember the first time my grandmother made this dish. Her kitchen was filled with the aroma of fresh ginger and the smoky scent of chipotle, a combination that felt like a warm hug. Each bite was a burst of flavor — the spice of the chipotle, the crunch of the cabbage, and the unexpected sweetness of honey. It was a culinary adventure that brought us closer, sitting around the table, sharing stories and laughter.


Difficulty Rating: 4/10


As a main dish, this recipe is rated as an easy 4 out of 10. It's perfect for those who are looking to whip up something impressive without too much hassle. Whether you’re a seasoned chef or a kitchen newbie, this salad is accessible to all.


Conclusion


The Chinese Chicken Salad with Chipotle Dressing is a testament to how food can transcend mere sustenance, becoming a vessel of nostalgia and a catalyst for connection. So gather your ingredients, invite your loved ones, and create new memories with this delightful dish. Enjoy the journey from your kitchen to the heart of your home.

Read more about Appetizers

Read more about Main Dishes

Read more about Desserts

Spicy Indian-Style Hummus | Made by Meaghan Moineau

Spicy Indian-Style Hummus | Made by Meaghan Moineau

Title: Spicy Indian-Style Hummus: A Flavorful Fusion of Tradition and Taste
Description: Dive into the vibrant world of Indian-inspired cuisine with our Spicy Indian-Style Hummus. This unique take on a classic dip combines traditional hummus ingredients with the robust flavors of Indian spices, creating a dish that's both familiar and exotic. Perfect as an appetizer, this easy-to-make recipe brings a touch of nostalgia to your table, reminiscent of cherished family gatherings. Rated 4 out of 10 on the difficulty scale, this dish promises to be a delightful addition to your culinary repertoire.

---


Spicy Indian-Style Hummus: A Family Favorite with a Twist

There's something inherently comforting about recipes that remind us of home. For me, hummus has always been one of those dishes. Growing up, our kitchen was a melting pot of flavors, with my Indian heritage blending seamlessly with my love for international cuisine. This Spicy Indian-Style Hummus is a testament to that fusion, a dish that brings together the best of both worlds.


Ingredients:

- 1 cup dried chickpeas


- 1 pinch asafetida


- 1/2 teaspoon cayenne


- 2 tablespoons fresh chives, chopped


- 1 tablespoon fresh ginger, minced


- 2 tablespoons fresh parsley, chopped


- 2 cloves garlic, minced


- 1 teaspoon ground coriander


- 1 teaspoon ground cumin


- 1/2 teaspoon black fresh ground pepper


- Juice of 1 lemon


- 1/4 cup olive oil (plus more if needed)


- 1-2 red and green fresh chilies, chopped


- 1 teaspoon sea salt


- 1/4 cup tahini


- 1/2 teaspoon turmeric


Instructions:
1. Prep the Chickpeas: Begin by rinsing the chickpeas thoroughly. Soak them for 8 hours or overnight in several inches of water, adding a bit of yogurt whey or lemon juice to aid in softening them.
2. Cook the Chickpeas: Drain and rinse the soaked chickpeas, then transfer them to a large saucepan. Cover them with fresh water, bring to a boil, and then reduce the heat to medium-low. Cover and simmer for 1 to 1 1/2 hours, or until the beans are buttery soft. Drain them completely.
3. Blend the Ingredients: In a food processor, combine the cooked chickpeas with asafetida, cayenne, chives, ginger, parsley, garlic, coriander, cumin, black pepper, lemon juice, olive oil, chilies, sea salt, tahini, and turmeric. Process until you achieve a thick, smooth paste. For a thinner consistency, add more olive oil or a bit of water.
4. Serve: This recipe makes approximately 3 cups of hummus. Serve it as a delicious appetizer with fresh vegetables, pita bread, or crackers.
Family Memory:

Every summer, our family would gather at my grandparents' house for a weekend filled with laughter, stories, and, of course, food. My grandmother, with her eclectic mix of recipes, would always surprise us with something new. One year, she introduced us to her Spicy Indian-Style Hummus. I remember her bustling around the kitchen, explaining how the spices she used reminded her of her childhood in India. As we sat around the table, dipping warm, crusty bread into the hummus, I realized that food was more than just sustenance. It was a bridge connecting us to our past, a way to share and preserve cherished memories.


Difficulty Rating: 4/10
Classification: Appetizer

This Spicy Indian-Style Hummus is not just a dish; it's a journey through flavors and time, weaving together the threads of tradition and personal history. Whether you're hosting a gathering or simply looking to spice up your snack game, this hummus is sure to be a hit. Enjoy!

Read more about Appetizers

Read more about Main Dishes

Read more about Desserts

My Sister’s Soup: Creamy Curried Squash and Cauliflower Soup | Made by Meaghan Moineau

My Sister's Soup: Creamy Curried Squash and Cauliflower Soup | Made by Meaghan Moineau

Title: A Bowl of Comfort: My Sister's Creamy Curried Squash and Cauliflower Soup
Description: Dive into the warmth of fall with a bowl of Creamy Curried Squash and Cauliflower Soup, inspired by cherished family memories. This flavorful, soul-soothing dish combines the comforting sweetness of butternut and delicata squash with the aromatic spices of curry and cayenne. Perfect as a main dish for cozy evenings, this recipe is not only delicious but also carries the warmth of family traditions.

---


As the leaves begin to turn and the air carries a crisp bite, there's nothing quite like a steaming bowl of soup to wrap your hands around. In our family, the arrival of autumn is synonymous with my sister's Creamy Curried Squash and Cauliflower Soup—a recipe that has evolved into a cherished culinary tradition over the years.


The Heartwarming Story Behind the Soup

When I think of this soup, I'm instantly transported back to a particular fall evening in my childhood. The smell of roasted squash and curry would waft through the house, mingling with the sound of crackling logs in the fireplace. My sister, always the culinary artist, would orchestrate the making of this soup with a grace that was both comforting and inspiring.


Our parents would gather around the kitchen table, sharing stories from their own childhoods, as we watched the magic unfold. The kitchen was our stage, and the soup, our family heirloom, lovingly passed down with each ladle. It wasn’t just about the flavors; it was about the laughter shared and the love that simmered alongside the ingredients.


The Recipe: My Sister's Creamy Curried Squash and Cauliflower Soup
Ingredients:

- Butternut squash


- Delicata squash


- Cauliflower


- Vegetable stock


- Yellow diced onion


- Fresh garlic


- Curry powder


- Butter


- Dashes of cayenne pepper


- Salt and pepper


Instructions:

1. Preheat your oven to 375°F (190°C). Slice the squash lengthwise and place them face down in a casserole dish with about 1/4 inch of water at the bottom.


2. Bake for about 30 minutes or until the squash is tender. Allow it to cool a bit, then scoop out the seeds and the flesh, setting it aside in a bowl.


3. In a large stock pot, heat the butter and sauté the onions over low-to-medium heat until they turn translucent.


4. Add the garlic, curry powder, cayenne pepper, salt, and pepper to the onions, stirring well.


5. Add the squash flesh and cauliflower into the pot along with the vegetable stock. Let the mixture simmer for about 20 minutes.


6. Puree the squash and cauliflower, along with the liquid, in batches using a blender. If the mixture seems too thick, gradually add more stock until you achieve your desired consistency.


7. Transfer the soup to bowls and serve with a dollop of sour cream for extra creaminess.


Difficulty: 5/10
Classification: Main Dish

This soup is more than just a meal; it is a reminder of the power of family traditions and the joy of sharing simple moments. As you prepare and enjoy this dish, may it bring warmth to your home and fill your kitchen with memories, just as it has done in ours.

Read more about Appetizers

Read more about Main Dishes

Read more about Desserts

Chipotle Cheese Stuffed Black Bean Burgers with Avocado Creme | Made by Meaghan Moineau

Chipotle Cheese Stuffed Black Bean Burgers with Avocado Creme | Made by Meaghan Moineau

Title: Savor the Spice: Chipotle Cheese Stuffed Black Bean Burgers with Avocado Crème


Description:

Dive into a world of zesty flavors and creamy textures with our Chipotle Cheese Stuffed Black Bean Burgers with Avocado Crème. This satisfying vegetarian dish combines the earthiness of black beans, the smoky heat of chipotle, and the lusciousness of cream cheese. Topped with a refreshing avocado crème, these burgers promise a taste adventure in every bite.

The Recipe: A Culinary Adventure


Ingredients:

- 1 can black beans, drained

- 1 small yellow onion, diced


- 1 cup diced mushrooms


- 1 egg


- 1/2 cup panko bread crumbs


- 1 tsp cumin


- 1 tsp chipotle chili powder


- Salt and pepper to taste


- Olive oil


- 1/4 cup cream cheese spread


- Hamburger buns


- Sliced cheese (optional)


- Fresh spinach and tomato slices


Avocado Crème:

- 1 ripe avocado


- 1/2 cup sour cream


- 1 tbsp lime juice


- Sea salt to taste


Instructions:

1. Prepare the Veggies: Heat a swirl of olive oil in a skillet over medium heat. Add the diced onions and mushrooms. Sauté until softened, seasoning with salt and pepper. Remove from heat and set aside.
2. Create the Burger Mix: In a medium bowl, mash the drained black beans with a fork. Stir in the sautéed onions and mushrooms, followed by the egg and panko bread crumbs. Mix in the cumin and chipotle chili powder until well combined.
3. Form the Patties: Divide the mixture into equal portions, shaping them into patties. Make a small indent in the center of each patty and add a spoonful of cream cheese spread. Carefully mold the patty around the cream cheese, ensuring it's sealed.
4. Cook the Patties: Heat a skillet over medium heat with a swirl of olive oil. Cook the patties in batches, about 4 minutes per side, until browned and cooked through. If desired, add sliced cheese on top during the last minute of cooking and cover the skillet to melt the cheese.
5. Prepare the Avocado Crème: In a food processor or blender, combine the avocado, sour cream, lime juice, and sea salt. Blend until smooth and creamy. Adjust seasoning to taste.
6. Assemble the Burgers: Place each hot cooked burger on an open toasted bun. Top with fresh spinach and tomato slices, and a generous scoop of avocado crème. Finish with the top bun and serve immediately.

A Nostalgic Family Memory:


Growing up, summer barbecues were more than just meals; they were family reunions where laughter filled the air and stories were shared over the grill's sizzling symphony. My grandmother, with her knack for inventive cooking, introduced these chipotle cheese-stuffed black bean burgers as a vegetarian twist to our traditional meat-heavy lineup. I remember her explaining how she discovered the idea while experimenting with her garden's harvest. The smoky aroma mingled with the scent of fresh-cut grass, as she deftly assembled each burger with love and precision. The addition of her special avocado crème was a revelation, a creamy, tangy topping that brought everything together. These burgers became a family favorite, a reminder of those warm summer days spent in the backyard, creating memories that would last a lifetime.


Difficulty Rating:

5/10 - Perfect for a home cook looking to impress without the stress.

Classification:

Main Dish

This recipe is not just a meal; it's an experience—a homage to flavors that bring people together and create lasting memories. Enjoy the adventure of cooking and savor every bite!

Read more about Appetizers

Read more about Main Dishes

Read more about Desserts

Moroccan Chicken Pitas | Made by Meaghan Moineau

Moroccan Chicken Pitas | Made by Meaghan Moineau

Title: A Taste of Tradition: Moroccan Chicken Pitas
Description: Embark on a flavorful journey with our Moroccan Chicken Pitas, a recipe steeped in rich spices and cherished family memories. Discover how to create this enticing main dish that marries the vibrant flavors of Morocco with a personal touch of nostalgia.

---


A Culinary Adventure: Moroccan Chicken Pitas


When the aroma of paprika, coriander, and cinnamon fills the kitchen, it takes me back to sunny afternoons at my grandmother's house. Our family would gather around the backyard grill, eagerly awaiting the delicious spread that promised to transport us to the bustling souks of Marrakesh. Today, I'm thrilled to share with you our cherished family recipe for Moroccan Chicken Pitas—a dish that's as heartwarming as it is flavorful.


Ingredients:


- For the Chicken:

- Skinless boneless chicken breasts


- 1 teaspoon paprika


- 1 teaspoon coriander


- 1/2 teaspoon cinnamon


- 1 teaspoon cumin


- 1/4 teaspoon cayenne pepper


- 2 cloves garlic, minced


- 1 teaspoon ginger, grated


- Salt to taste


- 2 tablespoons olive oil


- Fresh Italian parsley, finely chopped


- For the Tabbouleh:

- 1 cup cooked quinoa


- 1 can diced petite tomatoes, drained


- 1 yellow onion, diced


- Juice of 1 lemon


- 1/2 cup diced Medjool dates


- 2 tablespoons olive oil


- Sea salt to taste


- For the Yogurt Sauce:

- 1 cup Greek yogurt


- 1/2 cucumber, diced


- Fresh mint, chopped


- Juice of 1 lemon


- Additional:

- Pita bread, halved and split open


Instructions:


1. Prepare the Chicken:

Combine paprika, coriander, cinnamon, cumin, cayenne pepper, garlic, ginger, and salt in a bowl. Mix well to create a fragrant spice blend. Place chicken breasts on a cutting board and pound to about 1/2 inch thick using a meat mallet. Generously rub the spice mixture over all sides of the chicken breasts. Cover and refrigerate for at least an hour to allow the flavors to meld.


2. Make the Tabbouleh:

In a large bowl, combine cooked quinoa, diced tomatoes, onion, lemon juice, Medjool dates, olive oil, and sea salt. Stir well to integrate all the ingredients. Adjust salt and oil to your liking. Cover and chill in the refrigerator while the chicken marinates.


3. Prepare the Yogurt Sauce:

In a separate bowl, combine Greek yogurt, diced cucumber, mint, and lemon juice. Stir to combine and refrigerate until ready to serve.


4. Grill the Chicken:

Preheat your grill to medium heat. Grill the marinated chicken breasts until fully cooked, about 16 minutes, ensuring some crispy edges form for added flavor. Once cooked, let them rest for a few minutes before slicing.


5. Assemble the Pitas:

Take the halved pita bread and fill each with slices of grilled chicken, a generous helping of tabbouleh, and a dollop of the refreshing yogurt sauce.


Nostalgic Family Story:


This dish always reminds me of family gatherings at my grandmother's home. She had a magical way of bringing everyone together with her cooking. I vividly remember my cousins and I playing in the garden while the adults chatted around the grill. The smell of the spices wafted through the air, creating an atmosphere of warmth and anticipation. My grandmother would always remind us that food is not just about nourishment—it's about connection and creating memories. These Moroccan Chicken Pitas are more than just a recipe; they are a piece of our family's history, a tradition we continue to savor and celebrate.


Recipe Difficulty: 6/10


Classification: Main Dish

---


Whether you're introducing your family to the vibrant flavors of Morocco or simply looking to add a new favorite to your meal rotation, these Moroccan Chicken Pitas promise an unforgettable dining experience. Enjoy the journey and create your own cherished memories with every bite.

Read more about Appetizers

Read more about Main Dishes

Read more about Desserts

Hot Charlotte Cocktail | Made by Meaghan Moineau

Hot Charlotte Cocktail | Made by Meaghan Moineau

Title: A Sip of Nostalgia: The Hot Charlotte Cocktail
Description: Discover the perfect blend of flavors in the Hot Charlotte Cocktail, a drink that promises to invigorate your senses while transporting you back to cherished family gatherings. With a hint of spice and a touch of elegance, this cocktail is your new go-to for any occasion.

---


In the world of mixology, there are cocktails that simply quench thirst and then there are those that resonate with the soul, invoking memories of laughter-filled evenings and warm family gatherings. The Hot Charlotte Cocktail is one such creation—a delightful concoction that not only tantalizes your taste buds but also brings a sense of nostalgia with every sip.


The Ingredients: A Symphony of Flavors
To craft the Hot Charlotte Cocktail, you'll need the following ingredients:

- Hendrick's Gin


- St. Germain


- Fresh lemon juice


- Cucumber


- Tobasco sauce


Instructions: Crafting Your Nostalgic Sip

1. Begin by taking a cocktail glass and muddling a few slices of cucumber with a dash of Tobasco sauce.


2. Add Hendrick's Gin, St. Germain, and fresh lemon juice to the mix. Shake well to combine the flavors.


3. Strain the mixture over ice to ensure a perfectly chilled experience.


4. Garnish with a cucumber wheel for an elegant finish.


Difficulty Rating: 4/10

The Hot Charlotte Cocktail is accessible to both novice and seasoned cocktail enthusiasts. Its simplicity in preparation makes it an ideal choice for those looking to impress with minimal effort.


Classification: Appetizer

This drink serves as a perfect appetizer, whetting your palate with its refreshing and subtly spicy profile.


A Family Memory: The Tale Behind the Taste

The story of the Hot Charlotte Cocktail is one interwoven with cherished family memories. I remember the first time I tasted this unique blend at a summer family reunion. It was a sweltering afternoon, and the air was filled with the scent of blooming flowers and freshly cut grass. My uncle, the self-proclaimed family bartender, was manning the makeshift bar set up under the old oak tree in our backyard.


He had a knack for creating drinks that mirrored the essence of our family—vibrant, spirited, and full of surprises. As he handed me a glass of the Hot Charlotte, he recounted tales of our grandmother Charlotte, who loved experimenting with homegrown ingredients. The addition of cucumber and Tobasco was his homage to her penchant for bold flavors and the garden she tended with pride.


With each sip of that cocktail, I was transported back to simpler times, surrounded by family, laughter, and the gentle hum of cicadas in the evening air. It's amazing how a single drink can encapsulate the warmth and love of family, turning an ordinary moment into a cherished memory.


Conclusion: Raise a Glass to Timeless Memories

The Hot Charlotte Cocktail is more than just a drink; it's a celebration of the moments that bring us together. Whether you're reminiscing about family gatherings or creating new memories, this cocktail is sure to add a touch of magic to any occasion. So, gather your loved ones, share stories, and raise a glass to the enduring power of nostalgia. Cheers!

Read more about Appetizers

Read more about Main Dishes

Read more about Desserts

Cheesy Bacon Burger with Spicy Chipotle Aiolo Sauce | Made by Meaghan Moineau

Cheesy Bacon Burger with Spicy Chipotle Aiolo Sauce | Made by Meaghan Moineau

Title: The Ultimate Cheesy Bacon Burger with Spicy Chipotle Aioli: A Flavor Explosion to Remember
Description: Dive into the rich, savory world of the Cheesy Bacon Burger with Spicy Chipotle Aioli Sauce. This mouthwatering dish combines the smoky heat of chipotle with the creamy goodness of Laughing Cow cheese, all encased in a juicy burger. Perfect for summer cookouts or family gatherings, this burger is not just a meal but a memory in the making.

---


The Ultimate Cheesy Bacon Burger with Spicy Chipotle Aioli: A Flavor Explosion to Remember


When it comes to comfort food, few things can compete with a juicy burger fresh off the grill. The Cheesy Bacon Burger with Spicy Chipotle Aioli Sauce is a testament to this, marrying the rich, smoky flavors of chipotle chiles and turkey bacon with the creamy delight of Laughing Cow cheese. It's a dish that doesn't just satisfy your hunger but also evokes sweet family memories.


Ingredients You'll Need


- For the Burger:

- 8 oz lean ground beef


- 4 wedges of Laughing Cow Swiss cheese


- 4 slices of cooked turkey bacon


- 1 green bell pepper, diced


- 1 onion, diced


- 1 tsp garlic powder


- 1/2 tsp ground black pepper


- Whole wheat hamburger buns


- For the Spicy Chipotle Aioli Sauce:

- 2 chipotle chiles in adobo, minced


- 1/2 cup fat-free mayonnaise


- 1/4 cup Greek yogurt


- 1 clove garlic, minced


- 1 tbsp fresh lime juice


- 1/2 tsp ground cumin


Instructions


For the Burgers:
1. Prepare the Bacon and Veggies: In a pan, cook the turkey bacon according to the package instructions. Once done, set aside. In the same pan, add diced bell pepper and onion. Cook until tender, about 10 minutes.
2. Season the Beef: In a small bowl, combine the ground beef with garlic powder and black pepper, mixing well.
3. Form the Patties: Divide the seasoned beef into 8 equal pieces, approximately 2 oz each. Flatten each piece and place half a wedge of cheese on top. Cover with another piece of beef, sealing the edges to keep the cheese from oozing out.
4. Grill to Perfection: Place the burgers on the grill and cook for about 5 minutes on each side, or until done to your liking.
5. Assemble the Burger: Place the cooked burger on a whole wheat bun, top with turkey bacon, cooked peppers, onions, and a generous dollop of spicy chipotle aioli sauce.
For the Spicy Chipotle Aioli Sauce:
1. Mix It Up: In a small bowl, combine minced chipotle chiles, mayonnaise, Greek yogurt, minced garlic, lime juice, and ground cumin. Whisk until well blended. This yields about 3/4 cup or 12 tablespoons of sauce.

A Nostalgic Family Memory


As I prepare this delicious burger, I'm reminded of the summer barbecues at my grandmother's house. The smoky aroma of grilled meat mixed with the laughter of family filled the air. My father, the grill master, would always hand me the first sizzling burger, packed with cheese and topped with his secret spicy sauce. As a child, I would sit at the picnic table, eagerly awaiting that first bite, knowing it would be another cherished memory added to our family gatherings.


Difficulty Rating: 6/10


This flavorful burger is classified as a Main Dish. While the recipe involves several steps, from preparing the sauce to grilling the burgers, it is straightforward and highly rewarding. With a bit of preparation, even novice cooks can bring this delightful dish to life.

Dive into this recipe, and let it become a cherished memory for your family, just as it is for mine. Whether for a casual weeknight dinner or a lively family cookout, the Cheesy Bacon Burger with Spicy Chipotle Aioli is sure to be a hit. Enjoy the blend of flavors and the joy of good company around the table.

Read more about Appetizers

Read more about Main Dishes

Read more about Desserts

Peanut Butter Sriracha Cookies | Made by Meaghan Moineau

Peanut Butter Sriracha Cookies | Made by Meaghan Moineau

Spicy Sweet Nostalgia: Peanut Butter Sriracha Cookies


Description: Dive into a culinary adventure with our Peanut Butter Sriracha Cookies — where the classic comfort of peanut butter meets a fiery twist of sriracha. This unique dessert not only satisfies your sweet tooth but also tickles your taste buds with a subtle heat, making it the perfect conversation starter at any gathering. Rated a 4 out of 10 in difficulty, even novice bakers can tackle this recipe with ease. Join us as we blend flavors and memories, creating a treat that's as heartwarming as it is intriguing.

---


A Sweet and Spicy Family Tradition


Growing up, our family kitchen was always a bustling hub of activity. The scent of freshly baked cookies often filled the air, drawing us in like moths to a flame. My grandmother, the culinary maestro of the family, believed that every recipe told a story — and her Peanut Butter Sriracha Cookies were no exception.


It was the summer of my tenth birthday, and as a tradition, my grandmother let me choose the special treat for our annual family picnic. Having recently discovered the joys of spicy foods, I boldly requested a cookie that matched my newfound adventurous palate. With a twinkle in her eye, Grandma nodded and said, "Let's spice things up a little, shall we?"


The kitchen became our playground. As she expertly creamed together the unsalted butter, crunchy peanut butter, and sugars, I watched in awe, eagerly awaiting my turn to contribute. Slowly, she added the sriracha, its vibrant red swirling into the creamy mixture like a secret waiting to be uncovered. I was entrusted with the task of cracking eggs and measuring out vanilla extract — a responsibility I took very seriously.


In another bowl, we mixed the flour, baking powder, baking soda, and salt, the dry ingredients resembling the sands of a distant desert, waiting to be united with our spicy concoction. I held my breath as we combined the two mixtures, the batter rich with promise.


After an hour of chilling, the dough was ready. I gleefully rolled it into balls, dipping each top in granulated sugar before placing them on the cookie sheet. Grandma guided my hands as we pressed a criss-cross pattern into each one, the fork leaving its indelible mark.


As the cookies baked, the sweet and spicy aroma wafted through the house, drawing curious family members into the kitchen. When they finally emerged from the oven, we placed a Hershey's chocolate kiss atop each one, the final touch of sweetness to balance the heat.


The picnic was a resounding success, and the cookies were the star of the show. Family members marveled at the unexpected yet delightful combination of peanut butter and sriracha, each bite evoking laughter and joy. To this day, whenever I bake these cookies, I'm transported back to that sunlit kitchen, the warmth of my grandmother's love, and the magic of flavors coming together to create something truly special.


The Recipe: Peanut Butter Sriracha Cookies


Ingredients:

- Unsalted butter


- Crunchy peanut butter


- Sugar


- Brown sugar


- Sriracha


- Eggs


- Vanilla extract


- Flour


- Baking powder


- Salt


- Baking soda


- Granulated sugar


- Hershey's chocolate kiss (for topping)


Instructions:

1. Cream together butter, peanut butter, and sugars in a large mixing bowl.


2. Gradually add sriracha, eggs, and vanilla extract. Beat until well combined.


3. In a separate bowl, mix flour, baking powder, baking soda, and salt.


4. Gently combine the dry mixture with the peanut butter mixture until well incorporated.


5. Refrigerate the dough for 1 hour.


6. Preheat your oven to 375°F (190°C).


7. Roll dough into 1-inch balls or use a medium-sized cookie scoop.


8. Dip the top of each dough ball into granulated sugar and place on a cookie sheet.


9. Flatten each ball with a fork, creating a criss-cross pattern.


10. Bake for 8-10 minutes, ensuring not to over-bake.


11. Cool on wire racks and top each with a Hershey's chocolate kiss. Enjoy!


Conclusion


Our Peanut Butter Sriracha Cookies are more than just a treat; they are a testament to the joy of culinary experimentation and the power of family traditions. Whether you're a seasoned baker or a newcomer to the kitchen, this recipe offers a delightful challenge with a rewarding payoff. Happy baking!

Read more about Appetizers

Read more about Main Dishes

Read more about Desserts

Spicy Lump Crab and Avocado Salad | Made by Meaghan Moineau

Spicy Lump Crab and Avocado Salad | Made by Meaghan Moineau

Title: A Taste of Nostalgia: Spicy Lump Crab and Avocado Salad
Description: Dive into a flavorful fusion of tender lump crabmeat and creamy avocados with our Spicy Lump Crab and Avocado Salad. This dish, enriched with the zest of fresh lemon juice and a kick of sriracha, is a perfect blend of spice and freshness. Ideal for both a sophisticated appetizer and a light main dish, this recipe holds a special place in my heart, evoking cherished family gatherings by the sea.

---


A Taste of Nostalgia: Spicy Lump Crab and Avocado Salad

As the warm breeze carried the scent of the ocean, our family would gather at the seaside cottage every summer. The sound of waves crashing against the shore was the perfect backdrop for our family tradition—an indulgent feast featuring the Spicy Lump Crab and Avocado Salad. This dish, with its vibrant colors and tantalizing flavors, became a staple at our gatherings, etching unforgettable memories into our hearts.


The Essence of the Dish

Our Spicy Lump Crab and Avocado Salad is a delightful combination of succulent lump crabmeat, creamy avocados, and a spicy dressing that tantalizes the taste buds. The dish is a symphony of textures, with the smoothness of the avocado complementing the delicate sweetness of the crab. The addition of sriracha chile sauce adds a fiery kick, balanced by the tangy freshness of lemon juice.


Ingredients:

- 2 ripe avocados


- 1 red bell pepper, finely chopped


- Fresh parsley, chopped


- 1 tablespoon fresh lemon juice


- 1 pound lump crabmeat


- 2 tablespoons mayonnaise


- Salt and pepper, to taste


- 2 scallions, finely sliced


- 1 tablespoon sriracha chile sauce


- 1 teaspoon Worcestershire sauce


Instructions:
1. Prepare the Spicy Sauce: In a small bowl, combine the mayonnaise, sriracha chile sauce, Worcestershire sauce, lemon juice, salt, and pepper. Stir until well blended, and set aside to let the flavors meld.
2. Mix the Crab Salad: In a medium bowl, gently toss together the crabmeat, scallions, red bell pepper, and fresh parsley. Be careful to maintain the integrity of the crab lumps. Lightly fold in the spicy sauce, ensuring an even coating without breaking the crabmeat.
3. Prepare the Avocados: Slice the avocados in half and remove the pit. Trim a small section from the bottom of each half so they sit flat on a plate. Brush or pour lemon juice over the cut surfaces to prevent browning.
4. Assemble and Serve: Place the avocado halves on a serving plate and generously fill each center with the crab salad. Serve immediately for the freshest flavor.
A Family Memory

Every year, as we prepared this dish, my grandmother would recount the story of how she first learned the recipe from a local fisherman during her honeymoon. She spoke of the joy of discovering new flavors and the warmth of sharing food with loved ones. As we savored each bite, it felt like a tribute to her adventurous spirit and love for family gatherings.


The Spicy Lump Crab and Avocado Salad is more than just a dish; it's a bridge to cherished memories and a reminder of the simple joys in life.


Difficulty Rating: 4/10
Classification: Appetizer or Light Main Dish

This recipe is relatively easy to prepare, making it accessible even for novice cooks. Whether you serve it as an appetizer or a light main dish, it's guaranteed to be a hit, resonating with the warmth of familial love and the excitement of summer days by the sea.

Read more about Appetizers

Read more about Main Dishes

Read more about Desserts

chilli chicken | Made by Meaghan Moineau

chilli chicken | Made by Meaghan Moineau

Title: "Spicy Nostalgia: The Flavorful Journey of Chilli Chicken"
Description: Dive into the rich, aromatic world of Chilli Chicken—a dish that not only tantalizes your taste buds but also stirs heartwarming family memories. From the vibrant colors of bell peppers to the savory depth of soya sauce, learn how this dish has become a beloved staple at our family gatherings. Rated 6/10 in difficulty, this versatile delight can be served as an appetizer or a main dish. Discover a cherished family story intertwined with this recipe and find complete cooking instructions at Swasthi's Recipes.

---


Spicy Nostalgia: The Flavorful Journey of Chilli Chicken

There’s something magical about family recipes—they are time machines that transport you back to cherished moments, filled with warmth, laughter, and the comforting aroma of home-cooked meals. Chilli Chicken, with its spicy allure and vibrant colors, holds a special place in my heart, not just as a dish but as a treasured family memory.


A Burst of Flavors and Colors

The beauty of Chilli Chicken lies in its simplicity and the explosion of flavors it offers. The key ingredients—bell peppers, boneless chicken breast, and slit green chilies—create a colorful medley that is as pleasing to the eye as it is to the palate. The essential spices—red chili powder and pepper powder—bring a fiery kick, while garlic and onion add depth and aroma. The sticky, savory embrace of soya sauce, combined with the tangy notes of vinegar and the subtle sweetness of sugar, create a harmonious balance that is simply irresistible.


A Family Tradition

Every family gathering at our house was incomplete without a sizzling platter of Chilli Chicken. I vividly remember my grandmother bustling around the kitchen, her hands deftly working through the ingredients, her face lit with a loving smile. The air would fill with the intoxicating aroma of garlic sizzling in oil, mixing with the spicy scent of red chili powder. It was a sensory symphony that signaled the start of another memorable feast.


One particular instance stands out in my memory: a chilly winter evening when the entire family was gathered around the dining table, the warmth of laughter and stories enveloping us like a cozy blanket. My grandmother placed the dish in the center, and as the steam rose, so did our anticipation. With each bite of the tender chicken and crunchy bell peppers, we were transported to a world where flavors danced on our tongues and time seemed to stand still.


Creating Your Own Memories

While nostalgia adds a unique flavor to Chilli Chicken, creating your own memories with this dish is just as delightful. Rated 6/10 in difficulty, it’s accessible yet rewarding, making it perfect for a family dinner or a casual gathering with friends. Whether you choose to serve it as an appetizer or the main dish, Chilli Chicken promises to be the star of the meal.


For those looking to recreate this flavorful journey, detailed instructions can be found at Swasthi's Recipes. Embrace the joy of cooking as you experiment with the ingredients, perhaps adding your own twist to make it uniquely yours.


In the end, Chilli Chicken is more than just a dish; it's a connection to the past, a celebration of the present, and an invitation to create future memories. So, gather your loved ones, roll up your sleeves, and let the rich, spicy aroma of Chilli Chicken weave its magic into your family story.


---


Whether you're a seasoned cook or a culinary novice, Chilli Chicken is an adventure worth embarking on. So, why not dig in and let this dish become a delicious chapter in your own family’s story?

Read more about Appetizers

Read more about Main Dishes

Read more about Desserts

Sweet and Spicy Nuts | Made by Meaghan Moineau

Sweet and Spicy Nuts | Made by Meaghan Moineau

Title: Sweet and Spicy Nuts: A Family Tradition with a Fiery Twist
Description: Discover the delightful balance of sweet and spicy flavors in this easy-to-make Sweet and Spicy Nuts recipe. Perfect as an appetizer or a snack, this dish is sure to add a kick to your family gatherings. Reminisce with me as I share a cherished family memory tied to these delectable nuts. Difficulty: 3/10.

---


When I think of Sweet and Spicy Nuts, my mind drifts back to those delightful family gatherings at my grandmother's house. Tucked away in her cozy kitchen, the air was always filled with the comforting aroma of buttery spices, a scent that wrapped around us like a warm hug.


The recipe I'm about to share has become a staple in our family—a perfect blend of sweet and spicy that echoes the warmth of those cherished memories. It's a dish that brings smiles and a bit of nostalgia, as it reminds us of those lively conversations and laughter shared over a bowl of these flavorful nuts.


Sweet and Spicy Nuts Recipe
Ingredients:

- 2 tablespoons butter


- 1/2 teaspoon cayenne pepper


- 1/2 teaspoon ground cinnamon


- 1/2 teaspoon ground cumin


- 1/4 cup light brown sugar


- 2 cups mixed nuts (such as walnuts)


- 1 teaspoon salt


- 1 tablespoon water


Instructions:
1. Mix the Spices: In a small bowl, combine the ground cumin, cayenne pepper, ground cinnamon, and salt. Set aside for later use.
2. Toast the Nuts: Heat a dry skillet over medium heat. Add the mixed nuts and cook, stirring frequently, until they begin to toast, about 4 minutes. Transfer the nuts to a small bowl and set aside.
3. Create the Glaze: In the same hot skillet, add the butter, light brown sugar, water, and the spice mixture. Cook, stirring, until a smooth glaze forms, about 1 minute.
4. Coat the Nuts: Return the toasted nuts to the skillet. Toss them in the glaze, ensuring they are well-coated. Cook for an additional 1 to 2 minutes, or until the nuts are glazed and golden brown.
5. Cool and Store: Remove the skillet from the heat and transfer the glazed nuts to a baking sheet lined with aluminum foil. Use a fork to separate them. Allow the nuts to cool until the sugar hardens, about 10 minutes. Store in an airtight container.
A Nostalgic Note:

The tradition of making Sweet and Spicy Nuts started with my grandmother. She had a knack for turning simple ingredients into something magical. As kids, we would gather around her, eyes wide with anticipation, as she tossed the nuts in the sizzling glaze. The aroma was irresistible, and we eagerly waited for them to cool, often sneaking a few warm morsels when she wasn't looking.


These nuts have now become a symbol of our family's togetherness, a dish that travels with us through generations. Whether it's a holiday party or a casual Sunday afternoon, a bowl of Sweet and Spicy Nuts always makes its way to the table, sparking conversations and creating new memories.


Difficulty: 3/10
Category: Appetizer

---


Next time you're looking for a delightful appetizer to impress your guests or just a snack to enjoy on a cozy afternoon, give these Sweet and Spicy Nuts a try. They are sure to add a fiery twist to your gatherings and maybe even inspire a family tradition of your own.

Read more about Appetizers

Read more about Main Dishes

Read more about Desserts

Roasted Acorn Squash Stuffed with spicy Biryani (Veg/vegan) | Made by Meaghan Moineau

Roasted Acorn Squash Stuffed with spicy Biryani (Veg/vegan) | Made by Meaghan Moineau

Title: A Flavorful Journey: Roasted Acorn Squash Stuffed with Spicy Biryani
Description: Discover the aromatic allure of Roasted Acorn Squash Stuffed with Spicy Biryani, a delightful vegan dish that marries the nutty sweetness of squash with the rich, spicy flavors of biryani. Explore a heartwarming family memory tied to this dish, learn step-by-step instructions, and find out why this recipe is a show-stopping main dish perfect for any occasion.

---


A Flavorful Journey: Roasted Acorn Squash Stuffed with Spicy Biryani


The kitchen was always the heart of our home, especially during the vibrant chaos of family gatherings. I vividly remember the aromatic symphony of spices wafting through the air as my grandmother prepared her signature dish: Roasted Acorn Squash Stuffed with Spicy Biryani. This dish was more than just a meal; it was a celebration of flavors and memories woven together, bringing everyone closer with each bite.


Ingredients


- 2 acorn squashes, halved and seeds removed


- 1 cup basmati rice, soaked in water


- 1 cup water


- 1-2 tbsp garam masala


- 1 red onion, diced


- 1 cup sweet peppers, diced


- A handful of cashew nuts


- A pinch of saffron


- A bunch of cilantro, chopped


- 1 tbsp biryani paste (recipe below)


- 1 onion, sliced into rounds


- Salt, to taste


- Black coarse pepper, to taste


- PAM Original Flavor spray


- 2 tbsp vegetable oil


- 1 white onion, diced


- 1 beefsteak tomato, diced


- 3 cloves garlic, minced


- 1 inch ginger, grated


- 1 tsp chili powder


Biryani Paste Recipe:

- 2 tbsp vegetable oil


- 1 onion, finely chopped


- 2 cloves garlic, minced


- 1 inch ginger, grated


- 1 tsp chili powder


- Salt, to taste


Instructions


1. Preheat and Roast:

Preheat the oven to 400°F (200°C). On a baking sheet, place the acorn squash halves cut side up. Spray lightly with PAM and sprinkle with garam masala. Broil until tender and charred, about 10-15 minutes.


2. Prepare Filling:

While the squashes are roasting, heat a large skillet over medium heat. Spray with PAM and add vegetable oil. Sauté the cashews until fragrant and slightly darkened. Add the red onion and sweet peppers, sprinkle with black pepper, and cook until soft, about 5-7 minutes.


3. Toast the Rice:

Drain the soaked basmati rice and add it to the skillet. Sauté for 5-7 minutes to toast the rice.


4. Cook the Rice:

Remove the squash from the oven and let it cool for a few minutes. Score the flesh into small cubes, avoiding cutting through the skin. Scoop out the cubes into a bowl and set aside. Keep the squash shells for later use.


5. Combine Ingredients:

Add 1 cup of water and a pinch of saffron to the rice. Cover and cook on medium-low heat for about 15 minutes until the rice is cooked through. Add the cubed squash and biryani paste, tossing gently. Mix in 3/4 of the chopped cilantro and taste for salt and flavor.


6. Prepare Onion Topping:

In a small skillet, spray with PAM and set over medium-high heat. Add the onion slices and sauté until golden brown, about 4-5 minutes.


7. Assemble and Serve:

Fill each squash shell with the rice mixture, mounding it slightly over the top. Top each with a sautéed onion round and sprinkle with the remaining cilantro. Serve with yogurt or raita for a cooling contrast.


A Nostalgic Memory


Each time I prepare this dish, I'm transported back to my grandmother's kitchen. The way she meticulously balanced spices, the laughter echoing through the house, and the joy of sharing a meal with loved ones are memories that linger with every bite. This dish, like a warm embrace, brings our family together, weaving a tapestry of tradition and flavor that transcends generations.


Difficulty Rating


Difficulty: 6/10
Classification: Main Dish

Roasted Acorn Squash Stuffed with Spicy Biryani is an inviting main dish that combines the warmth of family traditions with the vibrant flavors of Indian cuisine. Its moderate difficulty level makes it an achievable yet impressive addition to any dinner table. Enjoy this culinary journey that will surely create new memories alongside cherished old ones.

Read more about Appetizers

Read more about Main Dishes

Read more about Desserts

Sweet Corn Pudding | Made by Meaghan Moineau

Sweet Corn Pudding | Made by Meaghan Moineau

Title: Sweet Corn Pudding: A Cozy Comfort Dish with a Dash of Nostalgia
Description: Indulge in the creamy, savory goodness of Sweet Corn Pudding—a perfect side dish that combines the sweetness of corn with the rich flavors of cheese and jalapeño peppers. Dive into this heartwarming recipe that not only delights the palate but also brings back cherished family memories.

---


Sweet Corn Pudding Recipe


Difficulty Level: 5/10
Category: Side Dish

Ingredients

- 2 tablespoons butter

- 1 small onion, finely chopped


- 2 cloves garlic, minced


- 4 ears of corn, kernels removed


- 2 tablespoons all-purpose flour


- 1 cup heavy cream


- 1 cup cooked grits


- 2 tablespoons canned jalapeño peppers, chopped


- Salt, to taste


- Black pepper, to taste


- 2 large eggs, beaten


- 1 cup white shredded cheddar cheese


Instructions


1. Preheat the Oven: Set your oven to 425°F (218°C).
2. Sauté Aromatics: In a heavy-bottomed pot over medium heat, melt the butter. Add the onion and garlic, cooking until fragrant and translucent, about 3 minutes.
3. Add Corn: Stir in the corn kernels and cook for an additional 3 minutes, allowing the natural sweetness of the corn to develop.
4. Incorporate Flour and Cream: Sprinkle in the flour, stirring constantly for 1 minute, then gradually add the heavy cream. Continue stirring until the mixture comes to a gentle boil.
5. Blend and Season: Add the cooked grits, then remove the pot from heat. Stir in the jalapeño peppers, and season generously with salt and black pepper. Using a hand-held immersion blender, puree the mixture slowly while adding the beaten eggs until fully incorporated.
6. Bake to Perfection: Pour the smooth corn mixture into an ovenproof dish. Generously sprinkle the top with shredded cheddar cheese. Bake for 25-30 minutes, or until the center puffs up and the top turns a delicious golden brown.

---


A Taste of Nostalgia


The aroma of this Sweet Corn Pudding always transports me back to our family gatherings on summer evenings. I remember my grandmother standing by the stove, her apron dusted with flour, humming softly as she stirred the pot. The kitchen would fill with the comforting scent of sautéed onions and garlic, a symphony of familiar smells that signaled something special was about to be served.


We'd gather around the dining table, the centerpiece a bubbling dish of corn pudding, its golden top glistening under the soft light. Each bite was a blend of creamy corn and spicy jalapeño, a perfect harmony that mirrored the laughter and warmth shared among us. This dish wasn't just food; it was a vessel of memories, a reminder of summers spent together, and the love that was woven into each meal.


---


Conclusion


Sweet Corn Pudding is more than just a dish; it’s a culinary embrace that brings together the sweetness of corn, the richness of cream, and a hint of jalapeño heat. Perfect as a side for family dinners or festive occasions, this recipe is sure to become a cherished part of your own family traditions. So, gather your ingredients and create not just a meal, but a memory.

Read more about Appetizers

Read more about Main Dishes

Read more about Desserts

Winter Kimchi | Made by Meaghan Moineau

Winter Kimchi | Made by Meaghan Moineau

Title: Embrace the Cold: Crafting Winter Kimchi to Warm Your Soul
Description: Discover the art of making Winter Kimchi, a cherished family recipe that combines tradition, flavor, and nostalgia. Dive into this step-by-step guide to creating a tangy, spicy delight that’s perfect for warming up those chilly winter days.

---


As the frost begins to lace the windows and winter's chill settles in, there’s nothing quite like the comforting embrace of a traditional dish that warms you from the inside out. For my family, that dish has always been Winter Kimchi. Its bold flavors and vibrant colors have long been a staple at our table, bringing both warmth and a touch of spice to our coldest months.


Ingredients:

- 1 large napa cabbage, quartered


- Brine solution (water with salt)


- 1 bowl of cooked rice


- 1 radish, julienned


- 2 spring onions, chopped


- 1 bulb of garlic, cloves separated


- 1 tablespoon of sugar


- 2 tablespoons of Korean gochujang paste


- 1 tablespoon of chili flakes


- 1 can of fermented baby shrimps or cincalok


- 2 tablespoons of fish sauce


Instructions:

1. Begin by soaking the quartered napa cabbage in a brine solution for 4 hours. To ensure even soaking, weigh the cabbage down with a heavy plate.


2. Once the cabbage is well-brined, remove it from the solution and drain thoroughly.


3. In a food processor, combine the garlic cloves, cooked rice, fermented shrimp, fish sauce, sugar, gochujang paste, and chili flakes. Blend until you achieve a smooth paste.


4. Stir in the chopped spring onions into the paste to add a fresh, vibrant note.


5. Carefully stuff the napa cabbage with the spicy paste, making sure to get in between the individual leaves and coating every inch of the cabbage thoroughly.


6. Place your stuffed cabbage into an airtight container. Allow the kimchi to sit at room temperature for a day, then transfer it to the fridge to ferment for at least a week. For the best flavor, I recommend waiting around three weeks before diving in.


A Taste of Nostalgia:

Every winter, as the first snowflakes began to fall, my grandmother would gather the family around the kitchen table for the annual kimchi-making ritual. The kitchen would be filled with the pungent aroma of garlic and spices, mingling with the laughter and chatter of loved ones. As a child, I would watch in awe as my grandmother's skilled hands expertly layered the fiery red paste between the cabbage leaves, transforming simple ingredients into a dish that was nothing short of magical.


For us, Winter Kimchi was more than just food—it was a connection to our heritage, a symbol of resilience against the winter cold, and a reminder of the warmth of family bonds. Each bite was a sensory journey, a dance of flavors that told stories of the past and hopes for the future.


Difficulty: 6/10
Classification: Appetizer

Creating Winter Kimchi is a delightful adventure that marries tradition with creativity. Whether you're new to kimchi-making or a seasoned pro, the experience is both rewarding and deeply satisfying. As you savor each spicy, tangy bite, may it bring you as much warmth and joy as it has brought my family over the years.

Read more about Appetizers

Read more about Main Dishes

Read more about Desserts

Nachos Grande | Made by Meaghan Moineau

Nachos Grande | Made by Meaghan Moineau

Title: Nachos Grande: A Flavorful Journey to Family Gatherings


Description:

Explore the vibrant, tantalizing flavors of Nachos Grande—a dish that not only brings a delightful burst of taste to your table but also serves as a nostalgic trip down memory lane. Perfect for gatherings, this crowd-pleaser is a sure way to impress your guests with its rich, spicy notes and mouth-watering cheese melt. Discover a beloved family recipe that's both heartwarming and satisfying.

---


Recipe: Nachos Grande


Ingredients:

- 1 can of tomatoes

- 1 cup of cheddar cheese, shredded


- 1 tablespoon chili powder


- 2 tablespoons corn oil


- 2 garlic cloves, minced


- 1 green bell pepper, chopped


- 1 green fresh chili, diced


- 1 teaspoon ground cumin


- 1 onion, chopped


- 1 teaspoon paprika, plus extra for garnish


- 1 can of refried beans


- 1 bag of tortilla chips


- 1/2 cup of water


Instructions:

1. Sauté the Veggies: Heat corn oil in a skillet over medium heat. Add chopped onion, green bell pepper, and minced garlic. Sauté gently, stirring occasionally for about 5 minutes, until the vegetables are softened but not browned.
2. Cook the Sauce: Add canned tomatoes and fresh green chili to the skillet. Continue to cook over medium heat for another 5 minutes, allowing most of the liquid to evaporate.
3. Spice it Up: Stir in chili powder and paprika, cooking for an additional 3 minutes to let the spices bloom.
4. Prepare the Beans: Add the refried beans, breaking them up with a fork. Pour in the water and cook, stirring occasionally, for 8-10 minutes until the mixture thickens.
5. Assemble and Bake: Spoon the bean mixture into the center of a baking dish. Arrange tortilla chips around the edge and sprinkle with ground cumin. Generously distribute the shredded cheddar cheese over the beans and chips.
6. Final Touch: Bake at 400°F (200°C) for 15-20 minutes, or until the cheese is irresistibly melted. Garnish with a lattice pattern of paprika for a splash of color and serve immediately.

---


A Nostalgic Family Memory:


Nachos Grande has always been more than just a dish in our family; it’s a cherished tradition. Every summer during our annual family reunion, the kitchen would come alive with the vibrant aroma of spices and sizzling vegetables. My grandmother, the heart of our family, would orchestrate this culinary symphony, inviting us to join her in the kitchen.


We would gather around the table in anticipation, as the tantalizing scent of melting cheddar wafted through the air. The Nachos Grande would emerge from the oven, cheese bubbling and edges crisp, a masterpiece of flavors waiting to be devoured. As we dug in, laughter and stories filled the room, and each bite seemed to carry a piece of our shared history. To this day, the taste of Nachos Grande brings me back to those joyful gatherings, a delicious reminder of the love and connection that binds us.


---


Difficulty Rating: 4/10

Classification: Appetizer


Creating Nachos Grande is both a simple and rewarding experience, making it an excellent choice for those looking to whip up a quick yet impressive appetizer. Its vibrant flavors and ease of preparation make it a staple for any get-together, ensuring your guests enjoy a meal that's as memorable as it is delicious.

Read more about Appetizers

Read more about Main Dishes

Read more about Desserts

Saffron Chicken Tikka | Made by Meaghan Moineau

Saffron Chicken Tikka | Made by Meaghan Moineau

Title: Saffron Chicken Tikka: A Culinary Journey Through Spice and Memory
Description: Dive into the rich flavors of Saffron Chicken Tikka, a dish that marries aromatic spices with tender chicken to create a culinary masterpiece. This blog post will guide you through the steps to perfecting this Indian classic, all while sharing a nostalgic family story that encapsulates the warmth and joy of cooking together. Rated at a moderate difficulty of 6 out of 10, this main dish is perfect for those looking to impress at their next dinner gathering.

---


Saffron Chicken Tikka: A Culinary Journey Through Spice and Memory

If there's one dish that evokes fond memories of family gatherings and the comforting aroma of home, it's the Saffron Chicken Tikka. This dish is more than just a meal; it's a delightful blend of culture, tradition, and cherished family moments.


The Essence of Saffron Chicken Tikka

Creating Saffron Chicken Tikka is akin to painting with spices. The journey begins by soaking precious saffron strands in warm milk, allowing them to release their golden hue and unique aroma. This step, which takes a gentle 15 to 20 minutes, sets the stage for the flavors to come.


Meanwhile, the kitchen fills with the warm, inviting scent of dry roasted spices. Cinnamon sticks, black and green cardamom seeds, white peppercorns, and cloves are gently toasted to elevate their natural oils and flavors. Once roasted, these spices are pounded into a powder—not too fine—to retain their robust character.


A spicy kick is added with a paste made from green chilies, ground meticulously in a mortar and pestle. A pinch of coarse salt aids in achieving the perfect texture.


With all ingredients ready, the marinade comes together harmoniously. The chicken breasts, cut into cubes and patted dry, are enveloped in this fragrant mixture. A bowl of marinating chicken is then lovingly covered and placed in the refrigerator, allowing the flavors to meld overnight. The result? Moist and tender chicken tikkas that are sure to impress.


A Story of Flavor and Family

Every time I prepare Saffron Chicken Tikka, I'm transported back to a bustling kitchen filled with laughter and the clinking of dishes. It was during a summer family reunion when I first learned the art of making this dish from my grandmother. Her hands, seasoned by years of cooking, moved with an effortless grace as she orchestrated the symphony of spices.


We would gather around the kitchen island, each family member assigned a task. My cousins and I were in charge of pounding the spices, a job that came with the reward of licking our fingers to taste the fiery chilies. As the chicken marinated, we sat around the table sharing stories, our mouths watering in anticipation.


The next day, as the chicken skewers sizzled on the grill, the aroma wafted through the garden, drawing everyone to the table. The first bite was always magical, a testament to the love and care that went into its preparation.


Bringing it All Together

Saffron Chicken Tikka is more than just an appetizer; it is a main dish that speaks to the heart. With a moderate difficulty rating of 6 out of 10, it offers a rewarding challenge for those eager to explore the depths of Indian cuisine. Whether you're cooking for family or friends, this dish is bound to create lasting memories and perhaps inspire new traditions.


So, gather your ingredients, embrace the spices, and embark on a culinary journey that promises not only flavor but a taste of nostalgia.

Read more about Appetizers

Read more about Main Dishes

Read more about Desserts

Curried Cauliflower Gratin | Made by Meaghan Moineau

Curried Cauliflower Gratin | Made by Meaghan Moineau

Title: A Journey of Flavors: Curried Cauliflower Gratin
Description: Dive into the rich, aromatic world of Curried Cauliflower Gratin, a dish that combines the earthy essence of cauliflower with the warmth of exotic spices. Discover a family story that adds a touch of nostalgia to this delightful recipe, perfect as a main dish for any occasion. With a difficulty rating of 5 out of 10, this recipe promises a rewarding culinary adventure.

---


Curried Cauliflower Gratin: A Nostalgic Culinary Journey

There’s something inherently magical about the way certain dishes can transport us back to cherished moments in time. For me, Curried Cauliflower Gratin is more than just a delightful blend of flavors; it's a doorway to fond family gatherings where laughter echoed through the kitchen and the scent of spices filled the air.


Ingredients:

- 1 whole cauliflower


- 2 tablespoons peanut oil


- 1 shallot, finely chopped


- 2 cloves garlic, minced


- 1 tablespoon fresh ginger, grated


- 1 teaspoon ground cumin


- 1 teaspoon curry powder


- 1/2 teaspoon ground cardamom


- 1/2 teaspoon ground nutmeg


- 1/4 teaspoon cinnamon


- 1 teaspoon kosher salt


- 2 tablespoons flour


- 1 can (13.5 oz) coconut milk


- 1 tablespoon cumin seeds


- 1/2 cup breadcrumbs


- 2 tablespoons unsalted butter, melted


- Fresh cilantro, minced, for garnish


Instructions:
1. Prepare Your Workspace: Preheat the oven to 400°F. Butter an 8x8-inch baking dish and set it aside.
2. Steam the Cauliflower: Gently steam the whole cauliflower until it's tender but not overly soft—about 15 minutes. Once cooled, slice the cauliflower horizontally.
3. Create the Flavor Base: In a medium saucepan over medium heat, warm the peanut oil. Add the ginger, shallot, and garlic, and sauté for 3 to 4 minutes until fragrant and slightly golden.
4. Spice it Up: Introduce the ground cumin, curry powder, cardamom, nutmeg, and cinnamon to the saucepan. Sauté the spices for about 3 minutes until their aromas blossom.
5. Thicken the Sauce: Sprinkle in the flour, stirring to combine for about 2 minutes. Gradually whisk in the coconut milk and add the salt, allowing the mixture to simmer and thicken for 3 to 5 minutes.
6. Assemble the Gratin: Layer the cauliflower slices with the curry cream in your prepared baking dish. Scatter the cumin seeds and breadcrumbs over the top.
7. Add the Finishing Touches: Drizzle the breadcrumbs with melted butter to ensure a crispy, golden finish. Bake for 25 to 30 minutes until the gratin is bubbling and golden brown.
8. Garnish and Serve: Once out of the oven, sprinkle the dish generously with fresh cilantro. Serve warm and enjoy!
A Family Memory:

Growing up, our family kitchen was the heart of the home, a place where stories were shared and recipes were passed down. I vividly remember one Sunday afternoon when my grandmother decided to teach me the secrets of her Curried Cauliflower Gratin. Her eyes would twinkle with joy as she recounted tales of her own mother, who had introduced her to the aromatic world of spices.


The moment the gratin hit the table, the room was filled with groans of delight, the creamy texture and complex flavors a testament to the love and care baked into every bite. To this day, every time I prepare this dish, I am reminded of those precious moments and the legacy of culinary tradition.


Difficulty Rating: 5/10
Classification: Main Dish

---


This Curried Cauliflower Gratin is a perfect marriage of tradition and taste, offering a unique spin on a classic comfort food. Whether you're sharing it with family or introducing it to friends, it’s a dish that's sure to leave an impression, sparking conversations and creating memories of your own.

Read more about Appetizers

Read more about Main Dishes

Read more about Desserts