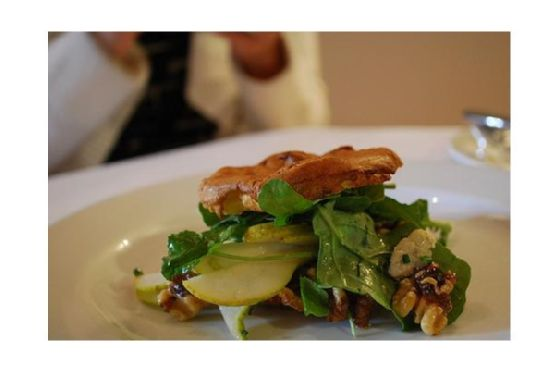
Pear Salad With Walnuts and Blue Cheese
Intro
There’s something inherently magical about the crispness of autumn, the way the air turns cooler, and the leaves transform into a symphony of warm hues. As a child, this season always meant family gatherings where we would indulge in hearty meals that celebrated the bounty of the harvest. One dish that has always stood out in my memory is my grandmother’s pear salad. It was a delightful mix of sweet and savory, with juicy pears, crunchy walnuts, and the bold flavor of blue cheese. This salad was more than just food; it was a celebration of the season’s best offerings, a dish that brought everyone together, and left you feeling warm and content. Today, I’m thrilled to share this beloved recipe with you, hoping it brings the same warmth to your table as it has to ours.
Why You’ll Love It
This pear salad with walnuts and blue cheese is a perfect blend of flavors and textures. Here’s why you’ll fall in love with it:
- Balance of Flavors: The sweetness of pears complements the tangy blue cheese, while the walnuts add a savory crunch.
- Healthy and Nourishing: Packed with vitamins, antioxidants, and healthy fats, this salad is as nutritious as it is delicious.
- Quick and Easy: With minimal prep time, this salad is perfect for a quick meal or a stunning appetizer.
- Visually Stunning: The vibrant colors of the salad leaves, pears, and cheese make this dish as beautiful as it is tasty.
Ingredients
- 4 ripe pears
- 1 cup crumbled blue cheese
- 1/4 cup finely chopped chives
- 6 cups mixed salad leaves (such as curly endive)
- 2 tablespoons lemon juice
- 3 tablespoons safflower oil
- 1 tablespoon walnut oil
- 1 cup walnuts, toasted and roughly chopped
Instructions
- Prepare the pears by cutting the base so they stand straight. This not only makes for an appealing presentation but also ensures the pear remains stable in the bowl.
- Arrange one pear and a generous handful of mixed salad leaves in individual serving bowls.
- Add a scattering of chopped celery to each bowl for added crunch.
- In a separate bowl, whisk together the lemon juice, safflower oil, and walnut oil to create the dressing. Drizzle the dressing over each salad.
- Finish by sprinkling the crumbled blue cheese and toasted walnuts evenly over each salad.
- Serve immediately and enjoy the delightful flavors of autumn.
Tips
For the best experience, ensure your pears are ripe but still firm to the touch. This will give you the perfect balance of sweetness and crunch. Toasting the walnuts enhances their flavor, so don’t skip this step! If you prefer a milder cheese, consider using gorgonzola instead of blue cheese.
Variations & Substitutions
- Cheese: Swap blue cheese for feta or goat cheese for a different flavor profile.
- Nuts: Pecans or almonds can be used as alternatives to walnuts for some variety.
- Extra Add-ins: Add dried cranberries or pomegranate seeds for a touch of sweetness and color.
- Dressing: A honey-mustard vinaigrette can be a delightful alternative to the walnut oil dressing.
Storage
This salad is best enjoyed fresh. However, if you need to prepare it in advance, keep the dressing separate and add it just before serving to prevent the salad leaves from wilting. Store any leftovers in an airtight container in the refrigerator for up to a day.
FAQ
Can I use canned pears instead of fresh ones?
While fresh pears offer the best texture and flavor, you can use canned pears in a pinch. Just ensure they are well-drained and not overly sweetened.
What can I use if I’m allergic to nuts?
If you have a nut allergy, try substituting the walnuts with sunflower seeds or pumpkin seeds for an added crunch without the risk.
How can I make this salad vegan?
To make this salad vegan, simply omit the cheese or use a vegan cheese alternative. Ensure the dressing is also free from animal products, perhaps using a balsamic vinaigrette instead.
Nutrition
Each serving of this pear salad is approximately 250 calories, with 18 grams of healthy fats, 5 grams of protein, and 20 grams of carbohydrates. It is a good source of fiber, vitamin C, and antioxidants, making it a nutritious choice for any meal.
Conclusion
This pear salad with walnuts and blue cheese is a tribute to the flavors of fall, a dish that is as nourishing as it is delectable. Whether you’re serving it as a starter at a dinner party or enjoying it as a light lunch, it’s sure to impress with its complex flavors and beautiful presentation. I hope this recipe becomes a staple in your home, just as it has in mine, creating new memories and bringing joy to your dining table.
Related update: Pear Salad With Walnuts and Blue Cheese
Related update: Japanese Gyoza Pot Stickers
Related update: Thai Cucumber Salad (By Roz)