Glazed pork chops | Made by Meaghan Moineau

Glazed Pork Chops

Intro

There’s something magical about the aroma of sizzling pork chops wafting through the kitchen. It reminds me of Sunday dinners at my grandmother’s house, where the whole family would gather around the table, eagerly awaiting the hearty meal that she had lovingly prepared. Her glazed pork chops were always the star of the show, tender and flavorful, with a glossy finish that made them irresistible. Inspired by those cherished memories, I am thrilled to share my own version of this delightful dish with you. This recipe is a modern twist on a classic favorite, combining savory and sweet flavors to create a mouthwatering experience that you’ll want to recreate time and time again.

Why You’ll Love It

This glazed pork chops recipe is a true gem for several reasons:

  • Flavor Explosion: The combination of honey, soy sauce, and balsamic vinegar creates a rich, tangy glaze that perfectly complements the pork chops.
  • Easy to Prepare: With just a few simple steps, you can have a restaurant-quality meal on the table in no time.
  • Versatile: This recipe pairs well with a variety of side dishes, making it a versatile option for any occasion.
  • Family-Friendly: The sweet and savory flavors are sure to be a hit with both kids and adults alike.

Ingredients

  • Balsamic vinegar
  • Black pepper
  • Butter
  • Cornstarch
  • Garlic cloves
  • Fresh green onions
  • Honey
  • Lean boneless pork chops
  • Soy sauce

Instructions

  1. Press one side of each pork chop into the black pepper to coat.
  2. Heat a nonstick grill skillet over high heat until hot.
  3. Add the pork chops, pepper side down, and cook for about 4 minutes or until browned.
  4. Reduce heat to medium, turn the pork chops, and cook for an additional 6-8 minutes, or until fully cooked through.
  5. Remove the skillet from heat, cover the pork chops, and set aside to rest.
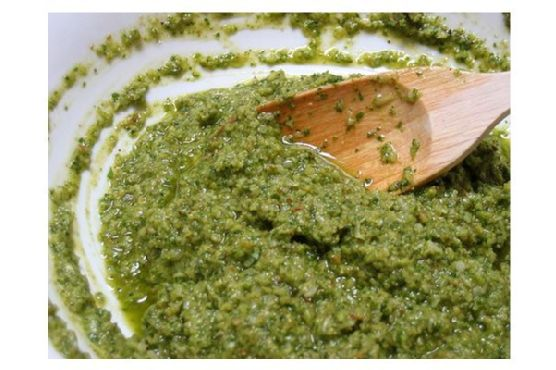
  6. In a separate bowl, mix honey, soy sauce, balsamic vinegar, and cornstarch until smooth. Add cracked pepper and stir well.
  7. Melt butter in a small pan over medium heat, add garlic, and cook for 30 seconds, stirring constantly.
  8. Stir the honey mixture into the pan and bring to a boil, cooking for 1 minute while stirring.
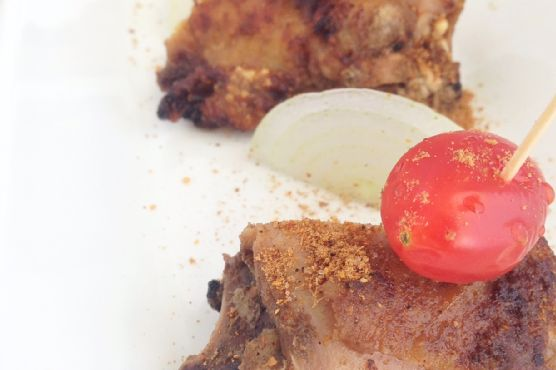
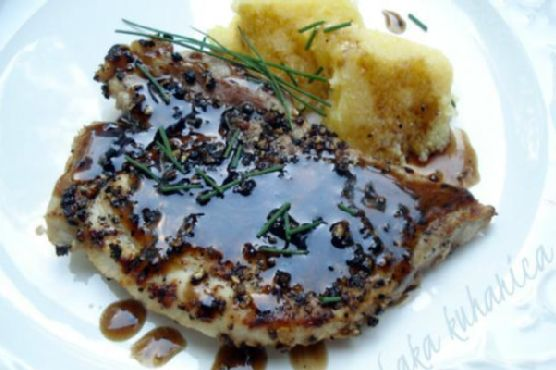
  9. Spoon the prepared sauce over the pork chops and sprinkle with fresh green onions.
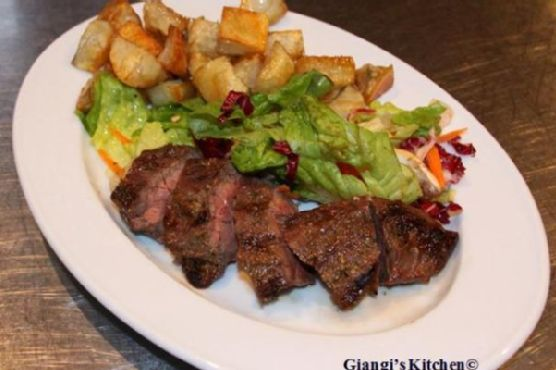
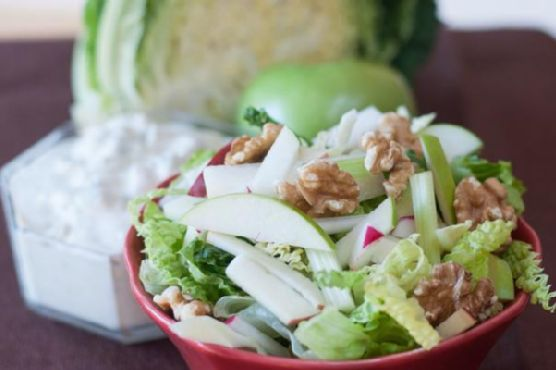
  10. Serve with polenta and a green salad for a complete meal.

Tips

  • Allow the pork chops to rest before serving to ensure they remain juicy.
  • For even more flavor, marinate the pork chops in the glaze for a few hours before cooking.
  • If you prefer a thicker glaze, let it simmer for an additional minute or two.

Variations & Substitutions

This recipe is wonderfully adaptable. Here are some variations you might consider:

  • Spicy Kick: Add a pinch of red pepper flakes to the glaze for a spicy twist.
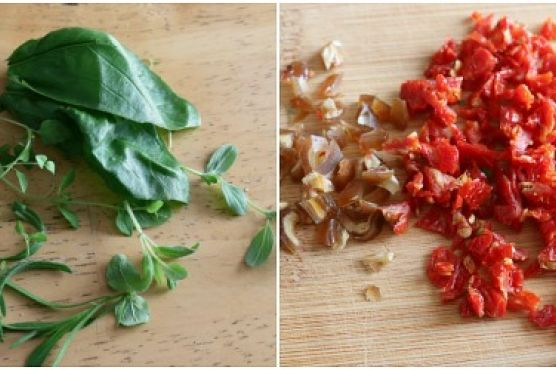
  • Herb Infusion: Incorporate fresh herbs like rosemary or thyme into the glaze for an aromatic touch.
  • Alternative Protein: This glaze also works well with chicken breasts or thighs.

Storage

To store leftovers, place the glazed pork chops in an airtight container and refrigerate for up to 3 days. Reheat gently in a skillet over medium heat, adding a splash of water to prevent the glaze from becoming too thick.

FAQ

Can I use bone-in pork chops for this recipe?

Yes, you can use bone-in pork chops, but be aware that the cooking time may be slightly longer. Ensure that the internal temperature reaches 145°F for safe consumption.

Is there a substitute for cornstarch?

If you don’t have cornstarch on hand, you can use arrowroot powder or all-purpose flour as a thickening agent for the glaze. Adjust quantities as needed to achieve the desired consistency.

Can I make this dish in advance?

While the pork chops are best enjoyed fresh, you can prepare the glaze ahead of time and store it in the refrigerator. Simply reheat and apply it to the cooked pork chops when ready to serve.

Nutrition

This dish is not only delicious but also offers a good balance of protein and flavors. With lean pork chops and a flavorful glaze, it’s a healthier choice for a satisfying meal. To keep it light, pair it with a fresh green salad and polenta.

Conclusion

These glazed pork chops are a delightful homage to traditional family meals, blending comfort and sophistication in every bite. Whether you’re cooking for a special occasion or just a weeknight dinner, this recipe promises to deliver a flavorful and satisfying meal. So, gather your ingredients, follow the simple steps, and enjoy the irresistible taste of glazed pork chops that are sure to become a staple in your culinary repertoire. Bon appétit!

Related update: Glazed pork chops

Carrot Cake Muffin Cookies | Made by Meaghan Moineau

Carrot Cake Muffin Cookies

Intro

There’s something truly comforting about the aroma of freshly baked goods wafting through the house. It takes me back to long Sunday afternoons spent in my grandmother’s kitchen, her laughter mingling with the sound of the mixer as she prepared her famous carrot cake. Inspired by those cherished memories, I’ve transformed that classic recipe into delightful Carrot Cake Muffin Cookies. These cookies capture the essence of a carrot cake but come in a convenient, delightful cookie form. Perfect for a cozy afternoon snack or a quick treat on the go, they’re sure to become a favorite in your household too.

Why You’ll Love It

Carrot Cake Muffin Cookies are the epitome of comfort food. They offer the wholesome goodness of a muffin with the convenience of a cookie. Here’s why you’ll adore them:

  • Flavorful: The perfect balance of sweet and spice, these cookies are brimming with the warm flavors of cinnamon and ginger.
  • Nutritious: Made with whole wheat pastry flour and packed with carrots, these cookies are a healthier treat option.
  • Versatile: Perfect for breakfast, a snack, or dessert. They’re a delicious way to satisfy your sweet tooth any time of the day.
  • Easy to Make: With simple ingredients and straightforward instructions, these cookies are a breeze to prepare.

Ingredients

  • 1/2 cup butter, softened
  • 1 cup packed brown sugar
  • 1/4 cup maple syrup
  • 1 teaspoon baking soda
  • 1 teaspoon ground cinnamon
  • 1/2 teaspoon ground ginger
  • 1/4 teaspoon salt
  • 1 large egg
  • 1/2 cup unsweetened applesauce
  • 1 teaspoon vanilla extract
  • 1 cup whole wheat pastry flour
  • 1 cup white whole wheat flour
  • 1 cup shredded carrots
  • 1/2 cup raisins
  • 1/2 cup chopped walnuts
  • Turbinado sugar for sprinkling

Instructions

  1. Preheat your oven to 350°F (175°C).
  2. In a large bowl, beat the softened butter with an electric mixer on medium speed for 30 seconds.
  3. Add the brown sugar, maple syrup, baking soda, cinnamon, ginger, and salt. Beat until combined.
  4. Beat in the egg, applesauce, and vanilla extract until well incorporated.
  5. Gradually beat in as much of the flour as you can with the mixer. Stir in any remaining flour using a spatula or wooden spoon.
  6. Fold in the shredded carrots, raisins, and walnuts just until combined.
  7. Drop dough by slightly rounded teaspoons 2 inches apart onto an ungreased cookie sheet.
  8. Sprinkle the tops with Turbinado sugar for extra crunch and sweetness.
  9. Bake for 8 to 10 minutes or until the edges are firm.
  10. Transfer the cookies to a wire rack and let them cool completely.

Tips

To ensure your Carrot Cake Muffin Cookies turn out perfectly each time, consider these helpful tips:

  • Grate the Carrots Finely: For the best texture, make sure to grate your carrots finely. This helps them blend seamlessly into the cookie dough.
  • Use Fresh Ingredients: Fresh spices and a good quality vanilla extract can make a significant difference in the flavor profile of your cookies.
  • Room Temperature Ingredients: Make sure your butter and egg are at room temperature to ensure even mixing.

Variations & Substitutions

One of the joys of baking is making a recipe your own. Here are some variations and substitutions you can try:

  • Gluten-Free Option: Substitute the whole wheat flours with a gluten-free flour blend to make these cookies gluten-free.
  • Nut-Free Version: Omit the walnuts if you have a nut allergy, or replace them with sunflower seeds for a similar crunch.
  • Extra Add-Ins: Add shredded coconut or a handful of dark chocolate chips for a different twist.

Storage

To keep your Carrot Cake Muffin Cookies fresh and delicious, store them in an airtight container at room temperature for up to one week. For longer storage, freeze the cookies in a single layer on a baking sheet, then transfer them to a freezer-safe bag or container. They can be frozen for up to three months. Thaw at room temperature before serving.

FAQ

Can I use regular flour instead of whole wheat flour?

Yes, you can substitute all-purpose flour for the whole wheat pastry flour and white whole wheat flour if you prefer. Keep in mind that using all-purpose flour may slightly alter the texture and nutritional profile of the cookies.

Can I omit the raisins or walnuts?

Absolutely! If you’re not a fan of raisins or walnuts, you can leave them out or replace them with another ingredient, such as dried cranberries or pecans, for a different flavor twist.

How do I know when the cookies are done?

The cookies are done when the edges are firm, and the tops have a light golden hue. They may appear slightly soft in the center, but they will firm up as they cool on the wire rack.

Nutrition

While these cookies are a treat, they’re also packed with wholesome ingredients that offer nutritional benefits. Carrots provide vitamin A, raisins add natural sweetness and fiber, and walnuts contribute healthy fats. Each cookie is a delightful way to indulge without guilt.

Conclusion

Carrot Cake Muffin Cookies are a delightful fusion of tradition and convenience, bringing the beloved flavors of carrot cake into a compact, portable form. Whether you’re enjoying them with your morning coffee or sharing them with friends and family, these cookies are sure to bring warmth and joy to any occasion. Just like my grandmother’s kitchen, let these cookies fill your home with sweet memories and the comforting aroma of love. Happy baking!

Related update: Carrot Cake Muffin Cookies

Related update: Green Monster Ice Pops

Related update: Pumpkin French Toast

Avocado Chicken Salad | Made by Meaghan Moineau

Avocado Chicken Salad

Intro

There’s something incredibly comforting about a hearty salad that satisfies both the taste buds and the soul. This Avocado Chicken Salad is more than just a meal; it’s a journey back to my grandmother’s sunny kitchen, where the aroma of freshly cooked chicken and the zest of lime filled the air. I remember sitting at her wooden table, the afternoon sun streaming through the windows, eagerly awaiting the delightful concoction she would prepare. With each bite, I felt wrapped in warmth and love. This recipe is my attempt to recreate that magic and share it with you.

Why You’ll Love It

This Avocado Chicken Salad is a delightful blend of flavors and textures that will leave you craving more. Here’s why you’ll love it:

  • Quick and Easy: This recipe is perfect for a busy weekday lunch or a light dinner. It comes together in under 30 minutes!
  • Healthy and Nutritious: Packed with protein from the chicken and healthy fats from the avocado, it’s a balanced meal that supports a healthy lifestyle.
  • Flavorful: The combination of creamy avocado, tender chicken, and fresh lime juice creates a refreshing and satisfying dish.
  • Versatile: It’s perfect on its own, or you can serve it with crusty bread or in a wrap for a more filling option.

Ingredients

  • 2 ripe avocados
  • 1 cup cherry tomatoes
  • 2 tablespoons extra virgin olive oil
  • 2 limes, juiced
  • 2 tablespoons mayonnaise
  • Black pepper to taste
  • 4 cups shredded mixed salad greens
  • 1 skinless boneless chicken breast

Instructions

  1. Season the chicken breast with a little salt and pepper.
  2. Place the chicken in a pot of boiling water and cook until done, approximately 12-15 minutes.
  3. Remove the chicken from the water and allow it to cool, then cut into cubes and set aside.
  4. Cut the avocados into cubes.
  5. In a large bowl, combine the mixed salad greens with olive oil and lime juice. Toss well.
  6. Divide the mixed salad into two serving bowls.
  7. Evenly distribute the avocado cubes, chicken, and cherry tomatoes over the salad in each bowl.
  8. Drizzle mayonnaise and sprinkle a dash of black pepper over the salad.
  9. Serve immediately and enjoy!

Tips

  • Ripe Avocados: Make sure to use ripe avocados for the best texture. They should yield slightly when pressed.
  • Perfectly Cooked Chicken: To ensure the chicken is cooked perfectly, use a meat thermometer. The internal temperature should reach 165°F (74°C).
  • Fresh Ingredients: Use fresh lime juice and high-quality olive oil for the best flavors.

Variations & Substitutions

This salad is wonderfully versatile. Here are some ideas to make it your own:

  • Spicy Kick: Add a pinch of cayenne pepper or some sliced jalapeños for a spicy version.
  • Herbs: Fresh herbs like cilantro or basil can add an extra layer of flavor.
  • Vegan Option: Replace chicken with chickpeas and use vegan mayonnaise to make it plant-based.
  • Cheesy Delight: Sprinkle some feta or goat cheese for added creaminess.

Storage

This salad is best enjoyed fresh. However, if you have leftovers, store them in an airtight container in the refrigerator for up to two days. Keep the salad dressing separate if possible to prevent the greens from becoming soggy.

FAQ

Can I use grilled chicken instead of boiled?

Absolutely! Grilled chicken adds a smoky flavor to the salad and works perfectly. Just ensure it’s cooked through and cooled before cutting into cubes.

What can I use instead of mayonnaise?

If you’re not a fan of mayonnaise, you can substitute it with Greek yogurt or a light vinaigrette for a different but equally delicious taste.

Nutrition

This Avocado Chicken Salad is not only delicious but also nutritious. It’s high in protein and healthy fats, making it a great option for a balanced meal. Avocados are a great source of vitamins C, E, K, and B-6, as well as riboflavin, niacin, folate, pantothenic acid, magnesium, and potassium. Remember, nutritional values can vary based on the specific ingredients and quantities used.

Conclusion

This Avocado Chicken Salad is a celebration of fresh, wholesome ingredients and simple preparation. It’s a dish that brings a touch of nostalgia and comfort with every bite. Whether you’re enjoying it for lunch, dinner, or a gathering with friends, it’s sure to impress with its vibrant flavors and satisfying texture. I hope it becomes a cherished favorite in your home, just as it is in mine. Enjoy your culinary journey!

Related update: Avocado Chicken Salad

Related update: Best Baked Macaroni and Cheese

Pittata – Pizza Frittata | Made by Meaghan Moineau

Pittata – Pizza Frittata: A Delicious Twist on Classic Breakfast

Intro

Growing up, Sunday mornings were a sacred time in our household. The aroma of freshly brewed coffee mingled with the sounds of sizzling bacon, creating a comforting symphony that signaled the start of a leisurely day. My mother, with her extraordinary culinary skills, would whisk together the most delightful dishes, but there was one that always stood out – the pittata. A clever blend of pizza and frittata, this dish was the embodiment of indulgence and creativity. Today, I’m thrilled to share this cherished recipe with you, bringing a piece of my family tradition to your kitchen.

Why You’ll Love It

The pittata is a versatile dish that combines the best of two worlds: the savory satisfaction of pizza and the fluffy, protein-packed delight of a frittata. It’s perfect for breakfast, brunch, or even a light dinner, offering a filling meal that’s both quick to prepare and utterly delicious. Whether you’re hosting a gathering or simply looking to treat yourself, this dish is sure to impress with its simple ingredients and depth of flavor.

Ingredients

  • 6 large eggs
  • 1/4 cup fresh basil, chopped
  • 1/4 cup milk (optional)
  • 1/2 cup grated parmesan cheese
  • 1/4 cup sliced pepperoni
  • 1/2 cup shredded mozzarella cheese
  • Salt and pepper to taste
  • Cooking fat (e.g., olive oil, butter)

Instructions

  1. Preheat your oven to ~450°F (230°C), using the top heat setting only.
  2. On the stove, heat your choice of cooking fat in a large oven-safe skillet over medium heat.
  3. In a bowl, beat the eggs with milk, salt, pepper, and any herbs or spices you desire.
  4. Add any additional ingredients (except cheese) to the skillet. For this recipe, we keep it simple, but feel free to include cooked or quick-cooking vegetables like bell peppers.
  5. Pour the egg mixture into the skillet, tilting it to evenly distribute around any add-ins.
  6. Distribute the shredded mozzarella cheese and pepperoni slices over the egg mixture.
  7. Allow the eggs to cook on the stove until the edges are set, leaving the center slightly jiggly.
  8. Generously top with parmesan cheese.
  9. Transfer the skillet to the preheated oven and bake until the eggs are puffed, browned, and the center is firm.
  10. Remove from the oven and let the pittata cool for a couple of minutes before slicing into wedges.

Tips

For the best results, ensure that your skillet is well-greased to prevent sticking. Keep an eye on the pittata as it bakes; it can go from perfectly puffed to overcooked quickly. Use a toothpick to check that the center is set if you’re unsure. Lastly, let it rest slightly before serving; this makes cutting it into neat wedges much easier.

Variations & Substitutions

One of the joys of a pittata is its adaptability. Feel free to experiment with different herbs, spices, or cheeses. Swap pepperoni for sausage, or go vegetarian with mushrooms and spinach. For a dairy-free option, skip the milk and use a plant-based cheese alternative. The possibilities are endless, ensuring every pittata is a unique creation.

Storage

Store any leftover pittata in an airtight container in the refrigerator for up to three days. To reheat, warm it in the oven or a skillet over low heat until heated through, or microwave individual slices for about 30 seconds. For longer storage, freeze individual portions and reheat directly from frozen for a quick and easy meal.

FAQ

Can I make the pittata ahead of time?

Yes, you can prepare the pittata a day in advance. Simply follow the instructions until baking, then cover and refrigerate the skillet. When ready to bake, allow it to come to room temperature before placing it in the oven.

What can I serve with pittata?

Pittata pairs beautifully with a simple green salad, fresh fruit, or crusty bread. For a heartier meal, consider serving it with roasted potatoes or a side of bacon or sausage.

Is there a way to make it spicier?

For a spicier kick, add crushed red pepper flakes, diced jalapeños, or a splash of your favorite hot sauce to the egg mixture before cooking.

Nutrition

While the exact nutritional content will vary with portion sizes and specific ingredients used, a typical slice of pittata (1/6 of the whole) provides approximately 200 calories, 15g of protein, and 15g of fat, making it a hearty, satisfying dish that’s also relatively low in carbohydrates.

Conclusion

The pittata is more than just a meal; it’s a nod to creativity and the joy of cooking. Whether you’re reliving cherished memories or creating new ones, this dish is sure to become a staple in your recipe repertoire. I hope you find as much comfort and joy in making and sharing this dish as I have over the years. Bon appétit!

Related update: Pittata – Pizza Frittata

Related update: Mixed Berry Yogurt with Almonds

Pork Menudo | Made by Meaghan Moineau

Pork Menudo: A Filipino Comfort Dish

Intro

Pork Menudo has always held a special place at our family dinners. I remember my grandmother making it every Sunday, the aroma wafting through the house even before we reached the doorstep. She would prepare it with such care, adding a pinch of nostalgia to every bite. This dish is a quintessential part of Filipino cuisine, embodying the warmth and comfort of home. It’s a recipe that’s been passed down through generations, each adding their own twist. Today, I’m excited to share this beloved recipe with you, hoping it brings the same joy and comfort to your table.

Why You’ll Love It

There are so many reasons to fall in love with Pork Menudo. First, it’s a hearty and filling dish that’s perfect for any occasion, from casual family dinners to festive celebrations. The combination of savory pork, sweet raisins, and rich liver creates a symphony of flavors that dance on your taste buds. Additionally, it’s a versatile recipe that can be easily adapted to suit your preferences or dietary needs. Plus, the ingredients are simple and readily available, making it an accessible dish for home cooks of all skill levels.

Ingredients

  • 1 red bell pepper, diced
  • 2 tablespoons butter
  • 1 cup diced carrots
  • 1 chorizo, sliced
  • 1 cup cooked garbanzo beans
  • 4 cloves garlic, minced
  • 2 tablespoons oil
  • 1 onion, chopped
  • 1 cup frozen green peas
  • 1 bell pepper, diced
  • 1/2 pound pork livers, chopped
  • 1 pound pork cubes
  • 2 cups diced potatoes
  • 1/4 cup raisins
  • Salt, to taste
  • 2 tomatoes, chopped

Instructions

  1. Heat your wok or big kawali. Make sure it’s hot before you put oil.
  2. Fry the potatoes until half-cooked. Set aside.
  3. On the same pan, add butter and garlic. Do not burn the garlic.
  4. Add the pork, tomatoes, onions, and bell pepper. Add salt and pepper to taste. You can also add 1 pork cube for a richer flavor.
  5. Reduce to low heat. Juices will eventually come out from the vegetables so no need to add water.
  6. Cover, stirring occasionally. Simmer until pork is tender or until the liquid has almost dried up leaving a thick sauce.
  7. Add the liver, cover for about 5 minutes. I’m adding the liver at a later part because we don’t want to overcook it. Liver cooks fast and can be tough if overdone.
  8. Add the potatoes, carrots, green peas, and raisins (and the rest of the ingredients, if any).
  9. Simmer for 15 more minutes stirring occasionally.
  10. Serve with steamed rice.

Tips

For the best Pork Menudo, use fresh pork and liver to ensure the meat retains its flavor and tenderness. When frying the potatoes, ensure they are golden brown to add texture. Don’t rush the simmering process; allowing the pork to cook slowly ensures it absorbs all the rich flavors. Lastly, taste and adjust the seasoning as needed to suit your palate.

Variations & Substitutions

If you’re not a fan of liver, you can substitute it with chicken gizzards or simply omit it. For a vegetarian twist, replace the pork with tofu and add more vegetables like zucchini or eggplant. You can also swap the raisins for dried apricots if you prefer a different kind of sweetness. If you want a spicier kick, include a chopped chili pepper.

Storage

Pork Menudo can be stored in an airtight container in the refrigerator for up to 3 days. To reheat, simply place it in a pot over low heat until warmed through. You can also freeze it for up to a month, but be sure to allow it to cool completely before freezing to maintain the texture and flavor.

FAQ

Can I make Pork Menudo in advance?

Yes, Pork Menudo is a great make-ahead dish. In fact, it often tastes better the next day as the flavors have more time to meld together. Simply store it in the fridge and reheat before serving.

What can I serve with Pork Menudo?

Pork Menudo is traditionally served with steamed white rice, but you can pair it with garlic fried rice for an extra flavor boost. For a complete meal, serve it alongside a fresh green salad or pickled vegetables.

Nutrition

This recipe serves approximately 4 people. Each serving contains roughly 400 calories, 20g of fat, 30g of carbohydrates, and 25g of protein. It’s a hearty dish that provides a good balance of macronutrients.

Conclusion

Pork Menudo is more than just a dish; it’s a culinary embrace, a reminder of home, and a celebration of Filipino culture. Whether you’re enjoying it for the first time or it’s been a staple in your kitchen for years, I hope this recipe brings warmth and satisfaction to your dining experience. Gather your loved ones, serve it with a smile, and enjoy every mouthful of this delicious, comforting dish. Happy cooking!

Related update: Pork Menudo

Related update: Pittata - Pizza Frittata

chilli chicken | Made by Meaghan Moineau

Chilli Chicken: A Spicy Delight to Warm Your Heart

Intro

Growing up, there was always a dish that brought a gleam to my eyes and warmth to my heart: my grandmother’s Chilli Chicken. I remember the tantalizing aroma wafting through her cozy kitchen on chilly evenings, drawing us in like moths to a flame. The sizzle of the chicken hitting the hot pan was music to our ears, and her special blend of spices was the magic that made it all come together. Today, I’m thrilled to share this cherished recipe with you, so you too can bring a touch of spice and nostalgia to your home.

Why You’ll Love It

If you’re a fan of bold flavors and a little heat, this Chilli Chicken recipe is sure to become a favorite in your household. Not only does it pack a punch with its spicy kick, but it’s also incredibly versatile and can be customized to suit your taste preferences. Perfect for a cozy family dinner or a festive gathering, this dish is a surefire crowd-pleaser. Plus, it’s a great way to introduce a bit of culinary adventure into your weeknight meals with minimal fuss.

Ingredients

  • 2 boneless chicken breasts, cut into bite-sized pieces
  • 1 bell pepper / capsicum, sliced
  • 1 onion, sliced
  • 2 green chilies, slit
  • 2 tablespoons corn flour
  • 2 teaspoons red chili powder
  • 1 teaspoon pepper powder
  • 3 tablespoons oil
  • 2 tablespoons soya sauce
  • 2 tablespoons chilli sauce
  • 1 tablespoon vinegar
  • 1 tablespoon sugar
  • 2 cloves garlic, minced
  • Spring onions, chopped, for garnish

Instructions

  1. Find complete instructions on Swasthi’s recipes.

Tips

For the best results, use fresh ingredients wherever possible. Make sure to cut the chicken and vegetables into uniform pieces to ensure even cooking. Don’t overcrowd the pan when frying the chicken, as this will steam rather than sear the meat, resulting in a loss of texture. Lastly, taste as you go—adjust the seasoning and spice levels to suit your palate.

Variations & Substitutions

Feel free to experiment with this recipe by adding your favorite vegetables such as broccoli, carrots, or mushrooms. If you prefer a less spicy version, reduce the amount of chili powder or omit the green chilies. For a gluten-free alternative, use tamari instead of soy sauce. Vegetarian? Swap out the chicken for paneer or tofu for a delightful meat-free version.

Storage

Chilli Chicken can be stored in an airtight container in the refrigerator for up to three days. For longer storage, you can freeze it for up to a month. To reheat, simply thaw overnight in the refrigerator and gently warm in a pan over medium heat, adding a splash of water if necessary to maintain its saucy consistency.

FAQ

Can I make this dish ahead of time?

Absolutely! Chilli Chicken can be prepared ahead of time and stored in the refrigerator. The flavors will meld beautifully, making it even more delicious the next day. Just reheat and serve.

What can I serve with Chilli Chicken?

This dish pairs wonderfully with steamed rice, fried rice, or noodles. You could also serve it with a simple side of stir-fried vegetables for a complete meal.

Is there a way to reduce the spiciness?

If you’re sensitive to heat, you can tone down the spiciness by reducing the amount of chili powder and green chilies. Adding a little more sugar can also help balance the heat.

Nutrition

Chilli Chicken is a protein-rich dish with a moderate amount of carbohydrates and fats. The exact nutritional values will depend on the specific quantities and brands of ingredients used, but on average, a serving provides approximately:

  • Calories: 250
  • Protein: 20g
  • Carbohydrates: 15g
  • Fat: 10g

Keep in mind that nutritional values can vary, so it’s always a good idea to check the ingredients you use if you’re tracking your intake.

Conclusion

Chilli Chicken is more than just a dish; it’s an experience that brings people together with its vibrant flavors and comforting warmth. Whether you’re recreating cherished memories or forging new ones, this recipe is sure to become a staple in your culinary repertoire. So roll up your sleeves, gather your ingredients, and embark on a flavorful journey that promises to delight your taste buds and warm your heart. Enjoy every bite!

Related update: chilli chicken

Related update: Moroccan Carrot Soup

Liz’s Lomo Saltado | Made by Meaghan Moineau

Liz’s Lomo Saltado

Intro

Welcome to my kitchen! Today, I’m sharing a recipe that’s close to my heart – Liz’s Lomo Saltado. This dish takes me back to my childhood, where Sundays were reserved for family gatherings around a table brimming with laughter, love, and delicious food. My grandmother, Liz, would prepare this Peruvian classic with such passion and precision, ensuring every bite was a burst of flavor. Her secret? A perfect balance of spices and fresh ingredients. I hope this recipe brings you a taste of Peru and a touch of nostalgia, just as it does for me.

Why You’ll Love It

Lomo Saltado is a dish that beautifully combines the flavors of Peru with Asian influences. You’ll love it because:

  • Simple and Quick: This recipe comes together in just about 30 minutes, making it a perfect weeknight meal.
  • Flavorful Fusion: The blend of soy sauce, cumin, and red wine vinegar creates an irresistible savory and tangy profile.
  • Versatile: It’s perfect for meat lovers but can be adapted for vegetarians too.
  • Colorful Presentation: The vibrant mix of peppers and tomatoes makes this dish as visually appealing as it is delicious.

Ingredients

  • 1 lb beef tenderloin, cut into chunks
  • 1 tsp cumin
  • 1 tsp complete seasoning
  • 1 green bell pepper, sliced
  • 1 red bell pepper, sliced
  • 1 yellow onion, sliced
  • 2 garlic cloves, minced
  • 1 jalapeno pepper, minced
  • 2 tbsp red wine vinegar
  • 3 tbsp soy sauce
  • 2 plum tomatoes, cut into chunks
  • 1 bag of frozen french fries
  • Fresh cilantro, chopped for garnish

Instructions

  1. Prepare the frozen french fries according to package directions. Set aside when complete and keep warm.
  2. Heat a large wok or skillet over medium-high heat.
  3. Sauté the onions and bell peppers until translucent, about 10 minutes.
  4. Add the garlic and jalapeno and cook for an additional minute. Mix everything until combined.
  5. Add the beef chunks, cumin, complete seasoning, soy sauce, and red wine vinegar. Mix well and cook until beef is no longer pink, about 5 to 7 minutes.
  6. Add the tomato chunks, cover, and cook for an additional 5 minutes.
  7. When ready to serve, add the french fries and toss everything gently together.
  8. Serve lomo saltado over a bed of white rice and garnish with freshly chopped cilantro leaves. Enjoy with aji sauce on the side.

Tips

  • For the best results, use fresh and high-quality beef tenderloin. The tenderness of the meat is key to a great Lomo Saltado.
  • Don’t overcook the vegetables. They should remain slightly crisp to add texture to the dish.
  • Feel free to adjust the amount of jalapeno based on your spice preference. You can remove the seeds to lessen the heat.

Variations & Substitutions

If you’re looking to make this recipe your own, consider these variations and substitutions:

  • Vegetarian Option: Replace beef with mushrooms or tofu. You can still use the same marinade and cooking process.
  • Different Meats: Try using chicken or pork if you prefer a different protein.
  • Alternative Peppers: Use poblano or Anaheim peppers instead of bell peppers for a different flavor profile.

Storage

Leftovers can be stored in an airtight container in the refrigerator for up to 3 days. To reheat, warm in a skillet over medium heat until heated through. It’s best to keep the fries separate until serving to maintain their texture.

FAQ

Can I make Lomo Saltado in advance?

Yes, you can prepare the meat and vegetable mixture in advance and store it in the refrigerator for up to 24 hours. Reheat before serving and add the fries fresh for the best taste and texture.

What can I serve with Lomo Saltado?

Lomo Saltado is traditionally served with white rice, but you can also serve it with quinoa or a side salad for a lighter option. Aji sauce is a popular accompaniment that adds a nice spicy kick.

Nutrition

This dish is a good source of protein and vitamins from the fresh vegetables. However, if you’re watching your sodium intake, consider using a low-sodium soy sauce.

Conclusion

Liz’s Lomo Saltado is more than just a meal; it’s a celebration of flavors and cultures coming together in a single dish. Whether you’re making it for a family gathering or a cozy dinner at home, this recipe promises to deliver both warmth and satisfaction. I hope you enjoy making and eating it as much as I do. Don’t forget to share your experience and let us know how it turned out!

Related update: Liz’s Lomo Saltado

Related update: chilli chicken

Marinated Flat Iron Steak | Made by Meaghan Moineau

Marinated Flat Iron Steak: A Flavorful Delight

Intro

There’s something incredibly nostalgic about the sizzle of a steak hitting a hot grill. Growing up, summer evenings were often spent in the backyard with my family, gathered around the barbecue as the aroma of marinated meat filled the air. My dad would always let me help prepare the marinade, and I remember the joy of mixing the ingredients together, the sharp tang of balsamic vinegar mixing with the earthy aroma of fresh herbs. This Marinated Flat Iron Steak recipe brings back those cherished memories and promises to create new ones for your family and friends.

Why You’ll Love It

This Marinated Flat Iron Steak recipe is a delicious blend of simplicity and flavor, perfect for weeknight dinners or weekend gatherings. Here’s why you’ll love it:

  • Quick and Easy: With a straightforward marinade and minimal prep time, this recipe fits perfectly into busy schedules.
  • Flavorful: The combination of balsamic vinegar, dijon mustard, and fresh herbs infuses the steak with a vibrant taste.
  • Versatile: Whether you’re hosting a summer barbecue or looking for a cozy indoor dinner, this steak is a crowd-pleaser.
  • Memorable: Each bite is a reminder of sunny days and joyful gatherings, making it not just a meal, but a shared experience.

Ingredients

  • Balsamic vinegar
  • Dijon mustard
  • Flat iron steak
  • Garlic cloves
  • Ginger
  • Fresh herbs: rosemary
  • Lemon zest
  • Lemons
  • Mayonnaise
  • Olive oil
  • Salt and pepper

Instructions

  1. Cut the flat iron steak lengthwise to form two equal strips.
  2. In a large baking pan or Ziploc bag, combine balsamic vinegar, dijon mustard, minced garlic, grated ginger, chopped fresh rosemary, lemon zest, juice of the lemons, mayonnaise, olive oil, salt, and pepper to form the marinade.
  3. Add the steak strips to the marinade, ensuring they are well-coated. Cover, or seal the bag, and place in the refrigerator for at least an hour, or overnight for deeper flavor.
  4. Preheat your BBQ to high heat. Once hot, place the marinated steaks on the grill.
  5. Cover and cook for 3 minutes on one side.
  6. Flip the steaks and cook the other side for another 3 minutes, or until they reach your desired level of doneness.
  7. Remove from the grill and let the steaks rest for 5 minutes before slicing and serving.

Tips

To ensure your steak is perfectly cooked and flavorful, consider these tips:

  • Marinate Longer: For a more intense flavor, let the steak marinate overnight.
  • Room Temperature: Allow the steak to come to room temperature before grilling for even cooking.
  • Rest the Meat: Letting the steak rest after cooking will help retain its juices, ensuring a juicy bite.

Variations & Substitutions

This recipe is wonderfully adaptable to suit your tastes and dietary needs:

  • Herbs: Swap rosemary for thyme or oregano for different herbal notes.
  • Citrus Twist: Use lime or orange zest instead of lemon for a different citrus profile.
  • Spicy Kick: Add a pinch of red pepper flakes to the marinade for some heat.
  • Dietary Adjustments: For a dairy-free version, ensure your mayonnaise is plant-based.

Storage

If you have leftovers, store them properly to maintain their flavor:

  • Refrigeration: Store cooked steak in an airtight container in the refrigerator for up to 3 days.
  • Freezing: You can freeze the cooked steak for up to 2 months. Wrap it tightly in plastic wrap and place in a freezer-safe bag.
  • Reheating: Reheat gently in a skillet over medium heat or in the oven to prevent the steak from drying out.

FAQ

Can I use a different cut of steak?

Absolutely! While flat iron steak is great due to its tenderness and flavor, you can use this marinade with other cuts like flank steak, skirt steak, or even ribeye. Just adjust the cooking time based on the thickness and type of steak.

What side dishes pair well with this steak?

This steak pairs wonderfully with a variety of sides. Consider serving it with grilled vegetables, a fresh garden salad, or creamy mashed potatoes for a complete meal.

How do I know when the steak is done?

Use a meat thermometer to check the internal temperature. For medium-rare, aim for 135°F (57°C), for medium 145°F (63°C), and for well-done, 160°F (71°C). Remember that the steak will continue to cook a bit as it rests.

Nutrition

While the exact nutrition can vary based on the size of your steak and the exact amount of marinade, a typical serving of this marinated flat iron steak provides essential nutrients like protein, healthy fats from olive oil, and vitamins from the herbs and lemon. It’s a wholesome choice that fits well into a balanced diet.

Conclusion

Creating delicious meals that bring people together is a true joy, and this Marinated Flat Iron Steak recipe is perfect for just that. With its rich flavors and simple preparation, it’s sure to become a favorite at your table, just as it has been at mine. Whether you’re reminiscing about past gatherings or creating new memories, this dish is a wonderful way to celebrate the joy of cooking and sharing good food with loved ones.

Related update: Marinated Flat Iron Steak

Related update: Swiss Chard Wraps

Related update: Baked Tortellini In Red Sauce

Chicken Suya | Made by Meaghan Moineau

Deliciously Spiced Chicken Suya: A Taste of West Africa

Intro

Chicken Suya is a delightful and spicy grilled chicken recipe originating from West Africa, particularly Nigeria. This dish holds a special place in my heart, as it reminds me of warm summer evenings in Lagos, where the aroma of sizzling suya from roadside vendors filled the air. As a child, my family and I would often take strolls through the bustling city streets, stopping to indulge in this delectable treat. The succulent, spicy flavor of Chicken Suya has been a cherished part of my culinary journey, and I’m thrilled to share this recipe with you.

Why You’ll Love It

There are countless reasons to fall in love with Chicken Suya. Here are just a few:

  • Bold Flavors: The suya spice blend is a powerhouse of taste, combining ground peanuts, ginger, garlic, and chili powder to create a savory and slightly spicy profile that is utterly irresistible.
  • Simple Ingredients: Despite its complex flavor, Chicken Suya requires only a handful of ingredients that you likely already have in your pantry.
  • Versatile Dish: This dish can serve as a main course, appetizer, or even a snack. It’s perfect for gatherings, barbecues, or a cozy night in.
  • Healthy and Satisfying: Grilling the chicken keeps it lean, while the spices provide a burst of nutrition and taste.

Ingredients

  • 2-3 tablespoons suya spice
  • 1 whole chicken, cut into parts
  • 1 teaspoon chili powder
  • 2 tablespoons groundnut oil (or any cooking oil)
  • 2 seasoning cubes
  • 1 onion, sliced
  • 2 tomatoes, sliced
  • Salt to taste

Instructions

  1. Preheat your oven to 500°F (260°C).
  2. Wash the chicken pieces thoroughly and pat them dry with a paper towel.
  3. In a large bowl, combine the suya spice, chili powder, seasoning cubes, and salt. Mix well.
  4. Add the chicken to the bowl, ensuring that each piece is generously coated with the spice mixture.
  5. Drizzle the groundnut oil over the seasoned chicken and give it a good mix to ensure even distribution.
  6. Arrange the chicken pieces on a baking sheet lined with aluminum foil.
  7. Place the baking sheet in the preheated oven and grill for 40 minutes. Be sure to check the chicken occasionally, flipping it to ensure it cooks evenly on both sides.
  8. Once the chicken is cooked through and has a beautiful char, remove it from the oven.
  9. Serve hot, garnished with sliced onions, tomatoes, and an extra sprinkle of suya spice for added flavor.

Tips

  • For an authentic taste, try using a grill instead of an oven. The smoky flavor from the charcoal enhances the suya’s taste.
  • If you prefer a milder heat, adjust the amount of chili powder to suit your taste.
  • Rest the chicken for a few minutes after grilling to allow the juices to redistribute, ensuring a moist and flavorful bite.

Variations & Substitutions

If you’re looking to shake things up, consider these variations:

  • Protein Swap: While chicken is traditional, you can use beef, goat meat, or even tofu for a vegetarian option.
  • Nut-Free: If you have a peanut allergy, substitute the suya spice with a nut-free spice blend.
  • Additional Veggies: Add bell peppers or mushrooms to the grill for an extra layer of flavor and texture.

Storage

Leftover Chicken Suya can be stored in an airtight container in the refrigerator for up to 3 days. To reheat, place the chicken in a preheated oven at 350°F (175°C) for about 10 minutes or until warmed through. You can also freeze the cooked chicken for up to 2 months. Thaw overnight in the refrigerator before reheating.

FAQ

Can I prepare the suya spice blend at home?

Absolutely! To make your own suya spice blend, you can combine roasted peanuts, ground ginger, garlic powder, onion powder, paprika, and chili powder. Blend them together until you reach a fine consistency. Store in an airtight jar for future use.

How can I make my Chicken Suya extra crispy?

For an extra crispy texture, finish the grilled chicken under the broiler for a few minutes. Keep a close eye on it to prevent burning, and you’ll achieve a delightful crunch.

Nutrition

Chicken Suya is a nutritious option rich in protein and flavor. While exact nutritional values depend on portion sizes, a typical serving provides:

  • Calories: Approximately 250-300 per serving
  • Protein: 25-30g
  • Fat: 15-20g
  • Carbohydrates: 5-10g

It’s a great choice for those looking to maintain a balanced diet without sacrificing taste.

Conclusion

Chicken Suya is more than just a meal; it’s a culinary experience that transports you to the vibrant streets of West Africa. With its bold flavors and tantalizing aroma, it’s sure to become a favorite in your household. Whether you’re hosting a gathering or enjoying a quiet dinner at home, this dish promises to deliver satisfaction with every bite. I hope you enjoy making and eating this Chicken Suya as much as I do. Bon appétit!

Related update: Chicken Suya

Related update: Rotisserie Chicken and Bean Tostadas

Square Deviled Eggs | Made by Meaghan Moineau

Square Deviled Eggs: A Fun Twist on a Classic Appetizer

Intro

There is something truly delightful about deviled eggs. They are a timeless appetizer, cherished at family gatherings, holiday dinners, and picnics alike. As a child, I remember standing on a stool in my grandmother’s kitchen, watching her expertly prepare deviled eggs. The aroma of boiled eggs mingled with the tangy scent of mustard filled the air, and I was entranced by the magic of this simple dish. Today, I’m excited to share a unique twist on this classic recipe: Square Deviled Eggs. Perfect for surprising your guests or adding a touch of whimsy to your dining table, these square-shaped delights are not only fun to make but also utterly delicious!

Why You’ll Love It

Square Deviled Eggs are not just a visual treat; they also offer a delightful culinary experience. Here’s why you’ll love them:

  • Fun and Unique: The square shape adds a playful twist to the traditional deviled egg, making it a conversation starter at any gathering.
  • Kid-Friendly: The creamy filling is soft and mild, making it a hit with children and adults alike.
  • Versatile: Perfect for parties, picnics, or as a unique addition to your holiday spread.

Ingredients

  • Medium-sized cooked eggs
  • Cream cheese
  • Ham

Instructions

  1. Begin by preparing your hard-boiled eggs. Place the eggs in a saucepan and cover them with cold water.
  2. Bring the water to a boil over medium heat. Once boiling, let the eggs cook for 5 minutes.
  3. Remove the saucepan from heat and let the eggs stand covered in hot water for 10 minutes.
  4. Once cooled, peel the eggs.
  5. To create the square shape, use an Egg cuber or Square Egg Press (see note below for purchase options). Slide each peeled egg into the press and screw the top down gently, pushing the egg into the corners.
  6. Allow the eggs to cool completely before removing them from the mold. For the best results, use medium-sized eggs.
  7. For the filling, mash the egg yolks with cream cheese and finely chopped ham until smooth and creamy.
  8. Carefully fill the square-shaped egg whites with the creamy yolk mixture. Serve chilled.

Tips

Here are some tips to ensure your Square Deviled Eggs turn out perfectly every time:

  • Plan Ahead: If you plan to serve these at a party, consider investing in multiple egg cubers to save time.
  • Egg Size: Medium-sized eggs work best to fit into the egg press molds.
  • Cooling Time: Make sure the eggs are completely cooled before removing them from the mold for a perfect square shape.

Variations & Substitutions

If you’re looking to mix things up, consider these variations and substitutions:

  • Spicy Twist: Add a dash of hot sauce or sprinkle of cayenne pepper to the filling for a spicy kick.
  • Vegetarian Option: Omit the ham and add finely chopped herbs like dill or chives for a refreshing flavor.
  • Cheese Lovers: Substitute cream cheese with a sharp cheddar for an extra cheesy flavor.

Storage

Store any leftover Square Deviled Eggs in an airtight container in the refrigerator for up to two days. For best quality, consume them as soon as possible. The texture and flavor are at their peak when fresh.

FAQ

Where can I purchase an Egg cuber or Square Egg Press?

Egg cubers or square egg presses are available online through major retailers such as Amazon or specialty kitchen stores. They are an affordable and fun addition to your kitchen tools.

Can I make Square Deviled Eggs in advance?

Yes, you can prepare the eggs and filling in advance. Simply store them separately in the refrigerator and assemble just before serving.

Nutrition

Square Deviled Eggs are a nutritious appetizer option. The eggs provide a good source of protein, while cream cheese and ham add a touch of richness. For a lighter version, consider using low-fat cream cheese.

Conclusion

Square Deviled Eggs are sure to bring joy and surprise to your dining table. Whether you’re hosting a party, enjoying a picnic, or simply looking for a fun way to enjoy a classic dish, these eggs are a delightful choice. With a touch of nostalgia and a modern twist, they are perfect for all occasions. So grab your Egg cuber, invite your loved ones, and enjoy this whimsical take on an old favorite!

Related update: Square Deviled Eggs

Related update: Guacamole

Related update: Easy Thanksgiving Entertaining

Chicken Parmesan Patty- Eat As A Burger OR On Pasta | Made by Meaghan Moineau

Chicken Parmesan Patty – Eat As A Burger OR On Pasta

Intro

There’s something about the aroma of Italian seasonings and the rich, comforting taste of a classic Chicken Parmesan that brings back fond memories of family gatherings in my grandmother’s cozy kitchen. I remember the sound of laughter echoing through the house and the sight of her expertly preparing meals that would warm our hearts and fill our bellies. This Chicken Parmesan Patty recipe is a tribute to those cherished moments, offering the same delightful flavors in a versatile form. You can enjoy it nestled in a soft burger bun or served atop a bed of pasta for a delicious meal that is as comforting as it is satisfying.

Why You’ll Love It

This Chicken Parmesan Patty is perfect for those busy weeknights when you crave something delicious yet easy to prepare. The patties are packed with flavor, thanks to a mix of Italian seasoning, garlic, and onion, and they are wonderfully juicy thanks to the addition of ground chicken and egg. Plus, whether you decide to savor them as burgers or paired with pasta, these patties are sure to be a hit with the whole family. Their versatility means you can switch up your meal presentation without compromising on taste.

Ingredients

  • 1 cup whole wheat bread crumbs, divided
  • 1 egg
  • 1/2 cup fresh mozzarella, sliced
  • 2 cloves garlic, minced
  • 1 lb ground chicken
  • 2 tablespoons olive oil
  • 1 small onion, chopped and divided
  • 1/2 teaspoon pepper
  • 1 teaspoon sea salt
  • 1 teaspoon Italian seasoning blend

Instructions

  1. Preheat your oven to 400°F (200°C).
  2. In a large mixing bowl, combine the ground chicken, egg, 1/2 cup of the bread crumbs, half of the chopped onion, minced garlic, Italian seasoning, salt, and pepper.
  3. Mix the ingredients thoroughly until well combined.
  4. Shape the mixture into 6-8 patties, depending on your preferred size.
  5. Place the remaining bread crumbs on a plate and coat each patty evenly.
  6. Arrange the breaded patties on a sheet pan and drizzle them with olive oil.
  7. Bake in the preheated oven for about 20 minutes or until cooked through and golden brown.
  8. Top each patty with a slice of fresh mozzarella cheese and return to the oven for an additional 5 minutes, until the cheese is melted and bubbly.

Tips

For the best results, ensure that your patties are of even thickness so they cook uniformly. If you have time, let the patties rest in the refrigerator for about 30 minutes before cooking to help them hold their shape better. When drizzling olive oil, try to distribute it evenly to achieve a nice crispy texture on the outside.

Variations & Substitutions

If you prefer a spicier kick, add a pinch of red pepper flakes to the chicken mixture. To make a gluten-free version, substitute the whole wheat bread crumbs with gluten-free breadcrumbs. You could also experiment by adding some freshly chopped basil or parsley for an aromatic touch. For a creamier texture, mix a tablespoon of ricotta cheese into the chicken mixture before shaping the patties.

Storage

Store any leftover patties in an airtight container in the refrigerator for up to 3 days. To reheat, place them in a preheated oven at 350°F (175°C) for about 10 minutes, or until they are heated through. You can also freeze the patties for up to 2 months; just make sure to wrap them tightly in plastic wrap or aluminum foil before placing them in a freezer-safe bag.

FAQ

Can I use ground turkey instead of ground chicken?

Yes, ground turkey can be a great substitute for ground chicken in this recipe. It will yield a similar texture and flavor, and it’s just as nutritious.

How can I serve these patties as a burger?

To serve these patties as a burger, simply place them in a toasted burger bun. Top with your favorite condiments such as marinara sauce, fresh basil, or sliced tomatoes, and enjoy with a side of your choice.

What type of pasta pairs well with these patties?

These Chicken Parmesan Patties pair beautifully with a variety of pasta types. Consider serving them over spaghetti, penne, or fettuccine, topped with marinara sauce and a sprinkle of Parmesan cheese for a complete meal.

Nutrition

These patties are not only delicious but also packed with protein. Each serving contains approximately 220 calories, 15g of protein, 10g of fat, and 15g of carbohydrates. They’re a nutritious choice that fits well into a balanced diet.

Conclusion

This Chicken Parmesan Patty recipe is a delightful fusion of classic Italian flavors with modern culinary convenience. Whether you’re enjoying them as a hearty burger or a comforting pasta dish, these patties are sure to become a staple in your meal rotation. They bring the warmth and nostalgia of a cherished family recipe straight to your table, offering not just sustenance, but a taste of home. Bon appétit!

Related update: Chicken Parmesan Patty- Eat As A Burger OR On Pasta

Related update: Broccolini Quinoa Pilaf

Red Quinoa and Roasted Cauliflower Salad | Made by Meaghan Moineau

Red Quinoa and Roasted Cauliflower Salad

Intro

There’s something magical about the aroma of roasted cauliflower wafting through the kitchen. It transports me back to my grandmother’s cozy home, where the warmth of her cooking would fill every corner. She had a knack for taking simple ingredients and transforming them into something extraordinary. Inspired by her love for hearty, wholesome meals, I’ve created this Red Quinoa and Roasted Cauliflower Salad. It’s a dish that combines textures and flavors beautifully, making it a family favorite.

Why You’ll Love It

This salad is a delightful medley of nutty quinoa, sweet and chewy dried apricots, crunchy walnuts, and tangy feta cheese. The roasted cauliflower adds a savory depth, while the fresh green onions and parsley bring a burst of freshness. It’s a versatile dish that can be served warm or cold, making it perfect for any season. Whether you’re looking for a nutritious lunch, a side dish for dinner, or a potluck star, this salad fits the bill. Plus, it’s packed with protein, fiber, and healthy fats, ensuring you feel satisfied and nourished.

Ingredients

  • 1 head of cauliflower
  • 1 cup red quinoa
  • 1/2 cup walnuts, chopped
  • 1/2 cup dried apricots, chopped
  • 1/2 cup feta cheese, crumbled
  • 4 green onions, sliced
  • 1/4 cup fresh parsley, chopped
  • Salt and pepper to taste
  • Juice of 1/2 a lemon
  • 2 tablespoons olive oil

Instructions

  1. Cook the quinoa according to package directions. Set aside to cool slightly.
  2. Preheat the oven to 400°F (200°C).
  3. Cut the head of cauliflower into florets.
  4. Toss the cauliflower florets with olive oil, salt, and pepper. Arrange them on a baking sheet in a single layer.
  5. Roast the cauliflower in the preheated oven for 20 minutes or until tender and golden brown.
  6. Meanwhile, crumble the feta cheese and prepare the remaining ingredients: chop the walnuts, dried apricots, green onions, and parsley.
  7. In a large bowl, combine the cooked quinoa, roasted cauliflower, walnuts, apricots, feta cheese, green onions, and parsley.
  8. Drizzle with extra virgin olive oil and the juice from half a lemon. Toss to combine.
  9. Season with additional salt and pepper to taste.
  10. Serve immediately warm or chill in the refrigerator and serve cold.

Tips

For the best results, ensure your cauliflower florets are evenly coated in olive oil and spread out on the baking sheet to roast evenly. You can toast the walnuts for an extra layer of flavor. Simply place them in a dry skillet over medium heat, stirring frequently until fragrant. Be careful not to burn them! Finally, if you’re serving the salad cold, allow the flavors to meld by refrigerating it for at least an hour before serving.

Variations & Substitutions

This salad is highly adaptable to your preferences or dietary needs. You can swap the red quinoa for white or black quinoa, or even use farro or barley for a different grain base. If you’re not a fan of walnuts, try using almonds or pecans instead. For a vegan version, omit the feta cheese or replace it with a plant-based alternative. You can also add more veggies, like roasted cherry tomatoes or bell peppers, for extra color and nutrients.

Storage

This salad stores beautifully, making it an excellent option for meal prep. Place the salad in an airtight container and refrigerate for up to 4 days. If you’ve dressed the salad, the flavors will intensify over time, which many find delicious. However, if you prefer a fresher taste, consider storing the dressing separately and mixing it in just before serving.

FAQ

Can I make this salad ahead of time?

Absolutely! This salad is ideal for making ahead. Prepare all the components and combine them just before serving. This will keep the flavors vibrant and the textures perfect.

Is there a way to add more protein to this salad?

Yes, you can add grilled chicken, chickpeas, or tofu for additional protein. These options complement the existing flavors well and make the salad more filling.

What can I serve with this salad?

This salad is quite versatile and pairs well with grilled meats, such as chicken or fish. It’s also a great side dish for a barbecue or a potluck.

Nutrition

This Red Quinoa and Roasted Cauliflower Salad is not only delicious but also nutritious. It’s rich in plant-based protein from quinoa, healthy fats from walnuts and olive oil, and fiber from the cauliflower and dried apricots. It’s a well-rounded meal that will keep you energized and satisfied.

Conclusion

Whether you’re reminiscing about family meals or creating new memories, this Red Quinoa and Roasted Cauliflower Salad is a dish that brings people together. Its harmonious blend of flavors and textures makes it a standout choice for any occasion. I hope this recipe becomes a staple in your kitchen, just as it is in mine. Enjoy the journey of cooking and savor every bite!

Related update: Red Quinoa and Roasted Cauliflower Salad

Related update: Hush Puppies

Related update: Amaranth and Roast Veggie Salad

Harvest Hash | Made by Meaghan Moineau

Harvest Hash: A Cozy Fall Recipe

Intro

Autumn is a season that evokes a sense of warmth, comfort, and nostalgia. For me, it means gathering around the family table, sharing stories, and indulging in hearty dishes that capture the essence of fall. One of my favorite recipes during this time of year is Harvest Hash. This dish is a delightful medley of sweet potatoes, crispy bacon, caramelized onions, and honeyed apples—all roasted to perfection. I remember my grandmother preparing this dish in her cozy kitchen, the aroma filling the house and signaling that it was time to settle in for a delicious meal. Now, I’m excited to share this recipe with you, adding a modern twist to a cherished family tradition.

Why You’ll Love It

Harvest Hash is not just a meal; it’s a celebration of fall flavors. Whether you’re hosting a family dinner, looking for a festive side dish, or simply craving comfort food, this recipe is sure to impress. Here’s why you’ll love it:

  • Easy to Make: With simple ingredients and straightforward instructions, even novice cooks can master this dish.
  • Flavorful: The combination of sweet, savory, and smoky flavors creates a symphony in every bite.
  • Versatile: Enjoy it as a side dish, a main course, or add it to your brunch spread.
  • Nutritious: Packed with vitamins and minerals, it’s a healthy addition to your fall menu.

Ingredients

  • 2 medium sweet potatoes, peeled and diced
  • 4 slices of bacon, chopped
  • 1 red onion, diced
  • 2 honeycrisp apples, cored and diced
  • 3 tablespoons extra virgin olive oil (EVOO)
  • 1 teaspoon kosher salt

Instructions

  1. Preheat your oven to 400°F (200°C).
  2. In a large bowl, add the diced sweet potatoes. Drizzle with 2 tablespoons of EVOO and sprinkle with kosher salt. Toss to coat evenly.
  3. Spread the sweet potatoes on a baking sheet in a single layer. Roast in the oven until tender but not mushy, about 10-15 minutes. Remove from the oven and set aside.
  4. In a large frying pan, heat 1 tablespoon of EVOO over medium heat. Add the chopped bacon and cook until it starts to get crisp, about 5 minutes.
  5. Add the diced onion to the pan with the bacon. Sauté until the onions are soft and tender, approximately 5 minutes.
  6. Add the diced apples to the pan and cook for an additional 3-4 minutes, stirring occasionally.
  7. Stir in the roasted sweet potatoes. Cook everything together until the sweet potatoes start to get a little crisp around the edges, about 6-8 minutes.
  8. Serve immediately, perhaps alongside a juicy ham steak, and enjoy all the flavors of fall!

Tips

  • Uniform Cuts: Make sure to dice the sweet potatoes and apples evenly to ensure they cook at the same rate.
  • Crispy Bacon: For extra crispy bacon, cook it separately and sprinkle on top just before serving.
  • Adjust Seasoning: Taste as you go and adjust the seasoning to suit your preference. A pinch of cinnamon can enhance the fall flavors.

Variations & Substitutions

This recipe is versatile and can be adapted to suit different tastes and dietary needs:

  • Vegetarian: Omit the bacon and add nuts like pecans or walnuts for a crunchy texture.
  • Spicy Twist: Add a dash of cayenne pepper or crushed red pepper flakes for some heat.
  • Different Apples: Try using Granny Smith or Fuji apples for a different flavor profile.

Storage

Store any leftovers in an airtight container in the refrigerator for up to 3 days. Reheat gently on the stovetop or in the microwave before serving. Unfortunately, this dish doesn’t freeze well due to the texture changes in potatoes and apples.

FAQ

Can I make this recipe ahead of time?

Yes, you can prepare the components separately in advance. Roast the sweet potatoes and cook the bacon mixture, then combine and reheat everything just before serving.

What can I serve with Harvest Hash?

Harvest Hash pairs beautifully with roasted meats like chicken, pork, or ham. It also works well as part of a brunch spread alongside eggs and a fresh salad.

Is there a way to make this dish healthier?

To reduce fat content, you can use turkey bacon instead of regular bacon and cut back on the olive oil. Adding more vegetables like Brussels sprouts or kale can also boost the nutritional value.

Nutrition

This dish is a great source of vitamins A and C, fiber, and healthy fats. Sweet potatoes provide complex carbohydrates, while apples add natural sweetness and additional fiber. If you’re watching your sodium intake, adjust the amount of kosher salt used.

Conclusion

Harvest Hash is more than just a dish—it’s a comforting embrace of fall flavors that brings warmth and joy to your table. Whether you’re sharing it with loved ones or savoring it on a quiet evening, this recipe is sure to become a favorite in your autumn repertoire. I hope this dish brings as much joy and nostalgia to your home as it has to mine. Happy cooking!

Related update: Harvest Hash

Related update: Caramelised Onion and Mushroom Quiche

Gluten Free Quinoa and Corn Flour Crepes | Made by Meaghan Moineau

Gluten Free Quinoa and Corn Flour Crepes

Intro

Crepes have always held a special place in my heart. Growing up, Sundays were reserved for family brunches where my grandmother would whip up her famous crepes. We would gather around the kitchen, eagerly waiting for our turn to enjoy those golden, delicate pancakes. As I grew older and my dietary needs changed, I sought to recreate those cherished moments with a gluten-free twist. Enter the Gluten Free Quinoa and Corn Flour Crepes, a modern take on a timeless classic. These crepes are not only a nod to my past but also a delicious new memory in the making.

Why You’ll Love It

Our Gluten Free Quinoa and Corn Flour Crepes are a delightful blend of tradition and innovation. Here’s why you’ll fall head over heels for them:

  • Gluten-Free Goodness: Made with quinoa and corn flour, these crepes cater to those with gluten sensitivities without compromising on taste or texture.
  • Nutrient-Rich: Packed with proteins and fiber, they make for a wholesome breakfast or snack.
  • Versatile: Fill them with sweet or savory fillings, and they become the perfect canvas for any meal.
  • Easy to Make: With simple ingredients and straightforward steps, they’re perfect for beginner cooks and seasoned chefs alike.

Ingredients

  • 2 tablespoons virgin coconut oil, melted
  • 1 cup corn flour
  • 2 tablespoons ground flax seeds
  • 1 tablespoon maple syrup
  • 1 cup quinoa flour
  • 2 1/2 cups hemp milk, plus more if needed
  • 1/2 teaspoon sea salt
  • 1/4 cup tapioca flour
  • 1/4 teaspoon xanthan gum

Instructions

  1. Whisk the corn flour, quinoa flour, tapioca flour, sea salt, and xanthan gum together in a large bowl.
  2. In a separate bowl, mix the hemp milk, ground flax seeds, maple syrup, and melted coconut oil.
  3. Combine the wet ingredients with the dry ingredients, mixing gently. If the batter is too thick, add more hemp milk, a few tablespoons at a time, until you achieve a pourable consistency.
  4. Allow the batter to rest in the refrigerator for at least 30 minutes. This step is crucial for the dry ingredients to fully absorb the liquids, ensuring smooth and pliable crepes.
  5. Heat a nonstick skillet over medium heat and add a small amount of coconut oil.
  6. Pour about 1/2 cup of batter into the skillet, swirling the pan to spread the batter into a thin layer. Quickly fill any holes with additional batter.
  7. Cook until the top of the crepe looks dry, about 1 minute. Gently loosen the edges with a spatula and flip the crepe, cooking the other side for 30 to 60 seconds.
  8. Transfer the cooked crepe to a plate and keep warm. You can fill the crepe while it’s still in the pan with your choice of fillings.
  9. Repeat the process, adding more coconut oil as needed, until all the batter is used.

Tips

  • Rest the Batter: Allowing the batter to rest is key. This helps to achieve the right texture and prevents the crepes from breaking.
  • Adjust Consistency: The batter should be thin enough to spread easily. Don’t hesitate to add more hemp milk if needed.
  • Perfect Flip: Practice makes perfect! Use your fingers or a spatula to flip the crepes gently.

Variations & Substitutions

  • Flour Alternatives: If you don’t have quinoa flour, you can substitute it with almond flour or buckwheat flour for a different flavor profile.
  • Filling Ideas: Enjoy them with nut butter and bananas for a sweet treat, or try smoked salmon and cream cheese for a savory option.
  • Milk Options: Substitute hemp milk with almond milk or coconut milk for a different taste.

Storage

To store leftover crepes, place them in an airtight container, separating each crepe with parchment paper to prevent sticking. They can be refrigerated for up to three days. To reheat, simply warm them in a skillet over low heat until heated through.

FAQ

Can I make the batter ahead of time?

Yes, you can prepare the batter up to a day in advance. Store it in the refrigerator and give it a good stir before using. You may need to adjust the consistency with a little more hemp milk if it’s thickened overnight.

What if my crepes keep sticking to the pan?

Ensure your skillet is well-heated and use a good nonstick pan. Adding a small amount of coconut oil before each crepe can also help prevent sticking.

Nutrition

Each serving of these gluten-free crepes is not only delicious but also packed with nutrients. You’ll find a good source of protein, fiber, and healthy fats, making them a balanced choice for any meal.

Conclusion

Whether you’re reminiscing about cherished family gatherings or creating new traditions, these Gluten Free Quinoa and Corn Flour Crepes are a delightful addition to any meal. With their delicate texture and versatile nature, they’ll quickly become a staple in your kitchen. So go ahead, give them a try and watch as they bring joy to your table, one crepe at a time.

Related update: Gluten Free Quinoa and Corn Flour Crepes

Related update: Spicy Coconut French Toast

Dairy Free Chicken Salad | Made by Meaghan Moineau

Dairy Free Chicken Salad

Intro

Growing up, summer picnics were a staple in my family. My mom would always pack a huge basket filled with delicious homemade goodies, and we’d head to the local park to enjoy the sunshine and fresh air. One dish that always made an appearance was her chicken salad. It was creamy, flavorful, and always the highlight of our picnic spread. Fast forward to today, and I’ve put my own spin on this classic by creating a Dairy Free Chicken Salad that’s just as delightful and perfect for any gathering. Whether you’re planning a picnic or simply want a tasty, healthy meal, this recipe is sure to become a favorite in your household.

Why You’ll Love It

This Dairy Free Chicken Salad is not only delicious but also caters to those with dietary restrictions. Here are a few reasons why you’ll fall in love with this recipe:

  • Creamy and Flavorful: The Veganaise provides a creamy texture without any dairy, while the combination of spices and lemon juice adds a zesty kick.
  • Nutritious: Packed with protein from the chicken and eggs, this salad is both satisfying and nourishing.
  • Versatile: Enjoy it on its own, in a sandwich, or wrapped in lettuce for a low-carb option.
  • Easy to Prepare: With simple ingredients and straightforward steps, you can have this salad ready in no time.

Ingredients

  • Olive oil
  • Skinless boneless chicken tenderloins
  • Pepper
  • Salt
  • Paprika
  • Cooked whole eggs
  • Dill pickles
  • Veganaise
  • Lemon juice
  • Seasoned salt

Instructions

  1. Thaw the chicken if needed. Then, add the olive oil to a large skillet and bring to medium heat.
  2. Add the chicken to the skillet and season with paprika, salt, and pepper. Turn every few minutes and cook until the chicken is cooked through and juices run clear.
  3. Remove the chicken and place on a large cutting board. Using 2 forks, shred the chicken and place it in a large bowl.
  4. If you haven’t already, boil the eggs. Cover the eggs with cold water in a large pot, place the pot over medium-high heat, and as soon as it starts boiling, set your timer for 7 minutes. Done!
  5. Peel and chop the eggs, then place them in the bowl with your shredded chicken.
  6. Chop the dill pickles and add them to the bowl as well.
  7. Add the Veganaise, lemon juice, and seasoned salt. Toss to combine.
  8. Serve with your favorite bread or enjoy on its own.

Tips

For the best results, here are a few tips to keep in mind:

  • Shred Chicken Easily: To make shredding the chicken easier, let it cool slightly after cooking. This helps the chicken retain its moisture and makes it easier to handle.
  • Egg Perfection: Use a timer when boiling eggs to ensure they are perfectly cooked every time. This method prevents overcooking, which can lead to a greenish yolk.
  • Flavor Boost: For an extra burst of flavor, consider adding a teaspoon of Dijon mustard to the mix.

Variations & Substitutions

This Dairy Free Chicken Salad is highly adaptable. Here are some variations and substitutions you can try:

  • Vegetarian Option: Replace chicken with chickpeas for a vegetarian-friendly version.
  • Additional Crunch: Add chopped celery or walnuts for extra texture and crunch.
  • Herb Infusion: Fresh herbs like parsley or cilantro can add a refreshing taste to the salad.
  • Different Pickles: Swap dill pickles for bread and butter pickles for a slightly sweeter flavor.

Storage

Store any leftover chicken salad in an airtight container in the refrigerator for up to 3 days. Before serving, give it a good stir to redistribute the ingredients and flavors.

FAQ

Can I use this recipe for meal prep?

Absolutely! This Dairy Free Chicken Salad is perfect for meal prep. Make a big batch and portion it into containers for easy grab-and-go lunches throughout the week.

Is there a substitute for Veganaise?

If you don’t have Veganaise on hand, you can use any other dairy-free mayonnaise substitute. Just ensure it aligns with your dietary needs and preferences.

Nutrition

This salad is a great source of lean protein, thanks to the chicken and eggs. The use of Veganaise instead of traditional mayonnaise makes it a healthier option for those avoiding dairy, while the dill pickles and lemon juice add flavor without extra calories.

Conclusion

This Dairy Free Chicken Salad is a modern twist on a classic dish that brings back fond memories of family picnics while catering to today’s dietary needs. It’s creamy, flavorful, and easy to prepare, making it a perfect choice for any occasion. Whether you’re packing a lunch for work or planning a picnic in the park, this salad is sure to be a hit. Give it a try, and let it become a beloved staple in your own culinary repertoire.

Related update: Dairy Free Chicken Salad

Related update: Chicken Suya

Related update: Traditional Panzanella

Crispy Pineapple Fritters | Made by Meaghan Moineau

Crispy Pineapple Fritters: A Delightful Treat for Any Occasion

Intro

There’s something magical about the smell of freshly fried fritters wafting through the kitchen, bringing back memories of sunlit afternoons at my grandmother’s house. She would whip up a batch of her famous pineapple fritters, and we’d gather around the kitchen table, eagerly awaiting the first bite. The crispy exterior, the sweet and juicy pineapple inside, and a dusting of powdered sugar on top made for an unforgettable treat. Today, I’m thrilled to share this beloved recipe with you, updated for a new generation while preserving that nostalgic charm.

Why You’ll Love It

These Crispy Pineapple Fritters are a perfect blend of sweet and savory, with a satisfying crunch that makes them irresistibly good. Whether you’re serving them as a snack, dessert, or even a breakfast treat, these fritters are sure to delight everyone at the table. They’re easy to make, require simple ingredients, and are wonderfully versatile, allowing you to add your favorite toppings or enjoy them just as they are.

Ingredients

  • Canned pineapple rings
  • Flour
  • Cornstarch
  • Egg
  • Baking powder
  • Salt
  • Milk
  • Panko breadcrumbs
  • Canola oil

Instructions

  1. Prepare the batter by combining the flour, cornstarch, baking powder, salt, egg, and milk in a shallow dish. Whisk with a fork to create a smooth, pancake-like batter.
  2. In another shallow dish, place the panko breadcrumbs.
  3. Pour about an inch of canola oil into a large skillet and preheat the oil over medium-high heat.
  4. Pat the pineapple rings as dry as possible between sheets of paper towels to ensure they fry up crispy.
  5. Dip each pineapple ring into the batter, tapping off any excess, then coat well in the panko crumbs.
  6. Immediately fry the coated rings in the hot oil until they’re golden brown on both sides, about 2-3 minutes per side.
  7. Remove the fritters from the oil and drain them on paper towels.
  8. Serve the fritters hot, warm, or at room temperature. Optional garnishes include powdered sugar, cinnamon sugar, ice cream, or whipped cream.

Tips

For the best results, ensure your oil is at the right temperature. You can test this by dropping a small piece of batter into the oil; if it sizzles and browns quickly, you’re ready to fry. Also, be sure not to overcrowd the skillet, as this can lower the oil temperature and result in soggy fritters.

Variations & Substitutions

If you’re looking to switch things up, try using fresh pineapple instead of canned for a slightly tangier flavor. You can also experiment with different coatings, such as crushed cereal or coconut flakes, for added texture. For a dairy-free version, substitute the milk with almond or coconut milk, and for a gluten-free option, use gluten-free flour and breadcrumbs.

Storage

To store any leftover fritters, let them cool completely, then place them in an airtight container. They can be kept in the refrigerator for up to three days. To reheat, simply pop them in the oven at 350°F (175°C) for about 10 minutes or until heated through. Avoid microwaving, as it can make them soggy.

FAQ

Can I make these fritters ahead of time?

Yes, you can prepare the batter and coat the pineapple rings in advance. Store them in the refrigerator until you’re ready to fry. However, for the crispiest texture, it’s best to fry them just before serving.

What can I serve with pineapple fritters?

Pineapple fritters pair wonderfully with a scoop of vanilla ice cream or a dollop of whipped cream. For a more decadent treat, try drizzling them with caramel or chocolate sauce.

Nutrition

While the exact nutritional content will depend on the specific ingredients and portion sizes used, a typical serving of crispy pineapple fritters provides a delightful combination of carbohydrates, a moderate amount of fat from the frying process, and the natural sugars found in pineapple. Enjoy them as an occasional treat as part of a balanced diet.

Conclusion

Crispy Pineapple Fritters are a delightful way to bring a touch of tropical sweetness to any occasion. With their crunchy coating and juicy center, they’re sure to become a favorite in your household as they have in mine. I hope this recipe brings you as much joy and as many cherished memories as it has brought to my family. Happy cooking!

Related update: Crispy Pineapple Fritters

Related update: Fluffy frittata with spinach

Crisp Winter Salad with Maple Gorgonzola Dressing | Made by Meaghan Moineau

Crisp Winter Salad with Maple Gorgonzola Dressing

Intro

As the leaves begin to fall and the air turns crisp, I’m reminded of cozy family gatherings in my childhood home. My mother would always prepare a fresh, vibrant salad that seemed to mirror the beauty of the winter landscape outside. Her secret? A delightful blend of crunchy vegetables and a rich, creamy dressing that brought warmth to our hearts and smiles to our faces. This Crisp Winter Salad with Maple Gorgonzola Dressing is an homage to those cherished memories and a testament to the joy of sharing simple yet luxurious meals with loved ones.

Why You’ll Love It

This salad is a symphony of flavors and textures, perfect for those chilly months when you crave something fresh yet comforting. The crunchy vegetables provide a satisfying bite, while the maple gorgonzola dressing offers a creamy and tangy contrast. It’s a versatile dish that can be served as a starter, a side, or even a light main course. Whether you’re hosting a festive gathering or enjoying a quiet meal at home, this salad is sure to impress.

Ingredients

  • Broccoli stems, thinly sliced
  • Celery, thinly sliced
  • Cider vinegar
  • Dijon mustard
  • Gorgonzola cheese, crumbled
  • Jicama, julienned
  • Kosher salt
  • Low fat sour cream
  • Maple syrup
  • Olive oil
  • Radishes, thinly sliced
  • Red green apple, thinly sliced
  • Romaine lettuce, chopped
  • Savoy cabbage, shredded
  • Walnuts, toasted
  • White pepper

Instructions

  1. In a large bowl, combine the broccoli stems, celery, jicama, radishes, apple, romaine lettuce, and savoy cabbage. Toss gently to mix.
  2. In a medium bowl, whisk together the low fat sour cream, olive oil, cider vinegar, dijon mustard, maple syrup, kosher salt, and white pepper until smooth.
  3. Gently stir in the gorgonzola cheese, using a fork to combine without mashing the cheese—ensure there are visible chunks in the dressing.
  4. Add the toasted walnuts to the salad mixture, then pour the dressing over the top. Toss everything together until well coated.
  5. Serve immediately or refrigerate for up to an hour to allow the flavors to meld.

Tips

For the best results, use fresh, high-quality ingredients. Ensure your vegetables are crisp and your gorgonzola is flavorful and creamy. Toasting the walnuts enhances their flavor and adds a delightful crunch to the salad. Feel free to adjust the amount of maple syrup in the dressing to suit your taste for sweetness.

Variations & Substitutions

If gorgonzola isn’t your favorite, try substituting it with feta or blue cheese for a different flavor profile. For a vegan version, swap the sour cream with a plant-based alternative and omit the cheese altogether. Add some grilled chicken or roasted chickpeas for extra protein, making this salad a more substantial meal.

Storage

This salad is best enjoyed fresh, but you can store leftovers in an airtight container in the refrigerator for up to two days. If you plan to store the salad, keep the dressing separate and toss it just before serving to maintain the crunchiness of the vegetables.

FAQ

Can I make the dressing ahead of time?

Yes, you can prepare the dressing up to two days in advance. Store it in a sealed container in the refrigerator and give it a good stir before using.

What can I serve with this salad?

This salad pairs beautifully with roasted meats or grilled seafood. It also works well alongside hearty soups or stews, adding a fresh contrast to warm, rich dishes.

Can I use a different type of lettuce?

Absolutely! While romaine offers a nice crunch, you can use mixed greens, arugula, or even spinach for a different texture and flavor.

Nutrition

This salad is packed with nutritious ingredients. The array of vegetables provides fiber, vitamins, and minerals, while the walnuts add healthy fats. The dressing, although creamy, is made with low fat sour cream and olive oil, making it a healthier choice compared to traditional creamy dressings.

Conclusion

Our Crisp Winter Salad with Maple Gorgonzola Dressing is a delightful addition to any meal, bringing together the best of winter’s bounty. It’s a dish that not only nourishes the body but also warms the soul, reminding us of the simple joys of good food and cherished company. Whether you’re gathering around the table with family or treating yourself to a solo feast, this salad promises to deliver comfort and joy with every bite. Enjoy!

Related update: Crisp Winter Salad with Maple Gorgonzola Dressing

Walnut Pesto | Made by Meaghan Moineau

Walnut Pesto: A Nutty Twist on a Classic

Intro

I remember the first time I tasted homemade pesto at my grandmother’s kitchen table. The aroma of fresh basil mingling with garlic and cheese was heavenly, and it was an instant family favorite. Fast forward to today, I’ve put my own twist on this classic by incorporating walnuts, a nod to the bountiful walnut tree in our backyard. This walnut pesto is not only a homage to my grandmother’s recipe but also a deliciously nutty variation that adds depth and texture to a beloved classic.

Why You’ll Love It

This walnut pesto is a game-changer for several reasons. First, it’s incredibly versatile. Whether you’re tossing it with pasta, spreading it on sandwiches, or using it as a dip, this pesto adds a burst of flavor to any dish. Second, it’s quick and easy to make, taking less than 15 minutes from start to finish. Finally, the walnuts add a rich, earthy flavor and a dose of heart-healthy fats, making this pesto not only tasty but also nutritious.

Ingredients

  • 2 cups fresh basil leaves, packed
  • 2 cloves garlic
  • ½ cup olive oil
  • ½ cup grated Parmesan cheese
  • ½ teaspoon sea salt
  • ½ cup walnuts

Instructions

  1. Combine walnuts, basil, garlic, Parmesan, and salt in a food processor. Process until the mixture forms a coarse puree.
  2. With the machine running, slowly add the olive oil through the feed tube. Continue processing until the pesto is smooth, stopping to scrape down the sides as necessary.
  3. Transfer the pesto to an airtight jar, preferably one that is opaque to keep out the light.
  4. To prevent the pesto from browning, cover its surface with a thin layer of olive oil before sealing the jar.
  5. Store the pesto in the refrigerator and enjoy as needed.

Tips

For the best flavor, use fresh, high-quality ingredients. If your basil leaves are a little wilted, revive them by soaking in ice water for a few minutes. When adding olive oil, go slow to achieve the desired consistency. If your pesto is too thick, add more olive oil, a little at a time. You can also toast the walnuts lightly before processing for an added depth of flavor.

Variations & Substitutions

This recipe is incredibly adaptable. If you’re out of walnuts, try substituting with pine nuts or almonds. For a dairy-free version, omit the Parmesan cheese and add a tablespoon of nutritional yeast for a cheesy flavor. You can also experiment with different herbs; try adding a handful of parsley or cilantro for a unique twist. If you prefer a spicier kick, throw in a pinch of red pepper flakes while processing.

Storage

Store your walnut pesto in the refrigerator for up to a week. To extend its shelf life, freeze it in ice cube trays. Once frozen, transfer the cubes to a zip-top bag and store in the freezer for up to three months. Thaw the cubes in the refrigerator overnight or at room temperature for a couple of hours before using. Always ensure that the surface is covered with a layer of olive oil to prevent browning.

FAQ

Can I make walnut pesto without a food processor?

Yes, you can! If you don’t have a food processor, use a mortar and pestle. It requires a bit more elbow grease but yields a rustic texture that many find appealing. Start by crushing the garlic and salt, then gradually add the basil, walnuts, and cheese, grinding until you achieve a paste. Slowly mix in the olive oil to finish.

How can I use walnut pesto in my meals?

Walnut pesto is incredibly versatile. Toss it with your favorite pasta, spread it on sandwiches or wraps, or use it as a topping for grilled chicken or fish. It’s also a fantastic addition to soups and stews, adding a burst of flavor. Get creative and explore different ways to enjoy this delectable sauce!

Is walnut pesto vegan?

The traditional recipe includes Parmesan cheese, which is not vegan. However, you can make a vegan version by omitting the cheese and adding nutritional yeast to achieve a similar cheesy flavor. Ensure all other ingredients are vegan-friendly, and you’re good to go!

Nutrition

This walnut pesto is not only flavorful but also packed with nutrients. Walnuts are rich in omega-3 fatty acids, which are beneficial for heart health. Basil and garlic offer antioxidants, while olive oil provides healthy fats. This pesto is a nutritious addition to any meal, providing healthy fats, protein, and fiber.

Conclusion

Walnut pesto is a delightful twist on a classic recipe that’s sure to become a staple in your kitchen. Its rich, nutty flavor and versatility make it a must-try for pesto lovers and newcomers alike. Whether you’re making a quick weeknight dinner or looking to impress guests with a gourmet touch, this walnut pesto will not disappoint. I hope this recipe brings as much joy to your table as it has to mine. Enjoy!

Related update: Walnut Pesto

Related update: Quick N' Easy Basil Pesto

Kung Po Chicken | Made by Meaghan Moineau

Kung Po Chicken: A Fiery Delight

Intro

Growing up in a bustling household filled with the aromas of diverse cuisines, one dish always managed to stand out on our family dinner table: Kung Po Chicken. I vividly remember the excitement of watching my grandmother expertly toss the sizzling ingredients in her trusty old wok, her hands moving with the grace of a seasoned chef. The kitchen would fill with the mouth-watering scent of toasted spices and roasted peanuts, leaving us all impatient for the first bite. Today, I’m thrilled to share this cherished recipe with you, hoping it brings as much joy to your family as it has to mine.

Why You’ll Love It

Kung Po Chicken is a classic Chinese dish that’s beloved for its bold flavors and delightful textures. Here are a few reasons why this dish deserves a spot in your culinary repertoire:

  • Quick and Easy: Ready in under 30 minutes, this dish is perfect for busy weeknights.
  • Flavorful: The combination of spicy chili, savory soy sauce, and nutty sesame oil creates a tantalizing taste experience.
  • Versatile: Easily adapt this recipe to suit your dietary preferences or spice tolerance.
  • Nostalgic: A dish that brings the warmth of home and family to your dining table.

Ingredients

  • 2 whole chicken breasts, cut into 1/2 inch cubes (about 1-1/2 cups)
  • 6-8 red dried whole chili peppers
  • 3 tablespoons corn oil
  • 2 tablespoons cornstarch
  • 1 egg white
  • 1/2 cup roasted peanuts
  • 1 teaspoon salt
  • 2 scallions, chopped
  • 1 tablespoon sesame oil
  • 2 tablespoons soy sauce
  • 3 tablespoons water
  • 1 tablespoon white distilled vinegar

Instructions

  1. Cut the chicken breasts into 1/2 inch cubes, yielding approximately 1-1/2 cups of chicken.
  2. In a medium bowl, combine the egg white, cornstarch, soy sauce, and 1 tablespoon of water. Mix well and add the chicken cubes, ensuring they are coated evenly. Set aside for 30 minutes to marinate.
  3. Using a damp towel, wipe the chili peppers clean. Remove the tops and set them aside on a plate with the chopped scallions.
  4. In a small cup, combine the soy sauce, white distilled vinegar, and remaining water to create the sauce. Set aside near the cooking area.
  5. Place a strainer over a pot near the cooking station for ease of use.
  6. Heat a wok over moderate heat until it is very hot. Add the corn oil and heat to about smoking point.
  7. Mix the marinated chicken again and carefully add it to the hot oil. Raise the heat to high and stir-fry for about 3-4 minutes or until the chicken is cooked through.
  8. Remove the chicken using the strainer and set aside.
  9. In the same wok, add the chili peppers and stir-fry until they darken slightly, releasing their fragrance.
  10. Add the scallions and peanuts to the wok, stir-fry for an additional minute.
  11. Return the chicken to the wok, pour in the prepared sauce, and stir well to combine all ingredients.
  12. Drizzle with sesame oil, give it a final quick toss, and serve hot.

Tips

  • For a milder dish, remove the seeds from the chili peppers.
  • Ensure the wok is properly heated before adding the oil to achieve the perfect stir-fry texture.
  • Feel free to adjust the amount of chili peppers based on your spice preference.

Variations & Substitutions

The beauty of Kung Po Chicken lies in its adaptability. Here are some ways you can make this dish your own:

  • Vegetarian: Substitute the chicken with firm tofu or tempeh for a plant-based version.
  • Nuts: Swap peanuts with cashews or almonds for a different nutty twist.
  • Gluten-Free: Use tamari or coconut aminos instead of soy sauce.

Storage

Store any leftover Kung Po Chicken in an airtight container in the refrigerator for up to 3 days. Reheat in a skillet over medium heat, adding a splash of water to bring back the sauce’s consistency.

FAQ

Can I freeze Kung Po Chicken?

Yes, you can freeze Kung Po Chicken. Allow it to cool completely before transferring it to a freezer-safe container. It can be stored in the freezer for up to 2 months. Thaw overnight in the refrigerator before reheating.

What can I serve with Kung Po Chicken?

Kung Po Chicken pairs wonderfully with steamed jasmine rice or fried rice. For a low-carb option, serve it with cauliflower rice or a side of stir-fried vegetables.

Is it necessary to use a wok?

While a wok is ideal for stir-frying due to its shape and heat distribution, a large skillet can also be used. Just ensure it’s hot enough before adding the ingredients.

Nutrition

This dish is rich in protein and healthy fats from the chicken and peanuts. However, due to the use of oil and nuts, it is relatively high in calories. Adjust the oil and nuts according to your dietary needs if necessary.

Conclusion

Kung Po Chicken is more than just a meal; it’s a celebration of flavors and memories. Whether you’re looking to recreate a taste of home or simply enjoy a deliciously spicy dish, this recipe is sure to satisfy your cravings. I hope you enjoy making and sharing this dish with your loved ones as much as I have. Happy cooking!

Related update: Kung Po Chicken

Strawberry Pretzel Salad | Made by Meaghan Moineau

Strawberry Pretzel Salad: A Delightful Fusion of Flavors

Intro

Strawberry Pretzel Salad is a dish that takes me back to summer picnics at my grandmother’s house. I remember the warm, sunny afternoons where the air was filled with laughter and the scent of fresh strawberries. My grandmother would always prepare her signature Strawberry Pretzel Salad, a perfect blend of sweet and savory, crunchy and creamy. As kids, we would eagerly wait for the moment when we could finally dig in. This recipe is a modern twist on her classic salad, combining the vibrant taste of strawberries with the savory crunch of pretzels, all while incorporating fresh greens and a rich, tangy dressing.

Why You’ll Love It

This Strawberry Pretzel Salad is not only delicious but also incredibly versatile. It combines the freshness of spring greens and arugula with the juicy sweetness of strawberries, the creaminess of avocado, and the salty crunch of bacon and pretzels. The dressing, made with flax seed oil, balsamic vinegar, and whole grain mustard, adds a tangy and slightly nutty flavor that ties everything together. It’s a salad that satisfies a variety of tastes and textures, making it a hit at any gathering or as a standalone meal.

Ingredients

  • 1 cup arugula
  • 1 avocado, sliced
  • 4 slices bacon
  • 2 tablespoons balsamic vinegar
  • 1 cucumber, sliced
  • 2 tablespoons flax seed oil
  • 2 cups mixed spring greens
  • 1 bell pepper, sliced
  • 1 cup crushed pretzels
  • Salt and pepper to taste
  • 2 cups strawberries, hulled and sliced
  • 1 tablespoon whole grain mustard

Instructions

  1. Preheat your oven to 300°F (150°C).
  2. Arrange the bacon slices on a baking sheet lined with tin foil. Bake for 30 minutes, turning once halfway through. Once cooked, set aside to cool.
  3. In a small bowl, combine the flax seed oil, balsamic vinegar, whole grain mustard, and a pinch of salt and pepper. Whisk until well combined, then set aside.
  4. In a large salad bowl, combine the strawberries, cucumber, mixed greens, arugula, bell pepper, and bacon. Toss lightly to mix the ingredients.
  5. Add the dressing to the salad and toss until the ingredients are evenly coated.
  6. Divide the salad among four plates. Top each serving with slices of avocado and a generous sprinkle of crushed pretzels.
  7. Serve immediately and enjoy the delightful combination of flavors and textures!

Tips

For the best results, use fresh, ripe strawberries and avocados. The sweetness of the strawberries and the creaminess of the avocado are key to balancing the flavors in this salad. Additionally, when crushing the pretzels, try to keep some pieces larger for added texture, while allowing some to be finely crushed to mix with the dressing.

Variations & Substitutions

If you’re looking to switch things up, consider these variations:

  • Cheese Addition: Add crumbled feta or goat cheese for a tangy, creamy element.
  • Nuts: Substitute pretzels with toasted nuts like almonds or pecans for a different crunch.
  • Vegan Version: Omit the bacon and use tempeh bacon or roasted chickpeas for a plant-based protein.
  • Gluten-Free: Use gluten-free pretzels to make this dish suitable for those with gluten sensitivities.

Storage

This salad is best enjoyed fresh, but if you need to store leftovers, keep the dressing separate from the salad to prevent sogginess. Store the salad in an airtight container in the refrigerator for up to 2 days. When ready to serve, toss with the dressing and add fresh avocado and pretzels.

FAQ

Can I make this salad ahead of time?

Yes, you can prepare the components of this salad in advance. Keep the salad ingredients and dressing separate until you’re ready to serve to maintain freshness and texture.

What can I use instead of flax seed oil?

If you don’t have flax seed oil, you can substitute it with olive oil or any other neutral oil you prefer. This will slightly alter the flavor but still provide a delicious dressing.

Is this salad suitable for a main course?

Absolutely! The combination of greens, bacon, and avocado makes it a hearty choice for a main dish. You can also add grilled chicken or shrimp for extra protein if desired.

Nutrition

This Strawberry Pretzel Salad is not just a treat for your taste buds but also nutritious. The mixed greens and arugula provide a good source of vitamins A and C, while the avocado offers healthy fats. Strawberries are rich in antioxidants, and the flax seed oil dressing contributes omega-3 fatty acids. Moderation is key with bacon and pretzels, but overall, this salad is a balanced addition to your meal repertoire.

Conclusion

This Strawberry Pretzel Salad is a delightful way to enjoy a medley of flavors and textures in one dish. Whether you’re serving it at a family gathering or enjoying it as a nourishing meal, it’s sure to impress with its vibrant colors and delicious taste. I hope this salad brings you as much joy and nostalgia as it does for me. Happy cooking!

Related update: Strawberry Pretzel Salad

Related update: Guinness and Brats

Related update: Warm Goat Cheese Salad