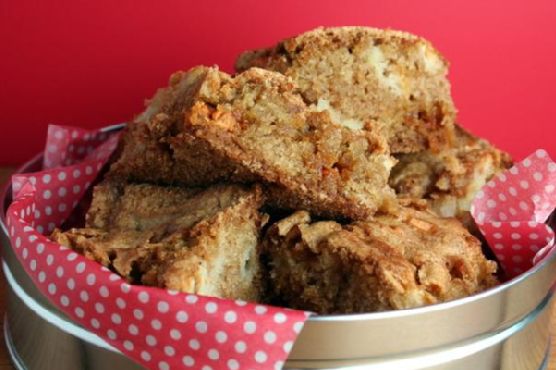
Apple Pie Bars | Made by Meaghan Moineau

Apple Pie Bars | Made by Meaghan Moineau

Title: Apple Pie Bars: A Nostalgic Twist on a Timeless Classic
Description: Dive into the heartwarming world of Apple Pie Bars, where the comforting flavors of spiced apples meet the delightful crunch of butterscotch chips. Perfect as a dessert, this recipe is not just about satisfying your sweet tooth; it's about reliving cherished family memories. Rated 5/10 in difficulty, this recipe is accessible to both novice and experienced bakers alike.

---


There's something inherently magical about the scent of cinnamon and nutmeg wafting through the air. It’s a spell that pulls you back to simpler times, to a kitchen filled with laughter and the gentle hum of an electric mixer. For me, this enchanting aroma is synonymous with Apple Pie Bars—a recipe that has been passed down through generations in our family.


Ingredients:

- McIntosh apples


- Baking powder


- Baking soda


- Butterscotch chips


- Eggs


- Flour


- Ground cinnamon


- Ground nutmeg


- Salt


- Sugar


- Vegetable oil


Instructions:

1. Preheat your oven to a cozy 350 degrees F. Prepare a 9 by 13-inch baking dish by giving it a generous coat of cooking spray.


2. In the bowl of an electric mixer, combine the oil, eggs, and sugar until they form a harmonious blend.


3. In a separate bowl, sift together the flour, baking powder, salt, baking soda, ground cinnamon, and ground nutmeg. Gradually add this dry mixture to the oil mixture, allowing the mixer to work its magic until everything is thoroughly combined. Be prepared for a thick, luscious batter.


4. Switch to a sturdy spoon and lovingly fold in the apple pieces. Transfer this mixture into your prepared baking dish, smoothing it out to create an even layer.


5. Gently sprinkle the butterscotch chips over the top, pressing them lightly into the batter.


6. Bake in the preheated oven for 45 minutes to an hour, until golden brown and just beginning to pull away from the edges of the pan.


7. Allow the bars to cool thoroughly before cutting them into delightful squares.


A Walk Down Memory Lane

I remember the first time I helped my grandmother make these Apple Pie Bars. I was barely tall enough to see over the kitchen counter, standing on a little wooden stool she had pulled out just for me. The kitchen was alive with activity, a symphony of clinking bowls and the whirring of our old mixer.


Every autumn, as the leaves turned to shades of amber and gold, my family would gather at my grandmother's house for our annual apple-picking adventure. We would come back with baskets brimming with McIntosh apples, their sweet-tart flavor perfectly suited for baking. My grandmother, the matriarch of our family, would lead the charge in transforming these apples into her famous Apple Pie Bars.


I recall the warmth of the kitchen, the stories shared across generations. My grandmother would tell tales of her own childhood, of how these bars were a staple at every family gathering. Each bite was a bridge to the past, a connection to family members who had long since passed, yet whose spirits lingered in every crumb.


Difficulty: 5/10
Classification: Dessert

Creating these Apple Pie Bars is more than just baking; it’s about creating memories. So, gather your loved ones, don an apron, and let the nostalgic aroma of apples and spices fill your home. These bars are a testament to the enduring power of family traditions and the simple joys of baking together.
Read more about Appetizers

Read more about Main Dishes

Read more about Desserts

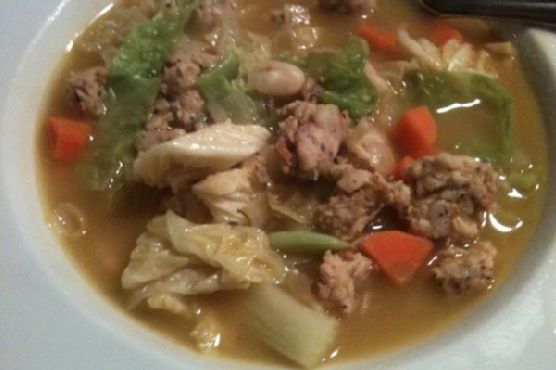
Chicken Sausage, White Bean and Cabbage Soup | Made by Meaghan Moineau

Chicken Sausage, White Bean and Cabbage Soup | Made by Meaghan Moineau

Title: A Hearty Hug in a Bowl: Chicken Sausage, White Bean, and Cabbage Soup
Description: Discover the comforting flavors of our Chicken Sausage, White Bean, and Cabbage Soup—a perfect blend of savory and wholesome ingredients. This easy-to-make, one-pot wonder is ideal for chilly nights and family gatherings. With a touch of nostalgia and warmth in every spoonful, this recipe is a must-try for anyone seeking a delicious and nourishing meal.

---


As the leaves turn golden and the air gets crisp, there’s nothing quite like a steaming bowl of soup to bring warmth and comfort to your soul. Our Chicken Sausage, White Bean, and Cabbage Soup is more than just a dish—it's a heartfelt embrace, a reminder of cozy family dinners, and a delicious way to celebrate the flavors of the season.


Ingredients


- Olive oil


- 1 white onion, chopped


- 2 diced carrots


- Salt and black pepper to taste


- 3 cloves garlic, minced


- 1/2 teaspoon crushed red pepper flakes


- 1 pound Italian mild chicken sausage


- 6 cups low sodium vegetable stock


- 2 cans white beans, drained and rinsed


- 1 small green cabbage, thinly sliced


Instructions


1. Start with Sautéing: In a large pot, heat olive oil over medium heat. Add chopped onions and sauté until tender, about 8 minutes.
2. Add Vegetables: Toss in diced carrots and continue cooking for another 5 minutes. Season with salt, pepper, garlic, and red pepper flakes; cook for another minute.
3. Cook the Sausage: Remove the sausage from its casing and break it into small chunks in the pot. Toss with vegetables to brown the meat, cooking for another 8-10 minutes.
4. Simmer the Soup: Pour in the vegetable stock, enough to cover all ingredients, and bring to a gentle simmer.
5. Incorporate Beans and Cabbage: Add the white beans and cabbage, stirring to combine. Simmer, covered, until the cabbage is wilted but not mushy, about 10 minutes. Taste and adjust seasoning with more salt or pepper if needed.

A Nostalgic Note


This soup takes me back to my grandmother's kitchen, where I spent countless chilly afternoons enveloped in the warmth of her loving care. The aroma of sautéed onions and garlic would drift through the house, a sign that something truly special was being prepared. As a child, I loved watching her add each ingredient with precision and care, taking the time to let the flavors meld into something magical. Her secret ingredient wasn't in the spice rack but rather in the love and joy she infused into every meal. Each bite was a reminder of her nurturing spirit and the cherished family memories we created around her table.


Difficulty and Classification


Difficulty: 3/10 - This soup is straightforward and perfect for beginners and seasoned cooks alike, offering a hassle-free cooking experience.
Classification: Main Dish - Packed with protein and hearty vegetables, this soup is a fulfilling main dish that holds its own as a complete and satisfying meal.

Whether you're looking to recreate a piece of nostalgia or simply enjoy a flavorful and hearty meal, this Chicken Sausage, White Bean, and Cabbage Soup is sure to become a beloved favorite in your home. Gather your loved ones and savor the simple joys of cooking and sharing a meal together.

Read more about Appetizers

Read more about Main Dishes

Read more about Desserts

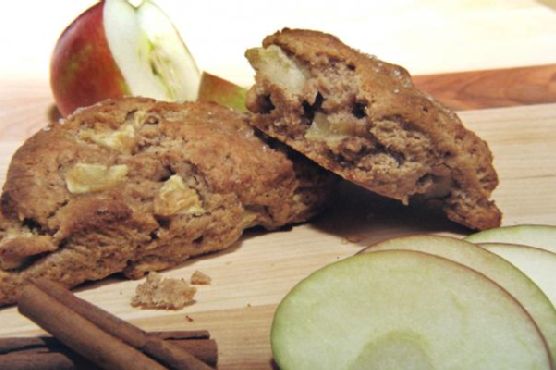
Apple Pie Honey Wheat Scones | Made by Meaghan Moineau

Apple Pie Honey Wheat Scones | Made by Meaghan Moineau

Title: "Warm Memories & Sweet Aromas: Crafting Apple Pie Honey Wheat Scones"


Description:

Dive into the heartwarming world of Apple Pie Honey Wheat Scones, a delightful dessert that combines rustic charm and nostalgic flavors. Explore the easy-to-follow recipe, enriched with a family memory that makes these scones more than just a treat—they're a cherished tradition. Rated for its simplicity and soul, this dish is perfect for any baking enthusiast looking to create something truly special.

---


A Whiff of Nostalgia: Apple Pie Honey Wheat Scones


There's something inherently comforting about the aroma of apple pie mingling with the cozy warmth of freshly baked scones. For me, these Apple Pie Honey Wheat Scones are more than just a dessert; they are a portal back to cherished family gatherings, where love was the main ingredient and laughter was the background music.


The Essence of Home


Growing up, autumn was a magical time in our household. The trees donned their vibrant golden hues, and the air was crisp with the promise of impending festivities. My grandmother, the heart of our family, would gather us in her spacious, sunlit kitchen to create culinary wonders. Among her specialties were these delightful Apple Pie Honey Wheat Scones.


With her apron tied snugly around her, she would expertly blend whole wheat flour and all-purpose flour, setting the stage for what was to come. The warm, spicy aroma of cinnamon and freshly grated ginger would fill the air, a prelude to the sweet symphony of flavors about to unfold.


The Recipe


Here's how you can recreate this beloved family recipe:
Ingredients:

- Whole wheat flour


- All-purpose flour plus 1 rounded tablespoon


- Dark brown sugar


- Cinnamon


- Baking powder


- Salt


- Fresh ginger


- Unsalted butter


- Heavy cream


- Egg


- Honey


- Vanilla extract


- Brandy


- Diced apple


- Turbinado sugar


Instructions:

1. Preheat your oven to 400°F (200°C) and line a baking sheet with parchment paper.


2. In a large mixing bowl, whisk together the first seven ingredients.


3. Add fresh ginger and butter. Work everything together with your fingers until the mixture resembles coarse crumbles. Keep the butter cool and in pieces.


4. Mix in the cream, egg, honey, vanilla, and brandy, kneading until the dough comes together.


5. Incorporate the diced apples, pressing them into the dough until evenly distributed.


6. On a floured surface, flatten the dough into a one-inch-thick disc. Cut into eight equal sections.


7. Place the scones on the baking sheet and sprinkle with turbinado sugar.


8. Bake for 15-18 minutes or until golden brown.


9. Melt butter and drizzle over a warm scone for an extra touch of indulgence.


10. Transfer the remaining scones to a wire rack to cool. Store in a sealed container or freeze for up to 3-4 months.


A Legacy of Love


Every bite of these scones transports us back to those treasured moments in my grandmother's kitchen, where the hustle and bustle of daily life paused, allowing us to savor the simple joys of togetherness. These scones are rated a 4 out of 10 for difficulty, making them accessible even to novice bakers, yet rewarding enough for seasoned pros.


As a dessert, Apple Pie Honey Wheat Scones are a delightful way to end any meal, offering a perfect balance of sweetness and spice. Whether enjoyed with a cup of tea or shared with loved ones around the table, they are more than just a treat—they are a slice of family history, lovingly baked into each scrumptious morsel.


So go ahead, gather your ingredients, and create your own warm memories with this timeless recipe. As my grandmother used to say, "A kitchen full of laughter and love is the recipe for happiness."


---


Nostalgia, warmth, and a touch of sweetness—these scones are sure to become a staple in your own family traditions. Enjoy baking and savor every moment, just as we did in those golden autumn days.

Read more about Appetizers

Read more about Main Dishes

Read more about Desserts

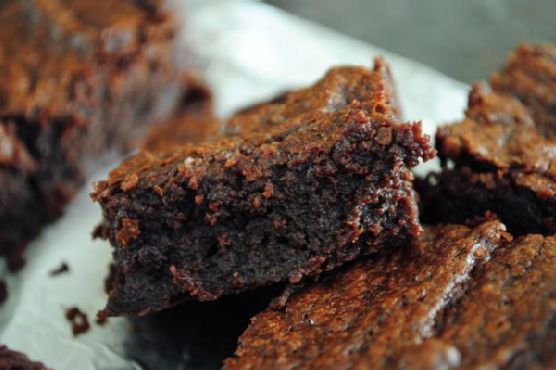
Thick, Fudgy, One Bowl Brownies | Made by Meaghan Moineau

Thick, Fudgy, One Bowl Brownies | Made by Meaghan Moineau

Title: A Journey Back in Time with Thick, Fudgy, One Bowl Brownies
Description: Dive into the comforting embrace of these Thick, Fudgy, One Bowl Brownies, a timeless dessert that promises both simplicity and indulgence. With a rich blend of semi-sweet and unsweetened chocolate, these brownies are as delightful to make as they are to eat. Join me as I share a cherished family memory that makes this recipe truly special.

---


There's something undeniably magical about the aroma of chocolate wafting through the house. It's the kind of scent that transports you back in time, evoking a swirl of cherished memories. For me, that memory is Saturday afternoons in my grandmother's kitchen, where the world seemed to slow down as we baked her famous brownies.


A Sweet Family Tradition

Growing up, weekends were synonymous with family gatherings, and no gathering was complete without Grandma's brownies. Her secret? A recipe that was as straightforward as it was delicious. Thick, fudgy, and requiring just one bowl, these brownies are a testament to the idea that simplicity is often the key to perfection.


As a child, I would perch on a stool, eyes wide with anticipation, watching Grandma melt chocolate in a large, heatproof bowl set over simmering water. The semi-sweet and unsweetened chocolate, combined with unsalted butter, would slowly transform into a smooth, glossy mixture. This was my favorite part—the moment when the kitchen filled with the rich, intoxicating scent of chocolate.


Once cooled, Grandma would let me stir in the cocoa powder, eggs, sugar, vanilla, and salt. Her gentle guidance made the process feel like a grand adventure. The final step was my sacred duty—carefully adding the flour and ensuring it was just combined. Grandma always said that overmixing was the enemy of a perfect brownie.


The Magic of Baking

After spreading the batter into a foil-lined baking pan, we'd slide it into the oven. Those 35 to 40 minutes felt like an eternity to a chocolate-loving child. But the wait was worth it. The brownies emerged slightly puffed, with a toothpick inserted into the center revealing the perfect balance between gooey and set.


Though the recipe suggested cooling them to room temperature, patience was never my strong suit. Five minutes was usually all I could manage before cutting into them. To this day, the first bite of those warm, fudgy brownies takes me back to those precious afternoons.


A Dessert to Cherish

Rated a 3 out of 10 for difficulty, this dessert is not only easy to make but also a delightful way to create lasting memories with loved ones. Whether you're a seasoned baker or a novice, these Thick, Fudgy, One Bowl Brownies are a must-try.


So, gather your ingredients—semi-sweet chocolate, unsweetened chocolate, unsalted butter, cocoa powder, eggs, vanilla extract, table salt, and flour—and embark on a nostalgic baking journey. This simple, yet indulgent treat is perfect for any occasion, but most importantly, it's a reminder that the best recipes are those that bring people together.


Conclusion

In a world that often feels hurried and complex, these brownies offer a moment of pause, a chance to savor the simple joys of life. Whether you're sharing them with family, indulging alone, or gifting them to a friend, these thick, fudgy brownies are sure to warm hearts and create sweet memories.

Read more about Appetizers

Read more about Main Dishes

Read more about Desserts

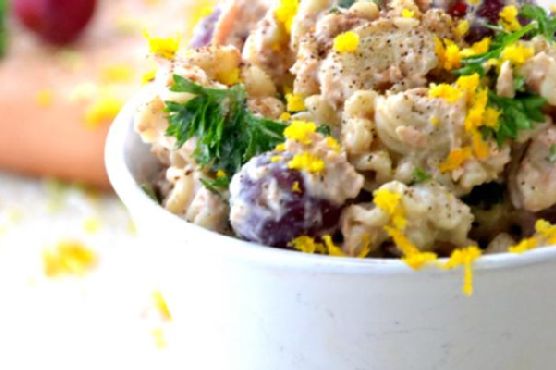
Easy Gluten Free Vegetarian Pasta Salad | Made by Meaghan Moineau

Easy Gluten Free Vegetarian Pasta Salad | Made by Meaghan Moineau

Title: A Taste of Summer: Easy Gluten-Free Vegetarian Pasta Salad
Description: Discover the fresh and vibrant flavors of our Easy Gluten-Free Vegetarian Pasta Salad. This delightful dish combines the zesty tang of oranges with the sweetness of fresh grapes, creating a refreshing and healthy meal perfect for any occasion. Join us as we explore the simplicity of this recipe and share a cherished family memory that makes this salad truly special.

---


A Taste of Summer: Easy Gluten-Free Vegetarian Pasta Salad

There’s something nostalgically comforting about a good pasta salad, especially when it’s easy to prepare and packed with flavor. Our Easy Gluten-Free Vegetarian Pasta Salad is a celebration of simple, wholesome ingredients that come together in perfect harmony. With gluten-free pasta as its base, this dish is perfect for those with dietary restrictions without compromising on taste.


Ingredients:

- Gluten-free pasta


- Plain Greek yogurt


- Orange zest


- Fresh orange juice


- Olive oil


- Fresh grapes


- Fresh cilantro


- Sea salt


- Black pepper


Instructions:

1. Cook the gluten-free pasta according to package directions. Drain and set aside to cool for 10 minutes.


2. In a large bowl, combine all ingredients; gently toss to combine.


3. Transfer pasta salad to four serving bowls.


4. Serve chilled.


Difficulty Rating: 3/10
Classification: Main Dish

---


A Nostalgic Family Memory

Every summer, my family would gather at my grandmother’s house for a weekend of laughter, games, and of course, delicious food. The backyard was always buzzing with the playful sounds of cousins chasing each other, while the adults lounged under the shade of the old oak tree, sharing stories and reminiscing about days gone by.


Among the array of dishes that adorned the picnic table, my grandmother’s pasta salad was always a standout. Her secret? A splash of fresh orange juice and a sprinkle of orange zest, which she believed added a bit of sunshine to each bite.


This recipe is my tribute to those cherished summer afternoons. As I prepare the salad, I’m reminded of the joy and warmth that filled those days, the citrusy aroma of oranges mingling with the fresh scent of cilantro, and the sweet taste of grapes bursting with flavor.


Each bite of this salad takes me back to those sunlit afternoons, with the gentle rustle of leaves in the breeze and the comforting presence of family by my side. It’s a reminder that the simplest dishes, made with love and shared with those we hold dear, often become the most memorable.


Whether you’re hosting a summer gathering or simply craving a light and refreshing meal, this Easy Gluten-Free Vegetarian Pasta Salad is sure to delight. It’s a dish that not only satisfies the palate but also nourishes the soul with its simplicity and the memories it evokes.


Enjoy this delightful salad chilled, and let each bite transport you to a place of warmth, joy, and togetherness.

Read more about Appetizers

Read more about Main Dishes

Read more about Desserts

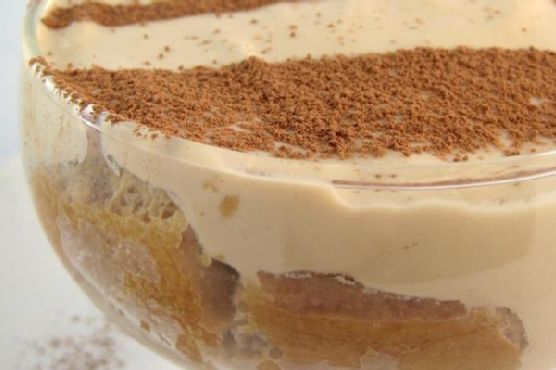
Kahlua Tiramisu | Made by Meaghan Moineau

Kahlua Tiramisu | Made by Meaghan Moineau

A Taste of Nostalgia: Kahlua Tiramisu


Indulge in the Rich Flavors of a Classic Dessert with a Twist


Kahlua Tiramisu is more than just a dessert; it's a journey through time, a blend of rich, creamy flavors that evokes cherished family memories. This delightful Italian classic, infused with a hint of Kahlúa, is perfect for any occasion. Whether you're hosting a dinner party or simply craving a sweet treat, this dessert is sure to impress.


Ingredients


- Mascarpone cheese


- Vanilla extract


- Kahlúa


- Espresso


- Whipping cream


- Icing sugar


- Ladyfingers (adjust quantity to fit your dish)


- Cocoa powder


Instructions


1. In a medium mixing bowl, combine the mascarpone, vanilla extract, Kahlúa, and slightly less than half of the espresso. Blend until smoothly mixed.


2. In another bowl, beat the whipping cream with the icing sugar until smooth. Gently fold in the mascarpone mixture.


3. Pour the remaining espresso into a large, deep plate. Quickly dip the ladyfingers, flipping sides, one by one, and arrange enough to form a single layer in an 11x7 casserole dish.


4. Evenly spread half of the mascarpone mixture over the ladyfingers.


5. Repeat with another layer of dipped ladyfingers and the remaining mascarpone mixture.


6. Refrigerate for a few hours or overnight to set.


7. Before serving, fill a small sieve with cocoa powder and lightly dust the top. For an extra touch of elegance, grate some bittersweet chocolate or create chocolate curls and scatter them over the top.


A Nostalgic Family Memory


The first time I tasted Kahlua Tiramisu, I was transported back to my grandmother's cozy kitchen, surrounded by the warmth of family gatherings. She had a knack for turning simple ingredients into culinary masterpieces, and her tiramisu was the star of many festive tables. The aroma of freshly brewed espresso mingling with the sweet, creamy layers always signaled a special occasion.


Every Thanksgiving, as we gathered around the table, my grandmother would bring out her treasured tiramisu, her eyes twinkling with pride. It was more than just dessert; it was a symbol of love and tradition, a recipe passed down through generations. Each bite was a reminder of the laughter and stories shared, the bonds strengthened over time. Even now, as I prepare this dish for my own family, I feel her presence, guiding me with every step.


Difficulty Rating: 4/10


Kahlua Tiramisu is surprisingly easy to make, yet it delivers a sophisticated and indulgent flavor profile. With a little patience and preparation, you'll have a dessert that's both impressive and deeply satisfying.


Classification: Dessert


Perfect as a decadent finale to any meal, this Kahlua Tiramisu is a timeless dessert that blends tradition with a modern twist. Enjoy a slice of nostalgia and create new memories with your loved ones around the table.

Read more about Appetizers

Read more about Main Dishes

Read more about Desserts

Fresh Strawberry Yogurt Cake | Made by Meaghan Moineau

Fresh Strawberry Yogurt Cake | Made by Meaghan Moineau

Title: "Sweet Memories: The Timeless Delight of Fresh Strawberry Yogurt Cake"
Description: Dive into the heartwarming flavors of our Fresh Strawberry Yogurt Cake, a dessert that effortlessly marries the sweetness of strawberries with the tangy zest of lemon. This delightful treat not only tantalizes your taste buds but also evokes cherished family memories. With a difficulty rating of 6 out of 10, it's the perfect dessert to impress your loved ones.

---


A Taste of Nostalgia: Fresh Strawberry Yogurt Cake

There's something inherently special about a recipe that transcends generations, weaving itself into the tapestry of family memories. For me, the Fresh Strawberry Yogurt Cake is not just a dessert—it's a portal to cherished times spent in my grandmother's cozy kitchen.


Ingredients:

- 2 cups flour, plus an additional ¼ cup


- 1 teaspoon baking soda


- ½ teaspoon salt


- Zest of 1 lemon


- ¾ cup butter, softened


- 1 ½ cups sugar


- 3 large eggs


- 1 tablespoon lemon juice, plus 2 tablespoons for the glaze


- 1 cup plain vanilla yogurt


- 1 ½ cups diced fresh strawberries


- 1 cup powdered sugar


Instructions:

1. Preheat your oven to 325°F (163°C) and prepare a 10-inch Bundt pan by greasing and flouring it.


2. Sift together 2 cups of flour, baking soda, and salt. Add the lemon zest to this mixture and set aside.


3. In a separate bowl, use an electric mixer to cream together the butter and sugar until the mixture is light and fluffy.


4. Beat in the eggs one at a time, ensuring each is well incorporated before adding the next. Stir in 1 tablespoon of lemon juice.


5. Gradually mix in the flour mixture and the yogurt, alternating between the two until just incorporated.


6. Toss the diced strawberries with the remaining ¼ cup of flour and gently fold them into the batter.


7. Pour the batter into the prepared Bundt pan and bake for 60 minutes, or until a toothpick inserted into the center comes out clean.


8. Allow the cake to cool in the pan for 10 minutes before transferring it to a wire rack to cool completely.


9. Once cooled, whisk together the remaining 2 tablespoons of lemon juice with the powdered sugar, and drizzle this glaze over the top of the cake.


A Journey Back in Time:

As a child, summers meant endless days at my grandparents' farmhouse. Nestled amidst lush strawberry fields, it was a haven of laughter and love. My grandmother, a wizard in the kitchen, would often invite me to help her bake. The Fresh Strawberry Yogurt Cake was her signature dessert, always made with strawberries freshly plucked from the backyard.


I remember the excitement of picking strawberries with my little hands, my grandmother’s gentle guidance ensuring I chose only the ripest ones. The kitchen would soon be filled with the comforting aroma of the cake as it baked, mingling with the sweet, tangy scent of lemon and vanilla.


Once the cake was ready, the whole family would gather around the table. Each slice was a reminder of the love and warmth that my grandmother infused into her cooking. Today, as I prepare this cake for my own family, I am transported back to those idyllic summer days. It’s a recipe I treasure, not only for its deliciousness but for the cherished memories it brings back.


Conclusion:

The Fresh Strawberry Yogurt Cake is more than a delightful dessert; it’s a tribute to family traditions and the joy of shared experiences. With a difficulty rating of 6 out of 10, this dessert is accessible yet impressive, perfect for family gatherings or a sweet treat to end a meal. Whether you're making it for the first time or the hundredth, this cake promises to be a delightful journey through flavors and memories.

Read more about Appetizers

Read more about Main Dishes

Read more about Desserts

Chocolate Almond Bark | Made by Meaghan Moineau

Chocolate Almond Bark | Made by Meaghan Moineau

A Taste of Tradition: Chocolate Almond Bark Recipe


Description:

Indulge in the perfect blend of sweet and spicy with our Chocolate Almond Bark recipe. This easy-to-make dessert combines the rich flavor of candy-making chocolate with the subtle heat of cayenne pepper, creating a delectable treat that'll tantalize your taste buds. Whether you're a seasoned chef or a novice in the kitchen, this recipe is sure to impress. Dive into the story behind this family favorite and bring a touch of nostalgia to your dessert table.

---


Chocolate Almond Bark Recipe


Ingredients:

- 1 cup raw almonds, chopped

- 1 teaspoon cayenne pepper


- 10 oz candy-making chocolate


- 1 teaspoon sea salt, plus a pinch for topping


- 2 tablespoons Worcestershire sauce


Instructions:

1. Preheat your oven to 160 degrees.

2. In a medium bowl, combine the chopped almonds with Worcestershire sauce, cayenne pepper, and sea salt. Stir until the almonds are well coated.


3. Spread the almond mixture evenly on a baking sheet and roast in the oven for 20 minutes. Once done, allow the almonds to cool completely.


4. Melt the chocolate using a double boiler or microwave on low heat. Be sure to stir frequently to prevent scorching.


5. Mix the cooled almonds into the melted chocolate until well combined.


6. Spread the chocolate-almond mixture into an 8 x 8 inch pan lined with wax paper. Sprinkle a pinch of sea salt on top for added flavor.


7. Let the chocolate cool and set completely. Once firm, break into bite-sized pieces.


Difficulty Rating: 3/10


Classification: Dessert


---


A Sweet Nostalgia: The Story Behind the Chocolate Almond Bark


Every time I make Chocolate Almond Bark, I'm transported back to my grandmother's cozy kitchen during the festive holiday season. It's a recipe that's been passed down through generations, each family member adding their unique touch. For me, the smell of roasting almonds and melting chocolate brings back vivid memories of laughter and warmth shared around the kitchen table.


I remember one particular winter evening when the first snow began to fall, casting a magical glow over the neighborhood. My grandmother and I huddled in the kitchen, the windows fogged from the warmth inside. She showed me how to combine the ingredients with precision and care, her hands moving with practiced grace. As we waited for the almonds to cool, she shared stories of her childhood, of how her mother would make this very treat as a special surprise for the family.


The cayenne pepper was her secret ingredient, she whispered with a wink, adding just the right amount of unexpected heat to complement the sweetness of the chocolate. It was a combination that seemed odd at first, but one taste and I was hooked. The spiciness played off the chocolate in a way that was both surprising and delightful, making each bite an adventure.


Now, every holiday season, I make sure to carry on the tradition. I gather my own family in the kitchen, sharing stories and laughter as we create this exquisite dessert. It's more than just a recipe; it's a reminder of the love and joy that comes from sharing food and memories with those we hold dear.


So, as you embark on making this Chocolate Almond Bark, I hope you find your own moments of nostalgia and connection. May it become a cherished part of your family's traditions, just as it has in mine.

Read more about Appetizers

Read more about Main Dishes

Read more about Desserts

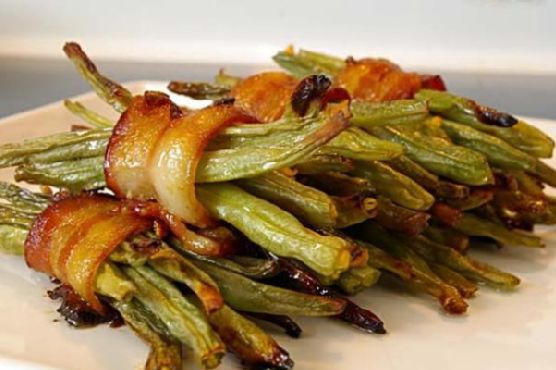
Bacon Wrapped Green Bean Bundles | Made by Meaghan Moineau

Bacon Wrapped Green Bean Bundles | Made by Meaghan Moineau

Title: Savoring Memories: The Irresistible Allure of Bacon Wrapped Green Bean Bundles
Description: Dive into a culinary journey that combines the comforting flavors of crispy bacon and tender green beans. This delightful appetizer, Bacon Wrapped Green Bean Bundles, not only promises to tantalize your taste buds but also evokes cherished family memories. Discover how this simple yet elegant dish can become a staple in your family gatherings.

---


A Nostalgic Culinary Adventure: Bacon Wrapped Green Bean Bundles


There’s something magical about the way certain dishes can transport us back to cherished moments in time. For me, Bacon Wrapped Green Bean Bundles are more than just an appetizer; they are a gateway to fond family memories and joyful gatherings around the dining table.


Ingredients:


- Fresh green beans


- Bacon


- Butter


- Brown sugar


- Fresh garlic


- Soy sauce


Instructions:


1. Preparation: Preheat your oven to 425°F (220°C). Grease a 10x15 inch baking dish and set it aside, setting the stage for a delightful culinary creation.
2. Assembly: Take 8 or 9 fresh green beans and wrap them with a strip of bacon, securing the bundle in the prepared dish. Repeat this process until all the green beans are lovingly embraced by bacon.
3. Flavor Infusion: In a small saucepan, melt butter and combine it with brown sugar, freshly minced garlic, and a splash of soy sauce. Stir well, letting the flavors meld into a luscious sauce.
4. Baking: Pour the sauce over your green bean bundles, ensuring each one is generously coated. Place the baking dish in the preheated oven and bake for 25 to 30 minutes, or until the bacon turns crispy and the green beans achieve a golden-brown hue.

A Family Memory


As a child, I remember visiting my grandmother’s house every Sunday for family dinner. The kitchen was always filled with the comforting aroma of home-cooked meals, a testament to her culinary skills. One particular evening stands out in my memory. My grandmother decided to try something new, a recipe she had found in a magazine: Bacon Wrapped Green Bean Bundles.


I watched in awe as she expertly wrapped each bundle, her hands moving with practiced ease. The anticipation grew as the scent of bacon mingled with the sweetness of brown sugar and the savory notes of garlic and soy sauce. When the bundles finally emerged from the oven, crispy and glistening, the entire family gathered around. The first bite was a revelation—salty, sweet, and utterly delicious. That evening, laughter and stories flowed as freely as the food, creating a tapestry of memories that I cherish to this day.


Difficulty: 3/10


This dish is rated as an easy, beginner-friendly appetizer. It requires minimal ingredients and preparation, making it perfect for cooks of all skill levels.


Appetizer Perfection


Bacon Wrapped Green Bean Bundles serve as an ideal appetizer, offering a delightful blend of flavors and textures that are sure to impress your guests. Whether you're hosting a holiday feast or a casual dinner party, this dish is bound to become a beloved favorite, much like it did in my family.


---


Incorporating this easy yet impressive appetizer into your culinary repertoire not only promises to delight your taste buds but also has the potential to create lasting memories for you and your loved ones. So, gather your ingredients, preheat your oven, and let the nostalgia-infused aroma of Bacon Wrapped Green Bean Bundles fill your kitchen and your heart.

Read more about Appetizers

Read more about Main Dishes

Read more about Desserts

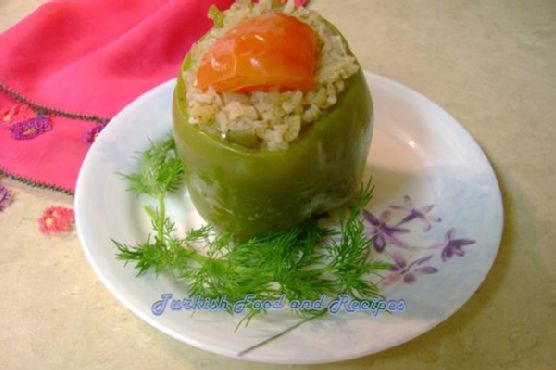
Rice Stuffed Bell Peppers (Zeytinyagli Biber Dolmasi) | Made by Meaghan Moineau

Rice Stuffed Bell Peppers (Zeytinyagli Biber Dolmasi) | Made by Meaghan Moineau

A Taste of Tradition: Rice Stuffed Bell Peppers (Zeytinyağlı Biber Dolması)


Experience the Heartfelt Flavors of a Timeless Turkish Delicacy


Introduction


There's a certain magic that comes with recreating traditional dishes, especially when they transport you back to cherished family gatherings. One such dish, the Rice Stuffed Bell Peppers, or Zeytinyağlı Biber Dolması, is a testament to the rich culinary heritage of Turkey. This delightful blend of aromatic spices and tender bell peppers filled with a savory rice mixture is both comforting and flavorful, making it a must-try for anyone looking to explore authentic Turkish cuisine.


Difficulty Level: 5/10
Category: Main Dish

Ingredients


- Bell peppers


- Olive oil


- Onions


- Tomatoes


- Tomato paste


- Rice


- Salt


- Sugar


- Allspice


- Cinnamon


- Dried or fresh mint


- Water


Instructions


1. Prepare the Peppers:

Begin by cutting the tops off the bell peppers, removing the seeds, and washing them thoroughly. Set aside to dry.


2. Create the Filling:

In a large pan, lightly sauté the onions in olive oil until they are translucent. Stir in the chopped tomatoes and tomato paste, allowing them to cook for an additional 3 minutes.


3. Cook the Rice:

Add the rice to the onion-tomato mixture and braise it for about 5 minutes. Then, add salt, sugar, allspice, cinnamon, and mint, along with hot water. Allow the mixture to simmer until all the liquid has evaporated. Let it cool for a short while.


4. Stuff the Peppers:

Using a spoon, fill each bell pepper with the rice mixture. Place a slice of tomato on top of each pepper to act as a cap.


5. Cook the Dolmasi:

Arrange the stuffed peppers in a large saucepan or pot. Add enough water to reach halfway up the sides of the peppers. Cover with a lid and cook on low heat for about 15-20 minutes.


6. Serve and Enjoy:

Serve the rice-stuffed bell peppers warm or hot, and enjoy the blend of spices and textures that make this dish so special.


A Nostalgic Family Memory


Growing up, Sunday afternoons at my grandmother's house were filled with the intoxicating aromas of her cooking. Zeytinyağlı Biber Dolması was always a family favorite, and its preparation was a cherished ritual. I can still picture my grandmother, her hands deftly crafting each stuffed pepper with care, while recounting tales of her childhood in the vibrant streets of Istanbul.


The kitchen buzzed with laughter and stories, a symphony of clinking pots and shared memories. We would gather around the table, eager to taste the fruits of her labor. Each bite of the dolmasi was a flavor-packed journey, the spices dancing on our tongues, mingling with the sweetness of the peppers.


These meals were more than just food; they were a connection to our heritage, a bridge linking us to generations past. Every time I prepare this dish, I am transported back to those warm, love-filled Sundays, and I feel a deep sense of gratitude for the culinary legacy passed down to me.


Conclusion


Rice Stuffed Bell Peppers (Zeytinyağlı Biber Dolması) is more than just a meal; it's an experience, a journey into the heart of Turkish culture and family traditions. Whether you're a seasoned cook or a curious beginner, this recipe offers a taste of nostalgia and the opportunity to create lasting memories around the dinner table. So, gather your ingredients, embrace the process, and enjoy the rich, savory flavors of this timeless dish.

Read more about Appetizers

Read more about Main Dishes

Read more about Desserts

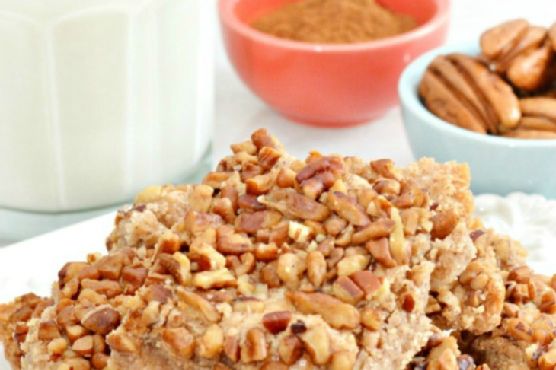
Cinnamon Nut Squares | Made by Meaghan Moineau

Cinnamon Nut Squares | Made by Meaghan Moineau

Title: Warm Memories and Sweet Treats: The Irresistible Allure of Cinnamon Nut Squares
Description: Discover the warmth of nostalgia with our Cinnamon Nut Squares—a delightful dessert that combines the rich flavors of cinnamon and pecans with a heartwarming family story. This easy-to-make recipe will become a cherished staple in your kitchen, perfect for creating new memories.

---


There’s something undeniably special about the aroma of cinnamon wafting through the house. It’s a scent that seems to wrap you in a warm hug, transporting you back to cherished moments of laughter and love. For me, the enchanting smell of cinnamon always takes me back to my grandmother’s cozy kitchen, where I first discovered the magic of baking.


Cinnamon Nut Squares: A Taste of Nostalgia
Ingredients:

- 1 cup butter, softened


- 1 teaspoon butter vanilla bakery emulsion


- 1 tablespoon ground cinnamon


- 1 large egg, separated


- 2 cups all-purpose flour


- 1 cup chopped pecans


- 1/2 teaspoon salt


- 3/4 cup sugar


Instructions:

1. Preheat your oven to 300 degrees Fahrenheit and generously spray a 14x8x2 inch oblong baking pan with baking spray.


2. In a mixing bowl, cream the butter, gradually adding the sugar. Continue beating until the mixture is light and fluffy, reminiscent of the joy a simple kitchen can bring.


3. Add the egg yolk, flour, cinnamon, salt, and vanilla emulsion. Mix well until the dough is thick, just like the bond of family.


4. Press the dough evenly into the prepared pan, creating a crust that may be thin but is full of flavor and love.


5. Lightly beat the egg white and brush it over the top of the dough. Sprinkle the chopped pecans evenly, pressing them gently into the dough.


6. Bake for about 50 minutes or until the edges turn golden brown, echoing the golden memories of yesteryears.


7. Remove from the oven and cut into squares while still hot. Let them cool and use a spatula to remove them from the pan.


8. Store in a tightly covered container; these sweet squares will keep for up to a week, inviting you to indulge in nostalgia one bite at a time.


A Walk Down Memory Lane

The first time I tasted these delightful squares was during a crisp autumn afternoon at my grandmother’s house. I was a curious child, always eager to help in the kitchen, and the task of pressing the dough into the pan was mine. I remember the way my small hands moved over the dough, feeling the coolness of the butter and the warmth of the cinnamon. It was a simple task, but the pride it brought was immense.


As the squares baked, my grandmother would regale me with stories of her own childhood, tales of family gatherings and the comforting presence of home-baked goods. The kitchen became a place where the past and the present intertwined, where each ingredient was a thread in the tapestry of our family history.


A Sweet Conclusion

Cinnamon Nut Squares are more than just a dessert—they are a vessel for memories, a tribute to the bonds that tie us together. With a difficulty rating of 3 out of 10, they are accessible to bakers of all levels, inviting everyone to create their own cherished moments.


Classified as a dessert, these squares are perfect for sharing at family gatherings, holiday parties, or simply as a treat to enjoy with a cup of tea. As you bake and savor these little squares of joy, may they remind you of the warmth of family and the sweetness of tradition.


So, gather your loved ones, preheat your oven, and let the delightful aroma of Cinnamon Nut Squares fill your home with memories old and new.

Read more about Appetizers

Read more about Main Dishes

Read more about Desserts

Mashed Sweet Potatoes | Made by Meaghan Moineau

Mashed Sweet Potatoes | Made by Meaghan Moineau

**Title: Comfort in a Bowl: Nostalgic Mashed Sweet Potatoes**


**Description:** Dive into the heartwarming world of Mashed Sweet Potatoes, a dish that marries the comforting flavors of cinnamon and cardamom with the sweet allure of maple syrup and brown sugar. This recipe is not just a side dish; it's a journey through cherished family memories and the warmth of home cooking. Join me as I share the joy of creating and savoring this delectable, easy-to-make dish that scores a low 3/10 on the difficulty scale, perfect as a delightful side for any meal.


---


**The Sweet Essence of Family: A Mashed Sweet Potatoes Journey**


There's something magical about the kitchen during the holidays. The hum of conversation, the clinking of dishes, and the mouthwatering aroma of sweet and spicy flavors dancing through the air create an atmosphere of warmth and togetherness. For me, one dish that encapsulates this feeling is Mashed Sweet Potatoes—a dish as comforting as a grandmother's hug.


**A Nostalgic Tale:**


Growing up, the holiday season was a bustling affair at my grandmother's house. The kitchen was always filled with the sights and sounds of family members working side by side, each contributing to the festive feast. Among the many dishes, my grandmother's Mashed Sweet Potatoes held a special place on the table and in our hearts.


I vividly remember the first time she let me help prepare them. I was barely tall enough to see over the countertop, but she handed me a wooden spoon and guided my tiny hands as we mashed the sweet potatoes together. "Now, add a bit of this," she'd say, passing me a pinch of cinnamon or a spoonful of maple syrup, her eyes twinkling with the wisdom of years spent perfecting this recipe.


The secret, she confided, was in the balance of flavors—the warm spice of cardamom, the unexpected heat of cayenne pepper, and the bright zest of an orange, all melded together by the luxurious smoothness of cream and butter. Each bite was a revelation, a perfect harmony of sweet and savory that left you longing for more.


**The Recipe: Mashed Sweet Potatoes**


**Ingredients:**


- 4 large sweet potatoes, peeled and cut into chunks


- 1/4 cup brown sugar


- 1/4 cup butter


- 1/2 teaspoon ground cardamom


- 1/8 teaspoon cayenne pepper


- 1 teaspoon ground cinnamon


- 1/4 cup cream


- Kosher salt, to taste


- 1/4 cup maple syrup


- 1 tablespoon orange zest


- 1 teaspoon vanilla extract


**Instructions:**


1. Begin by boiling the sweet potatoes until tender. Drain and return them to the pot.


2. Mash the peeled potatoes until well broken up. For a smoother texture, feel free to use an electric mixer.


3. In a separate bowl, mix together the cinnamon, cayenne, cardamom, orange zest, and brown sugar. Set this aromatic mixture aside.


4. Add the butter, cream, vanilla extract, and maple syrup to the mashed sweet potatoes. Stir thoroughly until the mixture is well combined and creamy.


5. Incorporate the cinnamon sugar mixture, blending until smooth.


6. Salt to taste, adjusting the seasoning until the flavors sing.


**A Dish for Every Occasion:**


Rated at a 3/10 on the difficulty scale, this dish is not only simple to make but also versatile enough to accompany a variety of meals. Whether served as a comforting side to a holiday roast or as a hearty addition to a weeknight dinner, these Mashed Sweet Potatoes bring a touch of nostalgia and warmth to any table.


As you savor this dish, remember that it's more than just a recipe; it's a celebration of family, tradition, and the simple joys of cooking together. So, gather your loved ones, share the story, and enjoy the sweet embrace of a dish that feels like home.

Read more about Appetizers

Read more about Main Dishes

Read more about Desserts

Baked Cinnamon Apple Wedges | Made by Meaghan Moineau

Baked Cinnamon Apple Wedges | Made by Meaghan Moineau

**Title: A Warm Hug in Every Bite: Baked Cinnamon Apple Wedges**


**Description:** Dive into the nostalgic flavors of fall with our Baked Cinnamon Apple Wedges. This simple yet flavorful dessert is perfect for cozy gatherings or a comforting treat at home. With just four ingredients, this easy-to-make dish brings back cherished family memories while delighting your taste buds.


---


As autumn leaves begin to fall and a crisp breeze fills the air, my thoughts often drift back to cozy family gatherings. One of my fondest memories is of my grandmother bustling around her warm kitchen, the welcoming scent of cinnamon and nutmeg weaving through the house like a comforting embrace. She had a knack for turning the simplest ingredients into something magical, and her Baked Cinnamon Apple Wedges were no exception.


Every autumn, she would gather the freshest apples from the local orchard, their skins glistening in shades of red and green. I remember sitting at the kitchen table, my feet barely touching the floor, as she meticulously cut each apple into perfect wedges. She would then drizzle them with rich maple syrup, sprinkle them with aromatic cinnamon and nutmeg, and slide them into the oven. The anticipation was almost too much to bear, as the sweet and spicy aroma filled the room, wrapping us in its warmth.


Just ten minutes later, the apples emerged from the oven, golden brown and tender, ready to be savored. Each bite was like a warm hug, the flavors perfectly balanced and reminiscent of everything wonderful about the season. We would gather around the table, sharing stories and laughter, the simple act of enjoying these baked apple wedges creating memories that would last a lifetime.


Now, as I prepare this dish for my own family, I am reminded not only of my grandmother's love but also of the joy found in sharing these timeless recipes. The Baked Cinnamon Apple Wedges are more than just a dessert; they are a connection to the past, a celebration of the present, and a tradition I hope to pass on.


**Recipe: Baked Cinnamon Apple Wedges**


**Ingredients:**


- 1 apple


- 1 tablespoon maple syrup


- 1 teaspoon ground cinnamon


- 1/4 teaspoon ground nutmeg


**Instructions:**


1. Preheat your oven to 180 degrees Celsius (356 degrees Fahrenheit).


2. Cut the apple into approximately 10-12 wedges.


3. In a bowl, mix the apple wedges with maple syrup, cinnamon, and nutmeg until evenly coated.


4. Arrange the apple wedges in a single layer in a small baking dish or on a baking tray.


5. Bake in the preheated oven for 10 minutes, or until the apples are golden brown and cooked through.


6. Serve warm and enjoy the comforting flavors.


**Difficulty Rating:** 2/10


**Classification:** Dessert


Whether you're looking to recreate cherished family memories or simply indulge in a deliciously easy dessert, these Baked Cinnamon Apple Wedges are sure to delight. With their enticing aroma and comforting taste, they capture the essence of fall in every bite. So gather your loved ones, share a story or two, and enjoy this warm hug from the oven.

Read more about Appetizers

Read more about Main Dishes

Read more about Desserts

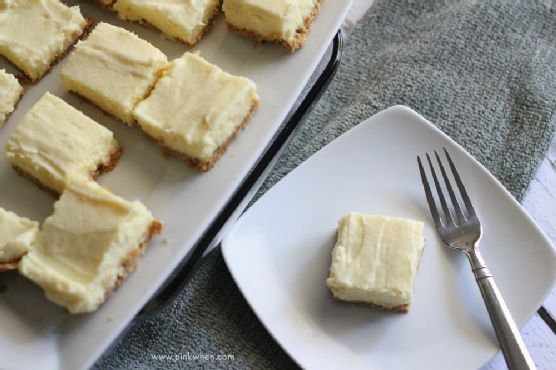
Creamy Lime Pie Square Bites | Made by Meaghan Moineau

Creamy Lime Pie Square Bites | Made by Meaghan Moineau

**Title: A Zesty Twist on Tradition: Creamy Lime Pie Square Bites**


**Description:** Dive into a world of tangy sweetness with our Creamy Lime Pie Square Bites. Perfect for dessert lovers, these luscious bites are a modern twist on a family classic. Discover the perfect blend of graham cracker crust and creamy lime filling, and indulge in a nostalgic journey that will tantalize your taste buds and warm your heart.


---


### A Nostalgic Bite of Lime Heaven


Growing up, my family had a tradition of gathering every Sunday afternoon at my grandmother's house for a potluck feast. Each member would bring their signature dish, but the highlight was always my grandmother's famous key lime pie. The tartness of the lime combined with the sweetness of the creamy filling was a taste that lingered in our memories long after the last bite was savored.


Fast forward to today, and I've taken her beloved recipe and transformed it into Creamy Lime Pie Square Bites—a delightful, bite-sized version that pays homage to those cherished family gatherings. These squares are perfect for sharing, just like the memories of those sunny Sundays in Grandma's kitchen.


### Ingredients:


- All-purpose flour


- Graham cracker crumbs


- Lime zest


- Sugar


- Unsalted butter


### Instructions:


1. **Preheat and Prepare:** Begin by preheating your oven to 350°F (175°C). Cover an 8x8 glass square dish with foil, ensuring the foil extends beyond the edges for easy removal later.


2. **Crust Creation:** In a medium bowl, whisk together all-purpose flour, graham cracker crumbs, lime zest, and sugar until they reach a grainy consistency. Melt unsalted butter and incorporate it into the mixture.


3. **Press and Bake:** Using a spoon or your fingers, press the graham crust mixture firmly into the prepared dish, making sure all edges and the bottom are well covered. Place in the oven and bake for 10-15 minutes until the crust is golden brown. Set aside to cool for about an hour.


4. **Filling the Flavor:** For the filling, combine all your ingredients in a medium bowl. Mix well for about 30 minutes, ensuring a smooth, creamy texture, then continue mixing on low speed for an additional 3 minutes.


5. **Assemble and Bake Again:** Pour the filling into the graham cracker crust, smoothing out the top and ensuring the edges are filled. Bake in the oven for another 5-10 minutes before removing the dish to a cooling rack for 15 minutes.


6. **Chill and Serve:** Finally, transfer the dish to the refrigerator for about 45 minutes to set. Once chilled, carefully lift the foil to remove the dessert from the dish. Slice into bite-sized squares and serve.


### A Tangy Twist on Tradition


These Creamy Lime Pie Square Bites are more than just a dessert. They're a testament to the power of family traditions and the joy of sharing a lovingly prepared meal. Whether you're a seasoned baker or a novice in the kitchen, these squares are a breeze to make and sure to impress.


**Difficulty:** 4/10


**Category:** Dessert


### Explore More Lime-Infused Delights


If you're as captivated by lime's zesty charm as we are, explore these delightful recipes:


- Coconut Lime Spritzer


- Blackberry Lime Margaritas


- Strawberry Limeade


- Cherry Lime Chia Energy Bars


- Strawberry Margarita Cheesecake


### A Note on Essential Oils


While adding a drop of high-quality lime essential oil can enhance the flavor, it's crucial to ensure the oil is edible. Look for therapeutic-grade oils with a Supplement Facts box. Always prioritize purity and safety in your culinary adventures.


Join our community of over 500,000 subscribers at Pink When and get exclusive recipes and tips delivered straight to your inbox. Sign up now and receive our FREE Simple Fit Dinners Ebook. Don’t miss out on the culinary fun!

Read more about Appetizers

Read more about Main Dishes

Read more about Desserts

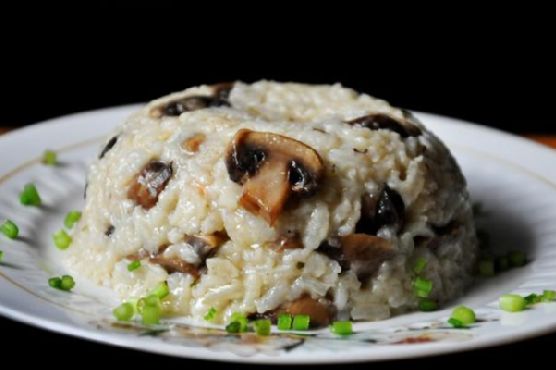
Brown Rice Mushroom Pilaf | Made by Meaghan Moineau

Brown Rice Mushroom Pilaf | Made by Meaghan Moineau

**Title: A Hearty Bowl of Comfort: Brown Rice Mushroom Pilaf**


**Description:** Discover the heartwarming delight of Brown Rice Mushroom Pilaf, a dish that brings back cherished family memories. Perfect as a main dish, this simple yet flavorful recipe is a wholesome addition to your menu. Join me as I share a nostalgic journey and a recipe that scores a 4 out of 10 on the difficulty scale, yet offers a 10 in satisfaction.


---


When the cool winds of autumn arrive, they carry with them a cascade of memories from a time when family gatherings were frequent and hearty meals filled the air with irresistible aromas. One such dish that has been a staple in my family for generations is the Brown Rice Mushroom Pilaf. With its earthy flavors and comforting warmth, it never fails to evoke a sense of home.


**The Nostalgic Story:**


I remember the first time I helped my grandmother make this pilaf. It was a chilly Saturday afternoon, and we were preparing for a large family dinner. The aroma of onions sizzling in sunflower oil filled the kitchen, mingling with the earthy scent of mushrooms. My grandmother, with her kind eyes and gentle hands, guided me through the process, teaching me how to patiently sauté the onions and mushrooms until they reached that perfect golden hue.


As the brown rice was added to the pan, she imparted her wisdom, "The secret, my dear, is to let each grain soak up the flavors. It’s like life; we must take in all the goodness around us." With her guidance, I learned the art of stirring the rice just enough to coat it in the oil without overdoing it, allowing each grain to absorb the rich flavors of the dish.


Once the water was added, we waited, sharing stories and laughter, letting the pilaf simmer, filling the air with its inviting aroma. The lid was placed on the saucepan, and we let it rest, just like she taught me, ensuring every drop of liquid was absorbed, leaving the rice tender and flavorful.


This dish, simple in its ingredients yet profound in its ability to bring people together, became a symbol of our family’s love and togetherness. To this day, whenever I prepare Brown Rice Mushroom Pilaf, it’s as if my grandmother is right there with me, smiling and reminding me of the importance of savoring life’s simple pleasures.


**Recipe for Brown Rice Mushroom Pilaf:**


**Ingredients:**


- 1 onion, chopped


- 1 cup brown rice


- 1 can (or equal amount) fresh mushrooms, sliced


- 2 tablespoons unrefined sunflower oil


- 2 cups water


- Sea salt, to taste


- Ground pepper, to taste


**Instructions:**


1. Heat the sunflower oil in a large saucepan over medium heat.


2. Add the chopped onion and sliced mushrooms, sautéing them for about 5 minutes until the onion becomes translucent and the mushrooms soften.


3. Stir in the brown rice, ensuring each grain is well-coated with the oil and flavors from the onion and mushrooms.


4. Pour in the water and bring the mixture to a boil.


5. Reduce the heat to a simmer, covering the saucepan. Let it cook for approximately 30 minutes.


6. Remove from heat, keeping the lid on, and let the pilaf rest until all the liquid is absorbed into the rice.


7. Season with sea salt and ground pepper to taste, then fluff with a fork before serving.


**Difficulty Rating:** 4/10


**Classification:** Main Dish


This Brown Rice Mushroom Pilaf is more than just a meal; it’s a journey into the past, a reminder of the warmth and love of family traditions. It’s perfect for a cozy dinner, offering a delightful blend of flavors that speak to the heart and soul. Whether you’re recreating cherished memories or making new ones, this dish is sure to become a beloved favorite in your home.

Read more about Appetizers

Read more about Main Dishes

Read more about Desserts

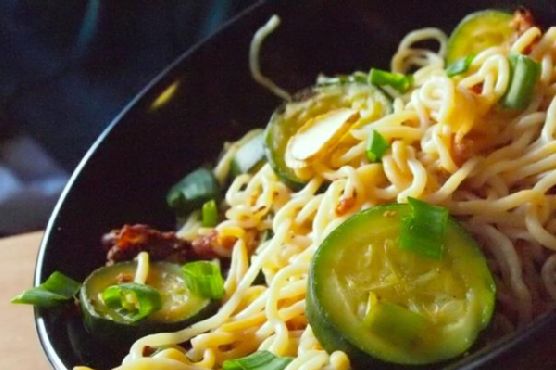
Szechuan-Style Shirataki Noodles | Made by Meaghan Moineau

Szechuan-Style Shirataki Noodles | Made by Meaghan Moineau

# Spice Up Your Meals with Szechuan-Style Shirataki Noodles


Are you looking for an exciting twist to your weeknight dinners? Look no further! Our Szechuan-Style Shirataki Noodles are a flavorful, easy-to-make dish that will tantalize your taste buds and impress your family and friends. This recipe is packed with bold flavors and is the perfect combination of spicy, savory, and aromatic goodness. Plus, it’s a guilt-free indulgence, thanks to the low-calorie shirataki noodles. Get ready to dive into a delightful culinary adventure!


## A Family Tradition with a Twist


Growing up, family dinners were always a cherished time in our household. My mother, a culinary enthusiast, would often experiment with various global cuisines. One of my fondest memories is the first time she introduced us to Szechuan-style cooking. The spicy aroma that filled the kitchen was unlike anything I had ever smelled before. I remember sitting around the dining table, our eyes wide with anticipation, as she served us a dish that would soon become a family favorite.


Years later, I decided to recreate this dish with a modern twist by incorporating shirataki noodles. Not only did it bring back a flood of happy memories, but it also offered a healthier alternative without compromising on flavor. Sharing this dish with my own family has kept the tradition alive, and it’s now a staple in our home.


## Ingredients You’ll Need


- Shirataki noodles


- Protein of your choice (tofu, chicken, beef, or turkey)


- Soy sauce


- Dry rice wine


- Chili sauce


- Fresh ginger


- Green and white scallions


- Raw veggies (bell peppers, carrots, broccoli, etc.)


- Sesame oil


## Step-by-Step Instructions


1. **Prepare the Noodles**: Microwave the shirataki noodles for 1 minute on high. Drain them thoroughly, pat them dry, and set aside.


2. **Marinate the Protein**: In a bowl, combine soy sauce, rice wine, and chili sauce. Add your chosen protein and toss to coat. If using ground meat, mix thoroughly and set aside.


3. **Stir-Fry Magic**: Spray a non-stick skillet with vegetable oil and heat over high flame. Add fresh ginger and cook for about 30 seconds until fragrant. Add your raw veggies and stir-fry until they’re nearly al dente.


4. **Add Flavor and Protein**: Toss in the scallions and marinated protein. Continue to stir-fry until the protein is cooked through (1-2 minutes for tofu, soy, or turkey).


5. **Combine and Serve**: Add the shirataki noodles to the skillet, sprinkle with an additional 2 tsp. of soy sauce, and stir-fry for about 1 minute until heated through. Transfer to a serving bowl, drizzle with sesame oil, and toss.


## Dish Classification and Difficulty


- **Classification**: Main Dish


- **Difficulty**: 4/10


This delightful dish is not only easy to prepare but also offers a quick escape to the vibrant streets of Szechuan. Whether you’re a seasoned cook or a beginner, this recipe is straightforward and guaranteed to deliver a burst of flavor with every bite.


## Final Thoughts


Our Szechuan-Style Shirataki Noodles are more than just a meal—they’re a journey through family memories and culinary exploration. By combining traditional Szechuan flavors with the modern twist of shirataki noodles, this dish offers a perfect balance of health and taste. Gather your loved ones, share your own stories, and create new memories with this delightful recipe. Enjoy!

Read more about Appetizers

Read more about Main Dishes

Read more about Desserts

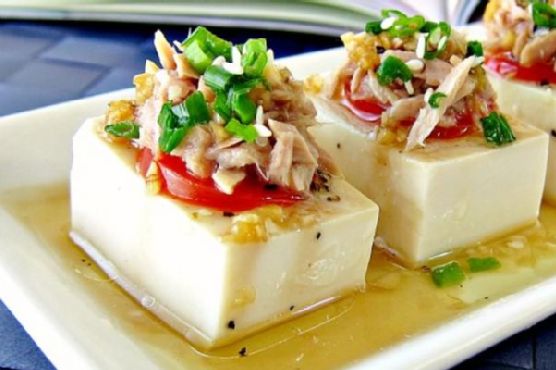
Tuna and Tofu Cold Dish | Made by Meaghan Moineau

Tuna and Tofu Cold Dish | Made by Meaghan Moineau

### A Taste of Nostalgia: Tuna and Tofu Cold Dish


**Description:** Dive into the delightful simplicity of our Tuna and Tofu Cold Dish, a refreshing appetizer that combines the delicate flavors of silken tofu, savory tuna, and fresh cherry tomatoes. Enhanced with a zesty sauce and subtle spices, this dish is not only easy to prepare but also a nostalgic nod to cherished family gatherings.


---


#### Ingredients:


- 1 block silken tofu


- 1 can tuna in water


- A handful of white cherry tomatoes, diced


- White pepper


- Extra virgin olive oil


- Vinegar


- Light Kikkoman soy sauce


- 1 clove garlic, minced


- Black pepper


- Toasted sesame seeds (for garnish)


- Diced spring onion (for garnish)


#### Instructions:


1. **Prepare the Tofu:** Begin by cutting the silken tofu into small, uniform blocks. Arrange these gently on a serving plate, being careful not to break them.


2. **Tuna Mixture:** Open the can of tuna and drain the water thoroughly. Slightly squash the tuna with a fork and mix in a dash of white pepper and a pinch of salt. This seasoning adds a subtle depth to the tuna, enhancing its natural flavor.


3. **Tomato Slices:** Thinly slice the white cherry tomatoes and scatter them over the tofu.


4. **Assemble the Dish:** Place the seasoned tuna over the tofu and tomatoes, ensuring an even distribution.


5. **Drizzle the Sauce:** In a small bowl, combine extra virgin olive oil, vinegar, light soy sauce, and minced garlic. Drizzle this mixture over the assembled tofu, tuna, and tomatoes.


6. **Garnish and Serve:** Sprinkle with toasted sesame seeds and diced spring onion for an added crunch and burst of flavor. Serve immediately to enjoy the freshness of this cold dish.


---


#### A Family Memory Revisited


As I prepare this Tuna and Tofu Cold Dish, I am transported back to my childhood summers spent at my grandmother's countryside home. Her kitchen was always filled with the comforting aroma of fresh ingredients and the sound of laughter. This dish, in particular, was a family favorite during our Sunday lunches in the garden, where the sun cast dappled shadows through the leaves of the old oak tree.


I remember sitting beside my grandmother, watching her deftly slice tofu and mix the tuna with a practiced hand. She would tell stories of her own childhood, weaving tales as she layered the ingredients with love and care. It was during these moments that I learned the true meaning of family and tradition—how a simple dish could bring us all together, bridging generations with each flavorful bite.


This Tuna and Tofu Cold Dish is more than just an appetizer; it's a connection to my past. Every time I recreate it, I feel a sense of warmth and continuity, knowing I am carrying on a family legacy that began long before my time.


---


#### Difficulty Rating: 3/10


**Classification:** Appetizer


With its minimal preparation and fresh ingredients, this Tuna and Tofu Cold Dish is an easy yet elegant appetizer perfect for summer gatherings or a light starter to any meal. Its simplicity is its charm, allowing the natural flavors to shine through and evoke memories of home and family with every bite.

Read more about Appetizers

Read more about Main Dishes

Read more about Desserts

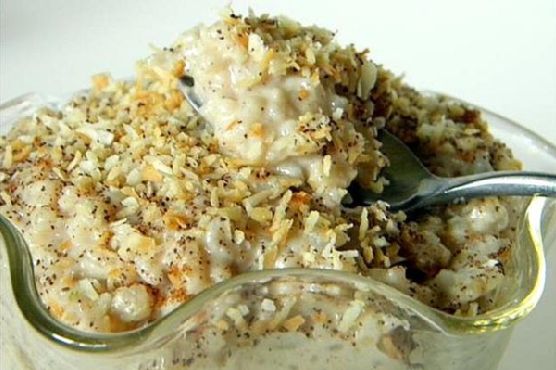
Rice Pudding | Made by Meaghan Moineau

Rice Pudding | Made by Meaghan Moineau

**Title: Nostalgia in a Bowl: The Comfort of Homemade Rice Pudding**


**Description:**


Indulge in the creamy, comforting embrace of homemade rice pudding—a classic dessert that effortlessly bridges the gap between past and present. This easy-to-follow recipe, rated at a 3 out of 10 on the difficulty scale, will not only satisfy your sweet tooth but also transport you back to the warm, nostalgic kitchens of yesteryear. Join me as I share a cherished family memory tied to this beloved dessert. Perfect for any occasion, this rice pudding is sure to become a staple in your dessert repertoire.


---


**A Journey Through Time: Reliving Childhood Memories with Rice Pudding**


There’s something magical about the aroma of vanilla and cinnamon wafting through the kitchen. It transports me back to my grandmother’s cozy home, where love was served by the spoonful. Rice pudding was not just a dessert; it was a ritual, a comforting constant amidst the whirlwind of childhood adventures.


Every Sunday afternoon, my family would gather around the kitchen table, eager to savor the sweet, creamy delight that was my grandmother’s signature rice pudding. She would always let me help, handing me a wooden spoon too big for my small hands and guiding me through the simple yet meticulous process.


“Patience is the secret ingredient,” she’d say, her eyes twinkling with the wisdom of countless desserts perfected over the years. As the rice simmered, she’d share stories from her own childhood, tales of family gatherings and festive occasions where rice pudding was the star of the dessert table.


Now, as an adult, I find myself recreating that same comforting dish in my own kitchen, savoring each spoonful and each memory that accompanies it. This recipe, with its creamy texture and delicate balance of flavors, is a testament to those cherished moments of family and tradition.


**The Recipe: A Step-by-Step Guide to Creamy Perfection**


**Ingredients:**


- 1 1/2 cups water


- 3/4 cup medium or short grain rice


- 1/4 teaspoon salt


- 2 cups whole milk, divided


- 1/3 cup sugar


- 1 large egg, beaten


- 1 tablespoon butter


- 1 teaspoon vanilla extract


- A pinch of cinnamon or nutmeg


**Instructions:**


1. **Prepare the Rice:**


In a medium saucepan, bring 1 1/2 cups of water to a boil. Add the rice and salt, stirring gently. Cover, reduce the heat, and let it simmer until the water is absorbed, approximately 15 minutes.


2. **Create the Creamy Base:**


In another saucepan, combine 1 1/2 cups of milk, sugar, and the cooked rice. Cook over medium heat, stirring constantly until the mixture becomes thick and creamy, about 15 to 20 minutes.


3. **Enrich with Egg and Milk:**


In a small bowl, mix the remaining 1/2 cup of milk with the beaten egg. Slowly add this mixture to the rice, stirring constantly. Continue cooking for 2 more minutes.


4. **Finishing Touches:**


Remove the saucepan from heat and stir in the butter and vanilla extract. Season with a pinch of cinnamon or nutmeg to enhance the flavors.


5. **Serve and Enjoy:**


Serve the rice pudding warm, and indulge in the sweet nostalgia that accompanies each bite.


**Conclusion:**


Rice pudding, with its simple ingredients and heartwarming memories, is more than just a dessert; it’s a bridge to the past, a reminder of the people and moments that shape us. Whether you’re creating new traditions or honoring old ones, this timeless dessert will always find a place at the table. So gather your loved ones, embrace the comforting aroma, and savor the joy of homemade rice pudding.

Read more about Appetizers

Read more about Main Dishes

Read more about Desserts

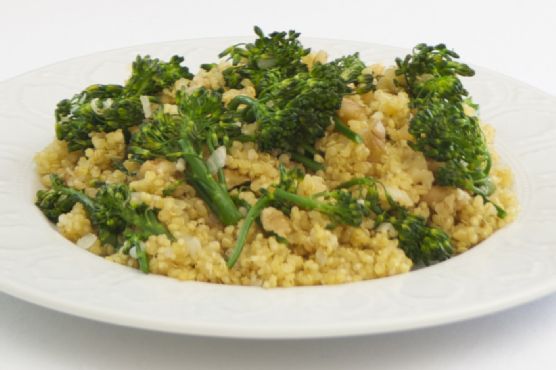
Broccolini Quinoa Pilaf | Made by Meaghan Moineau

Broccolini Quinoa Pilaf | Made by Meaghan Moineau

**Title: "Savor the Simplicity: Nostalgic Broccolini Quinoa Pilaf"**


**Description: Discover the delightful harmony of broccolini and quinoa in a wholesome pilaf that evokes cherished family memories. This nutritious dish is a perfect blend of flavors and textures, ideal as a main dish for any meal.**


---


There's something uniquely satisfying about a dish that not only fills your belly but also warms your heart with memories. Our Broccolini Quinoa Pilaf is one such creation, a delightful main dish that effortlessly combines the earthy notes of quinoa with the bright, slightly bitter touch of broccolini. This recipe not only tantalizes your taste buds but also nurtures your soul with its comfort and simplicity.


### Ingredients:


- 1 bunch of broccolini, trimmed


- 1 garlic clove, minced


- 2 tablespoons olive oil


- 1 medium onion, finely chopped


- 1 cup quinoa


- 2 cups vegetable broth


- ½ cup walnuts, toasted and roughly chopped


- Salt and pepper to taste


### Instructions:


1. In a large pan with a lid, heat olive oil over medium-high heat. Add onions and cook for 1 minute.


2. Add garlic and cook until onions are translucent and garlic is fragrant.


3. Stir in quinoa, ensuring it’s well mixed with the onions and garlic.


4. Gradually pour in the vegetable broth, bringing the mixture to a boil.


5. Cover the pan and reduce the heat to low. Let it simmer for 15 minutes.


6. In the last 2-3 minutes of cooking, place the broccolini on top of the quinoa without stirring, then cover again.


7. After cooking, uncover and gently toss the broccolini with the quinoa.


8. Season with salt and pepper to taste, sprinkle with toasted walnuts, and serve hot.


### A Nostalgic Family Memory:


Growing up, Sunday lunches were a time-honored tradition in our family. My grandmother, the matriarch of our culinary experiences, would often prepare her signature Broccolini Quinoa Pilaf. The aroma of sautéed onions and garlic would waft through the house, signaling the beginning of a meal that brought us all together.


This dish was more than just a meal; it was a vessel of stories and laughter shared around the dining table. As a child, I remember being tasked with the important job of trimming the broccolini, standing on tiptoes to reach the counter. My grandmother would watch over me with a gentle smile, recounting tales of her childhood and how she learned to cook from her own mother.


The simplicity of the pilaf, adorned with the crunch of walnuts, was a testament to the beauty of uncomplicated cooking. Each bite was a reminder of those precious family moments, where food was love and laughter was abundant.


### Difficulty Rating: 3/10


This Broccolini Quinoa Pilaf is not only a testament to uncomplicated cooking but also a delightful main dish that anyone can master with ease. Perfect for a nutritious meal, it brings a touch of nostalgia to your table, making it a cherished addition to any family gathering.

Read more about Appetizers

Read more about Main Dishes

Read more about Desserts

Chavrie Caramelized Red Onion Tarts | Made by Meaghan Moineau

Chavrie Caramelized Red Onion Tarts | Made by Meaghan Moineau

**Title: Nostalgic Bites: Chavrie Caramelized Red Onion Tarts That Delight**


**Description:** Delight your taste buds with our Chavrie Caramelized Red Onion Tarts. A symphony of flavors crafted with goat cheese, red grape jelly, and succulent red onions, this appetizer is perfect for those seeking a touch of gourmet nostalgia. Dive into an easy-to-follow recipe that combines rich ingredients with a cherished family memory, making each bite a trip down memory lane.


---


### Chavrie Caramelized Red Onion Tarts


#### Ingredients:


- 4 oz Chavrie goat cheese


- 1 cup red grape jelly


- 3 large red onions, finely minced


- 3 tablespoons red wine vinegar


- 2 tablespoons sugar


- 2 tablespoons unsalted butter


- 1 tablespoon vegetable oil


- Ready-made tart shells (12 small or 6 large)


#### Instructions:


1. **Prepare the Onions:**


- Heat the vegetable oil and unsalted butter over medium heat in a heavy-gauge skillet.


- Add the minced red onions and cook until translucent, approximately 10 minutes.


2. **Caramelize:**


- Stir in the sugar, red grape jelly, and red wine vinegar.


- Cook the mixture until it reaches a syrupy consistency, stirring occasionally for about 15 minutes.


3. **Cool Down:**


- Remove from heat and allow the mixture to cool to room temperature.


4. **Assemble the Tarts:**


- Preheat your oven to 350°F (175°C).


- Place the tart shells on a baking tray.


- Spoon 1 tablespoon of the caramelized onion mixture into each tart shell, then top with a dollop of Chavrie goat cheese.


5. **Bake and Serve:**


- Bake the tarts in the preheated oven for 8-10 minutes, until the goat cheese is slightly melted and the tart shells are warm.


- Serve warm and enjoy the fusion of sweet and savory flavors.


#### Difficulty: 4/10


#### Classification: Appetizer


---


### A Taste of Nostalgia


Growing up, Sunday afternoons at my grandmother's house were a culinary adventure. Her kitchen was a haven of rich aromas and comforting warmth. Among her many specialties, the Chavrie Caramelized Red Onion Tarts were a family favorite. These tarts were more than just appetizers; they were a testament to her love and creativity.


I remember watching her gracefully maneuver around the kitchen, her hands a flurry of movements as she chopped onions and stirred pots. The kitchen would fill with the tantalizing scent of onions caramelizing with sugar and grape jelly, a scent that felt like a warm embrace.


Grandma had a knack for turning simple ingredients into extraordinary dishes, and these tarts were no exception. They were often the highlight of our gatherings, a dish that brought our family together in shared delight. As we savored each bite, stories were exchanged, laughter echoed, and memories were made.


To this day, every time I make these tarts, I am transported back to those cherished afternoons. The sweet, tangy flavor of the red onions mingling with the creamy goat cheese is like a spoonful of nostalgia, a reminder of family bonds and the love that transcends generations.


---


Relive this nostalgic experience in your own home with these delightful Chavrie Caramelized Red Onion Tarts. Perfect as a sophisticated appetizer or a comforting treat, they're a delicious reminder of the power of food to bring us closer together.

Read more about Appetizers

Read more about Main Dishes

Read more about Desserts