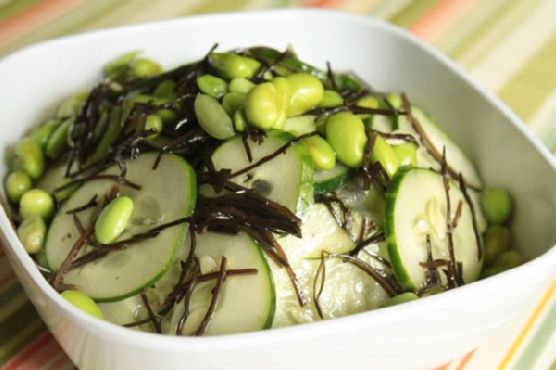
Arame Edamame Cucumber Salad
Intro
There’s something magical about revisiting childhood flavors, those that transport us back to simpler times and cherished memories. For me, that magic is encapsulated in the crisp, refreshing taste of cucumbers. Growing up, my grandmother would prepare a cucumber salad every summer, using fresh vegetables from her garden. I remember sitting on her porch, the sun casting warm rays on our faces as we savored each bite. Inspired by those days, I’ve created an Arame Edamame Cucumber Salad that combines the nostalgia of my grandmother’s recipe with vibrant, Asian-inspired flavors.
Why You’ll Love It
This Arame Edamame Cucumber Salad is not only delicious but also incredibly nutritious. It’s packed with protein-rich edamame, the unique flavor of arame, and the cool crunch of cucumber. The dressing, a delightful mix of olive oil, rice vinegar, sesame oil, and soy sauce, adds a tangy and savory finish. Whether you’re looking for a light lunch or a side dish that will impress family and friends, this salad is a versatile choice. Plus, it’s vegan, gluten-free, and can be prepared in under 20 minutes.
Ingredients
- 1 cucumber, finely sliced
- 1 cup edamame, shelled
- 1 tablespoon extra virgin olive oil
- 1 tablespoon rice vinegar
- 1 teaspoon sesame oil
- 1 tablespoon soy sauce
- 1/4 cup arame
Instructions
- Add 2 cups of water to the arame and let it soak for 5 minutes. After soaking, drain and set aside.
- Bring a pot of salted water to a boil and add the edamame. Boil for roughly 5 minutes or until tender. Drain and cool.
- Finely slice the cucumber. For best results, use a mandolin to achieve uniform slices.
- In a small jar, combine the extra virgin olive oil, rice vinegar, sesame oil, and soy sauce. Cover the jar and shake well to create the dressing.
- In a large bowl, combine the cucumber, edamame, and arame. Pour the dressing over the mixture and toss to coat evenly.
Tips
For a salad that’s truly refreshing, ensure your cucumbers are chilled before slicing. If you’re in a hurry, you can soak the arame in warm water to speed up the process. When preparing the dressing, feel free to adjust the soy sauce to taste, especially if you prefer a less salty flavor.
Variations & Substitutions
If you’re looking to add a bit of spice to your salad, consider adding a pinch of red pepper flakes to the dressing. You can also substitute tamari for soy sauce for a gluten-free option. For an added crunch, sprinkle toasted sesame seeds or sliced almonds over the salad just before serving.
Storage
This salad is best enjoyed fresh, but it can be stored in an airtight container in the refrigerator for up to 2 days. If you’re planning to make it ahead of time, consider keeping the dressing separate and combining it with the salad just before serving to maintain the crispness of the cucumber.
FAQ
Can I use frozen edamame for this salad?
Absolutely! Frozen edamame works perfectly in this recipe. Just make sure to boil it until tender and then cool before adding to the salad.
What is arame, and where can I find it?
Arame is a type of seaweed commonly used in Japanese cuisine. It has a mild, slightly sweet flavor and is typically sold dried. You can find it in health food stores or Asian markets, or you can order it online.
Is there a substitute for arame if I can’t find it?
If you can’t find arame, you can substitute it with another type of seaweed such as wakame or hijiki. Just be sure to adjust the soaking time according to the type of seaweed you’re using.
Nutrition
This salad is a nutritious powerhouse. It’s high in protein, thanks to the edamame, and low in calories. The seaweed adds a dose of iodine and other essential minerals, while the cucumber provides hydration and fiber. The oils in the dressing offer healthy fats, making this salad a balanced and wholesome choice.
Conclusion
The Arame Edamame Cucumber Salad is a delightful fusion of flavors and textures that celebrates both tradition and innovation. It’s a simple yet elegant dish that brings together the best of fresh, healthy ingredients. Whether you’re reminiscing about summer days on the porch or simply looking for a new go-to salad, this recipe is sure to become a favorite. Enjoy every crisp, delicious bite!
Related update: Arame Edamame Cucumber Salad