Raw Carrot Cake | Made by Meaghan Moineau

Raw Carrot Cake | Made by Meaghan Moineau

Title: "A Wholesome Delight: Unveiling the Raw Carrot Cake of Memories"
Description: Dive into the aromatic world of our Raw Carrot Cake, where nostalgia meets a modern twist. With a medley of natural ingredients and warm spices, this dessert is both a healthy delight and a sentimental journey. Perfect for gatherings or a cozy afternoon indulgence, this recipe is sure to be a cherished addition to your collection.

---


A Wholesome Delight: Unveiling the Raw Carrot Cake of Memories


In the heart of every cherished family recipe lies a story that weaves together flavors and memories. Our Raw Carrot Cake is no exception. A dessert that is as rich in history as it is in taste, this cake brings together the vibrant sweetness of carrots and the wholesome goodness of dried fruits and nuts.


A Walk Down Memory Lane


I remember the first time I encountered this delightful creation. It was a cool autumn afternoon at my grandmother's house, the air filled with the fragrance of spices and laughter. My grandmother, with her gentle hands and warm smile, introduced me to her "surprise cake." As children, my siblings and I would gather around her kitchen, eagerly awaiting the moment when the mysterious dessert would be revealed.


"Is it really cake if it’s not baked?" we would ask, our young minds puzzled by the concept. With a twinkle in her eye, Grandma would assure us that this was, indeed, a cake—a special one that didn't need an oven to shine.


Ingredients that Speak of Comfort


- Carrots: The star of the show, bringing natural sweetness and moisture.
- Raisins & Dried Apricots: Offering a chewy texture and a burst of fruity flavor.
- Mixed Peel: Adding a zesty twist that complements the sweetness.
- Date Purée: Acting as a natural sweetener while binding the ingredients together.
- Almond Flour & Desiccated Coconut: Providing a nutty, rich base that forms the cake’s structure.
- Spices: Ginger, cinnamon, and cloves—each adding warmth and depth to the cake.

Crafting the Perfect Raw Carrot Cake


1. Blend Away: Start by pulsing the carrots, raisins, date purée, and spices in a blender until they form a cohesive mixture.
2. Mix in the Magic: Add chopped apricots and mixed peel, pulsing a couple of times for even distribution.
3. Form the Foundation: Transfer the mixture into a large bowl, incorporating almond flour and desiccated coconut. Mix until well combined.
4. Shape and Set: Press the mixture into a large cake pan and refrigerate uncovered until it sets.
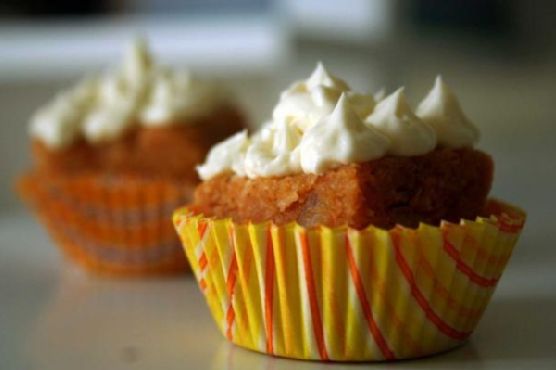
5. Finishing Touches: Once set, cut into bite-sized squares and frost with whipped cream, or roll into balls and dust with desiccated coconut for a delightful treat.

Difficulty Rating: 4/10


This recipe is straightforward and requires no baking, making it accessible even for novice chefs. The most challenging aspect might be waiting for the cake to set in the refrigerator!


Classification: Dessert


Perfect as a sweet finale to a meal or as a indulgent snack, this Raw Carrot Cake is a versatile addition to any dessert table.


---


Every time I make this cake, it feels like a warm hug from the past, reminding me of those carefree days in my grandmother's kitchen. Whether you’re creating new memories with your loved ones or simply indulging in a moment of nostalgia, this Raw Carrot Cake is sure to bring joy and warmth to your heart and home.

Read more about Appetizers

Read more about Main Dishes

Read more about Desserts

Barbecued Shrimp & Grits | Made by Meaghan Moineau

Barbecued Shrimp & Grits | Made by Meaghan Moineau

Savoring Southern Comfort: Barbecued Shrimp & Grits


A Nostalgic Twist on a Southern Classic


Introduction


There’s something undeniably heartwarming about the rich, savory flavors of Southern cuisine. Among the myriad of dishes that capture the essence of Southern hospitality, Barbecued Shrimp & Grits stands out as a true classic. This dish not only tantalizes the taste buds with its delightful combination of textures and flavors but also evokes cherished memories of family gatherings and warm summer evenings. Today, I’m sharing a treasured recipe that brings together the smoky goodness of bacon, the creamy comfort of grits, and the tangy kick of barbecue sauce. Let’s dive into this delectable journey!


Ingredients


- Bacon


- Barbecue sauce


- Butter


- Garlic cloves


- Grits


- Raw shrimp


- Salt


- Scallions


- Sharp cheddar cheese


- Water


Instructions


1. Prepare the Bacon: Fry bacon until crisp, crumble, and set aside. The aroma of sizzling bacon is just the beginning of our culinary adventure.
2. Prep the Shrimp: Peel and devein the shrimp. For that smoky, char-grilled flavor, skewer and grill them for 2-3 minutes on each side, or until they turn a lovely shade of pink. Alternatively, you can fry them over medium heat for about 5-8 minutes total, until perfectly cooked.
3. Sauté the Garlic: In 1 tablespoon of butter, sauté minced garlic until fragrant. This will infuse the dish with a subtle, yet robust flavor.
4. Cook the Grits: Bring water to a boil and stir in the grits. Cover and let them cook for 5 minutes before reducing the heat to low. Stir in sharp cheddar cheese, the remaining butter, sautéed garlic, and a pinch of salt to create a creamy, dreamy base.
5. Toss the Shrimp: Coat the cooked shrimp in your favorite barbecue sauce for that signature tangy and sweet glaze.
6. Assemble the Dish: In a bowl, layer the creamy grits, barbecue shrimp, crispy bacon, and freshly sliced scallions. Serve it piping hot, with an optional drizzle of extra barbecue sauce for added flair.

Family Memory


Every summer, our family would gather at my grandparent’s old farmhouse, a place where time seemed to stand still amidst the rolling hills and sprawling oak trees. My grandmother, a true Southern belle, would prepare her famous Shrimp & Grits, a dish that was as much a part of our family tradition as the laughter and stories shared around the table.


I remember the anticipation building as the aroma of bacon and garlic wafted through the screen doors, signaling the feast that awaited us. My cousins and I would scamper around the porch, while the adults chattered and clinked glasses of sweet tea. As we finally settled down to eat, the first bite of creamy grits paired with the tangy barbecue shrimp would silence the room, if only momentarily, as we all savored the comforting flavors.


Even now, each time I prepare this dish, I’m transported back to those sun-drenched afternoons, surrounded by family, love, and the unmistakable taste of home.


Difficulty Rating


Difficulty: 5/10

This dish is perfect for home cooks looking to impress with minimal effort. It requires basic cooking techniques and simple ingredients that come together beautifully.


Classification


Category: Main Dish

Barbecued Shrimp & Grits is a hearty and satisfying main course that pays homage to the rich culinary heritage of the South. Whether you’re sharing it with family or enjoying a cozy dinner for two, this dish is sure to become a beloved favorite.


Conclusion


Barbecued Shrimp & Grits is more than just a meal; it's a celebration of flavors and memories that bring people together. I encourage you to try this recipe and create your own cherished moments with family and friends. After all, food is not just about nourishment, but also about creating connections and savoring life’s simple pleasures.

Read more about Appetizers

Read more about Main Dishes

Read more about Desserts

Roasted Fingerling Potatoes and Brussels Sprouts | Made by Meaghan Moineau

Roasted Fingerling Potatoes and Brussels Sprouts | Made by Meaghan Moineau

Title: "Family Gatherings and Flavorful Roasts: The Magic of Roasted Fingerling Potatoes and Brussels Sprouts"
Description: Discover the heartwarming flavors of Roasted Fingerling Potatoes and Brussels Sprouts, a dish that brings families together with its savory aroma and rich taste. Infused with crispy bacon, aromatic rosemary, and perfectly roasted vegetables, this recipe is a nostalgic journey back to family gatherings and cherished memories. Ideal as a main dish, it’s a simple yet impressive addition to any occasion.

---


A Nostalgic Family Favorite: Roasted Fingerling Potatoes and Brussels Sprouts

There's something truly magical about the aroma of a hearty roast wafting through the house. It’s a scent that immediately transports me back to my grandmother's kitchen, where family gatherings were a cacophony of laughter, storytelling, and the irresistible fragrance of roasting vegetables. One dish that always stood out was her Roasted Fingerling Potatoes and Brussels Sprouts, a delightful blend of crispy textures and savory flavors.


Ingredients:

- 1 pound fingerling potatoes, halved


- 1 pound Brussels sprouts, trimmed and halved


- 6 slices of bacon, chopped


- Several cloves of garlic, peeled and smashed


- 1 red onion, sliced


- A drizzle of olive oil


- Several sprigs of fresh rosemary


- A sprinkle of sea salt


Instructions:

1. Preheat the oven to 400°F (200°C).


2. In a large roasting pan, combine the fingerling potatoes, Brussels sprouts, bacon, garlic, and red onion.


3. Drizzle with olive oil and toss to ensure everything is evenly coated.


4. Tuck in the rosemary sprigs among the vegetables and sprinkle with sea salt for added flavor.


5. Roast in the preheated oven for 60-75 minutes, stirring halfway through to ensure even cooking and browning.


6. Serve hot and enjoy with family and friends.


As a child, I remember eagerly awaiting the moment when the kitchen timer would finally go off. My siblings and I would gather around the table, our eyes wide in anticipation as my grandmother brought out the beautifully roasted dish. Each bite was a symphony of flavors—the earthiness of the potatoes, the slight bitterness of the Brussels sprouts countered by the savory bacon, and the aromatic hints of rosemary and garlic.


This dish was a staple at our family gatherings, a testament to how simple ingredients can create something truly special. It was more than just a meal; it was a reminder of the love and warmth that defined our family. The laughter and stories shared around the dinner table remain some of my most treasured memories.


Difficulty Rating: 3/10
Classification: Main Dish

Whether you're looking to create new memories with your loved ones or simply enjoy a comforting, flavorful meal, this Roasted Fingerling Potatoes and Brussels Sprouts recipe is perfect for any occasion. Its simplicity makes it accessible for cooks of all skill levels, while its rich, rustic flavors are sure to delight everyone at the table.

Read more about Appetizers

Read more about Main Dishes

Read more about Desserts

Butternut Squash Gnocchi With Whiskey Cream Sauce | Made by Meaghan Moineau

Butternut Squash Gnocchi With Whiskey Cream Sauce | Made by Meaghan Moineau

Butternut Squash Gnocchi with Whiskey Cream Sauce: A Savory Autumn Delight


Description

Dive into the heart of autumn with our Butternut Squash Gnocchi paired with a rich Whiskey Cream Sauce. This recipe combines the comforting flavors of roasted butternut squash and the warming notes of bourbon, creating a dish that’s perfect for a cozy dinner at home. Whether you're an experienced chef or a home cook looking for a challenge, this dish is sure to impress your family and friends with its unique flavor profile and elegant presentation.

Ingredients

- 1 large butternut squash

- ½ cup Parmesan cheese, grated


- ¼ teaspoon nutmeg


- 1 teaspoon salt


- ½ teaspoon bell pepper


- 2 large eggs


- 2 tablespoons butter


- 1 ½ cups all-purpose flour, plus more for dusting


- 2 diced shallots


- 2 cloves garlic, minced


- ½ cup chicken stock


- ¼ cup bourbon


- 1 cup heavy cream


- Salt and pepper to taste


- Fresh thyme leaves for garnish


Instructions


1. Roasting the Squash: Preheat your oven to 450°F (232°C). Cut the butternut squash in half and remove the seeds. Place the halves on a lightly oiled, rimmed baking sheet. Roast for 30-40 minutes, or until the flesh is soft. Scoop out the squash and puree it in a food processor until smooth.
2. Making the Gnocchi Dough: In a large bowl, combine the pureed squash with Parmesan cheese, nutmeg, salt, pepper, and eggs. Gradually add the flour, mixing by hand until the dough is smooth but sticky.
3. Forming the Gnocchi: Lightly flour a work surface and your hands. Roll a handful of dough into a long strip, about 1 inch in diameter. Cut the strip into 1-inch pieces. To create ridges, gently roll each piece with a fork. Place the formed gnocchi on floured parchment paper.
4. Cooking the Gnocchi: Bring a large pot of salted water to a boil. Cook the gnocchi in batches until they float to the surface, about 5 minutes per batch. Remove with a slotted spoon and set aside.
5. Preparing the Whiskey Cream Sauce: In a large skillet over medium heat, melt butter and whisk in flour until smooth. Add the shallots and garlic, sautéing for about 3 minutes. Pour in the bourbon and chicken stock, whisking as you increase the heat to bring the mixture to a boil. Reduce the sauce to a gravy-like consistency, then lower the heat and stir in the heavy cream. Season with salt and pepper to taste.
6. Combining and Serving: Add the cooked gnocchi to the cream sauce, stirring gently to coat. Serve the gnocchi warm, garnished with fresh thyme leaves.

A Nostalgic Family Memory

As the leaves turned golden and the air grew crisp, our family kitchen became a hub of warmth and laughter. My grandmother, with her apron perpetually dusted with flour, would gather us around the table to make her famous butternut squash gnocchi. The kitchen was filled with the sweet, nutty aroma of roasting squash, a scent that mingled with the laughter of children and the storytelling of the elders.

I remember the sense of accomplishment as I learned to roll the gnocchi under the fork, creating those distinctive ridges for the first time. It was a task that seemed monumental in my young eyes, but my grandmother’s gentle guidance made it seem like magic. Each piece of gnocchi was a testament to our collective effort, and when we finally sat down to eat, the dish was more than just a meal—it was a celebration of family and tradition.


Even now, preparing this recipe brings me back to those cherished times, as if each bite is a bridge to those joyful autumn evenings.


Difficulty: 7/10

Classification: Main Dish


This Butternut Squash Gnocchi with Whiskey Cream Sauce is a delightful main dish that requires a bit of patience and skill but rewards you with a flavorful and elegant meal. Enjoy creating and sharing this dish with your loved ones!

Read more about Appetizers

Read more about Main Dishes

Read more about Desserts

Herb and Cheddar Cordon Bleu | Made by Meaghan Moineau

Herb and Cheddar Cordon Bleu | Made by Meaghan Moineau

Title: Savoring Tradition: Herb and Cheddar Cordon Bleu
Description: Dive into a heartwarming family recipe that brings the comfort of home to your kitchen. Our Herb and Cheddar Cordon Bleu is a savory main dish that combines the richness of cheddar cheese, the smoky tenderness of deli ham, and the aromatic blend of herbs, providing an unforgettable culinary experience. Join us as we explore this dish that has been passed down through generations, complete with a nostalgic family story that adds a pinch of love to every bite.

---


Herb and Cheddar Cordon Bleu: A Taste of Family Legacy

There is something about the combination of herbs and cheddar that speaks directly to the heart. Every time I prepare this Herb and Cheddar Cordon Bleu, I am transported back to Sunday afternoons spent in my grandmother's kitchen, where the air was always filled with the comforting aroma of her culinary creations.


Ingredients You'll Need:

- 4 chicken breasts


- 4 slices of deli ham


- 4 slices of cheddar cheese


- 1 cup of breadcrumbs


- 1 teaspoon of dried marjoram


- 1 teaspoon of dried parsley


- 1 teaspoon of dried rosemary


- 1 egg


- 1/2 cup of flour


- Salt and pepper to taste


Instructions:
1. Preheat and Prep: Preheat your oven to 350°F (about 176°C). Take the chicken breasts and place them between two slices of wax paper. Using a rolling pin or meat mallet, flatten them until they're about a quarter of an inch thick.
2. Layer and Roll: On each flattened chicken breast, place a slice of ham and a slice of cheddar cheese. Roll each chicken breast as tightly as possible, securing with toothpicks or small skewers if needed.
3. The Coating Process: In a shallow baking dish, beat the egg. Prepare two more stations with foil or dishes: one for flour and another for a mixture of dried herbs and breadcrumbs. Coat each rolled chicken breast in flour, dip in the egg mixture, then press into the breadcrumb and herb mixture until fully covered.
4. Bake to Perfection: Place the prepared chicken in an oiled or buttered baking dish. Bake for about 30 minutes, or until the chicken is cooked through and the coating is golden brown.
A Bite of Nostalgia:

Growing up, Sunday dinners were a cherished tradition in our family. My grandmother, the matriarch of our culinary clan, would often prepare this Herb and Cheddar Cordon Bleu, filling her cozy kitchen with its irresistible scent. As a child, I would stand by her side, eagerly watching her every move, hoping to someday recreate her magic. The warmth of her kitchen, the gentle hum of her stories, and the love she infused into every dish were the soul of our family gatherings.


This dish, much like the memories it holds, is simple yet deeply satisfying. The medley of herbs and cheese wrapped in succulent chicken transports me back to those joyful Sundays, surrounded by laughter and love.


Difficulty Rating: 6/10
Category: Main Dish

Our Herb and Cheddar Cordon Bleu is a delightful nod to family traditions, perfect for any gathering that calls for warmth and nostalgia. Whether you're creating new memories or savoring old ones, this dish is sure to become a beloved staple in your home, too.

Read more about Appetizers

Read more about Main Dishes

Read more about Desserts

Ancho Chipotle Chili | Made by Meaghan Moineau

Ancho Chipotle Chili | Made by Meaghan Moineau

Title: "Spice Up Your Dinner Table with Ancho Chipotle Chili: A Hearty Family Favorite"
Description: Dive into the rich and smoky flavors of Ancho Chipotle Chili, a dish that brings warmth and nostalgia to any dinner table. Discover how this simple yet robust recipe, rated 6/10 in difficulty, can transform into a cherished family tradition. Perfect as a main dish, this chili combines savory ground beef, vibrant bell peppers, and the deep flavors of ancho and chipotle chiles, offering a symphony of taste in every bite.

---


There’s something uniquely comforting about a pot of chili simmering on the stove, its fragrant spices wafting through the house. For my family, Ancho Chipotle Chili isn't just a meal; it's a treasured tradition that brings us back to simpler times. This dish, rich in flavor and steeped in nostalgia, has been a staple at our family gatherings for generations.


Ingredients You'll Need:


- Dried ancho chile


- Vegetable bouillon powder


- Cumin


- Dried chipotle chile


- Fresh cilantro


- Ground beef


- Mushrooms


- Onion


- Dried oregano


- Red bell pepper


- Salt and pepper


- Tomato sauce


- Water


Instructions:


1. Prepare the Chiles: Start by slicing open the dried ancho and chipotle chiles to remove the seeds and pith. In a warm skillet over medium heat, toast the chiles for a few seconds on each side until they become fragrant—be careful not to burn them! Remember to wear gloves or wash your hands thoroughly after handling the chiles.
2. Soak the Chiles: Place the toasted chiles in a bowl or saucepan, pouring 250ml of boiling water over them. Allow them to soak for at least 15 minutes to soften.
3. Saute the Vegetables: In a large pot, sauté the chopped red bell pepper, onion, and mushrooms over medium heat until they are tender and aromatic.
4. Crisp the Beef: Meanwhile, in a separate skillet, fry the ground beef until it is crispy and browned.
5. Blend the Chiles: Once soaked, blend the chiles along with their soaking liquid to create a smooth paste.
6. Combine Ingredients: Add the crispy beef to the pot with sautéed vegetables, followed by the tomato sauce and blended chiles. If the mixture requires more liquid, add beef or vegetable broth (or water mixed with bouillon powder) until everything is adequately covered.
7. Season and Simmer: Season the chili with salt, pepper, cumin, and oregano to taste. Allow it to simmer gently for about 45 minutes, or until it reaches your desired thickness.
8. Serve: Ladle the chili into bowls and garnish with fresh cilantro for a burst of freshness.

A Taste of Family Tradition


Every time I prepare Ancho Chipotle Chili, I am transported back to my grandmother's kitchen. I remember the joy of watching her work her magic, effortlessly blending spices and ingredients. The kitchen was always filled with the laughter of cousins and the clatter of dishes, a symphony of sounds that signaled a meal made with love.


One particular memory stands out: a chilly autumn evening when the whole family gathered after a day of apple picking. We were all huddled around the table, bowls of steaming chili in front of us, as my grandmother recounted stories of our ancestors' culinary adventures. That night, the warmth of the chili was more than just physical; it was a reminder of our shared history and the love that binds us.


Difficulty Rating: 6/10


This Ancho Chipotle Chili recipe is moderately easy to prepare, making it accessible for both novice and experienced cooks. With a bit of patience and attention to detail, you'll create a dish that's sure to become a beloved staple in your own family tradition.


Classification: Main Dish


Whether served at a family gathering or a casual weeknight dinner, this chili is sure to satisfy and delight. Its robust flavors and hearty ingredients make it the perfect main dish to warm your heart and soul. So, gather your loved ones, share stories, and savor the taste of tradition with every spoonful.

Read more about Appetizers

Read more about Main Dishes

Read more about Desserts

Cheesy Bacon Burger with Spicy Chipotle Aiolo Sauce | Made by Meaghan Moineau

Cheesy Bacon Burger with Spicy Chipotle Aiolo Sauce | Made by Meaghan Moineau

Title: The Ultimate Cheesy Bacon Burger with Spicy Chipotle Aioli: A Flavor Explosion to Remember
Description: Dive into the rich, savory world of the Cheesy Bacon Burger with Spicy Chipotle Aioli Sauce. This mouthwatering dish combines the smoky heat of chipotle with the creamy goodness of Laughing Cow cheese, all encased in a juicy burger. Perfect for summer cookouts or family gatherings, this burger is not just a meal but a memory in the making.

---


The Ultimate Cheesy Bacon Burger with Spicy Chipotle Aioli: A Flavor Explosion to Remember


When it comes to comfort food, few things can compete with a juicy burger fresh off the grill. The Cheesy Bacon Burger with Spicy Chipotle Aioli Sauce is a testament to this, marrying the rich, smoky flavors of chipotle chiles and turkey bacon with the creamy delight of Laughing Cow cheese. It's a dish that doesn't just satisfy your hunger but also evokes sweet family memories.


Ingredients You'll Need


- For the Burger:

- 8 oz lean ground beef


- 4 wedges of Laughing Cow Swiss cheese


- 4 slices of cooked turkey bacon


- 1 green bell pepper, diced


- 1 onion, diced


- 1 tsp garlic powder


- 1/2 tsp ground black pepper


- Whole wheat hamburger buns


- For the Spicy Chipotle Aioli Sauce:

- 2 chipotle chiles in adobo, minced


- 1/2 cup fat-free mayonnaise


- 1/4 cup Greek yogurt


- 1 clove garlic, minced


- 1 tbsp fresh lime juice


- 1/2 tsp ground cumin


Instructions


For the Burgers:
1. Prepare the Bacon and Veggies: In a pan, cook the turkey bacon according to the package instructions. Once done, set aside. In the same pan, add diced bell pepper and onion. Cook until tender, about 10 minutes.
2. Season the Beef: In a small bowl, combine the ground beef with garlic powder and black pepper, mixing well.
3. Form the Patties: Divide the seasoned beef into 8 equal pieces, approximately 2 oz each. Flatten each piece and place half a wedge of cheese on top. Cover with another piece of beef, sealing the edges to keep the cheese from oozing out.
4. Grill to Perfection: Place the burgers on the grill and cook for about 5 minutes on each side, or until done to your liking.
5. Assemble the Burger: Place the cooked burger on a whole wheat bun, top with turkey bacon, cooked peppers, onions, and a generous dollop of spicy chipotle aioli sauce.
For the Spicy Chipotle Aioli Sauce:
1. Mix It Up: In a small bowl, combine minced chipotle chiles, mayonnaise, Greek yogurt, minced garlic, lime juice, and ground cumin. Whisk until well blended. This yields about 3/4 cup or 12 tablespoons of sauce.

A Nostalgic Family Memory


As I prepare this delicious burger, I'm reminded of the summer barbecues at my grandmother's house. The smoky aroma of grilled meat mixed with the laughter of family filled the air. My father, the grill master, would always hand me the first sizzling burger, packed with cheese and topped with his secret spicy sauce. As a child, I would sit at the picnic table, eagerly awaiting that first bite, knowing it would be another cherished memory added to our family gatherings.


Difficulty Rating: 6/10


This flavorful burger is classified as a Main Dish. While the recipe involves several steps, from preparing the sauce to grilling the burgers, it is straightforward and highly rewarding. With a bit of preparation, even novice cooks can bring this delightful dish to life.

Dive into this recipe, and let it become a cherished memory for your family, just as it is for mine. Whether for a casual weeknight dinner or a lively family cookout, the Cheesy Bacon Burger with Spicy Chipotle Aioli is sure to be a hit. Enjoy the blend of flavors and the joy of good company around the table.

Read more about Appetizers

Read more about Main Dishes

Read more about Desserts

Cheesy Spinach Stuffed Shells | Made by Meaghan Moineau

Cheesy Spinach Stuffed Shells | Made by Meaghan Moineau

Title: A Cheesy Affair: Spinach Stuffed Shells Bringing Families Together
Description: Dive into the delightful world of Cheesy Spinach Stuffed Shells – a comfort dish that's sure to win hearts and taste buds. This blog post not only takes you through a step-by-step guide to creating this delectable main dish but also shares a heartwarming family memory that makes this recipe truly special. With a difficulty level of 5 out of 10, it's perfect for home cooks looking to impress without stress.

---


A Cheesy Affair: Spinach Stuffed Shells Bringing Families Together


There's something undeniably magical about a dish that not only tantalizes your taste buds but also warms your heart with cherished memories. Cheesy Spinach Stuffed Shells is that dish for me. With every bite, I'm transported back to a bustling kitchen filled with laughter and the aroma of melting cheese and fresh basil.


Ingredients List


- Jumbo shells


- Cooked frozen spinach


- Wheat germ


- Shredded Parmesan cheese


- Pecans


- Shredded Mexican cheese


- Diced green onions


- Salt and dried basil


- Eggs


- Water


- Alfredo sauce


- Spaghetti sauce


Nostalgia on a Plate


Growing up, Sunday evenings were a sacred time in our house. It was the one day of the week when my entire family would gather around the table, eager to share stories and, of course, indulge in a delicious meal. One of my favorite dishes during these gatherings was my grandmother's Cheesy Spinach Stuffed Shells. I remember standing on a stool beside her, my small hands eager to help as I watched her create magic with simple ingredients.


Her secret? A sprinkle of nostalgia and a whole lot of love. She would recount tales of her own childhood, where she learned to cook by her mother's side, as we stuffed the shells together. The kitchen would come alive with the sounds of sizzling sauces and bubbling cheese, creating a symphony of flavors that even today, I strive to replicate.


Step-by-Step Instructions


1. Prepare the Shells: Begin by pre-boiling the jumbo shells in a large pot of salted water for about 9 minutes. This ensures they are perfectly al dente, as they will finish cooking in the oven. Once done, drain the shells face down on a paper towel to remove excess water.
2. Create the Filling: While the shells cool, focus on the filling. Cook the frozen spinach in the microwave, following the box instructions, but don't add water. Once cooked, mix the spinach with wheat germ, Parmesan cheese, shredded Mexican cheese, chopped pecans, and diced green onions. Season with salt, pepper, and dried basil. A hint of nutmeg is optional but recommended for an extra layer of warmth.
3. Combine and Stuff: Add two eggs and a splash of water to the spinach mixture, ensuring it's well combined. Stuff each shell generously with the mixture, aiming for about 16-20 shells.
4. Assemble the Dish: Grease an 8x8 pan with cooking spray. Spread a layer of Alfredo sauce on the bottom, followed by spaghetti sauce. Arrange the stuffed shells on top and cover them with the remaining sauce.
5. Bake to Perfection: Preheat your oven to 350 degrees. Bake the shells uncovered for 30-35 minutes, or until the sauce is bubbly. Serve hot and enjoy the cheesy goodness!

A Family Tradition


This main dish, with a difficulty rating of 5 out of 10, is not just a meal – it's a tradition. Every time I prepare Cheesy Spinach Stuffed Shells, I'm reminded of the joy of cooking with family, the laughter echoing in the kitchen, and the love that filled our home. It's a reminder that food can be more than sustenance; it can be a bridge to our past and a way to keep family memories alive.


So, gather your loved ones, roll up your sleeves, and create your own memories with this comforting and delicious recipe. Whether you're a seasoned chef or a beginner, this dish is your ticket to a heartwarming culinary experience.


---


Embrace the nostalgia and enjoy the cheesy delight that is Cheesy Spinach Stuffed Shells. Bon appétit!

Read more about Appetizers

Read more about Main Dishes

Read more about Desserts

Three-Cup Chicken | Made by Meaghan Moineau

Three-Cup Chicken | Made by Meaghan Moineau

Title: Unveiling the Soul of Taiwanese Cuisine: The Irresistible Allure of Three-Cup Chicken
Description: Discover the rich flavors and heartwarming stories behind Three-Cup Chicken, a classic Taiwanese main dish. With its aromatic blend of basil, garlic, and ginger, this recipe invites you on a journey to savor the essence of tradition and family memories. Rated 6/10 in difficulty, Three-Cup Chicken is an adventure for your culinary skills and your taste buds.

---


In the world of Taiwanese cuisine, few dishes capture the heart and soul of tradition quite like Three-Cup Chicken. This vibrant main dish, renowned for its aromatic blend of basil, bulb garlic, and old ginger, is more than just a culinary delight—it's a journey into the depths of family warmth and cherished memories.


A Taste of Tradition: The Recipe


To create this flavorful masterpiece, you will need the following ingredients: fresh basil, bulb garlic, slices of old ginger, a generous splash of rice wine, the nutty essence of sesame oil, a rich soy sauce, crisp spring onions, a hint of sugar, and, of course, a whole chicken.


Begin by marinating the chicken with soy sauce, sesame oil, and rice wine. Allow these flavors to mingle for at least six hours, though letting them meld overnight is best. Once the marination is complete, let the chicken come to room temperature.


Next, heat some sesame oil in a wok or claypot until it's sizzling hot. Introduce the garlic, ginger, and spring onions, frying them briefly until their fragrance fills the air. Add the chicken, searing it to seal in the flavors. Keep stir-frying as you pour in the marinade liquid and a sprinkle of sugar.


Once you achieve a rolling boil, cover the wok or claypot, letting it simmer gently over a small flame. Allow the liquid to evaporate completely, leaving the chicken caramelized, with just the right touch of char. The result should be a sizzling dish, ready to be served with pride.


A Nostalgic Journey: Family Memories


The aroma of Three-Cup Chicken always takes me back to my grandmother's cozy kitchen, where every meal was a labor of love. As a child, I would watch in awe as she expertly prepared this dish, each step a testament to her culinary prowess. The kitchen would fill with the comforting scents of garlic and ginger, enveloping us in a warm embrace that only home-cooked meals can provide.


I remember one particular family gathering when my grandmother, with her usual flair, prepared Three-Cup Chicken for a Sunday dinner. As we sat around the table, the chicken, glistening with its caramelized glaze, was the star of the meal. Each bite was a burst of flavor, a perfect harmony of sweet, salty, and aromatic notes. As we shared stories and laughter, I realized that this dish was more than just food; it was a bridge connecting generations, a reminder of our shared heritage and love.


Culinary Adventure: Difficulty and Classification


Rated at a moderate 6/10 on the difficulty scale, Three-Cup Chicken offers a manageable challenge for home cooks eager to explore Taiwanese cuisine. Its rich, complex flavors make it a proud addition to any table as a main dish.


In Conclusion


Three-Cup Chicken is not merely a recipe; it's an invitation to partake in a culinary tradition steeped in history and family bonds. Whether you're a seasoned chef or an enthusiastic home cook, this dish promises a rewarding experience, both in its preparation and in the joy it brings to those who gather to share it. Dive into the world of Taiwanese flavors and let Three-Cup Chicken be your guide on this delicious journey.

Read more about Appetizers

Read more about Main Dishes

Read more about Desserts

Avocado Nests | Made by Meaghan Moineau

Avocado Nests | Made by Meaghan Moineau

Title: "Avocado Nests: A Deliciously Nostalgic Culinary Experience"
Description: Dive into a world of flavor with our Avocado Nests, a recipe that combines the creamy richness of avocados with the savory crunch of bacon and hash browns. Perfect as a main dish or a hearty appetizer, this dish is not only delectable but also evokes heartwarming family memories.

---


There's something inherently comforting about the aroma of sizzling bacon and the creamy texture of avocados. These are not just ingredients; they are the essence of cherished family gatherings and nostalgic Sunday brunches. Today, I am thrilled to share with you a recipe that holds a special place in my heart: Avocado Nests.


Ingredients:

- Avocados


- Hardboiled eggs


- Frozen hash browns


- Bacon


- Mayonnaise or cream cheese


- Salt and pepper


Instructions:
1. Cook the Hash Browns: Follow the directions on the package to achieve crispy, golden perfection. The hash browns will serve as the crunchy base for our avocado nests.
2. Prepare the Bacon: Cut the bacon slices into thin strips. You can either bake or fry them, depending on your preference. The goal is to get them crispy enough to sprinkle over the hash browns.
3. Make Deviled Eggs: Slice the hardboiled eggs in half and remove the yolks. Mix the yolks with a bit of mayonnaise or cream cheese, and season with salt and pepper to taste. Fill the egg white halves with the yolk mixture.
4. Prepare the Avocados: Cut the avocados in half, remove the seed, and gently peel off the skin. Each half will cradle a deviled egg, fitting perfectly into the seed cavity.
5. Assemble the Dish: Place a generous layer of hash browns on a serving plate and sprinkle with crispy bacon strips. Nestle the avocado halves on top, each filled with a deviled egg, and serve immediately.
A Nostalgic Family Memory:

Growing up, Sunday brunch was a sacred tradition in our family. My grandmother, a culinary enthusiast, always had a knack for creating dishes that were as heartwarming as they were delicious. One of her signature creations was the Avocado Nests. I still remember her teaching me how to perfectly peel the avocados without bruising the delicate flesh. We’d laugh and chat in the kitchen, the smell of bacon wafting through the air, as she shared stories from her own childhood.


These avocado nests were more than just a meal; they were a symbol of togetherness. Every bite was a burst of flavor, a combination of creamy, salty, and crunchy that brought our family closer together around the table. To this day, preparing this dish brings back those cherished memories, making it a beloved addition to our family meals.


Difficulty Rating: 4/10
Classification: Main Dish/Appetizer

Simple yet sophisticated, Avocado Nests are an excellent choice for those seeking a dish that is both easy to prepare and impressive to serve. Whether you’re hosting a brunch or looking for a light main dish, this recipe is sure to delight your taste buds and warm your heart. Enjoy the comforting flavors and the nostalgia that comes with every bite!

Read more about Appetizers

Read more about Main Dishes

Read more about Desserts

How to Make the Best Chili | Made by Meaghan Moineau

How to Make the Best Chili | Made by Meaghan Moineau

The Ultimate Comfort: How to Make the Best Chili


Discover the Heartwarming Recipe That's Been a Family Favorite for Generations


Chili holds a special place in many hearts, often evoking memories of cozy family gatherings and the delightful aroma that fills the kitchen on a chilly day. This blog post will guide you through making the best chili you've ever tasted, with a recipe that's easy to follow and bursting with flavor. This hearty dish is the perfect main course to warm your soul and satisfy your taste buds.


Ingredients You'll Need:


- 1 bell pepper, chopped


- 1 can of kidney beans


- 1 can of pinto beans


- 1 pound lean ground beef


- 1 large onion, chopped


- 1 can of tomato juice


- 1 can of tomato paste (optional substitute)


- 2 cups water


- 2 tablespoons chili powder


- 1 teaspoon cayenne pepper


- 1 teaspoon ground cumin


- 1 teaspoon black pepper


- 1 teaspoon oregano


- 1 tablespoon white sugar


Instructions:


1. Brown the Ground Beef: In a deep skillet, brown the lean ground beef over medium heat until it is fully cooked, then drain the excess fat.
2. Combine Ingredients: In a large pot over high heat, add the cooked ground beef, tomato juice, kidney beans, pinto beans, water, and tomato paste. Stir in the chili powder, cumin, black pepper, oregano, sugar, cayenne pepper, chopped bell pepper, and onions.
3. Bring to a Boil: Allow the mixture to come to a boil, stirring occasionally.
4. Simmer: Once boiling, reduce the heat and let it simmer uncovered for 2 hours. This allows the flavors to meld perfectly, creating a rich and savory chili.

A Nostalgic Memory


I vividly remember the first time I helped my grandmother make this chili. It was a cold winter evening, and the snow was gently falling outside. The kitchen was warm and inviting, filled with laughter and the comforting aroma of simmering spices. My grandmother handed me a wooden spoon, and with her guidance, I stirred the pot, watching as the ingredients melded into a rich, hearty stew. We shared stories and sipped hot cocoa while the chili simmered, creating a cherished memory that I hold dear to this day. Every time I prepare this dish, I'm transported back to that cozy kitchen, surrounded by love and the promise of a delicious meal shared with family.


Difficulty Rating: 4/10


With its straightforward instructions and readily available ingredients, this chili recipe is perfect for cooks of all skill levels. The most challenging part is waiting patiently as the chili simmers, allowing the flavors to develop fully.


Classification: Main Dish


This chili is more than just a meal—it's an experience. Perfect for family dinners, potlucks, or anytime you crave something hearty and satisfying. Serve it with a side of cornbread or over a bed of rice for an even heartier meal.


Conclusion


Making the best chili doesn't have to be complicated. With this simple recipe, you can create a dish that's not only delicious but also steeped in tradition and nostalgia. Whether you're a seasoned chef or a novice cook, this chili will become a staple in your kitchen, bringing warmth and joy to your family for years to come. So, grab your ingredients and get ready to savor the ultimate comfort food!

Read more about Appetizers

Read more about Main Dishes

Read more about Desserts

Amaranth and Roast Veggie Salad | Made by Meaghan Moineau

Amaranth and Roast Veggie Salad | Made by Meaghan Moineau

Title: A Taste of Home: The Nostalgic Amaranth and Roast Veggie Salad
Description: Dive into the heartwarming world of our Amaranth and Roast Veggie Salad, a recipe that blends wholesome ingredients with cherished family memories. This dish, rich in nutrients and flavors, is a delightful addition to your table as an appetizer or a light main dish. With a difficulty rating of 3 out of 10, it's perfect for both novice and seasoned cooks looking to create something special yet simple.

---


A Taste of Home: The Nostalgic Amaranth and Roast Veggie Salad

Growing up, Sunday family dinners were always an affair to remember. The kitchen buzzed with activity, as laughter and the aroma of roasting vegetables filled the air. My grandmother, the culinary maestro of our family, often whipped up her signature Amaranth and Roast Veggie Salad. This dish was more than just a meal; it was a comforting embrace, a nostalgic reminder of the warmth and love that surrounded our family gatherings.


Ingredients:

- 1 cup amaranth


- 2 tablespoons basil-infused olive oil


- 1 bell pepper, sliced


- 1 cup diced pumpkin


- 1 red onion, roughly chopped


- A handful of rocket leaves


- Herbal salt, to taste


- 1 punnet baby tomatoes


Instructions:
1. Cook the Amaranth: Begin by cooking the amaranth with about a cup of water. Allow it to simmer until it reaches a sticky consistency, a texture that beautifully binds the salad together.
2. Prepare the Veggies: Roughly chop the red onion and dice the pumpkin. Spread them on a tinfoil-lined baking tray.
3. Season and Roast: Drizzle the basil-infused olive oil over the onion and pumpkin. Sprinkle generously with herbal salt and pepper. Place the tray in a hot oven, roasting until the edges of the pumpkin turn irresistibly crispy. Just before the roasting is complete, add the punnet of baby tomatoes for a burst of flavor.
4. Assemble the Salad: Once the veggies are roasted to perfection, mix them with the cooked amaranth. Tear a few rocket leaves and toss them into the salad for a fresh, peppery touch.
5. Serve and Enjoy: Serve the salad warm, allowing the flavors to meld together into a harmonious medley.
A Family Tradition

As I recreate this salad today, I'm transported back to those Sunday dinners, where my grandmother would share stories of her youth while expertly preparing each ingredient. The simplicity of this dish, combined with its rich flavors, never failed to bring our family together. Each bite was a celebration of love, tradition, and the joy of cooking with fresh, wholesome ingredients.


Difficulty Rating: 3/10

This Amaranth and Roast Veggie Salad is an easy-to-make dish that promises to delight your taste buds while evoking fond memories of family and togetherness. Whether you're serving it as a hearty appetizer or a light main dish, this salad is sure to become a cherished addition to your culinary repertoire. Enjoy a slice of nostalgia with every bite, and perhaps, create some new family memories of your own.

Read more about Appetizers

Read more about Main Dishes

Read more about Desserts

Spicy Lump Crab and Avocado Salad | Made by Meaghan Moineau

Spicy Lump Crab and Avocado Salad | Made by Meaghan Moineau

Title: A Taste of Nostalgia: Spicy Lump Crab and Avocado Salad
Description: Dive into a flavorful fusion of tender lump crabmeat and creamy avocados with our Spicy Lump Crab and Avocado Salad. This dish, enriched with the zest of fresh lemon juice and a kick of sriracha, is a perfect blend of spice and freshness. Ideal for both a sophisticated appetizer and a light main dish, this recipe holds a special place in my heart, evoking cherished family gatherings by the sea.

---


A Taste of Nostalgia: Spicy Lump Crab and Avocado Salad

As the warm breeze carried the scent of the ocean, our family would gather at the seaside cottage every summer. The sound of waves crashing against the shore was the perfect backdrop for our family tradition—an indulgent feast featuring the Spicy Lump Crab and Avocado Salad. This dish, with its vibrant colors and tantalizing flavors, became a staple at our gatherings, etching unforgettable memories into our hearts.


The Essence of the Dish

Our Spicy Lump Crab and Avocado Salad is a delightful combination of succulent lump crabmeat, creamy avocados, and a spicy dressing that tantalizes the taste buds. The dish is a symphony of textures, with the smoothness of the avocado complementing the delicate sweetness of the crab. The addition of sriracha chile sauce adds a fiery kick, balanced by the tangy freshness of lemon juice.


Ingredients:

- 2 ripe avocados


- 1 red bell pepper, finely chopped


- Fresh parsley, chopped


- 1 tablespoon fresh lemon juice


- 1 pound lump crabmeat


- 2 tablespoons mayonnaise


- Salt and pepper, to taste


- 2 scallions, finely sliced


- 1 tablespoon sriracha chile sauce


- 1 teaspoon Worcestershire sauce


Instructions:
1. Prepare the Spicy Sauce: In a small bowl, combine the mayonnaise, sriracha chile sauce, Worcestershire sauce, lemon juice, salt, and pepper. Stir until well blended, and set aside to let the flavors meld.
2. Mix the Crab Salad: In a medium bowl, gently toss together the crabmeat, scallions, red bell pepper, and fresh parsley. Be careful to maintain the integrity of the crab lumps. Lightly fold in the spicy sauce, ensuring an even coating without breaking the crabmeat.
3. Prepare the Avocados: Slice the avocados in half and remove the pit. Trim a small section from the bottom of each half so they sit flat on a plate. Brush or pour lemon juice over the cut surfaces to prevent browning.
4. Assemble and Serve: Place the avocado halves on a serving plate and generously fill each center with the crab salad. Serve immediately for the freshest flavor.
A Family Memory

Every year, as we prepared this dish, my grandmother would recount the story of how she first learned the recipe from a local fisherman during her honeymoon. She spoke of the joy of discovering new flavors and the warmth of sharing food with loved ones. As we savored each bite, it felt like a tribute to her adventurous spirit and love for family gatherings.


The Spicy Lump Crab and Avocado Salad is more than just a dish; it's a bridge to cherished memories and a reminder of the simple joys in life.


Difficulty Rating: 4/10
Classification: Appetizer or Light Main Dish

This recipe is relatively easy to prepare, making it accessible even for novice cooks. Whether you serve it as an appetizer or a light main dish, it's guaranteed to be a hit, resonating with the warmth of familial love and the excitement of summer days by the sea.

Read more about Appetizers

Read more about Main Dishes

Read more about Desserts

chilli chicken | Made by Meaghan Moineau

chilli chicken | Made by Meaghan Moineau

Title: "Spicy Nostalgia: The Flavorful Journey of Chilli Chicken"
Description: Dive into the rich, aromatic world of Chilli Chicken—a dish that not only tantalizes your taste buds but also stirs heartwarming family memories. From the vibrant colors of bell peppers to the savory depth of soya sauce, learn how this dish has become a beloved staple at our family gatherings. Rated 6/10 in difficulty, this versatile delight can be served as an appetizer or a main dish. Discover a cherished family story intertwined with this recipe and find complete cooking instructions at Swasthi's Recipes.

---


Spicy Nostalgia: The Flavorful Journey of Chilli Chicken

There’s something magical about family recipes—they are time machines that transport you back to cherished moments, filled with warmth, laughter, and the comforting aroma of home-cooked meals. Chilli Chicken, with its spicy allure and vibrant colors, holds a special place in my heart, not just as a dish but as a treasured family memory.


A Burst of Flavors and Colors

The beauty of Chilli Chicken lies in its simplicity and the explosion of flavors it offers. The key ingredients—bell peppers, boneless chicken breast, and slit green chilies—create a colorful medley that is as pleasing to the eye as it is to the palate. The essential spices—red chili powder and pepper powder—bring a fiery kick, while garlic and onion add depth and aroma. The sticky, savory embrace of soya sauce, combined with the tangy notes of vinegar and the subtle sweetness of sugar, create a harmonious balance that is simply irresistible.


A Family Tradition

Every family gathering at our house was incomplete without a sizzling platter of Chilli Chicken. I vividly remember my grandmother bustling around the kitchen, her hands deftly working through the ingredients, her face lit with a loving smile. The air would fill with the intoxicating aroma of garlic sizzling in oil, mixing with the spicy scent of red chili powder. It was a sensory symphony that signaled the start of another memorable feast.


One particular instance stands out in my memory: a chilly winter evening when the entire family was gathered around the dining table, the warmth of laughter and stories enveloping us like a cozy blanket. My grandmother placed the dish in the center, and as the steam rose, so did our anticipation. With each bite of the tender chicken and crunchy bell peppers, we were transported to a world where flavors danced on our tongues and time seemed to stand still.


Creating Your Own Memories

While nostalgia adds a unique flavor to Chilli Chicken, creating your own memories with this dish is just as delightful. Rated 6/10 in difficulty, it’s accessible yet rewarding, making it perfect for a family dinner or a casual gathering with friends. Whether you choose to serve it as an appetizer or the main dish, Chilli Chicken promises to be the star of the meal.


For those looking to recreate this flavorful journey, detailed instructions can be found at Swasthi's Recipes. Embrace the joy of cooking as you experiment with the ingredients, perhaps adding your own twist to make it uniquely yours.


In the end, Chilli Chicken is more than just a dish; it's a connection to the past, a celebration of the present, and an invitation to create future memories. So, gather your loved ones, roll up your sleeves, and let the rich, spicy aroma of Chilli Chicken weave its magic into your family story.


---


Whether you're a seasoned cook or a culinary novice, Chilli Chicken is an adventure worth embarking on. So, why not dig in and let this dish become a delicious chapter in your own family’s story?

Read more about Appetizers

Read more about Main Dishes

Read more about Desserts

Pan Seared Lamb Loin With Chimichurri & Roasted Trio Squash Salad With Goat Cheese and Pinenuts | Made by Meaghan Moineau

Pan Seared Lamb Loin With Chimichurri & Roasted Trio Squash Salad With Goat Cheese and Pinenuts | Made by Meaghan Moineau

Title: Savoring Tradition: Pan-Seared Lamb Loin with Chimichurri & Roasted Trio Squash Salad
Description: Discover the rich flavors and comforting nostalgia of our Pan-Seared Lamb Loin with Chimichurri paired with a Roasted Trio Squash Salad adorned with Goat Cheese and Pine Nuts. This main dish not only tantalizes your taste buds but also carries the warmth of cherished family memories. Experience a culinary journey that brings together the zest of fresh herbs and the heartwarming glow of the holiday table.

---


When it comes to family gatherings, few dishes evoke the warmth and comfort of home like a beautifully prepared lamb loin. As the holiday season approaches, I find myself reminiscing about the countless family dinners centered around this delightful dish. The aroma of fresh herbs mingling with the rich, savory lamb was a staple at our holiday table, a tradition passed down through generations.


Ingredients:

- Cilantro


- Extra virgin olive oil


- Flat leaf parsley


- Garlic clove


- Black ground pepper


- Kosher salt and pepper


- Lamb loin chops


- Lemon


- Mint


- Pine nuts


- Red pepper flakes


- Shallot


Instructions:
1. Preheat Your Oven: Start by preheating your oven to 400°F, setting the stage for a dish that’s sure to impress.
2. Prepare the Chimichurri: In a large bowl, combine cilantro, flat leaf parsley, minced garlic, lemon juice, mint, and a hint of red pepper flakes. Blend with extra virgin olive oil until you achieve a smooth consistency. Season to taste with kosher salt and freshly ground black pepper.
3. Sear the Lamb: Heat a large, heavy-bottomed pan with a splash of olive oil until it begins to smoke. Season each side of the lamb loin chops with salt and pepper. Sear them for about 2 minutes per side to lock in those delicious juices.
4. Oven Finish: Transfer the seared lamb to the preheated oven.

- For rare, roast for 2-3 minutes.


- For medium rare, extend to 6-8 minutes.


- For medium, let it cook for 9-11 minutes.


- For well done, aim for 12-14 minutes.


Remember, the lamb continues to cook after it's out of the oven, so adjust your times accordingly.


5. Roasted Trio Squash Salad: As the lamb cooks, prepare a medley of roasted squash. Toss sliced squash with olive oil, salt, and pepper, then roast until tender. Finish with a sprinkle of goat cheese and toasted pine nuts for a delightful crunch.
A Nostalgic Twist:

This dish always brings me back to a particular winter evening at my grandmother's house. The fireplace crackled, casting a warm glow across the dining room. I remember watching her skillfully sear the lamb, her hands moving with the confidence of years of practice. As we sat around the table, the laughter of my cousins filled the room, and the scent of chimichurri and roasted squash wrapped us in a cozy embrace. These moments, filled with love and laughter, are the essence of why I cherish this dish.


Difficulty: 6/10
Classification: Main Dish

---


Whether you’re creating new memories or savoring the nostalgia of family traditions, this Pan-Seared Lamb Loin with Chimichurri and Roasted Trio Squash Salad is sure to become a beloved part of your culinary repertoire. Indulge in the symphony of flavors and share a meal that speaks the universal language of love and togetherness.

Read more about Appetizers

Read more about Main Dishes

Read more about Desserts

Shrimp & Orzo | Made by Meaghan Moineau

Shrimp & Orzo | Made by Meaghan Moineau

Title: "Savoring Tradition: Shrimp & Orzo Delight with a Nostalgic Twist"
Description:

Embark on a culinary journey with our delectable Shrimp & Orzo recipe, a dish that beautifully marries the vibrant flavors of the Mediterranean with the comforting warmth of home-cooked meals. This main dish, rated a 7 out of 10 on the difficulty scale, is perfect for a cozy family dinner or a casual get-together with friends. Follow along as we not only guide you through creating this sumptuous dish but also share a cherished family memory that brings this recipe to life.


---


A Nostalgic Journey Through Shrimp & Orzo

Every family has a dish that stirs up a fond memory, and for mine, it’s the delightful Shrimp & Orzo. This dish isn’t just a meal; it’s a tapestry of flavors woven with the threads of family tradition and love.


I vividly remember the first time my grandmother introduced this recipe to our family table. It was a balmy summer evening, one of those nights where the air was thick with the scent of blooming jasmine and the distant sound of cicadas. Our family gathered in her sun-dappled kitchen, a place that felt like the heart of our home. The faint sizzle of olive oil hitting the hot Dutch oven announced the beginning of our culinary adventure.


As my grandmother stirred the diced onion and fennel bulb, she regaled us with stories from her childhood, tales of seaside summers where shrimp were abundant and laughter even more so. Those evenings were always special, the kitchen alive with laughter, the clinking of glasses, and the anticipation of yet another unforgettable meal.


---


Recipe: Shrimp & Orzo
Ingredients:

- 1 can diced tomatoes


- 1/2 cup dry white wine


- 1 fennel bulb, diced


- 1/2 cup crumbled feta cheese


- 2 tablespoons fresh parsley, divided


- 4 cloves of garlic, minced


- Lemon wedges for serving


- 2 cups low sodium chicken broth


- 2 tablespoons olive oil


- 1 diced onion


- 1 teaspoon dried oregano


- 1 1/2 cups orzo pasta


- 1/4 teaspoon crushed red pepper flakes


- Salt & pepper to taste


- 1 pound large shrimp, peeled and deveined


- 1/2 cup water


Instructions:

1. Preheat your oven to 400 degrees F. Season the shrimp with salt and pepper, then refrigerate until ready to use. Grease a 13x9-inch baking dish.


2. Heat the olive oil in a large Dutch oven over medium-high heat until shimmering. Add the onion, fennel bulb, and 1/2 teaspoon salt. Cook, stirring frequently, until the vegetables are softened and starting to brown around the edges, about 10 minutes.


3. Stir in the minced garlic and crushed red pepper flakes, and cook until the garlic becomes very fragrant, about 30 seconds.


4. Add the orzo to the vegetables, stirring to coat with oil. Continue cooking, stirring frequently, for about 4 minutes, until the orzo has a toasty aroma.


5. Pour in the white wine, cooking and stirring constantly, until the liquid evaporates, about 1 minute.


6. Add the chicken broth, water, and 1/4 teaspoon salt. Bring to a boil, then reduce the heat and simmer until the orzo is almost tender, about 12 minutes, stirring frequently to prevent sticking.


7. Remove from heat and stir in the shrimp, tomatoes, oregano, and 1 tablespoon of parsley.


8. Transfer the mixture to the prepared baking dish and sprinkle with feta cheese.


9. Bake for about 20 minutes, until the shrimp is cooked through and the feta is lightly browned.


10. Before serving, sprinkle with the remaining parsley and the reserved fennel fronds. Serve with lemon wedges.


---


Creating Shrimp & Orzo is more than just assembling ingredients; it's about reliving cherished memories and crafting new ones. Each bite is a tribute to family, tradition, and the joy of sharing a meal with the ones you love. So, gather around the table, share stories, and savor the exquisite flavors of this timeless dish.

Read more about Appetizers

Read more about Main Dishes

Read more about Desserts

Big Batch Smoothie Bowl | Made by Meaghan Moineau

Big Batch Smoothie Bowl | Made by Meaghan Moineau

Title: Nourishing Nostalgia: The Big Batch Smoothie Bowl That Revives Family Memories
Description:

Step into a world where wholesome ingredients meet cherished family moments. Our Big Batch Smoothie Bowl is more than just a breakfast treat—it's a blend of flavors and memories, perfect for those who crave both nutrition and nostalgia.


---


The Big Batch Smoothie Bowl: A Wholesome Family Tradition

There's something magical about the clinking of spoons and the chatter of family gathered around the kitchen table. For me, the Big Batch Smoothie Bowl isn't just a delightful dish; it's a cherished family tradition that brings back vivid memories of sunlit mornings and joyous laughter.


Ingredients:

- Whey protein


- Frozen strawberries


- Frozen blueberries


- Bananas


- Pomegranate seeds


- Walnuts


- Pumpkin seeds


- Flaxseed


- Granola


Instructions:

1. Begin by blending the frozen strawberries and blueberries with creamy kefir and a scoop of whey protein. This step is best done ahead of time, allowing the mixture to rest until it reaches the perfect temperature—not too icy, just refreshingly cool.


2. Once your blend is ready, portion out each serving into inviting bowls. Top them with slices of ripe bananas, a generous sprinkle of pomegranate seeds, crunchy granola, and a dusting of ground walnuts and flaxseed. For an added burst of flavor and texture, scatter a few pumpkin seeds on top.


3. Gather your loved ones and savor each spoonful, enjoying not just the taste, but the moments shared together.


A Walk Down Memory Lane:

This smoothie bowl brings me back to summer mornings at my grandparents' house. I remember waking up to the aroma of ripe fruits and the soft hum of the blender. My grandmother would call us to the kitchen, her eyes twinkling with warmth and love.


As we sat around the table, each bowl was a masterpiece—vibrant colors of berries, the crunch of granola, and the subtle nuttiness of flaxseed. It wasn't just breakfast; it was a celebration of togetherness. My grandfather would share stories of his childhood, and we'd listen, captivated by tales of a simpler time.


Even now, as I prepare this dish for my own family, it's as if I'm honoring those memories, carrying forward a tradition that nourishes both body and soul. The Big Batch Smoothie Bowl is a testament to the power of food to connect generations, creating bonds that transcend time.


Difficulty Rating: 3/10

This recipe is as easy as it is delightful, with minimal preparation and maximum enjoyment.


Classification: Main Dish

While often enjoyed as a breakfast treat, the hearty ingredients make this smoothie bowl a satisfying main dish, perfect for starting the day on a healthy and happy note.


---


Embrace the blend of flavors and family memories with our Big Batch Smoothie Bowl. A dish that's as nourishing as it is nostalgic, allowing you to savor both the taste and the tradition, one spoonful at a time.

Read more about Appetizers

Read more about Main Dishes

Read more about Desserts

Penne with Goat Cheese and Basil | Made by Meaghan Moineau

Penne with Goat Cheese and Basil | Made by Meaghan Moineau

Title: A Taste of Home: Penne with Goat Cheese and Basil
Description: Dive into the delightful simplicity of Penne with Goat Cheese and Basil, a dish that promises to bring comfort and nostalgia to your dining table. This easy yet flavorful main dish is perfect for any occasion, whether you're a seasoned cook or a kitchen novice.

---


There's something magical about the aroma of fresh basil mingling with the creamy tang of goat cheese. It takes me back to warm summer evenings at my grandmother's house, where the air was always filled with laughter and the scent of herbs from her garden. This dish, Penne with Goat Cheese and Basil, is not only a nod to those cherished moments but also a testament to the power of simple ingredients to create something truly special.


Ingredients:

- Penne pasta


- Fresh basil leaves


- Goat cheese


- Olive oil


- Salt and pepper


Instructions:

1. Begin by cooking the penne pasta according to the package directions. The key is to achieve that perfect al dente texture, where each piece offers a slight bite yet is tender enough to soak up the flavors.


2. While the pasta cooks, take a generous bunch of basil leaves and arrange them in a neat stack. Roll them up tightly like a cigar and cut crosswise to create beautiful, fragrant ribbons using the classic chiffonade technique.


3. Once the pasta is cooked and drained, toss it with a drizzle of olive oil and crumbled goat cheese. Allow it to cool for a few minutes, letting the cheese melt slightly and coat the pasta in a creamy embrace.


4. Finally, add your basil chiffonade, a pinch of salt, and freshly cracked pepper. Toss everything together gently, ensuring each piece of penne is enveloped in the harmonious blend of flavors.


5. Serve immediately and savor each bite, perhaps with a glass of chilled white wine or a summery iced tea.


A Nostalgic Note:

This dish always takes me back to those family gatherings at grandma's. I remember the way she would wander through her garden, snipping fresh basil with a pair of well-used scissors, smiling as she handed me the fragrant leaves. We'd cook together, her guiding hands showing me the chiffonade technique, her voice blending with the sounds of the bustling kitchen. The simple act of preparing and sharing a meal was her way of teaching us about love and togetherness.


Difficulty Rating: 3/10
Classification: Main Dish

Whether you're looking to impress guests with minimal effort or simply want to treat yourself to a comforting meal, Penne with Goat Cheese and Basil is the perfect choice. Its simplicity is its strength, allowing the fresh, vibrant ingredients to shine. Give it a try, and perhaps you'll create a new memory of your own to cherish.

Read more about Appetizers

Read more about Main Dishes

Read more about Desserts

Chicken Piccata With Angel Hair Pasta | Made by Meaghan Moineau

Chicken Piccata With Angel Hair Pasta | Made by Meaghan Moineau

Zesty Chicken Piccata With Angel Hair Pasta: A Timeless Family Classic


Description


Discover the tangy and savory delight of Chicken Piccata with Angel Hair Pasta, a dish that balances bright citrus notes with the richness of a buttery sauce, all harmonized with tender chicken and delicate pasta. This main dish not only promises a burst of flavor but also serves as a nostalgic journey back to family gatherings marked by laughter, love, and unforgettable meals. Perfect for a weeknight dinner or a special occasion, this recipe is rated 6/10 in difficulty and will leave your taste buds dancing with joy.


---


A Walk Down Memory Lane


Growing up, Sunday dinners were a cherished tradition in our family. My grandmother would spend the afternoon bustling around the kitchen, her apron dusted with flour and a twinkle in her eye as she orchestrated the meal that would bring us all together. Chicken Piccata with Angel Hair Pasta was a staple, a dish that magically combined her Sicilian roots with a touch of modern flair.


I remember the way the kitchen smelled, the citrusy aroma of fresh lemons mingling with the savory scent of sautéed garlic and olive oil. As children, my cousins and I would gather around the table, eagerly awaiting the moment when she would place the steaming platter before us. Each bite was a revelation—the tangy capers popping against the tender chicken and the delicate strands of pasta soaking up the rich, buttery sauce.


Those evenings were filled with stories and laughter, the kind of moments that linger long after the plates have been cleared. To this day, every time I prepare this dish, I can almost hear my grandmother's gentle laughter and feel the warmth of those family gatherings. It's more than just a meal; it's a connection to the past, a way to keep those precious memories alive.


---


Ingredients


- 1 cup all-purpose flour


- 8 oz angel hair pasta


- 2 boneless chicken breasts


- 2 tablespoons capers


- 1 cup chicken broth


- Fresh basil, chopped


- 2 diced garlic cloves


- Black kosher salt and pepper to taste


- Zest and juice of 2 lemons


- 3 tablespoons olive oil, divided


- 1 teaspoon red chili flakes


- 2 diced Roma tomatoes


- 3 tablespoons unsalted butter


---


Instructions


1. Prepare the Chicken:

Place 1 cup of flour in a shallow dish. Using a sharp knife, slice each chicken breast in half. Cover each piece with wax paper and use a kitchen mallet to pound them to about ½ inch thick. Season the chicken generously with salt and pepper. Coat the chicken pieces in flour, shaking off any excess.


2. Cook the Chicken:

In a large skillet, heat 2 tablespoons of olive oil over medium heat. Add the chicken to the skillet and sauté each side until golden brown, about 3-4 minutes per side. Once cooked, transfer the chicken to a clean plate and cover with aluminum foil.


3. Boil the Pasta:

Begin boiling the angel hair pasta according to package instructions.


4. Make the Sauce:

Using the same skillet, add the remaining olive oil and sauté the garlic until aromatic, avoiding browning. Add red chili flakes, capers, lemon juice, lemon slices, zest, and chicken broth. Use a wooden spoon to scrape up any brown bits from the skillet. Increase heat to medium-high and allow the liquid to reduce by half.


5. Finish the Sauce:

In a small bowl, mash together 1 tablespoon of flour and the butter. Whisk into the reducing liquid, cooking for 1-2 minutes. Ensure the sauce is smooth and adjust seasoning with salt and pepper.


6. Combine Everything:

Drain the cooked pasta and toss it in the lemon caper sauce with tomatoes and basil, reserving a few spoonfuls of sauce. Adjust seasoning if needed.


7. Serve:

Plate the pasta and top each serving with a piece of chicken. Spoon the reserved lemon caper sauce over the chicken and pasta. Serve immediately.


---


Conclusion


Recreate this delicious Chicken Piccata with Angel Hair Pasta and transport yourself to a place where every meal becomes a memory worth savoring. Whether you're sharing it with family or enjoying a quiet evening at home, this dish promises to delight with its robust flavors and heartwarming nostalgia.

Read more about Appetizers

Read more about Main Dishes

Read more about Desserts

Broccoli Rabe and Breaded Veal Scallopini | Made by Meaghan Moineau

Broccoli Rabe and Breaded Veal Scallopini | Made by Meaghan Moineau

Title: "Savoring Heritage: Broccoli Rabe and Breaded Veal Scallopini"
Description:

Dive into the rich flavors of Broccoli Rabe and Breaded Veal Scallopini, a dish that marries tradition with taste. This main dish, rated 6 out of 10 in difficulty, offers a delightful culinary journey. Join us as we explore the steps to create this masterpiece, infused with a nostalgic family memory that brings warmth to every bite.


---


Broccoli Rabe and Breaded Veal Scallopini: A Taste of Tradition

In the heart of our family kitchen, where laughter mingled with the aroma of simmering dishes, Broccoli Rabe and Breaded Veal Scallopini took center stage. It was a dish that whispered stories of heritage, of Sundays spent around the table, and of the hands that lovingly prepared it. Today, I invite you to recreate this beloved recipe, a culinary heirloom that promises to enchant your taste buds and warm your soul.


Ingredients:

- Broccoli rabe


- Butter


- Egg


- Olive oil


- Salt and pepper


- Yellow onion


- Garlic clove


- Bread crumbs


- Veal scallopini


- Tomatoes


Instructions:
1. Prepare the Broccoli Rabe:

Begin by washing and steaming the broccoli rabe for a few minutes. This step can be done in a pressure cooker for efficiency. The vibrant greens are the perfect complement to the savory veal.


2. Sauté the Aromatics:

Thinly slice the yellow onion. Peel and halve the garlic clove, removing the stem. Heat 1-2 tablespoons of olive oil in a deep pan. Sauté the onion and garlic on medium heat until translucent, releasing their fragrant aroma.


3. Cook the Vegetables:

Add the steamed broccoli rabe to the pan, cover with a lid, and let it cook for a few more minutes. As the flavors meld together, cut the tomatoes into wedges and add them to the pan. Cook for several additional minutes, seasoning with salt and pepper to taste.


4. Prepare the Veal Scallopini:

Season each scallopini with salt and pepper. Dip them in beaten egg, ensuring an even coat. Follow by dipping them in bread crumbs, pressing down to cover evenly.


5. Pan Fry the Veal:

In another pan, melt a generous amount of butter. Pan fry the breaded veal scallopini over high heat, cooking for 1-2 minutes on each side. Add more butter before flipping, as the bread crumbs will absorb it, ensuring a golden, crispy finish.


A Nostalgic Family Memory:

As a child, Sundays meant gathering in my grandmother's cozy kitchen. The clatter of pots and pans was the soundtrack to our family stories, and Broccoli Rabe and Breaded Veal Scallopini was always the star of the meal. I remember my grandmother's skilled hands, dusted with flour, as she taught me the art of breading the veal, her stories weaving into the fabric of our family's culinary history. The dish was more than just food; it was a connection to our roots, a tapestry of flavors that told the story of our heritage.


Difficulty Rating: 6/10

This dish, while requiring attention to detail, is a rewarding culinary endeavor that even intermediate cooks can master. It stands proudly as a main dish, perfect for family gatherings or a special Sunday dinner.


Conclusion:

Broccoli Rabe and Breaded Veal Scallopini is more than just a recipe; it's a journey through time, a celebration of flavors that transcends generations. As you prepare this dish, may it bring you the same joy and nostalgia it has brought to our family table. Bon appétit!

Read more about Appetizers

Read more about Main Dishes

Read more about Desserts