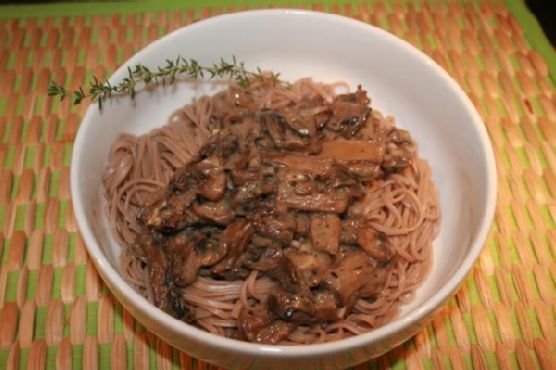
Quick and Easy Scallop Pasta | Made by Meaghan Moineau
Title: Savor the Sea: Quick and Easy Scallop Pasta RecipeDescription: Dive into the delicious simplicity of our Quick and Easy Scallop Pasta, where succulent scallops meet the aromatic allure of garlic and white wine, all wrapped up in the comforting embrace of Japanese ramen noodles. Perfect for a weeknight dinner or an elegant weekend meal, this dish is a seafood lover's dream. With a difficulty rating of just 4 out of 10, even novice cooks can bring this Main Dish to life in their own kitchens. Join us on this culinary adventure and discover a recipe that’s not just about food, but also family, nostalgia, and the joy of shared meals.
---
A Taste of the Past: Family Memories with Scallop Pasta
Growing up, Sundays were always special in our household. They were the days when the entire family gathered around the dining table, sharing laughter and stories, and of course, savoring a delicious meal. My grandmother, an extraordinary cook, would often prepare a seafood feast, and scallop pasta was always a crowd favorite. As a child, I remember the anticipation that built as the rich aroma of garlic and butter wafted through the house, signaling that dinner was almost ready.
I learned the art of cooking scallops from watching her. She would expertly pat them dry, sprinkle a touch of salt and pepper, and sear them to perfection, creating a delectable golden crust. Her secret was the splash of sauvignon blanc that deglazed the pan, infusing the dish with a depth of flavor that was nothing short of magical.
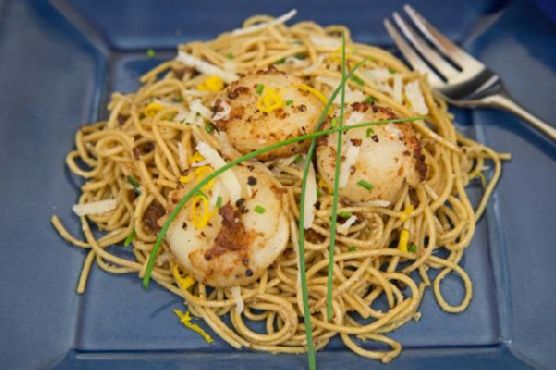
As we sat around the table, the clinking of forks and contented sighs filled the air. The pasta, twirled expertly around our forks, was coated in a luscious sauce that brought together the briny scallops, nutty parmesan, and the subtle bite of fresh chives. Each bite was a harmonious blend of flavors, a testament to my grandmother's culinary skills and her love for her family.
Creating Your Own Scallop Pasta Experience
Ingredients:
- Dry scallops
- Dry Japanese ramen noodles
- Garlic
- Sesame oil
- Sauvignon blanc white wine
- Unsalted butter
- Parmesan cheese
- Round chives
- Lemon zest
- Fresh sea salt
Instructions:
1. Begin by patting the room temperature scallops dry with a paper towel. Season both sides with fresh sea salt, pepper, and granulated garlic.
2. Boil the ramen noodles for four minutes, then drain, rinse, and shake them dry. Set aside until needed.
3. Heat sesame oil in a 12-inch non-stick sauté pan over medium-high heat. Once hot, add the scallops, cooking them for three minutes on one side until they develop a golden-brown crust. Carefully flip and cook for another three minutes. Remove the scallops and keep them warm in a low-temperature oven.
4. Reduce the pan heat to medium and add minced garlic, cooking for about 1 to 1½ minutes until fragrant.
5. Carefully pour in the sauvignon blanc white wine, deglazing the pan by stirring up the browned bits from the scallops. Add the butter, stirring until it melts and combines with the wine to create a rich pan sauce.
6. Return the pasta to the pan, along with chopped chives and grated parmesan cheese. Mix thoroughly to combine all the flavors.
Serving Suggestion:
Finish your dish with a sprinkle of lemon zest for a fresh, zesty kick. Serve immediately, garnished with additional chives and a light dusting of parmesan cheese for a touch of elegance.
---
Whether you're creating new memories with loved ones or enjoying a quiet dinner for one, this Quick and Easy Scallop Pasta will bring a touch of nostalgia and joy to your table. Bon appétit!