chilli chicken | Made by Meaghan Moineau

chilli chicken | Made by Meaghan Moineau

Title: Spicing Up Memories: The Timeless Allure of Chilli Chicken
Description: Dive into the irresistible world of Chilli Chicken, a dish that marries bold flavors with cherished family memories. This mouthwatering journey not only brings to life a beloved recipe but also evokes the warmth of shared moments in the kitchen.

---


A Flavorful Journey into Nostalgia: Chilli Chicken


There's something about the spicy aroma of sizzling Chilli Chicken that takes me back to the heart of our family kitchen. As the days grow shorter and the air crisper, this dish becomes a beacon of warmth and comfort, a culinary masterpiece that tells a story as vibrant as its flavor.


The Ingredients of Tradition

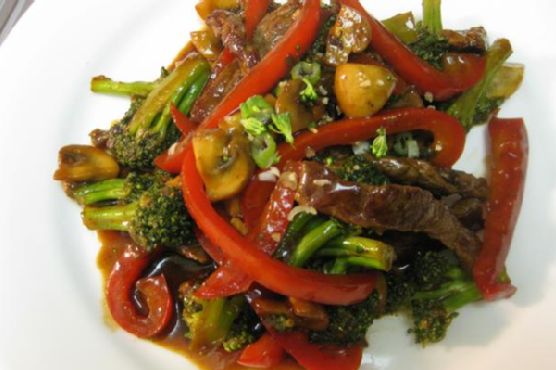
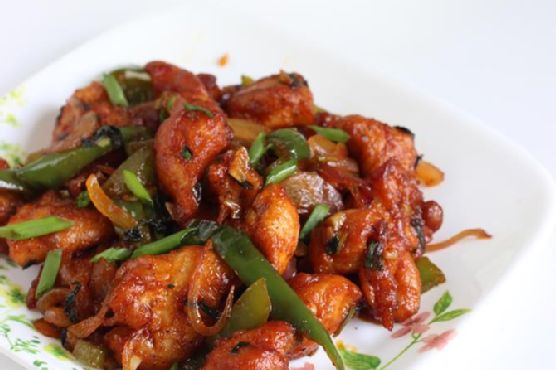
At the core of this beloved recipe are simple ingredients, each carrying its own weight in tradition and taste. You'll need the crisp crunch of bell pepper, succulent boneless chicken breast, and the fiery kick of green chilies, slit for that perfect infusion of heat. Red chili powder, corn flour, and freshly minced garlic combine to form the aromatic base that makes this dish an unforgettable experience.


Oil and onions sautéed to golden perfection lay the groundwork for our journey, while the dual presence of soy sauce and its salty depth adds complexity. Don't forget the pepper powder, a dash of sugar to balance the heat, and a splash of vinegar for that signature tang. Finally, the dish is crowned with a scattering of vibrant spring onions, adding a pop of color and freshness to each bite.


A Family Memory Etched in Flavor

Growing up, Chilli Chicken was more than just a meal—it was an event. Every Sunday, the kitchen would transform into a bustling hub of activity, the rhythmic chopping and sizzling a comforting soundtrack to our family gatherings. My father, the designated chef of the day, would orchestrate his culinary symphony, each ingredient contributing its unique note to the melody of flavors.


I remember my younger self, perched on a stool, eager to help. My task was simple yet vital: stirring the pot. As the steam rose, carrying with it the spicy aroma, it felt like I was stirring more than just ingredients; I was blending laughter, stories, and the essence of family togetherness. The anticipation would build until, finally seated around the dining table, we'd savor each bite, the Chilli Chicken disappearing almost as quickly as it was made.


Crafting Your Own Memories

This dish, with its medium difficulty level of 6 out of 10, is not just about replicating a recipe. It's about creating a canvas for your own memories, a backdrop for laughter, and perhaps a bit of culinary chaos. It's the perfect appetizer to ignite conversation and whet the appetite for more.


For those eager to bring this dish to life in their own kitchens, the complete instructions await you on Swasthi's Recipes. There, you'll find the step-by-step guide to mastering this flavorful dish, ensuring your Chilli Chicken is as memorable as the ones served in kitchens around the world.


In Conclusion

Chilli Chicken is more than a dish; it's a testament to the power of food in bringing people together. Whether you're revisiting cherished family memories or creating new ones, this tantalizing recipe promises not just a feast for the senses, but a celebration of the bonds that tie us together through the universal language of food.

Read more about Appetizers

Read more about Main Dishes

Read more about Desserts

Beef Teriyaki Stir Fry | Made by Meaghan Moineau

Beef Teriyaki Stir Fry | Made by Meaghan Moineau

Title: Savoring Memories with Beef Teriyaki Stir Fry: A Nostalgic Family Delight
Description: Dive into the flavors of our Beef Teriyaki Stir Fry—a savory blend of tender beef, vibrant vegetables, and a delectable sauce. This main dish not only tantalizes your taste buds but also brings back cherished memories of family gatherings. Rated a 6/10 on the difficulty scale, this recipe is perfect for both seasoned cooks and culinary novices looking to create a delicious and heartwarming meal.

---


Beef Teriyaki Stir Fry: A Flavorful Journey Through Time

The aroma of soy sauce mingling with ginger and garlic, the sizzle of beef in a hot pan, and the vibrant colors of fresh vegetables—these are the sensations that transport me back to my grandmother's kitchen. It was a place where magic happened, where every meal was a celebration of flavors and family. Today, I want to share a recipe that encapsulates those cherished moments: Beef Teriyaki Stir Fry.


Ingredients:

- 1 lb flank steak, thinly sliced


- 2 cups broccoli florets


- 1 red bell pepper, sliced


- 1 cup mushrooms, sliced


- 2 scallions, sliced


- 2 tablespoons soy sauce


- 1 tablespoon brown sugar


- 1 tablespoon dark sesame oil


- 2 cloves garlic, minced


- 1 inch fresh ginger, grated


- 2 tablespoons vegetable oil


- 1 tablespoon cornstarch


- 2 teaspoons cold water


- Sesame seeds for garnish


Instructions:
1. Marinate the Flavors: In a small bowl, whisk together soy sauce, brown sugar, sesame oil, garlic, and ginger. Add the sliced flank steak to the mixture, ensuring each piece is well-coated. Cover and refrigerate for at least 30 minutes, allowing the flavors to meld.
2. Sizzle and Sauté: Heat vegetable oil in a large frying pan over medium heat. Add the marinated beef, cooking for 3-4 minutes to brown it on all sides. Remove the beef from the pan and set it aside.
3. Vegetable Medley: In the same pan, add broccoli, red bell pepper, and mushrooms. Sauté for about 5 minutes, or until the vegetables begin to soften.
4. Saucy Symphony: Stir in the teriyaki sauce and bring the mixture to a simmer. Return the beef to the pan, including any flavorful drippings. Cook for another 5 minutes, stirring occasionally to ensure even flavor distribution.
5. Thickening Touch: In a small bowl, dissolve cornstarch in 2 teaspoons of cold water. Stir this mixture into the pan, allowing the sauce to thicken over 2 minutes. Toss the beef and vegetables to coat them evenly in the rich teriyaki sauce.
6. Serve and Enjoy: Sprinkle with sesame seeds and sliced scallions before serving. Pair it with steamed rice or noodles for a complete meal.
A Nostalgic Family Memory:

Every Sunday afternoon, my family would gather at my grandmother's house. The kitchen was always a hub of activity, filled with laughter, stories, and the enticing scent of her Beef Teriyaki Stir Fry. I remember standing on a stool, watching her expertly whisk the sauce, her hands moving with the grace of years of practice. The sizzling beef and vibrant vegetables were a feast for the senses, and as we sat around the table, each bite was a reminder of the love and care she infused into every dish.


These meals were more than just food; they were a celebration of our heritage and the bonds that held us together. Even now, whenever I make this dish, I'm reminded of those precious Sundays, and I feel a sense of gratitude for the culinary legacy she passed down to us.


Difficulty Rating: 6/10
Dish Classification: Main Dish
Conclusion:

Beef Teriyaki Stir Fry is more than just a recipe; it's an opportunity to recreate memories and share them with loved ones. Whether you're cooking for family or friends, this dish is sure to bring a sense of warmth and nostalgia to your table. Enjoy the symphony of flavors and the stories woven into each bite, and perhaps, create a few new memories of your own.

Read more about Appetizers

Read more about Main Dishes

Read more about Desserts

The Secret to Easy Skillet Filet Mignon Steak Tacos | Made by Meaghan Moineau

The Secret to Easy Skillet Filet Mignon Steak Tacos | Made by Meaghan Moineau

Title: Unveiling the Secret to Easy Skillet Filet Mignon Steak Tacos: A Culinary Masterpiece
Description: Dive into the exquisite world of gourmet tacos with our Easy Skillet Filet Mignon Steak Tacos recipe. Perfectly seasoned and cooked filet mignon pairs beautifully with creamy guacamole, tangy sour cream, and sharp cheddar cheese, all nestled in warm white corn tortillas. This dish is not just a meal; it's an experience that will transport you back to cherished family gatherings. Easy to prepare yet sophisticated in flavor, these tacos are the perfect main dish for any occasion.

---


Who doesn't love tacos? They are versatile, flavorful, and bring people together in a way that few other foods can. But when you elevate the humble taco with luxury ingredients like filet mignon, you create something truly special. This recipe for Easy Skillet Filet Mignon Steak Tacos not only satisfies your cravings but also evokes heartwarming memories of family gatherings.


A Nostalgic Trip Down Memory Lane

Growing up, Sunday dinners were a sacred ritual in my family. My grandmother would spend the entire afternoon preparing a feast that would bring us all together. One of her most beloved dishes was her special steak tacos. I can still remember the aroma of sizzling steak filling the kitchen, mingling with the warmth of laughter and stories shared around the dinner table.


My grandmother had a knack for turning a simple meal into a grand celebration. Her tacos, much like these Easy Skillet Filet Mignon Steak Tacos, were more than just food; they were a symbol of love and togetherness. Every bite was a reminder of those cherished moments spent with family, making memories that would last a lifetime.


Ingredients:

- 2 filet mignon steaks


- Olive oil extra virgin


- Cracked black pepper


- White corn tortillas


- Guacamole


- Sour cream


- Shredded cheddar cheese


Instructions:
1. Prepare the Skillet: Heat a skillet over medium to low heat. This gentle heat ensures the steaks cook evenly without losing their tenderness.
2. Season the Steaks: Rub the filet mignon steaks with extra virgin olive oil and season generously with cracked black pepper. This simple seasoning allows the natural flavors of the steak to shine.
3. Cook the Steaks: Place the steaks in the heated skillet. For medium doneness, cook each side for about 7 minutes, adjusting as necessary for your preferred level of doneness. The key is to cook them slowly to maintain their juicy tenderness.
4. Slice the Steaks: Once cooked to perfection, remove the steaks from the heat and let them rest for a few minutes. Then, slice them thinly and lengthwise for easy taco assembly.
5. Warm the Tortillas: In a clean skillet over medium heat, warm the white corn tortillas until they're soft and pliable.
6. Assemble the Tacos: Generously top each tortilla with slices of steak. Add dollops of guacamole and sour cream, then sprinkle with shredded cheddar cheese for that perfect cheesy finish.
A Delicious Main Dish

These Easy Skillet Filet Mignon Steak Tacos are more than just a meal; they're an invitation to gather around the table, share stories, and create new memories. Rated at a difficulty level of 4 out of 10, this dish is accessible to both seasoned cooks and kitchen novices alike. Perfect as a main dish, it's sure to impress your family and friends with its gourmet appeal and nostalgic charm.


As you savor each bite, may you be reminded of the simple joys of life and the power of food to bring us together. Enjoy!

Read more about Appetizers

Read more about Main Dishes

Read more about Desserts

French Onion Marsala Soup | Made by Meaghan Moineau

French Onion Marsala Soup | Made by Meaghan Moineau

Title: A Hearty Bowl of Comfort: French Onion Marsala Soup
Description: Dive into a bowl of soul-warming French Onion Marsala Soup, a delightful twist on the classic French favorite. With the rich flavors of marsala wine and the savory depth of caramelized onions, this dish is perfect for cozy evenings. Discover the recipe that brings back cherished family memories while earning its place as a staple in your kitchen.

---


As the leaves begin to fall and the evenings grow chillier, there's nothing quite as comforting as a steaming bowl of soup. Today, I’m excited to share a recipe that holds a special place in my heart—French Onion Marsala Soup. This dish is an ode to tradition with a unique twist that elevates it to new heights.


Ingredients:

- 2 tablespoons butter


- 2 tablespoons olive oil


- 4 large onions, thinly sliced


- 6 cups canned beef broth


- 1 cup marsala wine


- 1 teaspoon dried thyme


- Salt and pepper to taste


- 1 teaspoon sugar


- Texas toast croutons


- 8 slices provolone cheese


- 1 cup diced swiss cheese


- 1/2 cup grated parmesan cheese


Instructions:

1. Begin by melting the butter with olive oil in a large pot over medium heat. Add the thinly sliced onions and stir continually until they turn translucent and start to caramelize.


2. Pour in the beef broth, marsala wine, and sprinkle in the dried thyme. Allow the soup to simmer gently for about 30 minutes, allowing the flavors to meld beautifully.


3. Stir in the sugar and season with salt and pepper, keeping a careful hand to avoid over-salting.


4. Ladle the aromatic soup into oven-safe bowls, placing a generous handful of Texas toast croutons in each.


5. Sprinkle the croutons with grated parmesan and diced swiss cheese, then lovingly layer two slices of provolone cheese on top.


6. Carefully transfer the bowls onto a cookie sheet and broil in a preheated oven until the cheese bubbles and turns a delightful golden brown.


A Nostalgic Family Memory:

This recipe brings back memories of Sunday evenings at my grandmother's house. Her kitchen was a haven of warmth and love, where the scent of caramelizing onions would waft through the air, signaling the start of our weekly family gathering. We would sit around her large, wooden dining table, eagerly awaiting the moment she’d bring out her signature French Onion Marsala Soup. The combination of flavors was magical, and the added touch of marsala wine gave it an unmistakable aroma that lingered in the air long after the meal was over. It was a dish that not only filled our bellies but also warmed our hearts, becoming a cherished family tradition passed down through the generations.


Difficulty: 5/10
Classification: Main Dish

This French Onion Marsala Soup is more than just a meal; it’s a journey back in time, a reminder of family bonds, and a testament to the joy of sharing food with loved ones. Give it a try, and let it become a part of your family’s culinary tradition, just as it is in mine.

Read more about Appetizers

Read more about Main Dishes

Read more about Desserts

Lusciously Lemony Lentil Soup | Made by Meaghan Moineau

Lusciously Lemony Lentil Soup | Made by Meaghan Moineau

Title: Unveiling Comfort: Lusciously Lemony Lentil Soup
Description: Dive into a heartwarming culinary journey with our Lusciously Lemony Lentil Soup—a dish that's as nourishing as it is delicious. Infused with the zesty brightness of lemon and the warmth of cumin, this soup is perfect for those who crave a comforting yet refreshing meal. Whether you're a kitchen novice or a seasoned chef, this recipe is your ticket to creating a soul-soothing masterpiece.

---


In the hustle and bustle of modern life, few things offer the same solace as a warm bowl of soup. Today, we're exploring a family favorite that has graced our table for generations: Lusciously Lemony Lentil Soup. This dish not only warms the body but also the heart, being steeped in nostalgia and love.


A Whiff of Tradition

I remember the first time I tasted this soup. It was a chilly autumn evening at my grandmother's house, where the scent of cumin and lemon wafted through the air, mingling with the laughter and chatter of family. My grandmother, a culinary maestro in her own right, stirred the pot with a gentle hand, regaling us with tales of her own childhood.


She often spoke of how this simple yet flavorful dish brought her family together during lean times. The hearty lentils combined with aromatic spices and a bright hit of lemon provided a nourishing meal that was both economical and satisfying. It was, she said, a testament to the power of simplicity and the joy of shared meals.


Crafting the Soup: Step by Step

*Ingredients:*


- 2 tablespoons olive oil


- 1 large onion, chopped


- 3 cloves garlic, minced


- 2 tablespoons tomato paste


- 1 teaspoon cumin


- Salt and pepper, to taste


- 1/2 teaspoon chili powder


- 6 cups chicken or vegetable broth


- 3 carrots, diced


- 2 cups cooked lentils (or dried lentils, rinsed)


- 1/4 cup fresh lemon juice


- 1/4 cup chopped cilantro


*Instructions:*


1. Sauté the Aromatics: Heat the olive oil over medium-high heat. When the oil is hot, add the onion and garlic. Cook until they are soft and translucent, about 5 minutes.
2. Introduce the Spices: Stir in the tomato paste, cumin, salt, pepper, and chili powder. Cook for about 2 minutes until the spices are fragrant and well-integrated.
3. Simmer to Perfection: Pour in the broth, then add the diced carrots. Cover and let it simmer on medium-low heat until the carrots are tender, approximately 15 minutes.
4. Blend and Brighten: Add the cooked lentils and heat through. For a velvety texture, blend the soup using an emulsifier directly in the pot or transfer it in batches to a blender. Stir in the lemon juice and cilantro. Season with additional salt if needed.
5. Serve and Savor: Ladle the soup into bowls, garnish with extra cilantro if desired, and enjoy the comforting warmth.
A Dish to Cherish

This Lusciously Lemony Lentil Soup is not just a meal; it’s a cherished memory, a piece of family history served in a bowl. The lemon adds a zesty twist that elevates the earthiness of the lentils, while the spices create a rich, aromatic depth.


Difficulty Rating: 4/10

Classified as a Main Dish, this recipe is accessible to cooks of all levels, offering a perfect balance of ease and flavor. It’s an invitation to slow down, gather loved ones, and celebrate the timeless tradition of home-cooked meals. As you savor each spoonful, may this soup bring you as much joy and warmth as it has to our family over the years.

Read more about Appetizers

Read more about Main Dishes

Read more about Desserts

Chinese Potstickers | Made by Meaghan Moineau

Chinese Potstickers | Made by Meaghan Moineau

Deliciously Nostalgic: Crafting Perfect Chinese Potstickers at Home


Description

Dive into the rich flavors and textures of Chinese potstickers, a delightful culinary journey wrapped in a delicate dumpling. This detailed guide not only provides a step-by-step recipe but also shares a heartwarming family story that will inspire you to bring a taste of tradition to your kitchen. Perfect as an appetizer or a savory snack, these potstickers will soon become a family favorite.

---


A Taste of Tradition: Chinese Potstickers


The sizzling sound of dumplings hitting the hot pan, the aroma of sesame oil wafting through the kitchen, and the anticipation of that first bite—making Chinese potstickers is more than just preparing a meal; it's about creating memories. For me, these potstickers are a culinary heirloom passed down through generations, each fold and pleat crafted with love.


Ingredients


- 200g lean ground pork (or substitute with ground chicken)


- 100g canned water chestnuts, chopped (or substitute with spinach or cabbage)


- 1 teaspoon sea salt


- 1 teaspoon fine sugar


- 1/2 teaspoon black ground pepper


- 2 teaspoons light soy sauce


- 2 teaspoons sesame oil


- 1 tablespoon Shaoxing Huatiao wine


- 2-3 tablespoons finely chopped scallions


- Dumpling wrappers (thawed if frozen)


- Plain flour for dusting


- 2-3 tablespoons vegetable oil


- 1/3 cup water


Instructions


1. Prepare the Filling:

- In a large mixing bowl, combine the ground pork with sea salt, sugar, ground pepper, soy sauce, sesame oil, and Shaoxing Huatiao wine.


- Add the chopped water chestnuts to the mixture. For a twist, you can use spinach or cabbage instead.


- Stir in the finely chopped scallions and mix all ingredients well.


2. Assemble the Dumplings:

- Dust your working surface with flour. Carefully separate the dumpling wrappers and lay them out.


- Place about 1.5 teaspoons of the pork filling in the center of each wrapper.


- Lightly wet the edges of the wrapper with water. Bring the edges together and pinch at the center.


- Create pleats on one side of the dumpling, folding towards the center and pinching to seal. Repeat on the other side, ensuring three pleats per side.


3. Cooking the Potstickers:

- Heat vegetable oil in a frying pan over high heat.


- Place the dumplings flat-side down in the pan and fry until the bottoms are golden brown.


- Add water, cover the pan, and steam for 4-5 minutes. Remove the cover and let them crisp up for another minute.


4. Serving Suggestion:

- Serve the potstickers with a vinegar dip made of balsamic or black Chinese vinegar and thinly sliced ginger. Enhance the dip with soy sauce, chili oil, or sesame oil for extra flavor.


A Family Memory


Growing up, Sunday afternoons were reserved for dumpling-making in my grandmother's kitchen. Her nimble fingers would work magic, transforming simple ingredients into delectable bites. As children, my siblings and I would gather around the table, our hands dusted with flour, trying to mimic her expert pleats. Laughter and stories filled the room, each dumpling a testament to our shared love and heritage. These potstickers are more than a dish; they're a connection to those cherished days, a reminder that food has the power to bring families together.


Difficulty: 6/10

Classification: Appetizer


Creating Chinese potstickers is a rewarding experience that combines the art of cooking with the joy of tradition. Whether you're new to dumpling-making or a seasoned pro, this recipe promises delicious results that will delight your senses and bring a touch of nostalgia to your dining table. Enjoy!

Read more about Appetizers

Read more about Main Dishes

Read more about Desserts

Cider-Braised Pork Shoulder With Caramelized Onion and Apple Confit | Made by Meaghan Moineau

Cider-Braised Pork Shoulder With Caramelized Onion and Apple Confit | Made by Meaghan Moineau

Title: A Taste of Autumn: Cider-Braised Pork Shoulder with Caramelized Onion and Apple Confit
Description:

Dive into the heartwarming flavors of fall with our Cider-Braised Pork Shoulder with Caramelized Onion and Apple Confit. This main dish, rated 7 out of 10 on the difficulty scale, beautifully marries the rich, savory notes of pork with the sweet, tangy essence of apples and onions. As you savor each bite, you'll be transported back to cherished family gatherings and the cozy warmth of a kitchen filled with laughter and love.


---


The Recipe for Nostalgia and Comfort

When the leaves start to turn and the air crisps with the promise of autumn, there's nothing quite like gathering around a table with loved ones to share a meal that encapsulates the essence of the season. Our Cider-Braised Pork Shoulder with Caramelized Onion and Apple Confit isn't just a dish; it's a journey back to those nostalgic family dinners that marked the change of seasons.


Ingredients:

- 1 tied pork shoulder


- Black salt and pepper, to taste


- Olive oil


- 2 large yellow onions, thinly sliced


- 1/4 cup Calvados brandy


- 2 Granny Smith apples, peeled and sliced


- 4 garlic cloves, minced


- 1 teaspoon fresh dried thyme


- 2 cups apple cider


- 1 cup chicken stock


- 2 tablespoons Dijon mustard


Instructions:
1. Preheat and Prepare:

Begin by preheating your oven to 400°F (200°C). Pat the pork shoulder dry with paper towels and generously season with black salt and pepper.


2. Sear the Pork:

Heat olive oil in a large ovenproof pot or Dutch oven over medium-high heat. Brown the pork on all sides, turning with tongs, for about 6-8 minutes per side to create a rich, savory crust. Transfer the pork to a plate.


3. Caramelize the Onions:

Pour off excess fat from the pot, leaving just enough to coat the bottom. Add the sliced onions and 1 teaspoon of salt. Sauté over medium heat, stirring occasionally, until the onions are soft and deeply golden brown, about 18-20 minutes.


4. Deglaze and Build Flavor:

Stir in the Calvados to deglaze the pan, scraping up any browned bits. Add the apple slices, minced garlic, and thyme, cooking for an additional 30 seconds until fragrant.


5. Braise the Pork:

Nestle the pork shoulder back into the pot, ensuring it's surrounded by the onion mixture. Pour in the apple cider and chicken stock. Cover the pot and place it in the oven, reducing the heat to 325°F (163°C). Braise until the pork is incredibly tender, about 2 1/2 to 3 hours.


6. Finish the Sauce:

Once cooked, transfer the pork to a cutting board and remove the kitchen strings. Boil the onion and apple mixture over high heat until the liquid is slightly reduced and thickened, about 2 minutes. Stir in the Dijon mustard and season to taste with additional salt and pepper.


7. Serve and Enjoy:

Slice the tender pork into serving pieces and arrange them on a platter or individual plates. Generously spoon the caramelized onion and apple confit over and around the meat, allowing the flavors to meld beautifully.


A Family Memory:

This dish always reminds me of the autumn evenings spent at my grandmother's house. The warmth of her kitchen, the aroma of apples and onions slowly caramelizing, and the sound of laughter echoing through the rooms. One particular fall, as the first snowflakes began to dance in the air, she taught me how to prepare this very dish. My small hands struggled to tie the pork, but her gentle guidance and the promise of a comforting meal kept me eager to learn. As we sat down to dinner, wrapped in the cozy embrace of family, I realized that this was more than just a recipe—it was a legacy of love and tradition.


Conclusion:

This Cider-Braised Pork Shoulder with Caramelized Onion and Apple Confit is more than a main dish; it's a celebration of the season and a testament to the power of food to bring us together. As you recreate this dish, may it fill your home with warmth and your heart with cherished memories.

Read more about Appetizers

Read more about Main Dishes

Read more about Desserts

Classic French Mussels | Made by Meaghan Moineau

Classic French Mussels | Made by Meaghan Moineau

Title: Unveiling the Elegance of Classic French Mussels: A Taste of Nostalgia
Description: Dive into the heart of French culinary tradition with our Classic French Mussels recipe. Perfectly blending delicate flavors and cultural richness, this dish offers a taste of nostalgia, transporting you to cherished family gatherings. With simple ingredients like dry white wine, fresh parsley, and garlic, this mussel recipe is a delightful appetizer rated 4 out of 10 in difficulty. Relish the harmony of taste and memory as you savor each bite.

---


There’s something inherently comforting about the ritual of preparing a beloved family dish. For me, Classic French Mussels brings back vivid memories of summer evenings spent at my grandmother’s quaint seaside cottage in Brittany, France. The air was always filled with the briny scent of the ocean, mingling with the aroma of garlic and shallots sizzling in olive oil—a sensory symphony that signaled the beginning of a cherished meal.


Ingredients:

- 2 lbs mussels


- 2 tablespoons olive oil


- 2 shallots, finely chopped


- 4 garlic cloves, minced


- 1 cup dry white wine


- 1/2 cup low-fat buttermilk


- 2 tablespoons unsalted light butter


- 1/4 cup fresh parsley, chopped


- Kosher salt to taste


Instructions:
1. Prepare the Mussels: Begin by scrubbing the mussels under cold water with a stiff brush. Discard any mussels that remain open or have broken shells. Soak them in cool, clean water for at least an hour to allow them to expel any sand.
2. Remove the Beards: Locate the small fibrous "beard" on each mussel and pull it out toward the hinge of the shell to avoid injuring the mussel.
3. Cook the Aromatics: In a large pot, heat the olive oil over medium-high heat. Add the shallots and garlic, cooking until soft and fragrant, approximately 5 minutes.
4. Combine Ingredients: Add the mussels to the pot, followed by the wine, buttermilk, butter, and parsley. Season generously with kosher salt. Stir well to combine all ingredients.
5. Steam the Mussels: Cover the pot and allow the mussels to cook for 10 to 15 minutes, or until they have opened and are cooked through.
6. Serve: Divide the mussels and the flavorful juices between two bowls. Serve immediately with crusty whole-grain bread to soak up the delectable sauce.

This dish, a testament to the simplicity and elegance of French cuisine, is the perfect appetizer for any occasion. It’s rated a 4 out of 10 in difficulty, making it accessible even for those new to cooking mussels.


As I watch the mussels gently open in the pot, I’m reminded of those magical evenings in Brittany, where laughter echoed around the dinner table, and the warmth of family togetherness was as nourishing as the meal itself. Today, I carry on this tradition, serving Classic French Mussels to my own family, creating new memories while honoring the old.


Savor the rich flavors and let this dish transport you to a place of warmth, love, and tradition. Bon appétit!

Read more about Appetizers

Read more about Main Dishes

Read more about Desserts

Herbivoracious’ White Bean and Kale Soup | Made by Meaghan Moineau

Herbivoracious' White Bean and Kale Soup | Made by Meaghan Moineau

Savoring Simplicity: Herbivoracious' White Bean and Kale Soup Recipe


A Comforting Bowl of Nostalgia and Nutrition


In the hustle and bustle of modern life, it's often the simplest things that bring the most comfort. Herbivoracious' White Bean and Kale Soup is one of those treasured recipes that seamlessly blends heartiness with wholesomeness. Whether you're a seasoned chef or a culinary novice, this soup is your gateway to a world of flavors that marries nutrition with nostalgia.


Ingredients


- 2 tablespoons olive oil
- 1 medium onion, diced
- 3 cloves garlic, whole
- 2 carrots, diced
- 1 teaspoon kosher salt
- 2 bay leaves
- 1 tablespoon fresh rosemary leaves
- Choice of Parmesan rind, dried porcini, or broth powder
- 1 cup dried white navy beans
- 6 cups water
- 1 bunch dinosaur kale, chopped
- Juice of 1 lemon
- Extra-virgin olive oil for drizzling

Instructions


Pressure Cooker Method


1. Sauté the Vegetables: In the pressure cooker, heat olive oil over medium-high heat. Sauté the onion, garlic, carrot, and salt until the onion is translucent, about 4 minutes.
2. Add Aromatics and Beans: Stir in the bay leaves, rosemary, and your choice of Parmesan rind, dried porcini, or broth powder. Add the dried beans and water.
3. Pressure Cook: Seal the pressure cooker and bring to high pressure. Cook for 40 minutes, then allow the pressure to release naturally.
4. Finalize the Soup: Open the lid, remove the bay leaves and Parmesan rind. Add the kale and lemon juice, and simmer for 10 minutes until the kale is tender. Adjust seasoning to taste.
5. Serve: Garnish with a generous drizzle of extra-virgin olive oil before serving.

Stovetop Method


1. Prepare the Beans: Soak beans overnight in ample water. Drain and place them in a large saucepan with enough water to cover by 2 inches. Bring to a boil, then reduce heat and simmer until tender, about 1 ½ to 2 hours. Drain, reserving the broth.
2. Sauté the Vegetables: In a large saucepan, heat olive oil over medium-high heat. Sauté the onion, garlic, carrot, and salt until the onion is translucent, about 4 minutes.
3. Simmer the Soup Base: Add 4 cups of the reserved bean broth, bay leaves, rosemary, and your choice of Parmesan rind, dried porcini, or broth powder. Simmer for 30 minutes.
4. Complete the Soup: Remove bay leaves and Parmesan rind. Add the cooked beans, kale, and lemon juice, simmering for 10 minutes until the kale is tender.
5. Serve: Adjust seasoning and serve with a drizzle of extra-virgin olive oil.

A Nostalgic Taste of Home


Growing up, Sundays were a time for family gatherings, where stories were shared and laughter echoed through the house. My grandmother often made a version of this White Bean and Kale Soup, filling the kitchen with its irresistible aroma. I remember sitting at her worn wooden table, watching the steam rise from my bowl as she recounted tales from her childhood. This soup, with its rustic charm and hearty flavors, became a symbol of family love and togetherness. Even today, every spoonful takes me back to those cherished moments, reminding me of the warmth and comfort of home.


Difficulty Rating: 4/10


Herbivoracious' White Bean and Kale Soup is a delightful main dish that's simple to prepare, making it accessible to cooks of all skill levels. With a bit of patience and love, this recipe transforms basic ingredients into a nourishing meal that feeds both body and soul.


Embrace the culinary journey of creating this comforting dish, and allow it to become a staple in your family's collection of wholesome recipes. Whether you're gathering around the table with loved ones or seeking solitude with a good book, this soup is a testament to the power of simplicity and the joy of homemade goodness.

Read more about Appetizers

Read more about Main Dishes

Read more about Desserts

Curry-Braised Chicken | Made by Meaghan Moineau

Curry-Braised Chicken | Made by Meaghan Moineau

Title: Curry-Braised Chicken: A Comforting Culinary Journey
Description: Dive into the fragrant world of Curry-Braised Chicken, a dish that marries rich flavors with tender textures. Perfect for cozy family dinners or special gatherings, this curry-infused delight will transport you to a warm kitchen filled with laughter and nostalgia. Discover the recipe, memories, and more as we explore this delectable main dish.

---


Curry-Braised Chicken: A Comforting Culinary Journey


There’s something comforting about a dish that fills the home with an aroma so inviting, it feels like a warm hug. Curry-Braised Chicken is one such dish, a symphony of flavors that dances across your palate and evokes memories of family gatherings and heartfelt conversations. Let's dive into this comforting recipe and relive the cherished memories it brings.


Ingredients


- Basmati Rice
- 2 tablespoons Brown Sugar
- 2 tablespoons Fish Sauce
- 2 tablespoons Fresh Lime Juice
- 1 Bell Pepper, sliced
- Salt, to taste
- 4 Skinless Boneless Chicken Breasts, halved
- 1 can (13.5 oz) Unsweetened Coconut Milk
- 2 tablespoons Vegetable Oil
- 3 tablespoons Yellow, Red, or Green Curry Paste

Instructions


1. Preheat the Oven: Start by preheating your oven to 325 degrees Fahrenheit.
2. Prepare the Chicken: Slice the chicken breasts in half for even cooking. Dust them with salt and pepper.
3. Brown the Chicken: Heat the vegetable oil over medium-high heat in a Dutch oven. Brown the chicken for 1-2 minutes on each side in batches. Set aside once done.
4. Create the Curry Base: Add the curry paste to the same Dutch oven. Use a wooden spoon to break up any large pieces and incorporate the paste into the hot oil.
5. Add Coconut Milk: Pour in the coconut milk, using the wooden spoon to release any browned bits of chicken from the bottom of the pot.
6. Flavor it Up: Stir in the fish sauce and brown sugar, ensuring everything is well combined.
7. Bake: Cover the Dutch oven and place it in the oven. Bake for 45-55 minutes, or until the chicken is fully cooked and no longer pink.
8. Final Touch: Just before serving, stir in the fresh lime juice to lend a zesty finish.
9. Serve: Plate the Curry-Braised Chicken with cooked basmati rice and bell pepper slices for a complete meal.

A Nostalgic Memory


Every time I prepare this dish, I am whisked back to a lively kitchen bustling with family members during the holiday season. My grandmother, with her warm smile and gentle guidance, would orchestrate our culinary endeavors. As the curry simmered, stories of our heritage were shared, bridging generations. This dish, with its rich aroma and tantalizing flavors, became a symbol of unity and warmth — a reminder that food is not just sustenance, but a vessel for love, laughter, and legacy.


Difficulty: 4/10


While the steps are straightforward, the key lies in patience and allowing the flavors to meld together harmoniously in the oven. This main dish is approachable for cooks of all levels, making it a perfect choice for a comforting family meal.


---


Curry-Braised Chicken is more than just a recipe; it's a journey through flavors and family history. Whether you're new to the kitchen or an experienced cook, this dish promises a delightful experience that warms both the heart and soul. Enjoy this culinary adventure and create your own memories to treasure for years to come.

Read more about Appetizers

Read more about Main Dishes

Read more about Desserts

Rack of Lamb With Parsley | Made by Meaghan Moineau

Rack of Lamb With Parsley | Made by Meaghan Moineau

Title: A Nostalgic Feast: Rack of Lamb with Parsley and Family Memories
Description: Dive into the rich flavors of our Rack of Lamb with Parsley recipe—a main dish destined to become a family favorite. Discover the warmth of shared memories and how this dish brings culinary delight to the table. Rated 6/10 in difficulty, it's a perfectly elegant addition to any dinner menu, ideal for both seasoned cooks and adventurous beginners.

---


When I think of home-cooked meals that bring the family together, my mind inevitably drifts to the aroma of a perfectly roasted Rack of Lamb with Parsley. This dish has been a staple in our family’s culinary repertoire for generations, and each time I prepare it, I am reminded of my grandmother's kitchen, where the warmth of the oven was only surpassed by her welcoming smile.


Ingredients:

- 1 rack of lamb


- 2 tablespoons peanut oil


- Salt and freshly ground pepper to taste


- 2 tablespoons Dijon mustard


- 2 slices white bread, crumbled


- 1 bunch fresh parsley, chopped


- 1 green garlic clove, minced


- 1 shallot, finely chopped


- 1 teaspoon herbes de Provence


- 2 tablespoons unsalted butter, melted


Instructions:

1. Preheat your oven to 400°F (200°C). Brush the rack with peanut oil, and sprinkle it generously with salt and freshly ground pepper.


2. Place the rack in a roasting pan and roast it in the preheated oven for 12 minutes. This initial roasting sets the stage for a beautifully tender lamb.


3. Remove the meat from the oven, and coat it evenly with Dijon mustard. Lower the oven temperature to 350°F (175°C) to ensure a delicate finish.


4. In a medium bowl, combine the bread crumbs, parsley, shallot, garlic, herbes de Provence, and melted butter. This mixture will form a flavorful crust that elevates the lamb to new heights.


5. Spread the bread crumb mixture over the top of the rack, pressing gently to adhere.


6. Return the rack to the 350°F oven, and roast for an additional 15 minutes. The result is a medium-rare lamb rack, with a crust that is both crispy and fragrant.


7. Remove the rack from the oven and let it rest for 10 minutes before carving it into chops.


This dish was the centerpiece of many family gatherings at my grandmother’s house. I remember the anticipation as the aroma filled the room, signaling that dinner was almost ready. My grandmother would regale us with stories from her youth, her voice as comforting as the meal she was preparing. There was something magical about how this simple yet elegant dish could transform an ordinary evening into a cherished memory.


Difficulty Rating: 6/10
Classification: Main Dish

There’s a certain art to preparing a rack of lamb, and while it may seem daunting at first, with a little patience and practice, it becomes a rewarding experience. Whether you’re hosting a dinner party or simply want to treat your family to something special, this Rack of Lamb with Parsley is sure to impress. As you carve into the tender meat and savor the herbaceous crust, you’re not just serving a meal—you’re creating memories that will be cherished for years to come.

Read more about Appetizers

Read more about Main Dishes

Read more about Desserts

Mushroom-Pea Risotto | Made by Meaghan Moineau

Mushroom-Pea Risotto | Made by Meaghan Moineau

Title: A Taste of Home: Crafting the Perfect Mushroom-Pea Risotto
Description: Discover a heartwarming recipe for Mushroom-Pea Risotto that brings family memories to life. This detailed guide provides step-by-step instructions and a nostalgic story, inviting you to recreate a beloved dish that's both delicious and meaningful. Get ready to savor the flavors and memories that this classic main dish offers.

---


There’s something incredibly comforting about the aroma of a simmering risotto, and for me, Mushroom-Pea Risotto is more than just a dish—it's a cherished family tradition. With its creamy texture and rich flavors, this recipe is a delightful blend of tender arborio rice, earthy mushrooms, and sweet green peas, all brought together with the luxurious touch of Parmesan cheese. Rated at a 6 out of 10 in terms of difficulty, this main dish is perfect for a cozy family dinner or a special occasion.


Ingredients:

- 1 ½ cups arborio rice


- 5 cups chicken broth


- 3 cloves garlic, minced


- 2 tablespoons olive oil


- 1 cup diced onions


- 1 cup freshly grated Parmesan cheese


- 1 cup frozen green peas


- Salt and pepper, to taste


- 2 cups sliced white mushrooms


Instructions:

1. Begin by bringing the chicken broth to a gentle simmer, then remove from heat and cover to keep warm.


2. In a large skillet over medium heat, add the olive oil. Once heated, add the diced onions and sauté until tender, about 10 minutes.


3. Stir in the garlic and mushrooms, cooking until the mushrooms become tender and release their savory aroma.


4. Add the arborio rice to the skillet, stirring to coat the grains and sauté until they become translucent.


5. Reduce the heat to medium-low and pour in the vermouth, cooking until the liquid is absorbed.


6. Gradually add the warm broth, one cup at a time, stirring often. Allow each addition of broth to be fully absorbed before adding more. Continue this process until the rice is tender and creamy.


7. Finally, stir in the frozen green peas and freshly grated Parmesan cheese. Season with salt and pepper to taste.


A Nostalgic Family Memory:

Every time I prepare Mushroom-Pea Risotto, I am transported back to my grandmother's cozy kitchen. I remember the warmth of her embrace and the sound of her laughter as she shared stories from her own childhood. Her risotto was more than just a meal; it was a symbol of love and togetherness. She would let me stir the rice, guiding my small hands with hers and explaining the importance of patience in creating the perfect risotto. Those moments were filled with warmth, much like the dish itself, and they instilled in me a love for cooking and family traditions that I cherish to this day.


Conclusion:

Crafting the perfect Mushroom-Pea Risotto is an experience that goes beyond the kitchen. It's about savoring the flavors and the fond memories that accompany them. Whether you're an experienced cook or a beginner looking to explore the world of risotto, this recipe invites you to create a dish that's both delicious and meaningful. Gather your loved ones, share stories, and enjoy the delightful taste of home with every bite.

Read more about Appetizers

Read more about Main Dishes

Read more about Desserts

Baked Ziti Or Rigatoni | Made by Meaghan Moineau

Baked Ziti Or Rigatoni | Made by Meaghan Moineau

Title: "Savor the Comfort: Baked Ziti/Rigatoni Recipe to Warm the Heart and Home"
Description: Dive into the rich, comforting flavors of this Baked Ziti or Rigatoni recipe—a classic Italian-American dish that's sure to become a family favorite. With gooey mozzarella, creamy ricotta, and a savory tomato sauce, this main dish is both easy to prepare and delightful to eat. Follow along as we share not only the simple steps to this delicious pasta bake but also a nostalgic family story that highlights the warmth and love this dish brings to the table.

---


A Taste of Home: Baked Ziti/Rigatoni


When the air turns crisp and the leaves begin to fall, there's nothing quite like indulging in a hearty dish that feels like a warm hug. Baked Ziti or Rigatoni is that dish for many families, a staple at gatherings and a beacon of comfort on chilly evenings. This recipe is a straightforward yet flavorful delight, earning a difficulty rating of 4 out of 10, making it an accessible main dish for cooks of all levels.


Ingredients:

- Cooked ziti or rigatoni

- 1 egg


- 1 cup Parmesan cheese, divided


- 1 cup ricotta cheese


- 2 cups shredded mozzarella cheese


- 3 1/2 cups spaghetti sauce, divided


Instructions:

1. Preheat your oven to 375°F (190°C).

2. In a large mixing bowl, combine the cooked ziti, egg, 1/2 cup of Parmesan cheese, ricotta, shredded mozzarella, and 1 1/2 cups of spaghetti sauce. Mix until well blended.


3. In a 2 1/2 quart baking dish, spread 1/2 cup of spaghetti sauce evenly across the bottom.


4. Pour the ziti mixture into the baking dish, spreading it out evenly.


5. Top the ziti mixture with the remaining 1 1/2 cups of spaghetti sauce.


6. Sprinkle the top with the remaining 1/2 cup of Parmesan cheese.


7. Bake in the preheated oven for 30 minutes, or until the top is slightly browned and bubbly.


8. Allow to cool for a few minutes before serving.


A Family Memory


For me, Baked Ziti has always been more than just a meal; it's a cherished family tradition. I remember one particularly chilly autumn day when my grandmother decided to teach me how to make her famous Baked Ziti. The kitchen was filled with the scent of simmering tomato sauce and fresh herbs, a sensory invitation to warmth and comfort.


As we prepared the dish together, my grandmother shared stories of her own childhood, recounting how her mother would make this very dish for Sunday dinners. It was a ritual of love, bringing the family together after a long week. We laughed as we accidentally spilled a bit of mozzarella on the floor, and she playfully nudged me with her elbow, reminding me that cooking is just as much about the memories we create as it is about the food itself.


When the ziti emerged from the oven, golden and bubbling, it was as if time had slowed down, allowing us to savor the moment. Each bite was rich and satisfying, filled with the flavors of tradition and the warmth of family bonds. Even now, years later, every time I bake ziti, I am transported back to that cozy kitchen, enveloped by the love and laughter of generations past.


Conclusion


Baked Ziti or Rigatoni is more than just a recipe; it's a bridge to the past, a tradition to be savored and shared. Whether you're cooking for loved ones or enjoying a quiet meal at home, this dish promises comfort and joy with every bite. So gather your ingredients, preheat your oven, and let this simple yet exquisite recipe become a part of your family's cherished memories.

Read more about Appetizers

Read more about Main Dishes

Read more about Desserts

Easy Shrimp Scampi | Made by Meaghan Moineau

Easy Shrimp Scampi | Made by Meaghan Moineau

**Title: A Taste of Home: Easy Shrimp Scampi for the Soul**


**Description:** Dive into the heartwarming flavors of Easy Shrimp Scampi, a quick and delightful main dish that combines the rich taste of garlic, butter, and white wine with succulent shrimp. Perfect for a family dinner or a solo indulgence, this recipe is a nostalgic journey back to cherished family gatherings. Discover the simplicity and joy of cooking this classic dish, rated just 3 out of 10 in difficulty—ideal for both seasoned cooks and beginners alike.


---


There's something magical about the aroma of garlic sizzling in butter and olive oil, a fragrance that transports me back to my grandmother's cozy kitchen. Every Sunday, our family would gather around her wooden dining table, eagerly awaiting the feast she had prepared. Among her culinary masterpieces, her Shrimp Scampi was a standout—simple yet bursting with flavor.


**Ingredients:**


- 2 tablespoons butter


- 2 tablespoons olive oil


- 4 cloves garlic, minced


- 1/2 cup white wine


- 2 tablespoons lemon juice


- 1 pound shrimp, peeled and deveined


- 1/4 cup fresh parsley, chopped


- Salt and pepper to taste


**Instructions:**


1. In a large skillet, melt the butter and olive oil over medium heat. The kitchen fills with the comforting scent, reminiscent of those cherished Sunday gatherings.


2. Add the minced garlic and sauté for about 30 seconds, just until it begins to release its aromatic goodness.


3. Stir in the white wine and lemon juice, letting it simmer for a minute. This step always reminded me of my grandmother's gentle touch as she cooked, her love infusing every dish.


4. Add the shrimp, fresh parsley, salt, and pepper. Cooking over high heat, stir constantly for 2-3 minutes until the shrimp turn pink and are cooked through.


5. Serve immediately over a bed of pasta or rice, just like we did back then, when every bite was accompanied by laughter and stories from our week.


As I recreate this dish today, I remember a particular Sunday during a chilly autumn. The leaves were turning, painting the landscape in shades of gold and crimson. We were all gathered in my grandmother's warm kitchen, the windows fogged up from the heat of the stove. I watched as she moved gracefully, her hands a blur of practiced motions, creating magic with simple ingredients. Her Shrimp Scampi was always the highlight, a dish that brought us together and made us feel at home.


**Difficulty:** 3/10


**Classification:** Main Dish


With every bite of this Easy Shrimp Scampi, I'm reminded of those beautiful moments—an ode to simpler times, where food and family were the heart of our home. May this recipe bring a touch of that warmth and nostalgia to your table, too. Enjoy!

Read more about Appetizers

Read more about Main Dishes

Read more about Desserts

Chicken Adobo & Coconut Ginger Rice | Made by Meaghan Moineau

Chicken Adobo & Coconut Ginger Rice | Made by Meaghan Moineau

# Savoring Memories: Chicken Adobo & Coconut Ginger Rice


## A Culinary Journey Through Time and Flavor


**Description:** Dive into a world where tangy meets savory, and a hint of sweetness dances on your palate. This Chicken Adobo & Coconut Ginger Rice recipe not only promises a symphony of flavors but also brings forth a nostalgic story of family, love, and tradition. Perfect for any dinner occasion, this dish is a main course masterpiece, rated at a moderate difficulty level of 5 out of 10.


---


### A Dish Steeped in Tradition


Whenever I think of Chicken Adobo & Coconut Ginger Rice, I am transported back to my grandmother's cozy kitchen, where the aroma of garlic sizzling in oil melded with the tangy scent of vinegar, creating a comforting embrace. This dish was more than just a meal; it was a ritual that brought our family together every Sunday afternoon.


#### Ingredients:


- 1/2 cup low sodium soy sauce


- 1/2 cup apple cider vinegar


- 4 cloves garlic, minced


- 1 tablespoon peppercorns


- 2 tablespoons brown sugar


- 3 bay leaves


- 6 bone-in chicken thighs


- 2 tablespoons grapeseed oil


- 1 cup chicken broth


- 1 tablespoon cornstarch


- 1/4 cup water


- Kosher salt to taste


- 3 cups water


- 1 1/2 cups rice


- 2 tablespoons fresh ginger, grated


- 1/2 cup sweetened shredded coconut


- 2 scallions, thinly sliced


- 2 tablespoons parsley, chopped


#### Instructions:


1. **Marinate the Chicken:** In a large bowl or flat dish, combine soy sauce, vinegar, garlic, peppercorns, brown sugar, and bay leaves. Add the chicken thighs, ensuring they are well-coated. Marinate for at least an hour, or for a deeper flavor, let them soak overnight.


2. **Brown the Chicken:** Heat grapeseed oil in a pan over medium heat. Once hot, remove the chicken from the marinade and brown each side for 2-3 minutes. Set the chicken aside.


3. **Cook the Sauce:** Pour the marinade into the pan along with chicken broth. Bring to a boil, then add the chicken back in. Cover and cook for 10 minutes.


4. **Thicken the Sauce:** Mix cornstarch with 1/4 cup water. Add this slurry to the pan, turning the chicken pieces over. Cover and cook until the chicken is fully cooked, about 6-9 minutes.


5. **Prepare the Rice:** In a separate pot, bring 3 cups of water to a boil with a pinch of salt. Add the rice and cook as per package instructions. Once cooked, fluff the rice and toss with scallions, parsley, ginger, and coconut.


6. **Serve:** Plate the rice, place the chicken on top, and drizzle with the rich adobo sauce.


### A Family Memory


As a child, I would often sit at the kitchen table, watching my grandmother move with grace and precision, her hands a blur of seasoned expertise. The kitchen was filled with laughter, stories, and the promise of something delicious. When the Chicken Adobo was finally ready, it was more than just food; it was a testament to the love and care my grandmother poured into every meal.


This dish was always the highlight of our gatherings, a symbol of unity and warmth. The blend of flavors in the adobo, with its savory garlic and vinegar base, complemented the subtle sweetness of the coconut-infused rice perfectly. Each bite was a reminder of home, family, and the simple joys of life.


### Conclusion


Chicken Adobo & Coconut Ginger Rice is more than just a meal; it is an experience, a journey into a world of rich, comforting flavors that tell a story of family and tradition. Whether you're looking to recreate a cherished memory or start a new one, this dish is sure to bring warmth and joy to your table.


---


Enjoy this nostalgic culinary adventure and let every bite transport you back to the heartwarming memories of family and togetherness.

Read more about Appetizers

Read more about Main Dishes

Read more about Desserts

Mango Fried Rice | Made by Meaghan Moineau

Mango Fried Rice | Made by Meaghan Moineau

**Title: Tropical Delight: Mango Fried Rice That Takes You Back Home**


**Description:** Dive into the vibrant fusion of flavors with our Mango Fried Rice recipe, a tropical twist on a classic dish that’s sure to awaken your taste buds. This delightful main dish combines the sweetness of mango with the rich flavors of chicken stock and the spicy kick of scotch bonnet peppers, promising a culinary journey that’s both comforting and exciting. Easy to prepare with a difficulty rating of 3 out of 10, this dish is perfect for any gathering or a cozy evening at home. Discover the magic of this recipe, where every bite tells a story of warmth and family traditions.


---


**Mango Fried Rice Recipe: A Taste of Nostalgia and Tropical Bliss**


There’s something incredibly heartwarming about a dish that not only satisfies your palate but also transports you back to cherished moments from the past. For me, Mango Fried Rice is that dish—a vibrant blend of flavors that evokes memories of family gatherings under the golden glow of the afternoon sun.


**Ingredients:**


- Rice


- Chicken stock


- Seasoning cubes


- Mango, cubed


- Mixed vegetables (your choice: carrots, peas, bell peppers, etc.)


- Scotch bonnet pepper, finely chopped


**Instructions:**


1. Begin by washing your rice thoroughly. Bring it to a gentle boil on medium heat with just a little water, as you’ll continue cooking it in chicken stock later. This method ensures the rice absorbs all the delicious flavors without becoming mushy.


2. Once the rice is slightly soft and the initial water has dried up, reduce the heat. Pour in the chicken stock and cook until it’s fully absorbed and the rice is perfectly tender. If your chicken stock is freshly made, it might have some natural oils from the chicken, negating the need for additional oil.


3. Increase the heat and stir in the chopped vegetables and scotch bonnet pepper. Add your seasoning cube to enhance the flavors.


4. Finally, gently fold in the cubed mango, allowing its sweetness to seep into every grain of rice. Serve warm with any protein of your choice. Personally, I recommend pairing it with grilled chicken, but feel free to customize it to your liking.


**Nostalgic Family Memory:**


Growing up, Sundays were a time of togetherness in our household. After a long week, we would gather in the kitchen, everyone playing a part in preparing the Sunday meal. My mother, with her warm smile and gentle guidance, would often lead us in making Mango Fried Rice. I remember the anticipation as we chopped fresh mangoes, their sweet aroma filling the air and mingling with the savory scent of chicken stock simmering on the stove.


Those afternoons were filled with laughter and stories shared around the kitchen table, the kind of memories that linger long after the meal is over. It was during these times that I learned the true essence of cooking—it wasn’t just about the food; it was about the love and tradition that went into every dish.


**Conclusion:**


Mango Fried Rice is more than just a recipe; it’s a testament to the power of food to bring people together and create lasting memories. With its simple preparation and rich blend of flavors, this dish is a delightful addition to any meal, offering a touch of nostalgia with every bite. Whether you’re an experienced cook or just starting out, this recipe promises a taste of tropical bliss that’s both easy to make and a joy to share.


Rating its difficulty at 3 out of 10, this main dish is perfect for those looking to explore new flavors without the hassle. So gather your ingredients, invite your loved ones, and create your own memories with Mango Fried Rice—a dish that’s sure to become a family favorite.

Read more about Appetizers

Read more about Main Dishes

Read more about Desserts

San Francisco Cioppino | Made by Meaghan Moineau

San Francisco Cioppino | Made by Meaghan Moineau

**Title: Dive into Flavor: The Unforgettable Experience of San Francisco Cioppino**


**Description: Discover the rich history and vibrant flavors of San Francisco Cioppino, a seafood lover's dream come true. This classic main dish, with its medley of fresh seafood and aromatic herbs, is as much a feast for the senses as it is a cherished family tradition. Join me as I share a nostalgic memory that makes this dish so special, and learn how to create this culinary masterpiece yourself.**


---


### A Taste of San Francisco: The Legacy of Cioppino


There's something magical about the way a dish can transport you back in time, bringing cherished memories to life with every bite. For me, San Francisco Cioppino is one such dish. A seafood stew with roots in the bustling ports of San Francisco, Cioppino is a symphony of flavors, blending fresh seafood with the aromatic essence of herbs and spices. It's a main dish that not only satisfies the palate but also warms the heart.


#### The Recipe


**Ingredients:**


- Fresh canned tomatoes


- Clams


- Dry white wine


- Cooked freshly Dungeness crabs


- White fresh fish


- Fresh basil


- Fresh parsley


- Garlic


- Black fresh ground pepper


- Olive oil


- Fresh oregano


- Raw shrimp


- Scallops


- Tomato paste


- Yellow onion


**Instructions:**


1. **Prepare the Crabs:** Remove the legs and claws from the crabs and break the body in half, reserving as much of the "crab butter" as possible (the yellow-colored center). Set crab pieces aside and force the crab butter through a sieve into a small bowl. Set aside.


2. **Cook the Clams:** Place the clams in a pan, add 1 cup of wine, and steam, covered, over medium heat for 5 minutes or until clams open. Remove clams and discard any that do not open. Strain the stock through a cheesecloth and reserve.


3. **Build the Base:** In an 8-quart saucepan, heat the oil. Add the onion and garlic and sauté over medium heat until soft, but not browned. Add tomatoes, tomato paste, and remaining 2 cups of wine, pepper, herbs, and clam stock. Partially cover and simmer for 20 minutes.


4. **Add the Seafood:** Add the fish, scallops, shrimp, crab, and crab butter. Simmer for approximately 5 minutes or until all seafood is cooked; do not stir or the fish will break apart.


5. **Finish and Serve:** Add the clams and heat for a scant 1 minute. Sprinkle with parsley and serve immediately from the pot.


#### A Nostalgic Memory


Every time I prepare Cioppino, I'm reminded of family gatherings at my grandparents' cozy home in San Francisco. My grandfather, a retired fisherman, would regale us with stories of the sea as he expertly prepared this dish, his hands moving deftly through the familiar motions. The kitchen would fill with the intoxicating aroma of simmering tomatoes and herbs, drawing everyone together. As we gathered around the table, the world seemed to slow down, and the warmth of family and tradition enveloped us, much like the rich flavors of the Cioppino itself.


#### Difficulty: 7/10


Creating Cioppino requires a bit of finesse, particularly in handling the seafood, but the reward is well worth the effort. With its deep, complex flavors and nostalgic charm, it stands as a testament to the culinary heritage of San Francisco and the enduring power of family traditions.


---


So, roll up your sleeves and dive into the rich, flavorful world of San Francisco Cioppino. Whether you're sharing it with family or enjoying it solo, this dish promises an unforgettable culinary journey.

Read more about Appetizers

Read more about Main Dishes

Read more about Desserts

Roasted Pumpkin and Barley Risotto | Made by Meaghan Moineau

Roasted Pumpkin and Barley Risotto | Made by Meaghan Moineau

# Cozy Autumn Nights: Savoring Roasted Pumpkin and Barley Risotto


## A Hearty Dish That Warms the Soul


### Description:


Experience the flavors of fall with our Roasted Pumpkin and Barley Risotto, a comforting main dish that combines the rich, earthy taste of roasted pumpkin with the nutty texture of barley. This recipe is not only a feast for the taste buds but also a nostalgic journey that brings back fond family memories. Rated 6 out of 10 in difficulty, it’s a rewarding culinary challenge fit for any home chef eager to create something special.


---


### Ingredients:


- 1 cup barley


- 2 tablespoons butter


- 4 cups chicken stock


- 1 teaspoon cumin powder


- 1 teaspoon dried thyme


- Fresh mint leaves for garnish


- 2 cloves of garlic, minced


- 1 small piece of ginger, grated


- 1 diced onion


- 1 teaspoon oregano


- 1 teaspoon pink peppercorns


- 2 cups pumpkin puree


- Salt and pepper to taste


- 1/2 cup sour cream


- 1 tablespoon Worcestershire sauce


### Instructions:


1. **Prepare the Pumpkin:**


- Preheat your oven to 400°F (200°C).


- Cut the pumpkin, removing the seeds and strings.


- Place the pumpkin halves cut side down in a baking dish with 1/4 inch of water.


- Bake for 45 minutes or until the flesh is soft and cooked through.


- Scoop out the cooked flesh and puree it with a splash of milk until smooth.


2. **Sauté and Season:**


- In a large skillet, melt the butter over medium heat.


- Add the diced onions and minced garlic, cooking until translucent.


- Stir in the barley, toasting lightly for about 2 minutes.


- Season with salt, pepper, cumin, thyme, and oregano.


3. **Cook the Risotto:**


- Add 2 cups of chicken stock to the skillet.


- Cook, stirring occasionally, until the liquid is nearly absorbed.


- Stir in the pumpkin puree.


- Gradually add the remaining stock, 1/2 cup at a time, allowing each addition to be absorbed before adding more.


- Continue to cook until the barley becomes creamy and tender.


4. **Finish and Serve:**


- Remove from heat and stir in the sour cream and Worcestershire sauce.


- Serve immediately, garnished with fresh mint leaves and a dollop of pumpkin-sour cream.


### A Trip Down Memory Lane


As the aroma of roasted pumpkin fills the kitchen, I am transported back to my grandmother's cozy house on chilly autumn evenings. She would prepare this comforting risotto with love, her hands skillfully working the ingredients into a symphony of flavors. The warmth of the dish, combined with the laughter and stories shared around the dinner table, made each meal a cherished memory. My grandmother always knew how to turn simple ingredients into a dish that not only nourished our bodies but also our souls. This Roasted Pumpkin and Barley Risotto is more than just a meal; it’s a reminder of family, love, and the beauty of home-cooked food.


---


### Conclusion:


Whether you're looking to impress guests or simply indulge in a cozy night in, this Roasted Pumpkin and Barley Risotto is the perfect main dish. With its blend of spices and creamy texture, it captures the essence of fall while offering a heartwarming nod to family traditions. Enjoy the process of creating this delightful dish and savor the memories it may bring to your table.

Read more about Appetizers

Read more about Main Dishes

Read more about Desserts

Slow Cooker Spicy Hot Wings | Made by Meaghan Moineau

Slow Cooker Spicy Hot Wings | Made by Meaghan Moineau

**Title: "Slow Cooker Spicy Hot Wings: A Fiery Family Favorite"**


**Description: Discover the perfect blend of sweet and spicy with our Slow Cooker Spicy Hot Wings recipe. These wings are a crowd-pleaser, combining the heat of cayenne pepper and Louisiana hot sauce with the sweetness of brown sugar. Perfectly cooked in a slow cooker, they are then crisped to perfection under the broiler. Accompanied by a nostalgic family story, this dish is more than just an appetizer—it's a cherished memory on a plate.**


---


**Slow Cooker Spicy Hot Wings: A Fiery Family Favorite**


If you're a fan of bold flavors and effortless cooking, you're in for a treat with these Slow Cooker Spicy Hot Wings. This dish is a harmonious blend of heat and a hint of sweetness, perfectly balancing the fiery notes of cayenne pepper with the comforting sweetness of brown sugar. Rated a 4 out of 10 on the difficulty scale, this appetizer is not only easy to make but also promises to be a hit at any gathering.


**Ingredients**:


- 2 lbs regular chicken wings


- 1 cup Louisiana hot sauce


- 2 tablespoons brown sugar


- 2 teaspoons cayenne pepper


- 3 cloves garlic, crushed


- Cooking spray


**Instructions**:


1. In a medium mixing bowl, combine brown sugar, crushed garlic, hot sauce, and cayenne pepper. Mix well and set aside.


2. Spray the inside of your slow cooker and the chicken wings with cooking spray. This step ensures the wings remain juicy and packed with flavor.


3. Toss the wings in the bowl with the spice mixture, ensuring they are evenly coated.


4. Place the seasoned wings in the slow cooker and cook on low for 4 hours.


5. After the slow cooking is complete, carefully transfer the wings to a prepared cookie sheet.


6. Set your oven to the broiler setting and broil the wings for 4-6 minutes to achieve a crispy exterior.


7. Serve immediately with blue cheese dressing and celery for a classic pairing.


**A Nostalgic Wing Night**


Growing up, our family had a tradition of hosting "Wing Wednesdays." Every week, my mom would whip up a batch of her signature spicy hot wings, and the entire house would be filled with the tantalizing aroma of garlic and hot sauce. It was a night we all looked forward to, not just for the delicious wings but for the laughter and stories shared around the dinner table.


One particular evening stands out in my memory. It was a chilly winter night, and the snow had begun to pile up outside. The warmth of the kitchen, coupled with the spice of the wings, created a cozy haven. My brother, who had a notoriously low tolerance for spicy food, dared to try one of the wings. His face turned as red as the hot sauce, and we all erupted into laughter as he reached for a glass of milk. It became a running joke in our family, and to this day, every time we make these wings, we reminisce about that night.


These Slow Cooker Spicy Hot Wings are more than just an appetizer; they're a testament to family, warmth, and the simple joys of sharing a meal with loved ones. Whether you're hosting a game day or simply craving something spicy, this recipe is sure to bring people together. Enjoy the heat, savor the sweetness, and make your own memories around the table.

Read more about Appetizers

Read more about Main Dishes

Read more about Desserts

Stir Fried Quinoa, Brown Rice and Chicken Breast | Made by Meaghan Moineau

Stir Fried Quinoa, Brown Rice and Chicken Breast | Made by Meaghan Moineau

# A Taste of Home: Stir Fried Quinoa, Brown Rice, and Chicken Breast


## Bringing Back Memories with Every Bite


There's something magical about the aroma of a well-cooked dish wafting through your kitchen. It has the power to transport you back to cherished moments with loved ones, where laughter was abundant, and time seemed to stand still. Today, I invite you to embark on a culinary journey with a delightful recipe that encapsulates the essence of family, tradition, and the joy of sharing a meal together: Stir Fried Quinoa, Brown Rice, and Chicken Breast.


### A Family Tradition


Growing up, Sundays were a special day in our household. After returning from church, my family would gather in the kitchen, each of us playing a role in preparing the day's feast. My father, with his infectious enthusiasm, would take charge of marinating the chicken, infusing it with a generous sprinkle of suya spice and seasoning cubes. As a child, the vibrant colors of the spices and the tantalizing aroma never failed to captivate my senses.


My mother, the orchestrator of our culinary symphony, would oversee the boiling of the quinoa and brown rice mix—a task I eagerly volunteered for, feeling important as I watched the grains dance in the pot. It was during these moments that I learned the value of patience, as the grains slowly softened and absorbed the rich flavors.


### The Recipe


#### Ingredients:


- Suya spice


- 1 cup quinoa and brown rice mix


- 2 tablespoons butter


- 2 medium carrots, sliced


- 1 cup whole cherry tomatoes


- 2 chicken breasts


- 3 cloves garlic, minced


- 2 seasoning cubes


- 1 green bell pepper, chopped


- 1 roma tomato, chopped


- 1 scotch bonnet pepper, finely chopped


- 2 spring onions, sliced


- 1 teaspoon vegetable oil


- 1 cup water


#### Instructions:


1. **Marinate the Chicken**: In a bowl, season the chicken breasts with seasoning cubes and suya spice. Allow to marinate for 2 hours, or use immediately if pressed for time.


2. **Prepare the Quinoa and Rice**: In a pot of boiling water (1 cup), add the quinoa and brown rice mix along with a teaspoon of vegetable oil. Allow to boil until soft, about 5-7 minutes. Pour into a bowl and set aside.


3. **Cook the Chicken**: In a pan, melt the butter over medium heat and pan fry the chicken breasts, flipping constantly to brown on both sides. Reduce the heat, cover the pan, and allow the chicken to cook thoroughly. If the pan becomes dry, add 2 tablespoons of water.


4. **Combine and Serve**: Stir in the chopped vegetables—carrots, cherry tomatoes, green bell pepper, roma tomato, scotch bonnet pepper, and spring onions—into the pan with the frying chicken. Finally, add the quinoa and brown rice mix. Serve hot!


### Nostalgia on a Plate


As we sat around the dining table, savoring the medley of flavors, stories from the past would surface—of my grandparents' tales of resilience, of my parents' adventurous youth, and of my own childhood escapades. This dish, a delightful amalgamation of textures and tastes, became more than just a meal; it was a bridge connecting generations, a testament to our shared history.


### Difficulty Level


This recipe is rated a 5 out of 10 in terms of difficulty. It strikes a perfect balance between simplicity and the exciting challenge of combining diverse flavors and textures. Classified as a Main Dish, it's hearty, nutritious, and destined to become a staple in your family meals.


### Conclusion


If you're looking to recreate a little magic in your kitchen and perhaps spark a walk down memory lane, this Stir Fried Quinoa, Brown Rice, and Chicken Breast recipe is your ticket. It embodies the warmth of home, the love of family, and the beauty of tradition. Enjoy the journey, one delicious bite at a time.

Read more about Appetizers

Read more about Main Dishes

Read more about Desserts