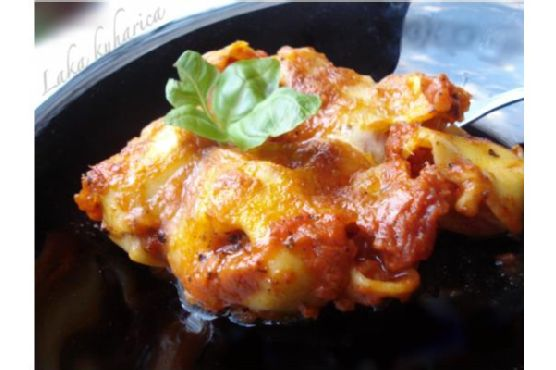
Baked Tortellini In Red Sauce
Intro
Growing up, Sunday family dinners were a beloved ritual in our home. The tantalizing aroma of tomatoes and garlic simmering on the stove would draw everyone into the kitchen, setting the stage for an evening of laughter, stories, and delicious food. One of my all-time favorite dishes from those cherished meals was my grandmother’s Baked Tortellini in Red Sauce. With its warm, comforting flavors and perfectly baked, cheesy top, it’s a dish that brings back fond memories each time I make it. Today, I’m thrilled to share this beloved recipe with you, hoping it becomes a staple in your home too.
Why You’ll Love It
This Baked Tortellini in Red Sauce is the epitome of comfort food, combining the richness of a homemade tomato sauce with the creamy, satisfying texture of cheese-filled tortellini. It’s a dish that feels both indulgent and heartwarming, perfect for a cozy family dinner or a special gathering with friends. The ingredients are simple, yet they come together to create a symphony of flavors with every bite. Plus, it’s easy to prepare, making it perfect for those busy weeknights when you crave something homemade without the fuss.
Ingredients
- 2 cloves garlic, minced
- 1/2 cup grated Grana Padano cheese
- 1 cup coarsely grated mozzarella
- 2 tablespoons olive oil
- 1 medium onion, chopped
- 1 teaspoon dried oregano
- Salt and pepper to taste
- 1 teaspoon sugar
- 2 cans (14 ounces each) chopped tomatoes with juice
- 1 pound fresh tortellini
Instructions
- Preheat your oven to 240°C (464°F) and lightly oil a baking dish.
- In a large pan, heat the olive oil over medium heat. Add the chopped onion and minced garlic, sautéing for about 5 minutes until the onion is translucent.
- Season the onion and garlic with salt, pepper, and dried oregano.
- Add the chopped tomatoes and their juice to the pan. Stir to combine and season again with salt, pepper, and oregano.
- Bring the mixture to a boil, then sprinkle in the sugar and reduce the heat. Let it simmer on low heat for 20 minutes, allowing the flavors to meld. Adjust seasoning to taste.
- While the sauce is simmering, bring a pot of salted water to a boil. Plunge the fresh tortellini into the boiling water and cook just until they float to the surface. Drain and return them to the pot.
- Toss the cooked tortellini with the tomato sauce, ensuring each piece is well coated.
- Transfer the tortellini and sauce mixture to the prepared baking dish. Sprinkle evenly with the grated Grana Padano and mozzarella cheese.
- Bake in the preheated oven for 20-25 minutes, until the cheese is golden and bubbly and the surface is well baked.
- Remove from the oven and let the dish stand for 5 minutes before serving. Enjoy with a fresh green salad for a complete meal.
Tips
For an even richer flavor, consider adding a splash of red wine to the tomato sauce as it simmers. If you prefer a spicier kick, a pinch of red pepper flakes can elevate the dish nicely. Remember to taste and adjust the seasoning of the sauce before combining it with the pasta.
Variations & Substitutions
Feel free to customize this recipe to suit your taste or dietary needs. Substitute the Grana Padano cheese with Parmesan for a slightly different flavor. For a vegetarian version, ensure your tortellini is filled with cheese or vegetables. You can also add sautéed mushrooms or spinach for an extra layer of flavor and nutrition.
Storage
Leftovers can be stored in an airtight container in the refrigerator for up to 3 days. To reheat, simply place the tortellini in a preheated oven at 180°C (356°F) until warmed through, or microwave individual portions until hot.
FAQ
Can I use frozen tortellini instead of fresh?
Yes, you can use frozen tortellini. Simply follow the package instructions for cooking time, and proceed with the recipe as directed.
Is it possible to make this dish ahead of time?
Absolutely! You can prepare the tomato sauce and cook the tortellini ahead of time. Combine them in the baking dish, cover and refrigerate for up to a day. When ready to serve, sprinkle with cheese and bake as directed, adding a few extra minutes to the baking time if needed.
Nutrition
While the exact nutritional information will vary based on the brands and specific ingredients used, a generous serving of this baked tortellini dish is a good source of protein and calcium, thanks to the cheese and pasta. For those watching their sodium intake, consider using low-sodium canned tomatoes and adjusting the amount of salt added throughout the recipe.
Conclusion
There’s something truly special about a dish that can transport you back in time, evoking memories of family gatherings and cherished moments. This Baked Tortellini in Red Sauce is not only a simple, satisfying meal but also a culinary hug that brings warmth and comfort to the table. Whether you’re making it for your family or sharing it with friends, it’s sure to become a favorite in your home, just as it has in mine. Enjoy every bite and the memories it creates!
Related update: Baked Tortellini In Red Sauce
Related update: Liz's Lomo Saltado