Havarti and Asparagus Quiche | Made by Meaghan Moineau

Havarti and Asparagus Quiche: A Delightful Spring Brunch

Intro

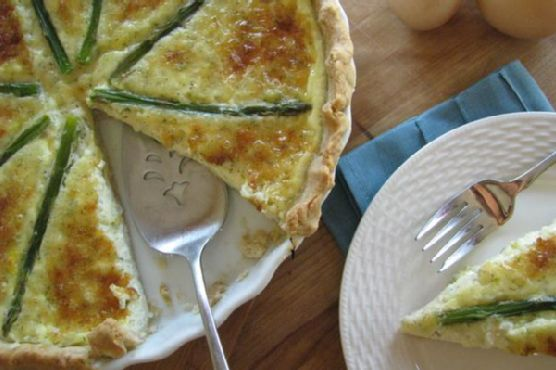
There’s something about the smell of a freshly baked quiche that takes me back to Sunday brunches at my grandmother’s house. The table was always set with the finest lace tablecloth, and the kitchen was filled with the comforting scent of buttery pastry and savory fillings. One of my all-time favorites was her Havarti and Asparagus Quiche, a dish that perfectly captured the essence of spring. Today, I’m thrilled to share this nostalgic recipe with you, bringing a touch of elegance and warmth to your own table.

Why You’ll Love It

This Havarti and Asparagus Quiche is a true celebration of flavors and textures. The creamy custard, combined with the subtle sharpness of Havarti cheese and the fresh, tender asparagus, creates a harmonious balance that is both satisfying and sophisticated. The homemade crust is perfectly flaky, providing a delightful contrast to the rich filling. Whether you’re serving it for a special occasion or simply enjoying a slice on a quiet morning, this quiche is sure to become a beloved favorite in your home.

Ingredients

  • 1 cup all-purpose flour
  • 1/4 teaspoon salt
  • 1/2 teaspoon sugar
  • 1/2 cup unsalted butter, chilled and diced
  • 5-6 tablespoons ice water
  • 1 bunch asparagus, trimmed
  • 2 cups Havarti cheese, shredded
  • 3 large eggs
  • 1 cup heavy cream
  • 1/2 cup milk

Instructions

  1. In the bowl of a food processor, combine flour, salt, and sugar. Add butter and pulse until the mixture resembles the size of small peas.
  2. Add the first 5 tablespoons of water, one at a time. Check consistency – if the mixture holds together when pinched, the crust is perfect. If it still crumbles, add the last tablespoon of water one teaspoon at a time, rechecking consistency.
  3. Turn the dough out onto a piece of plastic wrap. Form the dough into a disk, and refrigerate for 30 minutes.
  4. Meanwhile, boil a pot of water large enough to fit the stalks of asparagus. Blanch the asparagus for 2-3 minutes, then transfer to an ice bath. Set aside.
  5. Preheat the oven to 350°F (175°C). On a lightly floured surface, roll the dough into a circle a few inches larger than your quiche or pie pan. Transfer the dough to the pan, trimming the excess and crimping the edges.
  6. Poke a few fork holes in the crust and blind bake for 5 minutes. Remove from oven and sprinkle with Havarti cheese. Set aside.
  7. Increase oven temperature to 375°F (190°C). In a large bowl, combine eggs, heavy cream, and milk, whisking thoroughly. Pour over the cheese.
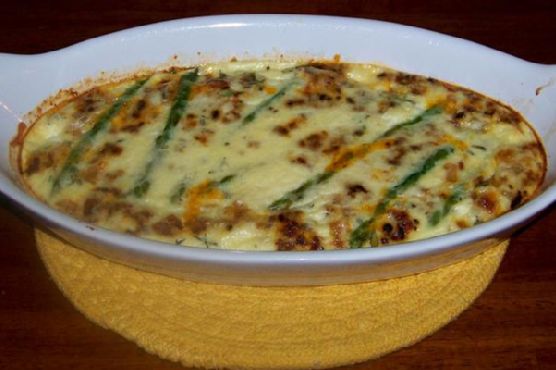
  8. Arrange the asparagus in a spoke pattern on top of the egg mixture. Bake for 40 minutes. Check the crust; if it’s getting too brown, cover with foil. Bake an additional 10-12 minutes.
  9. Test doneness with a butter knife. If it comes out clean, the quiche is ready. If not, bake for another 3-4 minutes with foil tented over the top.

Tips

  • Ensure all your ingredients, especially the butter, are cold when preparing the crust for the best flaky texture.
  • Use a rolling pin to gently lift and place the dough into the pan, preventing tears in the crust.
  • For an evenly baked quiche, rotate the pan halfway through the baking time.

Variations & Substitutions

If you want to experiment with this recipe, consider these variations:

  • Cheese: Swap Havarti with Gruyère or Swiss for a different flavor profile.
  • Vegetables: Add mushrooms or bell peppers for an extra layer of taste.
  • Herbs: Incorporate fresh dill or chives for an aromatic twist.

Storage

Once cooled, wrap your quiche tightly in plastic wrap or store in an airtight container. It can be refrigerated for up to 3 days. For longer storage, freeze individual slices and reheat in the oven before serving.

FAQ

Can I make the crust ahead of time?

Yes! You can prepare the crust a day in advance. Simply wrap it tightly in plastic wrap and store it in the refrigerator until you’re ready to roll it out.

Is it possible to use frozen asparagus?

While fresh asparagus provides the best flavor and texture, frozen asparagus can be used in a pinch. Make sure to thaw and pat it dry before using.

Can I make this quiche dairy-free?

Absolutely! Substitute the butter with a vegan butter alternative and use plant-based milk and cream. Opt for a dairy-free cheese to maintain the cheesy flavor.

Nutrition

This quiche is rich in protein from the eggs and cheese while providing a healthy dose of vitamins from the asparagus. Each slice offers a balanced combination of fats and carbohydrates, making it a satisfying meal.

Conclusion

Whether you’re reminiscing about cherished family gatherings or creating new memories, this Havarti and Asparagus Quiche is the perfect dish to grace your table. Its blend of flavors and textures is a testament to the beauty of simple, wholesome ingredients. We hope this recipe brings as much joy to your home as it has to ours. Enjoy!

Related update: Havarti and Asparagus Quiche

Related update: Chicken Adobo & Coconut Ginger Rice

Blueberry Almond Crescent Rolls | Made by Meaghan Moineau

Blueberry Almond Crescent Rolls

Intro

Growing up, my grandmother’s kitchen was always filled with the most incredible aromas. On Sunday mornings, the smell of fresh pastries would waft up the stairs and gently coax me out of bed. One of my fondest memories is of her blueberry almond crescent rolls, golden and flaky, with a hint of almond that balanced perfectly with the sweet-tart blueberry jam. This recipe is my homage to those cherished mornings, bringing a piece of nostalgia to your kitchen. Whether you’re making these for a special brunch or just because, these crescent rolls promise to deliver warmth and joy with every bite.

Why You’ll Love It

These Blueberry Almond Crescent Rolls are the perfect blend of simplicity and elegance. The flaky pastry is filled with a luscious cream cheese and blueberry filling, kissed with almond essence. The rolls are easy to make yet look and taste like they took hours to prepare. Perfect for breakfast, brunch, or a delightful dessert, these crescent rolls are sure to become a family favorite. The combination of textures and flavors will leave everyone reaching for seconds.

Ingredients

  • 1 teaspoon almond extract
  • 1/2 cup blueberry jam
  • 4 oz cream cheese, softened
  • 1 can (8 oz) regular crescent rolls
  • 1 egg
  • 1 tablespoon water
  • 1 tablespoon all-purpose flour
  • 1 tablespoon milk
  • Pinch of sea salt
  • 1/4 cup confectioner’s sugar, divided
  • Turbinado sugar for sprinkling

Instructions

  1. Preheat your oven to 375 degrees F and line a large baking sheet with parchment paper or a silicone baking mat. Set aside.
  2. In the bowl of your stand mixer, with paddle attachment fixed (or a handheld electric mixer may be used), combine the cream cheese, blueberry jam, 2 tablespoons of confectioner’s sugar, flour, salt, and 1 teaspoon of almond extract. Mix until smooth, about 30 seconds. Set aside.
  3. Lay your crescent roll wedges out on a large work surface. Take about a tablespoon of the cream cheese mixture and dollop it on the wide end of each crescent roll. Roll them up until the narrow end is sealed underneath.
  4. Transfer them to the prepared baking sheet and brush them with the egg wash. Sprinkle with turbinado sugar.
  5. Place the crescent rolls in the oven and bake for 13-15 minutes, or until puffed and golden. Remove from heat and transfer to a wire rack to cool.
  6. While the crescent rolls are cooling, prepare your glaze. In a medium bowl, combine the remaining 2 tablespoons of confectioner’s sugar, remaining 1 teaspoon of almond extract, and milk. Whisk until smooth. Adjust seasoning by adding a pinch of sea salt if you find that the glaze is too sweet.
  7. Drizzle the glaze on the slightly cooled crescent rolls and serve immediately. Enjoy!

Tips

For the best results, ensure your cream cheese is at room temperature before mixing to achieve a smooth filling. When rolling the crescents, try not to overfill them to avoid the filling spilling out during baking. If you prefer a stronger almond flavor, consider adding a few extra drops of almond extract to the glaze. Allow the crescent rolls to cool for a few minutes before glazing to prevent the glaze from melting off completely.

Variations & Substitutions

If you’re looking to mix things up, try substituting raspberry or apricot jam for the blueberry jam. You can also add a handful of chopped almonds to the filling for an added crunch. For a dairy-free version, use a dairy-free cream cheese alternative and plant-based milk for the glaze. If you’re not a fan of almond extract, vanilla extract makes a lovely substitute.

Storage

These crescent rolls are best enjoyed fresh, but if you have leftovers, store them in an airtight container at room temperature for up to two days. For longer storage, place them in the refrigerator for up to a week. To reheat, simply pop them in the oven at 350 degrees F for a few minutes.

FAQ

Can I make these crescent rolls ahead of time?

Yes, you can prepare the rolls up to the baking step and store them in the refrigerator for a few hours. Bake them fresh when you’re ready to serve.

Can I freeze these crescent rolls?

Absolutely! After baking, let them cool completely, then freeze in a single layer on a baking sheet. Transfer to a freezer-safe container or bag for up to three months. To serve, thaw overnight in the refrigerator and reheat in the oven.

What can I use instead of turbinado sugar?

If you don’t have turbinado sugar, you can use regular granulated sugar or skip the sugar topping altogether for a less sweet option.

Nutrition

While these crescent rolls are a delightful treat, they are rich and best enjoyed in moderation. Each roll contains approximately 180 calories, 9 grams of fat, 22 grams of carbohydrates, and 3 grams of protein. Always consider your dietary needs and adjust portion sizes accordingly.

Conclusion

Blueberry Almond Crescent Rolls are a delightful way to bring a touch of nostalgia and warmth to your table. Perfect for special occasions or simply to indulge in a moment of sweetness, these rolls are sure to impress with their delicate balance of flavors and textures. Whether you’re a seasoned baker or a novice in the kitchen, this recipe is straightforward yet rewarding. Gather your ingredients, embrace the comforting aroma, and enjoy the satisfaction of creating something truly delicious. Happy baking!

Related update: Blueberry Almond Crescent Rolls

Cheese and Leek Strata | Made by Meaghan Moineau

Cheese and Leek Strata: A Comforting Classic

Intro

Growing up, Sunday brunches were a cherished ritual in our household. My mother would wake up early, filling the kitchen with the comforting aroma of freshly baked goods. One of my all-time favorites was her cheese and leek strata, a dish that effortlessly combined savory flavors with a hint of nostalgia. I would sit at the kitchen counter, eagerly watching her layer the ingredients, each step building anticipation for the delicious meal to come. Today, I’m excited to share this beloved recipe with you, so you too can create new memories around your family table.

Why You’ll Love It

This cheese and leek strata is a perfect blend of rich flavors and creamy textures that will make any brunch special. Here’s why you’ll love it:

  • Make-ahead convenience: Prepare it the night before and bake it fresh in the morning.
  • Versatile: Easily customize the ingredients based on your preferences or what you have on hand.
  • Comforting and delicious: The combination of cheese, leeks, and tender bread is both satisfying and heartwarming.

Ingredients

  • 6 large eggs
  • 2 cups milk
  • 1/2 cup porter (dark beer)
  • 1 garlic clove, minced
  • 1/2 teaspoon salt
  • 1/4 teaspoon black pepper
  • 5 cups cubed sourdough bread
  • 1 large leek, cleaned and sliced
  • 1 red bell pepper, diced
  • 1 cup shredded cheddar cheese
  • 1 cup shredded Swiss cheese
  • Additional salt and pepper to season

Instructions

  1. Preheat your oven to 350°F (175°C).
  2. In a large bowl, combine the eggs, milk, porter, minced garlic, salt, and pepper. Beat well until the mixture is fully blended.
  3. Grease a 2.5-quart round baking dish and place half of the cubed sourdough bread on the bottom.
  4. Sprinkle half of the sliced leeks and diced red bell pepper over the bread pieces.
  5. Top with half of the shredded Swiss cheese and half of the cheddar cheese.
  6. Repeat the layers with the remaining ingredients, ending with a layer of cheddar cheese on top.
  7. Pour the egg mixture evenly over the top of the strata.
  8. Cover the dish tightly with foil or plastic wrap and weigh down the top of the strata with a slightly smaller baking dish.
  9. Refrigerate the strata for at least 2 hours or overnight to allow the flavors to meld.
  10. When ready to bake, remove the weight and cover, and bake the strata uncovered for 40 minutes or until the center is set.
  11. Serve warm and enjoy the delightful blend of flavors.

Tips

To make sure your strata is a success, consider these tips:

  • Use day-old bread: Slightly stale bread will absorb the egg mixture better, giving you a richer texture.
  • Don’t rush the soaking time: Allowing the strata to sit in the refrigerator ensures the bread fully absorbs the flavors.
  • Check for doneness: The center should be set and not jiggly when done. A knife inserted should come out clean.

Variations & Substitutions

This recipe is versatile, so feel free to experiment and make it your own:

  • Cheese: Swap out cheddar and Swiss for Gruyere, mozzarella, or your favorite cheese blend.
  • Vegetables: Add mushrooms, spinach, or tomatoes for additional flavor and nutrients.
  • Meat lovers: Incorporate cooked bacon, sausage, or ham for a heartier dish.
  • Gluten-free: Use gluten-free bread to accommodate dietary needs.

Storage

Leftover strata can be stored in an airtight container in the refrigerator for up to 3 days. To reheat, cover with foil and warm in the oven at 350°F (175°C) until heated through. Individual portions can also be microwaved for quick reheating.

FAQ

Can I freeze the strata before baking?

Yes, you can freeze the strata before baking. Assemble it as directed, then cover tightly with plastic wrap and foil. Freeze for up to 1 month. Thaw in the refrigerator overnight before baking.

What can I use instead of porter?

If you prefer not to use beer, substitute with vegetable or chicken broth for a different flavor profile while maintaining moisture.

Nutrition

This dish is rich in protein from the eggs and cheese, while the vegetables add fiber and nutrients. Keep in mind the nutritional content will vary based on specific ingredient brands and substitutions.

Conclusion

Cheese and leek strata is more than just a dish; it’s a way to bring loved ones together and create cherished memories. Whether it’s for a holiday brunch or a simple weekend gathering, this comforting recipe will surely become a family favorite, just as it has in mine. I hope you enjoy making and sharing it as much as I have over the years.

Related update: Cheese and Leek Strata

Related update: Watching What I Eat: Peanut Butter Banana Oat Breakfast Cookies with Carob / Chocolate Chips

Meyer Lemon Ricotta Pancakes with Blackberry Compote | Made by Meaghan Moineau

Meyer Lemon Ricotta Pancakes with Blackberry Compote

Intro

There’s something magical about Sunday mornings that calls for a special breakfast. As a child, I remember waking up to the soothing aroma of my grandmother’s pancakes wafting through the house. Those mornings were filled with warmth and laughter, as we gathered around the table, eagerly awaiting the first stack. Inspired by those cherished memories, I’ve crafted this recipe for Meyer Lemon Ricotta Pancakes with Blackberry Compote. Combining the tangy sweetness of Meyer lemons and the richness of ricotta, these pancakes are a delightful twist on a classic favorite.

Why You’ll Love It

This recipe is a delightful blend of flavors and textures. The pancakes are light and fluffy, thanks to the whipped egg whites, and have a subtle lemony aroma that pairs perfectly with the sweet-tart blackberry compote. The addition of ricotta makes these pancakes incredibly moist and tender. Whether you’re cooking a special breakfast for family or hosting a brunch for friends, these pancakes are sure to impress.

Ingredients

  • 1 cup all-purpose flour
  • 1 cup fresh blackberries
  • 2 tablespoons butter
  • 3 large eggs, separated
  • 2 tablespoons granulated sugar
  • 1 tablespoon Meyer lemon zest, divided
  • 1/4 cup Meyer lemon juice
  • 1 cup ricotta cheese
  • 1/4 teaspoon salt
  • 1/4 cup water

Instructions

  1. In a small saucepan over medium heat, add the blackberries, 1/2 tablespoon of Meyer lemon zest, 1 tablespoon of sugar, and water. Stir to combine and cook until the water starts to thicken and the berries lose their shape, stirring occasionally. This should take about 10 minutes. Remove from the heat and set aside.
  2. In a medium bowl, whisk together the ricotta cheese, the remaining Meyer lemon zest, lemon juice, 1 tablespoon of sugar, and egg yolks. Gradually stir in the flour until just combined.
  3. Using a stand or hand mixer, whisk the egg whites with a pinch of salt until stiff peaks are formed.
  4. Take a large spoonful of the egg whites and stir it into the batter. With the remaining egg whites, fold in half, slowly turning the bowl while you fold. It is fine if there are some white streaks left in the batter before you add the second half. Fold in the remaining egg whites and set the batter aside while you heat up a griddle or non-stick pan on medium heat.
  5. Add some butter to the pre-heated pan, and swirl to coat. Add about a 1/4 cup of batter and cook until bubbles start to form on the top and the edges begin to brown slightly. Flip the pancakes and cook for an additional minute. Remove and keep warm, while you repeat with the remaining batter.
  6. Serve the pancakes with the blackberry compote and, if you like, a little pure maple syrup.

Tips

For the fluffiest pancakes, be gentle when folding in the egg whites—this helps maintain the airy texture. If Meyer lemons are unavailable, regular lemons can be used, though the flavor will be slightly more tart. Ensure your pan is adequately heated before adding the batter; this helps achieve that perfect golden brown finish.

Variations & Substitutions

Feel free to experiment with other fruit compotes such as raspberry or strawberry, or even a mix of berries for a more complex flavor. If you’re looking for a gluten-free option, substitute the all-purpose flour with a gluten-free flour blend. You can also replace the ricotta with Greek yogurt for a slightly tangier taste.

Storage

These pancakes are best enjoyed fresh, but can be stored in an airtight container in the refrigerator for up to two days. The blackberry compote can be made in advance and kept in the refrigerator for up to a week. To reheat pancakes, simply place them in a toaster or warm them in the oven.

FAQ

Can I use frozen blackberries for the compote?

Yes, frozen blackberries can be used if fresh ones are not available. Just be sure to thaw them first and adjust the cooking time as they may release more water than fresh berries.

What can I use instead of ricotta cheese?

If you don’t have ricotta on hand, cottage cheese can be a great substitute. Just blend it first to achieve a smoother texture similar to ricotta.

Nutrition

These pancakes are a delicious treat, rich in protein thanks to the ricotta and eggs. While they do contain sugar, the amount is moderate, and they can be enjoyed as part of a balanced diet. If you’re watching your sugar intake, consider reducing the sugar in the compote or using a sugar substitute.

Conclusion

Meyer Lemon Ricotta Pancakes with Blackberry Compote are more than just a meal; they’re an experience. Each bite is a reminder of simpler times, where mornings were slow and family gathered around the breakfast table. Whether you’re reminiscing about the past or creating new memories, these pancakes are the perfect start to any day. Enjoy the delicate balance of flavors and the joy that comes with sharing them with loved ones.

Related update: Meyer Lemon Ricotta Pancakes with Blackberry Compote

Related update: Warm Lemon Poppy Seed Cake With Chocolate Ganache Center

Upside-Down Blueberry Puffs Brunch | Made by Meaghan Moineau

Upside-Down Blueberry Puffs Brunch

Intro

There’s something magical about a lazy Sunday brunch at home, where the air is filled with the aroma of freshly baked delights. Growing up, my grandmother would often whip up her famous Upside-Down Blueberry Puffs for our family brunches. The anticipation would build as the delectable scent wafted through the house, drawing everyone to the kitchen. These delightful puffs are a cherished family recipe that I’m excited to share with you today. I hope they bring as much joy to your table as they have to mine over the years.

Why You’ll Love It

This Upside-Down Blueberry Puffs recipe is a delightful fusion of simplicity and indulgence. With a tender, buttery crumb and the sweet tang of blueberries, these puffs are the perfect addition to any brunch spread. You’ll love how the blueberries caramelize at the bottom, creating a juicy, flavorful topping once the puffs are flipped. Not only are they delicious, but they are also visually stunning, sure to impress your family and guests alike. Plus, they’re surprisingly easy to make, which means you can enjoy a gourmet brunch experience with minimal effort.

Ingredients

  • 1 teaspoon baking powder
  • 1 cup blueberries, plus 6 extra for topping
  • 1/2 cup butter, softened
  • 1 teaspoon butter vanilla bakery emulsion
  • 1/4 teaspoon cream of tartar
  • 2 large eggs, separated
  • 1 1/2 cups all-purpose flour
  • 1/2 cup milk
  • 1/4 teaspoon salt
  • 3/4 cup sugar

Instructions

  1. Preheat your oven to 375 degrees Fahrenheit.
  2. Wash the blueberries and gently pat them dry.
  3. Spray six 6-ounce custard cups with baking spray and divide the blueberries among the cups, reserving 6 berries to top the cakes later.
  4. In a mixing bowl, combine the flour, salt, and baking powder, then set aside.
  5. Beat the egg whites until foamy, then add the cream of tartar and continue beating until stiff peaks form. Set the beaten egg whites aside.
  6. In a separate bowl, cream the butter, gradually adding the sugar and continuing to cream until light and fluffy.
  7. Add the egg yolks and butter vanilla bakery emulsion to the creamed mixture and mix until well blended.
  8. Alternately add the flour mixture and milk to the butter mixture, beating until well combined. The batter will be thick.
  9. Gently fold the beaten egg whites into the batter until fully incorporated.
  10. Spoon the batter into the prepared custard cups over the blueberries, filling no more than 3/4 full.
  11. Place the custard cups on a baking sheet and bake for 30 minutes, or until a toothpick inserted near the center of the cakes comes out clean.
  12. Turn out the cakes directly from the oven onto wire racks and allow them to cool slightly. Serve warm or at room temperature, optionally with whipped cream or ice cream topped with a blueberry.

Tips

To ensure your Upside-Down Blueberry Puffs turn out perfectly, consider these tips:

  • Use fresh, ripe blueberries for the best flavor. If fresh blueberries are unavailable, you can substitute with frozen ones, but make sure to thaw and drain them first.
  • When beating the egg whites, make sure your bowl and beaters are completely clean and dry to achieve stiff peaks.
  • Let the butter soften at room temperature before creaming to achieve a smooth, creamy texture.

Variations & Substitutions

Feel free to customize this recipe to suit your taste or dietary needs:

  • Fruit Substitution: Swap out the blueberries for other berries like raspberries or blackberries for a different flavor profile.
  • Gluten-Free Option: Use a 1:1 gluten-free flour blend in place of all-purpose flour.
  • Dairy-Free Version: Substitute the butter with a dairy-free margarine and the milk with almond or oat milk.

Storage

If you have any leftovers, store the Upside-Down Blueberry Puffs in an airtight container at room temperature for up to two days. For longer storage, cover them and place in the refrigerator for up to a week. Reheat them in the oven at a low temperature to enjoy them warm again.

FAQ

Can I make these puffs ahead of time?

Yes, you can prepare the batter and divide the blueberries into the custard cups the night before. Store them in the refrigerator and bake fresh in the morning for a warm brunch treat.

What can I serve with these puffs?

These puffs pair beautifully with a side of crispy bacon, a fresh fruit salad, or a simple arugula salad with a lemon vinaigrette to balance the sweetness.

Can I use frozen blueberries?

Yes, you can use frozen blueberries if fresh ones are not available. Make sure to thaw and drain them well before using to prevent excess moisture in the batter.

Nutrition

Each serving of Upside-Down Blueberry Puffs contains approximately:

  • Calories: 250
  • Fat: 12g
  • Carbohydrates: 32g
  • Protein: 4g
  • Sugar: 15g
  • Fiber: 1g

Conclusion

Upside-Down Blueberry Puffs are a delightful way to start your day with a touch of nostalgia and a burst of flavor. Whether you’re hosting a brunch or simply treating yourself to a special breakfast, these puffs are sure to become a favorite in your household. Easy to make and even easier to enjoy, they offer a perfect balance of sweetness and texture. I hope this recipe brings as much warmth and joy to your home as it has to mine. Happy baking!

Related update: Upside-Down Blueberry Puffs Brunch

Banana Blueberry Pancakes | Made by Meaghan Moineau

Banana Blueberry Pancakes

Intro

There’s something truly magical about starting your day with a stack of warm, fluffy pancakes. For me, banana blueberry pancakes bring back memories of cozy weekend mornings spent in my grandmother’s kitchen. The sweet scent of bananas mingling with the sharp tartness of blueberries filled the air as we eagerly awaited the first batch. Now, I’m thrilled to share this recipe with you so you can create your own cherished breakfast traditions.

Why You’ll Love It

These banana blueberry pancakes are not just a treat for the taste buds but also a wholesome start to your day. They combine the natural sweetness of ripe bananas with the burst of flavor from blueberries. The use of coconut flour makes them a nutritious alternative to regular pancakes, offering a delightful texture that’s both light and satisfying. Plus, they’re easy to make and perfect for a quick weekday breakfast or a leisurely weekend brunch.

Ingredients

  • 4 whole eggs
  • 1 cup water
  • 2 tablespoons liquid coconut oil
  • ½ cup coconut flour
  • 1 teaspoon cream of tartar
  • 1 teaspoon ground cinnamon
  • 2 ripe bananas, mashed
  • 1 cup frozen blueberries

Instructions

  1. Beat the eggs for 1 minute until they are light and frothy.
  2. Add the water, liquid coconut oil, and coconut flour. Whisk the mixture until combined.
  3. Allow the batter to sit for 5 minutes to let the coconut flour absorb and expand.
  4. Add the cream of tartar, cinnamon, and mashed bananas to the batter and whisk until smooth.
  5. Gently fold in the frozen blueberries using a spatula.
  6. Heat oil, butter, or a combination of both in a skillet over medium to low heat.
  7. Ladle ½ cup of the batter onto the skillet for each pancake.
  8. Cook for about 5 minutes on one side, then carefully flip the pancake to cook the other side until golden brown.
  9. Repeat the steps until you have made 8 pancakes.
  10. Serve hot, drizzled with maple syrup.

Tips

For the best results, make sure your bananas are overripe, as they will add extra sweetness and moisture to the pancakes. If your batter seems too thick, feel free to add a little more water to reach your desired consistency. It’s also important to cook the pancakes over medium to low heat to ensure they cook evenly and don’t burn.

Variations & Substitutions

If you don’t have coconut flour on hand, almond flour can be a great alternative, though the texture will be slightly different. You can also substitute fresh blueberries for frozen ones if they’re in season. For a nutty twist, add a handful of chopped walnuts or pecans to the batter.

Storage

These pancakes can be stored in an airtight container in the refrigerator for up to 3 days. For longer storage, freeze them by placing parchment paper between each pancake and sealing them in a freezer bag. Reheat in the microwave or toaster for a quick breakfast option.

FAQ

Can I make the batter ahead of time?

It’s best to prepare the batter just before cooking to maintain the freshness and texture of the pancakes. However, you can mix the dry ingredients and store them separately, then combine with the wet ingredients when you’re ready to cook.

Are these pancakes suitable for a gluten-free diet?

Yes, these banana blueberry pancakes are gluten-free as they use coconut flour, which is a great alternative to traditional wheat flour.

Nutrition

Each serving of these pancakes provides a good source of protein from the eggs and a boost of vitamins and antioxidants from the blueberries and bananas. Coconut flour adds healthy fats and fiber, making these pancakes a nutritious breakfast choice.

Conclusion

Banana blueberry pancakes are a wonderful way to start your day with something delicious and nutritious. Whether you’re making these for a special occasion or just a regular morning, they’re sure to bring a smile to your face. So gather your ingredients, put on your apron, and enjoy the delightful process of making these pancakes. You might just find they become a beloved staple in your morning routine!

Related update: Banana Blueberry Pancakes

Related update: Peach Carrot Coconut Vegan Pancake

Related update: Raspberry Thumbprint Wholewheat Scones With Macadamia Nuts

Pumpkin French Toast | Made by Meaghan Moineau

Pumpkin French Toast: A Cozy Autumn Breakfast Delight

Intro

There’s something magical about the crispness of fall mornings that calls for a breakfast as comforting as it is delicious. Growing up, I remember the aroma of spices filling our kitchen as my grandmother prepared her famous pumpkin French toast on chilly weekends. The warmth of cinnamon and nutmeg, combined with the sweetness of maple syrup, made those mornings unforgettable. This recipe is a tribute to those cherished memories, bringing the essence of autumn to your breakfast table.

Why You’ll Love It

This Pumpkin French Toast is more than just a breakfast; it’s an experience. The perfect blend of spices and pumpkin puree gives it that quintessential fall flavor, while the crispy exterior and fluffy interior provide a satisfying texture. Whether you’re hosting a brunch or treating yourself to a relaxed morning meal, this recipe is sure to impress. Plus, it’s easy to make and fills your home with an irresistible aroma.

Ingredients

  • Bread (preferably thick slices like brioche or challah)
  • 1/4 cup brown sugar
  • 1 teaspoon cinnamon
  • 4 eggs
  • 1/2 cup maple syrup
  • 1 cup milk
  • 1/4 teaspoon nutmeg
  • 1 teaspoon pumpkin pie spice
  • 1/2 cup pumpkin puree
  • 1 teaspoon vanilla extract

Instructions

  1. In a shallow dish, whisk together the eggs, milk, pumpkin puree, vanilla extract, brown sugar, cinnamon, nutmeg, and pumpkin pie spice until well combined.
  2. Preheat your griddle or skillet to 350 degrees Fahrenheit.
  3. Dip each slice of bread into the egg mixture, ensuring both sides are evenly coated. Allow the bread to soak for a few seconds for maximum flavor absorption.
  4. Place the coated bread slices onto the preheated griddle. Cook each side for 2-3 minutes, or until they are golden brown and cooked through.
  5. Serve the French toast hot, topped with butter and a generous drizzle of maple syrup. For an extra touch, spread some pumpkin butter on top.

Tips

For the best results, use day-old bread, as it absorbs the egg mixture more effectively without becoming overly soggy. If you’re using fresh bread, consider toasting it lightly before dipping. Be sure to adjust the cooking time according to the thickness of your bread slices to ensure even cooking.

Variations & Substitutions

You can easily customize this recipe to suit your tastes or dietary needs. Use almond milk or coconut milk for a dairy-free option, and swap out the brown sugar for coconut sugar or a sugar substitute if desired. Add a handful of chopped nuts or dried cranberries for a delightful texture contrast. For a gluten-free version, use your favorite gluten-free bread.

Storage

Leftover French toast can be stored in an airtight container in the refrigerator for up to 3 days. To reheat, simply place it in a toaster or oven at a low temperature until warmed through. You can also freeze the cooked French toast by laying slices flat on a baking sheet to freeze individually before transferring them to a freezer-safe bag or container. Reheat from frozen using a toaster or oven.

FAQ

Can I make the egg mixture ahead of time?

Yes, you can prepare the egg mixture up to a day in advance. Store it in the refrigerator in a covered container, and give it a good whisk before using it to ensure the spices are evenly distributed.

What kind of bread works best for this recipe?

Thick slices of bread like brioche, challah, or Texas toast are ideal for French toast as they hold up well to the egg mixture and cook evenly. However, feel free to use any bread you have on hand, just keep in mind that the texture may vary.

Can I use canned pumpkin pie filling instead of pumpkin puree?

It’s best to use pumpkin puree for this recipe as pumpkin pie filling contains added sugars and spices that could alter the flavor balance. If pumpkin puree is not available, you can adjust the spices in the recipe to account for the additional flavors in the pie filling.

Nutrition

This recipe is a delightful indulgence, providing a cozy start to your day. While the exact nutritional content will vary based on the type of bread used and toppings added, a serving made with regular bread and maple syrup typically contains around 250-300 calories, with healthy doses of vitamin A from the pumpkin puree.

Conclusion

Pumpkin French Toast is the perfect way to celebrate the flavors of fall. Its rich and comforting taste brings warmth to any morning, making it a favorite for family gatherings and lazy weekends alike. Whether you enjoy it with a cup of hot coffee or a glass of cider, this dish is sure to become a beloved part of your autumn traditions. Give it a try and let the nostalgic aroma of spices transport you to your own cherished memories!

Related update: Pumpkin French Toast

Related update: Banana Blueberry Pancakes

Pittata – Pizza Frittata | Made by Meaghan Moineau

Pittata – Pizza Frittata: A Delicious Twist on Classic Breakfast

Intro

Growing up, Sunday mornings were a sacred time in our household. The aroma of freshly brewed coffee mingled with the sounds of sizzling bacon, creating a comforting symphony that signaled the start of a leisurely day. My mother, with her extraordinary culinary skills, would whisk together the most delightful dishes, but there was one that always stood out – the pittata. A clever blend of pizza and frittata, this dish was the embodiment of indulgence and creativity. Today, I’m thrilled to share this cherished recipe with you, bringing a piece of my family tradition to your kitchen.

Why You’ll Love It

The pittata is a versatile dish that combines the best of two worlds: the savory satisfaction of pizza and the fluffy, protein-packed delight of a frittata. It’s perfect for breakfast, brunch, or even a light dinner, offering a filling meal that’s both quick to prepare and utterly delicious. Whether you’re hosting a gathering or simply looking to treat yourself, this dish is sure to impress with its simple ingredients and depth of flavor.

Ingredients

  • 6 large eggs
  • 1/4 cup fresh basil, chopped
  • 1/4 cup milk (optional)
  • 1/2 cup grated parmesan cheese
  • 1/4 cup sliced pepperoni
  • 1/2 cup shredded mozzarella cheese
  • Salt and pepper to taste
  • Cooking fat (e.g., olive oil, butter)

Instructions

  1. Preheat your oven to ~450°F (230°C), using the top heat setting only.
  2. On the stove, heat your choice of cooking fat in a large oven-safe skillet over medium heat.
  3. In a bowl, beat the eggs with milk, salt, pepper, and any herbs or spices you desire.
  4. Add any additional ingredients (except cheese) to the skillet. For this recipe, we keep it simple, but feel free to include cooked or quick-cooking vegetables like bell peppers.
  5. Pour the egg mixture into the skillet, tilting it to evenly distribute around any add-ins.
  6. Distribute the shredded mozzarella cheese and pepperoni slices over the egg mixture.
  7. Allow the eggs to cook on the stove until the edges are set, leaving the center slightly jiggly.
  8. Generously top with parmesan cheese.
  9. Transfer the skillet to the preheated oven and bake until the eggs are puffed, browned, and the center is firm.
  10. Remove from the oven and let the pittata cool for a couple of minutes before slicing into wedges.

Tips

For the best results, ensure that your skillet is well-greased to prevent sticking. Keep an eye on the pittata as it bakes; it can go from perfectly puffed to overcooked quickly. Use a toothpick to check that the center is set if you’re unsure. Lastly, let it rest slightly before serving; this makes cutting it into neat wedges much easier.

Variations & Substitutions

One of the joys of a pittata is its adaptability. Feel free to experiment with different herbs, spices, or cheeses. Swap pepperoni for sausage, or go vegetarian with mushrooms and spinach. For a dairy-free option, skip the milk and use a plant-based cheese alternative. The possibilities are endless, ensuring every pittata is a unique creation.

Storage

Store any leftover pittata in an airtight container in the refrigerator for up to three days. To reheat, warm it in the oven or a skillet over low heat until heated through, or microwave individual slices for about 30 seconds. For longer storage, freeze individual portions and reheat directly from frozen for a quick and easy meal.

FAQ

Can I make the pittata ahead of time?

Yes, you can prepare the pittata a day in advance. Simply follow the instructions until baking, then cover and refrigerate the skillet. When ready to bake, allow it to come to room temperature before placing it in the oven.

What can I serve with pittata?

Pittata pairs beautifully with a simple green salad, fresh fruit, or crusty bread. For a heartier meal, consider serving it with roasted potatoes or a side of bacon or sausage.

Is there a way to make it spicier?

For a spicier kick, add crushed red pepper flakes, diced jalapeños, or a splash of your favorite hot sauce to the egg mixture before cooking.

Nutrition

While the exact nutritional content will vary with portion sizes and specific ingredients used, a typical slice of pittata (1/6 of the whole) provides approximately 200 calories, 15g of protein, and 15g of fat, making it a hearty, satisfying dish that’s also relatively low in carbohydrates.

Conclusion

The pittata is more than just a meal; it’s a nod to creativity and the joy of cooking. Whether you’re reliving cherished memories or creating new ones, this dish is sure to become a staple in your recipe repertoire. I hope you find as much comfort and joy in making and sharing this dish as I have over the years. Bon appétit!

Related update: Pittata – Pizza Frittata

Related update: Mixed Berry Yogurt with Almonds

Wild Blueberry Lemon Muffins | Made by Meaghan Moineau

Wild Blueberry Lemon Muffins

Intro

There’s something inexplicably comforting about the aroma of freshly baked muffins wafting through the house. It takes me back to Sunday mornings in my grandmother’s cozy kitchen, where the sun would gently stream through the lace curtains, casting delicate patterns on the worn wooden table. Those mornings were filled with the chatter of family and the irresistible scent of golden-brown muffins cooling on the counter. Today, I’m thrilled to share a recipe that captures that warmth and nostalgia: Wild Blueberry Lemon Muffins. These muffins combine the tartness of lemons with the sweet burst of wild blueberries, creating a delightful treat that’s perfect for breakfast, brunch, or any moment in between.

Why You’ll Love It

These Wild Blueberry Lemon Muffins are the embodiment of simple pleasures. Each bite offers a perfect balance of sweetness and tartness, with the wild blueberries providing juicy pops of flavor. The muffins are moist, tender, and crowned with a tangy lemon glaze that elevates them from ordinary to extraordinary. Whether you’re hosting a brunch or looking for a delightful weekday breakfast, these muffins are sure to impress. Plus, they’re incredibly easy to make, requiring just a few staple ingredients and minimal effort.

Ingredients

  • 2 cups all-purpose flour
  • 2 teaspoons baking powder
  • 1/4 teaspoon salt
  • 1/2 cup unsalted butter, softened
  • 1 cup granulated sugar, plus 1/8 cup for lemon zest
  • 1 large egg
  • 1 cup buttermilk
  • 1 teaspoon vanilla extract
  • 1 tablespoon fresh lemon juice
  • 1 tablespoon lemon zest
  • 1 cup canned wild blueberries, drained
  • 1 cup powdered sugar

Instructions

  1. Preheat your oven to 375°F (190°C). Line 16 muffin cups with paper liners.
  2. Mash 1/8 cup of sugar with the lemon zest in a small bowl until the sugar is moistened and fragrant.
  3. In a medium-sized bowl, whisk together the flour, baking powder, and salt. Set aside.
  4. Using an electric mixer, beat 1 cup of sugar and the softened butter together in a large bowl until light and fluffy.
  5. Add the egg to the butter mixture, beating well after each addition.
  6. Mix in the buttermilk, vanilla extract, and lemon sugar gradually, ensuring each ingredient is fully incorporated.
  7. Slowly add the flour mixture to the wet ingredients, mixing until the batter is smooth and free of lumps.
  8. Fold in the wild blueberries gently with a large spatula, being careful not to crush them.
  9. Divide the batter equally among the prepared muffin tins, filling each about 3/4 full.
  10. Bake for about 35 minutes, or until a cake tester inserted into the center of a muffin comes out clean.
  11. Allow the muffins to cool in the pan for a few minutes before transferring them to a wire rack.
  12. Prepare the lemon glaze by combining the lemon juice, remaining lemon zest, and powdered sugar in a small bowl.
  13. Spoon about 1 tablespoon of glaze over each muffin, letting it drip down the sides.

Tips

For the best muffins, ensure your butter is at room temperature before you start. This allows it to incorporate more air, resulting in fluffier muffins. Also, when folding in the blueberries, do so gently to avoid breaking them and turning your batter purple. Finally, don’t skip the glaze—it’s what ties everything together with a delightful zing!

Variations & Substitutions

If you can’t find canned wild blueberries, fresh or frozen ones will work just as well. Just make sure to pat them dry if using frozen to avoid excess moisture. For a dairy-free version, substitute the buttermilk with almond milk mixed with a splash of lemon juice. You can also try adding a handful of chopped nuts, like almonds or walnuts, for some extra texture.

Storage

These muffins are best enjoyed fresh, but they can be stored in an airtight container at room temperature for up to three days. If you want to keep them longer, they freeze beautifully. Just wrap each muffin individually in plastic wrap and place them in a resealable plastic bag. They can be frozen for up to two months. To enjoy, simply thaw at room temperature or warm them in the oven for a few minutes.

FAQ

Can I use regular blueberries instead of wild blueberries?

Absolutely! Regular blueberries can be used as a substitute if wild blueberries aren’t available. Keep in mind that wild blueberries tend to be smaller and more intensely flavored, so you might notice a slight difference in taste and texture with regular blueberries.

How can I make my muffins rise higher?

To achieve higher rising muffins, make sure your baking powder is fresh. Additionally, starting with a higher oven temperature for the first 5 minutes of baking can create a burst of steam, which helps the muffins rise. Then, reduce the temperature to the specified 375°F for the remainder of the baking time.

Can I make these muffins gluten-free?

Yes, you can make these muffins gluten-free by using a gluten-free all-purpose flour blend. Ensure the blend contains xanthan gum or a similar binding agent, which helps mimic the texture of traditional flour.

Nutrition

Each muffin is approximately 210 calories, with 8g of fat, 32g of carbohydrates, and 2g of protein. The nutritional content can vary slightly based on ingredient brands and portion sizes.

Conclusion

These Wild Blueberry Lemon Muffins are more than just a treat; they’re a little piece of nostalgia wrapped in a paper liner. With their sunny lemon flavor and sweet blueberries, they’re sure to brighten any day. Whether you enjoy them with a cup of tea or as a grab-and-go breakfast, these muffins are a delightful reminder of the simple joys in life. I hope this recipe brings as much joy to your kitchen as it has to mine. Happy baking!

Related update: Wild Blueberry Lemon Muffins

Banana Blueberry Pancakes | Made by Meaghan Moineau

Banana Blueberry Pancakes

Intro

There’s something incredibly comforting about the aroma of pancakes sizzling on a Sunday morning. Growing up, weekends were a special time in our household, and my mom’s banana blueberry pancakes were a tradition that never failed to bring the family together. As a child, I would eagerly help mash the bananas, my little hands sticky with sweet fruit, while my mom expertly flipped each pancake to golden perfection. Those mornings, filled with laughter and the sweet scent of pancakes, remain some of my fondest memories. I’m thrilled to share this beloved recipe with you, hoping it will create equally delicious memories in your home.

Why You’ll Love It

These banana blueberry pancakes are a delightful blend of natural sweetness and fruity goodness, offering a wholesome start to your day. The combination of ripe bananas and juicy blueberries creates a flavor explosion with every bite, while coconut flour adds a subtle nuttiness and a gluten-free twist. Whether you’re looking for a hearty breakfast or a comforting brunch option, these pancakes are sure to please. Plus, they are easy to make, requiring simple ingredients and minimal preparation time, making them perfect for both busy mornings and leisurely weekend brunches.

Ingredients

  • 4 whole eggs
  • 1 cup water
  • 2 tablespoons liquid coconut oil
  • ½ cup coconut flour
  • 1 teaspoon cream of tartar
  • 1 teaspoon ground cinnamon
  • 2 ripe bananas, mashed
  • 1 cup frozen blueberries

Instructions

  1. Beat the eggs for 1 minute in a medium-sized bowl until they are light and frothy.
  2. Add the water, coconut oil, and coconut flour to the eggs. Whisk together until the mixture is smooth and well combined.
  3. Allow the batter to sit for 5 minutes to let the coconut flour absorb the liquid and expand.
  4. Stir in the cream of tartar, ground cinnamon, and mashed bananas. Whisk until the batter is smooth.
  5. Gently fold in the frozen blueberries using a spatula, ensuring they are evenly distributed throughout the batter.
  6. Heat a little oil, butter, or a combination of both in a skillet over medium to low heat.
  7. Ladle about 1/2 cup of batter for each pancake onto the skillet, spreading it out to form a circle.
  8. Cook the pancakes for about 5 minutes on one side, or until bubbles form on the surface and the edges are set.
  9. Carefully flip the pancakes and cook the other side until golden brown and cooked through.
  10. Repeat the process with the remaining batter to make approximately 8 pancakes.
  11. Serve the pancakes warm, drizzled with maple syrup, and enjoy!

Tips

For the perfect pancakes, make sure your skillet is well-heated before you start cooking. This ensures a nice, even browning. If the batter seems too thick after resting, you can add a little more water, a tablespoon at a time, until you reach your desired consistency. Be gentle when folding in the blueberries to avoid breaking them and turning your batter blue!

Variations & Substitutions

If you’re looking to switch things up, consider adding a handful of chopped nuts, such as walnuts or pecans, for added crunch. You can also substitute the coconut flour with almond flour if you prefer, though the texture might be slightly different. For a vegan version, replace the eggs with a flaxseed egg substitute and use a plant-based oil.

Storage

These pancakes store well in the refrigerator for up to 3 days. Simply place them in an airtight container. To reheat, warm them in a skillet over low heat or in the microwave. You can also freeze the pancakes for up to 2 months. Separate each pancake with parchment paper and store them in a freezer-safe container or bag.

FAQ

Can I use fresh blueberries instead of frozen?

Absolutely! Fresh blueberries work just as well in this recipe. Just be sure to rinse and dry them thoroughly before folding them into the batter.

What can I use if I don’t have cream of tartar?

If you don’t have cream of tartar on hand, you can substitute it with 1 1/2 teaspoons of baking powder. This will help the pancakes rise and achieve a fluffy texture.

Are these pancakes gluten-free?

Yes, these banana blueberry pancakes are gluten-free, thanks to the use of coconut flour. Just ensure that all your ingredients, including baking powder, are certified gluten-free if you have a severe allergy or sensitivity.

Nutrition

Each pancake is packed with nutrients and flavor. While the exact nutrition will vary based on the ingredients and portion sizes, these pancakes are a good source of protein from the eggs, healthy fats from the coconut oil, and fiber from the coconut flour and blueberries. Plus, they’re naturally sweetened with bananas, making them a healthier choice for breakfast.

Conclusion

Banana blueberry pancakes are more than just a meal; they’re a hug on a plate, a reminder of cozy mornings and cherished family traditions. Whether you’re making them for a special occasion or just to brighten up a weekday morning, these pancakes are sure to be a hit. I hope this recipe brings as much joy to your kitchen as it does to mine. Happy cooking!

Related update: Banana Blueberry Pancakes

Avocado Nests | Made by Meaghan Moineau

Avocado Nests: A Delightful and Nutritious Breakfast

Intro

Growing up, Sunday mornings were always special in our household. My grandmother had a knack for turning simple ingredients into something extraordinary, and her Avocado Nests were no exception. The vibrant green of the avocado paired with the golden hue of hash browns and the savory goodness of bacon and eggs was a sight to behold. It was a dish that brought the family together, and to this day, it evokes cherished memories of laughter and love shared around the breakfast table.

Why You’ll Love It

This Avocado Nests recipe is more than just a feast for the eyes. It combines the creamy richness of avocados with the satisfying crunch of hash browns and the savory flavor of bacon, creating a harmonious blend of textures and tastes. The addition of deviled eggs brings an unexpected twist, elevating this dish to a new level of deliciousness. Whether you’re preparing a cozy breakfast for your family or impressing guests at brunch, Avocado Nests are sure to delight everyone at the table.

Ingredients

  • 2 ripe avocados
  • 4 hardboiled eggs
  • 2 cups frozen hash browns
  • 4 slices bacon
  • 2 tablespoons mayonaise (or cream cheese)
  • Salt and pepper to taste

Instructions

  1. Cook the frozen hash browns according to the package directions until they are golden and crispy. Set aside.
  2. Cut the bacon slices into thin strips and cook them in a skillet over medium heat until crispy, or bake them in the oven at 400°F (200°C) for about 15 minutes. Drain on a paper towel.
  3. To make the deviled eggs, carefully peel the hardboiled eggs and slice them in half lengthwise. Remove the yolks and place them in a bowl. Mix the yolks with mayonaise or cream cheese until smooth, then season with salt and pepper. Spoon or pipe the mixture back into the egg white halves.
  4. Cut the avocados in half lengthwise, remove the seeds, and gently peel the skin.
  5. On a serving plate, create a bed of hash browns and sprinkle the cooked bacon strips over them.
  6. Carefully place the deviled eggs into the seed cavity of each avocado half.
  7. Rest the filled avocado halves on the bed of hash browns and bacon, and serve immediately.

Tips

For the best results, use ripe but firm avocados to ensure they hold their shape. If you prefer a smokier flavor, consider using smoked bacon. Use a piping bag for a neater presentation of the deviled egg filling. To save time, you can prepare the deviled eggs and cook the bacon the night before.

Variations & Substitutions

Feel free to customize the Avocado Nests to suit your taste. For a vegetarian version, omit the bacon and add sautéed mushrooms or roasted bell peppers. If you’re looking to cut down on carbs, you can substitute the hash browns with a bed of fresh arugula or mixed greens. For a spicier kick, add a dash of hot sauce or a sprinkle of cayenne pepper to the deviled egg mixture.

Storage

Avocado Nests are best enjoyed fresh, but if you have leftovers, store them in an airtight container in the refrigerator for up to two days. To prevent the avocados from browning, you can brush them with a little lemon juice before storing. Reheat the hash browns and bacon in a skillet to restore their crispiness before serving.

FAQ

Can I make the deviled eggs in advance?

Yes, you can prepare the deviled eggs up to two days ahead of time. Store them in an airtight container in the refrigerator until you’re ready to assemble the dish.

What can I use instead of mayonnaise for the deviled eggs?

If you’re not a fan of mayonnaise, cream cheese or Greek yogurt are excellent substitutes that will provide a similar creamy texture.

Nutrition

While it’s difficult to provide precise nutritional information without exact measurements, Avocado Nests are generally a good source of healthy fats from the avocados, protein from the eggs, and essential nutrients from the bacon and hash browns. For those watching their calorie intake, consider using turkey bacon and reducing the amount of hash browns.

Conclusion

Avocado Nests are a delightful way to elevate your breakfast or brunch game. With their eye-catching presentation and mouthwatering flavors, they are sure to become a favorite in your household, just as they have in mine. I hope this recipe brings as much joy to your table as it has to ours. Enjoy these little nests of goodness and the memories they create with your loved ones.

Related update: Avocado Nests

Related update: Mexi-Chicken Roll Ups

French Toast Croissants with Strawberries | Made by Meaghan Moineau

French Toast Croissants with Strawberries

Intro

There’s something magical about the aroma of freshly cooked French toast wafting through the kitchen. It takes me back to those lazy Sunday mornings at my grandmother’s house, where breakfast was an event to be savored. Instead of traditional bread, today we’re giving this classic breakfast staple a delightful twist by using croissants. The rich, buttery layers of croissants make them the perfect canvas for this sweet, eggy delight. Paired with fresh strawberries and a hint of orange, this dish elevates any breakfast or brunch spread.

Why You’ll Love It

This recipe combines the best of both worlds: the indulgence of a French pastry and the comforting familiarity of French toast. Here’s why you’ll fall in love with these French Toast Croissants with Strawberries:

  • Rich Flavor: The croissants’ buttery layers absorb the egg mixture beautifully, creating a rich and satisfying taste.
  • Easy to Make: With simple ingredients and straightforward instructions, this recipe is perfect for both beginners and seasoned cooks.
  • Versatile: Whether you’re making a special breakfast or a fancy brunch, this dish fits the bill.
  • Seasonal Freshness: The addition of fresh strawberries brings a burst of color and flavor, making it a perfect dish for spring and summer.

Ingredients

  • Butter
  • Split plain croissants
  • Eggs
  • Milk
  • Orange peel
  • Powdered sugar
  • Fresh strawberries

Instructions

  1. In a small mixer bowl, beat together all orange butter ingredients at medium speed, scraping the bowl often, until light and fluffy (about 1 to 2 minutes); set aside.
  2. In a pie pan, stir together milk, eggs, and 1 teaspoon of orange peel.
  3. In a 10-inch skillet or griddle, melt 2 tablespoons of butter over medium heat.
  4. Dip 4 croissant halves into the egg mixture, turning to coat both sides. Place croissant halves, cut side down, in the skillet.
  5. Cook, turning once, until golden brown (3 to 4 minutes on each side). Remove to a serving platter and keep warm.
  6. Repeat with the remaining 2 tablespoons of butter and 4 croissant halves.
  7. Dust croissant halves with powdered sugar and serve with orange butter and fresh strawberries.

Tips

  • Use Day-Old Croissants: Slightly stale croissants will absorb the egg mixture better without becoming too soggy.
  • Keep Warm: To keep the croissants warm while you finish cooking, place them in a preheated oven at a low temperature.
  • Don’t Overcrowd the Pan: Cook the croissants in batches if necessary to ensure even cooking.

Variations & Substitutions

If you’re looking to customize your French toast croissants, here are a few ideas:

  • Fruity Variations: Swap strawberries with blueberries, raspberries, or sliced bananas for a different flavor profile.
  • Nutty Addition: Sprinkle chopped nuts like almonds or pecans for added crunch.
  • Dairy-Free Option: Use almond milk or coconut milk instead of regular milk for a dairy-free version.

Storage

French Toast Croissants are best enjoyed fresh, but if you have leftovers, store them in an airtight container in the refrigerator for up to two days. Reheat in a preheated oven at 350°F until warmed through, or use a toaster oven for added crispiness.

FAQ

Can I make the orange butter ahead of time?

Yes, you can prepare the orange butter ahead of time and store it in the refrigerator. Just make sure to bring it to room temperature before serving so it spreads easily.

Can I freeze French Toast Croissants?

While it’s possible to freeze them, the texture might change slightly. If you choose to freeze, wrap each croissant tightly in plastic wrap and place in a freezer-safe bag. Thaw in the fridge overnight before reheating.

What can I serve with French Toast Croissants?

This dish pairs wonderfully with a side of crispy bacon or sausage. A refreshing fruit salad or a glass of freshly squeezed orange juice complements the meal beautifully.

Nutrition

While I don’t have exact nutritional information, this dish is indulgent and should be enjoyed as a treat. For lighter options, consider reducing the amount of butter or powdered sugar, or serving with a fresh fruit salad.

Conclusion

French Toast Croissants with Strawberries is a delightful twist on a classic breakfast favorite that promises to add a touch of elegance to your morning routine. Whether you’re enjoying a cozy family breakfast or hosting a brunch with friends, this dish is sure to impress. The combination of buttery croissants, sweet strawberries, and fragrant orange butter creates a symphony of flavors that’ll transport you straight to a Parisian café. So, grab your apron and treat yourself to this indulgent breakfast experience!

Related update: French Toast Croissants with Strawberries

Related update: Caramel ice cream

Related update: Banana Blueberry Pancakes

Spicy Coconut French Toast | Made by Meaghan Moineau

Spicy Coconut French Toast

Intro

Growing up, Sunday mornings in my family were synonymous with the enticing aroma of French toast wafting through the house. My grandmother would always prepare a classic version that was simple yet utterly delightful. However, as I grew older and started experimenting with flavors, I found that adding a hint of spice and a tropical twist transformed this beloved breakfast staple into something truly extraordinary. And thus, the Spicy Coconut French Toast was born—a dish that combines the warmth of nostalgia with a burst of exciting flavors, perfect for any brunch table.

Why You’ll Love It

This Spicy Coconut French Toast is a delightful departure from the traditional. Here’s why it will become a favorite in your home:

  • Unique Flavor Profile: The combination of coconut and a hint of cayenne pepper adds a surprising yet harmonious twist to the classic French toast.
  • Perfect for Special Occasions: Whether it’s a weekend brunch or a special breakfast gathering, this dish is sure to impress your guests.
  • Simple Ingredients: Despite its gourmet appearance, this recipe uses everyday ingredients that you likely already have in your pantry.
  • Quick and Easy: It takes just a few steps to prepare, making it ideal for both leisurely mornings and busy days.

Ingredients

  • 4 large eggs
  • 1 loaf French bread, sliced thickly
  • Oil for frying
  • 1/2 teaspoon ground cayenne pepper
  • 1/4 cup maple syrup
  • 1/4 teaspoon nutmeg
  • Pinch of salt
  • 1 tablespoon sugar
  • 1 cup sweetened shredded coconut
  • 1 teaspoon vanilla extract
  • 1 cup whole milk

Instructions

  1. Heat a large skillet over medium heat.
  2. In a baking dish or large bowl, whisk together the milk, eggs, salt, vanilla extract, sugar, cayenne pepper, and nutmeg.
  3. Pour the shredded coconut onto a plate.
  4. Pour enough oil into the skillet to completely coat the bottom.
  5. Dip each slice of bread into the egg mixture, allowing it to soak for 15-20 seconds per side.
  6. Then, dip the soaked bread slices into the coconut, ensuring an even coat on both sides.
  7. Once the oil is hot, start frying one slice as a test batch. Cook for 1 minute on each side, watching for a crispy golden-brown crust. The coconut may turn a deep brown, but avoid letting it burn.
  8. If the coconut browns before the crust forms, reduce the heat slightly. Add more oil as needed and continue frying the remaining slices.
  9. Serve warm with maple syrup and fresh berries for a delightful breakfast experience.

Tips

  • Use stale bread if possible, as it soaks up the egg mixture better without getting too soggy.
  • Adjust the amount of cayenne pepper to suit your spice preference.
  • Test the oil temperature by dropping a small piece of bread into it. If it sizzles and browns slowly, it’s ready.

Variations & Substitutions

  • Dairy-Free Version: Substitute whole milk with almond milk or coconut milk for a dairy-free alternative.
  • Gluten-Free Option: Use gluten-free bread to accommodate dietary restrictions.
  • Extra Spice: Add a pinch of cinnamon for an additional layer of warmth and spice in the flavor.

Storage

Store any leftover French toast in an airtight container in the refrigerator for up to 2 days. To reheat, place the slices in a toaster oven or on a skillet over medium heat until warmed through. Avoid microwaving to retain the crispy texture.

FAQ

Can I make this recipe ahead of time?

While it’s best enjoyed fresh, you can prepare the egg mixture and slice the bread the night before. Store them separately and quickly assemble and fry the French toast in the morning for a quick breakfast.

What can I serve with Spicy Coconut French Toast?

This dish pairs beautifully with fresh fruit, crispy bacon, or a dollop of whipped cream. For a more savory option, consider serving it with scrambled eggs or a sausage link.

Nutrition

Each serving of Spicy Coconut French Toast provides approximately:

  • Calories: 350
  • Protein: 8g
  • Carbohydrates: 45g
  • Fat: 15g
  • Sugar: 14g

Note: Nutritional values are estimates and can vary based on specific ingredients and preparation methods.

Conclusion

Spicy Coconut French Toast is a delightful fusion of sweet, spicy, and tropical flavors that will make your breakfast or brunch spread truly special. Its crispy exterior and soft, flavorful interior create a perfect bite every time. Whether you’re making it for your family or serving it at a gathering, this dish is bound to become a cherished favorite. So gather your ingredients, fire up the skillet, and indulge in a breakfast experience that’s both comforting and exciting. Enjoy!

Related update: Spicy Coconut French Toast

Related update: French Toast Croissants with Strawberries

French Toast Croissants with Strawberries | Made by Meaghan Moineau

French Toast Croissants with Strawberries

Introduction

There’s something undeniably magical about the aroma of French toast wafting through the house on a lazy weekend morning. This recipe for French Toast Croissants with Strawberries is a delightful twist on the classic breakfast favorite. I still remember the first time I made this dish; it was a chilly Sunday morning, and my little kitchen was filled with warmth and laughter. My grandmother, who was visiting from France, watched as I nervously whisked the ingredients together, offering gentle guidance and stories of her own childhood in Paris. It became an instant family favorite, invoking memories of cozy brunches and shared stories. I hope this recipe brings a touch of that same magic to your home.

Why You’ll Love It

This recipe is a delightful blend of rich, buttery croissants and the sweet, tangy pop of fresh strawberries. It’s perfect for a special brunch or a lazy morning treat. The croissants soak up the egg mixture beautifully, creating a creamy, custard-like interior while maintaining a crisp, golden exterior. The orange butter adds a zingy freshness, perfectly complementing the sweetness of the strawberries. Whether you’re serving it to guests or indulging yourself, these French Toast Croissants are sure to impress.

Ingredients

  • 4 tablespoons butter, divided
  • 4 plain croissants, split
  • 2 eggs
  • 1/2 cup milk
  • 1 teaspoon grated orange peel
  • 1 tablespoon powdered sugar
  • Fresh strawberries, sliced
  • Orange butter (optional, see tips for recipe)

Instructions

  1. In a small mixer bowl, beat together all the orange butter ingredients at medium speed, scraping the bowl often, until light and fluffy (1 to 2 minutes); set aside.
  2. In a pie pan, stir together the milk, eggs, and 1 teaspoon of orange peel.
  3. In a 10-inch skillet or griddle, melt 2 tablespoons of butter over medium heat.
  4. Dip 4 croissant halves into the egg mixture, turning to coat both sides.
  5. Place the croissant halves, cut side down, in the skillet. Cook, turning once, until golden brown (3 to 4 minutes on each side). Remove to a serving platter; keep warm.
  6. Repeat with the remaining 2 tablespoons of butter and 4 croissant halves.
  7. Dust croissant halves with powdered sugar; serve with orange butter and fresh strawberries.

Tips

  • Use day-old croissants if possible; they will soak up the egg mixture better without becoming too soggy.
  • For the orange butter, simply mix softened butter with a bit of orange zest and a touch of honey or sugar.
  • Ensure your skillet is not too hot to prevent burning the croissants before the inside is cooked.

Variations & Substitutions

  • Fruits: While strawberries are delightful, you can use blueberries, raspberries, or sliced peaches for a different flavor profile.
  • Dairy-Free: Substitute the milk with almond milk or coconut milk, and use a dairy-free butter alternative.
  • Spices: Add a dash of cinnamon or nutmeg to the egg mixture for an extra layer of flavor.

Storage

French Toast Croissants are best enjoyed fresh. However, if you have leftovers, store them in an airtight container in the refrigerator for up to 2 days. Reheat them in a skillet over medium heat until warmed through. Avoid microwaving as it may make them soggy.

FAQ

Can I prepare the egg mixture ahead of time?

Yes, you can prepare the egg mixture a few hours in advance. Store it in the refrigerator and give it a good stir before using.

How can I make this recipe gluten-free?

To make this recipe gluten-free, use gluten-free croissants. The rest of the ingredients are naturally gluten-free.

Nutrition

While indulgent, this dish provides a good balance of protein and carbohydrates to start your day off right. Each serving contains approximately:

  • Calories: 450
  • Protein: 8g
  • Carbohydrates: 38g
  • Fat: 28g
  • Sugar: 10g

Please note that these values are estimates and can vary based on specific ingredients used.

Conclusion

French Toast Croissants with Strawberries is a dish that brings together comfort and elegance. Whether you’re reminiscing about a trip to Paris or simply treating yourself to a luxurious breakfast at home, this recipe is sure to delight. The combination of buttery croissants, fresh strawberries, and a hint of citrus will transport you to a cozy café, even if just for a moment. I hope you enjoy making and sharing this recipe as much as my family has over the years. Bon appétit!

Related update: French Toast Croissants with Strawberries

Related update: Huli-Huli Chicken

Fluffy frittata with spinach | Made by Meaghan Moineau

Fluffy Frittata with Spinach

Intro

There’s something magical about the aroma of a freshly made frittata wafting through the kitchen. It takes me back to Sunday mornings at my grandmother’s house, where the sizzle of garlic and the sight of her expertly whisked eggs made breakfast feel like an event. Among her many beloved recipes, her fluffy spinach frittata was always my favorite. Today, I’m excited to share a version of her classic dish that’s not only nostalgic but also incredibly easy to prepare. Whether you’re hosting a brunch or simply treating yourself to a hearty breakfast, this frittata is bound to become your new go-to recipe.

Why You’ll Love It

This fluffy spinach frittata is everything you want in a breakfast dish: quick to make, absolutely delicious, and packed with nutritious ingredients. The combination of fresh spinach and creamy ricotta cheese makes it light yet satisfying, while the hint of garlic and nutmeg adds depth to its flavor. Perfect for both novice and seasoned cooks, this frittata is a testament to the fact that simplicity often leads to the most delightful outcomes.

Ingredients

  • 4 large eggs, separated
  • 1 clove garlic, minced
  • 1/4 teaspoon ground pepper
  • 1/8 teaspoon nutmeg
  • 2 tablespoons olive oil
  • 1/4 cup grated parmesan cheese
  • 1/2 cup ricotta cheese
  • 1/2 teaspoon salt
  • 1 cup fresh spinach (or 1/2 cup dry frozen spinach, thawed and drained)

Instructions

  1. Preheat your oven to 200°C (392°F).
  2. In a medium oven-proof skillet, heat the olive oil over medium heat. Add the minced garlic and cook until softened and fragrant, about 1 minute.
  3. In a large glass or metal bowl, beat the egg whites until stiff peaks form. This will ensure your frittata turns out perfectly fluffy.
  4. In another bowl, beat the egg yolks and stir in the spinach and ricotta cheese. Season the mixture with salt, ground pepper, and nutmeg.
  5. Gently fold the beaten egg whites into the yolk mixture, taking care not to deflate the whites.
  6. Pour the egg mixture into the hot skillet with the garlic. Cook over medium heat until the edges are just set, approximately 2 minutes.
  7. Transfer the skillet to the preheated oven and bake until the frittata is golden and fluffy, about 15 minutes.
  8. Sprinkle the grated parmesan cheese over the top of the frittata and bake for an additional 2 minutes, or until the cheese is melted and bubbly.
  9. Remove from the oven and let it cool slightly before cutting into wedges. Serve immediately for best results.

Tips

For the fluffiest frittata, ensure that the egg whites are beaten to stiff peaks before folding them into the yolk mixture. When folding, use a gentle hand to maintain the airy texture. Preheating the oven and using an oven-proof skillet will help the frittata cook evenly and achieve a beautiful golden color.

Variations & Substitutions

If you’re looking to customize this frittata, consider adding sautéed mushrooms, sun-dried tomatoes, or bell peppers for added flavor and texture. For a bit of heat, a pinch of red pepper flakes can do wonders. If you’re out of fresh spinach, frozen spinach works well, just be sure to thaw and drain it thoroughly. Additionally, feta or goat cheese can be used in place of ricotta for a different cheese profile.

Storage

Leftover frittata can be stored in an airtight container in the refrigerator for up to 3 days. To reheat, place a slice in a skillet over low heat until warmed through, or use a microwave for a quicker option. While it can be frozen, note that the texture may change slightly upon thawing.

FAQ

Can I make this frittata ahead of time?

Yes, this frittata can be made a day in advance. Simply store it in the refrigerator and reheat it in the oven at a low temperature before serving to maintain its texture.

Is it possible to make this frittata dairy-free?

Definitely! You can substitute the ricotta cheese with a dairy-free cheese alternative and use nutritional yeast instead of parmesan for a similar cheesy flavor without the dairy.

Nutrition

This frittata is a great source of protein and packed with vitamins from the spinach. Each serving contains approximately 250 calories, 18 grams of protein, and 5 grams of carbohydrates. It’s a nutritious way to start your day!

Conclusion

This fluffy spinach frittata is a delightful dish that’s sure to become a staple in your breakfast or brunch repertoire. Its simplicity and versatility make it an ideal choice for any occasion. Whether you’re reminiscing about family breakfasts or creating new traditions, this frittata brings warmth and comfort to your table. I hope you enjoy making and sharing this recipe as much as I have over the years. Bon appétit!

Related update: Fluffy frittata with spinach

Related update: Overnight Oatmeal

Related update: BBQ Mac and Cheese

Berry & Ricotta Danishes | Made by Meaghan Moineau

Berry & Ricotta Danishes

Intro

There’s something magical about the scent of freshly baked pastries wafting through the kitchen. I remember when I was a child, visiting my grandmother on Sunday mornings. Her kitchen was always filled with the aroma of sweet delights, and my favorite treat was her berry danishes. She would let me help her sprinkle the sugar over the berries, a task I took very seriously. This Berry & Ricotta Danishes recipe is a tribute to those cherished mornings, combining the tartness of fresh berries with the creamy richness of ricotta cheese, all encased in flaky puff pastry.

Why You’ll Love It

These Berry & Ricotta Danishes are a delightful addition to any breakfast or brunch spread. The balance of sweet and tart flavors is simply irresistible, while the creamy ricotta filling adds a luxurious touch. The best part? They’re surprisingly easy to make, even for those who aren’t seasoned bakers. Whether you’re serving them for a special occasion or just to treat yourself, these danishes are sure to impress.

Ingredients

  • Glaze
  • Poached berries
  • Blueberries
  • Egg yolk
  • Pastry
  • Flour
  • Icing sugar
  • Fresh lemon juice
  • Lemon zest
  • Puff pastry
  • Ricotta cheese
  • Strawberries
  • Castor sugar
  • Vanilla extract
  • Water

Instructions

  1. Place the berries in a saucepan over medium-low heat. Sprinkle on castor sugar and add water. Cover the saucepan with a lid and shake it around to coat the berries. Poach the berries for about 5 minutes or until they soften but still retain their shape. Set aside to cool.
  2. Preheat the oven to 180°C (350°F).
  3. Make the ricotta filling by combining all ingredients in a mixing bowl. Mix well with a wooden spoon to thoroughly combine. Set aside.
  4. Prepare the glaze by mixing icing sugar and lemon juice together in a small bowl. Mix well and set aside.
  5. Remove the pastry from the refrigerator and place sheets on a clean, dry surface. Use a small, sharp knife to cut 10 8cm x 6cm (3″ x 2.5″) rectangles.
  6. Place 5 of the pastry rectangles on a lined baking sheet, ensuring there is space between them as they will expand. Lightly brush edges with a little water. These will be the “pastry rectangle bases”.
  7. Cut smaller rectangles out of the remaining 5 pastry rectangles to create small frames about 1.5cm (1/2″) in width.
  8. Place the frames on top of the pastry bases on the baking sheet.
  9. Fill the middle of each frame with about 3-4 tablespoons of ricotta mixture. Top with several berries, reserving some for topping once the danishes are baked.
  10. Repeat the process with remaining pastry frames.
  11. Bake in the oven for 15 to 18 minutes or until the pastry puffs up and is golden. Remove from oven and cool on a wire rack.
  12. Top with remaining poached berries and sprinkle on a little icing sugar just before serving.

Tips

For best results, ensure your puff pastry is cold before baking, as this helps achieve that signature flaky texture. If your kitchen is particularly warm, try chilling the assembled danishes for a few minutes before baking. Also, be sure not to overfill the center with ricotta mixture to prevent it from spilling over the edges during baking.

Variations & Substitutions

Feel free to get creative with the types of berries you use. Raspberries and blackberries make great alternatives or additions. If ricotta isn’t your favorite, try substituting it with cream cheese or mascarpone for a different flavor profile. For a touch of extra sweetness, drizzle some honey over the top before serving.

Storage

These danishes are best enjoyed fresh, but they can be stored in an airtight container in the refrigerator for up to two days. To reheat, place them in a preheated oven at 150°C (300°F) for about 5 minutes or until warmed through.

FAQ

Can I make these danishes ahead of time?

Yes, you can prepare the components separately ahead of time. Poach the berries and prepare the ricotta filling the day before, then assemble and bake the danishes when you’re ready to serve them.

Can I use frozen berries instead of fresh?

Absolutely! Frozen berries work just as well. Just be sure to thaw them and drain any excess liquid before using them in this recipe.

How do I prevent the pastry from becoming soggy?

To prevent soggy pastry, make sure the poached berries are well-drained and the ricotta mixture is not too wet. Baking the danishes on a wire rack after removing them from the oven also helps keep them crisp.

Nutrition

While the exact nutritional value will vary depending on specific brands and measurements, each danish is approximately 250 calories. They offer a delightful source of calcium from the ricotta cheese and antioxidants from the berries.

Conclusion

These Berry & Ricotta Danishes are a beautiful blend of flavors and textures, perfect for any occasion. Whether you’re reliving nostalgic memories or creating new ones, these pastries are sure to become a beloved part of your baking repertoire. Enjoy them with a cup of coffee or tea, and savor the simple pleasures of life. Happy baking!

Related update: Berry & Ricotta Danishes

Crab Cakes Eggs Benedict | Made by Meaghan Moineau

Crab Cakes Eggs Benedict: A Coastal Breakfast Delight

Intro

There’s something magical about waking up to the sound of waves crashing against the shore. As a child, summer mornings at our beach house were always accompanied by the irresistible aroma of my grandmother’s famous Crab Cakes Eggs Benedict. The combination of savory crab cakes and creamy hollandaise sauce, all atop a perfectly toasted English muffin, was a breakfast tradition that I eagerly anticipated each year. Today, I’m thrilled to share this beloved recipe with you, so you too can enjoy a taste of coastal charm in your own home.

Why You’ll Love It

This Crab Cakes Eggs Benedict is perfect for an indulgent weekend brunch or as a show-stopping dish for a special occasion. The richness of the crab meat, the tangy hollandaise sauce, and the comforting texture of the poached eggs create a harmonious blend of flavors and textures. Plus, the recipe is surprisingly easy to make, yet looks and tastes like a gourmet masterpiece.

Ingredients

  • 2 tablespoons celery, finely chopped
  • 1/4 cup dry bread crumbs
  • 8 large eggs
  • 3 English muffins, split and toasted
  • 1 package Knorr Hollandaise Sauce Mix
  • A few dashes of hot sauce
  • 1 pound lump crab meat
  • 1/4 cup mayonnaise
  • 1/4 cup onion, finely chopped
  • 1 tablespoon fresh parsley, chopped
  • 1 teaspoon seafood seasoning
  • 6 tablespoons unsalted butter, divided
  • 1 teaspoon Worcestershire sauce

Instructions

  1. Prepare the Crab Cakes: Cook the onion and celery in 4 tablespoons of butter over moderately low heat until tender. Transfer to a large bowl. Stir in the crab and bread crumbs.
  2. In a small bowl, whisk together the mayonnaise, seafood seasoning, Worcestershire sauce, hot sauce, parsley, and salt and pepper to taste. Stir this mixture into the crab mixture until well combined.
  3. Line a baking sheet with wax paper. Form the crab mixture into 6 flattened rounds. Chill the crab cakes, covered with plastic wrap, in the refrigerator for at least 1 hour.
  4. Heat 1 tablespoon of butter over moderate heat until the foam subsides. Cook half of the crab cakes until golden brown, about 2 to 3 minutes on each side. Repeat with the remaining crab cakes using the remaining tablespoon of butter.
  5. Prepare the Hollandaise Sauce: Follow the package instructions to make the Knorr Hollandaise Sauce.
  6. Poach the Eggs: Fill a medium-sized saucepan halfway with water. Add 1/2 teaspoon of white vinegar (optional, but it helps hold the egg together). Bring to a gentle boil and carefully add the eggs (1-2 at a time works best). Poach the eggs for 2-3 minutes or until the yolk has set to your preference.
  7. Assemble the Dish: Place a crab cake on each half of the toasted English muffins. Top with a poached egg and generously drizzle with hollandaise sauce. Serve immediately with a sprinkle of fresh parsley if desired.

Tips

For perfectly poached eggs, use the freshest eggs you can find. The fresher the egg, the better it will hold its shape in the water. If you’re new to poaching, don’t worry about achieving perfection on your first try—practice makes perfect!

Variations & Substitutions

If you prefer a spicier kick, consider adding extra hot sauce or a pinch of cayenne pepper to the crab cake mixture. For a gluten-free version, substitute gluten-free bread crumbs and English muffins. You can also experiment with different herbs, such as dill or chives, to add a personal twist to the dish.

Storage

If you have leftovers, store the crab cakes and poached eggs separately in airtight containers in the refrigerator for up to 2 days. Reheat the crab cakes in a skillet over medium heat and poach fresh eggs when ready to serve. The hollandaise sauce is best prepared fresh, but if you need to store it, keep it in the refrigerator for up to 1 day and reheat gently over low heat.

FAQ

Can I use canned crab meat instead of fresh?

Yes, you can use canned crab meat if fresh is not available. Just ensure you drain it well and gently squeeze out any excess moisture to prevent the crab cakes from becoming too soggy.

What can I serve with Crab Cakes Eggs Benedict?

This dish pairs beautifully with a simple green salad or roasted asparagus. You could also serve it with a side of fresh fruits for a refreshing contrast.

How do I keep the hollandaise sauce from breaking?

To prevent your hollandaise sauce from breaking, make sure to whisk constantly while gradually adding the melted butter. If the sauce starts to separate, whisk in a little bit of hot water to bring it back together.

Nutrition

This Crab Cakes Eggs Benedict recipe is a rich and indulgent dish, perfect for a special occasion. It’s a good source of protein from the eggs and crab, but remember to enjoy it in moderation due to its higher fat content from the hollandaise sauce and butter.

Conclusion

Crab Cakes Eggs Benedict is more than just a meal—it’s a tradition steeped in nostalgia and flavor. Whether you’re hosting a brunch or simply indulging in a weekend treat, this recipe is sure to impress and delight. I hope it brings as much joy to your table as it has to mine over the years. Happy cooking!

Related update: Crab Cakes Eggs Benedict

Related update: Sweet-N-Smoky Salmon With Ginger Mahogany Rice

Smoked Salmon Eggs Benedict With Lemon Dill Hollandaise | Made by Meaghan Moineau

Smoked Salmon Eggs Benedict With Lemon Dill Hollandaise | Made by Meaghan Moineau

Title: Savoring Sundays: Smoked Salmon Eggs Benedict with Lemon Dill Hollandaise
Description: Discover the luxurious flavors of our Smoked Salmon Eggs Benedict with Lemon Dill Hollandaise – a dish that combines the zest of lemon, the richness of smoked salmon, and the delicate touch of fresh herbs. Perfect for a Sunday brunch or a special family gathering, this recipe is a delightful way to enjoy a gourmet meal at home.

---


A Sunday Tradition: Smoked Salmon Eggs Benedict with Lemon Dill Hollandaise


There’s something inherently comforting about Sunday brunches. Growing up, Sundays were reserved for family gatherings at my grandparents’ house. The aroma of freshly brewed coffee mingled with the scent of a hearty breakfast spread, creating an atmosphere of warmth and love. Among the dishes that graced the table, one stood out for its elegance and rich flavors: Smoked Salmon Eggs Benedict with Lemon Dill Hollandaise.


This dish was my grandmother’s specialty, and she treated it with the reverence it deserved. Every element was carefully crafted, from the perfectly poached eggs to the luscious, velvety hollandaise sauce infused with lemon and dill. As a child, I watched in awe as she skillfully whisked the egg yolks over simmering water, her movements precise and practiced. The kitchen was her domain, and I was her eager apprentice, absorbing her culinary wisdom with every dish.


Ingredients:


- Baby arugula


- Baby spinach


- Butter


- Egg yolks


- Eggs


- Fresh or dried dill


- Lemon


- Multigrain bread


- Salt and pepper


- Smoked salmon


- Water


- Worcestershire sauce


Instructions:


1. Make the Lemon Dill Hollandaise:

- Fill a medium saucepan halfway with water, bringing it to a gentle simmer over medium heat.


- In a heatproof bowl, combine egg yolks and water. Season with a pinch of dill (if using dried), salt, and pepper.


- Whisk the ingredients together and place the bowl on top of the saucepan, ensuring it doesn’t touch the water directly.


- Stir the egg mixture continuously for about 5 minutes, until it begins to thicken. Be cautious not to scramble the eggs.


- Once thickened, remove the bowl from the heat and set aside.


2. Poach the Eggs:

- Fill another medium saucepan with water, adding a splash of white vinegar (optional) to help keep the egg whites intact.


- Bring the water to a gentle simmer, with tiny bubbles but not boiling.


- Carefully add eggs to the water and poach until they reach your desired doneness.


3. Assemble the Dish:

- Toast slices of multigrain bread and place them on serving plates.


- Top each slice with a layer of baby arugula, spinach, and slices of smoked salmon.


- Place the poached eggs on top of the salmon.


- Generously spoon the lemon dill hollandaise over the eggs.


- Garnish with fresh dill, a sprinkle of salt, and freshly cracked black pepper.


---


A Taste of Nostalgia


Every bite of this dish transports me back to my grandmother’s kitchen, where love was the secret ingredient in every meal. The tangy hollandaise, the smoky salmon, and the tender poached eggs all meld together, creating a symphony of flavors that capture the essence of those cherished Sundays.


Rating and Classification


Difficulty Rating: 6/10
Classification: Main Dish

This Smoked Salmon Eggs Benedict with Lemon Dill Hollandaise is not just a meal; it’s a celebration of family, tradition, and the joy of cooking. Whether you're carrying forward a family tradition or starting your own, this dish is sure to become a beloved favorite. Enjoy it with those you love, and create new memories with every delicious bite.

Read more about Appetizers

Read more about Main Dishes

Read more about Desserts

Cheese and Leek Strata | Made by Meaghan Moineau

Cheese and Leek Strata | Made by Meaghan Moineau

Savory Nostalgia: The Comforting Layers of Cheese and Leek Strata


Description


Dive into the delectable layers of our Cheese and Leek Strata, a dish that combines the humble charm of sourdough bread with the rich flavors of cheddar and Swiss cheese, all brought together by the subtle sweetness of leeks and the vibrant color of red bell peppers. This delightful recipe is perfect for a cozy brunch or a satisfying family dinner. With a hint of porter adding an unexpected depth, this strata promises to tantalize your taste buds and bring a touch of nostalgia to your dining table.


Ingredients


- 6 large eggs


- 2 cups milk


- 1/2 cup porter beer


- 1 garlic clove, minced


- Salt and pepper to taste


- 8 cups cubed sourdough bread


- 1 leek, cleaned and sliced


- 1 red bell pepper, diced


- 1 cup shredded cheddar cheese


- 1 cup shredded Swiss cheese


Instructions


1. Prepare the Oven: Preheat your oven to 350 degrees F (175 degrees C).
2. Mix the Egg Mixture: In a large bowl, combine eggs, milk, porter beer, minced garlic, salt, and pepper. Beat well until the mixture is thoroughly blended.
3. Layer the Ingredients:

- Place half of the bread cubes at the bottom of a greased 2.5-quart round baking dish.


- Sprinkle half of the sliced leeks and diced red bell pepper over the bread cubes.


- Top with half of the Swiss cheese and half of the cheddar cheese.


- Repeat the layers with the remaining ingredients, finishing with a generous layer of cheddar cheese on top.


4. Add the Egg Mixture: Pour the egg mixture evenly over the layered ingredients in the baking dish.
5. Refrigerate: Cover the dish tightly with foil or plastic wrap. Weigh the top of the strata down with a slightly smaller baking dish to compress the layers. Refrigerate for at least 2 hours, or ideally, overnight to allow the flavors to meld.
6. Bake: Remove the cover and bake the strata, uncovered, for 40 minutes or until the center is set and the top is golden brown.
7. Serve: Let it cool for a few minutes before serving warm.

A Slice of Memory


Every bite of this Cheese and Leek Strata takes me back to Sunday brunch at my grandmother's house. The kitchen would be filled with the aroma of baking bread and melting cheese, a scent that promised warmth and comfort. As children, my siblings and I would eagerly gather around the table, watching as my grandmother sliced into the perfectly golden crust, revealing the gooey layers within. It wasn't just a meal; it was a tradition, a time for family stories and laughter, all centered around this delicious dish. Even now, as I recreate this recipe in my own kitchen, I am reminded of those cherished Sundays and the love that went into every strata my grandmother made.


Difficulty


Rating: 4/10
Classification: Main Dish

This Cheese and Leek Strata is a straightforward yet rewarding dish that requires minimal preparation and rewards with maximum flavor. Ideal for feeding a crowd with ease or indulging in a weeknight treat, it's a dish that invites both novice and seasoned cooks to enjoy the art of layering flavors.

Read more about Appetizers

Read more about Main Dishes

Read more about Desserts

Baked Eggs With Asparagus and Sun Dried Tomatoes | Made by Meaghan Moineau

Baked Eggs With Asparagus and Sun Dried Tomatoes | Made by Meaghan Moineau

Title: "A Taste of Spring: Baked Eggs with Asparagus and Sun-Dried Tomatoes"
Description: Dive into the delightful world of baked eggs with this savory recipe featuring asparagus, sun-dried tomatoes, and parmesan cheese. Perfect as a brunch centerpiece or a light main dish, this recipe is a mouthwatering blend of flavors and textures. Join me as I share not only the step-by-step guide to creating this dish but also a cherished family memory tied to its deliciousness.

---


As the first hints of spring began to peek through the frost-covered windows of my grandmother's kitchen, a familiar and comforting aroma would often fill the air. It was the unmistakable scent of her signature baked eggs with asparagus and sun-dried tomatoes—a dish that has graced our family gatherings for generations.


This recipe, with its roots deeply embedded in our family tradition, is an ode to those early spring mornings spent around the breakfast table. The vibrant colors of the asparagus and sun-dried tomatoes mimic the awakening landscape outside, and the dish itself is a celebration of seasonal freshness.


Ingredients:

- 4 whole eggs


- 2 egg whites


- 1 cup steamed asparagus, cut into bite-sized pieces


- 1/4 cup sun-dried tomatoes, chopped


- 1 small onion, finely chopped


- 1 teaspoon dried thyme


- 1/2 cup canned quark


- 1/4 cup shredded parmesan cheese


- 1 cup fresh spinach


- Salt and pepper to taste


- Cooking spray


Instructions:
1. Preheat & Prepare: Preheat your oven to 375°F (190°C). Begin by steaming the asparagus until tender, about 3-4 minutes. Set aside.
2. Mix the Eggs: In a mixing bowl, whip together the whole eggs, egg whites, canned quark, thyme, and a pinch of salt and pepper. The quark adds a creamy texture that elevates the dish to new heights.
3. Sauté the Base: Heat a non-stick skillet over medium heat. Spray with cooking spray and add the chopped onion and sun-dried tomatoes. Sauté for about 4 minutes until the onions turn translucent and fragrant.
4. Assemble the Dish: Lightly spray a small baking dish with cooking spray. Layer the sautéed onion and tomato mixture at the bottom. Pour the egg mixture over them.
5. Top & Bake: Arrange the steamed asparagus and fresh spinach on top of the egg mixture. Sprinkle with shredded parmesan cheese for an added layer of richness. Bake in the preheated oven for 10-15 minutes, or until the eggs are set to your liking.
6. Serve & Enjoy: Once baked to perfection, remove from the oven and let it cool slightly before serving. This dish can be enjoyed warm or at room temperature, making it versatile for any mealtime.
Difficulty Rating: 4/10
Classification: Main Dish

As I prepare this dish today, I am reminded of those cherished mornings with my family. My grandmother would tell stories of how her mother taught her this recipe, using fresh ingredients from their garden. Each forkful is not just a bite of deliciousness but a trip down memory lane, reminding me of the warmth and love of family gatherings.


Whether you're looking to recreate a memory or start a new tradition of your own, this baked eggs recipe is a delightful way to welcome the joys of the spring season into your home. Enjoy every bite, and perhaps, create a new memory to pass down through the generations.

Read more about Appetizers

Read more about Main Dishes

Read more about Desserts