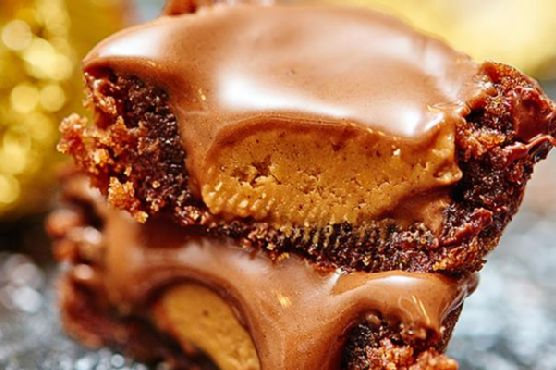
PB Cup Stuffed Brownie Bites
Intro
There’s something undeniably magical about the combination of peanut butter and chocolate. It takes me back to my childhood when I would eagerly unwrap peanut butter cups and savor each bite. Fast forward to today, and I’ve found a way to combine that nostalgic flavor with another favorite treat: brownies. These PB Cup Stuffed Brownie Bites are a delightful blend of rich, fudgy brownie with a surprise peanut butter center. They’re perfect for any occasion, whether it’s a simple family gathering or a festive celebration.
Why You’ll Love It
These brownie bites are a surefire hit for several reasons:
- Easy to Make: No complicated steps or fancy equipment required. Just mix, bake, and enjoy!
- Irresistibly Delicious: The combination of gooey brownie and creamy peanut butter is simply irresistible.
- Perfectly Portable: These bites are ideal for parties, picnics, or any time you need a sweet treat on the go.
- Kid-Friendly: Little hands will love helping to push the peanut butter cups into the brownies!
Ingredients
- 1 cup granulated sugar
- 3/4 cup all-purpose flour
- 2 large eggs
- 1/2 teaspoon salt
- 1/2 cup vegetable oil
- 1 teaspoon vanilla extract
- 1/3 cup unsweetened cocoa powder
- 1/2 cup sweet semi chocolate chips
- 12 Reese’s peanut butter cups
Instructions
- Preheat your oven to 350°F (175°C) and prepare a mini muffin pan with cooking spray.
- In a medium-sized bowl, whisk together the granulated sugar, flour, eggs, salt, vegetable oil, vanilla extract, and cocoa powder until well combined.
- Gently stir in the semi sweet chocolate chips, being careful not to over mix the batter.
- Scoop the batter into the prepared mini muffin pan, filling each slot about ¾ of the way full to allow room for rising.
- Bake in the preheated oven for 8-10 minutes, or until a toothpick inserted into the center comes out almost clean. It’s okay if they’re slightly underdone.
- Once the brownies are done, immediately press a peanut butter cup into the center of each brownie bite.
- Let the brownies set in the pan for a couple of minutes before removing them to cool completely on a wire rack.
Tips
- Ensure the brownie bites are slightly underdone before adding the peanut butter cups for a gooey center.
- Use a small cookie scoop to evenly distribute the batter into the muffin pan.
- Allow the brownies to cool completely before storing them to maintain their texture.
Variations & Substitutions
If you want to switch things up a bit, here are some ideas:
- Nut Butter Cups: Try using almond or cashew butter cups for a different flavor profile.
- Gluten-Free: Substitute the all-purpose flour with a 1:1 gluten-free flour blend.
- Dark Chocolate: Replace semi sweet chocolate chips with dark chocolate chips for a richer taste.
Storage
Store these delightful bites in an airtight container at room temperature for up to 3 days. For longer storage, you can refrigerate them for up to a week or freeze them for up to 3 months. Just ensure they are completely cooled before storing to prevent condensation.
FAQ
Can I make these brownie bites ahead of time?
Absolutely! These brownie bites can be made a day in advance and stored in an airtight container. They’re a great option for preparing ahead of time for parties or gatherings.
What if I don’t have a mini muffin pan?
If you don’t have a mini muffin pan, a regular muffin pan will work, though you may need to adjust the baking time. Check the brownies for doneness with a toothpick until it comes out almost clean.
Can I use a different type of chocolate chip?
Yes, you can use milk chocolate or even white chocolate chips if you prefer. Each type will add a unique flavor to the brownie bites.
Nutrition
Please note that nutritional information can vary based on the brands and quantities of ingredients used. Here’s a general idea per brownie bite:
- Calories: 150
- Carbohydrates: 18g
- Protein: 2g
- Fat: 8g
- Sugar: 12g
Conclusion
PB Cup Stuffed Brownie Bites are a deliciously indulgent treat that combines the best of both worlds—rich chocolate and creamy peanut butter. They’re easy to make, delightful to share, and sure to become a favorite in your dessert repertoire. Whether you’re baking for a special occasion or just to satisfy a sweet craving, these brownie bites are a perfect choice. Give them a try and watch them disappear in no time!
Related update: PB Cup Stuffed Brownie Bites