Watercress Salad With Miso-Lime Dressing | Made by Meaghan Moineau

Watercress Salad With Miso-Lime Dressing

Intro

There’s something about the crisp, refreshing bite of a fresh salad that can transport you to a summer day, no matter what the season. This Watercress Salad with Miso-Lime Dressing is not just a dish; it’s a journey back to the lush gardens of my childhood. I fondly remember visiting my grandmother’s garden every summer. Her garden was abundant with vibrant greens, each leaf kissed by the sun. Among the rows of vegetables and herbs, watercress was always my favorite. The spicy, peppery leaves were irresistible, and I would often sneak a handful to munch on while she wasn’t looking. It’s no surprise that watercress remains a beloved ingredient in my kitchen. This recipe is inspired by those summers, combining the freshness of garden greens with a tangy miso-lime dressing that brings everything together in a perfect harmony of flavors.

Why You’ll Love It

This salad is a celebration of flavor and texture. It’s not just a salad; it’s an experience. Here’s why you’ll fall in love with it:

  • Fresh and Nutritious: Packed with vibrant greens and crunchy vegetables, this salad is a powerhouse of nutrients.
  • Easy to Make: With simple steps and readily available ingredients, you can whip this salad up in no time.
  • Flavorful Dressing: The Miso-Lime Dressing is the star, offering a perfect balance of tangy, sweet, and savory flavors.
  • Versatile: Great as a side dish or a light meal, and easily customizable to suit different tastes and dietary needs.

Ingredients

  • Fresh sprouts
  • Fresh mung bean sprouts
  • Entire green onions, sliced
  • Grape tomatoes, halved
  • Diced orange bell pepper
  • Cilantro, chopped
  • Sesame seeds
  • Watercress leaves
  • Miso-lime dressing (recipe follows)
  • Fresh squeezed lime juice
  • Sesame oil
  • White miso

Instructions

  1. In a large bowl, toss together the fresh sprouts, mung bean sprouts, sliced green onions, grape tomatoes, diced orange bell pepper, chopped cilantro, and sesame seeds.
  2. In a small bowl, whisk together the fresh squeezed lime juice, sesame oil, and white miso to create your Miso-Lime Dressing.
  3. Pour the dressing over the mixed sprouts and vegetables in the large bowl. Toss until everything is evenly coated.
  4. Divide the watercress leaves evenly among four plates, creating a bed for the salad.
  5. Top each plate with the mixed sprout salad, evenly distributing the Miso-Lime Dressing among them.
  6. Serve immediately and enjoy the delicious flavors!

Tips

  • Choose Fresh Ingredients: Fresh, high-quality ingredients make all the difference. Look for crisp, vibrant watercress and sprouts for the best flavor and texture.
  • Miso-Lime Dressing Consistency: Adjust the dressing’s consistency by adding a little water if it’s too thick or more lime juice for extra tang.
  • Toast the Sesame Seeds: For an added depth of flavor, lightly toast the sesame seeds before adding them to the salad.

Variations & Substitutions

Feel free to make this salad your own by experimenting with different ingredients and flavors:

  • Protein Boost: Add grilled chicken, shrimp, or tofu for a more filling meal.
  • Nutty Flavor: Swap sesame seeds for toasted almonds or pine nuts for a different crunch.
  • Spicy Kick: Add a dash of chili flakes or sliced jalapeños for some heat.
  • Other Greens: If watercress is unavailable, arugula or baby spinach make excellent substitutes.

Storage

This salad is best enjoyed fresh, but if you have leftovers, store them in an airtight container in the refrigerator for up to two days. Keep the dressing separate if you plan to store the salad for later, to prevent the greens from wilting.

FAQ

Can I make the dressing ahead of time?

Absolutely! The Miso-Lime Dressing can be made in advance and stored in the fridge for up to a week. Just give it a good shake or stir before using.

Is this salad vegan-friendly?

Yes, this salad is naturally vegan. Just ensure that all your ingredients, especially the miso, are vegan-certified if you follow a strict vegan diet.

Can I use another type of miso?

White miso is recommended for its mild flavor, but if you prefer a stronger taste, yellow or red miso can be used. Keep in mind that they will affect the overall flavor of the dressing.

Nutrition

This refreshing salad is not only delicious but also packed with nutrients. Watercress is a superfood rich in vitamins A, C, and K, while the sprouts provide a good source of protein and fiber. The Miso-Lime Dressing adds a healthy dose of probiotics thanks to the fermented miso, making this dish both tasty and nourishing.

Conclusion

Whether you’re looking to add more greens to your diet or simply searching for a delightful salad to brighten up your meals, this Watercress Salad with Miso-Lime Dressing is a fantastic choice. With its refreshing flavors, easy preparation, and health benefits, it’s a dish that you’ll want to make again and again. I hope this salad brings a bit of the garden’s joy to your table, just as it does to mine. Enjoy every crunchy, flavorful bite!

Related update: Watercress Salad With Miso-Lime Dressing

Related update: Yorkshire Pudding

Related update: Traditional Panzanella

Valentine Hearts | Made by Meaghan Moineau

Valentine Hearts: A Sweet Treat for Your Loved Ones

Intro

Valentine’s Day has always held a special place in my heart. I remember the first time I tried these delightful Valentine Hearts was when I was visiting my grandmother. She had a knack for turning simple ingredients into something extraordinary. As she pulled these puff pastry hearts out of the oven, the warm aroma filled her cozy kitchen. We sat together, enjoying each bite, savoring the sweet and slightly tangy taste of strawberries mingling with creamy crème fraiche and rich chocolate. Now, I make these every year, sharing the love and nostalgia with my family and friends.

Why You’ll Love It

These Valentine Hearts are a perfect blend of simplicity and elegance. Whether you’re an experienced baker or a novice in the kitchen, you’ll find this recipe easy to follow and incredibly rewarding. Here’s why you’ll love making and sharing these with your loved ones:

  • Quick and Easy: With minimal preparation time, you can whip up a batch of these delightful treats in no time.
  • Deliciously Decadent: The combination of flaky pastry, sweet strawberries, creamy crème fraiche, and rich chocolate is nothing short of divine.
  • Visually Stunning: These heart-shaped pastries are not only tasty but also a feast for the eyes, making them perfect for special occasions.
  • Customizable: You can easily adjust the filling to suit your taste or dietary needs.

Ingredients

  • Puff pastry
  • 1 egg for glazing
  • Castor sugar
  • Canned crème fraiche
  • Fresh strawberries
  • Plain chocolate

Instructions

  1. Preheat your oven to 220 degrees C (425 degrees F).
  2. Thaw the puff pastry sheet according to the instructions on the box.
  3. Unroll the pastry sheet and use a heart-shaped cookie cutter to cut out approximately 8 hearts. I find a medium-sized cutter works best.
  4. Prick each heart with a fork to prevent it from puffing up too much.
  5. Brush the hearts with beaten egg and sprinkle lightly with castor sugar.
  6. Place the hearts on a greased baking sheet and bake in the preheated oven for about 10 minutes or until they are risen and golden brown.
  7. Allow the hearts to cool completely on a wire rack.
  8. Once cooled, slice fresh strawberries and split each pastry heart horizontally with a sharp knife.
  9. Sandwich the halves together with crème fraiche and sliced strawberries.
  10. Drizzle melted plain chocolate over the top and dust with a little more castor sugar before serving.

Tips

Here are some tips to ensure your Valentine Hearts turn out perfectly:

  • Keep the Pastry Cold: For the best texture, make sure your puff pastry is cold when you work with it. If it gets too warm, pop it back in the fridge for a few minutes.
  • Even Baking: Rotate your baking sheet halfway through baking to ensure even browning.
  • Sharp Knife: Use a sharp knife to slice the hearts horizontally for a clean cut.

Variations & Substitutions

If you want to put your own twist on these Valentine Hearts, here are some ideas:

  • Fruit Variations: Try using raspberries or blueberries instead of strawberries for a different flavor profile.
  • Chocolate Substitution: White chocolate or milk chocolate can be used in place of plain chocolate for a sweeter option.
  • Dairy-Free Option: Substitute crème fraiche with a dairy-free cream alternative to make these suitable for lactose-intolerant guests.

Storage

These Valentine Hearts are best enjoyed fresh, but if you need to store them, here’s how:

  • Refrigeration: Store any leftovers in an airtight container in the fridge for up to 2 days. The pastry may lose some of its crispness, but they’ll still taste delicious.
  • Freezing: You can freeze the baked hearts without filling. Once completely cool, place them in a freezer-safe bag or container. When you’re ready to serve, thaw them at room temperature and then fill as directed.

FAQ

Can I make Valentine Hearts ahead of time?

Yes, you can prepare the pastry hearts a day in advance and store them in an airtight container once they’re completely cool. Fill them with crème fraiche and strawberries just before serving for the best texture and flavor.

What can I use instead of crème fraiche?

If you can’t find crème fraiche, you can substitute it with whipped cream, mascarpone cheese, or even Greek yogurt for a tangier twist.

Nutrition

While I don’t have exact nutritional information for this recipe, it’s worth noting that these Valentine Hearts are a treat to be enjoyed in moderation. The puff pastry and chocolate contribute to the calorie count, while the strawberries add a dose of vitamins and antioxidants.

Conclusion

Valentine Hearts are more than just a dessert; they’re a token of love and a nostalgic nod to cherished memories. Whether you’re sharing them with a loved one or treating yourself, each bite is a reminder of the joy and warmth that comes from creating something special. I hope this recipe brings as much happiness to your home as it has to mine. Happy baking, and Happy Valentine’s Day!

Related update: Valentine Hearts

Related update: Croissants With Sesame Seeds (Kifli)

Agedashi Tofu | Made by Meaghan Moineau

Agedashi Tofu: A Crispy Delight with a Silken Heart

Intro

There’s something magically comforting about a perfectly prepared dish of Agedashi Tofu. I remember the first time I encountered this delightful appetizer at a cozy Japanese restaurant tucked away in a busy Tokyo street. The warmth of the tofu, crisp on the outside and soft within, felt like a welcoming embrace. As the waiter set down the plate, the steam rose into the air, carrying the tantalizing aroma of fried goodness mixed with a hint of the savory hoisin sauce. That experience is forever etched in my memory as a moment of pure culinary joy. Today, I’m excited to share with you a simple yet authentic recipe for Agedashi Tofu, allowing you to recreate this beautiful dish in your own kitchen.

Why You’ll Love It

Agedashi Tofu is a dish that truly delights the senses. Its crispy exterior gives way to a soft, creamy interior, creating a contrast that’s both exciting and comforting. The sprinkle of fresh green onions adds a burst of color and a fresh, zesty flavor that complements the rich hoisin sauce perfectly. This recipe is straightforward and quick to prepare, making it an excellent choice for both weekday dinners and special occasions. Whether you’re a seasoned tofu lover or new to this versatile ingredient, this dish is sure to win you over.

Ingredients

  • 1 block silken tofu
  • Cornstarch, for dredging
  • Oil, for frying
  • 2 green onions, finely chopped
  • Hoisin sauce, for drizzling

Instructions

  1. Cut the tofu into 12 equal-sized cubes, handling gently to avoid breaking.
  2. Place the cornstarch on a plate or in a shallow bowl. Dredge each tofu cube in the cornstarch, ensuring all sides are coated thoroughly.
  3. In a medium-sized frying pan, heat enough oil so that the tofu cubes will be half-submerged when placed in the pan. The oil should be hot but not smoking.
  4. Fry the tofu cubes in the hot oil for 3 to 5 minutes on each side, or until they are golden brown and crispy. Avoid overcrowding the pan to ensure even frying.
  5. Once fried, remove the tofu cubes and let them drain on paper towels to remove excess oil.
  6. Place the tofu cubes on a serving dish. Sprinkle the chopped green onions over the top and drizzle with hoisin sauce.
  7. Serve immediately while the tofu is still warm and crispy.

Tips

For the best results, use silken tofu, which provides a creamy texture that contrasts beautifully with the crispy exterior. Be gentle when handling the tofu to keep it from breaking apart. Ensure your oil is hot enough to achieve that perfect crispiness without absorbing too much oil. A quick test is to drop a small piece of tofu into the oil; if it sizzles and rises to the surface, the oil is ready.

Variations & Substitutions

If you’re looking to add a twist to this classic dish, consider these variations:

  • Spicy Kick: Add a dash of chili oil or sprinkle some red pepper flakes on the tofu for a spicy version.
  • Gluten-Free: Substitute the hoisin sauce with a gluten-free alternative or tamari sauce.
  • Extra Flavor: Add a splash of soy sauce or ponzu to the hoisin for additional depth of flavor.

Storage

Agedashi Tofu is best enjoyed fresh for maximum crispiness. However, if you have leftovers, store them in an airtight container in the refrigerator for up to two days. Reheat in a hot pan with a little oil to restore some of the crispiness before serving. Avoid microwaving as it can make the tofu soggy.

FAQ

Can I use firm tofu instead of silken tofu?

While the recipe traditionally uses silken tofu for its creamy texture, you can use firm tofu if you prefer a slightly denser texture. The cooking method remains the same, but you might find the firm tofu easier to handle without breaking.

What oil is best for frying tofu?

Use a neutral oil with a high smoke point, such as vegetable oil, canola oil, or peanut oil. These oils will ensure your tofu crisps up nicely without imparting any unwanted flavors.

Is hoisin sauce necessary, or can I use something else?

Hoisin sauce adds a sweet and savory flavor that complements the tofu well. However, if you prefer a different taste, you can use soy sauce, teriyaki sauce, or even a splash of your favorite dipping sauce to customize the dish to your liking.

Nutrition

This delightful dish is not only tasty but also relatively low in calories, especially when compared to other fried foods. Tofu is a great source of protein and contains essential amino acids. It also provides iron, calcium, and other important minerals, making it a nutritious choice for vegetarians and meat-eaters alike. The key to keeping this dish healthy is to enjoy it in moderation and to thoroughly drain the tofu after frying to remove excess oil.

Conclusion

Agedashi Tofu is a beloved dish in Japanese cuisine, celebrated for its textural contrast and simple yet satisfying flavors. By following this recipe, you can bring a taste of Japan into your home and share a dish that’s sure to become a favorite at your dining table. Whether you’re reminiscing about a past trip or creating new memories with loved ones, this Agedashi Tofu recipe is a warm, inviting choice that promises to delight with every crispy bite. Enjoy!

Related update: Agedashi Tofu

Quick N’ Easy Basil Pesto | Made by Meaghan Moineau

Quick N’ Easy Basil Pesto

Intro

There’s something truly magical about the aroma of fresh basil wafting through the kitchen. It takes me back to my childhood, sitting at my grandmother’s kitchen table, eagerly watching as she crafted her signature pesto. The vibrant green of the basil, the nutty aroma of the pine nuts, and the sharp, tangy scent of freshly grated parmesan — these are the sensory memories that have stayed with me. Today, I want to share a simplified version of her recipe that retains all the charm and flavor of the traditional dish, while being quick and easy enough for anyone to make. Whether you’re a seasoned cook or a kitchen novice, this Quick N’ Easy Basil Pesto is sure to become a favorite in your home, just as it has in mine.

Why You’ll Love It

Our Quick N’ Easy Basil Pesto is a delightful blend of fresh ingredients that can elevate any meal. Here are just a few reasons why you’ll fall in love with this recipe:

  • Simple and Fast: With just a handful of ingredients and a few minutes, you can whip up a batch of homemade pesto.
  • Versatile: Use it as a pasta sauce, a sandwich spread, or a topping for grilled meats and veggies.
  • Rich in Flavor: Each bite delivers a burst of fresh, nutty, and cheesy goodness.
  • Customizable: Easily tweak the ingredients to suit your taste or dietary needs.

Ingredients

  • 2 cups fresh basil leaves, packed
  • 1/2 cup olive oil, plus more if needed
  • 1/3 cup pine nuts
  • 2 cloves garlic
  • 1/2 cup freshly grated parmesan cheese

Instructions

  1. Begin by washing and drying the basil leaves thoroughly.
  2. In a food processor, add the basil leaves, pine nuts, and garlic. Pulse a few times until coarsely chopped.
  3. With the processor running, slowly drizzle in the olive oil until the mixture is smooth and creamy.
  4. Add the parmesan cheese and pulse until well combined. Check the consistency; if it’s too thick, gradually add more olive oil until you achieve the desired texture.
  5. Taste and adjust seasoning if necessary. Remember, fresh pesto is best enjoyed within 24 hours.
  6. For longer storage, scoop the pesto into muffin cups lined with plastic wrap and freeze for future use.

Tips

To ensure your pesto is perfect every time, consider these tips:

  • Quality Ingredients: Use the freshest basil and highest quality olive oil you can find for the best flavor.
  • Toasting Nuts: Lightly toasting the pine nuts before adding them to the processor enhances their flavor.
  • Consistent Texture: Add olive oil slowly to control the texture of your pesto. You can always add more, but you can’t take it out!

Variations & Substitutions

One of the joys of making pesto is its flexibility. Here are some ideas to switch things up:

  • Nut Alternatives: Swap pine nuts for walnuts, almonds, or even sunflower seeds for a different flavor profile.
  • Cheese Options: Try Pecorino Romano or a vegan parmesan for a unique twist.
  • Herbal Variations: Substitute part of the basil with spinach, arugula, or parsley for a diverse taste.

Storage

Fresh pesto is best enjoyed within 24 hours for optimal flavor. If you need to store it longer, here are some options:

  • Refrigeration: Keep it in an airtight container with a thin layer of olive oil on top to prevent browning. It should last for up to a week.
  • Freezing: Freeze in muffin cups lined with plastic wrap for individual portions. Once frozen, transfer them to a zip-lock bag. They can last in the freezer for up to three months.

FAQ

Can I make pesto without a food processor?

Absolutely! If you don’t have a food processor, a blender can work as an alternative. You can also use a mortar and pestle for a more traditional approach, though it will take more time and effort.

Is there a way to make this recipe vegan?

Yes, you can make a vegan version by substituting the parmesan cheese with nutritional yeast or a vegan cheese alternative. This will still give you that cheesy flavor without using dairy.

Nutrition

This recipe is nutrient-dense, providing healthy fats from the olive oil and pine nuts, vitamins from the basil, and protein from the cheese. It’s a great choice for those looking to add more wholesome ingredients to their diet without sacrificing flavor.

Conclusion

Making your own basil pesto is a rewarding experience, connecting you to the vibrant flavors of fresh ingredients and the timeless traditions of Italian cooking. Whether you’re using it to dress up a pasta dish, spread on a sandwich, or as a dip, this Quick N’ Easy Basil Pesto is sure to become a staple in your culinary repertoire. So why not gather your ingredients, and embark on a delicious journey of flavor and nostalgia, just like the one I enjoyed with my grandmother so many years ago.

Related update: Quick N' Easy Basil Pesto

Blackberry Balsamic Drumsticks | Made by Meaghan Moineau

Blackberry Balsamic Drumsticks

Intro

There’s something magical about the combination of sweet and savory that brings back memories of family gatherings and warm summer nights. Growing up, Sundays were reserved for family dinners at my grandmother’s house. She was a culinary wizard who could transform any simple ingredient into a feast fit for royalty. Her secret? A garden brimming with fresh produce and an innate sense for pairing unusual flavors. One summer evening, she introduced us to a dish that would become a family favorite: Blackberry Balsamic Drumsticks. These succulent pieces of chicken, infused with the essence of ripe blackberries and aromatic balsamic vinegar, were a revelation. It’s a dish that not only tantalizes your taste buds but also carries the warmth of those cherished family moments. Today, I’m excited to share this special recipe with you, hoping it brings as much joy to your table as it has to mine.

Why You’ll Love It

Blackberry Balsamic Drumsticks are a delightful blend of sweet, tangy, and savory flavors that will have your taste buds dancing with joy. The unique combination of fresh blackberries and balsamic vinegar creates a mouthwatering glaze that elevates ordinary chicken drumsticks to a gourmet level. Not only is this dish incredibly tasty, but it’s also easy to prepare, making it perfect for both weeknight dinners and special occasions. The marinade, enriched with rosemary and mustard, infuses the chicken with a depth of flavor that is both comforting and sophisticated. Plus, who doesn’t love a dish that can be prepped in advance and left to marinate while you enjoy your day?

Ingredients

  • 8 skin-on chicken drumsticks
  • 1 cup fresh blackberries
  • 1/4 cup balsamic vinegar
  • 1/4 cup demerara sugar
  • 1 tablespoon fresh rosemary, chopped
  • 2 tablespoons butter
  • 2 tablespoons whole grain mustard
  • Salt and pepper to taste

Instructions

  1. Place blackberries, butter, 1/4 cup water, rosemary, sugar, and vinegar in a small saucepan.
  2. Cook over medium-high heat, stirring occasionally, until the mixture is slightly reduced, about 10-15 minutes.
  3. Remove from heat and stir in mustard, salt, and pepper. Allow the marinade to cool.
  4. Place the drumsticks in a large ziplock bag. Pour the cooled marinade over the top and seal the bag.
  5. Toss to coat the drumsticks evenly with the marinade.
  6. Refrigerate and marinate for 24 hours, allowing the flavors to infuse.
  7. When ready to cook, preheat the oven to 375°F (190°C).
  8. Arrange drumsticks on a cookie sheet lined with tin foil.
  9. Bake for 25 minutes, turning once halfway through the cooking time.
  10. Serve hot with your preferred side dish.

Tips

For the best results, use fresh blackberries when in season. They impart a natural sweetness and vibrant color to the dish. If fresh rosemary isn’t available, dried rosemary can be used, but use only half the amount as dried herbs are more potent. When cooking the marinade, keep an eye on it to prevent it from reducing too much, as it should remain syrupy and flavorful.

Variations & Substitutions

If you’re looking to switch things up, consider these variations:
Spicy Kick: Add a pinch of red pepper flakes to the marinade for a spicy twist.
Herbal Infusion: Substitute thyme or sage for rosemary for a different herbal note.
Sweetness Swap: Honey or maple syrup can be used in place of demerara sugar for a different sweetness profile.
Chicken Cuts: If drumsticks aren’t your preference, this marinade works wonderfully with chicken thighs or wings as well.

Storage

Leftover drumsticks can be stored in an airtight container in the refrigerator for up to 3 days. To reheat, place them in an ovenproof dish and warm at 350°F (175°C) until heated through. For a quick option, you can also microwave them on medium power. The flavors deepen over time, making leftovers equally enjoyable.

FAQ

Can I use frozen blackberries?

Yes, frozen blackberries can be used if fresh ones are unavailable. Ensure they are fully thawed and drained before adding to the marinade to avoid excess liquid.

Is it necessary to marinate the drumsticks for 24 hours?

While marinating for 24 hours yields the best flavor, if you’re short on time, even a few hours will still impart a delicious taste. Aim for at least 4 hours if possible.

Can I grill the drumsticks instead of baking them?

Absolutely! Grilling adds a smoky flavor that complements the sweet and tangy glaze. Grill the drumsticks over medium heat, turning frequently, until cooked through.

Nutrition

While exact nutritional values can vary based on portion size and specific brands of ingredients used, each serving of Blackberry Balsamic Drumsticks is approximately 250 calories. This includes a good amount of protein and some natural sugars from the blackberries and demerara sugar.

Conclusion

Blackberry Balsamic Drumsticks are more than just a meal; they’re a culinary experience that combines the richness of tradition with the excitement of bold flavors. Whether you’re gathering with family or hosting friends, this dish is sure to impress and become a staple in your recipe repertoire. Give it a try, and let the flavors transport you to a place of comfort, warmth, and delightful nostalgia. Happy cooking!

Related update: Blackberry Balsamic Drumsticks

Related update: chettinad egg curry

Minted Pea & Spinach Soup | Made by Meaghan Moineau

Minted Pea & Spinach Soup

Intro

As the days grow shorter and the air turns crisp, there’s nothing quite like a warm bowl of soup to bring comfort and warmth to your soul. Growing up, I fondly remember my grandmother’s kitchen, where the scent of fresh herbs and simmering vegetables filled the air. Her minted pea soup was a family favorite, and every spoonful felt like a warm hug. Today, I’m excited to share my own version of this nostalgic dish, with a delightful twist of spinach for added nutrition and flavor. It’s a simple, yet satisfying recipe that I’m sure will become a staple in your kitchen as well.

Why You’ll Love It

This Minted Pea & Spinach Soup is a delightful fusion of flavors that is both refreshing and comforting. Here are a few reasons why you’ll fall in love with this recipe:

  • Quick and Easy: With just a few simple steps, you’ll have a delicious soup ready in no time.
  • Nutritious: Packed with vitamins and minerals from peas and spinach, this soup is as healthy as it is tasty.
  • Versatile: Perfect as a starter or a light meal, and easy to customize to your taste.
  • Comfort in a Bowl: The creamy texture and soothing flavors make this soup the ultimate comfort food.

Ingredients

  • 2 cups chicken stock
  • 1/2 cup cream
  • 1 teaspoon canned dried mint
  • 1 cup milk
  • 2 cups frozen peas
  • 2 diced potatoes
  • Salt & pepper to taste
  • 2 cups fresh spinach
  • 1 teaspoon sugar
  • 1 cup water
  • 1/2 cup yoghurt

Instructions

  1. Place the diced potatoes in a medium-sized pot with a little bit of water and some salt & pepper. Place the lid on and cook for 20 minutes until almost soft.
  2. Add the frozen peas and cook for a further 5 minutes until the potatoes are soft and cooked through.
  3. Add the fresh spinach and cook for an additional 3-5 minutes, until wilted.
  4. Remove the pot from heat and let it cool for a few minutes. Then, blend to a puree with an immersion blender.
  5. Return the pot to the stovetop, adding the cream, milk, water, and chicken stock. Re-heat for a few minutes until piping-hot.
  6. Add the yoghurt, dried mint, sugar, salt, and pepper to taste and stir through.
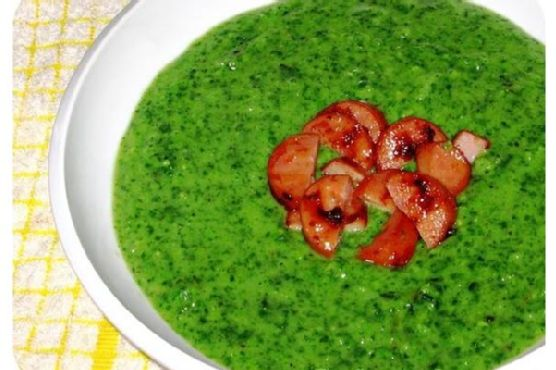
  7. Serve immediately, scattered with some crispy croutons or bacon bits. For a unique twist, fry up some cheesegrillers in thin slices with a bit of sweet chili sauce and use as a topper.

Tips

  • For a smoother texture, strain the soup through a fine mesh sieve after blending.
  • Adjust the seasoning to your preference, adding more mint or sugar for a balanced flavor.
  • Garnish with fresh mint leaves for a pop of color and added freshness.

Variations & Substitutions

This soup recipe is highly adaptable. Here are some variations and substitutions you can try:

  • Vegetarian Version: Substitute the chicken stock with vegetable stock for a vegetarian-friendly option.
  • Dairy-Free: Use coconut milk or almond milk instead of cream and milk for a dairy-free alternative.
  • Add Protein: Stir in some cooked chicken or tofu for added protein and texture.

Storage

This soup stores beautifully, making it perfect for meal prep:

  • Refrigerator: Store in an airtight container in the refrigerator for up to 3 days.
  • Freezer: Freeze in individual portions for up to 3 months. Thaw overnight in the refrigerator before reheating.

FAQ

Can I use fresh peas instead of frozen?

Yes, you can use fresh peas if they are in season. Simply adjust the cooking time to ensure they are tender before blending.

Is it necessary to use an immersion blender?

An immersion blender is convenient for making a smooth puree directly in the pot. However, if you don’t have one, you can carefully transfer the soup to a countertop blender and blend in batches.

Can I make this soup ahead of time?

Absolutely! This soup can be made a day in advance and stored in the refrigerator. Reheat gently on the stovetop before serving.

Nutrition

This soup is not only delicious but also packed with nutrients:

  • Calories: Approximately 180 per serving
  • Protein: 5g
  • Fat: 8g
  • Carbohydrates: 22g
  • Fiber: 4g

Conclusion

Minted Pea & Spinach Soup is a delightful blend of flavors that brings warmth and nourishment to any table. Whether you’re reminiscing about childhood memories or creating new ones, this soup is sure to become a cherished favorite. Enjoy it on a chilly day, share it with loved ones, or savor it in solitude with a good book. No matter how you choose to enjoy it, this soup is a reminder that comfort can be found in the simplest of ingredients. Happy cooking!

Related update: Minted Pea & Spinach Soup

Related update: Spicy Lemongrass Soup

Arame Edamame Cucumber Salad | Made by Meaghan Moineau

Arame Edamame Cucumber Salad

Intro

There’s something truly magical about a dish that can transport you back in time. For me, it’s the Arame Edamame Cucumber Salad. I remember the first time I tasted this salad at a quaint little Japanese restaurant during a family vacation when I was a child. The fresh, crisp cucumbers paired with the nutty edamame and the slightly sweet, earthy taste of arame made a lasting impression. It was a simple dish, yet it encapsulated the essence of that warm summer evening, eating outdoors under paper lanterns with the soft hum of conversation around us. Today, I’ve recreated that nostalgic dish in my own kitchen, and I’m excited to share it with you.

Why You’ll Love It

This Arame Edamame Cucumber Salad is not just a delight for the taste buds; it’s a celebration of textures and flavors. You’ll love the harmony of the soft, chewy arame with the crunchy cucumbers and the creamy edamame. The dressing, a blend of extra virgin olive oil, rice vinegar, sesame oil, and soy sauce, adds a subtle yet complex taste that ties all the components together beautifully. Not only is this salad refreshing and delicious, but it’s also incredibly nutritious, making it a perfect choice for a light lunch or a side dish at dinner.

Ingredients

  • 1 cucumber, finely sliced
  • 1 cup edamame, boiled and shelled
  • 2 tablespoons extra virgin olive oil
  • 2 tablespoons rice vinegar
  • 1 tablespoon sesame oil
  • 1 tablespoon soy sauce
  • 1/4 cup arame
  • 2 cups water (for soaking arame)

Instructions

  1. Add 2 cups of water to the arame and leave it soaking for 5 minutes. After soaking, drain the water thoroughly.
  2. Boil the edamame in salted water for roughly 5 minutes until tender. Drain and set aside.
  3. Finely slice the cucumber. Using a mandolin can help achieve evenly thin slices.
  4. In a small jar, combine the extra virgin olive oil, rice vinegar, sesame oil, and soy sauce. Cover the jar and shake well to mix the dressing.
  5. In a large bowl, combine the soaked arame, boiled edamame, and sliced cucumber. Pour the dressing over the mixture and toss well to ensure all ingredients are evenly coated.

Tips

For the best results, be sure to soak the arame for the full 5 minutes. This rehydrates it and enhances its flavor. When boiling edamame, don’t overcook them; you want them tender but still slightly firm to the bite. If you don’t have a mandolin, carefully slice the cucumber as thinly as possible with a sharp knife to maintain the salad’s texture.

Variations & Substitutions

If you’re looking to switch things up, try adding some toasted sesame seeds on top for an extra nutty flavor. You could also substitute the arame with wakame or hijiki, which are also types of seaweed with slightly different flavors and textures. For a spicy kick, add a dash of chili oil to the dressing. If soy sauce isn’t your thing, tamari makes a great gluten-free alternative.

Storage

This salad is best enjoyed fresh. However, if you have leftovers, store them in an airtight container in the refrigerator for up to two days. Keep in mind that the cucumbers may lose some of their crispness over time, so enjoy the salad sooner rather than later for the best experience.

FAQ

Can I make this salad ahead of time?

Yes, you can prepare the components of the salad ahead of time. Soak the arame, boil the edamame, and slice the cucumbers, but keep them separate until you’re ready to serve. Mix everything together and add the dressing just before serving for maximum freshness.

What can I serve with Arame Edamame Cucumber Salad?

This salad pairs wonderfully with grilled fish, chicken, or tofu. It can also be served alongside a bowl of miso soup for a light and balanced meal.

Is this salad vegan?

Yes, this Arame Edamame Cucumber Salad is completely vegan, making it a great option for plant-based diets.

Nutrition

This salad is not only delicious but also packed full of nutrients. Edamame is a great source of plant-based protein, while arame provides essential minerals such as iodine and calcium. Cucumbers are hydrating and low in calories, making this dish a healthy choice for any meal.

Conclusion

The Arame Edamame Cucumber Salad is a delightful blend of flavors and textures that is sure to become a favorite in your household. Whether it’s the nostalgic memories it invokes or the fresh taste of each ingredient, this salad is a testament to the beauty of simple, wholesome food. I hope you enjoy making and eating this dish as much as I do. Share it with family and friends, and perhaps it will create its own special place in your culinary memories.

Related update: Arame Edamame Cucumber Salad

Related update: Watercress Salad With Miso-Lime Dressing

Blackberry Cobbler | Made by Meaghan Moineau

Blackberry Cobbler: A Timeless Dessert

There’s something magical about the aroma of a blackberry cobbler baking in the oven. It brings back memories of my grandmother’s kitchen, where the warmth of the oven and the sweet, tangy scent of blackberries filled the air. She would always let me help with the mixing, and I remember impatiently waiting for the cobbler to cool just enough to dig in. Today, I’m sharing this cherished recipe that has been passed down through generations, with a few tweaks of my own. I hope it becomes a favorite in your home, just like it is in ours.

Why You’ll Love It

This blackberry cobbler is a crowd-pleaser for several reasons:

  • Simplicity: With just a handful of pantry staples, you can whip up this dessert in no time.
  • Flavor: The combination of sweet and tart blackberries with a buttery, tender crust is irresistible.
  • Versatility: You can enjoy it warm with ice cream or at room temperature for a sweet snack.
  • Nostalgia: It evokes a sense of home and comfort, perfect for family gatherings or a cozy night in.

Ingredients

  • 1 tsp baking powder
  • 2 cups fresh blackberries
  • 1/2 cup butter, melted
  • 1 cup all-purpose flour
  • 1 cup milk
  • 1/4 tsp salt
  • 1 cup sugar

Instructions

  1. Preheat your oven to 375°F (190°C).
  2. In a bowl, combine the blackberries and sugar. Allow them to macerate while you prepare the batter.
  3. In a larger bowl, mix together the flour, baking powder, and salt. Gradually add the milk and stir until smooth.
  4. Stir in the melted butter until the batter is well blended.
  5. Pour the batter into an ungreased baking dish.
  6. Spoon the sugared blackberries evenly over the top of the batter.
  7. Bake in the preheated oven for 45-55 minutes, or until the crust is golden brown and the blackberries are bubbling.
  8. Allow to cool slightly, then serve warm with whipped cream or ice cream for an extra treat.

Tips

  • Use Fresh Berries: Fresh blackberries work best, but if using frozen, thaw and drain them first.
  • Adjust the Sweetness: If you prefer a less sweet dessert, reduce the sugar to 3/4 cup.
  • Watch the Baking Time: Oven temperatures can vary, so start checking the cobbler at 45 minutes.

Variations & Substitutions

If you’re looking to change things up, consider these variations:

  • Mixed Berries: Substitute half of the blackberries with blueberries, raspberries, or strawberries.
  • Gluten-Free: Use a gluten-free flour blend in place of all-purpose flour.
  • Dairy-Free: Replace butter with coconut oil and milk with almond or oat milk.

Storage

Store any leftover cobbler in an airtight container in the refrigerator for up to 3 days. To reheat, warm in a 350°F (175°C) oven for about 10-15 minutes or microwave individual servings for about 30 seconds.

FAQ

Can I make blackberry cobbler ahead of time?

Yes, you can prepare the cobbler a day in advance. Simply bake it, allow it to cool, and store it in the refrigerator. Reheat before serving to enjoy it warm.

What if I don’t have blackberries?

If you don’t have blackberries, feel free to substitute with other berries like blueberries or raspberries. The recipe is quite forgiving and adaptable to different fruits.

Is it necessary to use unsalted butter?

While unsalted butter is recommended to control the saltiness, you can use salted butter. Just reduce the added salt by half to maintain a balanced flavor.

Nutrition

This dessert is a treat, so it’s okay to indulge occasionally. Each serving (based on 8 servings) is roughly estimated to contain:

  • Calories: 280
  • Fat: 12g
  • Carbohydrates: 42g
  • Protein: 3g
  • Sugar: 28g

Conclusion

Blackberry cobbler is more than just a dessert; it’s an experience that brings people together. Whether you’re sharing it at a family gathering or enjoying it on a quiet evening at home, this cobbler is sure to delight. Its simple preparation and delicious flavor make it a must-try recipe. I hope this becomes a staple in your dessert repertoire, bringing as much joy to your table as it does to mine. Enjoy!

Related update: Blackberry Cobbler

Raspberry Thumbprint Wholewheat Scones With Macadamia Nuts | Made by Meaghan Moineau

Raspberry Thumbprint Wholewheat Scones With Macadamia Nuts

Intro

There’s something wonderfully nostalgic about baking. The aroma of freshly baked goods wafting through the house, the warmth of the oven, and the anticipation of tasting that first bite bring back fond memories of baking with my grandmother. She would always let me use my thumb to press little wells into the dough for the jam—a task I took very seriously as a child. Today, I’m thrilled to share a recipe that combines that nostalgic thumbprint technique with a deliciously wholesome twist. These Raspberry Thumbprint Wholewheat Scones with Macadamia Nuts are not only a delightful treat but also a nod to those cherished baking days.

Why You’ll Love It

This recipe is a delightful fusion of textures and flavors. The earthiness of wholewheat flour, the slight crunch from macadamia nuts, and the sweet-tart burst of raspberry jam come together in perfect harmony. These scones are not only delicious but also relatively simple to make, perfect for breakfast or an afternoon snack. Plus, they’re a great way to introduce whole grains into your diet without sacrificing flavor!

Ingredients

  • 1 cup flour
  • 1 cup whole-wheat flour
  • 1/2 cup rolled oats
  • 1/4 cup brown sugar
  • 1 tsp baking powder
  • 1/2 tsp baking soda
  • 1/4 tsp salt
  • 1/2 tsp ground cinnamon
  • 1/4 tsp ground allspice
  • 1/4 cup butter, chilled and cubed
  • 1/2 cup nonfat sour cream
  • 2 tsp vanilla extract, divided
  • 1/2 cup dried cranberries
  • 1/3 cup macadamia nuts, chopped
  • 1/4 cup powdered sugar
  • 2 tbsp low-fat milk
  • 1/4 cup raspberry jam

Instructions

  1. Preheat your oven to 400°F (200°C).
  2. Place the rolled oats in a food processor and process until finely ground.
  3. Add the flour, whole-wheat flour, brown sugar, baking powder, baking soda, salt, cinnamon, and allspice to the food processor. Pulse three times to combine.
  4. Add the chilled butter to the mixture and pulse five times until the mixture resembles coarse meal. Be careful not to over-process.
  5. Add 1 teaspoon of vanilla extract and the sour cream. Pulse three times or until just combined. Avoid over-mixing to prevent the dough from becoming too runny. Alternatively, you can transfer the mixture to a large bowl and combine with a spatula.
  6. Fold in the dried cranberries and chopped macadamia nuts using a spatula.
  7. Turn the dough out onto a lightly floured surface and knead lightly three times. Roll the dough to a 1/2-inch thickness and cut with a 2 1/2-inch biscuit cutter.
  8. Place the cut dough on a baking sheet. Use a small round spoon to press into the center of each scone to create a well for the raspberry jam.
  9. Mix the raspberry jam with the remaining 1 teaspoon of vanilla extract. Add 1/2 teaspoon of jam into each well, being careful not to overfill.
  10. Bake for 14 minutes or until the scones are golden brown. Remove from the baking sheet and transfer to a wire rack to cool.
  11. While the scones are cooling, prepare the glaze by combining the powdered sugar and milk. Stir with a whisk until smooth, then drizzle evenly over the cooled scones.

Tips

To ensure your scones are light and fluffy, handle the dough as little as possible. Over-mixing or over-kneading can result in tough scones. If you don’t have a biscuit cutter, a drinking glass will work in a pinch. Just make sure to flour the rim to prevent sticking.

Variations & Substitutions

If you’re looking to switch things up, try swapping the raspberry jam for your favorite flavor, such as apricot or strawberry. You can also substitute the macadamia nuts with almonds or walnuts for a different nutty flavor. For a vegan version, use plant-based butter and yogurt in place of the dairy ingredients.

Storage

These scones are best enjoyed fresh but can be stored in an airtight container at room temperature for up to two days. For longer storage, freeze the scones in a single layer, then transfer to a freezer-safe bag. Thaw at room temperature and reheat in the oven for a few minutes before serving.

FAQ

Can I make these scones gluten-free?

Yes, you can substitute the regular and whole-wheat flour with a gluten-free all-purpose flour blend. Make sure your oats are certified gluten-free as well.

What can I use instead of a food processor?

If you don’t have a food processor, you can manually mix the dry ingredients in a large bowl and cut in the butter using a pastry cutter or two knives. This will take a little more time but will achieve a similar texture.

Nutrition

Each scone provides a wholesome mix of carbohydrates, proteins, and healthy fats, making it a satisfying snack. While the exact nutritional values can vary, these scones are a good source of fiber, thanks to the whole-wheat flour and oats. They’re also lower in fat compared to traditional scones due to the use of nonfat sour cream instead of full-fat cream.

Conclusion

These Raspberry Thumbprint Wholewheat Scones with Macadamia Nuts are a delightful addition to any tea time or morning routine. They’re easy to make, yet taste like a special treat. Whether you’re enjoying them with a cup of coffee or sharing them with loved ones, these scones are sure to bring a touch of warmth and nostalgia to your day. So, roll up your sleeves and enjoy the process of creating these delicious scones—just like Grandma would have wanted.

Related update: Raspberry Thumbprint Wholewheat Scones With Macadamia Nuts

Related update: Blackberry Cobbler

Related update: Croissants With Sesame Seeds (Kifli)

Japanese Mabo Tofu With Eggplant | Made by Meaghan Moineau

Japanese Mabo Tofu With Eggplant

Intro

Growing up, the kitchen was always a place of warmth and enticing aromas in my home. My grandmother, with her gentle smile and nimble fingers, would prepare the most delightful dishes that seemed to dance on the taste buds. One of my fondest memories is of her making Mabo Tofu, a dish that combines the rich flavors of tofu, ground beef, and perfectly cooked eggplant. Today, I am thrilled to share with you a version of this beloved recipe, Japanese Mabo Tofu with Eggplant, a comforting dish that brings back those cherished memories with every bite.

Why You’ll Love It

This Japanese Mabo Tofu with Eggplant recipe is a delightful blend of flavors and textures that is sure to become a favorite in your household. The tender eggplant, savory ground beef, and delicate tofu soak up the rich, spicy sauce, creating a dish that is both comforting and exciting. It’s perfect for a cozy family dinner or a solo night in, and it’s incredibly satisfying when served over a steaming bowl of Japanese rice. You’ll love how easy it is to make, and how it fills your home with the mouthwatering aromas of ginger, garlic, and soy sauce.

Ingredients

  • Japanese rice
  • 1 eggplant
  • 1 onion
  • Fresh ginger
  • 2 garlic cloves
  • 1/2 lb ground beef
  • 2 spring onions
  • 2 tbsp oil
  • 1 tbsp sesame oil
  • 6 tbsp soy sauce
  • 2 tbsp cooking sake
  • 1 tbsp sugar
  • 1/2 cup water
  • 2 tbsp red to-ban-jan
  • 1 block of tofu

Instructions

  1. Cook the Japanese rice according to the package directions. I recommend using Nishiki rice for its perfect texture and flavor.
  2. Slice the eggplant lengthwise into four strips, then slice horizontally into quarters. Set aside.
  3. In a pan over medium/high heat, add 2 tablespoons of oil, garlic, ginger, onions, and half of the spring onions. Cook for 3 to 4 minutes, until the onions are translucent and fragrant.
  4. Add the ground beef to the pan and season with a bit of salt and pepper. Cook until the meat is fully browned.
  5. Stir in the red to-ban-jan, allowing its spicy aroma to infuse the dish.
  6. Add the sesame oil and eggplant slices to the pan. Cook for 5 to 7 minutes, until the eggplant strips are soft and cooked through.
  7. Add the tofu and delicately break it up while mixing it into the other ingredients.
  8. Add the cooking sake, sugar, water, and 4 tablespoons of soy sauce. Stir and let it cook for a couple of minutes to let the flavors meld.
  9. Add the remaining 2 tablespoons of soy sauce and the rest of the spring onions. Stir well, then turn off the heat.
  10. Serve the mabo tofu over the cooked rice and enjoy a taste of comforting nostalgia.

Tips

For the best results, use fresh ingredients whenever possible. Fresh ginger and garlic give the dish an authentic and vibrant flavor. Adjust the amount of red to-ban-jan to suit your spice preference. If you prefer your dish less spicy, you can reduce the amount used.

Variations & Substitutions

If you’re looking to make this dish vegetarian, you can easily substitute the ground beef with plant-based ground meat or mushrooms for a similar texture. For a gluten-free version, ensure your soy sauce is gluten-free, or substitute with tamari. You can also add other vegetables like bell peppers or zucchini to the mix for added flavor and nutrition.

Storage

Store any leftovers in an airtight container in the refrigerator for up to three days. This dish also freezes well, so you can make a larger batch and enjoy it later. To reheat, simply thaw in the refrigerator and warm on the stove or in the microwave until heated through.

FAQ

Can I use another type of tofu?

Yes, you can use any type of tofu you prefer, but I recommend using firm tofu for this recipe as it holds its shape better during cooking.

What can I use instead of red to-ban-jan?

If you can’t find red to-ban-jan, you can substitute it with a mix of chili paste and a bit of miso paste for a similar flavor profile.

Nutrition

This recipe provides a good balance of protein, carbohydrates, and fats. The tofu and beef offer high-quality protein, while the vegetables contribute fiber and essential nutrients. If you’re watching your sodium intake, consider using a low-sodium soy sauce.

Conclusion

Japanese Mabo Tofu with Eggplant is more than just a dish; it’s a comforting reminder of home and family. With its rich flavors and easy preparation, it’s a meal that brings warmth to any table. Whether you’re sharing it with loved ones or enjoying a quiet evening alone, this recipe is sure to become a treasured part of your culinary repertoire. I hope you enjoy making and savoring it as much as I do.

Related update: Japanese Mabo Tofu With Eggplant

Related update: Blackberry Balsamic Drumsticks

Ginger Molasses Rounds | Made by Meaghan Moineau

Ginger Molasses Rounds

Intro

As the days grow shorter and the air crisper, there’s nothing quite like the comfort of a warm, spiced cookie straight out of the oven. These Ginger Molasses Rounds take me back to my grandmother’s kitchen, where the aroma of spices and the sound of laughter filled the air. Every year, as the first leaves turned gold, she would bake these cookies with me, guiding my young hands with her own seasoned ones. The magic of mixing simple ingredients to create something so delightful was a lesson in love and patience. This recipe has been passed down through generations, and it’s my pleasure to share it with you, hoping it brings warmth and joy to your home as it always has to mine.

Why You’ll Love It

These Ginger Molasses Rounds are more than just cookies; they’re little bites of nostalgia and comfort. Here’s why you’ll fall in love with them:

  • Perfectly Spiced: The combination of ginger and cinnamon provides a warming, aromatic flavor that’s perfect for the fall and winter months.
  • Deliciously Chewy: Baking them just right ensures a soft, chewy texture that melts in your mouth.
  • Simple Ingredients: You probably already have most of the ingredients in your pantry!
  • Quick to Make: With a short baking time, these cookies are perfect for last-minute gatherings or a cozy evening treat.

Ingredients

  • 1 teaspoon baking soda
  • 3/4 cup butter, softened
  • 1 teaspoon ground cinnamon
  • 1 egg
  • 2 cups all-purpose flour
  • 1/4 cup additional granulated sugar (for rolling)
  • 1 teaspoon ground ginger
  • 1/4 cup molasses
  • 1/4 teaspoon salt
  • 1 cup granulated sugar

Instructions

  1. Preheat your oven to 350°F (175°C). Line a baking sheet with parchment paper.
  2. In a large bowl, cream together the butter and sugar until light and fluffy.
  3. Beat in the egg and molasses until fully incorporated.
  4. In a separate bowl, whisk together the flour, baking soda, salt, cinnamon, and ginger.
  5. Gradually blend the dry ingredients into the creamed mixture until just combined.
  6. Shape the dough into small balls, about 1 inch in diameter.
  7. Roll each ball in the additional granulated sugar to coat.
  8. Place the balls 2 inches apart on the prepared baking sheet.
  9. Bake for 8-9 minutes, until the cookies are just set and their tops are slightly cracked.
  10. Remove from the oven and let them cool on the baking sheet for a few minutes before transferring to a wire rack to cool completely.

Tips

To achieve the perfect texture, be sure to remove the cookies from the oven while they’re still soft. They’ll continue to firm up as they cool. If you prefer a slightly firmer cookie, you can bake them for an additional minute, but be careful not to overbake, as they can quickly become too hard.

Variations & Substitutions

  • Spice it Up: Add a pinch of nutmeg or cloves for an extra layer of warmth.
  • Whole Wheat Flour: Substitute half of the all-purpose flour with whole wheat flour for a nuttier flavor and added nutrition.
  • Gluten-Free: Use a 1:1 gluten-free baking blend in place of the all-purpose flour for a gluten-free version.
  • Vegan Option: Replace the butter with a vegan buttery spread and the egg with a flax egg (1 tablespoon ground flaxseed mixed with 3 tablespoons water).

Storage

Store these cookies in an airtight container at room temperature for up to a week. For longer storage, you can freeze them for up to three months. To enjoy from frozen, simply let them thaw at room temperature or warm them in a low oven for a few minutes.

FAQ

Can I use blackstrap molasses in this recipe?

Blackstrap molasses has a stronger, more bitter flavor compared to regular molasses, which can affect the taste of these cookies. If you enjoy a more robust molasses flavor, you can use blackstrap, but I recommend sticking with regular molasses for the classic taste.

Why are my cookies not cracking?

If your cookies aren’t cracking, it might be because the dough is too warm. Try chilling the dough for 10-15 minutes before baking. Also, ensure your baking soda is fresh, as it helps create those beautiful cracks on top.

Nutrition

Each cookie (assuming the recipe makes about 24 cookies) contains approximately:

  • Calories: 110
  • Fat: 5g
  • Carbohydrates: 16g
  • Protein: 1g
  • Sugar: 10g

Conclusion

Baking these Ginger Molasses Rounds is more than just making a dessert; it’s creating memories. Whether you share them with loved ones or enjoy them with a warm cup of tea on a quiet afternoon, these cookies are sure to bring a smile to your face. I hope this recipe becomes a cherished part of your family’s traditions, just as it is in mine. Happy baking!

Related update: Ginger Molasses Rounds

Related update: Carrot Cake Snack Bites

Related update: Chocolate Peppermint Cookies

Peach Carrot Coconut Vegan Pancake | Made by Meaghan Moineau

Peach Carrot Coconut Vegan Pancake

Intro

There’s something magical about the aroma of pancakes sizzling on a Sunday morning. It takes me back to my childhood, where weekends meant family, laughter, and a breakfast feast prepared by my grandmother. Her pancakes were legendary, and though her secret recipe was never fully revealed, I’ve tried to channel that nostalgic warmth into creating my own version with a modern, vegan twist. Enter the Peach Carrot Coconut Vegan Pancake—a delightful medley of flavors that captures the cozy, comforting essence of those cherished mornings while embracing the vibrant, health-conscious tastes of today.

Why You’ll Love It

These Peach Carrot Coconut Vegan Pancakes are a delightful way to start your day. They are light, fluffy, and packed with wholesome ingredients that will energize your morning. The sweetness of ripe peaches pairs beautifully with the earthiness of carrots and the tropical hint of coconut, creating a taste sensation that’s both unique and comforting. Plus, this recipe is entirely plant-based, perfect for vegans and anyone looking to reduce their dairy intake without sacrificing flavor.

Ingredients

  • 1 cup whole wheat flour
  • 2 tablespoons sugar
  • 1 tablespoon baking powder
  • 1/4 cup shredded coconut
  • 1 cup almond milk
  • 1 teaspoon vanilla extract
  • 2 tablespoons non-dairy butter, melted
  • 1/2 cup grated carrots
  • Fresh peaches, sliced, for serving
  • Maple syrup, for serving

Instructions

  1. In a medium bowl, combine the whole wheat flour, sugar, baking powder, and shredded coconut. Mix with a spatula until well combined.
  2. Add the almond milk, vanilla extract, and melted non-dairy butter to the dry ingredients. Stir to combine, then beat the batter for about one minute to incorporate some air.
  3. Fold in the grated carrots and allow the mixture to rest for a few minutes.
  4. Heat a non-stick pan over medium heat and lightly grease with a bit of non-dairy butter.
  5. Scoop a small amount of batter into the pan. Allow it to cook until bubbles form on the surface and the edges start to brown.
  6. Carefully flip the pancake and use a spatula to gently flatten it, ensuring the other side browns evenly.
  7. Repeat the process with the remaining batter. Serve the pancakes warm, topped with sliced peaches, additional shredded coconut, and a drizzle of maple syrup.

Tips

  • For the fluffiest pancakes, be careful not to overmix the batter. A few lumps are okay!
  • If you prefer a sweeter pancake, feel free to adjust the amount of sugar to your liking.
  • Ensure your pan is hot enough before adding the batter to achieve a nice golden brown finish.

Variations & Substitutions

If peaches aren’t in season, you can substitute them with other fruits like bananas, blueberries, or strawberries. For a nut-free version, replace almond milk with oat milk. You can also add a pinch of cinnamon or nutmeg to the batter for extra warmth and flavor.

Storage

Store any leftover pancakes in an airtight container in the refrigerator for up to three days. To reheat, simply warm them in a toaster or on a pan over low heat until heated through. These pancakes also freeze well—just layer them with parchment paper and store in a freezer-safe container for up to a month.

FAQ

Can I make the batter ahead of time?

Yes, you can prepare the batter the night before and store it in the refrigerator. Make sure to give it a good stir before cooking, as the ingredients may settle.

How can I make these pancakes gluten-free?

To make this recipe gluten-free, substitute the whole wheat flour with a 1:1 gluten-free flour blend. Ensure all other ingredients are certified gluten-free as well.

Can I add nuts to the pancake batter?

Absolutely! Chopped pecans or walnuts would add a lovely crunch and complement the flavors nicely. Stir them in with the grated carrots for a nutty twist.

Nutrition

Each serving of these pancakes is approximately 200 calories, with a good balance of carbohydrates, healthy fats, and a touch of protein. They are high in fiber thanks to the whole wheat flour and carrots, making them a nourishing option for breakfast.

Conclusion

These Peach Carrot Coconut Vegan Pancakes are not just a meal; they’re a wholesome experience that brings joy and nourishment to your morning routine. Whether you’re a seasoned vegan or simply exploring plant-based options, this recipe is sure to become a family favorite. So, gather your ingredients, fire up the pan, and enjoy a stack of these delicious pancakes. Here’s to warm memories and delightful flavors!

Related update: Peach Carrot Coconut Vegan Pancake

Related update: Meyer Lemon Ricotta Pancakes with Blackberry Compote

Related update: Ancient Grains Bread

Vanilla Cream Cakes, Easy and Fluffy Holiday Cakes | Made by Meaghan Moineau

Vanilla Cream Cakes: Easy and Fluffy Holiday Treats

Intro

There’s something magical about the holiday season that awakens the inner child in all of us. It’s a time when the air is filled with the sweet aroma of baked goods, and the kitchen becomes the heart of the home. Growing up, I remember my grandmother’s kitchen as a warm haven, especially during the holidays. She would bake her famous vanilla cream cakes, and the entire family would gather around the table, eagerly awaiting the first bite. These cakes were not just desserts; they were a symbol of love, warmth, and togetherness. Inspired by those cherished memories, I’m thrilled to share a recipe that brings a modern twist to my grandmother’s classic vanilla cream cakes. These fluffy, easy-to-make delights are perfect for any holiday gathering.

Why You’ll Love It

This recipe is a delightful combination of simplicity and indulgence. The vanilla cream cakes are light, fluffy, and melt in your mouth. They are perfect for those who want to enjoy a sweet treat without spending hours in the kitchen. The use of puff pastry not only simplifies the process but also adds a crisp, buttery texture that complements the creamy filling beautifully. Whether you’re hosting a holiday party or simply want to treat your family to something special, these cakes are sure to impress.

Ingredients

  • 500g puff pastry
  • 6 eggs
  • 200g sugar
  • 1 tablespoon rum
  • 6 liters whole milk
  • 1 packet vanilla sugar
  • 200g all-purpose flour
  • 250g heavy whipping cream
  • Powdered sugar for dusting

Instructions

  1. Preheat your oven to 200°C (390°F). Prepare a baking dish approximately 14 inches long, 10 inches wide, and 3.2 inches deep.
  2. Roll the puff pastry thinly to fit the size of your baking dish. You’ll need half for the bottom layer and half for the top layer of the cakes.
  3. Bake the pastry for 10-15 minutes until it turns golden brown. Allow the top layer to cool completely and leave the bottom layer in the baking dish.
  4. Separate the egg yolks from the whites, placing the whites in a large bowl.
  5. In a smaller bowl, combine egg yolks with sugar, vanilla sugar, and rum. Mix for 1-2 minutes, then add flour and 1/4 of the milk, mixing until smooth.
  6. Beat the egg whites until they reach a firm consistency. Gradually add sugar and continue beating until very firm.
  7. In a large pot, bring the remaining milk to a boil. Slowly add the egg yolk mixture, whisking constantly, and cook for 5 minutes until thick.
  8. Remove from heat and gradually pour the hot mixture into the egg whites, whisking constantly to achieve a thick consistency.
  9. Pour the mixture over the bottom layer of pastry in the baking dish, ensuring it fills every corner. Allow it to cool, preferably overnight in the refrigerator.
  10. Beat the heavy whipping cream with sugar until it forms stiff peaks. Spread over the cooled mixture.
  11. Cut the cooled top layer of pastry into 15 squares and place them on the whipped cream layer.
  12. Before serving, cut the cake into squares and dust with powdered sugar.

Tips

To ensure the perfect texture, make sure your egg whites are beaten to a very firm consistency. When combining the hot mixture with the egg whites, working with a partner can make the process easier. Don’t rush this step; it’s crucial for achieving the right consistency.

Variations & Substitutions

For a different flavor profile, consider adding a hint of almond extract to the creamy filling. You can also substitute the rum with an equal amount of your favorite liqueur or omit it entirely for a non-alcoholic version. If you’re looking for a gluten-free option, try using gluten-free puff pastry and flour.

Storage

These vanilla cream cakes are best enjoyed fresh but can be stored in an airtight container in the refrigerator for up to three days. The puff pastry may lose some of its crispness over time, but the flavors will remain delightful.

FAQ

Can I make these cakes in advance?

Yes, you can prepare the cake up to the whipped cream layer and store it in the refrigerator overnight. Add the top pastry layer and dust with powdered sugar just before serving.

What if I don’t have vanilla sugar?

If you don’t have vanilla sugar on hand, you can substitute it with an equal amount of regular sugar and add a teaspoon of vanilla extract to the egg yolk mixture.

Can I use a different type of milk?

Whole milk is recommended for the best texture and flavor, but you can use 2% milk if needed. Avoid using skim milk as it may not provide the desired creaminess.

Nutrition

Each serving of vanilla cream cake is rich in flavor and provides a delightful balance of carbohydrates, fats, and proteins. While these cakes are a treat, it’s important to enjoy them in moderation, especially if you’re mindful of your calorie intake during the holiday season.

Conclusion

Vanilla cream cakes are a wonderful way to bring a touch of nostalgia and warmth to your holiday celebrations. With their easy preparation and delightful taste, they are sure to become a favorite in your family, just as they were in mine. I hope this recipe brings you as much joy and togetherness as it has brought to my family over the years. Happy baking and happy holidays!

Related update: Vanilla Cream Cakes, Easy and Fluffy Holiday Cakes

Related update: Ginger Molasses Rounds

Polla alla Parmigiana: Chicken Parmesan | Made by Meaghan Moineau

Polla alla Parmigiana: Chicken Parmesan

Intro

There’s something truly magical about the aroma of a classic Chicken Parmesan wafting through the kitchen. As a child, Sundays at Nonna’s house meant gathering around the table for a meal that always included her famous Polla alla Parmigiana. The sizzle of the chicken frying, the rich, tangy tomato sauce, and the gooey, melted mozzarella all combined to create a dish that was more than just food—it was a symbol of love and family. Today, I’m thrilled to share this recipe with you so that you can bring a piece of that cherished tradition into your own home.

Why You’ll Love It

This recipe for Chicken Parmesan is a true classic, beloved for its crispy exterior and tender, juicy chicken inside. It’s a versatile dish that can be served over pasta, alongside a fresh salad, or even in a hearty sandwich. The combination of flavors from the seasoned breadcrumbs, the herb-infused tomato sauce, and the creamy mozzarella cheese make it a guaranteed crowd-pleaser. Plus, it’s easier to make than you might think, and with a few simple tips, you’ll have a restaurant-quality dish ready in no time.

Ingredients

  • 1 cup dry bread crumbs
  • 2 eggs
  • 1/2 cup flour
  • 1 teaspoon dry marjoram
  • 8 ounces fresh mozzarella, sliced
  • 1/4 cup oil (vegetable or olive oil)
  • 1/2 cup panko breadcrumbs
  • 1/4 cup grated parmesan cheese
  • 1 bell pepper, diced (optional)
  • Salt to taste
  • 4 skinless, boneless chicken breasts
  • 2 cups tomato sauce

Instructions

  1. Preheat your oven to 350°F (175°C).
  2. Pound the chicken breasts until they are even and about 1/2 inch thick.
  3. In a shallow dish, combine the flour, salt, and pepper.
  4. In a second dish, beat the eggs with 1 tablespoon of water.
  5. In a third dish, combine the bread crumbs, panko, marjoram, and parmesan cheese.
  6. Coat the chicken on both sides with the flour mixture, shaking off any excess.
  7. Dip both sides of the chicken into the egg mixture.
  8. Dredge both sides in the bread crumbs mixture, pressing lightly to adhere.
  9. Heat the oil in a large sauté pan over medium-high heat.
  10. Cook the breaded chicken for 2 to 3 minutes on each side, until golden brown.
  11. Remove the chicken and place it on a baking sheet.
  12. Smear tomato sauce over each piece of chicken and top with a slice of mozzarella.
  13. If using, sprinkle the diced bell pepper over the top for added flavor.
  14. Bake in the oven until the mozzarella has melted, about 10-15 minutes.

Tips

For the crispiest Chicken Parmesan, make sure not to overcrowd the pan while frying. This ensures that the chicken cooks evenly and maintains its crispy coating. When choosing mozzarella, fresh mozzarella will give you the best texture and flavor, but pre-sliced mozzarella can work in a pinch. Don’t forget to let the chicken rest for a few minutes before serving, as this helps retain juices and enhances the overall flavor.

Variations & Substitutions

If you’re looking to switch things up, try adding a layer of sautéed mushrooms or spinach between the chicken and the tomato sauce for added depth. For a gluten-free version, substitute the regular breadcrumbs and panko with gluten-free versions. You can also replace the chicken with eggplant slices for a vegetarian take on this classic dish.

Storage

Leftover Chicken Parmesan can be stored in an airtight container in the refrigerator for up to 3 days. To reheat, place it in a preheated oven until warmed through. Avoid microwaving, as it can cause the breading to become soggy. If you plan to freeze it, it’s best to do so before adding the tomato sauce and cheese. Simply freeze the breaded chicken, and when ready to eat, add the sauce and cheese before baking.

FAQ

Can I use chicken thighs instead of breasts?

Yes, you can use chicken thighs if you prefer. Just make sure they are boneless and pounded to an even thickness for even cooking.

What type of tomato sauce should I use?

Feel free to use your favorite store-bought tomato sauce or make your own if you have time. A sauce with garlic and basil works particularly well with this dish.

How can I make this dish healthier?

For a lighter version, try baking the breaded chicken instead of frying it. You can also use whole wheat breadcrumbs and low-fat mozzarella to reduce calories.

Nutrition

While exact nutritional content can vary based on specific ingredients and portion sizes, a typical serving of Chicken Parmesan (including sauce and cheese) contains approximately 400-500 calories, 30g of protein, 20g of fat, and 30g of carbohydrates. Keep in mind that these values can change based on any variations or substitutions you make.

Conclusion

Polla alla Parmigiana, or Chicken Parmesan, is more than just a meal—it’s a delightful experience that brings people together. Whether you’re cooking for a special occasion or simply enjoying a comforting dinner at home, this recipe is sure to impress with its rich flavors and satisfying textures. I hope this family favorite finds a place at your table and brings as much joy to your home as it has to mine. Buon appetito!

Related update: Polla alla Parmigiana: Chicken Parmesan

Related update: Japanese Mabo Tofu With Eggplant

Homemade Broccoli Cheddar Soup | Made by Meaghan Moineau

Homemade Broccoli Cheddar Soup

Intro

There’s something uniquely comforting about a warm bowl of soup, especially when it’s homemade. Growing up, I have fond memories of my grandmother’s kitchen, where the aroma of freshly made soup would fill the air, signaling that it was time to gather around the table and share stories of our day. Her broccoli cheddar soup was a family favorite, and I’ve taken her timeless recipe and added a few of my own touches to create this delightful Homemade Broccoli Cheddar Soup. It’s not just a meal—it’s a memory in a bowl.

Why You’ll Love It

This soup is a perfect blend of creamy and cheesy goodness with the nutritious punch of broccoli. It’s the ultimate comfort food that’s not only delicious but also packed with vitamins and minerals. Whether you’re looking to warm up on a chilly day or need a quick yet satisfying meal, this soup is your answer. Plus, it’s made with wholesome ingredients, making it a healthier choice for the whole family. You’ll love how easy it is to make and how it brings everyone together at the dinner table.

Ingredients

  • 1 large head of raw broccoli, chopped (reserve a few florets for garnish)
  • 1 shallot, diced
  • Juice of 1 lemon
  • 4 cups vegetable broth
  • Salt and pepper to taste
  • 1 red onion, diced
  • 1 cup plain yogurt (such as Chobani)
  • 2 Yukon Gold potatoes, peeled and diced
  • 1/4 cup fresh parsley, chopped
  • 1 bay leaf
  • 4 tablespoons olive oil
  • 2 cups plain almond milk
  • 2 cups shredded cheddar cheese

Instructions

  1. In your soup pot, heat 2 tablespoons of olive oil over medium-high heat. Add the shallot and red onion, sautéing until they become translucent.
  2. Add the lemon juice, vegetable broth, remaining olive oil, salt, and pepper. Reduce the heat to medium.
  3. Introduce the diced potatoes to the broth and bring the mixture to a boil. Cook until the potatoes are tender.
  4. Add the chopped broccoli (both florets and stems), reserving a few florets for later use. Cover with a lid, and when the broccoli is tender, turn off the heat.
  5. Transfer the contents of the pot into a large mixing bowl and let it cool slightly. Add the fresh parsley, plain yogurt, and almond milk, folding them gently into the hot soup mixture.
  6. In batches, puree the soup in a blender until smooth.
  7. In the soup pot, sauté the reserved broccoli florets with a dash of vegetable broth. Cover and cook for about a minute until tender.
  8. Return the pureed soup to the soup pot. Add in the bay leaf and simmer uncovered for at least twenty minutes, stirring constantly for the first few minutes. This helps to cook out any air bubbles.
  9. Remove the bay leaf before serving. Serve hot, garnished with the reserved florets and a sprinkle of cheddar cheese.

Tips

  • For an extra depth of flavor, roast the broccoli florets before adding them to the soup.
  • Adjust the thickness of the soup by varying the amount of almond milk or adding more broth.
  • Use freshly grated cheddar cheese for the best melt and flavor.

Variations & Substitutions

  • Vegan Option: Substitute the cheddar cheese with a vegan cheese alternative and use dairy-free yogurt.
  • Spicy Twist: Add a chopped jalapeno or a pinch of red pepper flakes for a spicy kick.
  • Herb Infusion: Experiment with different herbs like thyme or rosemary to add a new dimension of flavor.

Storage

This soup stores beautifully, making it perfect for meal prep. Once cooled, transfer the soup to an airtight container and store it in the refrigerator for up to 4 days. For longer storage, you can freeze it for up to 3 months. When reheating, thaw overnight in the refrigerator and warm on the stove over low heat, stirring occasionally.

FAQ

Can I use frozen broccoli instead of fresh?

Yes, you can use frozen broccoli if fresh is not available. Just be sure to thaw it before adding it to the soup, and adjust the cooking time as needed to ensure it’s tender.

Can I use another type of cheese?

Absolutely! While cheddar is classic, you can experiment with other cheeses like Gruyere or Swiss for a different flavor profile. Just ensure the cheese melts well to maintain the soup’s creamy consistency.

Nutrition

This homemade soup is not only delicious but also nutritious. With broccoli being rich in vitamins C and K, and the inclusion of potatoes for carbohydrates and yogurt for protein, this soup is a well-rounded meal. However, nutritional values will vary based on portion sizes and specific brands of ingredients used, so adjust according to your dietary needs.

Conclusion

Creating a pot of Homemade Broccoli Cheddar Soup is more than just preparing a meal; it’s an opportunity to create memories and share warmth with loved ones. This soup is a testament to the power of simple, wholesome ingredients coming together to create something truly comforting and nourishing. I hope this recipe becomes a cherished part of your family’s culinary traditions, just as it has in mine. Enjoy every spoonful!

Related update: Homemade Broccoli Cheddar Soup

Related update: Polla alla Parmigiana: Chicken Parmesan

Related update: Minted Pea & Spinach Soup

Banana Blueberry Pancakes | Made by Meaghan Moineau

Banana Blueberry Pancakes

Intro

There’s something truly magical about starting your day with a stack of warm, fluffy pancakes. For me, banana blueberry pancakes bring back memories of cozy weekend mornings spent in my grandmother’s kitchen. The sweet scent of bananas mingling with the sharp tartness of blueberries filled the air as we eagerly awaited the first batch. Now, I’m thrilled to share this recipe with you so you can create your own cherished breakfast traditions.

Why You’ll Love It

These banana blueberry pancakes are not just a treat for the taste buds but also a wholesome start to your day. They combine the natural sweetness of ripe bananas with the burst of flavor from blueberries. The use of coconut flour makes them a nutritious alternative to regular pancakes, offering a delightful texture that’s both light and satisfying. Plus, they’re easy to make and perfect for a quick weekday breakfast or a leisurely weekend brunch.

Ingredients

  • 4 whole eggs
  • 1 cup water
  • 2 tablespoons liquid coconut oil
  • ½ cup coconut flour
  • 1 teaspoon cream of tartar
  • 1 teaspoon ground cinnamon
  • 2 ripe bananas, mashed
  • 1 cup frozen blueberries

Instructions

  1. Beat the eggs for 1 minute until they are light and frothy.
  2. Add the water, liquid coconut oil, and coconut flour. Whisk the mixture until combined.
  3. Allow the batter to sit for 5 minutes to let the coconut flour absorb and expand.
  4. Add the cream of tartar, cinnamon, and mashed bananas to the batter and whisk until smooth.
  5. Gently fold in the frozen blueberries using a spatula.
  6. Heat oil, butter, or a combination of both in a skillet over medium to low heat.
  7. Ladle ½ cup of the batter onto the skillet for each pancake.
  8. Cook for about 5 minutes on one side, then carefully flip the pancake to cook the other side until golden brown.
  9. Repeat the steps until you have made 8 pancakes.
  10. Serve hot, drizzled with maple syrup.

Tips

For the best results, make sure your bananas are overripe, as they will add extra sweetness and moisture to the pancakes. If your batter seems too thick, feel free to add a little more water to reach your desired consistency. It’s also important to cook the pancakes over medium to low heat to ensure they cook evenly and don’t burn.

Variations & Substitutions

If you don’t have coconut flour on hand, almond flour can be a great alternative, though the texture will be slightly different. You can also substitute fresh blueberries for frozen ones if they’re in season. For a nutty twist, add a handful of chopped walnuts or pecans to the batter.

Storage

These pancakes can be stored in an airtight container in the refrigerator for up to 3 days. For longer storage, freeze them by placing parchment paper between each pancake and sealing them in a freezer bag. Reheat in the microwave or toaster for a quick breakfast option.

FAQ

Can I make the batter ahead of time?

It’s best to prepare the batter just before cooking to maintain the freshness and texture of the pancakes. However, you can mix the dry ingredients and store them separately, then combine with the wet ingredients when you’re ready to cook.

Are these pancakes suitable for a gluten-free diet?

Yes, these banana blueberry pancakes are gluten-free as they use coconut flour, which is a great alternative to traditional wheat flour.

Nutrition

Each serving of these pancakes provides a good source of protein from the eggs and a boost of vitamins and antioxidants from the blueberries and bananas. Coconut flour adds healthy fats and fiber, making these pancakes a nutritious breakfast choice.

Conclusion

Banana blueberry pancakes are a wonderful way to start your day with something delicious and nutritious. Whether you’re making these for a special occasion or just a regular morning, they’re sure to bring a smile to your face. So gather your ingredients, put on your apron, and enjoy the delightful process of making these pancakes. You might just find they become a beloved staple in your morning routine!

Related update: Banana Blueberry Pancakes

Related update: Peach Carrot Coconut Vegan Pancake

Related update: Raspberry Thumbprint Wholewheat Scones With Macadamia Nuts

Thai Savory Brown Fried Rice | Made by Meaghan Moineau

Thai Savory Brown Fried Rice

Intro

There’s something incredibly comforting about the aroma of fried rice sizzling on the stove, filling the kitchen with its enticing fragrance. This Thai Savory Brown Fried Rice recipe takes me back to my childhood summers spent in my grandmother’s bustling kitchen. She would whip up the most delicious meals seemingly without effort, and her fried rice was always the highlight of our family gatherings. Today, I am thrilled to share my version of this beloved dish, which brings together the warmth of those cherished memories and the vibrant flavors of Thailand in one delightful bowl.

Why You’ll Love It

This Thai Savory Brown Fried Rice is a deliciously wholesome and satisfying dish that you’ll fall in love with for several reasons:

  • Flavorful: The combination of garlic, red chili peppers, and fresh lime juice creates a symphony of tastes that dance on your palate.
  • Nutritious: Packed with wholesome ingredients like brown rice, fresh vegetables, and cashews, this dish is as nourishing as it is tasty.
  • Quick and Easy: Once the rice is ready, the rest of the meal comes together in a flash, making it perfect for busy weeknights.
  • Customizable: Easily adapt this recipe to suit your dietary preferences or whatever ingredients you have on hand.

Ingredients

  • 2 tablespoons extra virgin olive oil, divided
  • 3 cloves garlic, minced
  • 2 red fresh chili peppers, sliced
  • 1/2 cup raw cashew nuts
  • 1/4 cup dry unsweetened shredded coconut, toasted
  • 1 teaspoon stevia powder
  • 2 tablespoons Bragg Liquid Aminos
  • 1 tablespoon apple cider vinegar
  • 1 flax egg (1 tablespoon ground flaxseed mixed with 3 tablespoons water)
  • 1 cup fresh green beans, trimmed and cut into 1-inch pieces
  • 2 cups shredded regular bok choy
  • 3 cups cooked brown rice
  • Lime wedges, for serving

Instructions

  1. Prepare the Perfect Brown Rice: In a medium saucepan, heat 1 teaspoon of olive oil over medium heat. Add 1 cup of uncooked brown rice and stir until lightly browned. Place 2 basil leaves on top of the rice and add 2 cups of filtered water all at once. Cover with a lid and bring to a boil. Reduce heat to a simmer and cook until all the water has evaporated, about 40 minutes. Remove from heat and let it sit covered for 5 minutes, then fluff with a fork.
  2. While the rice is cooking, heat the remaining olive oil in a wok or large frying pan over medium heat. Add the minced garlic and cook until lightly golden, being careful not to burn it.
  3. Add the sliced red chili peppers, cashew nuts, and toasted coconut to the pan, stirring to combine.
  4. In a small bowl, mix together the stevia powder, Bragg Liquid Aminos, and apple cider vinegar. Pour this mixture into the pan and cook for 1 minute over medium heat.
  5. Push the stir-fry to one side of the pan and add the flax egg on the opposite end. Cook and stir the flax egg for about a minute, then incorporate it into the stir-fry mixture.
  6. Add the green beans, bok choy, and cooked brown rice to the stir-fry. Cook and stir on medium for another minute, until the bok choy is wilted but the green beans remain slightly crunchy.
  7. Spoon the fried rice into a serving dish and serve with lime wedges on the side for squeezing over the rice before eating.

Tips

  • Toast the Coconut: Toasting the coconut enhances its flavor and adds a delightful crunch to the dish. Simply spread it in a dry pan and heat over medium heat, stirring frequently until golden brown.
  • Prep Ahead: Cook the brown rice ahead of time and store it in the refrigerator. Cold rice works best for fried rice recipes as it doesn’t clump together.
  • Adjust Spice Level: If you prefer a milder dish, reduce the amount of chili peppers or remove the seeds before slicing.

Variations & Substitutions

This recipe is incredibly versatile, and you can easily adapt it to suit your taste or dietary needs:

  • Protein Options: Add tofu, shrimp, or chicken for additional protein.
  • Vegetable Swaps: Substitute or add other vegetables such as bell peppers, carrots, or snap peas.
  • Soy Sauce Alternative: If you don’t have Bragg Liquid Aminos, tamari or soy sauce will work just as well.

Storage

Leftover Thai Savory Brown Fried Rice can be stored in an airtight container in the refrigerator for up to 3 days. Reheat gently in a pan over medium heat, adding a splash of water or broth to help rehydrate the rice. Avoid microwaving as it can make the rice rubbery.

FAQ

Can I use white rice instead of brown rice?

Yes, you can substitute white rice for brown rice in this recipe. Keep in mind that white rice cooks faster, so adjust the cooking time accordingly.

Is there a substitute for flax egg?

If you’re not vegan, you can use a regular egg instead of a flax egg. Simply scramble it in the pan before adding it to the stir-fry.

Can I make this dish ahead of time?

Yes, you can prepare the rice and chop the vegetables ahead of time to streamline the cooking process. However, for the best texture and flavor, it’s recommended to stir-fry the ingredients just before serving.

Nutrition

This Thai Savory Brown Fried Rice is a wholesome and balanced meal. It’s rich in fiber from the brown rice and vegetables, healthy fats from the olive oil and cashews, and offers a moderate amount of protein. However, nutritional values can vary based on serving size and any variations you make to the recipe.

Conclusion

Thai Savory Brown Fried Rice is more than just a meal; it’s a culinary journey that brings together vibrant flavors and cherished memories. Whether you’re cooking for family, friends, or just treating yourself, this dish is sure to impress with its delightful taste and nourishing ingredients. I hope this recipe becomes a beloved staple in your home, just as it has in mine. Enjoy!

Related update: Thai Savory Brown Fried Rice

Related update: Madras Beef Curry

How to Make the Perfect Sweet Potato Sloppy Joes | Made by Meaghan Moineau

How to Make the Perfect Sweet Potato Sloppy Joes

Intro

Do you remember those comforting dinners from your childhood that filled the house with warmth and mouth-watering aromas? For me, it was always the deliciously messy sloppy joes my mom would whip up on busy weeknights. The rich, savory flavors combined with the soft buns were a match made in heaven. Now, as a grown-up, I’ve found a new twist on this classic dish that not only satisfies those nostalgic cravings but also packs in a nutritious punch. Welcome to my recipe for Perfect Sweet Potato Sloppy Joes—where comfort meets health!

Why You’ll Love It

  • Healthier Twist: By replacing traditional buns with sweet potatoes, you’re adding fiber and essential nutrients to your meal.
  • Flavor Explosion: The combination of savory turkey, sweet potatoes, and a rich tomato sauce creates a delightful medley of flavors.
  • Family-Friendly: This dish is sure to be a hit with both adults and kids, making it perfect for family dinners.
  • Easy to Make: With simple steps and readily available ingredients, you can have a wholesome meal on the table in no time.

Ingredients

  • 4 medium-sized sweet potatoes
  • 1 tablespoon olive oil
  • 1 pound lean ground turkey
  • 1 diced onion
  • 1 diced bell pepper
  • 2 cloves diced garlic
  • 1 tablespoon tomato paste
  • 1 15-ounce can tomato sauce
  • 1/2 cup water
  • Salt and pepper to taste

Instructions

  1. Preheat your oven to 425°F (220°C).
  2. Pierce the sweet potatoes all over with a fork. Rub the skins with olive oil, then wrap each one in foil.
  3. Bake the wrapped sweet potatoes in the oven for 1 hour, or until they’re fully cooked and tender.
  4. In a large skillet over medium heat, brown the ground turkey until fully cooked.
  5. Add the diced onion, bell pepper, and garlic to the skillet. Stir well and cook until the vegetables are soft and the mixture starts to crumble.
  6. Stir in the tomato paste, tomato sauce, and water. Mix well to combine.
  7. Reduce the heat to low and let the mixture simmer for about 20 minutes, stirring occasionally.
  8. Remove the sweet potatoes from the oven and unwrap the foil. Slice each potato down the middle, then mash the insides gently with a fork.
  9. Top the mashed sweet potatoes with the sloppy joe mixture. Serve immediately and enjoy!

Tips

  • Sweet Potato Cooking: Be sure to pierce the sweet potatoes thoroughly to allow steam to escape and ensure even cooking.
  • Make it Spicy: Add a pinch of cayenne pepper or a splash of hot sauce for an extra kick.
  • Serve with Greens: Pair with a simple green salad for a well-rounded meal.

Variations & Substitutions

  • Meat Options: Swap ground turkey for ground beef or chicken if you prefer.
  • Vegetarian: Use lentils or crumbled tofu as a vegetarian alternative to ground meat.
  • Extra Veggies: Enhance the nutritional value by adding diced carrots, zucchini, or mushrooms to the mixture.

Storage

Leftovers can be stored in an airtight container in the refrigerator for up to 3 days. To reheat, simply warm them in the microwave or on the stovetop. If you plan to freeze the mixture, let it cool completely before transferring to a freezer-safe container. It will keep well for up to 2 months.

FAQ

Can I prepare the sweet potatoes in advance?

Yes, you can bake the sweet potatoes ahead of time. Simply store them in the refrigerator and reheat in the oven or microwave before serving.

Can I use canned sweet potatoes?

While fresh sweet potatoes are recommended for the best flavor and texture, canned sweet potatoes can be used in a pinch. Just be sure to drain and mash them well before serving.

How can I make this dish gluten-free?

This recipe is naturally gluten-free! Just ensure that your tomato paste and sauce are certified gluten-free if you have a sensitivity.

Nutrition

This dish is a great source of protein and fiber. Sweet potatoes are rich in vitamins A and C, while lean ground turkey provides a healthy dose of protein and essential minerals like zinc and selenium. Plus, the addition of bell peppers and onions adds antioxidants and flavor without extra calories.

Conclusion

There you have it—your ultimate guide to crafting the Perfect Sweet Potato Sloppy Joes! This dish is not only a tribute to the comforting meals of our past but also a testament to how we can reimagine traditional recipes to fit our modern lifestyles. Whether you’re cooking for a family dinner or meal-prepping for the week, this delightful recipe is sure to become a staple in your kitchen. So gather your ingredients, embrace the messiness, and enjoy this hearty, wholesome meal. Bon appétit!

Related update: How to Make the Perfect Sweet Potato Sloppy Joes

Related update: Thai Savory Brown Fried Rice

Chicken Stew For The Soul | Made by Meaghan Moineau

Chicken Stew For The Soul

Intro

There’s something magical about the aroma of spices wafting through the kitchen on a chilly evening. It takes me back to my grandmother’s cozy kitchen, where love was an essential ingredient in every meal she prepared. Her Chicken Stew was a family favorite, a recipe passed down through generations, and one that I cherish deeply. This dish isn’t just food; it’s a warm embrace on a plate, a reminder of home, and a testament to the power of simple ingredients combined with love and care.

Why You’ll Love It

This Chicken Stew is not just any stew; it’s a heartfelt dish that brings warmth and comfort with every bite. The blend of aromatic spices and creamy coconut milk creates a rich, flavorful broth that envelops tender pieces of chicken and perfectly cooked potatoes. It’s a meal that satisfies both the palate and the soul, perfect for sharing with family and friends or for savoring on a quiet evening by yourself. Plus, it’s straightforward to prepare, making it a go-to recipe for any occasion.

Ingredients

  • Cardamoms
  • Chicken
  • Cinnamon stick, broken
  • Coconut milk
  • Curry leaves
  • Fresh coriander
  • Garam masala
  • Ginger garlic paste
  • Green chillies
  • Red ground chilli
  • Ground coriander
  • Ground turmeric
  • Lemon (juice)
  • Onion
  • Potatoes
  • Salt
  • Oil
  • Mustard seeds

Instructions

  1. Slice the onions, slit the chillies, cube the potatoes, and keep aside.
  2. Heat oil in a heavy-bottomed pan or pressure cooker and splutter mustard seeds.
  3. Add the whole spices and stir until you begin to get the aroma of the spices.
  4. Add sliced onions, curry leaves, and green chillies, and sauté.
  5. Stir in the ground coriander and add the marinated chicken. Stir to coat the chicken well in the sautéed mixture.
  6. Cover and let it cook until it is half done, then add the cubed potatoes.
  7. When the chicken is almost done, add the garam masala, salt, and coconut milk and stir.
  8. Once cooked, turn off the heat and garnish with chopped fresh coriander.
  9. Remember, the most important ingredient is love. Stir it with lots of love for the family and friends who will partake of the meal.
  10. Serve hot chicken stew with freshly made appams.

Tips

  • For a deeper flavor, marinate the chicken overnight with ginger garlic paste and a pinch of salt.
  • Adjust the level of spiciness by modifying the amount of green chillies and red ground chilli to suit your taste.
  • For a thicker stew, allow it to simmer uncovered for a few extra minutes to reduce the liquid.

Variations & Substitutions

If you’re looking to make this stew your own, here are a few variations and substitutions you might consider:

  • Protein: Swap chicken with boneless lamb or beef for a different twist.
  • Vegetables: Add carrots or bell peppers for extra flavor and color.
  • Coconut Milk: Use heavy cream or almond milk if you’re out of coconut milk.

Storage

This Chicken Stew can be stored in an airtight container in the refrigerator for up to 3 days. To reheat, simply place it in a saucepan over medium heat until warmed through. Freezing is also an option; just ensure it’s fully cooled before placing it in the freezer, where it will keep for up to 2 months. Thaw overnight in the fridge before reheating.

FAQ

Can I make this stew in advance?

Absolutely! This stew actually tastes even better the next day, as the flavors have more time to meld together. Simply prepare as directed, cool completely, and store in the refrigerator. Reheat gently on the stove when ready to serve.

What can I serve with Chicken Stew?

Chicken Stew pairs beautifully with appams, as mentioned, but you can also serve it with steamed rice, crusty bread, or naan to soak up the delicious gravy.

Is this dish spicy?

The level of spiciness in this Chicken Stew can be easily adjusted to suit your palate. If you prefer a milder stew, reduce the number of green chillies and red ground chilli. Conversely, if you enjoy heat, consider adding more.

Nutrition

While the exact nutritional content can vary based on portion size and specific ingredients used, a typical serving of Chicken Stew with coconut milk is a good source of protein and healthy fats. It provides essential nutrients from the spices and vegetables, making it a nourishing option for a balanced diet.

Conclusion

This Chicken Stew For The Soul is more than just a meal; it’s a culinary experience that brings warmth and comfort. Whether you’re cooking for your family, hosting a dinner with friends, or simply treating yourself, this stew is sure to impress and soothe the soul. Remember, the secret ingredient is love, and it’s what makes this dish truly special. So gather your ingredients, invite your loved ones, and create cherished memories around the dinner table with this heartwarming stew.

Related update: Chicken Stew For The Soul

Related update: How to Make the Perfect Sweet Potato Sloppy Joes

Related update: Homemade Broccoli Cheddar Soup

Indian Butter Chicken | Made by Meaghan Moineau

Indian Butter Chicken

Intro

There’s something magical about the aroma of spices wafting through the house, reminding me of my grandmother’s cozy kitchen. I remember being a child, watching her deft hands mix spices with precision and love. Her Indian Butter Chicken was a family favorite, and it’s a recipe that has traveled through generations, bringing warmth and joy to our family meals. Now, it’s my turn to share this beloved dish with you. Whether you’re looking for a comfort meal or an exotic dish to impress your dinner guests, this recipe is sure to hit the spot.

Why You’ll Love It

This Indian Butter Chicken is rich, creamy, and packed full of flavor. The perfect blend of spices creates a dish that’s both indulgent and comforting. Not only is it a feast for the taste buds, but it’s also a feast for the soul. You’ll love how easy it is to prepare, making it perfect for both weeknight dinners and special occasions. The combination of tender chicken and a luscious sauce will make it a regular on your dinner table.

Ingredients

  • 2 tablespoons butter
  • 1 pound chicken breasts, chopped
  • 1 cup chicken broth
  • 2 teaspoons garam masala
  • 3 cloves garlic, minced
  • 1 tablespoon fresh ginger, grated
  • 1 tablespoon lemon juice
  • 2 tablespoons oil
  • 1 cup plain yogurt
  • Salt and pepper, to taste
  • 1/2 cup sour cream
  • 1 can (14 ounces) diced tomatoes

Instructions

  1. Start by adding the oil to your pan and heating it up on medium-high heat. Add in your chopped chicken, garlic, and garam masala. Swirl it together and cook for about two to three minutes.
  2. Add in your onion and ginger. Continue cooking until the chicken is cooked through.
  3. Turn the heat down to medium and add in your lemon juice and butter. Let the butter melt completely.
  4. Once the butter has melted, add in the tomatoes and broth. Give the dish a minute or two to heat back up.
  5. Stir in the yogurt and sour cream. Mix it all together and season with salt and pepper to taste.
  6. Serve over rice and enjoy!

Tips

For the best results, use fresh ginger and garlic. This will enhance the flavors and give your dish a more authentic taste. Make sure to cook the chicken until it’s just done to keep it tender and juicy. If you prefer a thicker sauce, let it simmer a little longer after adding the sour cream and yogurt.

Variations & Substitutions

If you’re looking for a dairy-free version, you can substitute coconut milk for the yogurt and sour cream. To add some heat, consider adding a teaspoon of chili powder or a diced chili pepper. You can also substitute chicken thighs for the breasts if you prefer a richer flavor.

Storage

Store any leftovers in an airtight container in the refrigerator for up to three days. To reheat, simply warm it up on the stove over medium heat, adding a splash of water or broth if necessary to maintain the creamy consistency. This dish can also be frozen for up to two months. Thaw overnight in the refrigerator before reheating.

FAQ

Can I make this recipe ahead of time?

Absolutely! The flavors develop even more when made a day in advance. Just store it in the refrigerator and reheat on the stove before serving.

What can I serve with Indian Butter Chicken?

This dish pairs wonderfully with basmati rice or naan bread. A side of steamed vegetables or a simple salad would also complement the meal nicely.

Nutrition

This recipe is rich in protein and offers a good amount of vitamins and minerals from the spices and tomatoes. However, it is also indulgent and contains fats from the butter and sour cream. Moderation is key, and pairing it with wholesome sides like vegetables or whole grains can create a balanced meal.

Conclusion

Indian Butter Chicken is more than just a meal; it’s an experience. It’s about bringing people together and savoring the rich tapestry of flavors that Indian cuisine has to offer. I hope this recipe becomes a cherished part of your culinary repertoire, just as it has been in my family for generations. Enjoy the warmth and comfort it brings, and don’t forget to share it with the ones you love. Happy cooking!

Related update: Indian Butter Chicken

Related update: Chicken Stew For The Soul