Green Tea Fruit Medley Smoothie | Made by Meaghan Moineau

Green Tea Fruit Medley Smoothie

Intro

Welcome to your new favorite morning ritual: the Green Tea Fruit Medley Smoothie. There’s something magical about the quiet moments of dawn, where the world is still waking up and a gentle sun peeks through the curtains. It’s in these moments that I find myself reminiscing about the summers spent at my grandmother’s house. She had an expansive garden filled with vibrant berries and a cozy nook where she would brew fresh teas. The sweet aroma of berries mingling with the earthy scent of tea still lingers in my memory, and it’s this memory that inspired today’s recipe. This smoothie encapsulates those cherished mornings, blending the vibrant flavors of fresh berries and soothing green tea into a refreshing, nutrient-packed delight.

Why You’ll Love It

There are countless reasons to fall head over heels for this Green Tea Fruit Medley Smoothie:

  • Refreshing and Energizing: Start your day or recharge in the afternoon with a burst of natural energy from green tea and fruits.
  • Nutrient-Rich: Packed with antioxidants, vitamins, and fiber, this smoothie is as nutritious as it is delicious.
  • Quick and Easy: With just a few simple ingredients and a blender, you can whip up this delightful treat in minutes.
  • Customizable: Easily tweak the recipe to suit your taste or dietary needs.

Ingredients

  • 1 cup water
  • 3 Bigelow Green tea bags
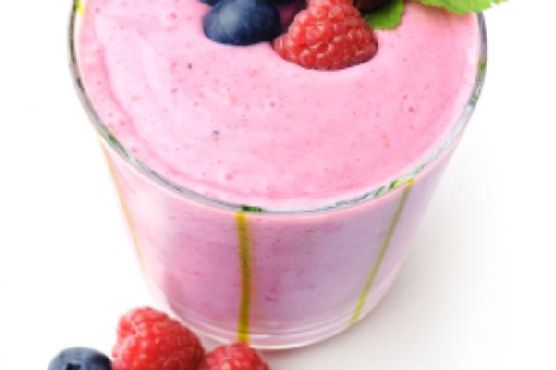
  • 1 cup fresh berries (such as strawberries, blueberries, or raspberries)
  • 1 cup pineapple juice
  • 1/2 cup vanilla yogurt
  • 1 cup ice cubes

Instructions

  1. Bring 1 cup of water to a boil and pour over 3 Bigelow Green tea bags. Let steep for 5 minutes.
  2. Gently squeeze out the tea bags to extract all the flavor, then discard the bags.
  3. In a blender, combine the brewed green tea, fresh berries, pineapple juice, vanilla yogurt, and ice cubes.
  4. Blend all the ingredients until the mixture is smooth and creamy.
  5. Pour into a glass, serve immediately, and enjoy the refreshing taste of summer.

Tips

  • Choose ripe berries: For the best flavor, use ripe and sweet berries. You can also freeze them beforehand for a thicker smoothie.
  • Adjust sweetness: If you prefer a sweeter smoothie, add a teaspoon of honey or agave syrup.
  • Chill the tea: Prepare the green tea ahead of time and chill it for a colder, more refreshing drink.

Variations & Substitutions

This smoothie is quite versatile, and you can easily modify it to suit your preferences:

  • Different fruits: Swap out the berries for mangoes, peaches, or bananas for a different flavor profile.
  • Dairy-free option: Substitute vanilla yogurt with coconut yogurt or almond milk yogurt for a vegan version.
  • Herbal twist: Add a handful of fresh mint or basil leaves for a unique and refreshing herbal twist.

Storage

While this smoothie is best enjoyed fresh, you can store any leftovers in an airtight container in the refrigerator for up to 24 hours. Give it a good shake or stir before drinking. For longer storage, consider freezing the smoothie in ice cube trays and blending the cubes when you’re ready for another serving.

FAQ

Can I use black tea instead of green tea?

Yes, you can use black tea if you prefer its stronger flavor. Keep in mind that black tea has a higher caffeine content and a more robust taste, which will alter the flavor profile of the smoothie.

Is this smoothie suitable for kids?

Absolutely! This smoothie is a great way to sneak in some extra fruit and antioxidants into your child’s diet. If you’re concerned about caffeine, you can opt for a decaffeinated green tea.

Can I make this smoothie ahead of time?

While fresh is best, you can prepare the smoothie up to a day in advance. Store it in the refrigerator and give it a good shake before serving. For optimal freshness, consider freezing it into smoothie pops for a delightful treat.

Nutrition

This smoothie is a powerhouse of nutrition. Each serving is approximately 150 calories, with a good balance of carbohydrates, protein, and a small amount of fat. It provides a healthy dose of vitamin C, antioxidants from the berries and green tea, and probiotics from the yogurt, making it a well-rounded choice for a nutritious snack or breakfast.

Conclusion

The Green Tea Fruit Medley Smoothie is not just a drink; it’s a celebration of flavors and memories, a bridge connecting the tranquil mornings of the past with the vibrant mornings of today. Whether you’re enjoying it as a quick breakfast, a post-workout refreshment, or an afternoon pick-me-up, this smoothie promises to delight your senses and nourish your body. So, why wait? Gather your ingredients, blend up a glass, and let the refreshing taste remind you of sunlit gardens and peaceful mornings. Cheers to a deliciously healthy journey!

Related update: Green Tea Fruit Medley Smoothie

Related update: Fresh Peach Margarita With Lime Sugar

Stir Fry Mushrooms In Butter, Garlic And White Wine | Made by Meaghan Moineau

Stir Fry Mushrooms In Butter, Garlic And White Wine

Intro

There are few things more comforting than the sizzle of mushrooms in a hot pan, enveloped in the aroma of garlic and butter. This recipe for Stir Fry Mushrooms in Butter, Garlic, and White Wine takes me back to my grandmother’s cozy kitchen. I can vividly remember the way she would expertly toss a medley of mushrooms in her well-worn skillet, filling the room with a fragrance that promised a delightful meal. Her secret? A splash of white wine that added a touch of elegance, transforming a simple dish into something truly special. Today, I’m excited to share this recipe with you, hoping it brings as much warmth and joy to your table as it has to mine.

Why You’ll Love It

This dish is a celebration of flavors and textures. The mushrooms are tender and juicy, absorbing the richness of butter and the aromatic punch of garlic. A hint of white wine adds a sophisticated depth, while the teriyaki sauce and balsamic vinegar bring a delightful balance between sweet and tangy. Finished with a touch of chili oil for heat and fresh herbs for brightness, this dish is as versatile as it is delicious. Whether you’re a seasoned home cook or a beginner, you’ll find this recipe simple yet impressive.

Ingredients

  • Fresh shiitake mushrooms
  • White mushrooms
  • Garlic
  • Butter
  • White wine
  • Teriyaki sauce
  • Balsamic vinegar
  • Black ground pepper
  • Salt
  • Chili oil
  • Parsley
  • Diced spring onions

Instructions

  1. Melt the butter in a frying pan over medium heat.
  2. Add the garlic and stir-fry until fragrant, about 1 minute.
  3. Add the mushrooms and stir-fry for 30 seconds, allowing them to absorb the garlic-infused butter.
  4. Pour in the white wine and let it evaporate, infusing the mushrooms with its delicate flavor.
  5. Continue to fry the mushrooms for another minute.
  6. Add salt, black pepper, balsamic vinegar, teriyaki sauce, and chili oil. Fry for an additional minute, ensuring everything is well combined.
  7. Turn the heat to low and add parsley and diced spring onions. Mix well to incorporate the herbs’ freshness.
  8. Transfer the mushrooms to a serving plate and enjoy!

Tips

For the best results, use a mix of fresh shiitake and white mushrooms. Make sure the mushrooms are dry before adding them to the pan to achieve a nice golden-brown sear. If you want a more intense garlic flavor, add an extra clove or two. Always let the white wine fully evaporate to prevent the dish from tasting too acidic. Finally, adjust the amount of chili oil to your heat preference.

Variations & Substitutions

If you’re looking to switch things up, try adding some sliced bell peppers or snap peas for extra color and crunch. For a vegetarian-friendly version, ensure your teriyaki sauce is free of animal products. If you prefer a non-alcoholic version, substitute the white wine with vegetable broth. You can also use olive oil instead of butter for a lighter dish.

Storage

Leftover stir fry mushrooms can be stored in an airtight container in the refrigerator for up to 3 days. To reheat, simply warm them in a skillet over medium heat, adding a splash of water if needed to prevent drying out.

FAQ

Can I use other types of mushrooms?

Absolutely! Feel free to use any mushrooms you have on hand. Cremini, portobello, or oyster mushrooms would all work beautifully in this recipe.

What can I serve with stir fry mushrooms?

These mushrooms are incredibly versatile and can be served as a side dish with grilled meats, tossed with pasta, or even as a topping for bruschetta. They also make a great filling for an omelet or a savory crepe.

Nutrition

This dish is rich in antioxidants and essential nutrients provided by the mushrooms. The garlic and parsley contribute additional health benefits, such as boosting the immune system and providing anti-inflammatory properties. While butter and wine add richness, the dish is relatively low in calories and can be adjusted for dietary preferences.

Conclusion

Stir Fry Mushrooms in Butter, Garlic, and White Wine is more than just a dish; it’s a comforting experience that brings warmth to any table. Its simple preparation and complex flavors make it a perfect recipe for both everyday meals and special occasions. Whether you’re enjoying it as a side dish or the star of your meal, this recipe is sure to become a favorite. I hope you find as much joy in making and sharing this dish as I have.

Related update: Stir Fry Mushrooms In Butter, Garlic And White Wine

Related update: Basil Lime White Bean Hummus

Blue Cheese and Mushroom Turkey Burger | Made by Meaghan Moineau

Blue Cheese and Mushroom Turkey Burger

Intro

There’s something magical about the sizzle of a burger on the grill, the aroma wafting through the air, and the anticipation of that first juicy bite. When I was growing up, summer evenings were often spent in the backyard, my dad at the grill perfecting his burger technique. Those days were filled with laughter, the smell of freshly cut grass, and the comforting sound of cicadas in the distance. Inspired by those cherished memories, I crafted this Blue Cheese and Mushroom Turkey Burger to combine nostalgia with a rich, gourmet twist. Let me walk you through why this burger is going to become your next favorite.

Why You’ll Love It

This Blue Cheese and Mushroom Turkey Burger is a delightful fusion of flavors that will tantalize your taste buds. The earthy mushrooms combined with the savory turkey provide a hearty base, while the blue cheese adds a creamy, tangy finish. Whether you’re a grilling novice or a seasoned pro, this recipe is straightforward and satisfying. Plus, it’s a healthier alternative to traditional beef burgers without sacrificing any of the flavors.

Ingredients

  • 2 garlic cloves, minced
  • 1 pound of ground turkey
  • 1 onion, finely chopped
  • 1 cup portabello mushrooms, diced
  • 1 pinch of sea salt
  • 1 tablespoon soy sauce
  • Blue cheese, crumbled, for topping

Instructions

  1. In a large mixing bowl, combine the minced garlic, ground turkey, chopped onion, diced portabello mushrooms, sea salt, and soy sauce. Mix thoroughly until all ingredients are well incorporated.
  2. Divide the mixture into equal portions and form them into patties, making sure they’re not too thick for even cooking.
  3. Preheat your grill or a large frying pan over medium-high heat. Place the patties on the grill or in the pan.
  4. Cook the burgers for about 5-6 minutes on each side, flipping once, until they are cooked through and reach an internal temperature of 165°F (74°C).
  5. Once the burgers are cooked, add a small amount of crumbled blue cheese on top of each patty.
  6. If you’re using a grill, close the grill top and allow the cheese to melt for 1-2 minutes. If pan-frying, cover the pan with a lid to melt the cheese.
  7. Remove the burgers from the heat and let them rest for a couple of minutes before serving.

Tips

For the best results, make sure your turkey is fresh and not frozen. Fresh herbs like thyme or rosemary can be added to the mixture for an extra burst of flavor. If you’re grilling, lightly oil the grates to prevent sticking. Letting the burgers rest ensures the juices redistribute, keeping them moist and delicious.

Variations & Substitutions

Feel free to experiment with the ingredients. If blue cheese isn’t your favorite, try using goat cheese or feta for a different yet equally delicious taste. For a spicier kick, add a pinch of cayenne pepper or some chopped jalapeños to the turkey mixture. If you’re avoiding soy, try using Worcestershire sauce as an alternative.

Storage

Store any leftover burgers in an airtight container in the refrigerator for up to 3 days. To reheat, place them in a preheated oven at 350°F (175°C) until warmed through, or use a microwave. If freezing, wrap each patty individually in plastic wrap and store in a freezer bag for up to 3 months. Thaw in the refrigerator before reheating.

FAQ

Can I use a different type of cheese?

Absolutely! While blue cheese adds a unique flavor, you can substitute it with any cheese you prefer, such as cheddar, Swiss, or mozzarella. Each will bring its own distinct taste to the burger.

How can I make this recipe gluten-free?

To make this recipe gluten-free, ensure that your soy sauce is labeled gluten-free, or substitute it with tamari, which is naturally gluten-free. Check all other ingredient labels to ensure they are gluten-free as well.

Nutrition

This turkey burger is a healthier alternative to traditional beef burgers. It’s lower in fat and calories, making it a suitable option for those looking to enjoy a delicious meal without the guilt. The addition of mushrooms not only enhances the flavor but also adds fiber and nutrients.

Conclusion

Whether you’re reminiscing about summer barbecues or simply looking for a new recipe to try, this Blue Cheese and Mushroom Turkey Burger is sure to impress. Its rich, savory flavors and creamy cheese topping create a delightful culinary experience that’s both comforting and sophisticated. So, fire up your grill or heat up your pan and indulge in this delightful twist on a classic favorite. Enjoy every bite, and don’t forget to share the love with family and friends!

Related update: Blue Cheese and Mushroom Turkey Burger

Related update: Boeuf Bourgignon

Creamsicle Cookies | Made by Meaghan Moineau

Creamsicle Cookies

Intro

There’s something magical about the combination of orange and vanilla that takes me back to my childhood. I remember those hot summer days when I would run to the ice cream truck, clutching my allowance, eagerly anticipating the creamy delight of a creamsicle. The tangy orange wrapped around the smooth vanilla ice cream was a taste of pure joy. Today, I’m thrilled to share a recipe that captures that nostalgic flavor in cookie form: Creamsicle Cookies. These delightful treats are perfect for a sunny afternoon or a cozy evening with a cup of tea.

Why You’ll Love It

If you’re a fan of the classic creamsicle, these cookies are sure to become your new favorite treat. They offer a delightful balance of flavors—the citrusy burst of orange zest paired with the rich sweetness of white chocolate chips. Not only are these cookies delicious, but they’re also incredibly easy to make. Whether you’re a seasoned baker or just starting out, you’ll find this recipe straightforward and rewarding. Plus, these cookies are perfect for any occasion, from family gatherings to a simple afternoon snack.

Ingredients

  • 2 cups all-purpose flour
  • 1/2 teaspoon baking soda
  • 1/4 teaspoon salt
  • 1/2 cup firmly packed brown sugar
  • 1/2 cup granulated sugar
  • 1/2 cup butter, softened
  • 1 large egg
  • 1 teaspoon vanilla extract
  • 1 tablespoon orange zest
  • 1 cup white chocolate chips

Instructions

  1. Preheat your oven to 375°F (190°C).
  2. In a small bowl, combine the flour, baking soda, and salt; set aside.
  3. In a large bowl, cream together the butter, brown sugar, and granulated sugar until light and creamy.
  4. Beat in the egg and vanilla extract until smooth and well combined.
  5. Gradually add the flour mixture to the wet ingredients, mixing until just combined.
  6. Stir in the orange zest and white chocolate chips until evenly distributed.
  7. Drop rounded teaspoonfuls of dough onto ungreased cookie sheets. Do not flatten the cookies; it will make them dry.
  8. Bake for 8-10 minutes or until the edges are golden brown. Avoid overcooking to keep the cookies plump and soft.
  9. Allow the cookies to cool on the sheets for several minutes before transferring them to a wire rack to cool completely.
  10. Store the cookies in an airtight container to maintain their freshness.

Tips

For the best results, make sure your butter is softened but not melted. This will help create that perfect creamy texture in your cookie dough. Also, be mindful of the baking time; slightly underbaking the cookies will keep them soft and chewy.

Variations & Substitutions

If you’re looking to switch things up, consider substituting half of the white chocolate chips with milk or dark chocolate chips for a richer flavor. For a nuttier texture, you can also add a half-cup of chopped nuts like almonds or pecans. If you don’t have fresh oranges, you can use a teaspoon of orange extract in place of the zest, though fresh zest will give the most vibrant flavor.

Storage

Store your Creamsicle Cookies in an airtight container at room temperature for up to a week. If you’d like to keep them longer, consider freezing the baked cookies or the dough. To freeze the dough, scoop it into balls and freeze on a baking sheet before transferring to a freezer bag. Bake from frozen, adding an extra minute or two to the baking time.

FAQ

Can I use margarine instead of butter?

While you can use margarine as a substitute for butter, it may alter the flavor and texture slightly. Butter provides a richer taste and a better texture for these cookies.

How can I make the cookies less sweet?

If you find the cookies too sweet, consider reducing the amount of white chocolate chips, or use a mix of white and dark chocolate chips to balance the sweetness.

Can I add more orange flavor?

Absolutely! You can increase the amount of orange zest or add a few drops of orange extract for a more pronounced citrus flavor.

Nutrition

These cookies are meant to be a treat, so while they are deliciously indulgent, remember to enjoy them in moderation. Each cookie (assuming the recipe makes about 24) contains approximately 120 calories, 6 grams of fat, 16 grams of carbohydrates, and 1 gram of protein.

Conclusion

Creamsicle Cookies are a delightful reminder of those cherished childhood memories wrapped in a deliciously modern twist. Whether you’re baking for family, friends, or just yourself, these cookies are sure to bring a smile to anyone’s face. I hope this recipe brings a bit of sunshine and nostalgia to your kitchen. Happy baking, and enjoy every bite!

Related update: Creamsicle Cookies

Related update: Pear and Walnut Coffee Cake

Related update: Brown sugar & Spice Sugar cookie frogs

Creamy White Chili | Made by Meaghan Moineau

Creamy White Chili

Intro

There’s something magical about the blend of flavors in a warm, hearty bowl of chili. Growing up, my family had a tradition of making this Creamy White Chili every year as the leaves began to turn and the air became crisp. The kitchen would be filled with the comforting aroma of onions and garlic, mingling with the richness of chicken and the subtle heat of green chilies. I remember sitting by the window, watching the golden leaves dance in the breeze, while eagerly waiting for dinner to be served. This recipe is more than just a meal; it’s a cherished memory that I now get to share with you.

Why You’ll Love It

This Creamy White Chili is perfect for those who crave a comforting, flavorful meal with a touch of nostalgia. It’s a refreshing take on traditional chili, featuring tender chicken, creamy textures, and a delightful medley of spices. Whether you’re hosting a cozy dinner party or simply looking for a satisfying weeknight meal, this chili is sure to become a favorite in your household. The best part? It’s simple to make and can be ready in just under an hour.

Ingredients

  • Black pepper
  • Canned great northern beans
  • Chicken (cubed)
  • Canned chicken broth
  • Cumin
  • Garlic (minced)
  • Canned green chilies
  • Heavy whipping cream
  • Olive oil
  • Onion (chopped)
  • Oregano
  • Salt
  • Shredded cheddar cheese
  • Sour cream

Instructions

  1. In a heavy saucepan, sauté the chicken, onion, and garlic in olive oil over medium heat until the chicken is cooked through and the onion is translucent.
  2. Add the chicken broth, great northern beans, green chilies, cumin, oregano, salt, and black pepper to the pan.
  3. Reduce the heat to low and let the mixture simmer for 20 minutes, allowing the flavors to meld together.
  4. Remove the pan from heat and stir in the sour cream and heavy whipping cream until the chili is smooth and creamy.
  5. Serve hot, topped with shredded cheddar cheese for an extra layer of richness.

Tips

For the best results, use fresh chicken and quality canned beans. Adjust the level of heat by varying the amount of green chilies or adding a pinch of cayenne pepper for extra spice. Be sure to simmer the chili gently to avoid curdling the cream.

Variations & Substitutions

Feel free to make this recipe your own by trying different variations. You can substitute turkey for chicken, or use a mix of different beans such as cannellini or navy beans. For a vegetarian version, omit the chicken and use vegetable broth instead of chicken broth. Add extra vegetables like bell peppers or corn for added texture and flavor.

Storage

Store any leftover chili in an airtight container in the refrigerator for up to 3 days. To reheat, warm gently on the stove over low heat, stirring occasionally. For longer storage, freeze the chili in a freezer-safe container for up to 3 months. Thaw overnight in the refrigerator before reheating.

FAQ

Can I make this chili in a slow cooker?

Absolutely! To make this chili in a slow cooker, sauté the chicken, onion, and garlic as directed, then transfer to the slow cooker along with the rest of the ingredients except for the creams and cheese. Cook on low for 4-6 hours, then stir in the sour cream and heavy whipping cream before serving.

How can I make this dish spicier?

If you prefer a spicier chili, consider adding some diced jalapeños or a few dashes of hot sauce. You can also increase the amount of green chilies or experiment with different types of chili peppers to achieve your desired level of heat.

Is there a lighter version of this recipe?

For a lighter version, use reduced-fat sour cream and cream, or substitute with Greek yogurt for a healthier alternative. You can also use skinless chicken breast to reduce fat content while keeping the flavor intact.

Nutrition

While nutritional values can vary based on specific ingredients and portion sizes, this Creamy White Chili is rich in protein and calcium, thanks to the chicken and cheese. It also provides a good amount of fiber from the beans. For those watching their intake, opt for reduced-fat dairy options to lower the calorie and fat content.

Conclusion

This Creamy White Chili is a heartwarming dish that brings together the best of comfort food with a unique twist. Whether you’re revisiting a cherished family tradition or creating new memories, this recipe promises to deliver warmth and satisfaction with every spoonful. We hope you enjoy making and sharing it as much as we do. Happy cooking!

Related update: Creamy White Chili

Related update: Blue Cheese and Mushroom Turkey Burger

Related update: Caribbean black bean and sweet potato soup

Berry & Ricotta Danishes | Made by Meaghan Moineau

Berry & Ricotta Danishes

Intro

There’s something truly magical about the smell of freshly baked pastries wafting through the kitchen. It transports me back to my grandmother’s cozy kitchen, where every Sunday morning was a celebration of buttery, flaky goodness. One of my fondest memories is watching her skillfully craft the most delightful pastries, her hands moving with the grace of years of practice. Today, I want to share a recipe inspired by those cherished mornings: Berry & Ricotta Danishes. These danishes are a perfect blend of creamy ricotta, vibrant berries, and the light, airy texture of puff pastry, making them an irresistible treat for any occasion.

Why You’ll Love It

This Berry & Ricotta Danishes recipe is a must-try for several reasons:

  • It’s quick and easy, perfect for beginners and seasoned bakers alike.
  • The combination of creamy ricotta and juicy berries is simply divine.
  • Each pastry is a beautiful, individual serving, making them perfect for entertaining guests.
  • The ingredients are versatile and can be adjusted based on what’s in season or your personal preferences.

Ingredients

  • Glaze
  • Poached berries
  • Blueberries
  • Egg yolk
  • Pastry
  • Flour
  • Icing sugar
  • Fresh lemon juice
  • Lemon zest
  • Puff pastry
  • Ricotta cheese
  • Strawberries
  • Castor sugar
  • Vanilla extract
  • Water

Instructions

  1. Place the berries in a saucepan over medium-low heat. Sprinkle on castor sugar and add water. Cover the saucepan with a lid and shake to coat the berries. Poach berries for about 5 minutes or until they soften but still retain their shape. Set aside to cool.
  2. Preheat the oven to 180°C (350°F).
  3. Make the ricotta filling by combining all ingredients in a mixing bowl. Mix well with a wooden spoon to thoroughly combine. Set aside.
  4. Prepare the glaze by mixing icing sugar and lemon juice together in a small bowl. Mix well and set aside.
  5. Remove the pastry from the refrigerator and place sheets on a clean, dry surface. Use a small, sharp knife to cut ten 8cm x 6cm (3″ x 2.5″) rectangles.
  6. Place 5 of the pastry rectangles on the lined baking sheet, ensuring there is space between them as they will expand. Lightly brush edges with a little water. These are your “pastry rectangle bases”.
  7. Cut smaller rectangles out of the remaining 5 pastry rectangles to create frames of about 1.5cm (1/2″) in width.
  8. Place the frames on top of the pastry bases on the baking sheet. Fill the middle of the frame with about 3-4 tablespoons of ricotta mixture. Top with several berries, reserving some for topping once the danishes are baked.
  9. Repeat the process with the remaining pastry frames. Place in the oven and bake for 15 to 18 minutes or until the pastry puffs up and is golden.
  10. Remove from the oven and cool on a wire rack. Top with remaining poached berries and sprinkle on a little icing sugar just before serving.

Tips

  • Ensure your puff pastry is cold when you begin working with it to help prevent sticking and ensure the best rise.
  • Use a sharp knife to cut the pastry for clean edges.
  • Don’t overfill the pastries to prevent them from spilling over while baking.

Variations & Substitutions

Feel free to get creative with this recipe! You can substitute the berries for other fruits such as peaches or apples, depending on the season. If you’d like a bit more sweetness, add a tablespoon of honey to the ricotta mixture. For a zestier flavor, include a teaspoon of lemon zest in the ricotta filling. If you prefer a more traditional pastry, try using cream cheese instead of ricotta.

Storage

These danishes are best enjoyed fresh but can be stored in an airtight container at room temperature for up to two days. If you plan to keep them longer, refrigerate for up to five days and warm them in the oven before serving.

FAQ

Can I use frozen berries for this recipe?

Yes, you can use frozen berries. Just make sure to thaw and drain them well before using to prevent excess moisture in the pastries.

Can I prepare these danishes in advance?

Yes, you can prepare the components in advance. Poach the berries, make the ricotta filling, and cut the pastry rectangles a day ahead. Store them separately and assemble just before baking for the best results.

Nutrition

While exact nutritional values will vary based on specific ingredients and brands used, a single danish typically contains approximately:

  • Calories: 250
  • Protein: 5g
  • Fat: 15g
  • Carbohydrates: 25g
  • Fiber: 1g
  • Sugars: 10g

Conclusion

These Berry & Ricotta Danishes are a delightful way to bring a touch of bakery magic into your home. They’re not just a treat for your taste buds but also a feast for the eyes. Whether you’re making them for a special occasion or just because, I hope this recipe becomes a beloved staple in your kitchen. May each bite bring you as much joy as it does to me, and perhaps even inspire some fond memories of your own.

Related update: Berry & Ricotta Danishes

Related update: Green Tea Fruit Medley Smoothie

Mediterranean eggplants | Made by Meaghan Moineau

Mediterranean Eggplants: A Savory Delight

Intro

There’s something magical about the aroma of Mediterranean cooking wafting through the kitchen, instantly transporting you to a sun-drenched terrace overlooking the azure sea. For me, Mediterranean eggplants are more than just a dish; they are a nostalgic journey back to my grandmother’s kitchen, where I first learned the art of transforming simple ingredients into a feast for the senses. I remember the warmth of the oven, the sound of fresh sausage sizzling in the pan, and the gentle hum of my grandmother’s voice as she shared her culinary wisdom. Today, I’m excited to share this beloved recipe with you, hoping it brings as much joy to your home as it has to mine.

Why You’ll Love It

This Mediterranean eggplant dish is a delicious blend of flavors and textures that will tantalize your taste buds. Whether you’re a fan of Mediterranean cuisine or just looking to try something new, here are a few reasons why you’ll fall in love with this recipe:

  • Rich Flavor: The combination of feta and mozzarella cheese with savory sausage creates a deep, satisfying flavor profile.
  • Healthy Ingredients: Eggplants are a nutritious base, rich in fiber and antioxidants, perfect for a balanced diet.
  • Versatile: This dish can be served as a main course or a side, making it perfect for family dinners or potlucks.
  • Easy to Make: With straightforward instructions and common ingredients, this dish is accessible for both novice and experienced cooks alike.

Ingredients

  • 2 large eggplants
  • 200g fresh sausage (without casing)
  • 1 egg
  • 100g feta cheese, crumbled
  • 100g mozzarella cheese, shredded
  • 50g almonds, chopped
  • 1 tablespoon ground pepper
  • 4 tablespoons bread crumbs
  • 3 tablespoons olive oil
  • Fresh dill for garnish

Instructions

  1. Preheat your oven to 230°C (450°F). Line a baking sheet with parchment paper.
  2. Wash the eggplants and remove the stems. Cut them in half lengthwise.
  3. Using a spoon, carefully scoop out the middle of each eggplant half, leaving a thick border to create a shell.
  4. In a large bowl, combine the sausage meat, egg, feta cheese, mozzarella cheese, chopped almonds, and ground pepper. Mix until well combined.
  5. Stuff each eggplant shell with the sausage mixture, pressing gently to ensure it fills the eggplant evenly.
  6. Sprinkle each stuffed eggplant with about a tablespoon of bread crumbs and drizzle with olive oil.
  7. Place the stuffed eggplants on the prepared baking sheet and bake for 25 minutes, or until the tops are golden brown and the eggplants are tender.
  8. Remove from the oven and let cool slightly. Serve hot, garnished with fresh, chopped dill.

Tips

For the best results, follow these tips:

  • Choose firm and shiny eggplants without blemishes for the freshest taste.
  • If you’re short on time, prepare the stuffing mixture in advance and refrigerate until ready to use.
  • Adjust the seasoning to your taste, adding more pepper or herbs if desired.

Variations & Substitutions

This recipe is versatile and can be adapted to suit various dietary preferences:

  • Vegetarian: Replace the sausage with cooked quinoa or lentils for a vegetarian version.
  • Nut-Free: Omit the almonds and add extra cheese or breadcrumbs for a nut-free option.
  • Cheese Alternatives: Use goat cheese or ricotta instead of feta for a creamier texture.

Storage

To store leftover Mediterranean eggplants, follow these steps:

  • Allow the eggplants to cool completely before storing.
  • Place them in an airtight container and refrigerate for up to 3 days.
  • For longer storage, wrap each eggplant half in plastic wrap and freeze for up to one month. Reheat in the oven before serving.

FAQ

Can I prepare Mediterranean eggplants in advance?

Yes, you can prepare the stuffing mixture a day in advance and store it in the refrigerator. When you’re ready to cook, simply stuff the eggplants and bake as directed.

What can I serve with Mediterranean eggplants?

This dish pairs well with a simple green salad, roasted vegetables, or a side of couscous or quinoa for a complete meal.

How do I know when the eggplants are done?

The eggplants are done when they are tender to the touch, and the stuffing is golden brown on top. You can insert a fork or knife to check the tenderness of the eggplant flesh.

Nutrition

This dish is a wholesome and hearty meal that provides a good balance of protein, healthy fats, and fiber. While the exact nutritional content will vary based on portion sizes and specific ingredient brands, a serving of Mediterranean eggplants offers approximately:

  • Calories: 300
  • Protein: 20g
  • Fat: 18g
  • Carbohydrates: 15g
  • Fiber: 5g

Conclusion

Mediterranean eggplants are more than just a dish; they are a celebration of flavors and the joy of cooking. Whether you’re hosting a dinner party or enjoying a quiet evening at home, this recipe is sure to impress. I hope you and your loved ones enjoy these Mediterranean eggplants as much as my family and I have over the years. Happy cooking, and may your kitchen be filled with warmth and delightful aromas!

Related update: Mediterranean eggplants

Related update: Creamy White Chili

Related update: Stir Fry Mushrooms In Butter, Garlic And White Wine

Delicious Triple Chocolate Bundt Cake | Made by Meaghan Moineau

Delicious Triple Chocolate Bundt Cake

Intro

There’s something magical about the aroma of chocolate wafting through the house. It takes me back to my childhood, where Sunday afternoons were dedicated to baking with my grandmother. Her kitchen was a treasure trove of sweet delights, but nothing compared to her decadent chocolate creations. This Delicious Triple Chocolate Bundt Cake is a homage to those cherished memories. Rich, moist, and incredibly chocolaty, it’s a treat that’s sure to win over the hearts of everyone who tastes it. Whether you’re a seasoned baker or a novice, this recipe is simple to follow and guarantees a show-stopping dessert every time.

Why You’ll Love It

This cake is a chocolate lover’s dream come true. Here’s why you’ll fall head over heels for this delightful dessert:

  • Triple Chocolate Goodness: The combination of devil’s food cake mix, chocolate fudge pudding mix, and milk chocolate chips makes this cake irresistibly rich and flavorful.
  • Moist and Tender: The addition of sour cream ensures that every bite is moist and tender, melting in your mouth.
  • Simple and Quick: With just a few ingredients and straightforward steps, you can have this cake ready in no time.
  • Versatile: Perfect for any occasion, whether it’s a family gathering, a birthday celebration, or simply a treat-yourself moment.

Ingredients

  • 1 box devil’s food cake mix
  • 1 package chocolate fudge pudding mix
  • 1 cup milk chocolate chips
  • 1 cup sour cream

Instructions

  1. Preheat your oven to 350 degrees Fahrenheit.
  2. In a large mixing bowl, prepare the devil’s food cake mix as directed on the package.
  3. Add the chocolate fudge pudding mix and sour cream to the bowl. Mix well until the batter is smooth and well combined.
  4. Gently fold in the milk chocolate chips, ensuring they are evenly distributed throughout the batter.
  5. Generously spray a bundt pan with non-stick spray and coat with flour. This will help the cake release easily after baking.
  6. Pour the batter into the prepared bundt pan, smoothing the top with a spatula.
  7. Bake in the preheated oven for 50 minutes or until a toothpick inserted into the center comes out clean.
  8. Allow the cake to cool in the pan for 5 minutes before inverting it onto a cooling rack to cool completely.
  9. Optional: Serve warm slices with a drizzle of Dove milk chocolate ice cream topping and a scoop of vanilla ice cream for an extra indulgent treat.

Tips

  • Coat the Chocolate Chips: Toss the chocolate chips in a little flour before adding them to the batter. This will help prevent them from sinking to the bottom of the cake.
  • Check for Doneness: Every oven is different, so start checking the cake at around 45 minutes. The cake is done when a toothpick comes out with a few moist crumbs.
  • Cooling Time: Allow the cake to cool slightly in the pan before inverting it. This prevents the cake from breaking apart.

Variations & Substitutions

If you’re looking to put your own spin on this classic, here are some variations and substitutions you can try:

  • White Chocolate Chips: Swap out the milk chocolate chips for white chocolate chips for a twist on the original.
  • Dark Chocolate Lovers: Use dark chocolate chips and add a tablespoon of instant espresso powder to the batter for an intensified chocolate flavor.
  • Gluten-Free Option: Use a gluten-free cake mix and pudding mix to accommodate dietary restrictions.

Storage

Store any leftover cake in an airtight container at room temperature for up to three days. If you’d like to keep it fresh for longer, refrigerate it for up to a week. To freeze, wrap the cake tightly in plastic wrap and then in foil. It will keep well in the freezer for up to three months. When ready to enjoy, thaw at room temperature or warm individual slices in the microwave.

FAQ

Can I make this cake ahead of time?

Absolutely! This cake is perfect for making ahead. You can bake it a day or two before serving. Just be sure to store it properly to maintain its freshness.

What can I use instead of sour cream?

If you don’t have sour cream on hand, plain Greek yogurt is a great substitute. It will provide the same moisture and tanginess to the cake.

Nutrition

While this cake is undeniably indulgent, you can enjoy it in moderation. Each serving (without the optional toppings) contains approximately:

  • Calories: 320
  • Fat: 15g
  • Saturated Fat: 8g
  • Carbohydrates: 45g
  • Sugar: 30g
  • Protein: 4g

Conclusion

This Delicious Triple Chocolate Bundt Cake is more than just a dessert; it’s a celebration of flavor and a testament to the simple joys of baking. Whether you’re making it to share with loved ones or to treat yourself, this cake is sure to bring smiles to the table. Happy baking, and may each bite transport you to a world of chocolatey bliss!

Related update: Berry & Ricotta Danishes

Related update: Classic Carrot Cake With Cream Cheese Frosting

Honey Dijon Roasted Brussels Sprout | Made by Meaghan Moineau

Honey Dijon Roasted Brussels Sprouts

Intro

There’s something truly magical about the way certain flavors can transform a dish from ordinary to extraordinary. I remember the first time I experienced this transformation was in my grandmother’s cozy kitchen on a crisp autumn afternoon. She handed me a bowl of Brussels sprouts, a vegetable I had always turned up my nose at, and told me to taste. To my surprise, they were deliciously sweet, tangy, and slightly charred to perfection. This was my first encounter with Honey Dijon Roasted Brussels Sprouts, and it’s been a cherished recipe in our family ever since. I’m thrilled to share this warm, flavorful dish with you, hoping it brings the same comfort and joy to your table.

Why You’ll Love It

These Honey Dijon Roasted Brussels Sprouts are a delightful side dish that will quickly become a staple in your home. The combination of sweet honey and tangy Dijon mustard creates a perfect balance of flavors, while roasting brings out the natural sweetness of the Brussels sprouts. Not only is this dish incredibly flavorful, but it’s also simple to prepare, making it an ideal choice for busy weeknights or festive holiday gatherings. The subtle char on the leaves adds a pleasing crunch, ensuring that every bite is a sensory delight.

Ingredients

  • Brussels sprouts
  • Dijon mustard
  • Honey
  • Olive oil
  • Salt and pepper to taste

Instructions

  1. Preheat your oven to 400°F (200°C).
  2. In a small bowl, whisk together olive oil, Dijon mustard, and honey until well combined.
  3. In a large bowl, toss the Brussels sprouts in the honey mustard mixture, ensuring they are evenly coated.
  4. Spread the Brussels sprouts evenly on a cast iron skillet or roasting pan.
  5. Season with salt and pepper to taste.
  6. Bake on the top rack for 20 minutes.
  7. Remove from the oven and toss the sprouts to ensure even cooking.
  8. Place back in the oven and roast for an additional 10 minutes, until the outside leaves are slightly charred and the inside is tender.

Tips

For the best results, try to select Brussels sprouts that are uniform in size, as this ensures even cooking. If you have larger sprouts, you may want to halve them for more consistent results. Make sure your oven is fully preheated before placing the Brussels sprouts inside, as this helps them to roast rather than steam. And don’t skip the tossing step halfway through cooking; this helps achieve that perfect charred exterior.

Variations & Substitutions

This recipe is versatile and can be adapted to suit your taste preferences. If you prefer a bit of spice, consider adding a pinch of red pepper flakes to the honey mustard mixture. For a touch of acidity, a splash of apple cider vinegar can be added to the dressing. If you’re out of Dijon mustard, whole grain mustard can provide a lovely texture and flavor. And for a nutty twist, sprinkle some toasted almonds or walnuts over the roasted Brussels sprouts just before serving.

Storage

Leftover Honey Dijon Roasted Brussels Sprouts can be stored in an airtight container in the refrigerator for up to three days. To reheat, simply place them on a baking sheet and warm them in the oven at 350°F (175°C) until heated through. Avoid microwaving, as this can make them soggy.

FAQ

Can I use frozen Brussels sprouts for this recipe?

While fresh Brussels sprouts are recommended for the best texture and flavor, you can use frozen ones in a pinch. Just be sure to thaw and pat them dry thoroughly to remove any excess moisture before tossing them in the honey mustard mixture.

What can I serve with Honey Dijon Roasted Brussels Sprouts?

These Brussels sprouts make a fantastic side dish for a variety of main courses. They pair beautifully with roasted chicken, grilled salmon, or even a hearty steak. For a vegetarian option, serve them alongside a grain like quinoa or farro for a complete meal.

Nutrition (if applicable)

Brussels sprouts are a nutritional powerhouse, packed with vitamins C and K, fiber, and antioxidants. The addition of olive oil provides healthy fats, while the honey adds a natural sweetness without processed sugars. This dish is not only delicious but also a healthy choice for any meal.

Conclusion

Whether you’re a lifelong Brussels sprouts enthusiast or a skeptic ready to be converted, this Honey Dijon Roasted Brussels Sprouts recipe is sure to win you over. With its perfect blend of sweet and tangy flavors and delightful texture, it’s a dish that captures the essence of comforting, home-cooked meals. I hope this recipe brings warmth to your kitchen and joy to your table, just as it has for my family over the years. Enjoy!

Related update: Honey Dijon Roasted Brussels Sprout

Korean Honey Citron Tea Cheesecake | Made by Meaghan Moineau

Korean Honey Citron Tea Cheesecake

Intro

There’s something magical about the blend of sweet and tangy flavors that transport you to cherished moments from the past. I remember my first taste of Korean honey citron tea, which was during a chilly winter visit to my grandmother’s home. She always had a stash of this golden, aromatic paste, ready to warm us up from the inside out. It wasn’t just a drink; it was a ritual, a comfort, a hug in a cup. Today, I’m bringing that warmth to you in the form of a cheesecake that combines the beloved flavors of honey citron tea with the creamy decadence of a classic dessert. This Korean Honey Citron Tea Cheesecake is my way of sharing a piece of my heritage and the cozy memories of my childhood with you.

Why You’ll Love It

This Korean Honey Citron Tea Cheesecake is a unique twist on a classic dessert that will surely captivate your taste buds. Here’s why it deserves a spot in your recipe repertoire:

  • Remarkable Flavor: The fusion of sweet honey and zesty citron creates a refreshing yet indulgent taste.
  • No-Bake Delight: Perfect for those warm days when you want a delicious dessert without turning on the oven.
  • Textural Marvel: The creamy, smooth filling pairs beautifully with the crunchy biscuit base and the slightly set topping.
  • Easy to Prepare: With simple instructions and ingredients, this cheesecake is a breeze to make, even for beginners.

Ingredients

  • Butter
  • Cream cheese
  • Non-dairy topping cream
  • Gelatin
  • Korean honey citron tea paste
  • Lemon juice
  • Marie biscuits
  • Fresh milk
  • Sugar
  • Water

Instructions

  1. Line a 23cm round pan with a removable base and set aside.
  2. Combine crushed digestive biscuit crumbs and melted butter in a mixing bowl. Press the biscuit crumbs onto the base of the prepared pan and refrigerate for later use.
  3. Measure water into a bowl and sprinkle in the gelatin (do not stir). Allow the gelatin to swell for a few minutes. Place the bowl over a pot of simmering hot water and stir until the gelatin melts. Remove from heat and let cool to room temperature.
  4. Whisk non-dairy topping cream until it reaches peak form (not too stiff), then set aside.
  5. In another mixing bowl, beat cream cheese and sugar until smooth. Gradually add milk until combined. Add lemon juice and honey citron tea paste, mixing well. Incorporate the gelatin solution and combine thoroughly.
  6. Gently fold in the whipped non-dairy topping cream using a hand whisk. Pour the cream cheese mixture into the prepared cake tin and refrigerate for at least 4 hours until set.
  7. For the topping, heat the gelatin using the same method as before. Stir in the honey citron tea paste, mix well, and leave to cool. Spread the honey citron tea paste thinly and evenly over the cheesecake.
  8. Refrigerate the cheesecake until ready to serve.

Tips

  • Ensure your cream cheese is at room temperature before beating; this helps achieve a smoother texture.
  • When melting the gelatin, be careful not to overheat it, as this can affect its setting properties.
  • For an even more pronounced citrus flavor, consider adding a bit of lemon zest to the cream cheese mixture.

Variations & Substitutions

Feel free to make this recipe your own by trying out some of these variations:

  • Use a different base: Swap marie biscuits for graham crackers or digestive cookies to change the texture and flavor of the crust.
  • Dairy-free option: Substitute cream cheese and milk with their dairy-free alternatives for a lactose-friendly version.
  • Extra flavor: Drizzle some additional honey on top before serving for an extra touch of sweetness.

Storage

Store the cheesecake in an airtight container in the refrigerator for up to 5 days. For longer storage, you can freeze the cheesecake for up to a month. Simply wrap it well in plastic wrap and aluminum foil before freezing. To serve, let it thaw in the refrigerator overnight.

FAQ

Can I use regular whipping cream instead of non-dairy topping cream?

Yes, regular whipping cream can be used as a substitute. Just make sure to whip it to soft peaks before incorporating it into the cheesecake mixture.

Where can I find Korean honey citron tea paste?

Korean honey citron tea paste is commonly found in Asian grocery stores or online. It’s a popular product, often used for making beverages, and its unique flavor makes it a great ingredient for both sweet and savory dishes.

Can I make this cheesecake in advance?

Absolutely! This cheesecake is perfect for making ahead of time. Prepare it a day in advance and let it set in the refrigerator overnight. This will also allow the flavors to meld beautifully.

Nutrition (approximation per serving)

  • Calories: 350
  • Fat: 22g
  • Sugar: 20g
  • Protein: 5g
  • Carbohydrates: 30g

Conclusion

Bringing together the beloved flavors of Korean honey citron tea and the creamy indulgence of cheesecake, this recipe is sure to become a favorite in your home. It’s a dessert that invites warmth and nostalgia with every bite, perfect for sharing with friends and family. Whether served at a festive gathering or as a treat for yourself, this Korean Honey Citron Tea Cheesecake is a delightful way to add a touch of sweetness to your day. Enjoy the journey as you create and savor this memorable dessert!

Related update: Korean Honey Citron Tea Cheesecake

Related update: Delicious Triple Chocolate Bundt Cake

Related update: Dulce De Leche Cheesecake

Homemade Muesli Breakfast Cereal | Made by Meaghan Moineau

Homemade Muesli Breakfast Cereal

Introduction

There’s something truly special about waking up to a bowl of homemade muesli, especially when it’s made with love and care. I remember visiting my grandmother’s house every summer, and one of my favorite memories was the aroma of freshly toasted muesli wafting through the kitchen. She had a knack for creating the perfect blend of ingredients, and now, I’m excited to share my version of this delightful breakfast cereal with you.

Why You’ll Love It

This homemade muesli is not just a breakfast cereal; it’s a versatile, nutritious, and delicious way to start your day. You’ll love it because:

  • Customizable: You can adjust the ingredients to match your dietary needs or flavor preferences.
  • Nutritious: Packed with fiber, healthy fats, and natural sweetness, this muesli is a wholesome start to your day.
  • Easy to make: With just a few simple steps, you can prepare this muesli and enjoy it for days.
  • Cost-effective: Making your own muesli is often cheaper than buying pre-packaged versions.

Ingredients

  • 1 cup rolled oats
  • 1/2 cup corn flakes or bran flakes
  • 1/4 cup cashews
  • 1/4 cup craisins (dried cranberries)
  • 1/4 cup apple chunks
  • 2 tablespoons honey
  • 2 tablespoons olive oil
  • 1 tablespoon sesame seeds
  • 2 tablespoons wheat bran
  • 2 tablespoons wheat germ

Instructions

  1. Preheat your oven to 250 degrees Fahrenheit.
  2. In a small bowl, mix the olive oil and honey. Warm this mixture slightly until it blends smoothly.
  3. In a large oven-proof dish, combine all the other ingredients.
  4. Pour the warmed oil-honey mixture over the dry ingredients.
  5. Give everything a brisk stir to ensure even coating.
  6. Place the dish in the oven and bake for 30 minutes. Stir the mixture occasionally to promote even toasting.
  7. Once toasted, remove from the oven and let it cool for about an hour. The muesli will crisp up as it cools.

Tips

To make the most out of your homemade muesli, consider these helpful tips:

  • Stir frequently: Stirring during baking helps to ensure even toasting and prevents any clumping.
  • Cool completely: Allow the muesli to cool completely for the best texture and crunch.
  • Store properly: Keep your muesli in an airtight container to maintain its freshness.

Variations & Substitutions

This muesli recipe is incredibly flexible. Here are some ideas for variations and substitutions:

  • Nut-free: Swap cashews for sunflower seeds if you’re avoiding nuts.
  • Gluten-free: Use certified gluten-free oats and corn flakes to make this recipe gluten-free.
  • Sweetener alternatives: Replace honey with maple syrup or agave nectar for a different flavor.
  • Fruit swaps: Use dried apricots, raisins, or chopped dates instead of craisins for a new twist.

Storage

To keep your muesli fresh and crunchy, store it in an airtight container at room temperature. It should last for up to two weeks. For longer storage, consider refrigerating it, which can extend its shelf life to about a month.

FAQ

Can I make this muesli without an oven?

Yes, you can toast the muesli on the stovetop. Use a large skillet over medium-low heat and stir frequently until the ingredients are golden and fragrant.

How do I serve homemade muesli?

Homemade muesli can be served with milk, yogurt, or your favorite non-dairy alternative. You can also top it with fresh fruits like berries or banana slices for added flavor and nutrition.

Is muesli the same as granola?

While similar, muesli and granola have some differences. Muesli is typically less sweet and not as clumpy as granola. Granola is often baked with sweeteners and oil to form clusters, while muesli is generally a looser mixture.

Nutrition

This homemade muesli is a nutritious blend of whole grains, nuts, and dried fruits. It’s high in fiber, offers healthy fats from the nuts, and provides natural sweetness without too much added sugar. A serving (about 1/2 cup) contains approximately:

  • Calories: 180
  • Fat: 8g
  • Carbohydrates: 23g
  • Protein: 4g
  • Fiber: 3g

Conclusion

Homemade muesli is a wonderful way to enjoy a healthy and satisfying breakfast. With its customizable ingredients and easy preparation, it can become a staple in your morning routine. I hope this recipe brings a touch of nostalgia and warmth to your kitchen, just as it has to mine. Enjoy your wholesome breakfast journey!

Related update: Homemade Muesli Breakfast Cereal

Eggplant pizzette | Made by Meaghan Moineau

Eggplant Pizzette: A Delightful Twist on a Classic Dish

Intro

Eggplant pizzette has always held a special place in my heart. I vividly remember visiting my grandmother’s kitchen on summer afternoons, the air thick with the scent of fresh basil and the sizzle of tomatoes simmering on the stove. As a child, I would eagerly await her signature eggplant pizzette, a dish that never failed to bring the family together around the table. This recipe, inspired by her culinary magic, offers a modern twist on a cherished classic, ideal for both intimate gatherings and solo indulgence.

Why You’ll Love It

Eggplant pizzette is an innovative and delightful dish that brings together the best of both worlds: the comforting flavors of pizza and the health benefits of fresh vegetables. Whether you’re a lifelong vegetarian or simply looking to incorporate more plant-based meals into your diet, this recipe is a winner. It’s simple to prepare, requires minimal ingredients, and is perfect for a quick appetizer or a light, satisfying meal. You’ll love the way the creamy eggplant pairs with the fresh, zesty tomatoes and aromatic herbs, all topped with a layer of melted Swiss cheese for that extra touch of indulgence.

Ingredients

  • Round eggplant
  • Tomatoes
  • Swiss cheese
  • Fresh basil leaves
  • Fresh oregano leaves

Instructions

  1. Preheat your oven to 230°C (450°F) and prepare a non-stick pan by greasing it lightly with olive oil.
  2. Slice the eggplant into rounds, about 1/2 inch thick, and arrange them in the prepared pan.
  3. Bake the eggplant rounds in the oven for 10 minutes. This will soften them and bring out their natural flavors.
  4. Remove the pan from the oven, leaving the baked eggplant inside to retain its warmth.
  5. On each eggplant round, place a spoonful of chopped tomatoes, ensuring even coverage.
  6. Sprinkle fresh basil and oregano leaves over the tomatoes for a burst of herbal aroma.
  7. Top each round with a generous amount of grated Swiss cheese.
  8. Return the pan to the oven and bake for an additional 5 minutes. Watch closely until the cheese is melted and golden brown.
  9. Remove from the oven and allow to cool slightly before serving. Enjoy your pizzette warm or cooled as a delightful appetizer or small meal.

Tips

To make your eggplant pizzette truly shine, ensure that the eggplants are fresh and firm to the touch. If you prefer a slightly thicker texture, you can leave the eggplant rounds a bit thicker, but adjust the initial baking time accordingly. Also, feel free to experiment with the cheese; while Swiss cheese is recommended for its mild flavor, mozzarella or provolone can be great substitutes for a different taste experience.

Variations & Substitutions

The beauty of eggplant pizzette is its versatility. You can easily customize it to suit your taste preferences or dietary needs. For a vegan version, simply replace the Swiss cheese with your favorite plant-based cheese. If you’re looking for a spicier kick, add a sprinkle of red pepper flakes or a dash of hot sauce. Additionally, you can incorporate other toppings like olives, roasted red peppers, or caramelized onions to add more depth to the dish.

Storage

If you have leftovers, store them in an airtight container in the refrigerator for up to three days. To reheat, place the pizzette in a preheated oven at 180°C (350°F) for about 5 minutes, or until they are warmed through. Avoid microwaving, as it may cause the eggplant to become too soggy.

FAQ

Can I make the eggplant pizzette ahead of time?

Yes, you can prepare the eggplant rounds and toppings ahead of time. Assemble them right before the second baking stage to ensure the cheese melts perfectly and the flavors remain vibrant.

What can I serve with eggplant pizzette?

Eggplant pizzette pairs beautifully with a fresh green salad or a light pasta dish. You can also serve them alongside a charcuterie board for a more substantial appetizer spread.

Is eggplant a good substitute for pizza dough?

Absolutely! Eggplant offers a nutritious and gluten-free alternative to traditional pizza dough. It’s lower in calories and carbohydrates, making it a healthier option without compromising on flavor.

Nutrition

Eggplant pizzette is a nutritious dish, rich in fiber and essential vitamins. Eggplants are a good source of antioxidants and can help in maintaining heart health. Fresh tomatoes and herbs add to the nutritional profile with vitamins C and K, while Swiss cheese provides a good dose of calcium and protein.

Conclusion

Eggplant pizzette is more than just a recipe; it’s a culinary journey that marries tradition with creativity. Whether you’re recreating a childhood memory or discovering a new favorite dish, this recipe promises satisfaction in every bite. Enjoy this delightful twist on a classic, and don’t forget to share the experience with loved ones. Cooking is, after all, an act of love, and what better way to express it than with delicious food!

Related update: Eggplant pizzette

Related update: Honey Dijon Roasted Brussels Sprout

Amaretto Almond Cookies | Made by Meaghan Moineau

Amaretto Almond Cookies

Intro

There’s something magical about the aroma of freshly baked cookies wafting through the house. It transports me back to my grandmother’s cozy kitchen, where she often had a batch of cookies in the oven. Her cookie jar, a charming porcelain piece shaped like a plump cat, was always filled with delightful treats. Among them, the Amaretto Almond Cookies held a special place in my heart. With their rich almond flavor and a hint of amaretto, these cookies were her signature recipe that she loved to serve with a warm cup of tea. Today, I’m excited to share this cherished recipe with you, hoping it brings the same warmth and joy to your home as it did to mine.

Why You’ll Love It

These Amaretto Almond Cookies are a delightful blend of softness and flavor that will surely become a staple in your baking repertoire. Here’s why you’ll love them:

  • Rich Flavor: The combination of almond extract and amaretto provides a deep, nutty flavor that’s truly irresistible.
  • Simple Ingredients: With ingredients you likely already have in your pantry, these cookies are easy to whip up at a moment’s notice.
  • Perfect Texture: These cookies strike the perfect balance between chewy and crispy, making them a delightful treat for any occasion.
  • Nostalgic Aroma: Baking these cookies will fill your home with a warm, inviting aroma that evokes a sense of nostalgia and comfort.

Ingredients

  • 1 teaspoon almond extract
  • 2 tablespoons amaretto
  • 2 eggs
  • 1 cup ground almonds
  • 1 teaspoon grated lemon rind
  • 2 tablespoons molasses
  • 1/2 cup unsalted butter, softened
  • 1 1/2 cups whole wheat pastry flour

Instructions

  1. Cream together the unsalted butter and molasses in a large mixing bowl until the mixture is smooth and well combined.
  2. Add the eggs, one at a time, beating well after each addition. Stir in the ground almonds, grated lemon rind, and almond extract, mixing until everything is well incorporated.
  3. Stir in the amaretto, alternating with the whole wheat pastry flour. Mix until the dough is smooth and all ingredients are thoroughly combined.
  4. Drop the dough by teaspoonsful onto unoiled cookie sheets, spacing them about 2 inches apart.
  5. Bake in a preheated oven at 350 degrees Fahrenheit (175 degrees Celsius) for 12-15 minutes or until the cookies are golden brown.
  6. Remove from the oven and allow the cookies to cool on the baking sheet for a few minutes before transferring them to a wire rack to cool completely.

Tips

To ensure your Amaretto Almond Cookies turn out perfectly every time, consider these helpful tips:

  • Use room temperature butter for easier creaming with the molasses.
  • For a stronger almond flavor, you can increase the almond extract by an additional 1/2 teaspoon.
  • If you prefer a slightly crispier cookie, let them bake for the full 15 minutes.
  • Feel free to sprinkle a touch of sea salt on top of the cookies before baking for an added depth of flavor.

Variations & Substitutions

This recipe is quite versatile, allowing you to modify it to suit your taste preferences or dietary needs:

  • Gluten-Free: Substitute the whole wheat pastry flour with a gluten-free flour blend to make these cookies gluten-free.
  • Vegan: Replace the eggs with a flax egg (1 tablespoon ground flaxseed mixed with 2.5 tablespoons water per egg) and use a vegan butter substitute.
  • Nut-Free: If you have a nut allergy, you can replace the ground almonds with oat flour and omit the almond extract, using vanilla extract instead.
  • Citrus Twist: Add a little extra lemon rind or a few drops of lemon juice for a more pronounced citrus flavor.

Storage

To keep your Amaretto Almond Cookies fresh and delicious, store them in an airtight container at room temperature. They will stay fresh for up to a week. For longer storage, you can freeze the cookies for up to 3 months. Simply thaw them at room temperature before serving.

FAQ

Can I use regular flour instead of whole wheat pastry flour?

Yes, you can substitute regular all-purpose flour for whole wheat pastry flour if you prefer. This will slightly alter the texture, making the cookies a bit denser, but they will still taste wonderful.

What can I use instead of amaretto?

If you don’t have amaretto on hand, you can use almond liqueur or even a bit of rum or brandy as a substitute. For a non-alcoholic version, replace the amaretto with almond syrup or additional almond extract.

How do I know when the cookies are done?

The cookies are done when they have turned a golden brown color around the edges. They may still be slightly soft in the center when you take them out of the oven, but they will firm up as they cool.

Nutrition

While these cookies are a delightful treat, it’s important to enjoy them in moderation. Each cookie contains approximately:

  • Calories: 80
  • Fat: 4g
  • Carbohydrates: 10g
  • Protein: 2g
  • Sugar: 2g

Conclusion

Baking these Amaretto Almond Cookies is more than just making a delicious treat; it’s about creating memories and sharing warmth with those you love. Whether you’re enjoying them with family, sharing with friends, or savoring one quietly with a cup of tea, these cookies are sure to bring joy and satisfaction. I hope this recipe becomes a beloved part of your baking traditions, as it has been in mine. Happy baking!

Related update: Amaretto Almond Cookies

Related update: Korean Honey Citron Tea Cheesecake

Related update: Almond Butter Slices

5-Minute Blueberry Chia Jam | Made by Meaghan Moineau

5-Minute Blueberry Chia Jam

Intro

There’s something magical about homemade jams that can instantly transport you back to the cozy kitchens of your childhood. I remember spending summer afternoons in my grandmother’s kitchen, surrounded by baskets of fresh berries picked from her garden. The sweet aroma of simmering fruits would fill the air as she stirred her pot of homemade jam, teaching me the art of patience and the joy of creating something truly delicious from scratch. Those cherished memories inspired me to create a quick and easy version of jam that fits perfectly into our busy lives today. Introducing: the 5-Minute Blueberry Chia Jam! This delightful recipe combines the natural sweetness of blueberries with the nutritional power of chia seeds, offering you a healthy and delicious spread in no time.

Why You’ll Love It

This 5-Minute Blueberry Chia Jam is not only quick and easy to make, but it is also packed with nutrients and flavor. Here are just a few reasons you’ll fall head over heels for this recipe:

  • Time-Saving: It takes just five minutes to whip up this jam, making it perfect for busy mornings or last-minute brunches.
  • Healthful Ingredients: Packed with antioxidants from blueberries and fiber from chia seeds, this jam is a nutritious addition to any meal.
  • Versatile: Use it on toast, pancakes, yogurt, or even as a topping for desserts.
  • Customizable Sweetness: You can adjust the sweetness to your liking with honey or maple syrup.
  • No Cooking Required: That’s right, no need to slave over a hot stove!

Ingredients

  • 1 cup fresh blueberries
  • 2 tablespoons chia seeds
  • 1-2 tablespoons honey or maple syrup (to taste)
  • Water (as needed for blending)

Instructions

  1. Add all of the ingredients to your blender with just enough water to allow it to blend smoothly.
  2. Blend until the mixture reaches your desired consistency. You can make it smooth or leave some texture, as you prefer.
  3. Pour the jam into a glass jar or similar container.
  4. Seal the jar and store it in the fridge. The jam should last for around 4-5 days.

Tips

For the best results, use fresh, ripe blueberries. If fresh blueberries aren’t available, frozen ones can be a good substitute—just make sure to thaw them first. Adjust the sweetness based on the natural sweetness of your berries and your personal preference. You can add a dash of lemon juice for a slight tangy twist, which also helps preserve the vibrant color of the jam.

Variations & Substitutions

Feel free to get creative with this recipe! You can substitute blueberries with other berries like strawberries, raspberries, or blackberries. If you’re vegan or prefer a different sweetener, agave syrup or coconut sugar works well too. For a thicker jam, simply add more chia seeds, as they will absorb the liquid and thicken the mixture.

Storage

Store your 5-Minute Blueberry Chia Jam in a sealed glass jar in the refrigerator. It’s best consumed within 4-5 days for optimal freshness and flavor. If you want to make a larger batch, consider freezing smaller portions in ice cube trays. Once frozen, transfer the cubes to a zip-top bag. Simply thaw as needed and enjoy!

FAQ

Can I use a food processor instead of a blender?

Yes, you can use a food processor if you don’t have a blender. Just ensure that the blueberries break down enough to mix well with the chia seeds and sweetener. You might need to scrape down the sides a few times to achieve an even consistency.

What if my jam is too runny?

If your jam is too runny, add an additional tablespoon of chia seeds and let the mixture sit for a few minutes to thicken. Chia seeds absorb liquid and will help achieve a firmer texture.

Nutrition

Blueberries are a powerhouse of antioxidants, while chia seeds provide a healthy dose of omega-3 fatty acids, fiber, and protein. Using honey or maple syrup allows you to control the sweetness naturally. This jam is a nutrient-rich choice compared to traditional sugar-laden jams and is suitable for a variety of dietary preferences.

Conclusion

With its simplicity, health benefits, and delightful taste, this 5-Minute Blueberry Chia Jam is sure to become a staple in your kitchen. Whether you’re spreading it on your morning toast or offering it as a topping on your favorite dessert, this jam promises to bring a bit of sunshine to your day. So, why not take a few minutes to make a batch today and enjoy a taste of homemade goodness that’s both nostalgic and nourishing?

Related update: 5-Minute Blueberry Chia Jam

Related update: Homemade Muesli Breakfast Cereal

Watching What I Eat: Peanut Butter Banana Oat Breakfast Cookies with Carob / Chocolate Chips | Made by Meaghan Moineau

Watching What I Eat: Peanut Butter Banana Oat Breakfast Cookies with Carob / Chocolate Chips

Intro

Welcome to a delightful journey of taste and nostalgia with our Peanut Butter Banana Oat Breakfast Cookies with Carob / Chocolate Chips. Growing up, Saturday mornings were my sanctuary. I’d wake up to the sweet aroma of freshly baked cookies wafting from the kitchen, where my grandmother orchestrated her baking magic. These cookies capture the essence of those cherished mornings, combining wholesome ingredients with a touch of indulgence. Whether you’re looking for a healthy breakfast option or a comforting snack, these cookies will transport you back to simpler times with every bite.

Why You’ll Love It

These breakfast cookies are not just delicious; they are a perfect blend of nutrition and nostalgia. Here’s why you’ll fall in love with them:

  • They are packed with wholesome ingredients, providing a great start to your day.
  • The combination of peanut butter and banana is a timeless classic that delivers a rich, satisfying flavor.
  • Carob or chocolate chips add a touch of indulgence, making these cookies a delightful treat.
  • They are easy to make and perfect for meal prep, saving you time on busy mornings.
  • They’re versatile and can be customized to suit your taste or dietary preferences.

Ingredients

  • 2 ripe bananas, mashed
  • 1/4 cup butter flavor shortening
  • 1/2 cup chocolate or carob chips
  • 1/2 cup creamy peanut butter
  • 1/4 cup chopped nuts (your choice)
  • 1 cup oatmeal
  • 1/4 cup unsweetened applesauce
  • 1 teaspoon vanilla extract
  • 1/2 cup vanilla protein powder

Instructions

  1. Preheat your oven to 350 degrees Fahrenheit.
  2. In a large bowl, mix the mashed bananas and peanut butter until completely combined.
  3. Add the applesauce, vanilla protein powder, and vanilla extract to the mixture. Mix again until fully combined.
  4. Add the oatmeal and nuts to the banana mixture and combine thoroughly. If desired, add carob or chocolate chips at this stage to mix them throughout the dough.
  5. Let the dough rest for 10 minutes.
  6. Drop spoonfuls of cookie dough onto a parchment-lined baking sheet, flattening them into circles. If you prefer, add carob or chocolate chips on top of the cookies now.
  7. Bake for 20-30 minutes, depending on your preference for a softer or crispier cookie. Aim for a golden brown finish.
  8. Remove from the oven and let them rest on the cookie sheet for 5 minutes before transferring them to a cooling rack.
  9. If you like traditional fork marks, use a pizza cutter or sharp knife to score the tops while they’re still warm.
  10. Once completely cool, store in a covered container. Enjoy with a cup of tea or coffee!

Tips

Here are some handy tips to ensure your cookies turn out perfectly every time:

  • Use ripe bananas for a naturally sweet flavor.
  • If the dough feels too sticky, add a bit more oatmeal to achieve the right consistency.
  • For an even bake, make sure the cookies are of uniform size and thickness.
  • Experiment with baking times to find your preferred level of cookie softness or crispiness.

Variations & Substitutions

Make these cookies your own with these variations and substitutions:

  • Nut-Free: Omit the nuts or replace them with sunflower seeds for a nut-free version.
  • Gluten-Free: Use gluten-free oats and ensure all other ingredients are gluten-free.
  • Vegan: Replace butter flavor shortening with coconut oil and ensure your chocolate chips are vegan.
  • Sugar-Free: Use sugar-free chocolate chips or carob chips to lower the sugar content.

Storage

Store your peanut butter banana oat breakfast cookies in an airtight container at room temperature for up to 5 days. For longer storage, keep them in the refrigerator for up to two weeks or freeze them for up to three months. Thaw frozen cookies at room temperature before enjoying.

FAQ

Can I use almond butter instead of peanut butter?

Absolutely! Almond butter is a great alternative and will add a slightly different flavor profile to the cookies. Just ensure it’s creamy for the best texture.

What can I use instead of vanilla protein powder?

If you don’t have vanilla protein powder, you can substitute it with an equal amount of oat flour or almond flour. You might want to add a bit more vanilla extract to maintain the flavor.

Nutrition

Each cookie is approximately 150 calories, with 8g of fat, 18g of carbohydrates, and 5g of protein. These values may vary based on specific brands and measurements used.

Conclusion

These Peanut Butter Banana Oat Breakfast Cookies with Carob / Chocolate Chips are more than just a treat; they’re a connection to cherished memories and a step towards a healthier lifestyle. Whether you’re rushing out the door or enjoying a leisurely morning, these cookies are a perfect companion. I hope they bring joy to your mornings as much as they do to mine. Happy baking!

Related update: Watching What I Eat: Peanut Butter Banana Oat Breakfast Cookies with Carob / Chocolate Chips

Related update: 5-Minute Blueberry Chia Jam

Tart Raspberry Sorbet with a Hint of Heat | Made by Meaghan Moineau

Tart Raspberry Sorbet with a Hint of Heat

Intro

There’s something magical about the first scoop of a homemade sorbet. It’s a treat that instantly transports you back to sun-drenched afternoons and lazy picnics in the park. I remember as a child, my grandmother would make a variety of sorbets, each with its unique twist. The kitchen would be filled with the vibrant colors and aromas of fresh fruits. One summer day, she surprised us with a raspberry sorbet that had an unexpected kick of spice. The combination was unforgettable, and it left an indelible mark on my taste buds. This Tart Raspberry Sorbet with a Hint of Heat is a tribute to that delightful creation, perfect for those who crave a refreshing and unique dessert experience.

Why You’ll Love It

This sorbet is not your usual dessert. It’s a delightful blend of tart raspberries and a surprising hint of heat from green chili, balanced by the aromatic warmth of cardamom. The addition of white grape juice and raspberry jam enhances the sweetness, while a splash of lime juice adds a refreshing zing. It’s a perfect treat for those hot summer days, or whenever you need a little culinary adventure.

  • Unique flavor profile: The combination of tart, sweet, and spicy is sure to tantalize your taste buds.
  • Easy to make: With just a few ingredients and simple steps, you can enjoy a gourmet dessert at home.
  • Versatile: Perfect as a dessert, a palate cleanser, or a refreshing snack.

Ingredients

  • 1/4 teaspoon cardamom powder
  • 1 small green chili (adjust to taste), seeded and finely chopped
  • Juice of 1 lime
  • 4 cups frozen raspberries
  • 1/2 cup raspberry jam
  • 1 cup white grape juice

Instructions

  1. Combine all of the ingredients in a food processor and process until smooth.
  2. Push the mixture through a strainer to remove most of the seeds from the raspberries.
  3. Transfer the mixture to a container, cover, and place in the freezer.
  4. Every few hours, check the mixture’s consistency and stir it around a little.
  5. Near the end of the freezing time, consider shaping it into balls using an ice cream scoop or large spoon.
  6. Once the mixture is frozen, it’s ready to eat. You may want to let it thaw for a few minutes before serving, depending on your freezer’s temperature and how solid the sorbet is.
  7. Note: I let the sorbet freeze overnight and then let it thaw for a few minutes until I could scoop it out of the container to serve.

Tips

  • If you prefer a milder heat, start with half a chili and adjust to taste.
  • For a smoother texture, ensure the raspberry seeds are thoroughly strained out.
  • If you don’t have a food processor, a high-speed blender will work just as well.

Variations & Substitutions

Feel free to get creative with this sorbet recipe. Here are some variations and substitutions to consider:

  • Fruit Substitution: Swap out raspberries with strawberries or blackberries for a different berry flavor.
  • Spice Variation: Experiment with different spices like ginger or cinnamon if cardamom isn’t available.
  • Sugar-Free Option: Use sugar-free jam and white grape juice to reduce the sugar content.

Storage

Store the sorbet in an airtight container in the freezer for up to two weeks. To prevent ice crystals from forming, place a piece of plastic wrap directly on the surface of the sorbet before sealing the container. Allow the sorbet to sit at room temperature for a few minutes before serving to achieve a scoopable consistency.

FAQ

Can I make this sorbet without a food processor?

Yes, you can use a high-speed blender instead. Just ensure to blend the ingredients until smooth, and strain them well to remove the seeds.

How can I adjust the spiciness of the sorbet?

If you prefer a less spicy sorbet, start with half a green chili and gradually add more to taste. Remember, you can always add more spice, but you can’t take it away once it’s mixed in!

Nutrition

This sorbet is a delightful low-fat dessert option. While the exact nutritional content will vary based on the specific ingredients used, raspberries are rich in vitamins and antioxidants, and the sorbet’s low-fat content makes it a guilt-free treat.

Conclusion

This Tart Raspberry Sorbet with a Hint of Heat is not just a dessert; it’s an experience. The contrast of flavors will surprise and delight your guests, making it a perfect ending to any meal. Whether you’re reminiscing about your childhood or creating new memories, this sorbet brings a touch of nostalgia with every bite. So go ahead, indulge in this unique and refreshing treat that is sure to become a favorite in your dessert repertoire. Enjoy each spoonful, and let it transport you to those carefree summer days.

Related update: Tart Raspberry Sorbet with a Hint of Heat

Related update: Amaretto Almond Cookies

Delicious Rhubarb Custard Pie | Made by Meaghan Moineau

Delicious Rhubarb Custard Pie

Intro

There’s something magical about the smell of a freshly baked pie wafting through the house. It takes me back to my grandmother’s cozy kitchen, where I spent countless Sundays as a child. My grandmother always had a pie cooling on the windowsill, and her rhubarb custard pie was a family favorite. The tangy rhubarb paired with the creamy custard is a match made in dessert heaven. Today, I’m thrilled to share this timeless recipe with you, hoping it brings as much joy to your table as it has to mine.

Why You’ll Love It

This rhubarb custard pie is a delightful combination of flavors and textures. The tartness of the rhubarb perfectly balances the sweetness of the custard, and the buttery crust adds a lovely crunch. It’s a simple yet elegant dessert that’s perfect for any occasion, whether it’s a family gathering or a potluck with friends. Plus, it’s a great way to use up that rhubarb from your garden or local farmers’ market. You’ll love how easy it is to make, and your guests will love how delicious it tastes.

Ingredients

  • 1 pre-baked pie crust
  • 3 cups raw rhubarb, chopped
  • 1 cup sugar
  • 3 tablespoons all-purpose flour
  • 1/2 teaspoon nutmeg
  • 1/4 teaspoon salt
  • 3 large eggs, beaten
  • 1/4 cup butter, melted

Instructions

  1. Preheat your oven to 400°F (220°C).
  2. In a large bowl, combine the chopped rhubarb, sugar, flour, nutmeg, and salt. Mix well until the rhubarb is evenly coated.
  3. Pour the rhubarb mixture into the pre-baked pie crust, spreading it out evenly.
  4. Beat the eggs in a separate bowl until well combined, then pour them over the rhubarb mixture in the pie crust.
  5. Drizzle the melted butter evenly over the top of the pie to add richness and flavor.
  6. Make sure all the rhubarb is covered with the egg and butter mixture, pressing down gently if needed.
  7. Cover the edges of the pie crust with aluminum foil to prevent them from over-browning.
  8. Bake the pie in the preheated oven for 50 minutes, or until the custard is set and the top is golden brown.
  9. Allow the pie to cool on a wire rack before serving. This will help the custard firm up, making it easier to slice.

Tips

For the best results, use fresh rhubarb that’s firm and brightly colored. If your rhubarb is particularly tart, you can adjust the sugar to suit your taste. To prevent a soggy bottom crust, make sure your pie crust is fully baked before adding the filling. If you find that your pie is browning too quickly, you can tent a piece of foil over the top to slow down the browning process.

Variations & Substitutions

If you’re looking to mix things up, consider adding a teaspoon of vanilla extract or a pinch of cinnamon to the custard mixture for a different flavor profile. You can also substitute half of the rhubarb with strawberries for a classic strawberry-rhubarb combination. For a gluten-free version, use a gluten-free pie crust and substitute the all-purpose flour with a gluten-free flour blend.

Storage

This pie is best enjoyed fresh, but it can be stored in the refrigerator for up to three days. Simply cover the pie with plastic wrap or aluminum foil to keep it fresh. If you want to freeze the pie, wrap it tightly in plastic wrap and foil, and store it in the freezer for up to two months. Thaw it in the refrigerator overnight before serving.

FAQ

Can I use frozen rhubarb instead of fresh?

Yes, you can use frozen rhubarb if fresh is not available. Just make sure to thaw it completely and drain any excess liquid before using it in the pie to prevent a watery filling.

How can I tell when the pie is done?

The pie is done when the custard is set in the center and the top is lightly browned. You can gently jiggle the pie; if the center is firm and doesn’t wobble, it’s ready. If using a thermometer, the internal temperature of the custard should be around 180°F (82°C).

Can I make this pie ahead of time?

Yes, you can make the pie a day in advance. Once baked and cooled, cover it with plastic wrap and store it in the refrigerator. This allows the flavors to meld together, making it even more delicious.

Nutrition

This rhubarb custard pie is a delightful treat, but it is indulgent. Each slice contains approximately 300 calories, 15 grams of fat, 40 grams of carbohydrates, and 5 grams of protein. Enjoy it in moderation as part of a balanced diet.

Conclusion

There you have it, a delightful rhubarb custard pie that’s sure to be a hit at your next gathering. Whether you’re a rhubarb lover or new to this unique ingredient, this pie is a fantastic way to enjoy its distinctive flavor. I hope this recipe brings a touch of nostalgia to your home and becomes a cherished favorite. Happy baking!

Related update: Delicious Rhubarb Custard Pie

Hot Artichoke Crab Dip | Made by Meaghan Moineau

Hot Artichoke Crab Dip

Intro

There’s something magical about the aroma of a bubbling hot dip wafting through the house, heralding the arrival of friends and family. This Hot Artichoke Crab Dip recipe holds a special place in my heart, as it takes me back to countless family gatherings where laughter echoed through the rooms and the dip was the star of every appetizer table. I vividly remember my grandmother bringing out her signature dish, the sizzling crusty top crackling as it emerged from the oven. We all gathered around, eagerly dipping our bread into the creamy delight. Today, I continue the tradition, serving this decadent dip at every opportunity, and it never fails to delight!

Why You’ll Love It

This Hot Artichoke Crab Dip is not only easy to make but also irresistibly delicious. It’s creamy, cheesy, and loaded with chunks of artichoke and imitation crab, creating a symphony of flavors that captivate your taste buds. Whether you’re hosting a party or simply seeking comfort food, this dip is a crowd-pleaser that will have everyone coming back for more.

Ingredients

  • 1 cup mayonnaise
  • 1 cup sour cream
  • 1 cup shredded fresh parmesan cheese
  • 8 oz cream cheese, softened
  • 2 cloves garlic, minced
  • 1 small onion, finely chopped
  • 1 can (14 oz) artichoke hearts, drained and chopped
  • 8 oz fresh imitation crab meat, chopped

Instructions

  1. Preheat your oven to 350°F (175°C).
  2. In a microwave-safe bowl, soften the cream cheese for about 30 seconds in the microwave.
  3. Add mayonnaise, sour cream, parmesan cheese, minced garlic, chopped onion, artichoke hearts, and imitation crab meat to the softened cream cheese.
  4. Mix all the ingredients well until thoroughly combined.
  5. Transfer the mixture into a baking dish and spread it evenly.
  6. Bake in the preheated oven for 25-30 minutes, or until the top is golden and bubbly.
  7. Remove from the oven and let it cool slightly before serving.
  8. Serve with sliced baguette, crackers, or fresh vegetables. Enjoy!

Tips

  • Ensure the cream cheese is at room temperature before mixing; this helps in achieving a smooth consistency.
  • For an extra crispy top, consider sprinkling some additional parmesan cheese on top before baking.
  • If you prefer a spicier kick, add a pinch of red pepper flakes to the mixture.

Variations & Substitutions

If you’re feeling adventurous or need to accommodate dietary preferences, here are some suggestions:

  • Seafood Swap: Substitute imitation crab with real crab meat for a more authentic seafood flavor.
  • Cheese Variations: Try using a blend of cheeses like mozzarella or cheddar for a different flavor profile.
  • Vegan Option: Use vegan mayonnaise, cream cheese, and cheese substitutes along with artichoke and a plant-based protein like jackfruit.

Storage

Leftovers (if there are any!) can be stored in an airtight container in the refrigerator for up to 3 days. To reheat, simply place the dip back into the oven at 350°F until warmed through, or use a microwave for a quicker option.

FAQ

Can I make this dip ahead of time?

Absolutely! You can prepare the dip up to a day in advance. Simply mix all the ingredients and store in the fridge until you’re ready to bake. This makes it a convenient option for busy days or when hosting a gathering.

Can I freeze the dip?

While it’s possible to freeze this dip, dairy-based dips often change texture when frozen and reheated. If you choose to freeze, ensure it’s well-protected in an airtight container and plan to use it within a month for best results.

What can I use instead of imitation crab?

If you’re not a fan of imitation crab, feel free to use cooked, shredded real crab meat. Alternatively, shrimp or even cooked chicken could be interesting substitutes for a different twist.

Nutrition

While I don’t have exact nutritional data for this recipe, it’s worth noting that this dip is rich and indulgent. It’s best enjoyed in moderation, especially if you’re watching your calorie or fat intake. Consider pairing it with fresh veggies instead of bread for a lighter option.

Conclusion

The Hot Artichoke Crab Dip is more than just a dish; it’s a cherished tradition, a conversation starter, and a testament to the joy of sharing food with loved ones. Whether you’re reviving old memories or creating new ones, this warm, creamy, and flavorful dip is guaranteed to make your gatherings extra special. I hope you enjoy making and savoring it as much as I do. Happy dipping!

Related update: Hot Artichoke Crab Dip

Related update: Eggplant pizzette

Simply Bean Soup | Made by Meaghan Moineau

Simply Bean Soup

Intro

As the chilly winds of fall start to whisper through the trees, there’s nothing quite like the comfort of a hearty bowl of soup to warm the soul. Growing up, my grandmother’s kitchen was always filled with the comforting aroma of simmering soups. One of her specialties was a classic bean soup, a recipe passed down through generations. I remember sitting at her wooden kitchen table, watching her skillfully combine simple ingredients to create something magical. Her secret wasn’t just in the ingredients but in the love she folded into every pot. This Simply Bean Soup is my tribute to those cherished moments, a dish that’s both nostalgic and nourishing.

Why You’ll Love It

This Simply Bean Soup is a delightful blend of simplicity and flavor. It’s perfect for those who appreciate the humble yet hearty nature of beans, elevated by the aromatic freshness of herbs. You’ll love it because it’s:

  • Easy to Make: With just a few steps, you can have a delicious meal ready in no time.
  • Nutritious: Packed with proteins and fibers, this soup is a wholesome option for anyone looking to eat healthy.
  • Comforting: A warm hug in a bowl, it’s perfect for cozy nights at home.
  • Customizable: You can easily adapt it to suit your taste preferences and dietary needs.

Ingredients

  • 2 tablespoons butter
  • 1 onion, chopped
  • 3 cloves garlic, minced
  • 3 15-oz. cans white beans, drained and rinsed
  • 2 tablespoons fresh basil, chopped
  • 1 tablespoon fresh rosemary, chopped
  • 1 tablespoon fresh thyme, chopped
  • 1/2 cup white wine
  • 4 cups chicken broth
  • 2 tablespoons sherry
  • Salt and pepper to taste

Instructions

  1. Melt the butter in a large pan over medium heat.
  2. Add the chopped onion and minced garlic to the pan. Cook for 2 to 3 minutes until the onion is translucent and the garlic is fragrant.
  3. Stir in the drained and rinsed white beans along with the fresh basil, rosemary, and thyme.
  4. Pour in the white wine and chicken broth. Allow the mixture to come to a gentle simmer.
  5. Reduce the heat to medium-low and let it cook for another 10 minutes.
  6. Using an immersion blender, blend the soup to your desired consistency. Alternatively, you can blend it in batches using a countertop blender.
  7. Stir in the sherry and season the soup with salt and pepper to taste.
  8. Serve hot, garnished with additional fresh herbs if desired.

Tips

  • Onion and Garlic: Make sure not to burn the garlic, as it can turn bitter. Stir frequently while cooking.
  • Wine Choice: Use a dry white wine for a more balanced flavor. If you prefer not to use alcohol, you can substitute with extra broth or a bit of apple cider vinegar for acidity.
  • Blending: Be cautious when blending hot liquids. If using a countertop blender, allow the soup to cool slightly and blend in small batches.

Variations & Substitutions

  • Vegetarian Version: Substitute the chicken broth with vegetable broth to make it vegetarian-friendly.
  • Bean Variety: Feel free to use other types of beans like cannellini or navy beans for a different texture and flavor.
  • Spicy Twist: Add a pinch of red pepper flakes or a dash of hot sauce for a spicy kick.

Storage

To store any leftovers, allow the soup to cool completely before transferring it to an airtight container. It can be refrigerated for up to 3 days. For longer storage, freeze it in a freezer-safe container for up to 2 months. When ready to enjoy, thaw overnight in the refrigerator and reheat on the stove over low heat, stirring occasionally.

FAQ

Can I use dried beans instead of canned?

Yes, you can use dried beans, but they will require a bit more preparation. You’ll need to soak them overnight and cook them until tender before adding them to the soup. This will add additional time to the recipe but can enhance the flavor and texture of the soup.

What can I use instead of sherry?

If you don’t have sherry on hand, or prefer not to use it, you can substitute it with an equal amount of apple cider vinegar or omit it altogether. The sherry adds a depth of flavor, but the soup will still be delicious without it.

How do I make this soup thicker?

If you prefer a thicker soup, you can either reduce the amount of broth or add a peeled and diced potato to the soup as it simmers. Blending the potato along with the beans will create a thicker consistency.

Nutrition

This Simply Bean Soup is not only delicious but also packed with nutrients. Beans are an excellent source of protein and fiber, which help keep you full and satisfied. The fresh herbs provide antioxidants, and using chicken broth adds a dose of vitamins and minerals. It’s a wholesome meal that fits well into a balanced diet.

Conclusion

Simply Bean Soup is more than just a meal; it’s a comforting homage to family traditions and the simple pleasures of life. Whether you’re looking for a quick weeknight dinner or something to savor on a leisurely afternoon, this soup fits the bill. It’s a recipe that invites you to gather around the table, share stories, and create memories with those you love. So, grab your apron, fire up the stove, and let this heartwarming soup fill your home with its inviting aroma. Enjoy every spoonful, and perhaps, make it a tradition of your own.

Related update: Simply Bean Soup

Related update: Chorizo and Beef Quinoa Stuffed Pepper

Blueberry Almond Crescent Rolls | Made by Meaghan Moineau

Blueberry Almond Crescent Rolls

Intro

Growing up, my grandmother’s kitchen was always filled with the most incredible aromas. On Sunday mornings, the smell of fresh pastries would waft up the stairs and gently coax me out of bed. One of my fondest memories is of her blueberry almond crescent rolls, golden and flaky, with a hint of almond that balanced perfectly with the sweet-tart blueberry jam. This recipe is my homage to those cherished mornings, bringing a piece of nostalgia to your kitchen. Whether you’re making these for a special brunch or just because, these crescent rolls promise to deliver warmth and joy with every bite.

Why You’ll Love It

These Blueberry Almond Crescent Rolls are the perfect blend of simplicity and elegance. The flaky pastry is filled with a luscious cream cheese and blueberry filling, kissed with almond essence. The rolls are easy to make yet look and taste like they took hours to prepare. Perfect for breakfast, brunch, or a delightful dessert, these crescent rolls are sure to become a family favorite. The combination of textures and flavors will leave everyone reaching for seconds.

Ingredients

  • 1 teaspoon almond extract
  • 1/2 cup blueberry jam
  • 4 oz cream cheese, softened
  • 1 can (8 oz) regular crescent rolls
  • 1 egg
  • 1 tablespoon water
  • 1 tablespoon all-purpose flour
  • 1 tablespoon milk
  • Pinch of sea salt
  • 1/4 cup confectioner’s sugar, divided
  • Turbinado sugar for sprinkling

Instructions

  1. Preheat your oven to 375 degrees F and line a large baking sheet with parchment paper or a silicone baking mat. Set aside.
  2. In the bowl of your stand mixer, with paddle attachment fixed (or a handheld electric mixer may be used), combine the cream cheese, blueberry jam, 2 tablespoons of confectioner’s sugar, flour, salt, and 1 teaspoon of almond extract. Mix until smooth, about 30 seconds. Set aside.
  3. Lay your crescent roll wedges out on a large work surface. Take about a tablespoon of the cream cheese mixture and dollop it on the wide end of each crescent roll. Roll them up until the narrow end is sealed underneath.
  4. Transfer them to the prepared baking sheet and brush them with the egg wash. Sprinkle with turbinado sugar.
  5. Place the crescent rolls in the oven and bake for 13-15 minutes, or until puffed and golden. Remove from heat and transfer to a wire rack to cool.
  6. While the crescent rolls are cooling, prepare your glaze. In a medium bowl, combine the remaining 2 tablespoons of confectioner’s sugar, remaining 1 teaspoon of almond extract, and milk. Whisk until smooth. Adjust seasoning by adding a pinch of sea salt if you find that the glaze is too sweet.
  7. Drizzle the glaze on the slightly cooled crescent rolls and serve immediately. Enjoy!

Tips

For the best results, ensure your cream cheese is at room temperature before mixing to achieve a smooth filling. When rolling the crescents, try not to overfill them to avoid the filling spilling out during baking. If you prefer a stronger almond flavor, consider adding a few extra drops of almond extract to the glaze. Allow the crescent rolls to cool for a few minutes before glazing to prevent the glaze from melting off completely.

Variations & Substitutions

If you’re looking to mix things up, try substituting raspberry or apricot jam for the blueberry jam. You can also add a handful of chopped almonds to the filling for an added crunch. For a dairy-free version, use a dairy-free cream cheese alternative and plant-based milk for the glaze. If you’re not a fan of almond extract, vanilla extract makes a lovely substitute.

Storage

These crescent rolls are best enjoyed fresh, but if you have leftovers, store them in an airtight container at room temperature for up to two days. For longer storage, place them in the refrigerator for up to a week. To reheat, simply pop them in the oven at 350 degrees F for a few minutes.

FAQ

Can I make these crescent rolls ahead of time?

Yes, you can prepare the rolls up to the baking step and store them in the refrigerator for a few hours. Bake them fresh when you’re ready to serve.

Can I freeze these crescent rolls?

Absolutely! After baking, let them cool completely, then freeze in a single layer on a baking sheet. Transfer to a freezer-safe container or bag for up to three months. To serve, thaw overnight in the refrigerator and reheat in the oven.

What can I use instead of turbinado sugar?

If you don’t have turbinado sugar, you can use regular granulated sugar or skip the sugar topping altogether for a less sweet option.

Nutrition

While these crescent rolls are a delightful treat, they are rich and best enjoyed in moderation. Each roll contains approximately 180 calories, 9 grams of fat, 22 grams of carbohydrates, and 3 grams of protein. Always consider your dietary needs and adjust portion sizes accordingly.

Conclusion

Blueberry Almond Crescent Rolls are a delightful way to bring a touch of nostalgia and warmth to your table. Perfect for special occasions or simply to indulge in a moment of sweetness, these rolls are sure to impress with their delicate balance of flavors and textures. Whether you’re a seasoned baker or a novice in the kitchen, this recipe is straightforward yet rewarding. Gather your ingredients, embrace the comforting aroma, and enjoy the satisfaction of creating something truly delicious. Happy baking!

Related update: Blueberry Almond Crescent Rolls